Articles
How To Cut Cement Siding
Modified: February 23, 2024
Learn the step-by-step process of cutting cement siding with our informative articles. Discover expert tips and techniques for a flawless finish.
(Many of the links in this article redirect to a specific reviewed product. Your purchase of these products through affiliate links helps to generate commission for Storables.com, at no extra cost. Learn more)
Introduction
Welcome to this comprehensive guide on how to cut cement siding. Cement siding is a popular choice for homeowners due to its durability and low maintenance. Whether you’re embarking on a DIY project or working as a professional contractor, knowing how to cut cement siding properly is essential to achieve precise and clean cuts.
Cutting cement siding may seem like a daunting task, but with the right tools, techniques, and a little bit of patience, you can achieve professional-looking results. In this guide, we will walk you through the step-by-step process of cutting cement siding, from preparing the work area to making straight cuts, angles, and corners.
Before we get started, it’s important to note that safety should always be your top priority. Make sure to wear proper protective gear, such as safety glasses and gloves, and follow all safety guidelines provided by the manufacturer.
Now, let’s dive in and discover the tools and materials you’ll need for this project.
Key Takeaways:
- Mastering the art of cutting cement siding requires the right tools, meticulous measurements, and precision. By following safety guidelines and taking your time, you can achieve professional-looking results for any project.
- From preparing the work area to cutting straight lines, angles, and corners, this guide equips DIY enthusiasts and professional contractors with the knowledge and skills to confidently tackle cement siding projects.
Read more: What Is Cement Siding
Tools and Materials Needed
Before you begin cutting cement siding, it’s important to gather all the necessary tools and materials. Having everything ready will ensure a smooth and efficient cutting process. Here are the tools and materials you’ll need:
- Utility knife: A sharp utility knife with replaceable blades is essential for making precise cuts.
- Circular saw with a masonry blade: A circular saw equipped with a masonry blade will make cutting straight lines much easier.
- Jigsaw with a masonry blade: A jigsaw can be handy for cutting angles and corners in the cement siding.
- Straightedge: A straightedge or a carpenter’s square will help you make accurate measurements and guide your cuts.
- Measuring tape: A measuring tape is crucial for accurately measuring the dimensions of the cement siding.
- Chalk line: A chalk line will help you create straight guidelines for cutting.
- Caulk gun: A caulk gun will come in handy for applying adhesive or caulk to secure the cement siding.
- Safety glasses and gloves: Protect your eyes and hands while working by wearing safety glasses and gloves.
- Dust mask: Cutting cement siding can generate dust, so wearing a dust mask is essential to protect your lungs.
- Siding nails or screws: Depending on your project, you may need siding nails or screws to secure the cement siding in place.
In addition to these tools, make sure to have a stable workbench or a sawhorse to support the cement siding while cutting. It’s also a good idea to have a broom or vacuum cleaner nearby for easy clean-up after cutting.
Now that you have all the necessary tools and materials, it’s time to prepare the work area before cutting the cement siding.
Preparing the Work Area
Before you start cutting cement siding, it’s crucial to properly prepare the work area to ensure safety and achieve accurate cuts. Follow these steps to prepare your work area:
- Clear the area: Remove any objects, debris, or obstacles from the work area. This will give you enough space to maneuver the cement siding and prevent any accidents or damage.
- Set up a stable work surface: Use a sturdy workbench or sawhorse to support the cement siding while cutting. Make sure the surface is level and secure to avoid wobbling or instability.
- Protect nearby surfaces: Cover any nearby surfaces, such as windows or doors, with drop cloths or plastic sheets to protect them from potential dust or debris generated during the cutting process.
- Secure the siding: If you’re cutting a large piece of cement siding, use clamps or other methods to secure it to the work surface. This will prevent it from moving or shifting while cutting.
- Ensure proper ventilation: Cutting cement siding can create dust, so make sure the work area is well-ventilated. Open windows or use fans to circulate fresh air and minimize the accumulation of dust.
- Have a waste disposal system: Arrange a waste disposal system nearby, such as a trash can or debris bag. This will help you keep the work area clean and tidy as you discard the cut pieces of cement siding.
By taking the time to prepare the work area, you’ll create a safe and organized space for cutting the cement siding. Now that the work area is ready, let’s move on to measuring and marking the siding.
Measuring and Marking the Siding
Accurate measurements and precise markings are crucial when cutting cement siding. Here are the steps to measure and mark the siding:
- Measure the dimensions: Use a measuring tape to determine the desired dimensions for the cement siding. Measure the length, width, and any angles or corners that need to be cut.
- Transfer measurements to the siding: Take the measurements from step one and transfer them onto the cement siding using a pencil or marker. Make sure to mark the cutting lines clearly and accurately.
- Utilize a straightedge: To ensure straight and even cuts, use a straightedge or a carpenter’s square as a guide. Align the straightedge with the marked cutting lines and secure it in place.
- Create guidelines: If you need to make multiple cuts on the same piece of cement siding, use a chalk line to create guidelines. Simply snap the chalk line along the marked cutting lines to create straight and visible guidelines.
- Double-check measurements: Before you start cutting, double-check the measurements and markings to ensure accuracy. This step will help you avoid any costly mistakes or errors during the cutting process.
Remember to measure twice and cut once. Taking the time to measure and mark the cement siding properly will save you time, effort, and materials in the long run. With the siding properly measured and marked, you’re now ready to start cutting straight lines.
When cutting cement siding, use a carbide-tipped scoring knife for straight cuts and a circular saw with a diamond-tipped blade for more intricate cuts. Always wear protective gear and work in a well-ventilated area.
Cutting Straight Lines
When it comes to cutting straight lines on cement siding, using the right tools and techniques is essential. Follow these steps to achieve clean and precise straight cuts:
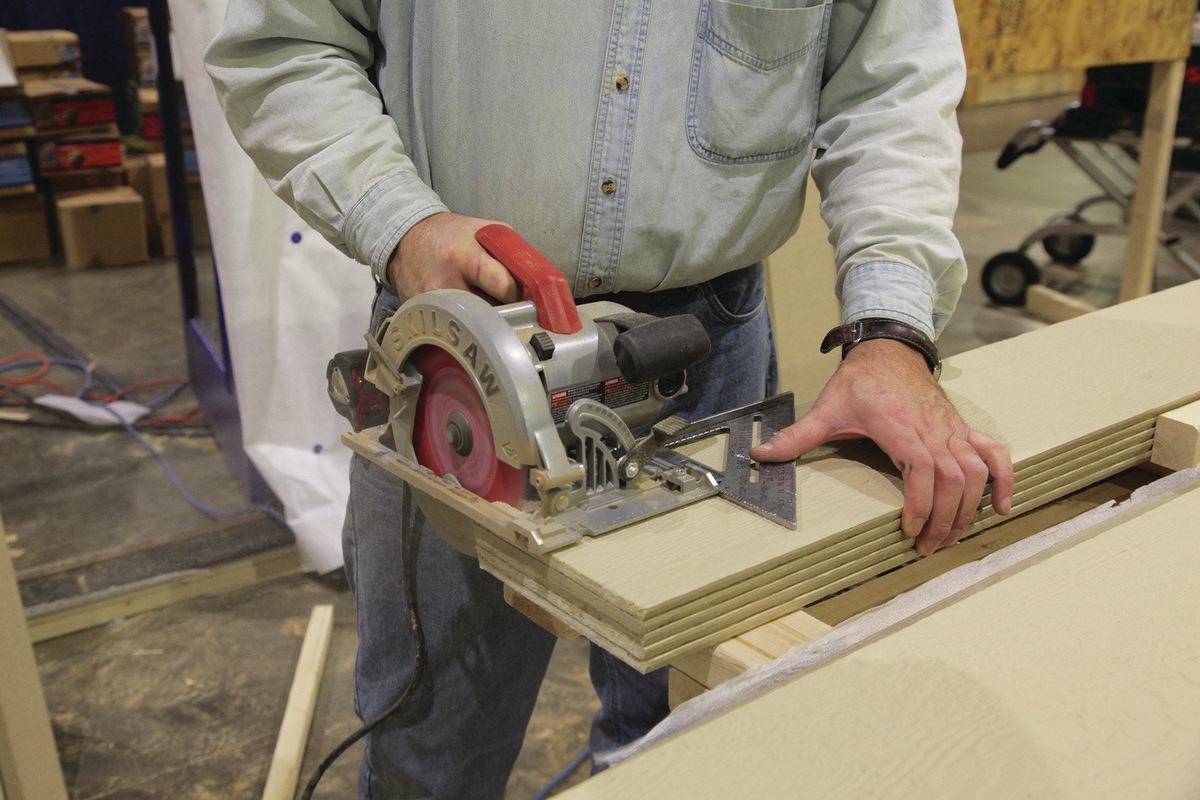
- Choose the appropriate tool: For cutting straight lines on cement siding, a circular saw with a masonry blade is the most effective tool. Ensure that the blade is suitable for cutting cement or fiber cement materials.
- Set the cutting depth: Adjust the cutting depth of the circular saw to match the thickness of the cement siding. This will prevent the blade from cutting too deep and damaging the underlying structure.
- Align the straightedge: Place the straightedge along the marked cutting line, using clamps or other methods to secure it in place. The straightedge will serve as a guide to help you achieve a straight and accurate cut.
- Turn on the circular saw: Ensure that you are in a safe and stable position, and then turn on the circular saw. Give the blade a moment to reach its full speed before starting the cut.
- Make the cut: With a firm grip on the circular saw, slowly guide it along the straightedge, following the marked cutting line. Apply gentle and even pressure, allowing the saw blade to do the work. Be mindful of your fingers and keep them away from the blade.
- Complete the cut: Continue cutting along the marked line until you reach the end point. Maintain a steady and smooth motion to achieve a clean and straight cut.
After completing the straight cut, move the cement siding aside and turn off the circular saw. Inspect the cut to ensure that it is clean and meets your desired specifications. If necessary, use sandpaper or a file to smooth any rough edges.
Now that you’ve mastered cutting straight lines on cement siding, it’s time to move on to cutting angles and corners.
Read more: How Much Is Cement Siding
Cutting Angles and Corners
Working with angles and corners requires careful attention and precise cuts to ensure a seamless fit. Follow these steps to cut angles and corners in cement siding:
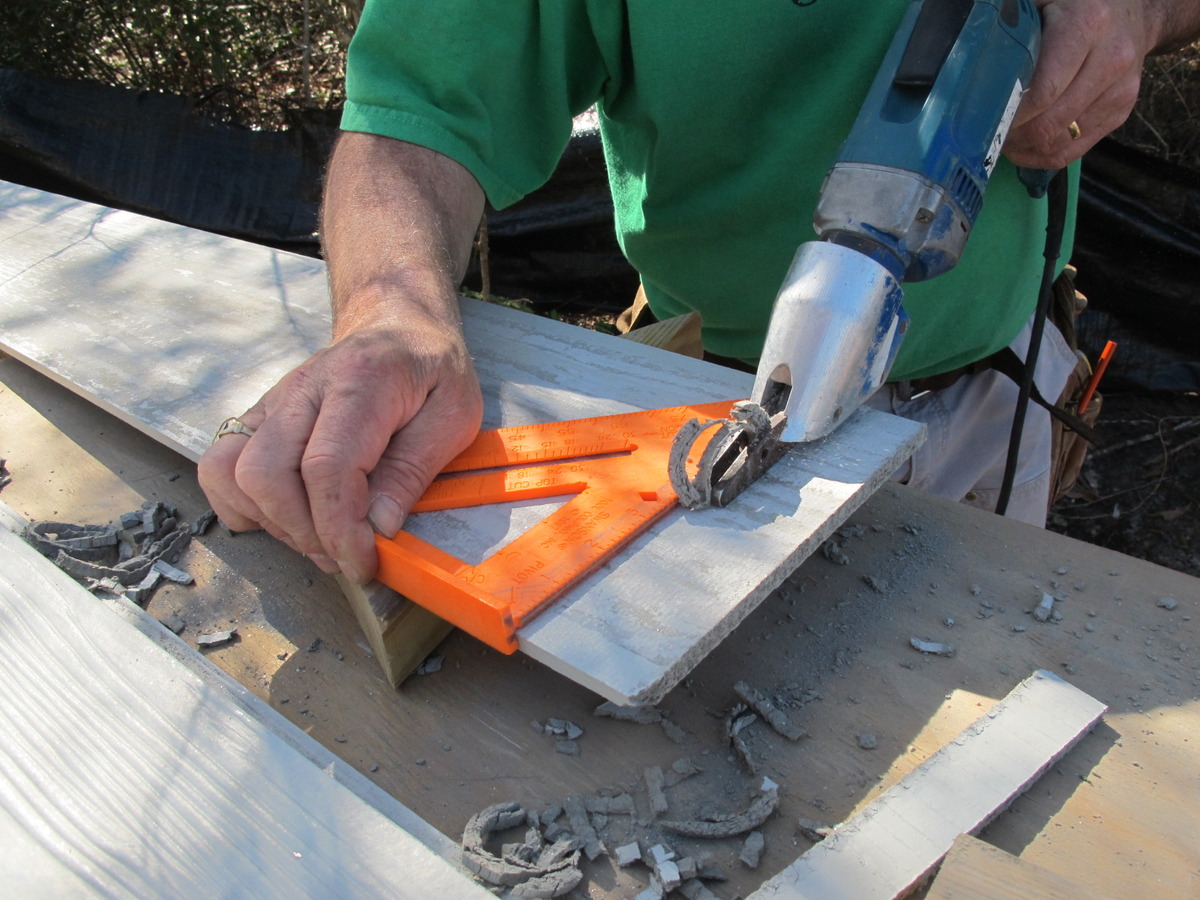
- Assess the angle or corner: Take a close look at the angle or corner that needs to be cut. Measure and mark the angle accurately on the cement siding.
- Choose the appropriate tool: For cutting angles and corners, a jigsaw with a masonry blade is the ideal choice. The jigsaw allows for more flexibility and control when making curved or intricate cuts.
- Secure the siding: Depending on the size and stability of the piece, use clamps or other methods to secure the cement siding in place. This will prevent it from shifting or moving during the cutting process.
- Start the cut: Position the jigsaw at the starting point of the marked angle or corner. Gently guide the jigsaw along the marked line, applying steady and even pressure. Be cautious of the blade and your fingers at all times.
- Follow the marking: Stay on the marked cutting line as closely as possible. Move the jigsaw slowly and steadily to achieve the desired angle or corner cut.
- Make necessary adjustments: If the angle or corner requires multiple cuts or intricate shaping, make necessary adjustments to the jigsaw blade or reposition the siding as needed.
- Double-check the fit: Once the angle or corner cut is complete, remove any clamps or reposition the cement siding temporarily to check the fit. Make any necessary adjustments or refinements before securing the siding permanently.
Remember, cutting angles and corners may require more patience and precision than cutting straight lines. Take your time and make small adjustments as needed to achieve a smooth and seamless fit.
With the angles and corners cut successfully, all that’s left is to add the finishing touches and clean up the work area.
Finishing Touches and Cleaning Up
Once you have cut the cement siding and achieved the desired shape and fit, it’s time to add the finishing touches and ensure a clean work area. Follow these steps for the final steps of your project:
- Inspect the cuts: Take a close look at all the cuts you have made on the cement siding. Check for any rough edges or imperfections that may need to be sanded or filed down.
- Smooth rough edges: If you notice any rough edges or uneven surfaces, use sandpaper or a file to carefully smooth them out. This will ensure a professional and polished appearance.
- Clean up debris: Remove any leftover debris, such as dust or small fragments, from the work area. Use a broom, vacuum cleaner, or a damp cloth to thoroughly clean up the space.
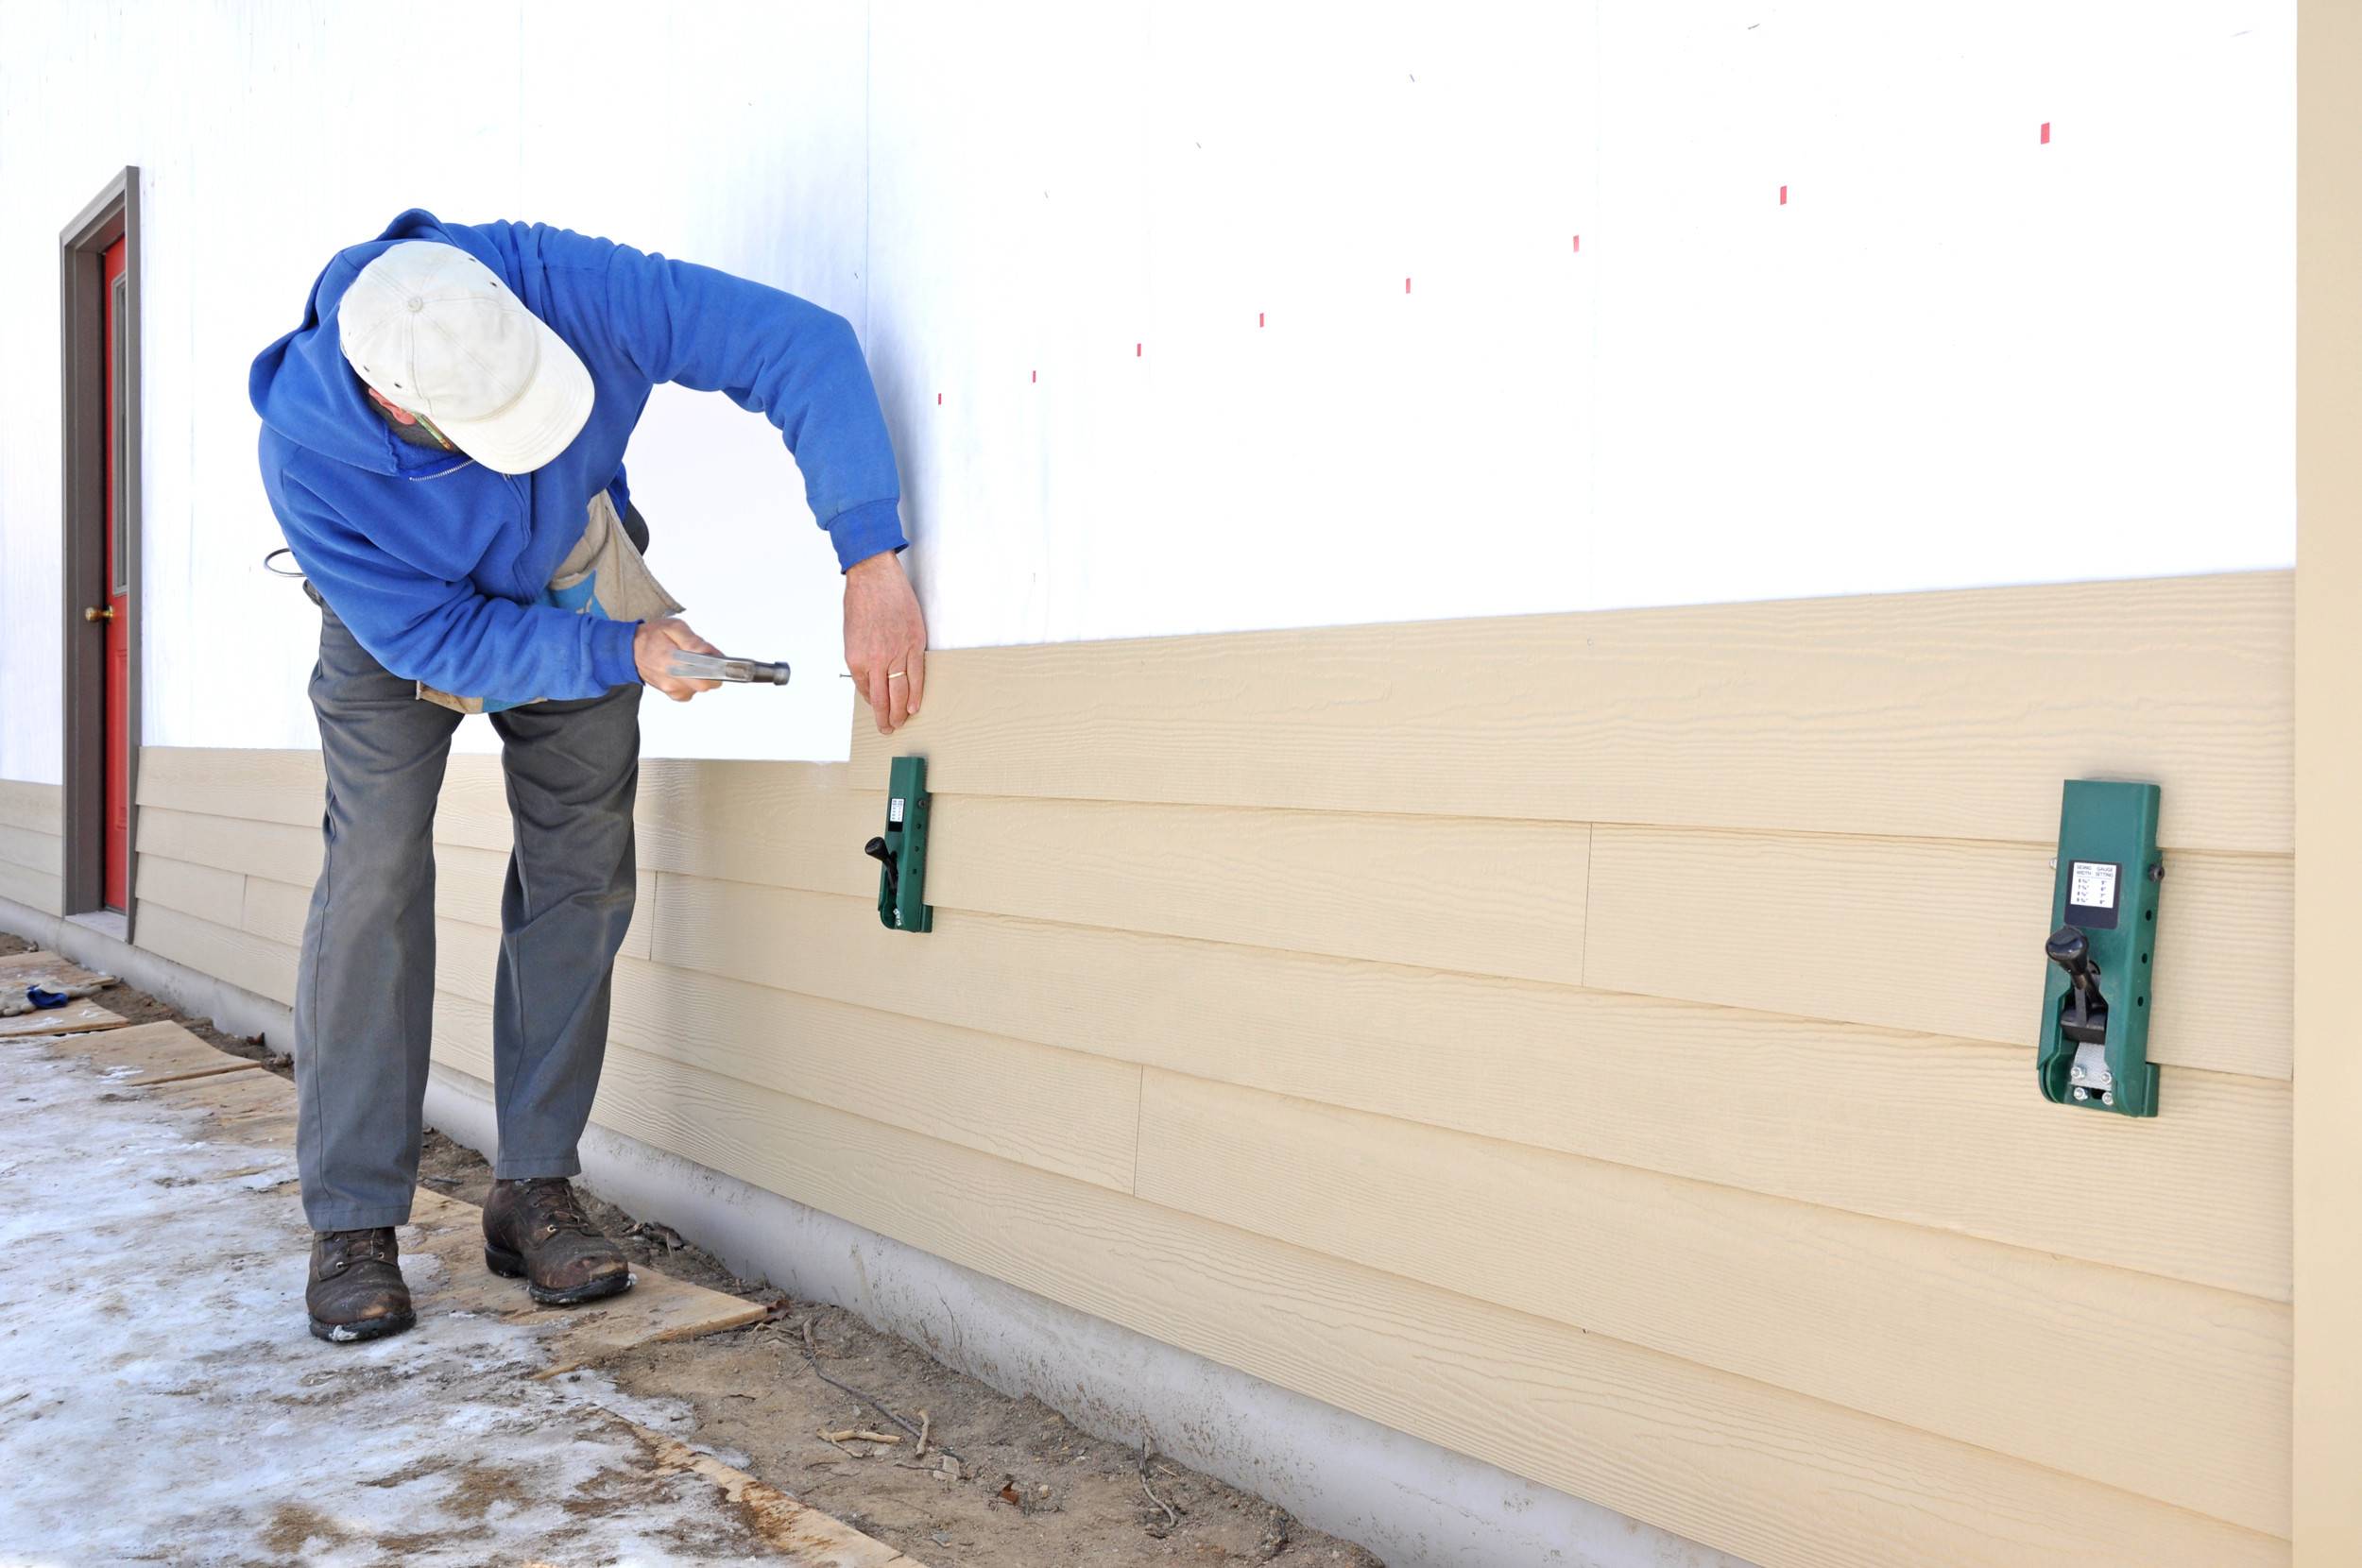
- Secure the cement siding: Once you are satisfied with the cuts and the fit, secure the cement siding in its designated place. Use siding nails or screws to attach it securely to the underlying structure.
- Apply caulk or adhesive: Depending on your project and the specific needs, you may need to apply caulk or adhesive to seal any gaps or joints in the cement siding. Use a caulk gun to apply an even bead of caulk along the edges or corners.
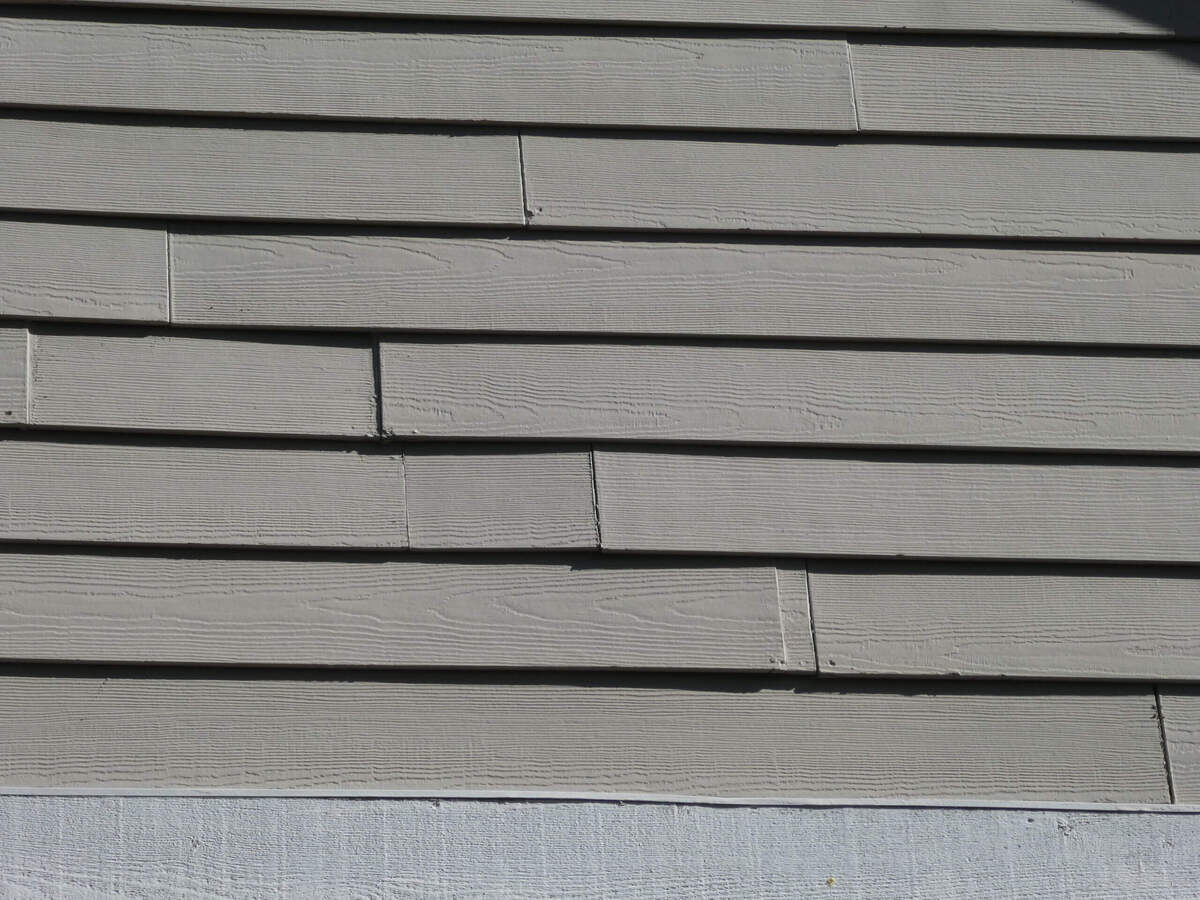
- Inspect the final result: Step back and inspect the final result of your cutting work. Ensure that the cement siding is properly aligned, securely attached, and visually appealing.
Congratulations! You have successfully cut and installed cement siding. By following these steps and taking your time with each cut, you have achieved professional-looking results.
Remember, it’s important to follow all safety guidelines and wear appropriate protective gear throughout the entire cutting process. Safety should always be a top priority.
That wraps up our comprehensive guide on how to cut cement siding. Whether you’re a DIY enthusiast or a professional contractor, you now have the knowledge and skills to tackle cement siding projects with confidence.
Good luck with your future projects!
Conclusion
Cutting cement siding may initially seem like a challenging task, but with the right tools, techniques, and attention to detail, it can be accomplished with great precision and success. By following the steps outlined in this guide, you have learned how to cut cement siding for both straight lines and angles or corners.
Remember, safety should always be your top priority. Wear the appropriate protective gear and follow all safety guidelines provided by the manufacturer. Take your time with each cut, ensuring accuracy and smoothness to achieve professional-looking results.
Preparing the work area, measuring and marking the siding, cutting straight lines, and tackling angles and corners are key steps in the process. Additionally, adding finishing touches and properly cleaning up the work area will ensure that your project is not only visually appealing but also well-secured and long-lasting.
Whether you’re a homeowner tackling a DIY project or a professional contractor working on a client’s siding installation, mastering the skill of cutting cement siding will give you the confidence and ability to create beautiful and durable results.
Now that you have the knowledge and skills to cut cement siding, go ahead and take on your next project with enthusiasm and precision. Happy cutting!
Frequently Asked Questions about How To Cut Cement Siding
Was this page helpful?
At Storables.com, we guarantee accurate and reliable information. Our content, validated by Expert Board Contributors, is crafted following stringent Editorial Policies. We're committed to providing you with well-researched, expert-backed insights for all your informational needs.


0 thoughts on “How To Cut Cement Siding”