Articles
How To Cover Cement Walls In Basement
Modified: August 28, 2024
Learn how to cover cement walls in your basement with these helpful articles. Transform your space with step-by-step guides and expert tips.
(Many of the links in this article redirect to a specific reviewed product. Your purchase of these products through affiliate links helps to generate commission for Storables.com, at no extra cost. Learn more)
Overview
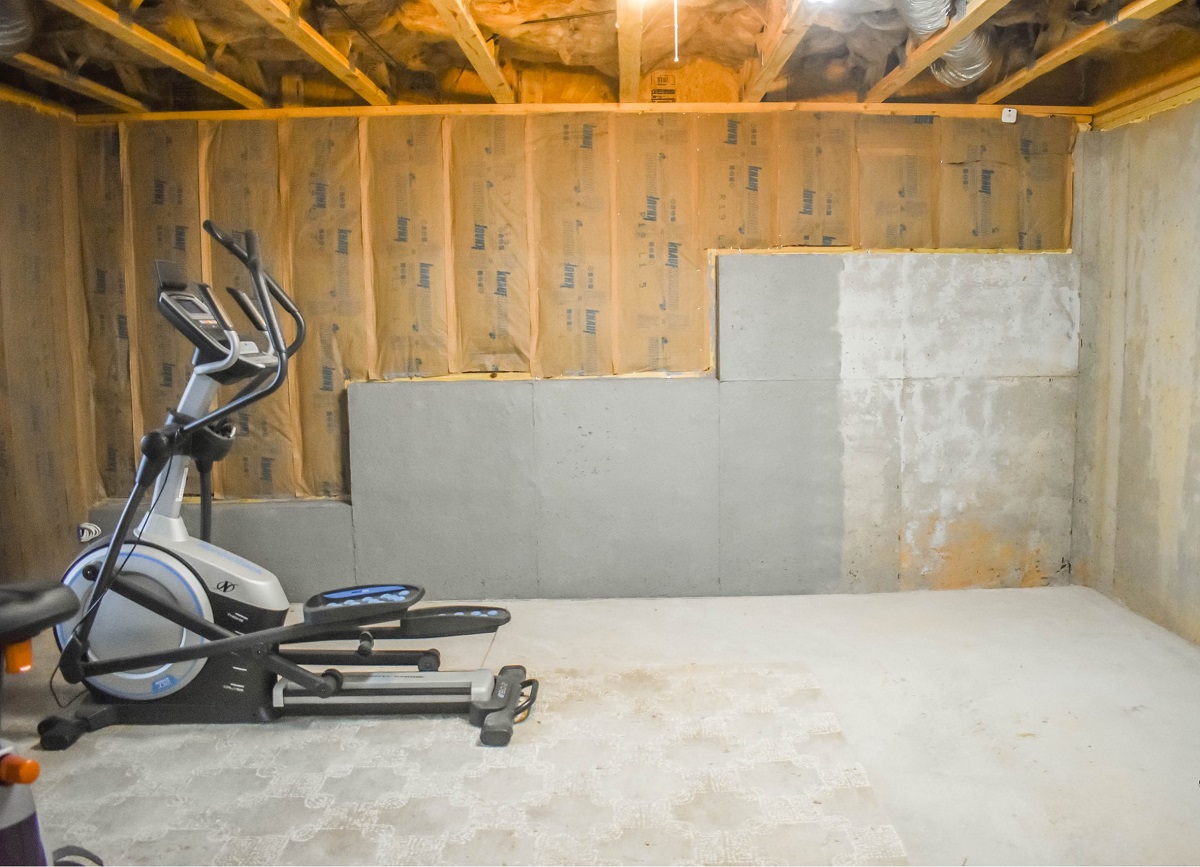
When it comes to basement renovations, one common challenge many homeowners face is dealing with unsightly cement walls. Cement walls can give your basement a cold and unfinished look, but with the right techniques and materials, you can transform those walls into a more welcoming and appealing space. In this article, we will guide you through the process of covering cement walls in your basement.
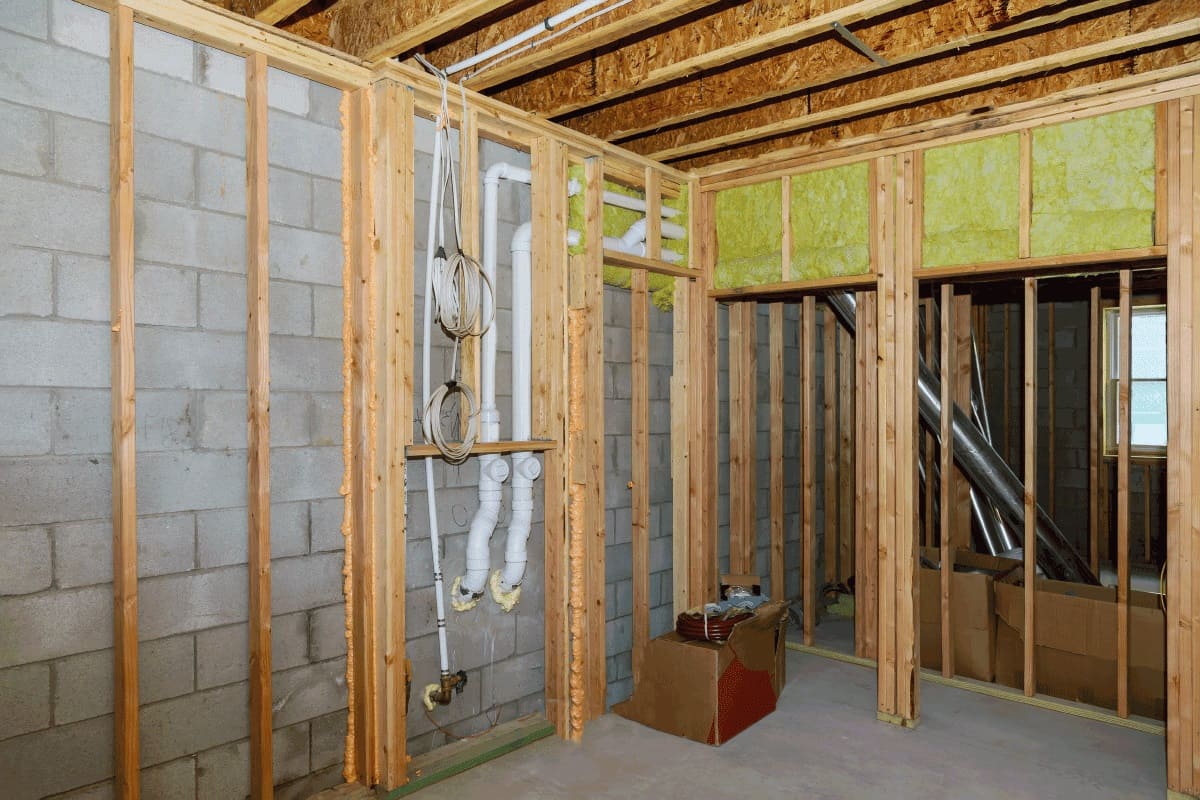
Before you begin, it’s important to assess the condition of the walls. Are there any cracks or holes that need to be repaired? Is the surface clean and free of debris? Taking the time to properly prepare the walls will ensure a successful and long-lasting result.
Once you’ve assessed the condition of the walls, it’s time to clean them. Use a broom or vacuum to remove any loose dirt or dust. For more stubborn dirt or stains, you may need to use a mild detergent and scrub brush. Make sure to rinse the walls thoroughly and allow them to dry completely before moving on to the next step.
If you notice any cracks or holes in the walls, it’s important to fill them before proceeding. Use a concrete crack filler or patching compound to repair any imperfections. Follow the manufacturer’s instructions for mixing and applying the product, and allow it to dry completely before continuing.
Next, it’s time to apply a primer. Applying a good-quality primer will not only help the covering adhere better to the walls, but it will also prevent any stains from bleeding through. Choose a primer that is specifically designed for concrete surfaces and follow the manufacturer’s instructions for application.
Now comes the fun part – choosing the right covering option for your basement walls. There are several options to consider, each with its own advantages and considerations. Let’s explore some of the most popular options.
Key Takeaways:
- Transforming your basement’s cement walls is a rewarding project that can enhance your home. Proper preparation, choosing the right covering option, and adding finishing touches can create a welcoming and appealing space.
- Whether you opt for painting, wallpaper, paneling, drywall, or cementitious coatings, there are various options to suit your style and budget. Embrace your creativity and enjoy the process of revitalizing your basement.
Read more: How To Paint A Basement Cement Floor
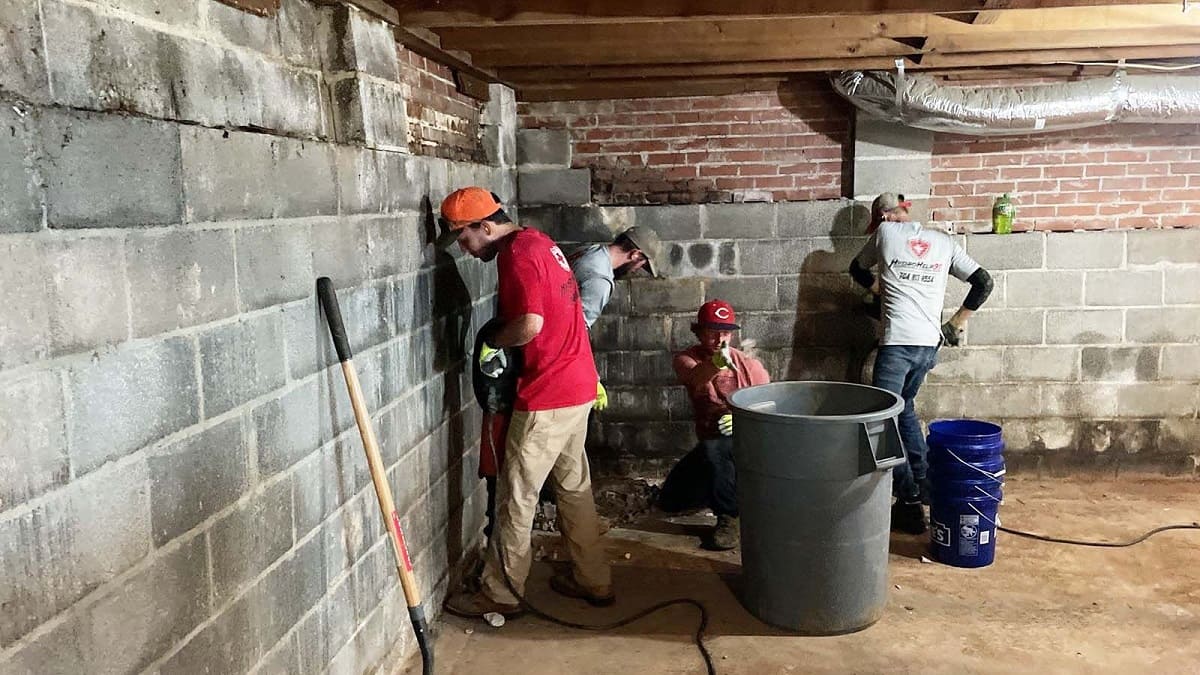
Preparing the Walls
Before you can start covering your cement walls in the basement, it’s crucial to properly prepare them. This step is essential for ensuring a smooth and successful application of the chosen covering, whether it’s paint, wallpaper, paneling, drywall, or cementitious coatings.
The first step is to assess the condition of the walls. Look for any cracks, holes, or significant damage that needs to be addressed before moving forward. Smaller cracks can be repaired easily with a concrete crack filler or patching compound. For larger cracks or structural issues, it’s recommended to consult a professional to evaluate and repair the damage.
Once any necessary repairs have been made, it’s time to clean the walls thoroughly. Start by removing any loose dirt, dust, or debris using a broom or vacuum cleaner. Stubborn stains or grease marks may require a more intensive cleaning approach. In such cases, a gentle detergent mixed with water and a scrub brush can be used. Rinse the walls well with clean water and allow them to dry completely before moving on to the next step.
Now that the walls are clean, it’s important to ensure that they are free from any loose paint or old wallpaper. Use a scraper or sandpaper to remove any loose or flaking paint. If there are areas with old wallpaper, use a wallpaper remover solution and a scraper to peel off the paper. It’s crucial to have a smooth and stable surface for the covering to adhere to.
After removing any loose paint or wallpaper, it’s advisable to inspect the walls for any signs of efflorescence. Efflorescence is a white powdery substance that can form on cement surfaces due to moisture. If you notice any efflorescence, use a wire brush to scrub it off and then rinse the walls thoroughly with clean water.
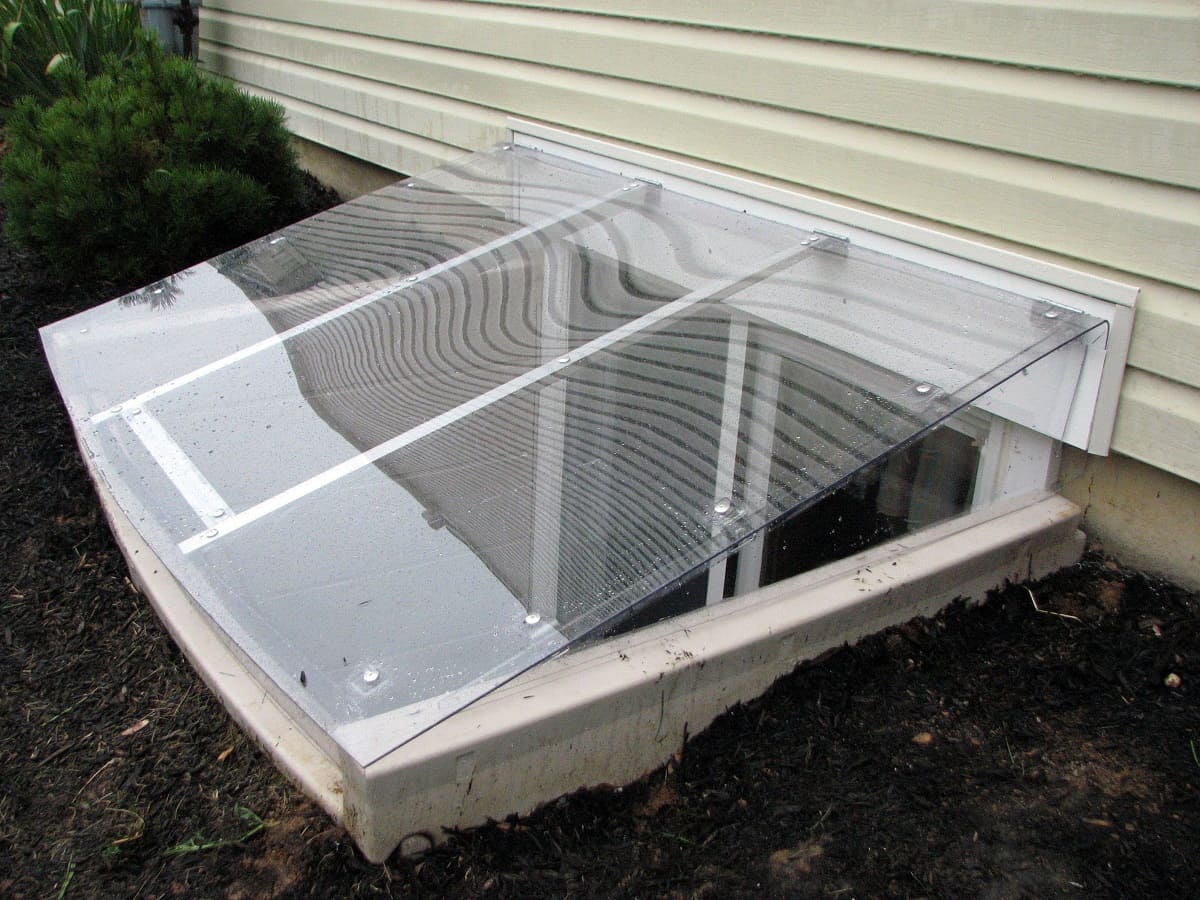
In addition to ensuring a clean and smooth surface, it’s important to address any moisture issues in the basement. Moisture can cause problems with the adhesion of coverings and lead to mold and mildew growth. Consider using a basement waterproofing system or applying a moisture barrier paint to prevent moisture from seeping through the walls.
By thoroughly preparing the walls, you are setting yourself up for a successful installation of the chosen covering option. Taking the time to repair, clean, and address any moisture issues will provide a solid foundation for the transformation of your basement walls.
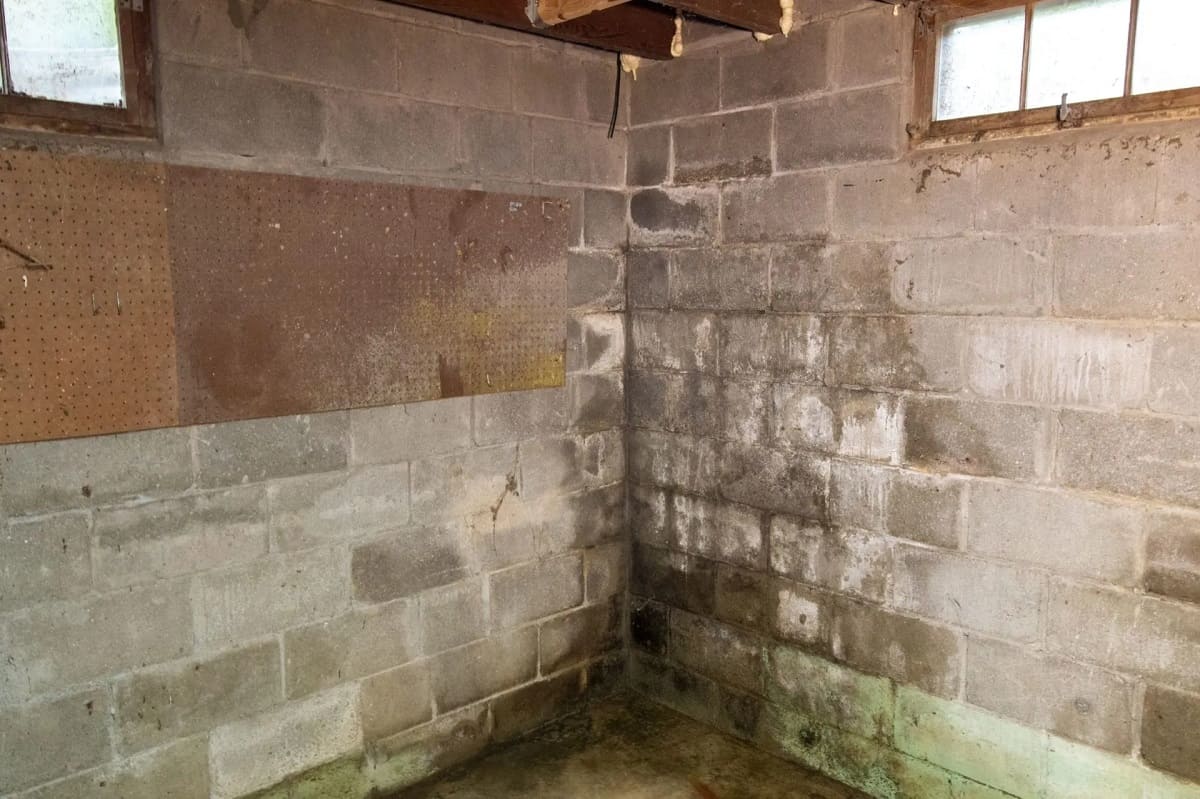
Cleaning the Walls
Before you can begin the process of covering your cement walls in the basement, it is essential to thoroughly clean the walls. Cleaning the walls not only ensures a clean surface but also helps to improve the adhesion of the chosen covering option.
Start by removing any loose dirt, dust, or debris from the walls. Use a broom, brush, or vacuum cleaner to sweep or suck up the loose particles. Pay special attention to the corners, edges, and any hard-to-reach areas.
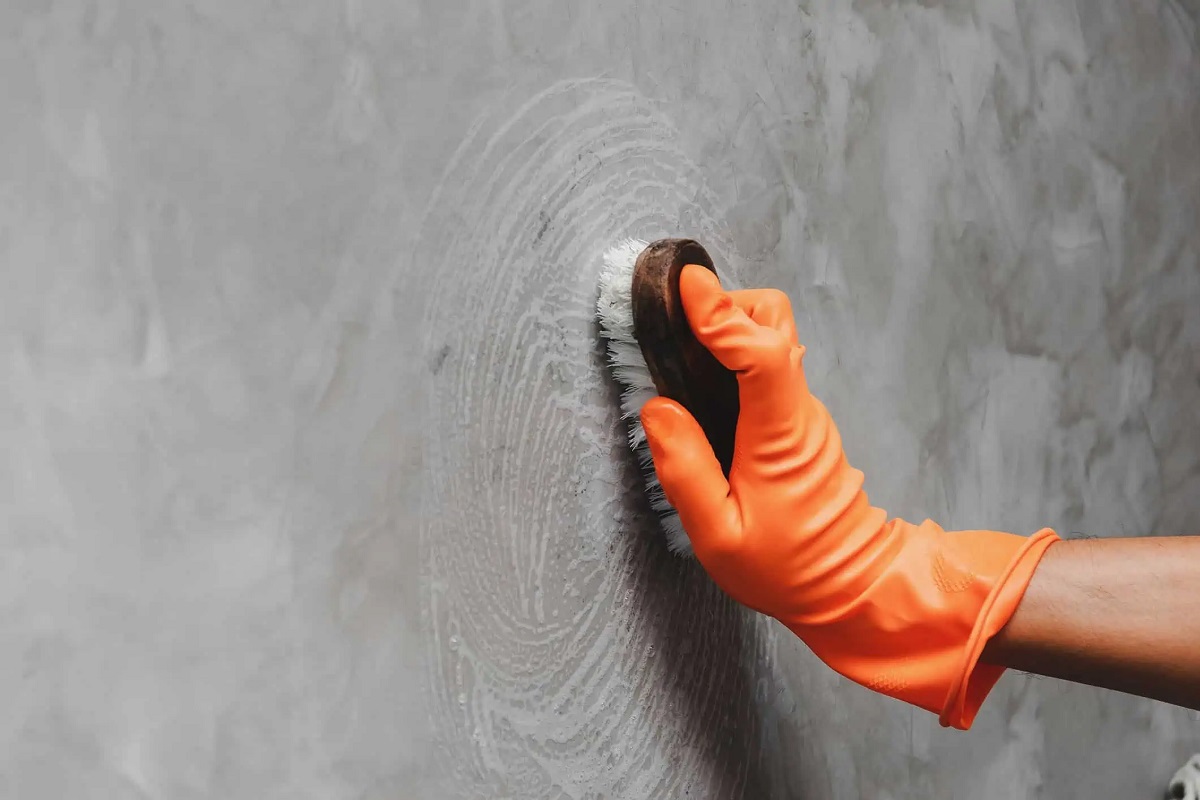
If you notice any stains or marks on the walls, it may be necessary to use a mild detergent solution to clean them. Mix a small amount of gentle detergent with water and apply the solution to the stained areas. Use a soft sponge or cloth to gently scrub the stains, working in circular motions. Be careful not to scrub too hard as it may damage the surface of the walls.
Rinse the walls thoroughly with clean water to remove any detergent residue. Ensure that all the soap has been rinsed off to prevent it from interfering with the adhesion of the covering.
If you encounter more stubborn stains, such as grease or oil marks, you may need to use a stronger cleaning agent. There are commercially available degreasing cleaners specifically designed for removing tough stains from cement surfaces. Follow the instructions on the product and test it on a small, inconspicuous area of the wall before applying it to the entire surface. Always wear protective gloves and ensure proper ventilation when using strong cleaning agents.
For mold or mildew growth, it is crucial to address the issue before applying any covering. Use a solution of equal parts water and bleach to clean the affected areas. Apply the solution with a sponge or brush, ensuring that it completely covers the mold or mildew. Allow the solution to sit for a few minutes and then scrub the area gently. Rinse the walls thoroughly with clean water to remove any bleach residue. If the mold or mildew problem is extensive, it is recommended to consult a professional for proper remediation.
Once the walls are clean, it is important to allow them to dry completely before applying any covering. Moisture on the walls can prevent proper adhesion and potentially damage the covering. Use fans or dehumidifiers in the basement to speed up the drying process.
Cleaning the walls is an essential step in preparing them for the covering of your choice. By thoroughly cleaning the walls and ensuring they are dry, you create the ideal surface to achieve a successful and long-lasting transformation of your basement walls.
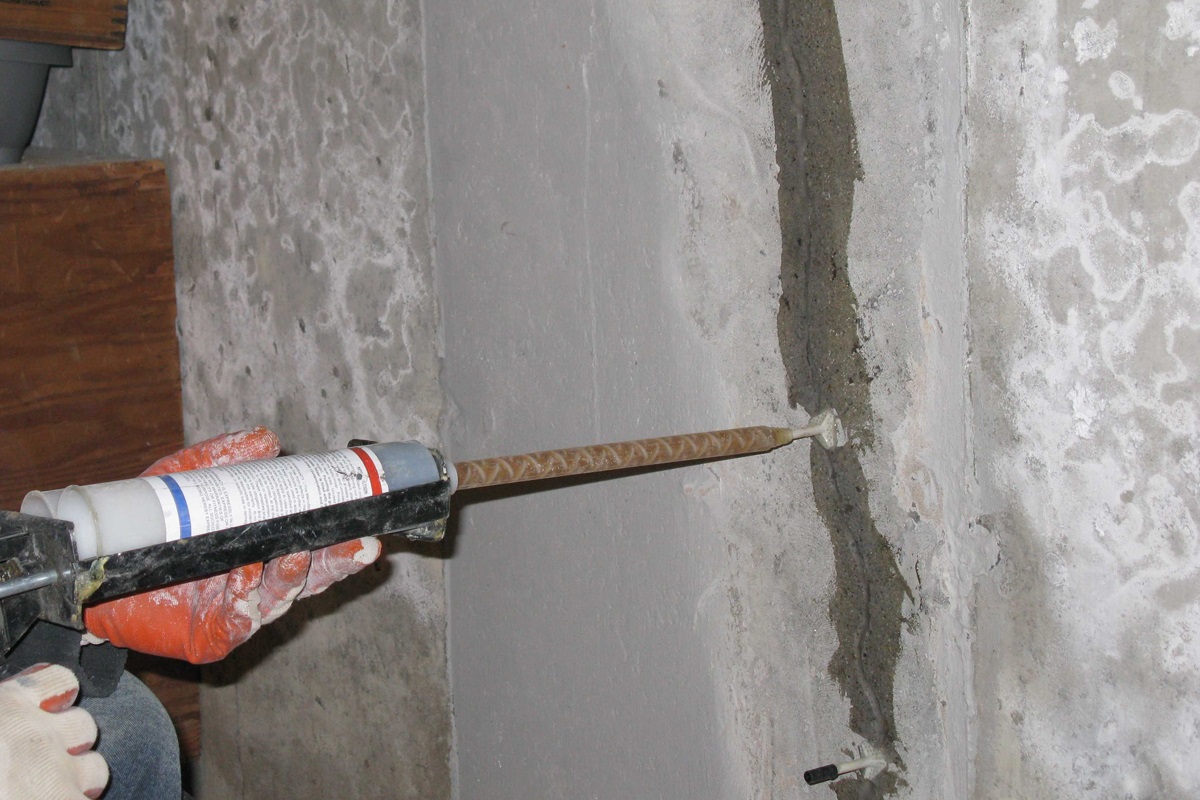
Filling any Cracks or Holes
Before covering your cement walls in the basement, it is crucial to fill any cracks or holes present on the surface. Filling these imperfections ensures a smoother and more even finish, while also preventing the covering from becoming compromised or damaged in the future.
Start by thoroughly inspecting the walls for any cracks, holes, or gaps. These imperfections can occur due to settling of the foundation, changes in temperature, or general wear and tear over time. Small cracks or holes may seem insignificant, but they can expand and cause major issues if left unaddressed.
To repair smaller cracks, you can use a concrete crack filler or patching compound. These products are readily available at most home improvement stores. First, clean the crack with a wire brush to remove any loose debris or particles. Then, follow the instructions on the product packaging to mix and prepare the filler or compound. Apply the mixture into the crack using a putty knife or trowel, ensuring that it fills the entire depth of the crack. Smooth the surface of the filler to match the surrounding wall, and allow it to dry completely as per the manufacturer’s instructions.
For larger cracks or holes, you may need to use a more robust repair method. Consider using a concrete mix specifically designed for structural repairs. Clean the area around the crack or hole, removing any loose material or debris. Moisten the area slightly to aid in the adhesion of the concrete mix. Then, prepare the mix according to the instructions on the packaging, making sure to achieve the proper consistency. Fill the crack or hole with the concrete mix, using a trowel to compact and smooth it. Allow it to dry completely, following the recommended curing time.
It’s important to note that some cracks or holes may be indicative of underlying structural issues. If you suspect that the cracks are due to more significant problems, it’s advisable to consult with a professional before proceeding with the filling process.
Once all the cracks and holes have been filled and allowed to dry, it’s essential to inspect the repair work. Check the filled areas for any unevenness or roughness. If needed, use sandpaper or a sanding block to smooth the surface of the repaired areas. This will ensure a seamless transition between the filled areas and the rest of the wall when applying the covering.
Filling any cracks or holes in your basement walls is a crucial step in the preparation process. By addressing these imperfections, you create a solid and stable surface for the covering of your choice. Taking the time to properly fill and repair the walls will result in a finished look that is not only aesthetically appealing but also durable and long-lasting.
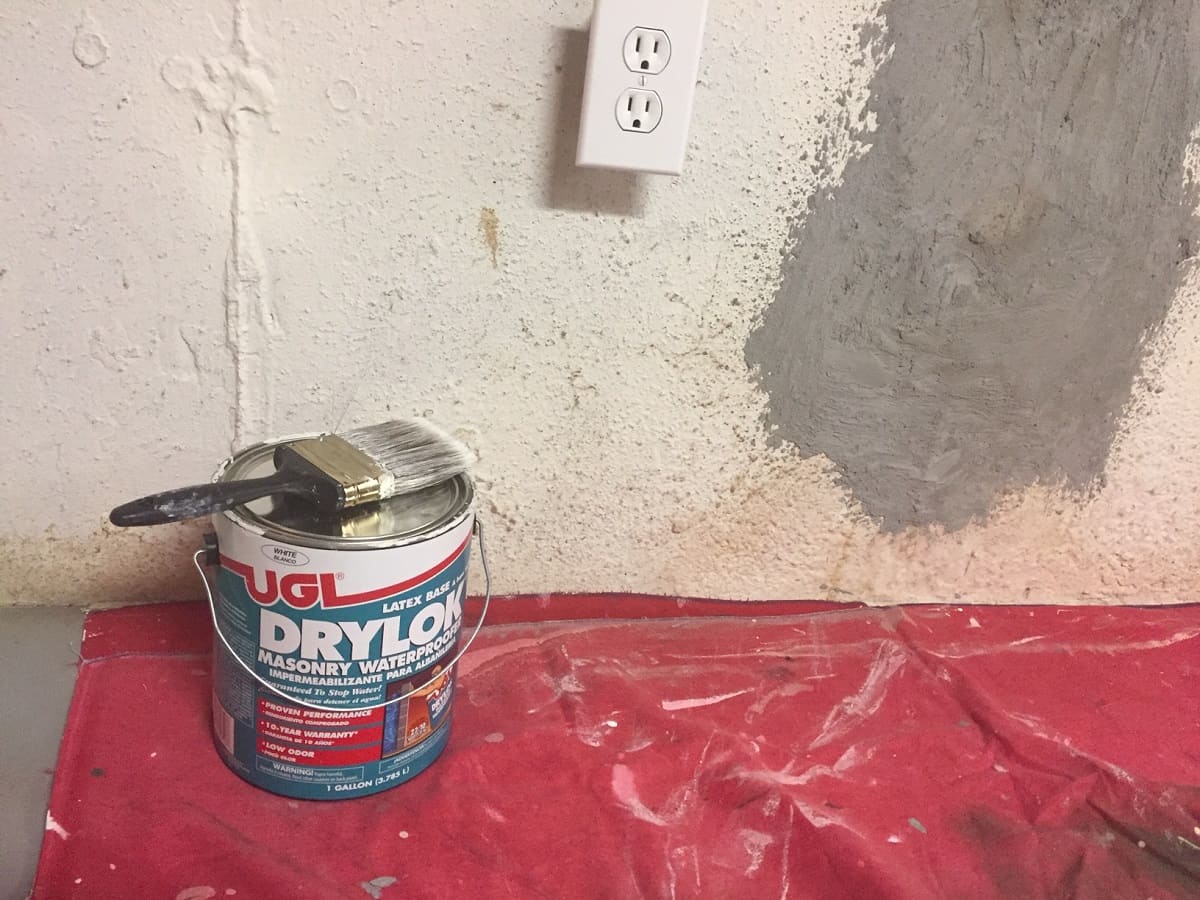
Applying a Primer
Before covering your cement walls in the basement, it is essential to apply a primer. A primer acts as a preparatory layer, creating a smooth and uniform surface for the chosen covering and enhancing its adhesion. Applying a primer also helps to seal the porous cement surface, prevents any stains from bleeding through, and promotes a longer lifespan for the covering.
When selecting a primer, it’s important to choose one that is specifically formulated for concrete or masonry surfaces. These primers are designed to adhere well to cement walls and provide a strong base for the covering. Consult with your local home improvement store or paint supplier to find the right primer for your specific needs.
Before applying the primer, thoroughly clean the walls to remove any dust, dirt, or debris. Use a broom or vacuum cleaner to remove loose particles, and if necessary, use a mild detergent solution to clean any stubborn stains. Rinse the walls with clean water and allow them to dry completely before proceeding.
Next, prepare the primer according to the manufacturer’s instructions. It may require stirring or shaking before use. Ensure that you have adequate ventilation in the basement while working with the primer.
Using a paint roller or brush designed for use with concrete surfaces, begin applying the primer to the walls. Start from the top and work your way down, working in small sections to ensure even coverage. Apply the primer in a thin and even coat, making sure to cover the entire surface. Pay extra attention to corners, edges, and any areas with cracks or repairs.
Allow the primer to dry completely before proceeding with the next steps. The drying time will vary depending on the specific type and brand of primer used, as well as the ambient temperature and humidity. Check the manufacturer’s instructions for the recommended drying time.
After the primer has dried, inspect the walls for any areas that may require a second coat. If necessary, apply a second coat of primer following the same technique as before. A second coat ensures better coverage and improves the overall adhesion and durability of the final covering.
Once the primer is completely dry and any additional coats have been applied if necessary, the walls are now prepped and ready for the chosen covering. Applying a primer is a crucial step in the process, ensuring that the covering adheres properly to the cement walls and provides a finished look that will stand the test of time.
Read more: How To Cement Bag A Brick Wall
Choosing the Right Covering Option
When it comes to covering cement walls in the basement, there are several options to consider. The right choice will depend on factors such as your personal preference, budget, desired aesthetic, and the amount of work you’re willing to undertake. Let’s explore some of the most popular covering options for basement walls.
- Paint: Painting the cement walls is one of the simplest and most cost-effective options. It allows you to add color and personality to your basement while covering up the raw cement. Choose a high-quality masonry paint that is suitable for concrete surfaces. It’s recommended to apply a primer before painting to enhance adhesion and prevent the paint from absorbing into the porous surface.
- Wallpaper: Wallpaper is another option that can transform the look of your basement walls. Opt for wallpaper specifically designed for use on concrete or masonry surfaces. Ensure that the wallpaper is properly measured and cut to fit the dimensions of your walls. Consider using a wallpaper adhesive that is suitable for cement surfaces to ensure proper adhesion.
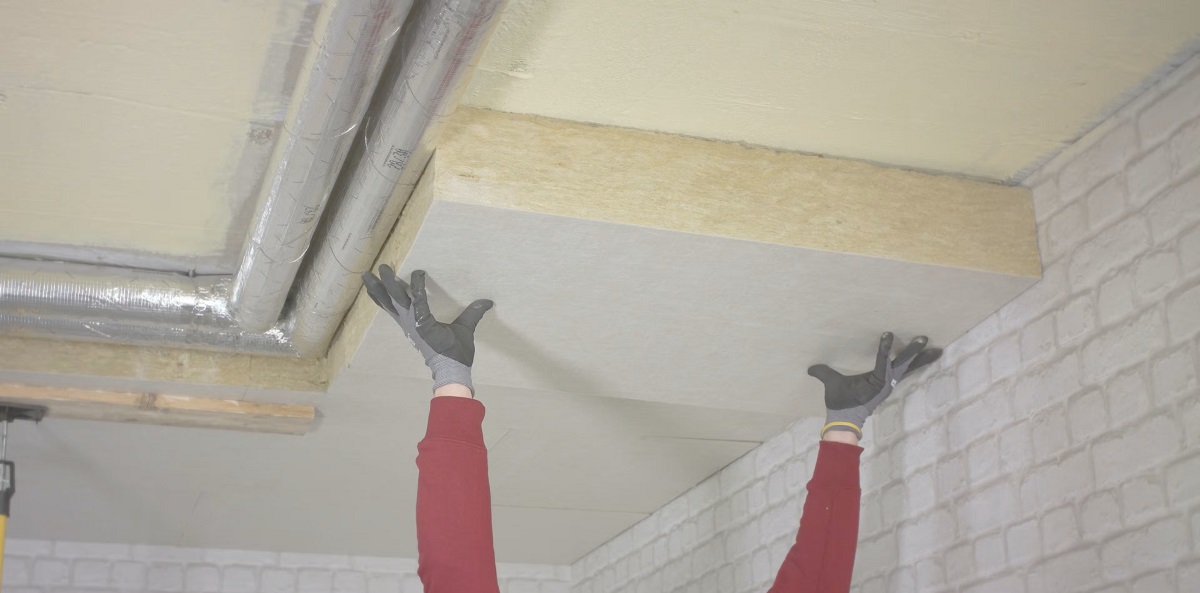
- Paneling: Installing wall panels is a popular choice for basement renovations. These panels are available in various materials, such as wood, PVC, or composite, and can be easily installed over the cement walls. Paneling not only covers the cement but also adds insulation and creates a more finished look to the space.
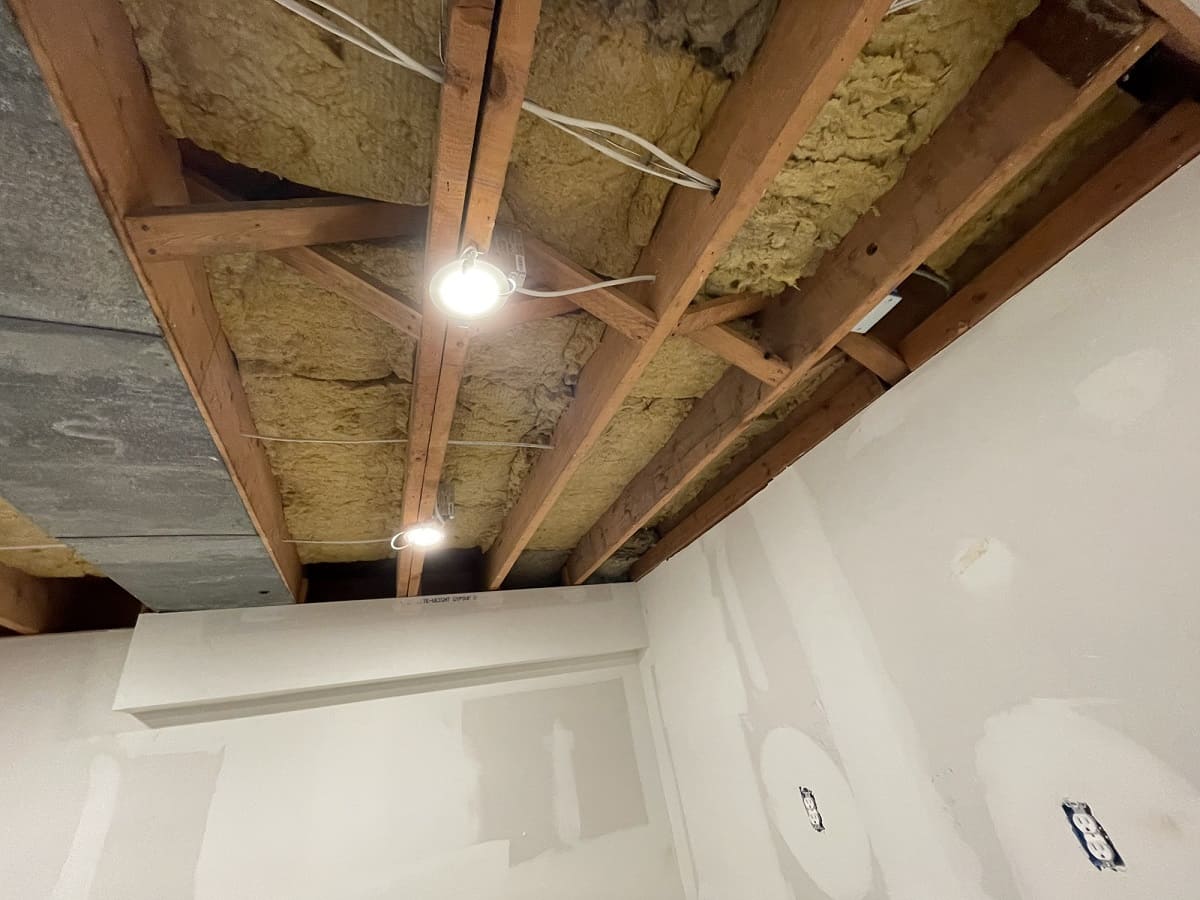
- Drywall: If you’re looking for a more traditional and polished finish, drywall is a great option. Installing drywall involves framing the walls and covering them with sheets of plasterboard. This option requires more extensive work and may be best suited for those with intermediate to advanced DIY skills or professional assistance.
- Cementitious Coatings: Cementitious coatings are specifically designed for covering concrete surfaces. These coatings provide a durable and attractive finish that can be smooth or textured, depending on your preference. Cementitious coatings are often used in industrial or modern-style basements and can be applied using a trowel or sprayer.
Consider your desired aesthetic, the level of maintenance required, and the overall budget when choosing the right covering option for your basement walls. It’s also important to keep in mind any specific factors that may influence your decision, such as moisture levels, insulation needs, or soundproofing requirements.
Ultimately, the chosen covering option should not only enhance the appearance of your basement but also suit your lifestyle and preferences. Take the time to research and explore different options to find the one that best suits your needs and creates a welcoming and comfortable space.
Option 1: Paint
Painting the cement walls in your basement is a popular and cost-effective option to transform the look and feel of the space. With a fresh coat of paint, you can add color, personality, and a sense of style to your basement while covering up the raw cement surface.
Before starting the painting process, it’s important to properly prepare the walls. Make sure the walls are clean and free from any dust, dirt, or debris. Use a broom, brush, or vacuum cleaner to remove loose particles from the surface. If necessary, clean the walls using a mild detergent solution and a sponge or cloth. Rinse the walls thoroughly with clean water and allow them to dry completely.
Next, it’s recommended to apply a primer specifically formulated for concrete surfaces. A primer helps enhance the adhesion of the paint and prevents it from being absorbed into the porous cement surface. Apply the primer using a paint roller or brush, starting from the top and working your way down. Allow the primer to dry completely according to the manufacturer’s instructions.
Once the primer is dry, it’s time to choose your paint color. Consider the overall aesthetic and desired atmosphere of your basement. Lighter colors can help make the space feel larger and brighter, while darker colors can create a cozy and intimate ambiance. Select a high-quality masonry paint that is specifically designed for use on concrete surfaces.
Before applying the paint, stir it thoroughly to ensure an even distribution of color. Start painting from the top of the wall and work your way down using a roller or brush. Apply thin, even coats of paint, allowing each coat to dry before applying the next. Multiple coats may be necessary to achieve the desired color saturation and coverage.
It’s important to follow proper painting techniques to ensure a smooth and professional finish. Use long, even strokes and avoid excessive brush marks or roller lines. Pay special attention to corners, edges, and any areas with cracks or repairs. Take breaks between coats to allow the paint to thoroughly dry.
Once the final coat is completely dry, inspect the walls for any touch-ups or areas that may require additional painting. Make sure to clean up any drips or spills and remove any painter’s tape or protective coverings used during the painting process.
Painting your basement walls is a versatile option that allows you to customize and enhance the look of the space. With the right paint color and proper application techniques, you can create a beautifully finished basement that reflects your personal style and brings new life to the area.
Consider using a combination of insulation and moisture-resistant materials such as foam board and drywall to cover cement walls in the basement. This will help improve insulation and create a more finished look.
Option 2: Wallpaper
Another popular option for covering cement walls in your basement is wallpaper. Wallpaper offers a wide range of designs, patterns, and textures that can instantly transform the look of your space and add a unique touch of style.
Before starting the wallpaper installation process, it’s important to properly prepare the walls. Ensure the walls are clean and free from any dirt, dust, or debris. Use a broom, brush, or vacuum cleaner to remove loose particles from the surface. If necessary, clean the walls using a mild detergent solution and a sponge or cloth. Rinse the walls thoroughly with clean water and allow them to dry completely before proceeding.
Measure the height and width of each wall and add a few inches of extra length to ensure you have enough wallpaper to cover the entire surface. Cut the wallpaper into manageable lengths, taking care to match the patterns if necessary.
Next, you’ll need to prepare the wallpaper paste or adhesive, as specified by the manufacturer’s instructions. Some wallpapers come pre-pasted, while others require you to apply adhesive to the back of the wallpaper. Allow the paste or adhesive to sit for the recommended amount of time to activate and become tacky.
Start at one corner of the wall and apply the wallpaper, ensuring it is aligned with the vertical edge. Carefully smooth the wallpaper from top to bottom, using a wallpaper brush or a clean, damp sponge to remove any air bubbles or wrinkles. Continue applying the wallpaper in a straight line, slightly overlapping each length to create a seamless look.
Take care when working around corners, windows, and doors. Use a sharp utility knife or scissors to trim the excess wallpaper, allowing for a neat and precise finish. Be cautious not to cut into the wall or trim too much off the wallpaper lengths.
Continue applying the wallpaper to each wall, working one section at a time. Take breaks between sections to ensure proper alignment and adhesion. Use a damp cloth to clean off any excess paste or adhesive that may have seeped onto the wallpaper surface.
Allow the wallpaper to dry completely according to the manufacturer’s instructions. Once dry, inspect the walls for any areas that may require touch-ups or additional adhesive. If needed, apply additional adhesive to ensure secure adhesion.
Wallpaper is a versatile and decorative option that can add color, texture, and visual interest to your basement walls. With a wide range of options available, you can choose a pattern or design that complements your personal style and creates a unique atmosphere in your basement space.
Option 3: Paneling
If you’re looking for a durable and stylish solution to cover your cement walls in the basement, paneling is an excellent choice. Paneling not only enhances the aesthetic appeal of your space but also provides additional insulation and creates a more finished and polished look.
Before installing the paneling, make sure the walls are clean and free from any dust or debris. Use a broom or vacuum cleaner to remove loose particles from the surface. Ensure the walls are dry before proceeding.
Choose the type of paneling that best suits your desired style and budget. There are various options available, such as wood, PVC, or composite paneling, each with its own unique features and benefits.
Measure the height and width of each wall to determine the quantity of panels needed. Cut the panels to the appropriate size using a saw or other cutting tools, following the manufacturer’s instructions.
Start by installing the first panel at one corner of the wall. Use a level to ensure it is straight and aligned. Secure the panel in place using adhesive or nails, depending on the paneling type. Repeat this process for each subsequent panel, ensuring a seamless and uniform look.
Pay attention to aligning the panels properly, especially at the corners and edges. Use a trim saw or utility knife to trim the panels as necessary to fit around windows, doors, or other obstacles. Take care to make precise cuts to achieve a professional finish.
Once all the panels are installed, it’s time to finish the paneling. This may involve adding trim pieces to cover any gaps or seams between the panels or to create a decorative border. The trim can be secured using adhesive, nails, or screws, depending on the paneling material.
If desired, you can further enhance the look of the paneling by painting or staining it. Choose a paint or stain that is suitable for the type of paneling you have installed. Follow the manufacturer’s instructions for proper application and allow adequate drying or curing time.
Paneling offers a versatile and durable option to cover cement walls in your basement. Not only does it provide a clean and attractive finish, but it also adds insulation and can help create a more welcoming and finished space.
Consider your desired aesthetic, maintenance requirements, and budget when choosing the type of paneling for your basement. With proper installation and finishing, paneling can transform your basement walls into a stylish and inviting space.
Option 4: Drywall
If you’re aiming for a more traditional and polished finish for your basement walls, drywall is an excellent option. Installing drywall provides a smooth and seamless surface, giving your basement a more refined and finished appearance.
Before installing drywall, ensure that the cement walls are clean and free from any dust or debris. Use a broom, brush, or vacuum cleaner to remove loose particles from the surface. It’s important to also inspect the walls for any cracks or damage that may need to be repaired before proceeding.
Start by framing the walls with wood or metal studs. Measure and cut the studs to the appropriate size, ensuring they are spaced according to building code regulations. Secure the studs to the cement walls using a combination of concrete screws or adhesive designed for attaching wood or metal to concrete. Ensure that the framing is sturdy and level.
Once the framing is complete, it’s time to install the drywall sheets. Measure the height and width of each section of the wall and cut the drywall sheets to fit. Use a utility knife to score the drywall along the measurements, and then snap it along the scoreline.
Lift the drywall sheets into place and attach them to the studs using drywall screws. Leave a small gap between each sheet to allow for expansion and contraction. Be sure to sink the screws slightly below the surface of the drywall without causing any damage.
Continue installing the drywall sheets until the entire wall is covered. Use a drywall joint compound to fill in the gaps between the sheets and cover the screw heads. Apply multiple layers of joint compound, allowing each layer to dry before applying the next. Feather the edges of the compound to create a smooth transition between the drywall sheets.
After the joint compound has dried and been sanded smooth, you can finish the drywall by applying primer and paint or by adding a textured finish if desired. Prime the drywall to promote proper adhesion of the paint or textured finish.
Installing drywall can be a more involved process compared to other covering options, but it provides a professional and polished look to your basement walls. It may require intermediate to advanced DIY skills or professional assistance for proper installation.
Drywall offers a strong and durable finish that can be customized with paint, wallpaper, or other decorative techniques. It provides a clean and versatile canvas for your basement’s interior design and can significantly enhance the overall appearance and value of the space.
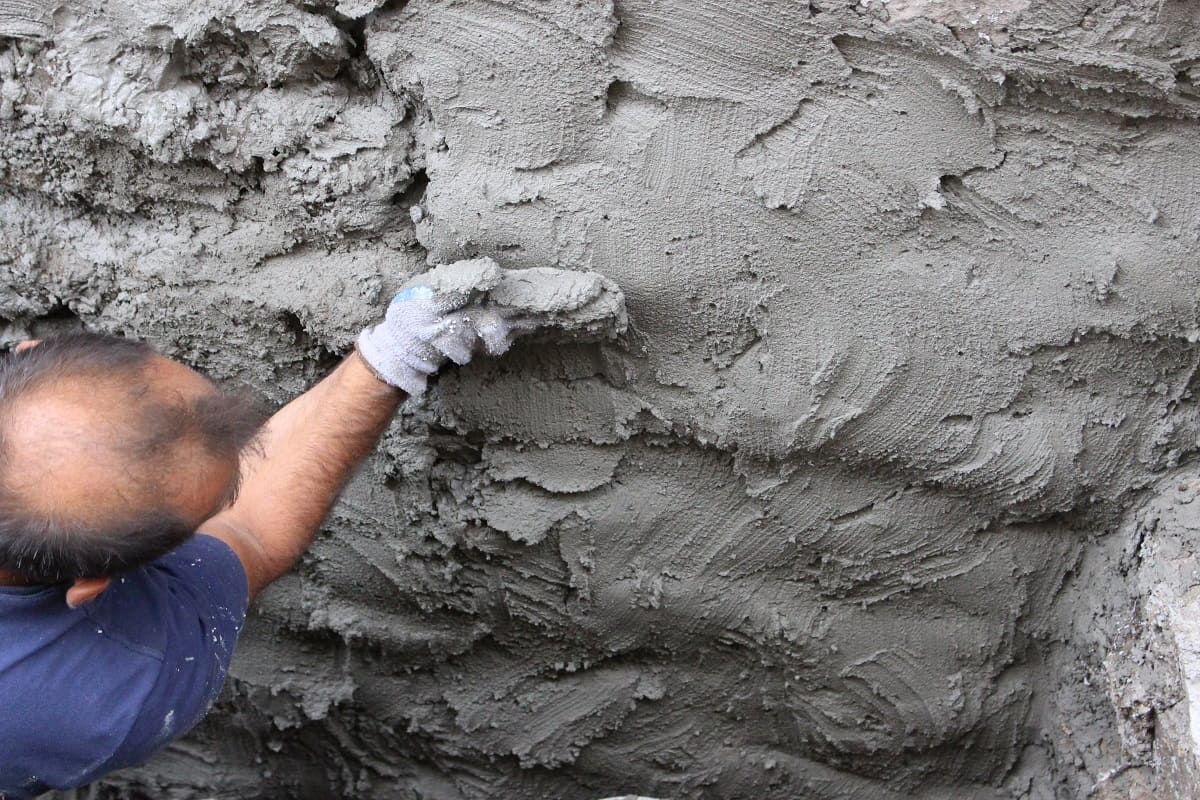
Option 5: Cementitious Coatings
For those seeking a modern and industrial look for their basement walls, cementitious coatings are an excellent option. Cementitious coatings provide a unique and textured finish that showcases the raw beauty of cement while adding a touch of sophistication to your space.
Cementitious coatings are specifically designed for applying directly onto concrete surfaces, making them an ideal choice for basement walls. These coatings create a durable and long-lasting finish that can withstand moisture, temperature changes, and general wear and tear.
Before applying a cementitious coating, it’s important to properly clean and prepare the walls. Remove any loose dirt, dust, or debris using a broom, brush, or vacuum cleaner. If necessary, use a mild detergent solution and a sponge or cloth to clean any stubborn stains. Rinse the walls thoroughly with clean water and allow them to dry completely.
Next, apply a bonding agent to the walls. This will help the cementitious coating adhere properly to the concrete surface. Follow the manufacturer’s instructions for applying the bonding agent and allow it to dry before proceeding.
Once the bonding agent is dry, you can start applying the cementitious coating. Mix the coating material according to the manufacturer’s instructions, ensuring a smooth and consistent texture. Use a trowel or sprayer to apply the coating to the walls, working in small sections at a time.
Spread the coating evenly over the surface, smoothing it out with the trowel or a float. The thickness of the coating will depend on the desired texture and effect. You can create a smooth and polished finish or a more textured and rustic look, depending on your preference.
If you want to add more depth and dimension to the coating, consider using different application techniques such as layering or creating patterns with the trowel. This can add visual interest and enhance the overall aesthetic of the walls.
Allow the cementitious coating to dry completely according to the manufacturer’s instructions. This may take several hours or even days, depending on the thickness of the coating and the ambient conditions. Avoid touching or disturbing the coating while it is drying to prevent any imperfections.
Once the coating is dry, you can choose to leave it as is for an industrial and minimalist look, or you can apply a clear sealer or topcoat for added protection and a more polished finish. The sealer will help to enhance the coating’s durability and make it easier to clean.
Cementitious coatings offer a unique and modern option for covering basement walls. They transform the raw cement surface into a visually striking feature that adds character and style to your space. Consider experimenting with different techniques and finishes to achieve the desired look for your basement walls.
Finishing Touches
Once you have covered your cement walls in the basement using your chosen option, there are a few finishing touches you can consider to complete the transformation of your space. These final touches will help enhance the overall aesthetic and functionality of your basement.
Trim and Molding: Adding trim and molding can provide a polished and refined look to the edges and corners of your walls. Consider installing baseboards, crown molding, or chair rails to give your basement a finished and cohesive appearance. Choose a trim style that complements the overall style of your space.
Lighting: Proper lighting can significantly impact the ambiance and functionality of your basement. Determine the desired purpose of your space and install appropriate lighting fixtures accordingly. Consider recessed lights, track lighting, or wall sconces to create a well-lit and inviting environment. Dimmer switches can also allow you to adjust the brightness levels to suit different occasions.
Decorative Elements: Personalize your basement by adding decorative elements that reflect your style and interests. Hang artwork, photographs, or mirrors on the walls to create a focal point and add visual appeal. Consider adding shelving or display units to showcase books, collectibles, or plants. Incorporate decorative accents such as throw pillows, curtains, or rugs to add warmth and texture to the space.
Furniture and Seating: Selecting the right furniture and seating can transform your basement into a functional and comfortable area. Choose pieces that are suitable for the purpose of your basement, whether it’s a lounge area, home theater, or home office. Opt for comfortable seating options such as sofas, recliners, or bean bags, and furnish the space with tables or desks for functional use.
Storage Solutions: Utilize clever storage solutions to keep your basement organized and clutter-free. Install shelves, cabinets, or built-in storage units to store items such as books, games, or seasonal decorations. Consider using storage bins, baskets, or wall-mounted hooks to keep smaller items neatly organized.
Flooring: If you haven’t already addressed the flooring in your basement, consider adding a suitable flooring option that complements the newly covered walls. Choose from options such as carpet, laminate, vinyl, or tile, depending on your style, budget, and level of use in the basement.
Comfort and Insulation: Enhance the comfort and insulation of your basement by considering additional elements such as installing insulation in the walls or adding an area rug or carpet for warmth. Properly insulating the space can help regulate temperature and reduce noise transfer.
Final Inspection: Once you have completed the finishing touches, take the time to do a final inspection. Check for any areas that may require touch-ups, repair any damages, and ensure that all elements are securely in place. This final step will help ensure your basement is in top shape and ready for use.
By paying attention to these finishing touches, you can elevate the overall look and functionality of your basement. Incorporate your personal style and preferences to create a space that is not only visually appealing but also comfortable and enjoyable for various activities.
Conclusion
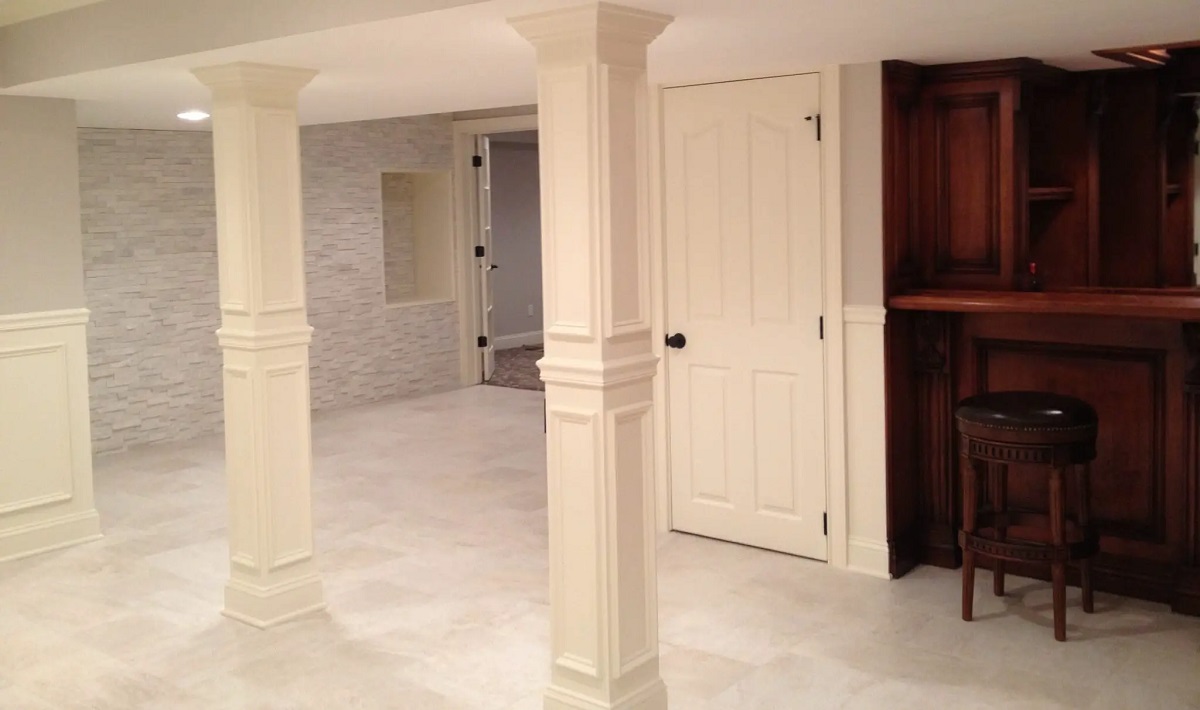
Transforming the cement walls in your basement into a more welcoming and appealing space is a rewarding project that can significantly enhance your home. Whether you choose to paint, wallpaper, panel, apply drywall, or opt for cementitious coatings, there are various options available to suit your style, budget, and level of expertise.
Proper preparation and thorough cleaning of the walls are essential before starting any covering process. Repair any cracks or holes and apply a suitable primer to ensure a smooth and long-lasting finish. Take the time to choose the right covering option that aligns with your design preferences and complements the overall decor of your basement.
After applying the chosen covering, don’t forget about the finishing touches that can elevate the appearance and functionality of your space. Consider adding trim and molding, incorporating appropriate lighting, and selecting furniture and decor that suits your needs and style. Pay attention to storage solutions and flooring options to create a well-organized and comfortable environment.
Throughout the process, remember to maintain a balance between creativity and SEO optimization. Engage readers with insightful details and a touch of creativity while ensuring the article is optimized for search engine visibility. By following these guidelines, you can create comprehensive and engaging content that resonates with readers and helps improve your search engine rankings.
In conclusion, covering cement walls in the basement is a project that can revitalize your space and create a more inviting and livable area in your home. Whether you’re embarking on a DIY endeavor or seeking professional assistance, with the right techniques and materials, you can achieve a successful and satisfying transformation. Embrace your creativity, stay organized, and enjoy the process of creating a beautiful and functional basement that you’ll be proud to showcase to family and friends.
Now that you've got some great ideas on covering those basement cement walls, why not dive deeper into transforming your basement? Wondering about the time commitment? Our article on how long renovations typically last will shed some light. Concerned about moisture and future issues? Check out our insights on effective waterproofing methods for peace of mind in your newly styled space.
Frequently Asked Questions about How To Cover Cement Walls In Basement
Was this page helpful?
At Storables.com, we guarantee accurate and reliable information. Our content, validated by Expert Board Contributors, is crafted following stringent Editorial Policies. We're committed to providing you with well-researched, expert-backed insights for all your informational needs.

0 thoughts on “How To Cover Cement Walls In Basement”