Articles
How To Cut Fabric For Quilt
Modified: January 5, 2024
Learn the proper technique to cut fabric for quilting with our informative articles. Find tips, tricks, and step-by-step instructions to create beautiful quilts.
(Many of the links in this article redirect to a specific reviewed product. Your purchase of these products through affiliate links helps to generate commission for Storables.com, at no extra cost. Learn more)
Introduction
When it comes to quilting, one of the most important steps is cutting the fabric. Properly cutting your fabric is crucial to achieving accurate and precise pieces that will fit together seamlessly in your quilt. Whether you are a beginner or an experienced quilter, mastering the art of fabric cutting is essential.
In this guide, we will walk you through the process of cutting fabric for a quilt. We will cover everything from the tools you need to the techniques for cutting different shapes. By following these steps and applying some helpful tips, you’ll be well on your way to creating beautiful quilts with perfectly cut fabric pieces.
Key Takeaways:
- Mastering the art of fabric cutting for quilts requires the right tools, precise techniques, and careful preparation. Accurate cuts lead to beautifully finished quilts that showcase your creativity and skill.
- From measuring and marking to cutting curved shapes, attention to detail and patience are key. Sharp tools, proper technique, and practice will elevate your fabric cutting skills and enhance the quality of your quilting projects.
Read more: How To Quilt Fabric
Tools Needed
Before you begin cutting fabric for your quilt, it’s important to gather the necessary tools to ensure accurate and efficient cutting. Here are the essential tools you will need:
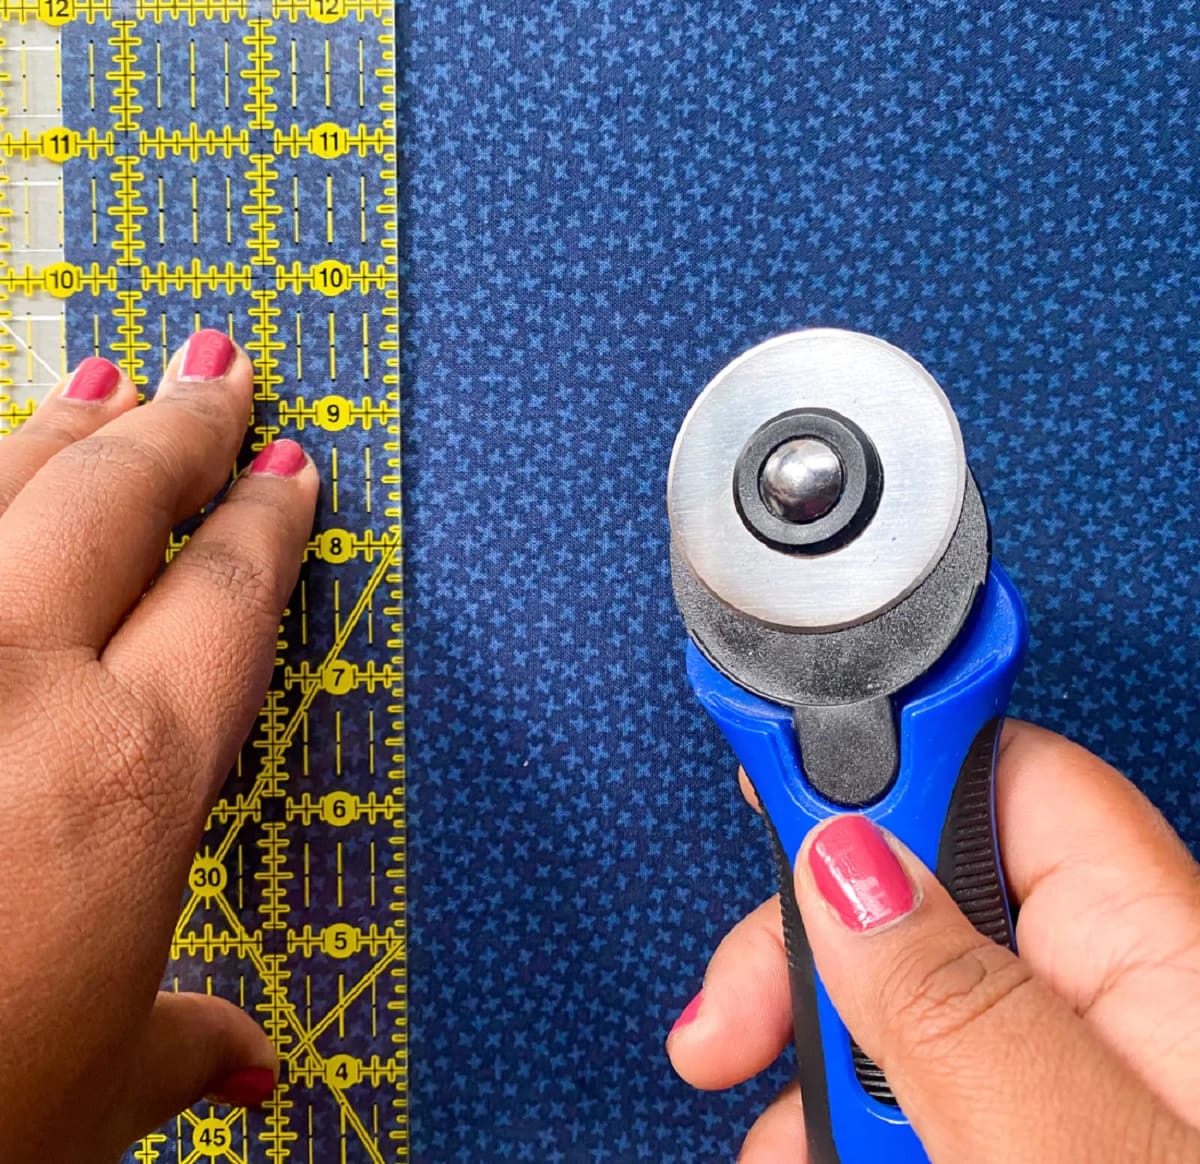
- Rotary Cutter: A rotary cutter is a must-have tool for quilting. It is a handheld tool with a sharp circular blade that allows for precise fabric cutting. Choose a rotary cutter with a comfortable grip and replace the blade regularly for optimal performance.
- Cutting Mat: A cutting mat provides a protective surface for your fabric and prevents the rotary cutter blade from dulling quickly. Look for a self-healing mat that is large enough to accommodate your fabric.
- Ruler: A quilting ruler is an essential tool for measuring and marking fabric accurately. Invest in a clear acrylic ruler with measurements in both inches and centimeters. A 6″ x 24″ ruler is a versatile choice for most quilting projects.
- Scissors: While a rotary cutter is ideal for straight cuts, a good pair of fabric scissors is necessary for trimming threads, cutting curves, and other small details.
- Pins or Clips: You will need pins or fabric clips to secure the fabric layers together while cutting. Opt for quilting pins with flat heads or fabric clips that won’t leave marks on your fabric.
- Iron: An iron is essential for pressing your fabric before cutting. A well-pressed fabric ensures accurate measurements and smooth cutting.
- Ironing Board: Choose a sturdy ironing board with a smooth and padded surface for convenient fabric pressing.
Gather these tools before you start cutting your fabric, and make sure they are in good condition. Having the right tools will make the fabric cutting process much more efficient and enjoyable.
Preparing the Fabric
Before you begin cutting your fabric for a quilt, it’s important to prepare the fabric to ensure accurate and clean cuts. Here are the steps to follow:
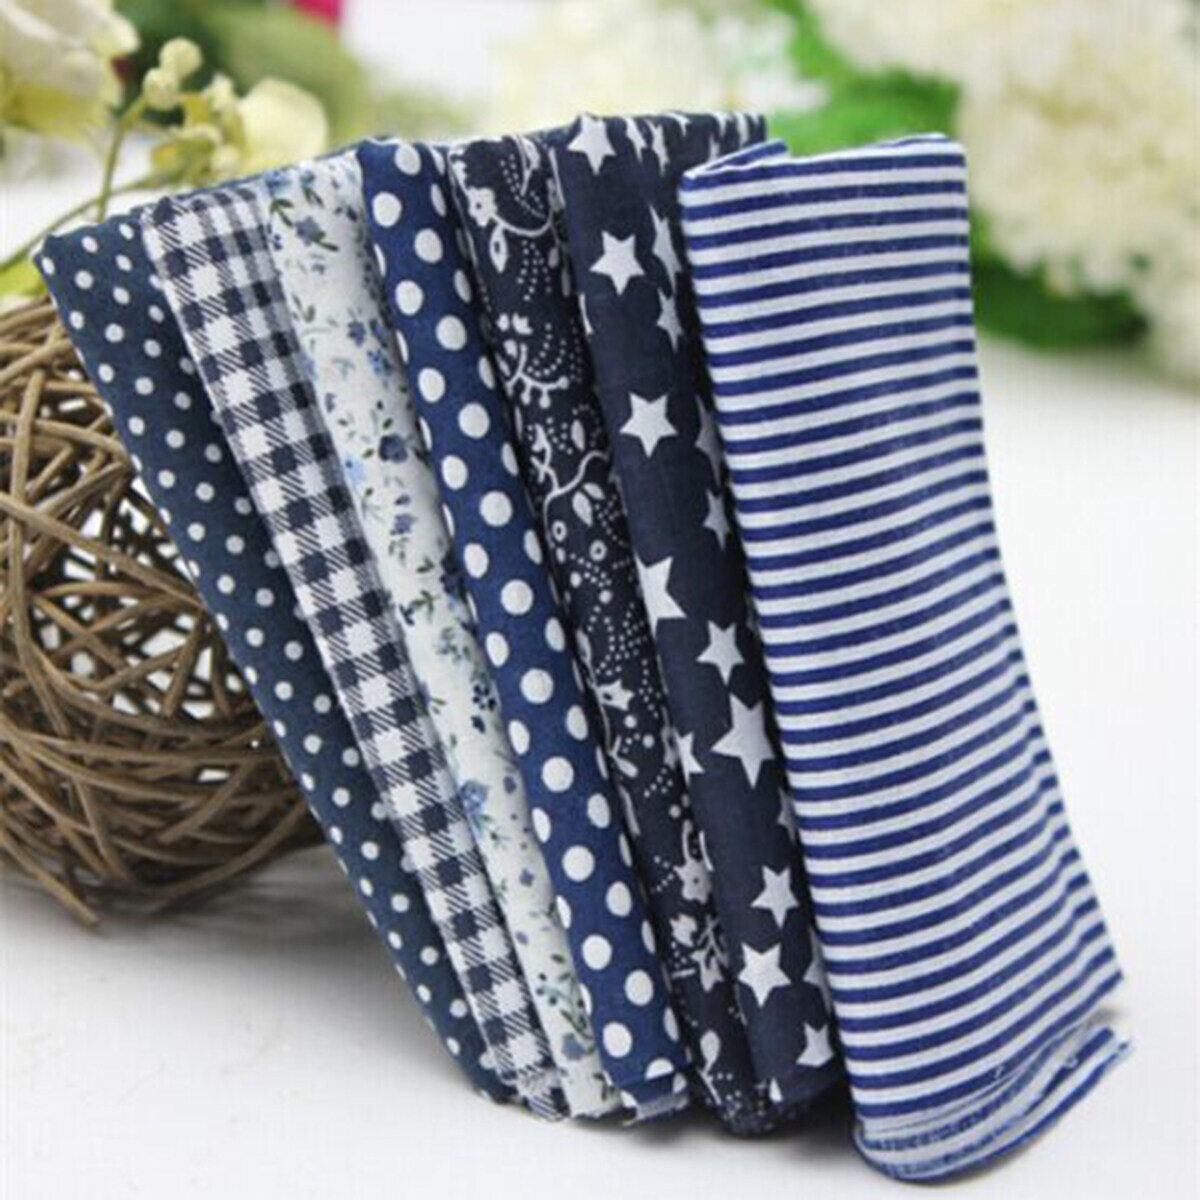
- Wash and Press: If your fabric is brand new, it is recommended to pre-wash it before cutting. This helps to remove any sizing, shrinkage, or excess dye that could affect the final size and appearance of your quilt. After washing, iron the fabric to remove any wrinkles and ensure a smooth surface for cutting.
- Square the Edges: Once your fabric is clean and pressed, square up the edges. Align the selvage edges and use a ruler and rotary cutter to trim off any uneven or frayed edges. This step ensures that your fabric pieces will be of the desired size and shape.
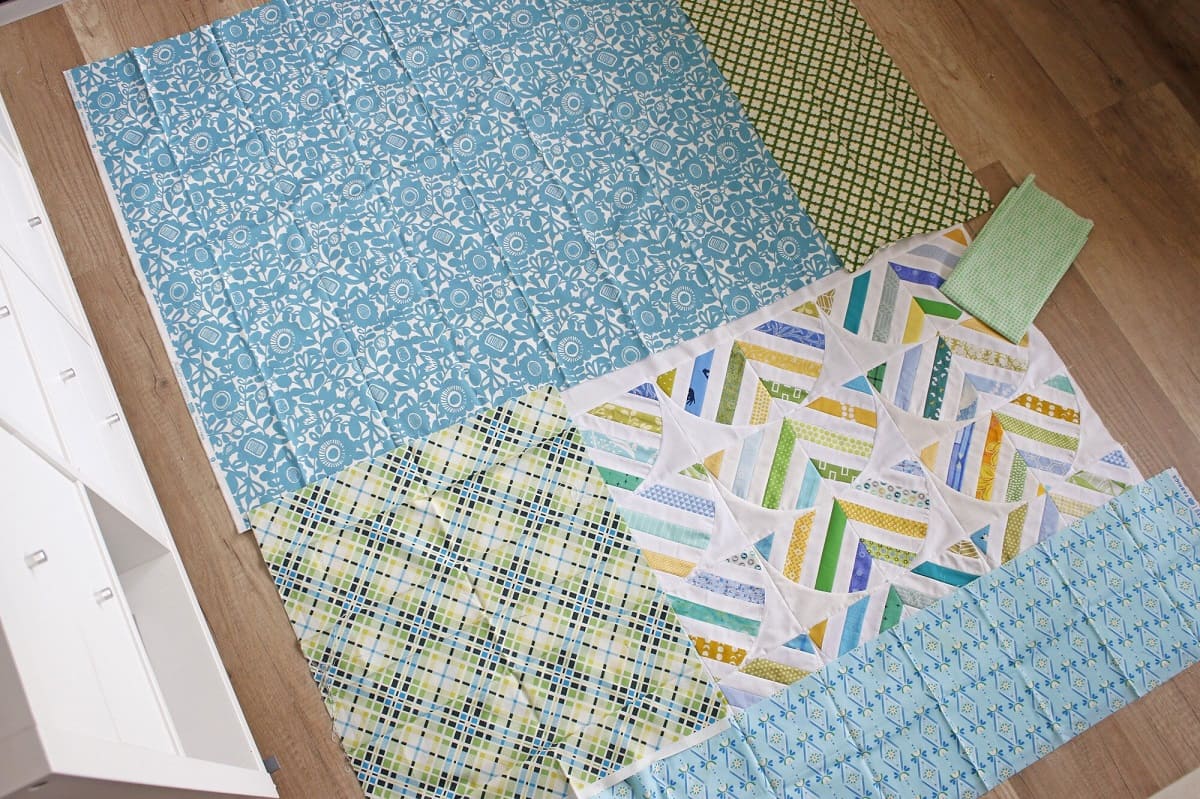
- Position and Smooth: Lay your fabric out on a clean and flat surface, such as a cutting mat or ironing board. Smooth out any wrinkles or folds in the fabric to prevent distortion during cutting.
- Fold and Align: If you have a large piece of fabric, consider folding it in half or quarters to make it more manageable. Ensure that the folded edges are aligned and the fabric is completely flat before proceeding.
By taking the time to prepare your fabric before cutting, you’ll minimize any inconsistencies and errors in your quilt blocks. This step is vital in achieving professional-looking results.
Measuring and Marking
Accurate measuring and marking are essential for precise fabric cutting. Here are some tips to help you measure and mark your fabric properly:
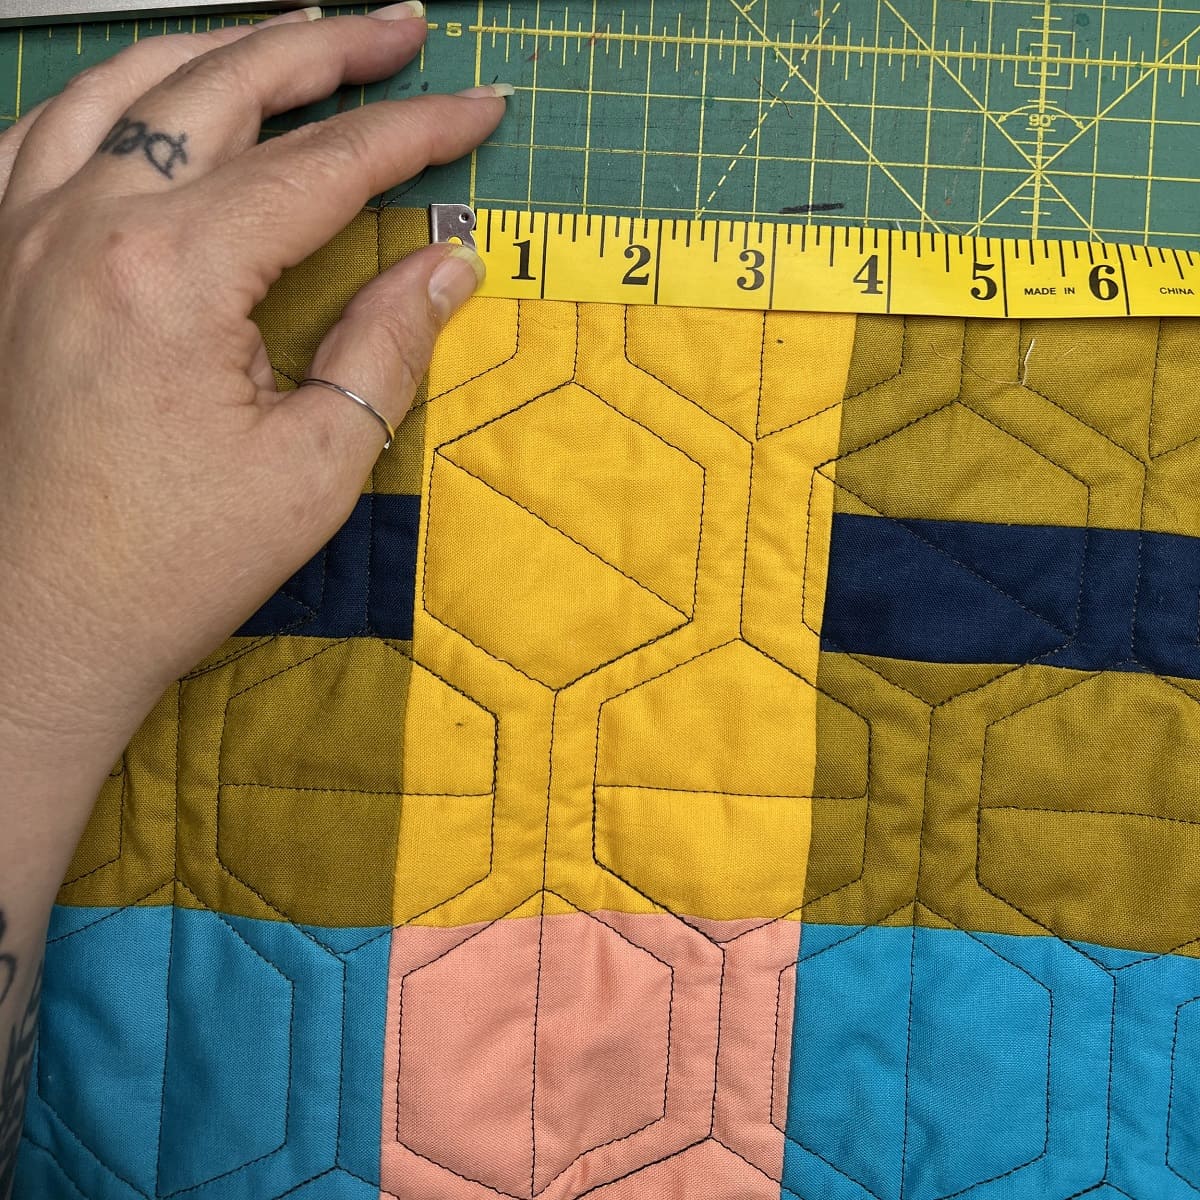
- Use a Quilting Ruler: A quilting ruler is a handy tool for measuring fabric accurately. Place the ruler on your fabric and line up the desired measurement with the fabric edge. Ensure that the ruler is straight and securely in place before making any marks.
- Pay Attention to Grainline: When measuring and marking your fabric, it’s important to align your ruler with the fabric’s grainline. The grainline is the direction in which the threads run parallel to the selvage. Aligning your ruler with the grainline helps maintain the fabric’s stability and prevents distortion.
- Use a Fabric Marker: Use a fabric marker or a washable pen to mark your measurements on the fabric. Make sure to choose a marker that is easily visible but won’t bleed or leave permanent marks on the fabric. Test the marker on a scrap piece of fabric beforehand to ensure it works as expected.
- Double Check Measurements: Before making any cuts, double-check your measurements to ensure accuracy. It’s better to be cautious and measure twice than to end up with fabric pieces that are too small or too large.
Remember to be precise and careful when measuring and marking your fabric. Accurate measurements will greatly contribute to the overall success of your quilt.
Cutting Techniques
Cutting fabric for a quilt involves various techniques, depending on the shape and design of the pieces you need. Here are the common cutting techniques you may encounter:
- Straight Cuts: Straight cuts are the most basic cutting technique. To make a straight cut, line up your ruler with the desired measurement and use a rotary cutter to cut along the edge of the ruler. Apply steady and even pressure to ensure a clean and straight cut.
- Curved Cuts: Curved cuts require a bit more attention and precision. To cut curved shapes, you can either use a template or draw the curve directly on the fabric and follow the line with your rotary cutter. Take your time and make small, gentle cuts to maintain the shape of the curve.
- Strip Cutting: Strip cutting involves cutting long, narrow strips of fabric. Measure the desired width of the strips and use a ruler and rotary cutter to cut parallel lines across the fabric. This technique is commonly used for borders, sashing, and binding.
- Rotary Cutting Around Templates: For complex shapes and designs, you may need to use templates. Place the template on the fabric, secure it in place with pins or clips, and carefully cut around the template using your rotary cutter. Make sure to follow the curves and angles precisely.
- Chain Cutting: Chain cutting is a time-saving technique where you cut multiple pieces of the same size in a continuous chain. Align the fabric layers and cut through multiple layers at once, following your marked lines. Be cautious and ensure accuracy when cutting through the layers.
Learning and practicing these cutting techniques will help you tackle different quilt patterns and projects with confidence. Take your time and be patient as you develop your cutting skills.
When cutting fabric for a quilt, use a rotary cutter and a clear quilting ruler for precise and accurate cuts. Make sure to measure and mark the fabric before cutting to ensure all pieces are the correct size.
Read more: How To Store Quilting Fabric
Cutting Square and Rectangular Pieces
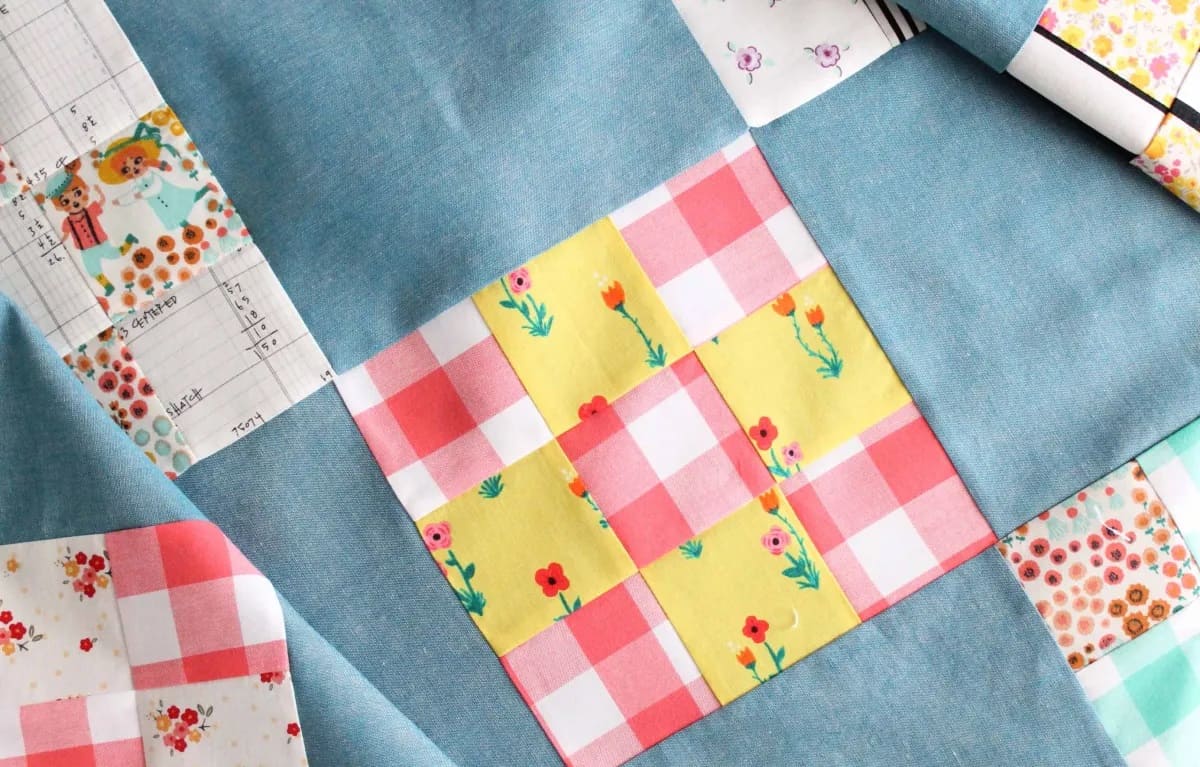
Cutting square and rectangular pieces is a fundamental aspect of quilting. Whether you’re working on a simple patchwork design or creating borders and blocks, here’s how to cut square and rectangular fabric pieces:
- Measure: Determine the desired size of your square or rectangle. Use a quilting ruler and measure the length and width needed.
- Align and Cut: Place your fabric on a cutting mat and align one edge of the fabric with the ruler. Ensure the fabric is flat and smooth. Hold the ruler securely in place and use a rotary cutter to cut along the edge of the ruler. Continue cutting until you have the desired number of square or rectangular pieces.
- Check Measurements: After cutting the first piece, double-check its measurements using the ruler. This will help ensure accuracy for all subsequent cuts.
When cutting multiple square or rectangular pieces, you can use the chain cutting technique. Simply align your ruler with the previously cut edge, cut another piece, and continue in a chain-like pattern. This method saves time and helps maintain consistency in size and shape.
To make sure every square or rectangular piece is cut with precision, it’s crucial to maintain a consistent cutting technique and check your measurements regularly. This will result in clean edges and perfectly fitting fabric pieces for your quilt.
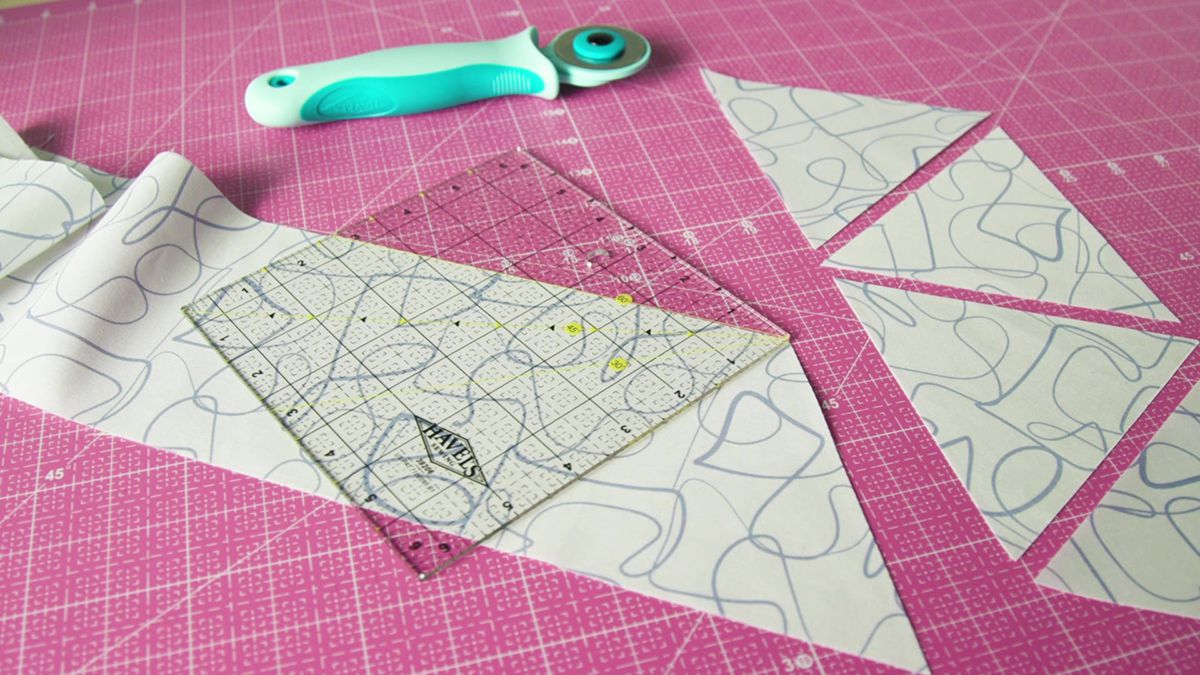
Cutting Triangular Pieces
Cutting triangular pieces adds interest and variety to quilt designs. Triangles can be used to create unique blocks, borders, and other decorative elements. Here’s how to cut triangular fabric pieces:
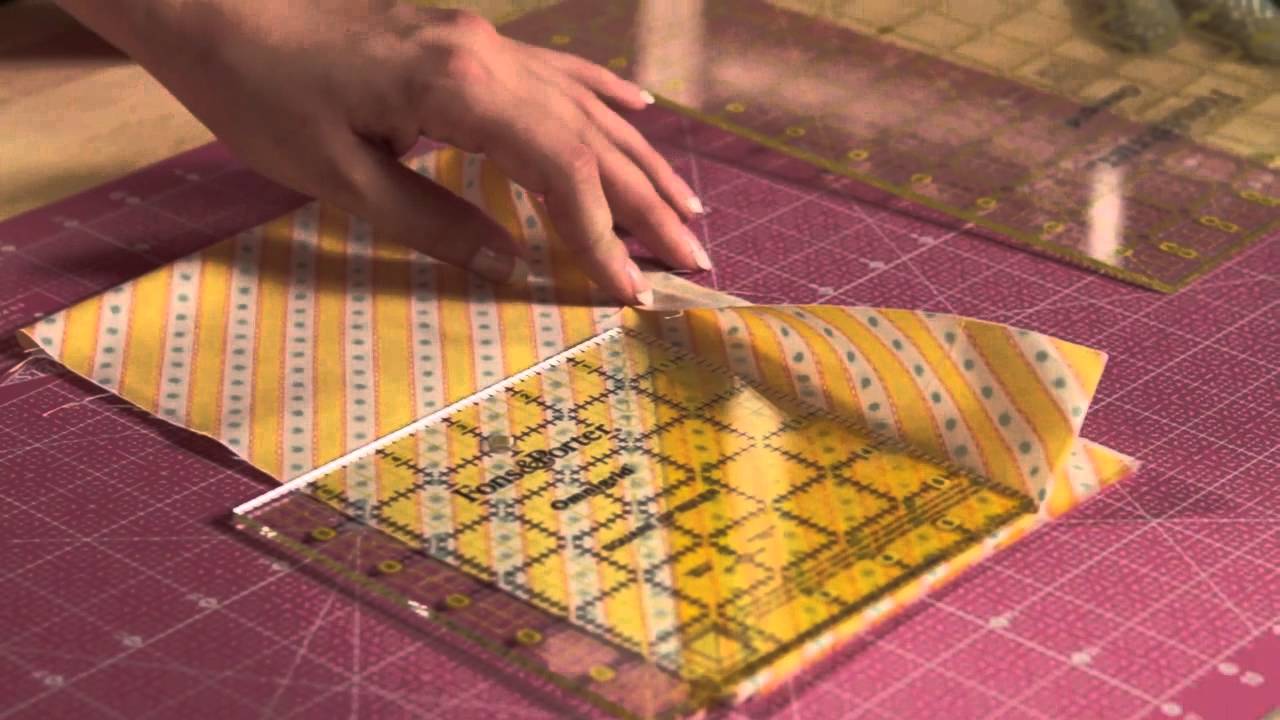
- Measure and Mark: Determine the size and angle of the triangles you want to cut. Use a quilting ruler to measure the length of the base and the height of the triangle. Mark these measurements on the fabric lightly using a fabric marker or washable pen.
- Align and Cut: Position your fabric on a cutting mat and align the ruler with the marked measurements. Make sure the ruler is straight and securely in place. Use a rotary cutter to cut along the edge of the ruler, following the marked line. Repeat this process to cut additional triangles.
- Check Accuracy: After cutting the first triangle, double-check its measurements and angle to ensure accuracy. This will help you maintain consistency as you cut more triangles.
For precise and consistent cuts, consider using templates for cutting triangles. Templates can be made of sturdy cardboard or acrylic and come in a variety of sizes and shapes. Simply place the template on the fabric, align it with the desired angle, and cut around it with a rotary cutter.
When working with multiple triangles, chain cutting can be a time-saving technique. Align the ruler with the edge of the previously cut triangle, make your marks, and continue cutting in a chain-like fashion.
Remember to handle triangles with care as their bias edges can stretch easily. Pressing them gently, rather than ironing, will help maintain their shape and prevent distortion.
By mastering the technique of cutting triangular pieces, you can add visual interest and dimension to your quilts, making them truly unique and captivating.
Cutting Curved Shapes
Cutting curved shapes adds a touch of elegance and intricacy to quilt designs. Curved pieces can be used to create beautiful appliqué motifs, curved borders, or unique quilt blocks. Here’s how to cut fabric for curved shapes:
- Trace or Create a Template: Start by tracing the desired curved shape onto a piece of cardboard or template plastic. You can also find pre-made templates in quilt shops or online. Ensure that the template is smooth and free from any jagged edges.
- Prepare the Fabric: Lay your fabric on a cutting mat and smooth out any wrinkles or folds. If the fabric is prone to fraying, consider applying a fabric stabilizer or starch spray to prevent distortion during cutting.
- Align and Trace: Place the template on the fabric and position it to outline the desired curved shape. Use a fabric marker or a washable pen to trace along the edges of the template. Make sure to trace accurately to achieve precise shapes.
- Secure and Cut: Once you have traced the curved shape, use fabric clips or pins to secure the fabric layers together. Maintain a smooth and taut fabric surface. With a pair of sharp fabric scissors or a rotary cutter, carefully cut along the traced line, making small, precise cuts.
- Check for Accuracy: After cutting the first curved shape, check its accuracy by comparing it to the template. Adjust your cutting technique if needed and double-check subsequent cuts to maintain consistency.
Cutting curved shapes requires steady hands and attention to detail. Take your time and make small cuts to ensure accurate results. If you’re new to cutting curves, start with simpler shapes and gradually tackle more complex designs as you build confidence.
Remember to handle the fabric gently while cutting curved shapes to prevent stretching or distorting. Pressing the fabric lightly with an iron can help smooth out any wrinkles or creases.
By mastering the art of cutting curved shapes, you can add a graceful and artistic touch to your quilt projects, creating stunning visual effects that will be admired by all.
Tips for Accurate Cutting
Accurate cutting is crucial to achieve precise and well-fitting fabric pieces for your quilt. Here are some tips to help you improve your cutting skills:
- Keep Your Tools Sharp: Make sure your rotary cutter blade is sharp and in good condition. Dull blades can result in frayed or uneven cuts. Replace the blade regularly to ensure clean and accurate cutting.
- Use a Sturdy Surface: Always work on a stable and flat cutting surface, such as a self-healing cutting mat or an ironing board with a padded surface. This will provide a secure base for cutting and prevent any slippage or movement.
- Double-Check Measurements: Before making any cuts, double-check your measurements to ensure accuracy. Use a quilting ruler and line up the desired measurements precisely along the fabric edge. This will help you avoid mistakes and ensure consistent sizes.
- Take Your Time: Cutting fabric requires concentration and precision. Avoid rushing through the process and take your time to make deliberate and accurate cuts. This will result in cleaner edges and better-fitting pieces.
- Secure the Fabric: Use pins or fabric clips to hold the layers of fabric together securely. This prevents shifting and ensures that your cuts are aligned and accurate.
- Practice Good Technique: Establish a comfortable grip on your rotary cutter and apply even pressure as you cut. Keep the cutter upright and perpendicular to the fabric to ensure straight and clean cuts.
- Manage Fabric Bulk: When cutting through multiple layers of fabric, be mindful of fabric bulk. Use a rotary cutter with a larger blade or consider cutting the layers in smaller sections to maintain accuracy.
- Press Before Cutting: Always press your fabric before cutting to remove wrinkles and creases. Pressing ensures a smooth and flat surface for accurate measuring and cutting.
- Practice on Scrap Fabric: If you’re trying out a new cutting technique or working with unfamiliar shapes, practice on scrap fabric first. This will help you gain confidence and refine your skills before cutting into precious fabric.
By incorporating these tips into your fabric cutting routine, you’ll enhance your accuracy and efficiency. Remember, practice and patience are key to mastering the art of fabric cutting for your quilt projects.
Read more: How To Quilt With Minky Fabric
Conclusion
Cutting fabric for a quilt is an essential skill that can greatly impact the success and overall appearance of your quilting projects. By following the proper techniques and using the right tools, you can achieve accurate and precise fabric pieces that fit together seamlessly.
In this guide, we have covered the tools needed for fabric cutting, the importance of preparing the fabric, measuring and marking techniques, as well as specific cutting techniques for square and rectangular pieces, triangular pieces, and curved shapes. We have also provided tips to help you improve your cutting skills and achieve better accuracy.
Remember, accurate cutting begins with having sharp tools and a stable cutting surface. Take the time to measure and mark your fabric correctly, and double-check your measurements for accuracy. Secure your fabric layers, use proper cutting techniques, and always practice good cutting habits.
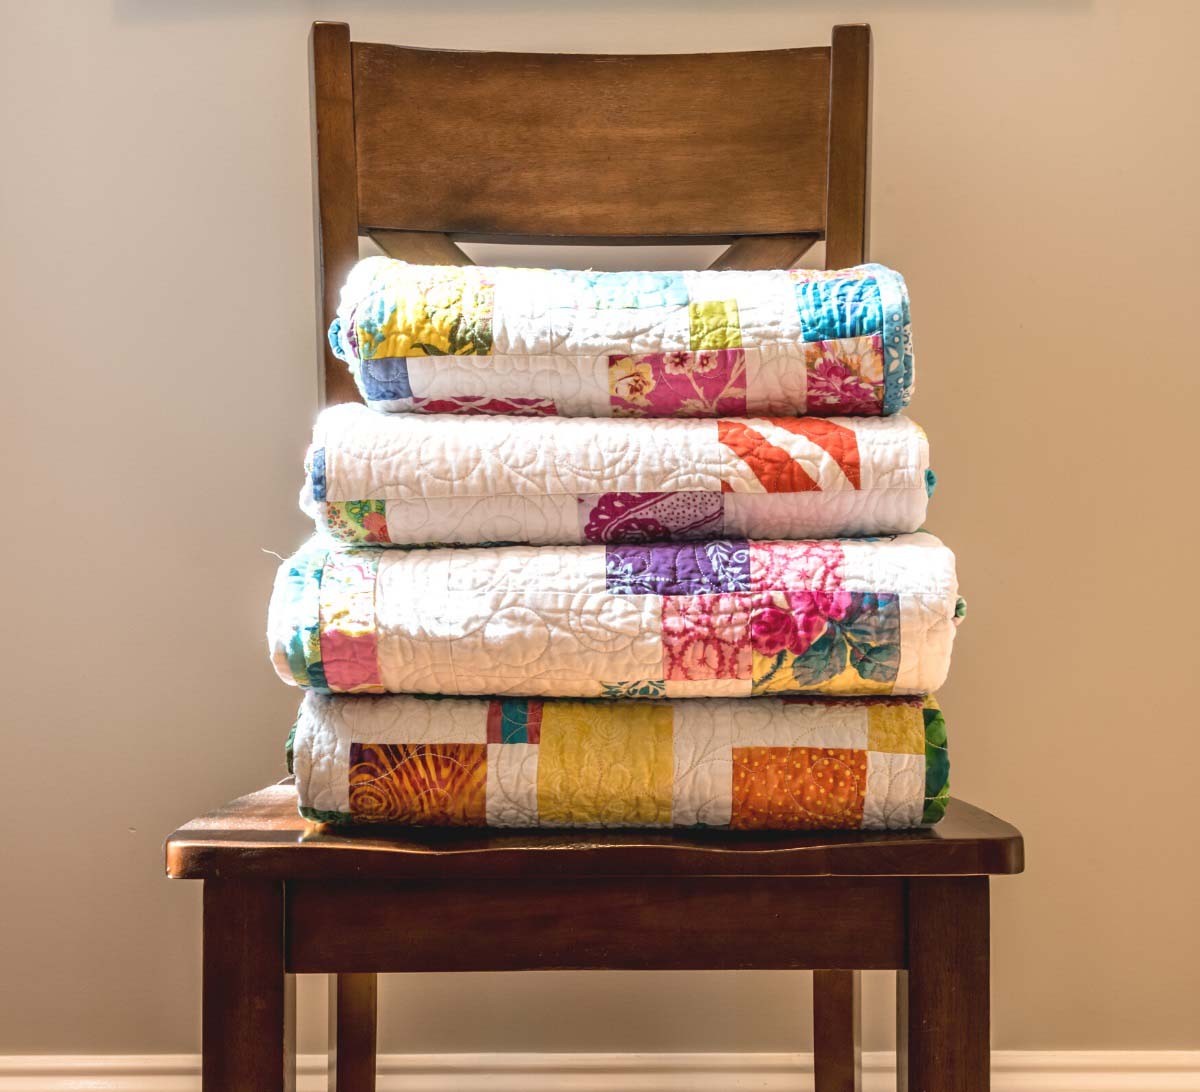
Developing your fabric cutting skills may take time and practice, but the effort is well worth it. With accurate cuts, your quilt pieces will fit together effortlessly, resulting in beautifully finished quilts that you can be proud of.
So, gather your tools, prepare your fabric, and dive into the world of fabric cutting for quilts. Let your creativity soar as you embark on new quilting projects, knowing that you have the knowledge and skills to cut fabric accurately and with confidence.
Frequently Asked Questions about How To Cut Fabric For Quilt
Was this page helpful?
At Storables.com, we guarantee accurate and reliable information. Our content, validated by Expert Board Contributors, is crafted following stringent Editorial Policies. We're committed to providing you with well-researched, expert-backed insights for all your informational needs.

0 thoughts on “How To Cut Fabric For Quilt”