Articles
How To Cut Metal Fence Posts
Modified: May 6, 2024
Discover helpful articles on how to cut metal fence posts, including tips and techniques for a clean and precise cut. Improve your DIY skills and achieve professional results.
(Many of the links in this article redirect to a specific reviewed product. Your purchase of these products through affiliate links helps to generate commission for Storables.com, at no extra cost. Learn more)
Introduction
When it comes to cutting metal fence posts, having the proper tools and techniques can make the task much easier and more efficient. Whether you’re replacing a damaged post or making adjustments to accommodate a new gate, knowing how to cut metal fence posts is a valuable skill for any homeowner or DIY enthusiast.
In this article, we will take you through the step-by-step process of cutting metal fence posts, and we’ll outline the tools and materials you’ll need to get the job done. From measuring and marking to choosing the right cutting method, we’ll cover everything you need to know to make clean and precise cuts.
Before we dive into the details, it’s important to note that safety should always be your top priority when working with power tools and cutting metal. Make sure to wear protective gear such as safety glasses, gloves, and earplugs, and always follow the manufacturer’s instructions for the tools you’ll be using.
Now, let’s gather our tools and materials, and get started on cutting those metal fence posts!
Key Takeaways:
- Safety First
When cutting metal fence posts, prioritize safety by wearing protective gear and following manufacturer’s instructions. Take breaks, work at a comfortable pace, and choose the appropriate cutting method for the best results. - Precision and Finish
After cutting, ensure a polished finish by smoothing sharp edges, cleaning the cut area, and inspecting the entire fence post for damage. This attention to detail will enhance safety and the overall aesthetic of your project.
Read more: How Much Are Metal Fence Posts
Tools and Materials Needed
Before you begin cutting metal fence posts, you’ll need to gather the following tools and materials:
- Measuring tape or ruler
- Marker or pencil
- Protective gear (safety glasses, gloves, earplugs)
- Metal hack saw or reciprocating saw or angle grinder
- Safety goggles or face shield
- Clamps or vise
- Power drill (if using an angle grinder)
- Angle grinder cutting disc or metal cutting blade
- Files or sandpaper
- Workbench or sturdy surface
- Clean cloth or brush
Having these tools and materials on hand will ensure that you have everything you need to cut your metal fence posts effectively and safely.
Step 1: Measure and Mark
The first step in cutting metal fence posts is to accurately measure and mark the desired cutting point. This will ensure that your fence post is cut to the correct length and properly aligned.
Start by using a measuring tape or ruler to determine the desired length of the fence post. If you’re replacing a damaged post, measure the length of the existing post to maintain consistency. Alternatively, if you’re installing a new gate or making adjustments, measure according to your specific requirements.
Once you have determined the measurement, use a marker or pencil to mark the cutting point on the metal fence post. Make sure to make a clear and visible mark that will be easily visible during the cutting process.
If you’re cutting multiple fence posts, it’s helpful to mark each one individually to avoid confusion. This will ensure that each post is cut accurately and to the desired length.
Take your time during this step to ensure precision and accuracy in your measurements and markings. Making a mistake at this stage could result in incorrectly sized fence posts, causing issues during installation.
Once you have finished measuring and marking, you’re ready to move on to the next step: preparing the area for cutting.
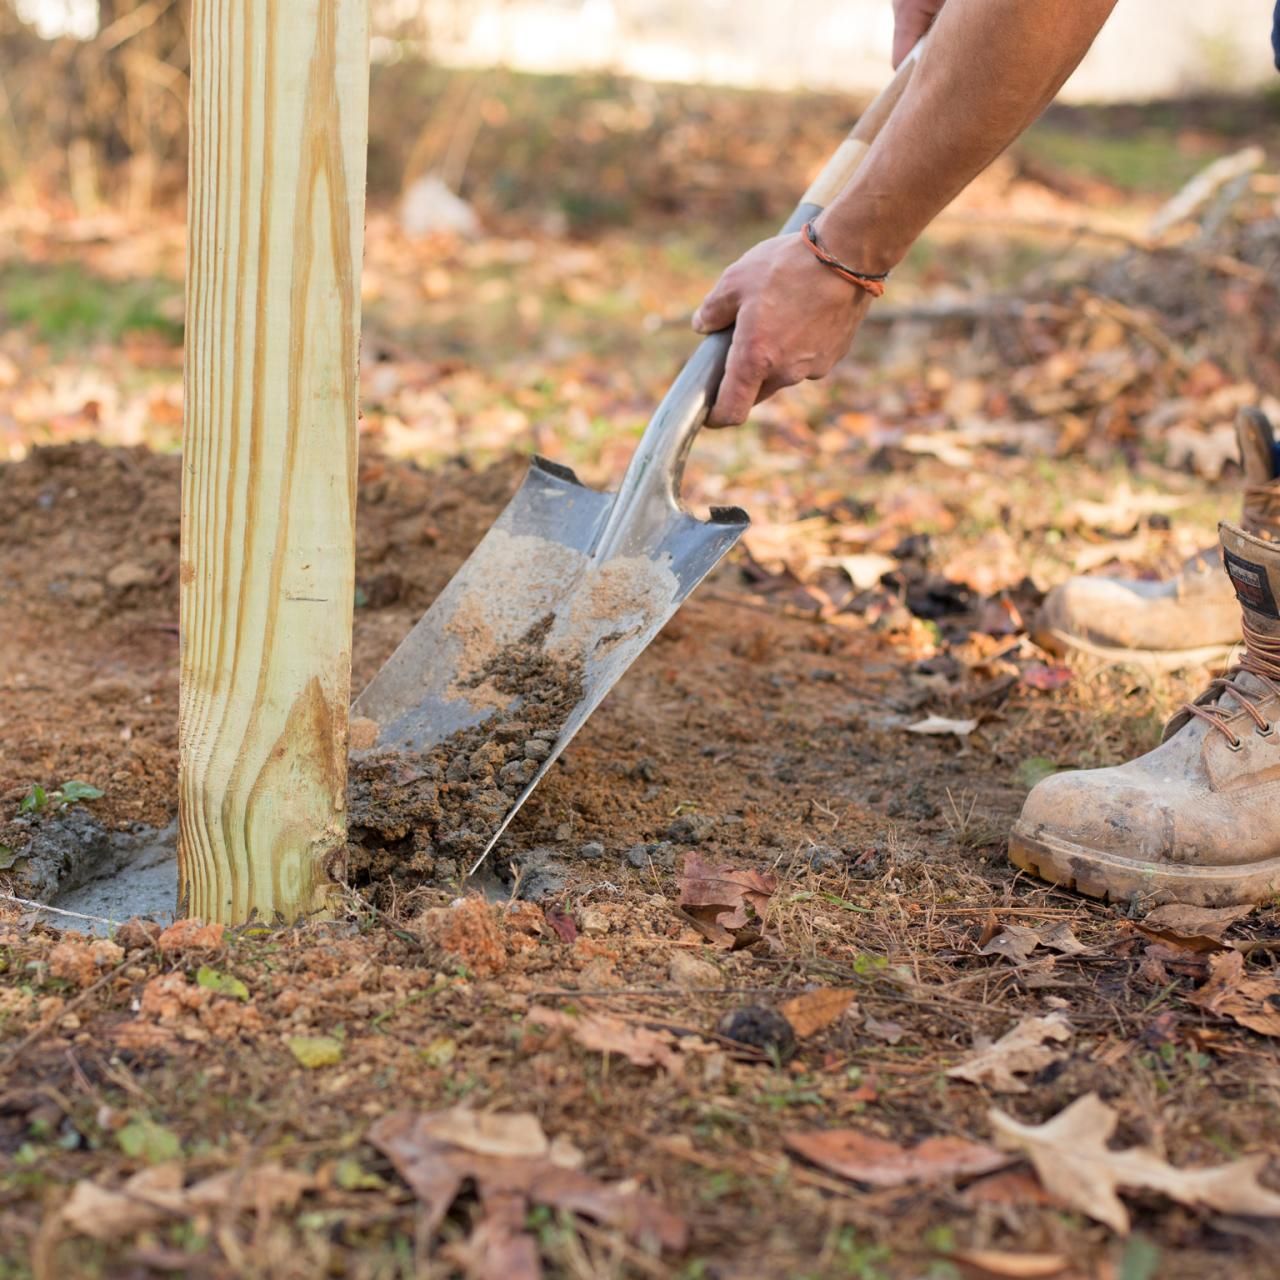
Step 2: Prepare the Area
Before you start cutting the metal fence post, it’s important to prepare the area to ensure a safe and efficient cutting process. Taking the time to prepare the area will help you avoid accidents and potentially damaging surrounding objects.
Here are the steps to prepare the area for cutting:
- Clear the surrounding area: Remove any obstacles or debris that may be near the fence post. This includes plants, tools, or other objects that could interfere with the cutting process.
- Secure the fence post: If the metal fence post is still assembled as part of the fence, use clamps or a vise to secure it in place. This will prevent the post from moving or vibrating during the cutting process, ensuring a clean and precise cut. Make sure the post is clamped securely without damaging it.
- Protect nearby objects: Cover nearby objects, such as gates, walls, or other structures, with a protective material like a drop cloth or cardboard. This will prevent sparks, metal shavings, or debris from damaging or staining these surfaces.
- Establish a safe work area: Set up your workbench or a sturdy surface in a well-ventilated area. Avoid working in confined spaces or areas with flammable materials nearby. It’s also a good idea to have a fire extinguisher within reach, just in case.
By taking these preparatory steps, you’ll create a safe and controlled environment for cutting your metal fence post.
With the area properly prepared, you’re now ready to move on to choosing the right cutting method for your project.
Step 3: Choose the Cutting Method
Once you’ve measured, marked, and prepared the area, it’s time to choose the most suitable cutting method for your metal fence post. There are several options available, each with its own advantages and considerations.
Here are three common cutting methods for cutting metal fence posts:
- Metal Hack Saw: A metal hack saw is a handheld tool with a fine-toothed blade specifically designed for cutting metal. This method is ideal for cutting thin-gauge metal posts or when precision is required. It does, however, require physical effort and may take longer than other methods.
- Reciprocating Saw: A reciprocating saw, or “Sawzall,” is a power tool that uses a push-and-pull motion to cut. It is an excellent choice for cutting thicker metal fence posts or posts made of harder materials, such as steel. This method offers speed and efficiency but requires a steady hand to maintain control.
- Angle Grinder: An angle grinder equipped with a metal cutting disc is another popular option for cutting metal fence posts. This method allows for fast and precise cuts, especially on thicker posts. However, angle grinders generate heat and sparks, so proper safety precautions are essential. It’s recommended to use this method only if you have experience with angle grinders.
Consider the thickness and hardness of your metal fence post, as well as your comfort level and access to the required tools, when choosing the cutting method. It’s always a good idea to have spare blades or discs on hand to ensure uninterrupted work.
Once you have decided on the cutting method, you’re ready to proceed to the specific steps for that particular method.
When cutting metal fence posts, use a metal cutting blade on a reciprocating saw for a clean and precise cut. Ensure the post is securely clamped to prevent movement during cutting.
Read more: How To Install Metal Fence Post
Step 4: Cutting with a Metal Hack Saw
If you’ve chosen to cut your metal fence post using a metal hack saw, follow these steps:
- Put on your safety goggles or a face shield to protect your eyes from any flying debris during the cutting process.
- Position yourself comfortably and securely, ensuring a stable stance. Hold the metal hack saw with both hands, placing one hand near the handle and the other on the front of the saw, closer to the blade.
- Align the saw blade with the marked cutting line on the metal fence post. Apply gentle pressure and start sawing back and forth using long, steady strokes. Let the saw blade do the work, avoiding excessive force or pushing of the saw.
- Maintain a consistent rhythm and pace, ensuring that the saw blade remains in contact with the metal at all times. Avoid pressing too hard, as it may cause the blade to bind or break.
- Continue sawing until you’ve cut through the metal fence post. Take breaks if needed, but try to maintain a continuous cutting motion to achieve a clean and even cut.
- Once the cut is complete, remove the saw from the metal fence post and inspect the cut for any excess metal or rough edges. Use a file or sandpaper to smooth out any sharp edges or burrs.
- Finally, clean the cut area by wiping away any metal shavings or debris with a clean cloth or brush.
Remember to work at your own pace and take breaks as needed to ensure safety and the quality of the cut. If your metal fence post is particularly sturdy or thick, it may take some time and effort to complete the cut with a metal hack saw.
Now that you’ve successfully cut your metal fence post with a hack saw, you can proceed to the next step or finish your project depending on your specific needs.
Step 5: Cutting with a Reciprocating Saw
If you’ve chosen to cut your metal fence post using a reciprocating saw, follow these steps:
- Put on your safety goggles, gloves, and earplugs to protect yourself from any potential hazards during the cutting process.
- Secure the metal fence post securely using clamps or a vise to prevent it from moving during the cutting process.
- Insert a metal-cutting blade into the reciprocating saw, making sure it is suitable for cutting metal.
- Position the saw blade on the marked cutting line of the metal fence post, ensuring that the blade is perpendicular to the post.
- Turn on the reciprocating saw and start cutting by applying gentle pressure and letting the saw’s back-and-forth motion do the work.
- Maintain a steady pace and rhythm as you guide the saw along the marked line, ensuring that the blade remains in contact with the metal at all times.
- Continue cutting until you’ve completely severed the metal fence post. Take breaks if needed, but try to maintain a continuous cutting motion for a clean and precise cut.
- Once the cut is complete, turn off the reciprocating saw and check the cut for any rough edges or excess metal. Use a file or sandpaper to smooth out any sharp edges.
- Afterward, clean the cut area by wiping away any metal shavings or debris with a clean cloth or brush.
Always prioritize your safety and follow the manufacturer’s instructions for operating the reciprocating saw. Take breaks as needed during the cutting process and work at a comfortable pace to maintain control and achieve a high-quality cut.
With the metal fence post successfully cut using a reciprocating saw, you can proceed to the next step or wrap up your project based on your specific requirements.
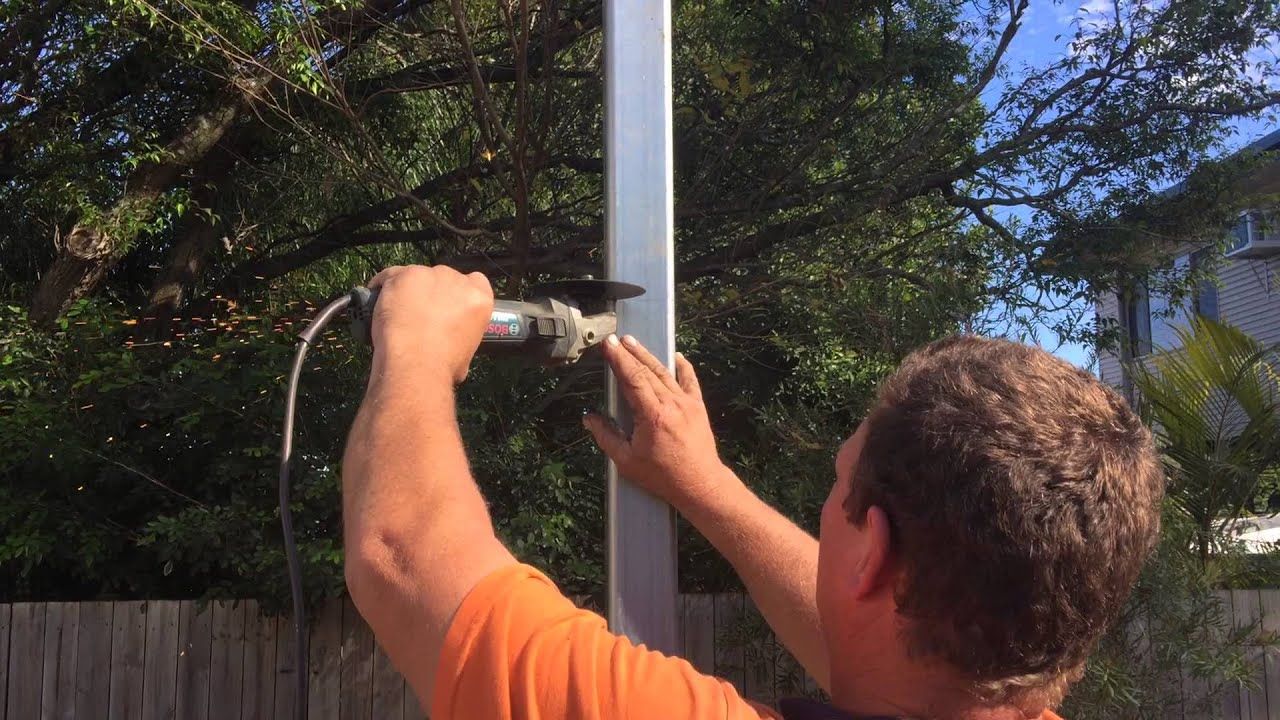
Step 6: Cutting with an Angle Grinder
If you’ve chosen to cut your metal fence post using an angle grinder, follow these steps:
- Put on your safety goggles, gloves, earplugs, and a face shield to protect yourself from the sparks, flying debris, and noise generated by the angle grinder.
- Secure the metal fence post in a stable position using clamps or a vise, ensuring it doesn’t move during the cutting process.
- Equip your angle grinder with a metal cutting disc that is suitable for cutting through metal.
- Hold the angle grinder firmly with both hands, keeping a firm grip on the handle and the guard.
- Position the cutting disc of the angle grinder on the marked cutting line of the metal fence post. Ensure the disc is perpendicular to the post.
- Activate the angle grinder and allow the cutting disc to reach full speed before making contact with the metal.
- Begin cutting by slowly moving the angle grinder along the marked line, applying gentle pressure. Let the cutting disc do the work, without excessive force or pushing.
- Maintain a steady pace and control the angle grinder as you cut through the metal fence post. Stay vigilant and watch for any sparks or changes in cutting speed or sound.
- Continue cutting until you’ve completely severed the metal fence post. Remember to take breaks if needed while maintaining a continuous cutting motion.
- Once the cut is complete, turn off the angle grinder and allow the cutting disc to come to a complete stop. Check the cut for any sharp edges or excess metal.
- Use a file or sandpaper to smooth out any rough edges and ensure a clean and safe cut.
- Afterward, clean the cut area by brushing away any metal shavings or debris with a clean cloth or brush.
Always follow the manufacturer’s instructions for operating the angle grinder and use caution when working with this powerful tool. Exercise patience and focus to achieve a precise and clean cut on your metal fence post.
With the metal fence post successfully cut using an angle grinder, you can proceed to the next step or conclude your project depending on your specific requirements.
Step 7: Finishing and Cleaning the Cut
After cutting your metal fence post, it’s important to finish and clean the cut to ensure a professional-looking result and avoid any potential hazards. Follow these steps to complete the finishing process:
- Inspect the cut area for any sharp edges or rough surfaces. Use a file or sandpaper to smooth out any imperfections and create a clean and safe finish.
- Remove any metal shavings or debris from the cut by brushing the area with a clean cloth or brush. This will help prevent any potential injuries and keep your work area tidy.
- If necessary, lubricate the cut area with an appropriate lubricant to prevent rust and promote longevity.
- If you’re planning to connect or reattach the fence post, make sure there are no obstructions or burrs that could hinder the process. Smooth out any rough edges to ensure a proper fit.
- Carefully inspect the entire fence post, including the newly cut area, for any signs of damage or weakness. If you notice any issues, address them before proceeding with installation or reassembly.
Finishing and cleaning the cut is crucial not only for the aesthetic value but also for the overall safety and functionality of your metal fence post. Taking the time to ensure a smooth and clean finish will help prevent accidents and maintain the integrity of your fence.
Once you’ve completed the finishing and cleaning process, you can proceed with installing or reassembling your fence, or simply admire your workmanship knowing that you’ve successfully cut your metal fence post.
Remember to clean up your work area, properly store your tools, and dispose of any waste materials responsibly.
Read more: How To Install Metal Posts For Wood Fence
Conclusion
Cutting metal fence posts may seem like a daunting task, but with the right tools and techniques, it can be accomplished efficiently and safely. By following the steps outlined in this guide, you’ll be able to make clean and precise cuts, ensuring your metal fence posts are the correct length and properly aligned.
Remember to always prioritize safety during the cutting process. Wear appropriate protective gear such as safety glasses, gloves, and earplugs, and follow the manufacturer’s instructions for the tools you’re using. Take breaks as needed and work at a comfortable pace to maintain control and achieve accurate cuts.
Choosing the appropriate cutting method for your metal fence posts is essential. Whether you opt for a metal hack saw, reciprocating saw, or angle grinder, consider the thickness and hardness of the metal, as well as your comfort level and access to the necessary tools.
Once you’ve successfully cut your metal fence posts, take the time to finish and clean the cut area. Smoothen any sharp edges and remove any metal shavings or debris to achieve a polished and safe finish. Ensure that the cut area is free from obstructions and inspect the entire fence post for any damage or weakness.
Cutting metal fence posts is a valuable skill that can save you time and money in future fence repairs or installations. With the knowledge and steps outlined in this guide, you’ll be able to tackle this DIY project with confidence and achieve professional-level results.
Remember, practice makes perfect. The more you work with metal and practice cutting techniques, the more proficient you’ll become. So, roll up your sleeves, gather your tools, and get ready to tackle your next metal fence post cutting project!
Now that you've mastered cutting metal fence posts, why not tackle more outdoor projects? Whether you're looking to spruce up your garden or add new features to your backyard, our guide on DIY outdoor activities offers plenty of inspiration. From building birdhouses to designing custom garden paths, these projects not only enhance your outdoor space but also boost your DIY prowess. Dive into our collection of ideas and start transforming your outdoor area today!
Frequently Asked Questions about How To Cut Metal Fence Posts
Was this page helpful?
At Storables.com, we guarantee accurate and reliable information. Our content, validated by Expert Board Contributors, is crafted following stringent Editorial Policies. We're committed to providing you with well-researched, expert-backed insights for all your informational needs.

0 thoughts on “How To Cut Metal Fence Posts”