Articles
How To Dig A Hole For Fence Post
Modified: August 22, 2024
Learn how to dig a hole for fence post with these informative articles. Find step-by-step instructions and expert tips to ensure a sturdy and durable fence installation.
(Many of the links in this article redirect to a specific reviewed product. Your purchase of these products through affiliate links helps to generate commission for Storables.com, at no extra cost. Learn more)
Introduction
Building a fence on your property not only enhances security and privacy but also adds aesthetic value to your outdoor space. A sturdy and durable fence starts with properly dug and positioned fence posts. Digging fence post holes may seem like a simple task, but it requires careful planning and execution to ensure the stability and longevity of your fence.
In this comprehensive guide, we will take you through the step-by-step process of how to dig a hole for a fence post. From gathering the necessary tools and materials to filling the post holes with concrete, we will cover all the essential details to help you successfully complete your fence installation project.
Before we dive into the specifics, it is important to note that the methods and techniques described here can be applied to various types of fences, such as wooden, vinyl, or metal fences. So, whether you are looking to enclose your backyard, protect your garden, or add a decorative touch to your property, this guide will provide you with the necessary knowledge to get the job done.
Now, let’s get started by gathering the tools and materials you will need for this project.
Key Takeaways:
- Proper planning, precise measurements, and careful installation are crucial for digging fence post holes. Following the step-by-step guide ensures a sturdy and visually appealing fence for your property.
- Attention to detail, alignment, and stability are essential for a successful fence installation. Regular maintenance and adherence to safety measures contribute to the long-term durability of the fence.
Read more: How Deep To Dig For Fence Post
Step 1: Gather the necessary tools and materials
Before you begin digging the fence post holes, it’s crucial to gather all the essential tools and materials. Having everything you need on hand will save you time and ensure a smooth and efficient process. Here’s a list of the main items you’ll need:
- Shovel: A sturdy shovel is essential for digging the holes. Opt for a shovel with a sharp point and a comfortable grip to make the digging process easier.
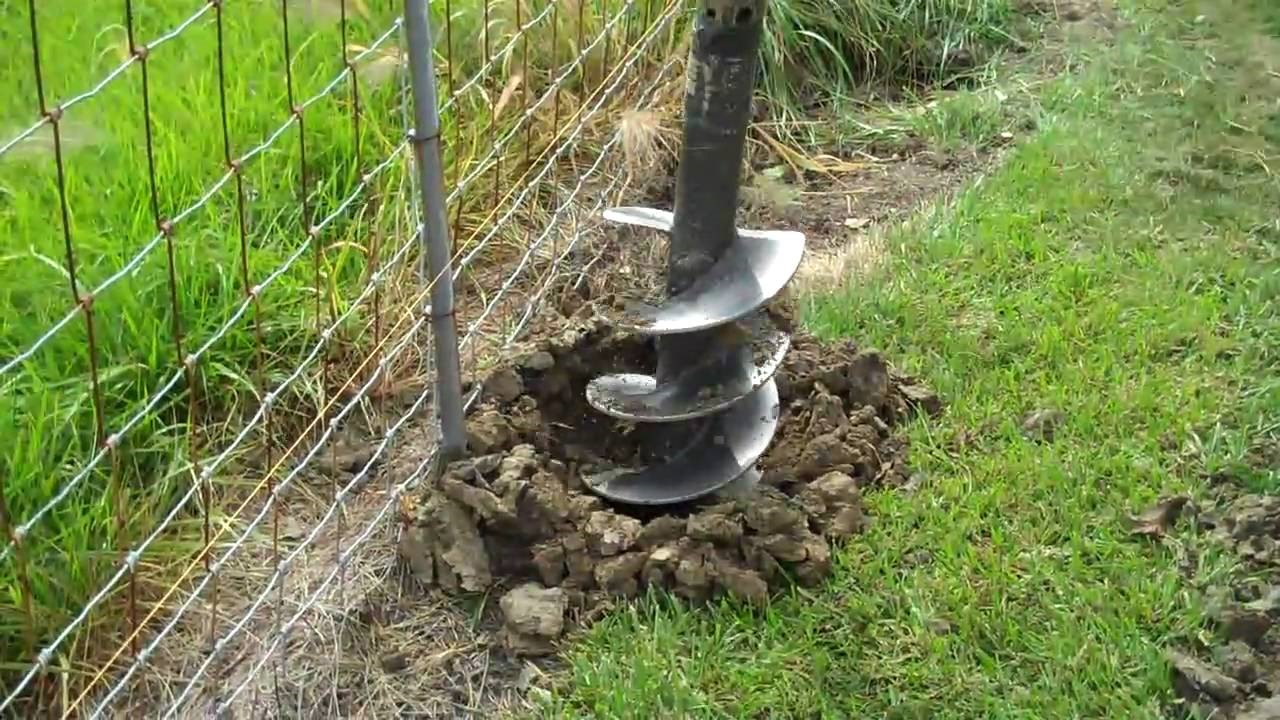
- Post hole digger: This tool is specifically designed for digging deep and narrow holes. It consists of two shovel-like blades that can be squeezed together to remove soil from the hole.
- Tape measure: Accurate measurements are crucial for ensuring your fence is properly aligned. A tape measure will help you determine the spacing between the posts and the depth of the holes.
- Level: A level is essential for ensuring that your fence posts are vertically straight. It will help you maintain a uniform and professional-looking fence.
- String and stakes: These are necessary for marking the fence line and determining the position of the posts. They will help you create a straight and evenly spaced fence.
- Concrete mix: For added stability and strength, you will need to fill the post holes with concrete. Purchase a high-quality concrete mix that is suitable for outdoor use.
- Water source: You will need access to water to mix the concrete and ensure proper curing.
- Protective gear: It’s important to protect yourself during the digging process. Wear gloves, safety glasses, and sturdy footwear to prevent injuries.
Once you have all the necessary tools and materials ready, you’re one step closer to digging the perfect fence post holes. Now, let’s move on to the next step: marking the fence line.
Step 2: Mark the fence line
Before you start digging the post holes, it’s crucial to mark the fence line to ensure a straight and even installation. Here’s how you can mark the fence line:
- Locate property boundaries: Determine the boundaries of your property to ensure that your fence is installed within your legal limits. Consult your property survey or contact your local municipality if you’re unsure about the property lines.
- Measure and mark the starting point: Use a tape measure to measure and mark the starting point of the fence line. This could be a corner of your property or a specific point where you want the fence to begin.
- Stretch string along the fence line: Attach one end of a tightly stretched string to the starting point, using stakes to hold it in place. Walk along the length of the fence line while keeping the string taut. Use additional stakes as needed to keep the string level and straight.
- Mark the positions of the posts: Use a marker, such as a spray paint or stakes, to mark the positions of the fence posts along the string line. The spacing between the posts will depend on the type of fence and your personal preference. Typically, wood fences have post spacing of 6 to 8 feet, while vinyl or metal fences may have different requirements.
- Double-check the alignment: Once you have marked all the post positions, double-check the alignment of the string to ensure that it is level and straight. Adjust the stakes and string as necessary to achieve the desired alignment.
Properly marking the fence line is crucial for a well-aligned and visually appealing fence. Taking the time to measure and mark accurately will save you headaches down the line. With the fence line marked, we can now move on to the next step: determining the post hole spacing.
Step 3: Determine the post hole spacing
Once you have the fence line marked, the next step is to determine the spacing between the fence posts. The spacing will depend on the type of fence you are installing and any specific requirements or recommendations provided by the manufacturer. Here’s how you can determine the post hole spacing:
- Refer to the fence manufacturer’s instructions: If you are installing a pre-made fence system, the manufacturer’s instructions will typically provide guidelines for post hole spacing. Consult these instructions to determine the recommended distance between each post.
- Consider the type of fence: Different types of fences have different requirements for post spacing. For example, a wooden privacy fence will typically have post spacing of 6 to 8 feet, while a chain-link fence may have spacing of 10 to 15 feet. Consider the type of fence you are installing and any local building codes or regulations that may dictate post spacing.
- Ensure even spacing: For a visually appealing fence, it’s important to have even spacing between the posts. Measure and mark the positions of the remaining posts along the fence line, ensuring that the spacing is consistent.
- Adjust for corner and gate posts: Corner posts and gate posts may require additional support and reinforcement. Consult the manufacturer’s instructions or seek professional advice to determine the appropriate spacing for these posts.
By determining the post hole spacing, you will ensure that your fence is structurally sound and visually pleasing. Once you have determined the spacing, you can proceed to the next step: digging the first post hole.
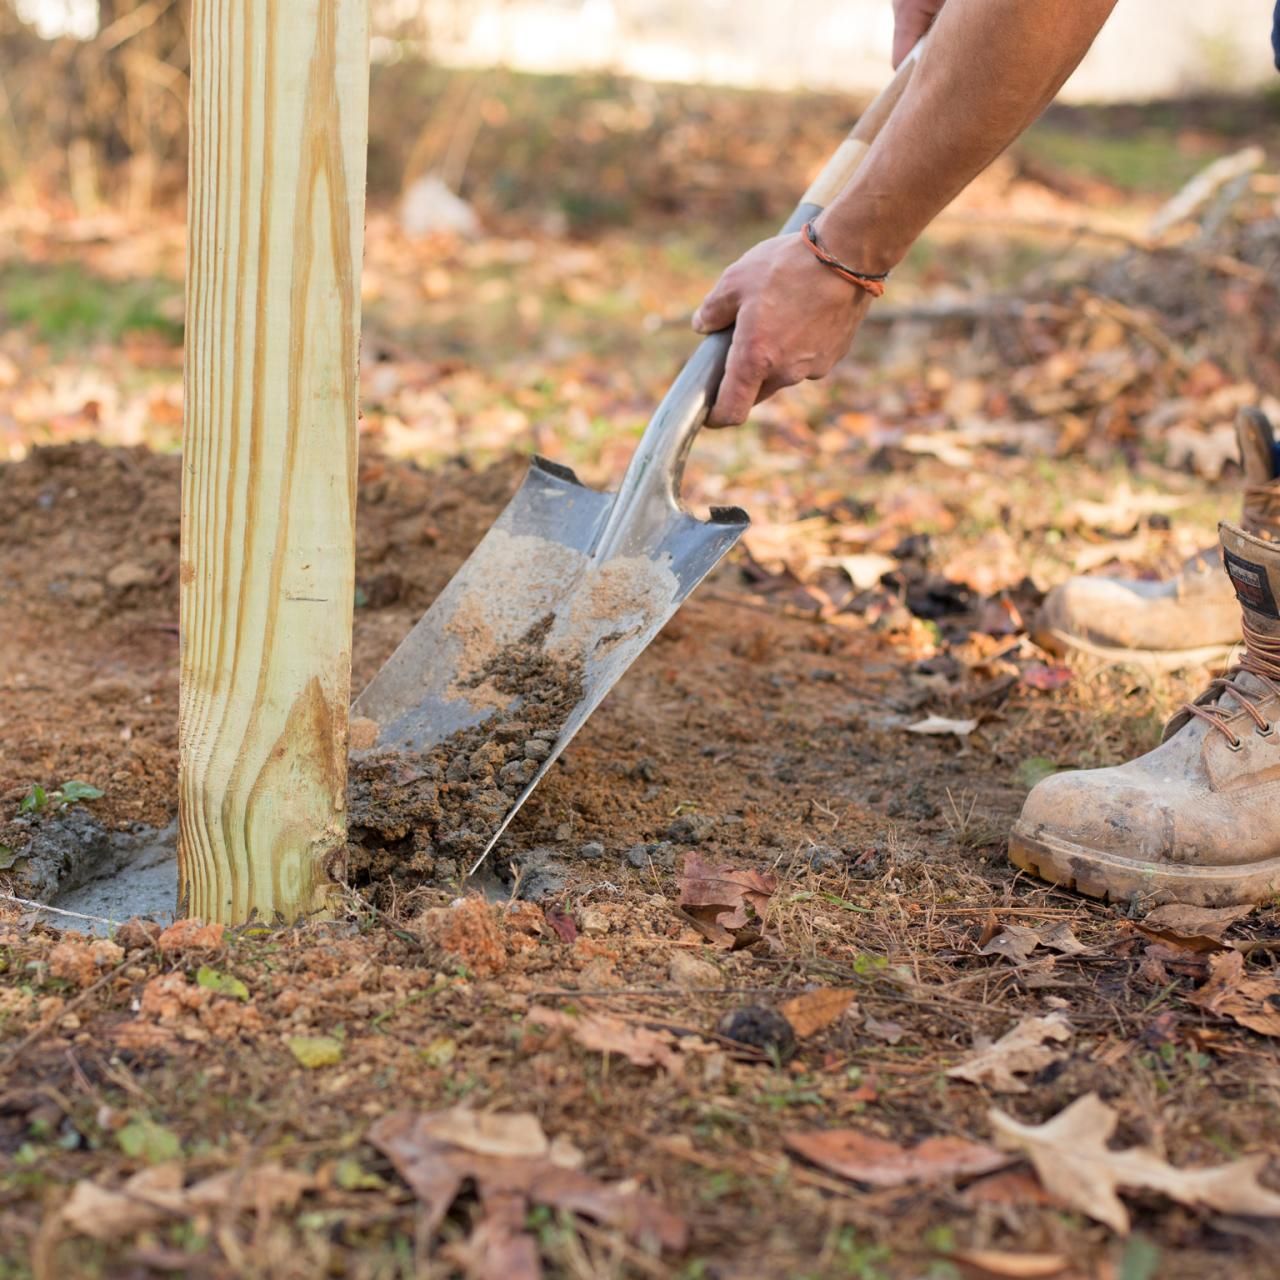
Step 4: Dig the first post hole
Now that you have determined the post hole spacing, it’s time to start digging the first hole for your fence post. Digging the post holes properly is crucial for the stability and longevity of your fence. Here’s how you can dig the first post hole:
- Start at the marked post position: Begin by positioning yourself at the first marked post position along the fence line. This will typically be at a corner of the fence or at the start of a straight section.
- Use the shovel or post hole digger: Depending on the tools you have available, use a shovel or a post hole digger to start excavating the hole. If using a shovel, dig a circular hole that is approximately twice the width of the fence post. If using a post hole digger, insert the blades into the ground and squeeze them together to remove the soil. Repeat this process until you reach the desired depth.
- Check the hole depth: Use a tape measure to check the depth of the hole. The depth will depend on the height of the fence, the frost line in your area, and any specific recommendations from the fence manufacturer. Typically, the hole should be one-third to one-half the height of the fence above ground level.
- Remove excess soil: Once the hole is at the desired depth, remove any excess soil from the hole. This will provide space for adding concrete later on and ensure a stable foundation for the fence post.
By following these steps, you will have successfully dug the first post hole for your fence. Repeat this process for each marked post position along the fence line. With the first hole complete, you’re ready to move on to the next step: digging the remaining post holes.
Read more: How To Install A No Dig Fence
Step 5: Dig the remaining post holes
With the first post hole dug, it’s time to move on and dig the remaining post holes along the fence line. Precise and consistent digging of the holes is crucial to ensure a straight and sturdy fence. Here’s how you can dig the remaining post holes:
- Continue along the fence line: Starting from the first hole, move along the marked positions of the remaining posts. Ensure that the spacing between the holes is consistent and matches the predetermined post hole spacing.
- Use the same digging method: Use the same method that you used to dig the first hole. Whether you’re using a shovel or a post hole digger, maintain consistency in the size and depth of the holes.
- Check the hole depth: As you dig each hole, don’t forget to periodically check the depth with a tape measure. This will ensure that all the holes are at a consistent depth, providing proper support for the fence posts.
- Remove any obstructions: While digging the remaining post holes, you may encounter rocks, tree roots, or other obstructions. Remove these obstacles to create a clean hole that will accommodate the fence posts.
By following these steps, you will successfully dig the remaining post holes for your fence. Take your time and pay attention to the details to ensure the stability and quality of your fence. Once all the post holes are dug, move on to the next step: measuring the depth of each hole.
Step 6: Measure the depth of each hole
After digging all the post holes, it’s important to measure the depth of each hole to ensure uniformity and proper positioning of the fence posts. Consistent hole depth is essential for the stability and alignment of your fence. Here’s how you can measure the depth of each hole:
- Use a tape measure: Take a tape measure and lower it into each hole until it reaches the bottom. The tape measure should be extended fully to accurately measure the depth of the hole.
- Record the measurements: As you measure each hole, record the corresponding depth to keep track of the measurements. This will help you compare the depths and make any necessary adjustments.
- Ensure proper depth: Check the recorded measurements against the desired depth for your fence posts. The depth will depend on various factors, including the height of the fence, local building codes, and manufacturer’s recommendations. Make sure each hole meets the specified depth criteria.
- Adjust as needed: If any of the holes are too shallow, continue digging until the desired depth is reached. Conversely, if any of the holes are too deep, add backfill material such as gravel or crushed stone to bring them to the appropriate depth.
By accurately measuring the depth of each hole, you will ensure that your fence posts are properly positioned and provide the necessary support for your fence. Taking the time to measure and adjust as needed will result in a sturdier and more visually appealing fence. With the hole depths measured, it’s time to move on to the next step: installing the fence posts.
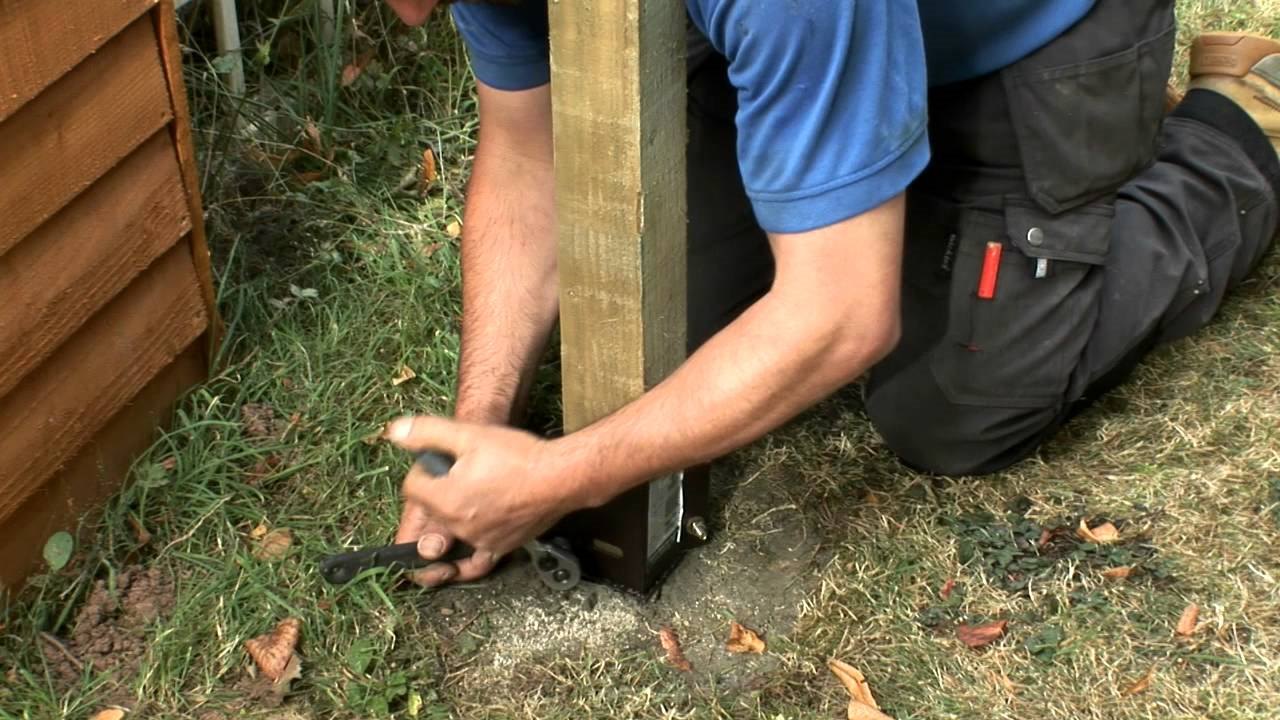
Step 7: Install the fence post
Now that you have dug all the post holes and measured their depths, it’s time to proceed with installing the fence posts. Properly installing the posts is crucial for the stability and longevity of your fence. Follow these steps to install the fence posts:
- Prepare the post: Inspect the bottom of the fence post for any damage or splintering. If necessary, trim or sand the bottom to ensure a clean and even surface.
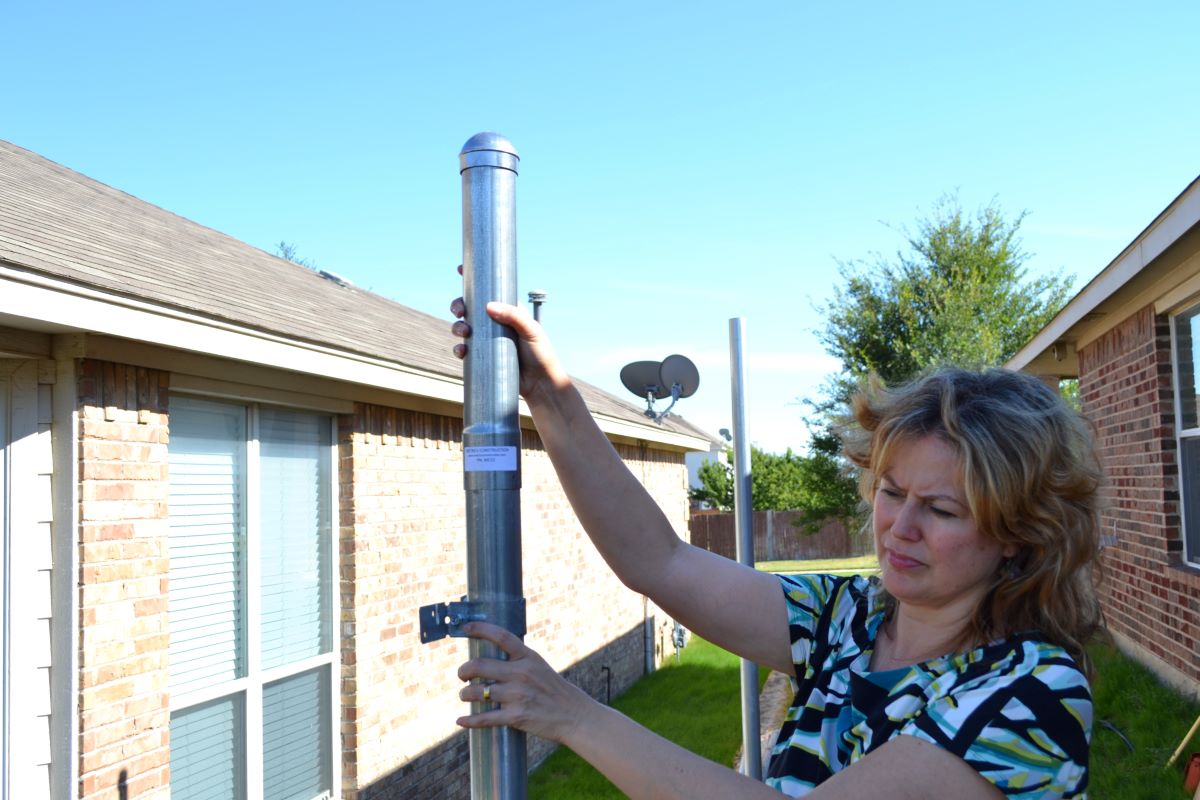
- Position the post: Carefully lower the fence post into the first post hole, ensuring that it is centered and aligned with the fence line. Use a level to ensure that the post is perfectly vertical.
- Add backfill material: Fill the hole around the post with backfill material, such as soil or gravel. Gradually add the material while holding the post in place to prevent it from shifting. Tamp the backfill material with a tamper or the end of a shovel to ensure compactness and stability.
- Check for proper alignment and height: Use a level to double-check the alignment and verticality of the post. Adjust the position of the post as needed, and ensure that it is at the correct height relative to the string line or nearby posts. Repeat this process for each fence post.
When installing the fence posts, it’s important to take your time and pay attention to detail. The accuracy and precision of the installation will impact the overall stability and uniformity of your fence. With the first post installed, move on to the next step: securing the fence post.
Before digging a hole for a fence post, make sure to call 811 to have underground utilities marked. Use a post hole digger or auger for efficient digging. Dig the hole at least one-third the length of the post and wider at the bottom for stability.
Step 8: Secure the fence post
Once the fence post is installed in the hole, it’s important to secure it properly to ensure stability and longevity. Securing the fence post will prevent shifting and movement over time, especially during inclement weather conditions. Follow these steps to securely fasten the fence post:
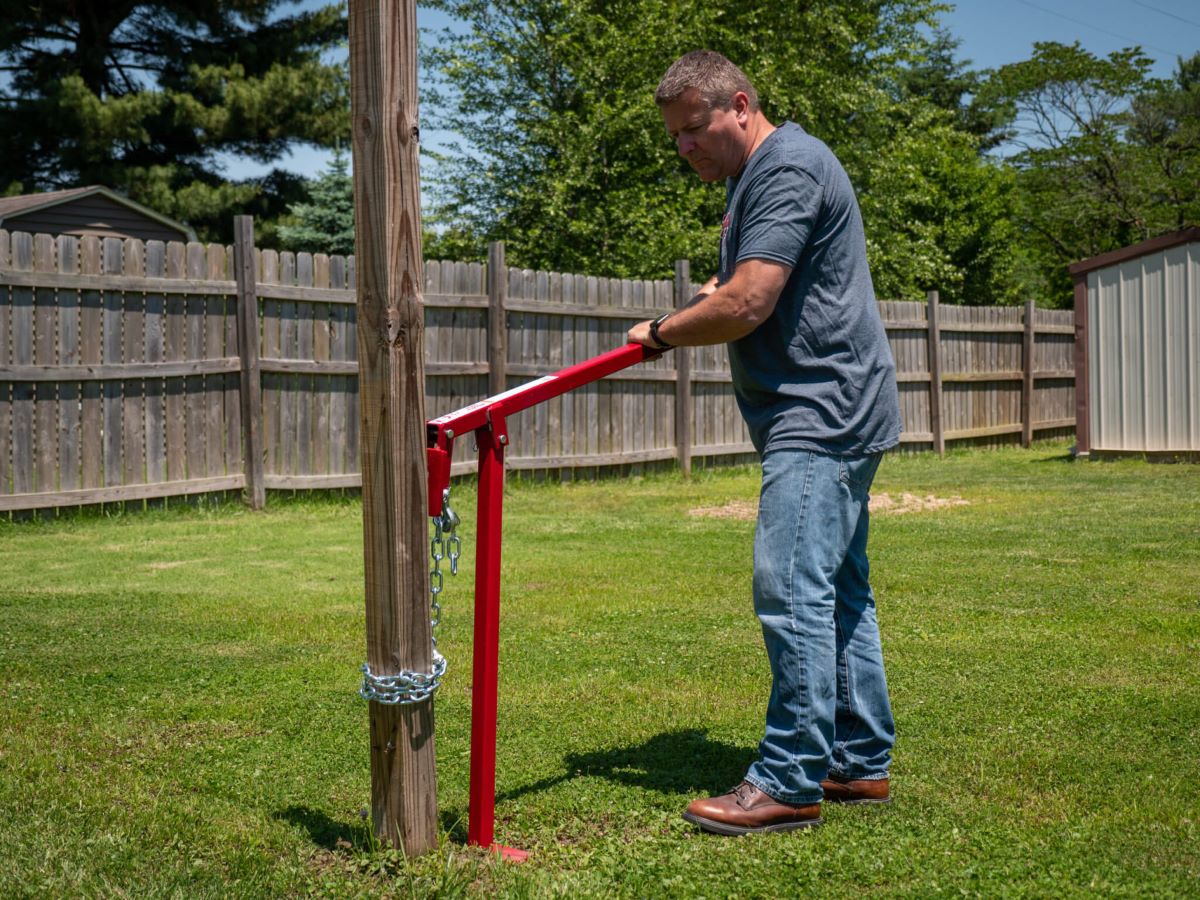
- Brace the post: Use temporary bracing to hold the post upright and in position. The bracing can be made of wood or metal and should be securely anchored to the ground.
- Add concrete mix: Prepare the concrete mix according to the manufacturer’s instructions. Pour the concrete mix into the hole, filling it around the post. Ensure that the concrete completely surrounds the base of the post and reaches the desired height.
- Compact and level the concrete: Use a stick or a small rod to agitate the concrete mix, removing any air bubbles and ensuring proper compaction. Use a level to check that the concrete is level and adjust if necessary.
- Cure the concrete: Allow the concrete to cure and harden according to the manufacturer’s instructions. This typically takes around 24 to 48 hours. During this time, keep the area around the post undisturbed.
- Remove the temporary bracing: Once the concrete has fully cured, remove the temporary bracing that was holding the post in place.
Securing the fence post with concrete will provide stability and prevent the post from shifting or leaning over time. It’s important to follow the recommended curing time to allow the concrete to fully harden before proceeding to the next steps of your fence installation project.
With the fence post securely in place, it’s time to repeat this process for the remaining posts. Move on to the next step: repeating the process for the remaining posts.
Read more: Which Animals Dig Holes In Lawns
Step 9: Repeat the process for the remaining posts
With the first fence post securely installed and braced, it’s time to repeat the process for the remaining posts along the fence line. Taking the time to ensure each post is properly installed will result in a sturdy and well-aligned fence. Follow these steps to install the remaining fence posts:
- Remove temporary bracing from the next post hole: Start by removing the temporary bracing from the next post hole along the fence line.
- Position the post: Lower the fence post into the hole, making sure it is centered and aligned with the fence line. Use a level to check for verticality.
- Add backfill material: Fill the hole around the post with backfill material, such as soil or gravel. Gradually add the material while holding the post in place, ensuring that it remains straight and stable.
- Check alignment and levelness: Use a level to check the alignment and verticality of the post. Adjust as necessary before moving to the next step.
- Secure the post with concrete: Follow the same process of adding concrete mix to secure the post in place. Pour the mix into the hole, ensuring it completely surrounds the base of the post. Compact and level the concrete, and allow it to cure according to the manufacturer’s instructions.
Repeat these steps for each remaining fence post until all posts are securely installed and braced. Taking the time to properly install each post will ensure the stability and durability of your fence. Once all posts are in place, move on to the next step: filling the post holes with concrete.
Step 10: Fill the post holes with concrete
Now that all the fence posts are securely installed, it’s time to fill the post holes with concrete. Filling the post holes with concrete provides additional stability and support for your fence. Here’s how you can fill the post holes with concrete:
- Prepare the concrete mix: Follow the manufacturer’s instructions to prepare the concrete mix. Ensure that you have the right proportions of water and concrete mix for a strong and workable consistency.
- Pour the concrete into each hole: Start with the first post hole and gradually pour the concrete mix into the hole. Fill the hole about three-fourths full, leaving room for any settling or adjustments.
- Tamp the concrete: Use a stick or a small rod to agitate the concrete mix and remove any air bubbles. This process, known as tamping, ensures that the concrete is well compacted and eliminates voids.
- Ensure proper coverage: Make sure the concrete completely surrounds the base of each post and reaches the top of the hole. Use a shovel or trowel to smooth out the surface of the concrete.
- Clean up any excess concrete: Use a damp cloth or sponge to remove any excess concrete that may have spilled or splattered during the filling process. This will result in a neat and professional-looking finish.
By filling the post holes with concrete, you ensure that the fence posts are securely anchored and resistant to shifting or sinking over time. The concrete provides added strength and stability, especially in areas prone to high winds or heavy soil conditions.
With the post holes filled with concrete, it’s time to move on to the next step: allowing the concrete to cure.
Step 11: Allow the concrete to cure
After filling the post holes with concrete, it’s crucial to allow the concrete to cure. Curing is the process by which the concrete gains strength and durability. Here’s how you can ensure proper curing of the concrete:
- Follow manufacturer’s instructions: Refer to the instructions provided by the concrete manufacturer for specific curing guidelines. These instructions may include the duration of curing and any special considerations.
- Avoid disturbing the concrete: During the curing process, it’s essential to avoid any activity that could disturb or damage the concrete. Keep people and pets away from the area and refrain from placing any heavy objects on or near the fence posts.
- Maintain moisture levels: Concrete cures best when kept moist during the initial days after pouring. Lightly mist the concrete with water or cover it with plastic sheeting to retain moisture. This will prevent rapid moisture loss and promote proper curing.
- Monitor the curing time: The curing time for concrete can vary depending on factors such as weather conditions and the specific type of concrete mix used. As a general guideline, allow the concrete to cure undisturbed for at least 48 to 72 hours. However, follow the manufacturer’s instructions for the recommended curing time.
- Inspect for full cure: Once the recommended curing time has passed, inspect the concrete for signs of full cure. The concrete should be hard, solid, and resistant to pressure. If there are any signs of weakness or softness, allow more time for curing before proceeding with the next steps of your fence installation.
By allowing the concrete to properly cure, you ensure the long-term durability and stability of your fence. Be patient during this process and resist the urge to rush ahead. Once the concrete has fully cured, you can move on to the next step: attaching the fence panels or rails.
Step 12: Attach the fence panels or rails
After the concrete has fully cured, it’s time to attach the fence panels or rails to the installed posts. Attaching the panels or rails is the final step in completing your fence installation. Here’s how you can attach the fence panels or rails:
- Prepare the panels or rails: If you’re using pre-made fence panels, ensure that they are properly aligned and in good condition. If you’re installing individual rails, make sure they are cut to the appropriate length and any necessary hardware is on hand.
- Position the first panel or rail: Start at one end of the fence and position the first panel or rail against the installed fence post. Ensure that it is level and aligned with the string line or adjacent panels.
- Attach the panel or rail to the post: Use appropriate fasteners, such as screws or nails, to securely attach the panel or rail to the fence post. Depending on the type of fence, you may need brackets or other hardware to ensure a secure attachment.
- Attach the subsequent panels or rails: Move along the fence line, attaching the remaining panels or rails to the already installed posts. Check for proper alignment, levelness, and spacing as you progress.
- Secure the panels or rails: Once all the panels or rails are attached, check that they are securely fastened and free from any wobbling or looseness. Make any necessary adjustments or tighten any loose fasteners.
When attaching the fence panels or rails, take care to ensure that they are properly aligned and evenly spaced. This will result in a visually pleasing and structurally sound fence. Following these steps will help you complete the installation of your fence panels or rails.
With the fence panels or rails securely attached, you’re almost done! Move on to the next step: checking the alignment and stability of the fence.
Read more: How To Secure Fence Post
Step 13: Check the alignment and stability of the fence
After attaching the fence panels or rails, it’s important to check the alignment and stability of the fence. Conducting a thorough inspection ensures that your fence is secure and properly installed. Here’s how you can check the alignment and stability of the fence:
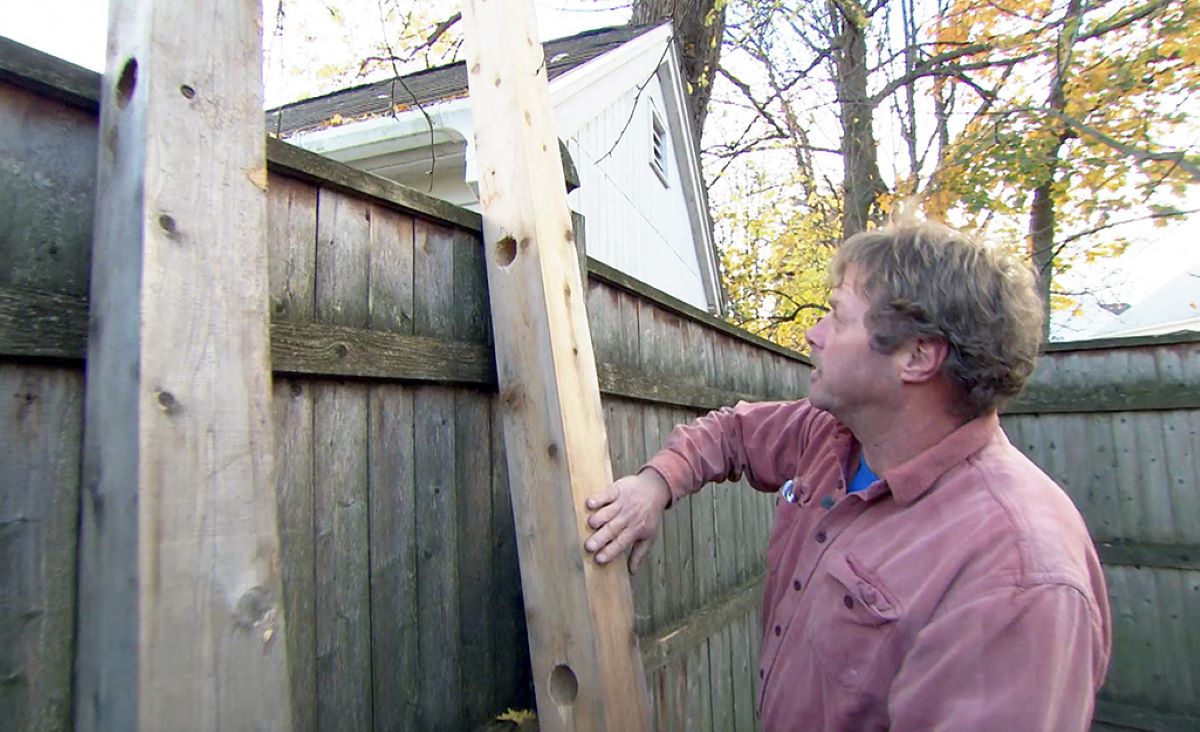
- Inspect the overall alignment: Step back and visually assess the alignment of the entire fence. Look for any potential deviations or misalignments along the length of the fence.
- Use a level: Place a level against the fence posts, panels, or rails to check for any leaning or tilting. Adjust as necessary to ensure that the fence is perfectly vertical and level.
- Check for stability: Give the fence a gentle push or shake to test its stability. It should be firm and not wobble or move excessively. Ensure that all fasteners are tight and secure.
- Inspect for gaps or loose components: Examine the connections between the fence panels or rails and the posts. Look for any gaps or loose components that may compromise the security and integrity of the fence.
- Walk along the fence perimeter: Take a walk along the fence perimeter, inspecting it closely. Check for any loose panels, rails, or pickets that may need to be reattached or tightened.
By carefully checking the alignment and stability of the fence, you ensure that it will perform its intended function and withstand various weather conditions. It’s important to address any issues or concerns promptly to avoid potential damage or disrepair.
Once you are satisfied with the alignment and stability of the fence, congratulations! You have successfully completed the installation process. Your fence is now ready to provide security, privacy, and aesthetic value to your property.
As a final note, it’s always a good idea to periodically inspect and maintain your fence to ensure its long-term durability. Regularly check for any signs of damage or wear, and address them promptly to keep your fence in excellent condition for years to come.
Thank you for following this comprehensive guide on how to dig a hole for a fence post. We hope it has been informative and helpful in your fence installation project. Happy fencing!
Conclusion
Building a fence may seem like a daunting task, but with the right knowledge and approach, it can be a rewarding and achievable project. By following the step-by-step guide we have provided, you now have the tools to dig a hole for a fence post and complete your fence installation with confidence.
From preparing the necessary tools and materials to securing the fence post and attaching the panels or rails, each step is crucial for ensuring the stability and longevity of your fence. Taking the time to properly plan, measure, and install the fence posts will result in a solid foundation for your fence, providing security, privacy, and aesthetic appeal to your outdoor space.
Throughout the process, it’s essential to pay attention to details, such as alignment, levelness, and stability. Regularly checking and adjusting as needed will ensure the fence remains in optimal condition for years to come.
Remember, safety is paramount during any construction project. Wear appropriate protective gear, such as gloves, safety glasses, and sturdy footwear, and exercise caution while working with tools and materials.
We hope that this comprehensive guide has provided valuable insights and guidance for your fence installation project. Always refer to the manufacturer’s instructions and local building codes for any specific requirements or considerations.
Now that you have the knowledge and know-how, it’s time to get started on your fence installation! Enjoy the process and the satisfaction of creating a functional and beautiful addition to your property.
Thank you for joining us, and happy fencing!
Frequently Asked Questions about How To Dig A Hole For Fence Post
Was this page helpful?
At Storables.com, we guarantee accurate and reliable information. Our content, validated by Expert Board Contributors, is crafted following stringent Editorial Policies. We're committed to providing you with well-researched, expert-backed insights for all your informational needs.


0 thoughts on “How To Dig A Hole For Fence Post”