Articles
How To Count Wires In An Electrical Box
Modified: October 20, 2024
Learn how to count wires in an electrical box with our informative articles. Master the art of wire counting and ensure a safe and efficient electrical installation.
(Many of the links in this article redirect to a specific reviewed product. Your purchase of these products through affiliate links helps to generate commission for Storables.com, at no extra cost. Learn more)
Introduction
Counting wires in an electrical box is a crucial task that electricians and DIY enthusiasts often encounter. Whether you’re installing new electrical components or troubleshooting existing wiring, knowing how to accurately count the wires is essential for safety and efficiency.
In this article, we will walk you through a step-by-step process to count wires in an electrical box. We will cover everything from preparing for the task to recording the number of wires. By the end of this guide, you’ll have the knowledge and confidence to tackle this task with ease.
Before we dive into the steps, it’s important to note that electrical work should always be approached with caution. If you’re not comfortable working with electricity or are unsure about any aspect of the process, it’s best to consult a licensed electrician.
Now, let’s get started with the first step: preparing for the task.
Key Takeaways:
- Safety First
Prioritize safety by preparing, turning off power, and wearing protective gear when counting wires in an electrical box. Consult a professional if unsure about any aspect of the process. - Accurate Counting Matters
Categorize, identify, and meticulously count wires while recording the information for future reference. Take your time and consult a professional for complex wiring configurations.
Read more: How To Wire A Shallow Electrical Box
Step 1: Prepare for the Task
Before you begin counting wires in an electrical box, it’s important to gather the necessary tools and take a few precautions to ensure your safety. Here are some steps to help you prepare for the task:
- Gather the Tools: Make sure you have the right tools on hand. You’ll need a screwdriver (typically a flathead or Phillips, depending on the type of screws in the electrical box), a flashlight, and a notepad or a smartphone to record your findings.
- Turn Off the Power: Safety should always be your top priority when working with electricity. Before opening the electrical box, turn off the power to the circuit you’ll be working on. Locate the circuit breaker in your electrical panel and switch it to the “off” position. For added safety, use a non-contact voltage tester to confirm that there is no electrical current flowing in the box.
- Wear Safety Gear: Protect yourself by wearing safety gear, including safety goggles and non-conductive gloves. These will shield your eyes and hands from any potential hazards or accidents.
- Ensure Proper Lighting: Since the inside of an electrical box can be dark, use a flashlight to ensure proper visibility. This will help you accurately count the wires and identify any potential issues.
- Clear the Area: Before you begin, clear the area around the electrical box to create a safe and unobstructed workspace. Remove any objects or debris that may hinder your access to the box.
- Take Note of the Wiring System: It’s helpful to familiarize yourself with the wiring system in your house. If possible, consult the electrical panel to identify which circuit corresponds to the electrical box you’ll be working on. This knowledge will aid you in troubleshooting and understanding the wiring configuration.
By following these steps and taking the necessary precautions, you will be well-prepared to count wires in an electrical box safely and accurately.
Step 2: Turn Off the Power
Turning off the power is a crucial step when working with electrical components. By cutting off the electricity supply, you minimize the risk of electric shock and ensure your safety while counting wires in an electrical box. Here’s how to turn off the power:
- Locate the Electrical Panel: The electrical panel, also known as the breaker box, is typically located in a utility room, basement, or garage. It contains a series of switches or circuit breakers that control the electrical circuits in your home.
- Identify the Circuit: Find the circuit that corresponds to the electrical box you’ll be working on. Most electrical panels have labels or markings indicating which circuit serves each part of the house. Look for a label that matches the room or area where the electrical box is located.
- Switch Off the Circuit Breaker: Once you’ve located the correct circuit, flip the corresponding breaker switch to the “off” position. This action will cut off the electrical supply to the circuit and prevent any electrical current from flowing through the wires.
- Confirm Power Disconnection: To be absolutely certain that the power is off, use a non-contact voltage tester. This handheld device can detect the presence of electrical current without the need for direct contact. Hold the tester near the electrical box to ensure there is no voltage present.
- Double Check with Lights and Appliances: As an additional safety measure, check lights, outlets, and appliances connected to the circuit you’ve turned off to confirm that they no longer function. This step provides further reassurance that the power has been successfully disconnected.
Remember, electrical safety is of utmost importance. Never attempt to count wires in an electrical box without first turning off the power. Taking the time to ensure the electricity is completely cut off will protect you from potential accidents and electrical hazards.
Step 3: Open the Electrical Box
Now that you have turned off the power, it’s time to open the electrical box. Opening the box will give you access to the wires inside, allowing you to accurately count them. Follow these steps to open the electrical box safely:
- Locate the Screw Fasteners: Most electrical boxes are secured with screws. Examine the box to identify the type and number of screws holding it in place. Common screw types include Phillips head and flathead screws.
- Use the Appropriate Screwdriver: Once you’ve determined the type of screws, select the appropriate screwdriver to remove them. Using the wrong screwdriver can damage the screws or strip their heads, making it difficult to open the box.
- Turn the Screws Counter-Clockwise: Insert the screwdriver into the screw head and turn it counter-clockwise to loosen the screws. Be sure to apply steady and even pressure to prevent slipping or stripping the screws.
- Remove the Screws: As you loosen the screws, carefully remove them from the electrical box and set them aside in a safe location. Keep track of the screws to ensure you can easily reassemble the box later.
- Gently Pull or Slide the Box Cover: Once the screws have been removed, you can gently pull or slide the box cover to open it. Take care not to force or damage the box during this process. Depending on the type of box, it may have a hinged cover or a removable cover.
- Inspect the Inside: With the box cover open, take a moment to inspect the inside of the electrical box. Look for any loose wires, signs of damage, or indications of improper wiring. If you notice any issues, it is recommended to consult a licensed electrician for further evaluation and repairs.
By following these steps, you can safely and effectively open the electrical box. Remember to handle the box cover and screws with care to avoid causing any unnecessary damage. Once the box is open, you’ll be ready to move on to the next step: identifying the wires.
Step 4: Identify the Wires
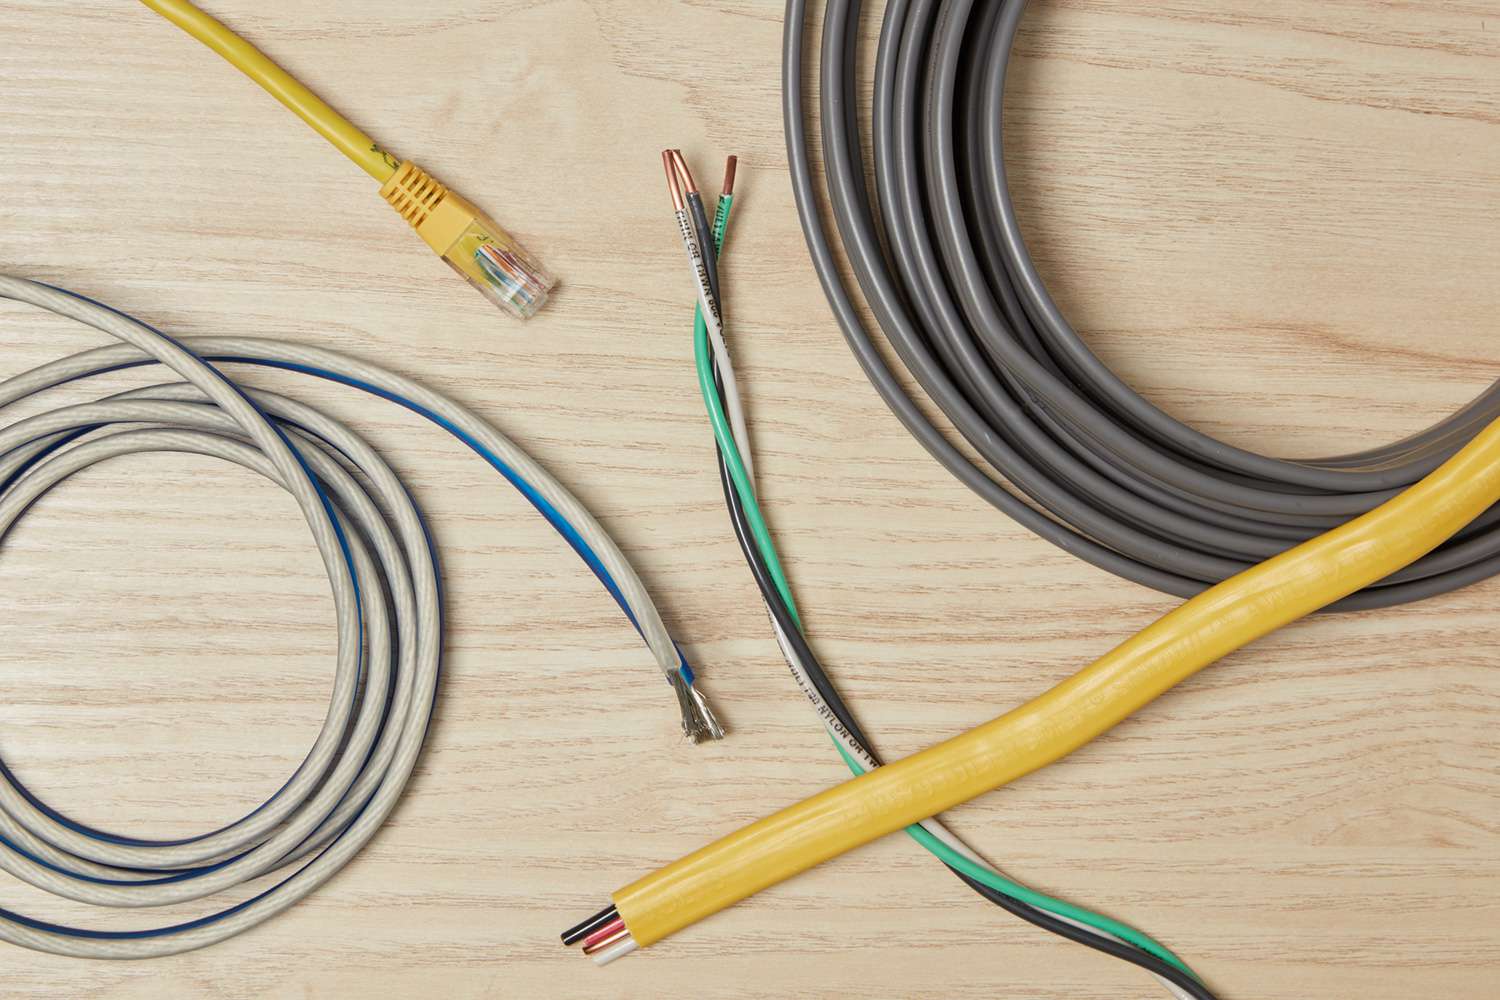
Before you start counting the wires in the electrical box, it’s important to properly identify and understand the different types of wires you may encounter. Here are some common types of wires and their purposes:
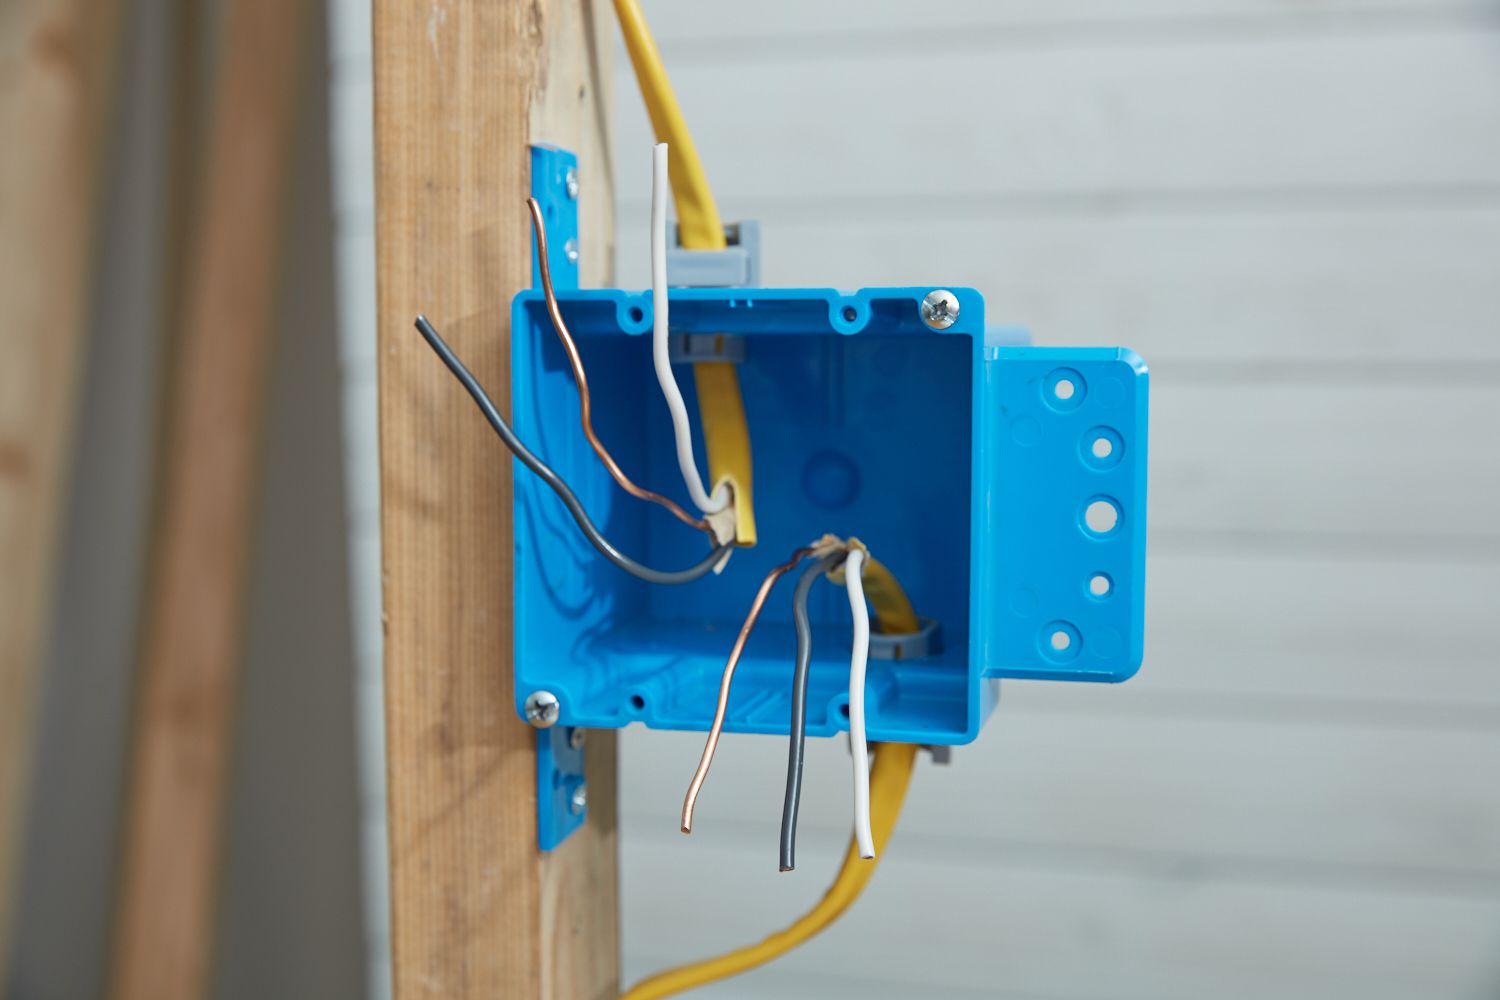
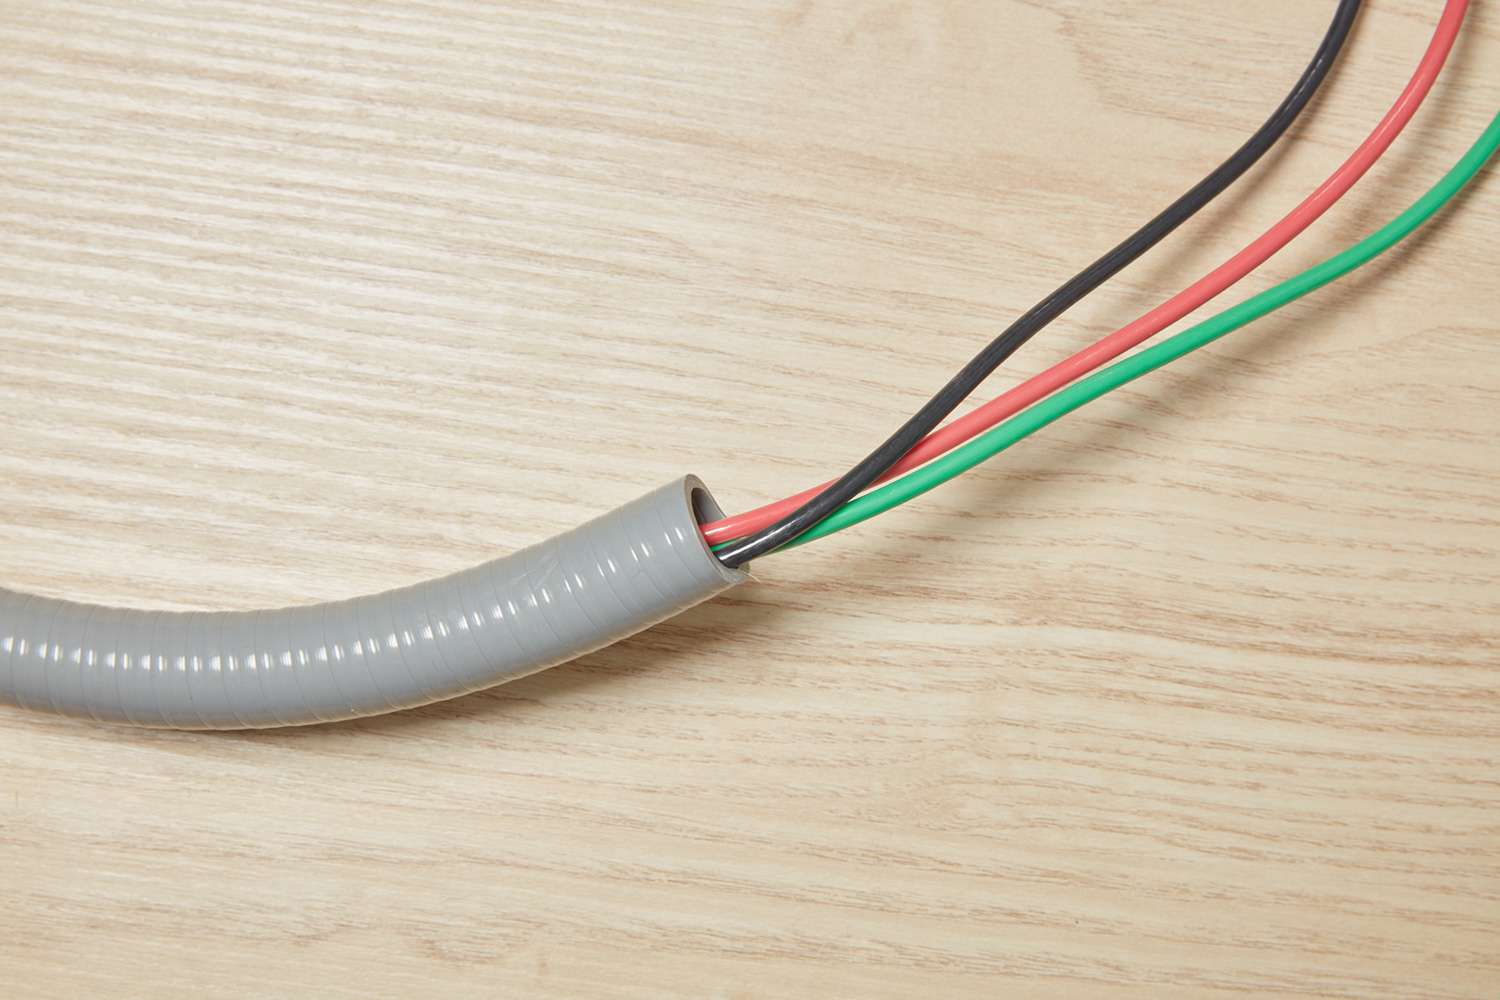
- Hot Wires (Black or Red): Hot wires carry electrical current from the power source to the electrical devices or outlets in a circuit. They are usually black or red in color and should be handled with caution as they can cause electric shock.
- Neutral Wires (White or Gray): Neutral wires provide the return path for electrical current back to the power source. They are typically white or gray in color and are essential for completing the circuit.
- Ground Wires (Bare Copper or Green/Yellow): Ground wires are a safety measure designed to prevent electric shock. They provide a direct path for electrical current to safely flow to the ground in case of a fault or electrical surge. Ground wires are usually bare copper or have green/yellow insulation.
- Switch Wires (Various Colors): Switch wires are used specifically for controlling electrical devices or lights. They can come in various colors depending on the specific circuit and wiring configuration.
- Traveler Wires (Usually Red or Black): Traveler wires are commonly found in three-way or four-way switch setups, where multiple switches control a single light or electrical device. They allow for communication between the switches and are usually red or black.
Once you understand the different types of wires, carefully examine the wires inside the electrical box. Use a flashlight if needed to get a clear view. Take note of how the wires are connected, their colors, and their locations within the box. This information will help you accurately count the wires in the next step.
If you’re uncertain about the types or functions of the wires, it’s advisable to consult a professional electrician for assistance. Electrical systems can be complex, and it’s important to handle them with care and knowledge.
With the wires identified, you’re now ready to move on to the next step: counting the wires in the electrical box.
When counting wires in an electrical box, remember to include all hot, neutral, and ground wires. Be sure to account for any wire nuts or connectors that may be hiding additional wires.
Read more: How To Run Electrical Wire From Breaker Box
Step 5: Count the Wires
Now that you have properly identified the different types of wires in the electrical box, it’s time to count the wires. Follow these steps to ensure an accurate count:
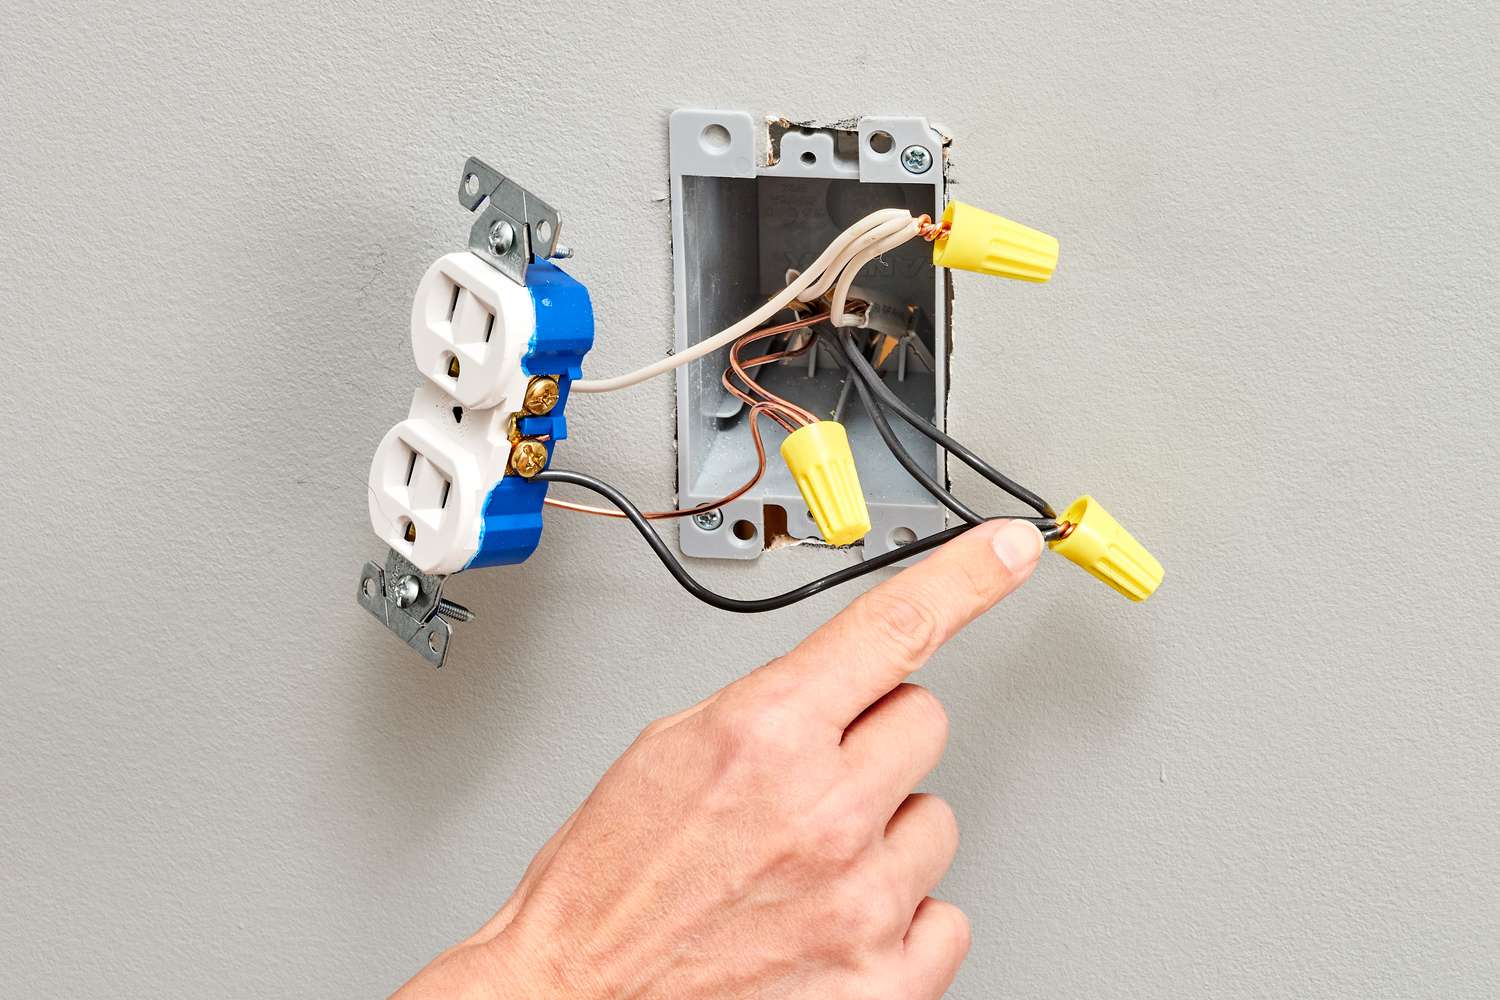
- Categorize the Wires: Group the wires based on their types (hot, neutral, ground, switch, traveler, etc.) This categorization will make it easier to keep track of the wires as you count them.
- Start with Hot Wires: Begin by counting the hot wires (typically black or red). These are the wires that carry electrical current and are usually connected to switches or outlets.
- Count the Neutral Wires: Next, count the neutral wires (typically white or gray). These wires provide the return path for electrical current and are necessary to complete the circuit.
- Identify the Ground Wires: Look for any bare copper or green/yellow insulated wires. These are the ground wires, which serve as a safety measure to prevent electric shock. Note the number of ground wires in the box.
- Include Switch and Traveler Wires: If your electrical box contains switch wires or traveler wires (used in three-way or four-way switch setups), count them as well. These wires are important for controlling electrical devices and lights within a circuit.
- Double-Check Your Count: After counting each type of wire, double-check your count to ensure accuracy. It’s essential to have an exact count for proper troubleshooting or installation purposes.
Take your time and be meticulous when counting the wires. It’s important not to miss any wires or count them twice, as this can lead to electrical issues or complications during the installation or troubleshooting process.
If you come across any confusing or unfamiliar wiring configurations, it’s advisable to consult a qualified electrician to assist you. They can provide guidance and ensure that the wiring is properly identified and handled.
With the wires accurately counted, you’re now ready for the next step: recording the number of wires.
Step 6: Record the Number of Wires
Recording the number of wires in the electrical box is an important step to keep track of the wiring configuration and facilitate future reference. Follow these steps to effectively record the number of wires:
- Prepare a Notepad or Smartphone: Have a notepad or smartphone ready to jot down the number of each wire type. You can also use a note-taking app or a voice memo feature to record the information.
- Label Each Wire Type: Create a clear and organized record by labeling each wire type with its corresponding count. For instance, write “Hot Wires: X”, “Neutral Wires: X”, “Ground Wires: X”, and so on.
- Take Clear and Legible Notes: Make sure your recordings are clear, legible, and easy to understand. This will be helpful for future reference or if you need to share the information with others.
- Note Any Observations or Concerns: If you encounter any abnormal wiring configurations, loose connections, or concerns, make a note of them during the recording process. This information can aid in troubleshooting or identifying potential issues.
- Double-Check Your Record: Once you’ve recorded the number of wires for each type, double-check your record to ensure accuracy. Mistakes or inaccuracies in the record can lead to confusion or difficulties down the line.
Having a detailed and accurate record of the number of wires in the electrical box will prove invaluable in various scenarios. It can help electricians troubleshoot electrical issues, ensure compliance with local electrical codes, or assist with future installations or modifications.
Remember to keep your record in a safe and easily accessible place for future reference. With the number of wires recorded, you’re ready for the final step: closing the electrical box.
Step 7: Close the Electrical Box
After completing the task of counting wires and recording the information, it’s important to properly close the electrical box to maintain safety and protect the wiring. Follow these steps to effectively close the electrical box:
- Carefully Position the Box Cover: Align the box cover with the electrical box and ensure it is properly positioned. Take care not to force or misalign the cover, as this can result in damage to the box or wiring.
- Secure the Screws: Retrieve the screws that were removed earlier and secure them back into their respective positions. Use the correct screwdriver and tighten the screws snugly, but avoid over-tightening, as it can damage the box or strip the threads.
- Check for Proper Fit: After securing the screws, ensure that the box cover fits securely and snugly. There should be no gaps or loose areas. A proper fit is important to maintain the integrity of the electrical box.
- Inspect the Closed Box: Take a moment to visually inspect the closed electrical box. Verify that no wires are pinched or obstructed by the box cover or screws. Ensure that all wires are properly contained within the box and not exposed.
- Restore Power: Now that the electrical box is closed, you can restore power to the circuit. Return to the electrical panel and switch the circuit breaker back to the “on” position. Test lights, outlets, or appliances connected to the circuit to confirm that the power has been successfully restored.
By following these steps, you can secure the electrical box and ensure that the wiring is well-protected. Properly closing the box also prevents any accidental contact with live wires, reduces the risk of electrical hazards, and helps maintain the overall functionality of the electrical system.
It’s important to remember that if you have any doubts or concerns about the electrical box or the wiring, it’s advisable to consult a licensed electrician for assistance. They have the expertise and knowledge to address any issues or perform any necessary repairs or modifications.
Congratulations! You have successfully counted the wires in the electrical box and closed it securely. By following the steps outlined in this guide, you can approach the task with confidence and ensure the safety and efficiency of your electrical system.
Conclusion
Counting wires in an electrical box may seem like a daunting task, but with the right knowledge and approach, it can be done safely and accurately. By following the step-by-step process outlined in this guide, you can confidently count the wires and ensure the integrity of your electrical system.
Throughout the process, it’s crucial to prioritize safety. Always turn off the power before working with electrical components and wear appropriate safety gear. If you encounter unfamiliar wiring configurations or have any concerns, don’t hesitate to consult a licensed electrician for assistance.
By preparing for the task, turning off the power, opening the electrical box, identifying the wires, counting them, recording the information, and closing the box properly, you can effectively complete the task. Taking the time to be thorough and accurate in your wire count will aid in troubleshooting, installations, and modifications in the future.
Remember, electrical work can be complex, and it’s important to approach it with caution and respect. If you have any doubts or are unsure about any aspect of working with electrical systems, it’s always best to enlist the help of a trained professional.
We hope that this guide has provided you with the knowledge and guidance you need to count wires in an electrical box with confidence. By following these steps, you can maintain safety, understand your electrical system better, and effectively tackle any electrical project that comes your way.
Frequently Asked Questions about How To Count Wires In An Electrical Box
Was this page helpful?
At Storables.com, we guarantee accurate and reliable information. Our content, validated by Expert Board Contributors, is crafted following stringent Editorial Policies. We're committed to providing you with well-researched, expert-backed insights for all your informational needs.


0 thoughts on “How To Count Wires In An Electrical Box”