Articles
How To Fix Crooked Garage Door
Modified: August 22, 2024
Learn how to fix a crooked garage door with these helpful articles. Get step-by-step instructions and troubleshooting tips to restore your garage door's alignment.
(Many of the links in this article redirect to a specific reviewed product. Your purchase of these products through affiliate links helps to generate commission for Storables.com, at no extra cost. Learn more)
Introduction
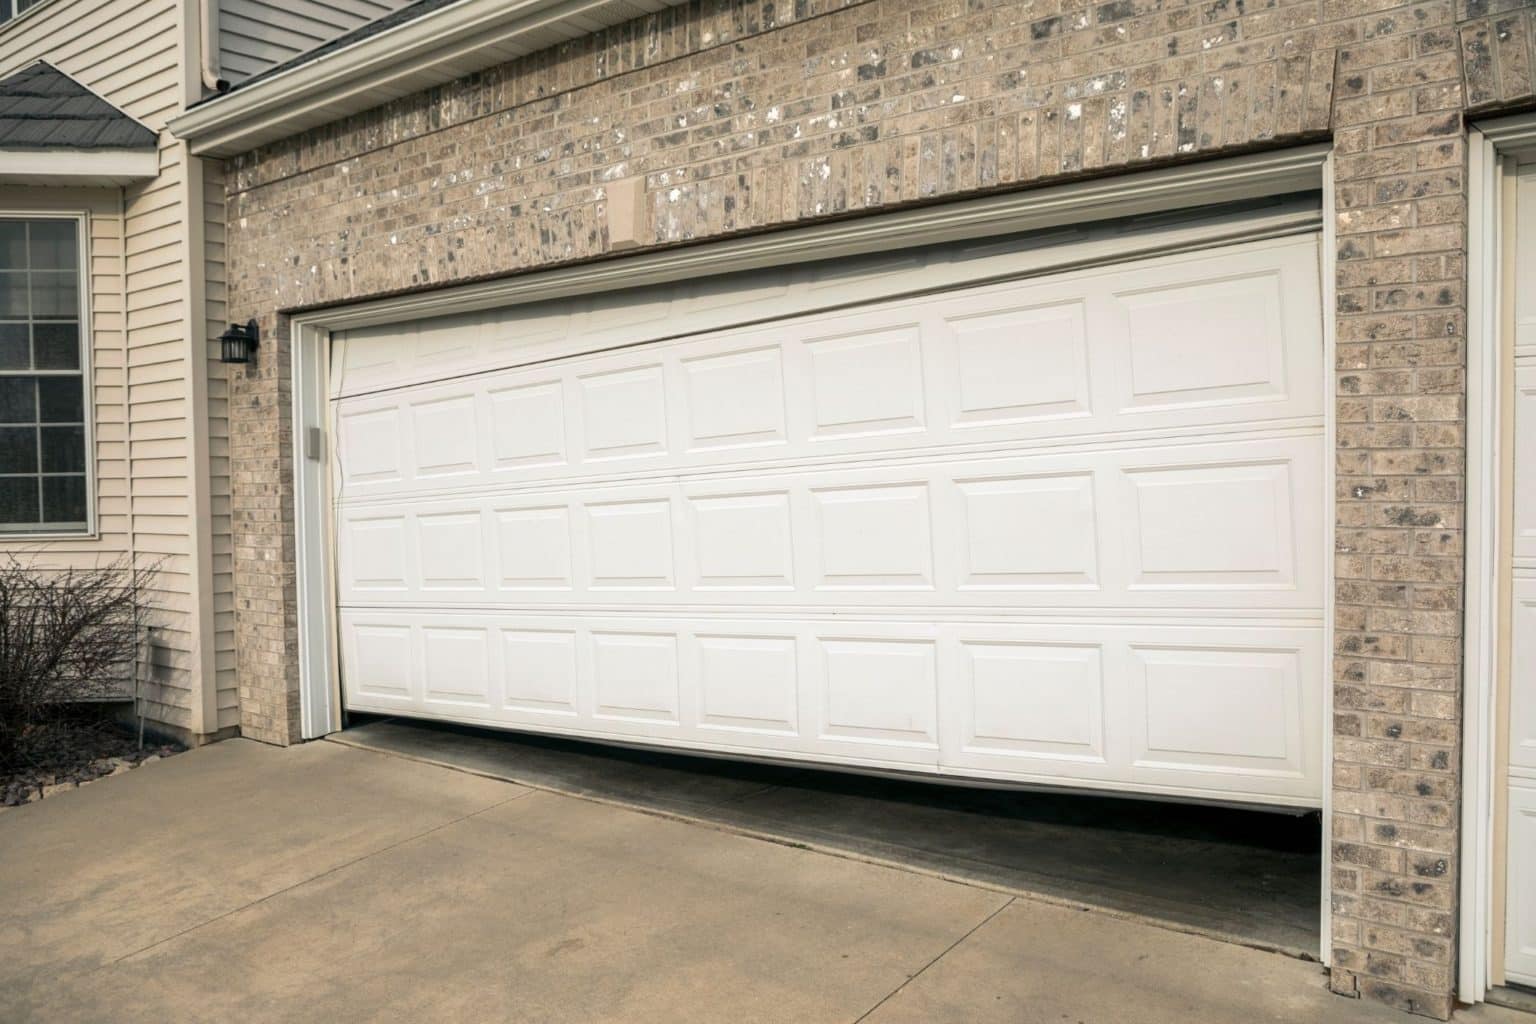
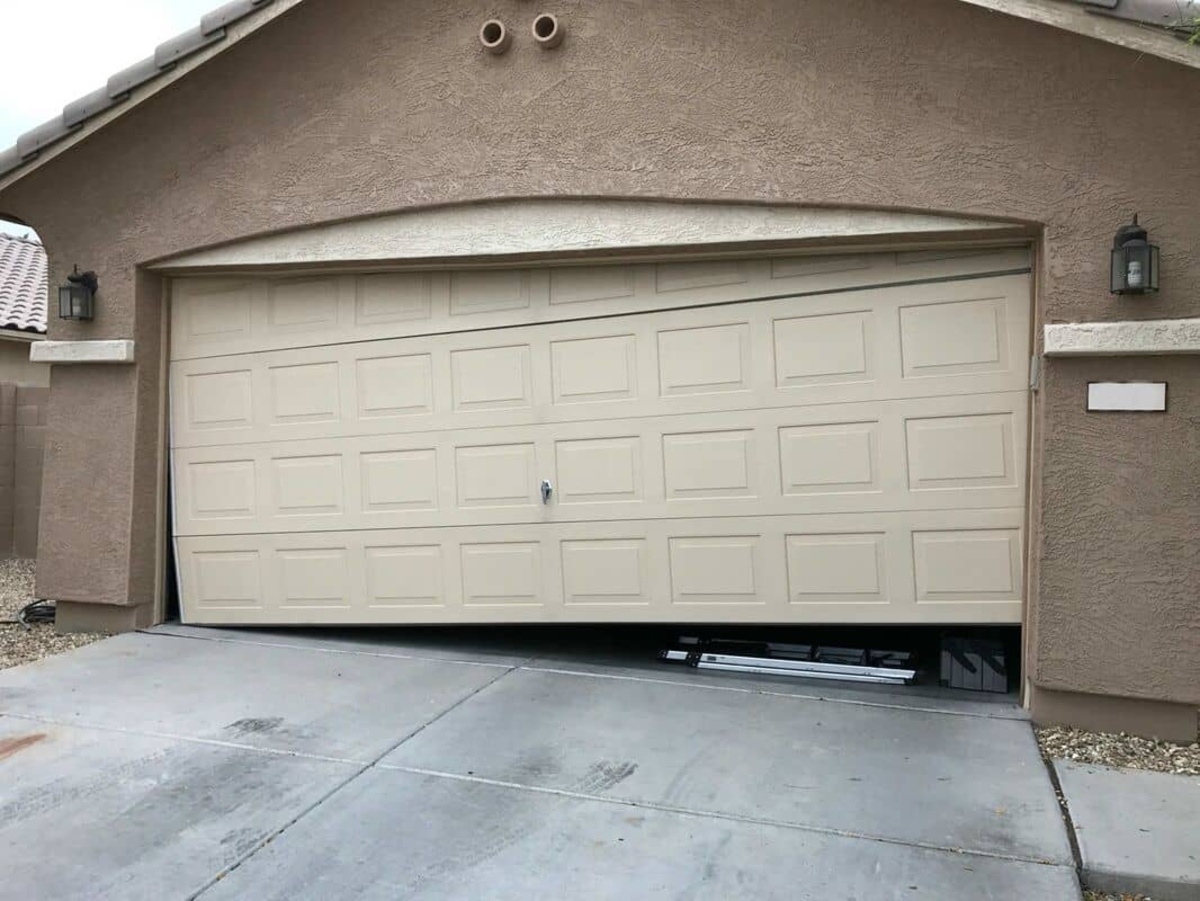
A crooked garage door can not only be an eyesore but also a safety concern. A misaligned door can result in difficulty opening and closing, increased wear and tear on the components, and potentially hazardous situations. If you find yourself dealing with a crooked garage door, don’t worry – it’s a problem that can be fixed. In this article, we will guide you through a step-by-step process on how to fix a crooked garage door.
Before we dive into the solutions, it’s important to understand the common causes of a crooked garage door. One of the key reasons is loose or damaged hardware. Over time, the constant operation of the door can cause the nuts, bolts, and brackets to become loose or even break. Another factor is misaligned tracks. If the tracks are not properly aligned, it can cause the door to veer off course when opening or closing. Additionally, worn-out rollers and springs can also contribute to a crooked door. Understanding these causes will help you diagnose the issue and implement the appropriate solutions.
Before you start working on fixing the crooked garage door, you will need a few tools and materials. These include a ladder, a socket set or wrench, a rubber mallet, a level, a measuring tape, and some lubrication. Make sure you have these items handy before proceeding with the steps.
Now that you have a better understanding of the problem and have gathered the necessary tools, let’s move on to the step-by-step process of fixing a crooked garage door.
Key Takeaways:
- Regular maintenance, such as tightening hardware and lubricating moving parts, can prevent a crooked garage door. Addressing minor alignment issues promptly can prevent major problems down the line.
- Understanding the common causes of a crooked garage door, such as misaligned tracks and worn-out rollers, is crucial for effective diagnosis and repair. Seek professional help if unsure about any repair steps.
Read more: How To Fix Garage Door
Common Causes of a Crooked Garage Door
A crooked garage door can occur as a result of several common causes. Understanding these causes will help you diagnose the issue and determine the best course of action to fix your garage door. Let’s take a closer look at these causes:
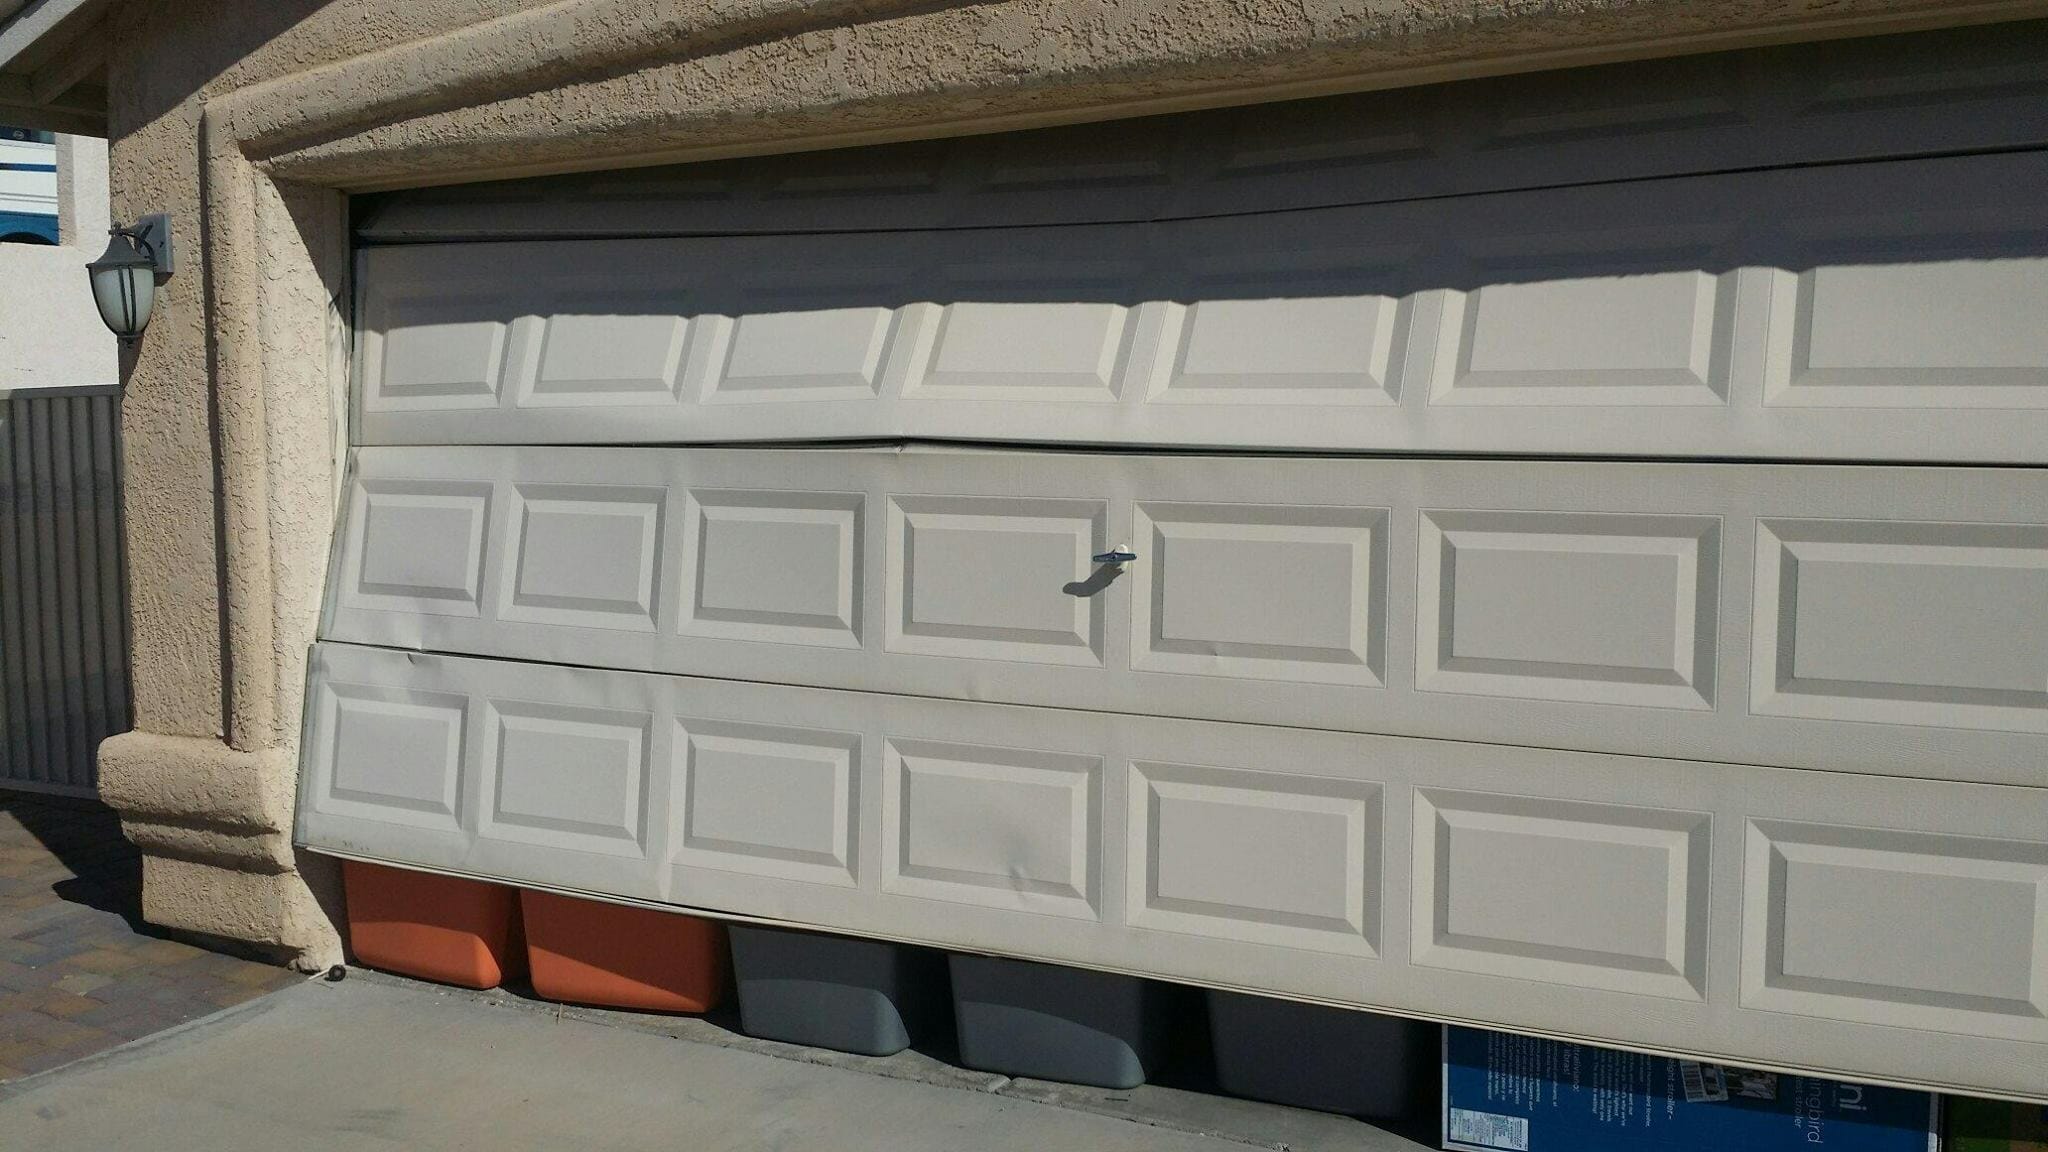
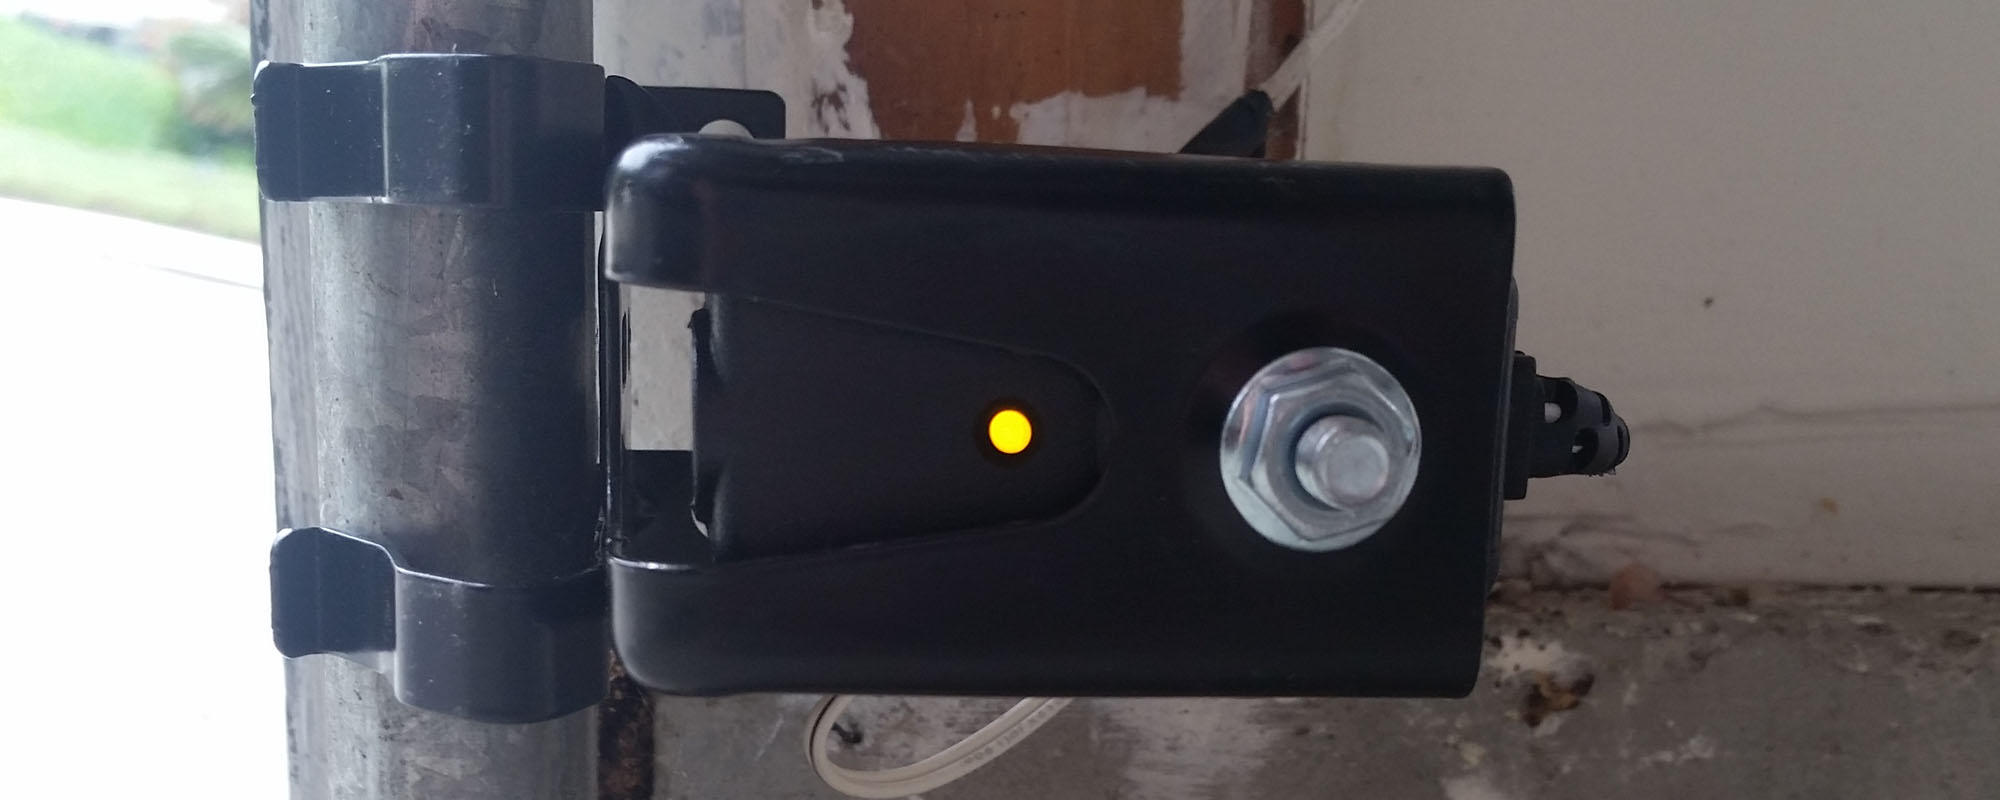
- Loose or Damaged Hardware: Over time, the constant use of the garage door can cause the nuts, bolts, hinges, and brackets to become loose or even break. When this happens, the door may come off its track or start to sag, resulting in a crooked appearance.
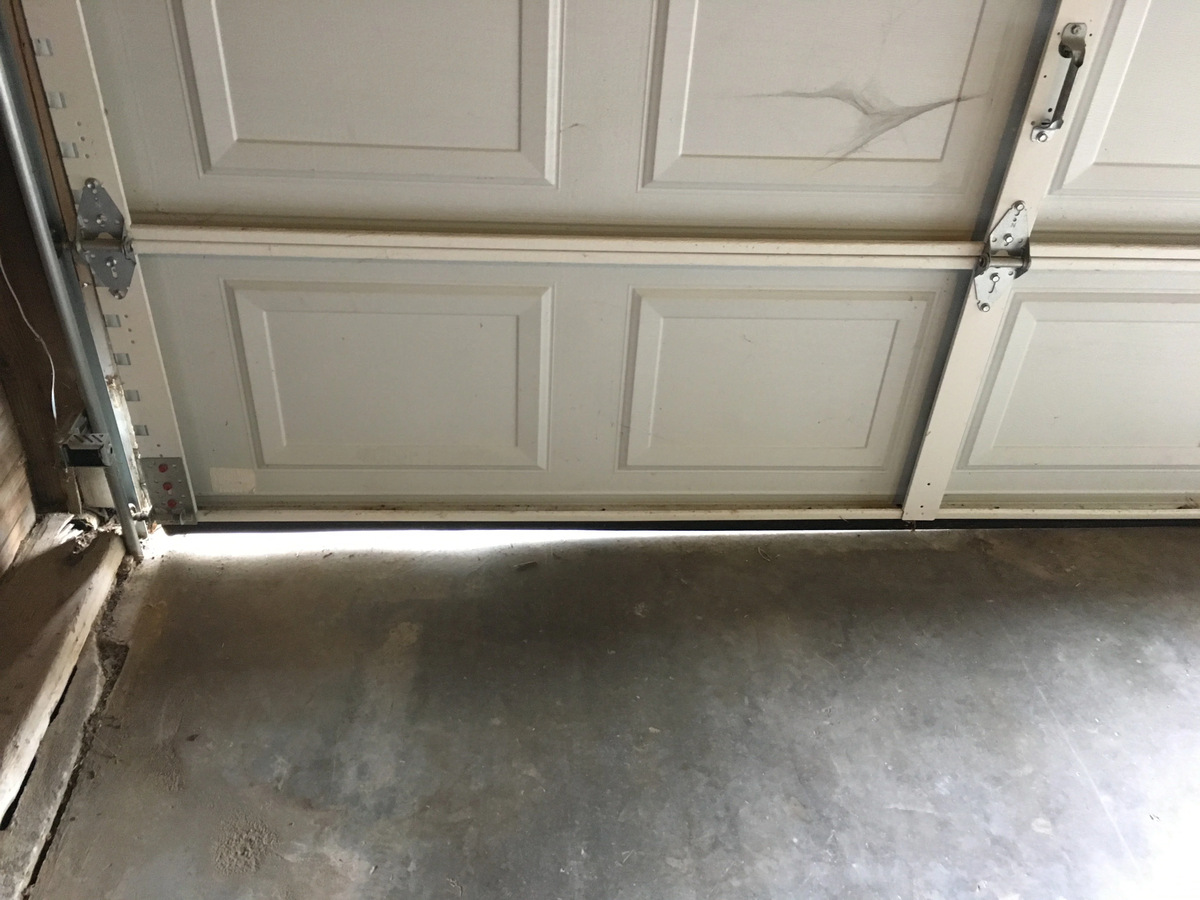
- Misaligned Garage Door Tracks: The garage door operates on a track system that allows it to open and close smoothly. If the tracks become misaligned, either due to loose hardware or other factors, the door may start to veer off course when moving, causing it to become crooked.
- Worn-out Rollers: The rollers on your garage door play a crucial role in helping it slide along the tracks. If the rollers become worn-out or damaged, they can create friction and resistance, causing the door to tilt or become uneven.
- Imbalanced Garage Door Springs: Garage doors typically rely on springs to counterbalance their weight and facilitate smooth operation. If the springs are not properly adjusted or one of them breaks, it can lead to an imbalance in the door, causing it to tilt or appear crooked.
- Uneven Garage Door Panels: In some cases, the crooked appearance of a garage door may be due to uneven panels. Over time, temperature fluctuations and constant use can cause the panels to warp or sag, resulting in an unbalanced and crooked door.
By identifying the specific cause of your crooked garage door, you can address the issue more effectively. In the next sections, we will provide step-by-step instructions on how to fix each of these common causes and restore your garage door to proper alignment and smooth operation.
Tools and Materials Needed
Before you begin fixing your crooked garage door, it’s important to have the necessary tools and materials on hand. Here’s a list of what you’ll need:
- Step ladder or extension ladder: You’ll need a sturdy ladder to access and work on the garage door components.
- Socket set or wrench: These tools are essential for tightening or loosening nuts and bolts.
- Rubber mallet: A rubber mallet will come in handy for gently tapping and adjusting the door tracks and rollers.
- Level: A level will help you ensure that the door is properly aligned and straight.
- Measuring tape: You’ll need a measuring tape to accurately measure and align the tracks, panels, and other components.
- Lubrication: It’s important to have a lubricant specifically designed for garage doors. This will keep the moving parts operating smoothly.
Make sure you have all of these tools and materials within reach before starting the fix. Having everything readily available will save you time and make the process more efficient.
In addition to these tools and materials, it’s also recommended to wear protective gloves and safety glasses when working on your garage door. This will help keep you safe from any potential injuries.
Once you have gathered all the necessary tools and materials, you’re ready to begin the process of fixing your crooked garage door. In the following sections, we will provide step-by-step instructions on how to address the common causes and restore your garage door to its proper alignment.
Step 1: Check for Loose or Damaged Hardware
The first step to fixing a crooked garage door is to check for any loose or damaged hardware. Over time, the constant operation of the door can cause the nuts, bolts, hinges, and brackets to become loose or even break. When this happens, it can lead to misalignment and a crooked appearance.
To perform this step, follow these instructions:
- Start by examining all the hardware on your garage door, including the hinges, brackets, and roller mounts. Look for any signs of looseness, rust, or damage.
- Using a socket set or wrench, tighten any loose nuts and bolts that you find. Be careful not to overtighten, as this can strip the threads or cause damage.
- If you come across any damaged hardware, such as broken hinges or brackets, replace them with new ones. This will ensure that your garage door is properly supported and aligned.
- While inspecting the hardware, pay close attention to the roller mounts. If they are damaged or worn-out, it’s best to replace them to prevent further issues with the door alignment.
Once you have tightened any loose hardware and replaced any damaged components, test the door to see if the crookedness has been corrected. Open and close the door a few times to ensure smooth operation and proper alignment.
If the crookedness persists, continue to the next step. Otherwise, your garage door should now be back in alignment and functioning properly.
Note: If at any point during the repair process you encounter difficulties or feel unsure about what to do, it’s best to consult a professional garage door technician. They have the expertise and experience to handle complex repairs and ensure the safety of your garage door.
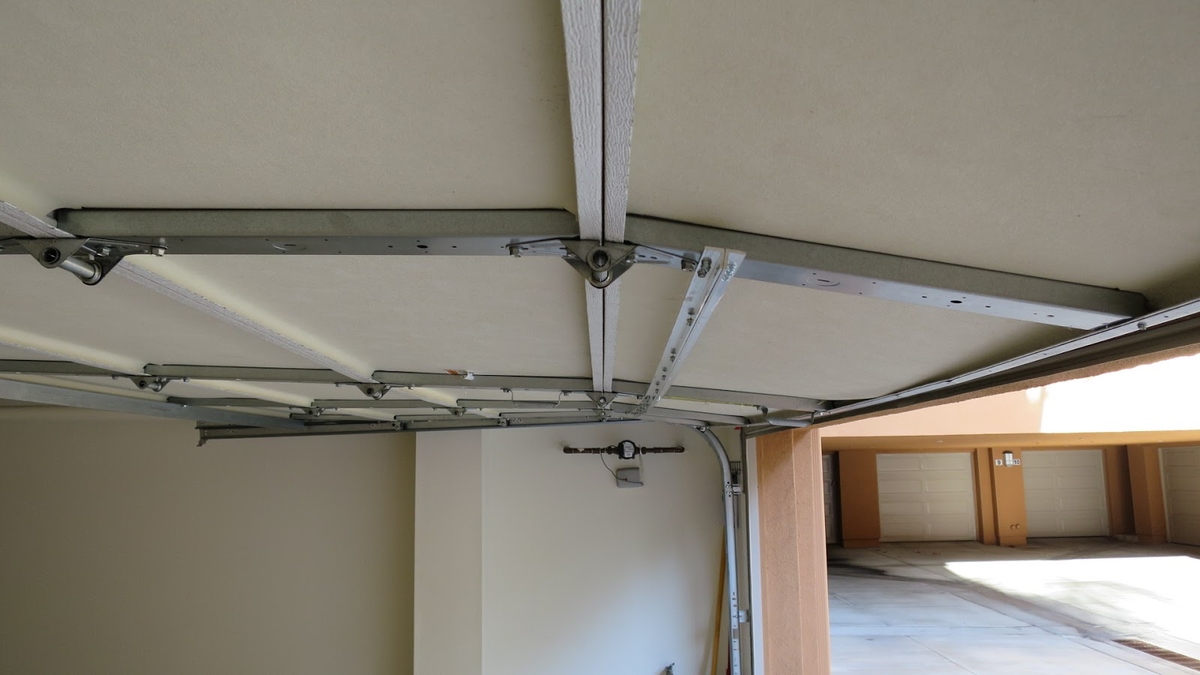
Step 2: Adjust the Garage Door Tracks
If your garage door is still crooked after checking the hardware, the next step is to adjust the garage door tracks. Misaligned tracks can cause the door to veer off course when opening or closing, resulting in an uneven appearance. By making some adjustments to the tracks, you can help realign the door and improve its functionality.
Follow these instructions to adjust the garage door tracks:
- Start by examining the tracks on both sides of the garage door. Look for any signs of misalignment, such as gaps or uneven spacing between the rollers and the tracks.
- If you notice any misalignment, use a rubber mallet to gently tap the tracks back into place. Be careful not to hit the tracks forcefully, as this can cause further damage.
- Measure the distance between the rollers and the tracks on both sides of the door to ensure they are parallel. If there is a significant difference in the measurements, adjust the track accordingly.
- To move the track, loosen the screws or bolts that hold it in place. Gently shift the track either inward or outward to achieve the desired alignment.
- Once you have adjusted the track, use a level to check its horizontal alignment. The track should be straight and level along its entire length.
- Tighten the screws or bolts to secure the track in its new position. Ensure that all the fasteners are tightened securely but be cautious not to overtighten.
- Repeat the process for the track on the opposite side of the door, ensuring that it is aligned in the same way as the first track.
After adjusting the tracks, test the garage door by opening and closing it to see if the crookedness has been resolved. The door should move smoothly and maintain proper alignment.
If the door is still crooked or encountering difficulties, move on to the next step to address the rollers.
Note: If you are unsure about making adjustments to the garage door tracks or encounter any difficulties during the process, it is recommended to seek assistance from a professional garage door technician.
Check the tracks for any obstructions or damage, and use a level to ensure they are properly aligned. Tighten any loose hardware and consider adjusting the tension on the springs. If the problem persists, consult a professional for further assistance.
Read more: How To Fix A Bent Garage Door
Step 3: Realign the Garage Door Rollers
If your garage door is still crooked after adjusting the tracks, the next step is to realign the garage door rollers. Worn-out or damaged rollers can create friction and resistance, causing the door to tilt or become uneven. By realigning the rollers, you can restore smooth operation and proper alignment to your garage door.
Follow these instructions to realign the garage door rollers:
- Start by closing the garage door completely. This will ensure that the rollers are in their correct positions.
- Inspect the rollers to check for any signs of damage or wear. If any rollers appear worn-out or damaged, it’s best to replace them with new ones for optimal performance.
- Next, locate the adjustment screws on the mounting brackets of the rollers. These screws allow for fine-tuning of the roller alignment.
- Using a socket set or wrench, loosen the adjustment screws on the brackets of the crooked rollers. This will allow you to move the rollers and realign them.
- Gently adjust the position of the roller by moving it up, down, or sideways as needed. The goal is to align the roller with the track and ensure proper engagement.
- Once the roller is aligned, tighten the adjustment screws on the mounting brackets to secure it in place. Ensure that the roller is snugly held without being too tight.
- Repeat the process for each of the crooked rollers, adjusting them and tightening the screws to ensure proper alignment.
- After realigning all the rollers, test the garage door by opening and closing it. The door should move smoothly and stay in proper alignment.
If, after realigning the rollers, the garage door is still crooked or experiencing difficulties, proceed to the next step to inspect and adjust the garage door springs.
Note: Adjusting garage door rollers can be challenging, and it’s important to exercise caution. If you are uncertain or uncomfortable with this step, it is advisable to seek the assistance of a professional garage door technician.
Step 4: Check and Adjust the Garage Door Springs
If your garage door remains crooked even after realigning the rollers, it’s time to check and adjust the garage door springs. The springs play a critical role in counterbalancing the weight of the door and facilitating smooth operation. If the springs are not properly adjusted or if one of them is broken, it can lead to an imbalance and a crooked door.
Follow these instructions to check and adjust the garage door springs:
- Carefully close the garage door and unplug the opener to ensure it doesn’t accidentally activate while you’re working on the springs.
- Locate the garage door springs, which are typically positioned above the door, parallel to the tracks. There are two types of springs: torsion springs, which are mounted above the door, and extension springs, which are located along the sides of the door.
- Inspect the springs for any signs of wear, damage, or breakage. If you notice any issues with the springs, it’s advisable to replace them with new ones. Garage door springs can be dangerous to work with, so it may be best to seek professional assistance for spring replacement.
- If the springs appear intact, you can adjust their tension to restore balance to the door. Keep in mind that adjusting the tension of garage door springs can be dangerous, so exercise caution and follow these steps carefully.
- If you have torsion springs, use a winding bar to turn the adjustment screws on the spring system. Turning the screws either clockwise or counterclockwise will increase or decrease tension, respectively. Make small adjustments, testing the balance of the door as you go.
- If you have extension springs, locate the safety cables that run through the center of the springs. These cables help prevent the springs from snapping if they loosen or break. Adjusting extension springs involves moving the hooks on the end of the springs to different holes on the track hangers. This will increase or decrease tension in the springs.
- After making adjustments to the springs, test the garage door by opening and closing it. The door should move smoothly and stay level.
It’s important to remember that garage door springs are under high tension and can cause serious injury if mishandled. If you are unsure or uncomfortable with adjusting the springs, it is strongly recommended to seek professional help from a garage door technician.
If the garage door is still crooked or experiencing difficulties, move on to the next step to level the door panels.
Step 5: Level the Garage Door Panels
If your garage door is still crooked after adjusting the springs, the next step is to level the garage door panels. Over time, temperature changes and constant use can cause the panels to warp or sag, resulting in an unbalanced and crooked door. By leveling the panels, you can restore the door’s proper alignment and functionality.
Follow these instructions to level the garage door panels:
- Close the garage door completely and inspect the panels for any signs of warping or sagging. Look for any gaps or misalignment between the panels.
- Identify the areas that need adjustment. You may need to loosen the screws or bolts that hold the panels in place.
- Use a level to determine the degree of misalignment. Place the level against the side of the panel and adjust until it is perfectly vertical or horizontal, depending on the direction of the misalignment.
- Once you have determined the required adjustment, gently tap the panels with a rubber mallet to move them into place. Be cautious not to strike the panels too forcefully, as this can cause further damage.
- Check the alignment again using the level. Make necessary adjustments until the panels are level and aligned with each other.
- Tighten the screws or bolts to secure the panels in their new positions. Ensure that all the fasteners are tightened securely but be mindful not to overtighten.
- Test the garage door by opening and closing it to ensure that it moves smoothly and stays level. If the door is still crooked or encountering difficulties, proceed to the next step.
If you are unsure about leveling the garage door panels or encounter any difficulties during the process, it is advisable to seek the assistance of a professional garage door technician. They have the expertise and experience to handle complex repairs and ensure the safety of your garage door.
With the panels properly leveled, your garage door should now maintain a straight and aligned appearance, enhancing both its functionality and curb appeal.
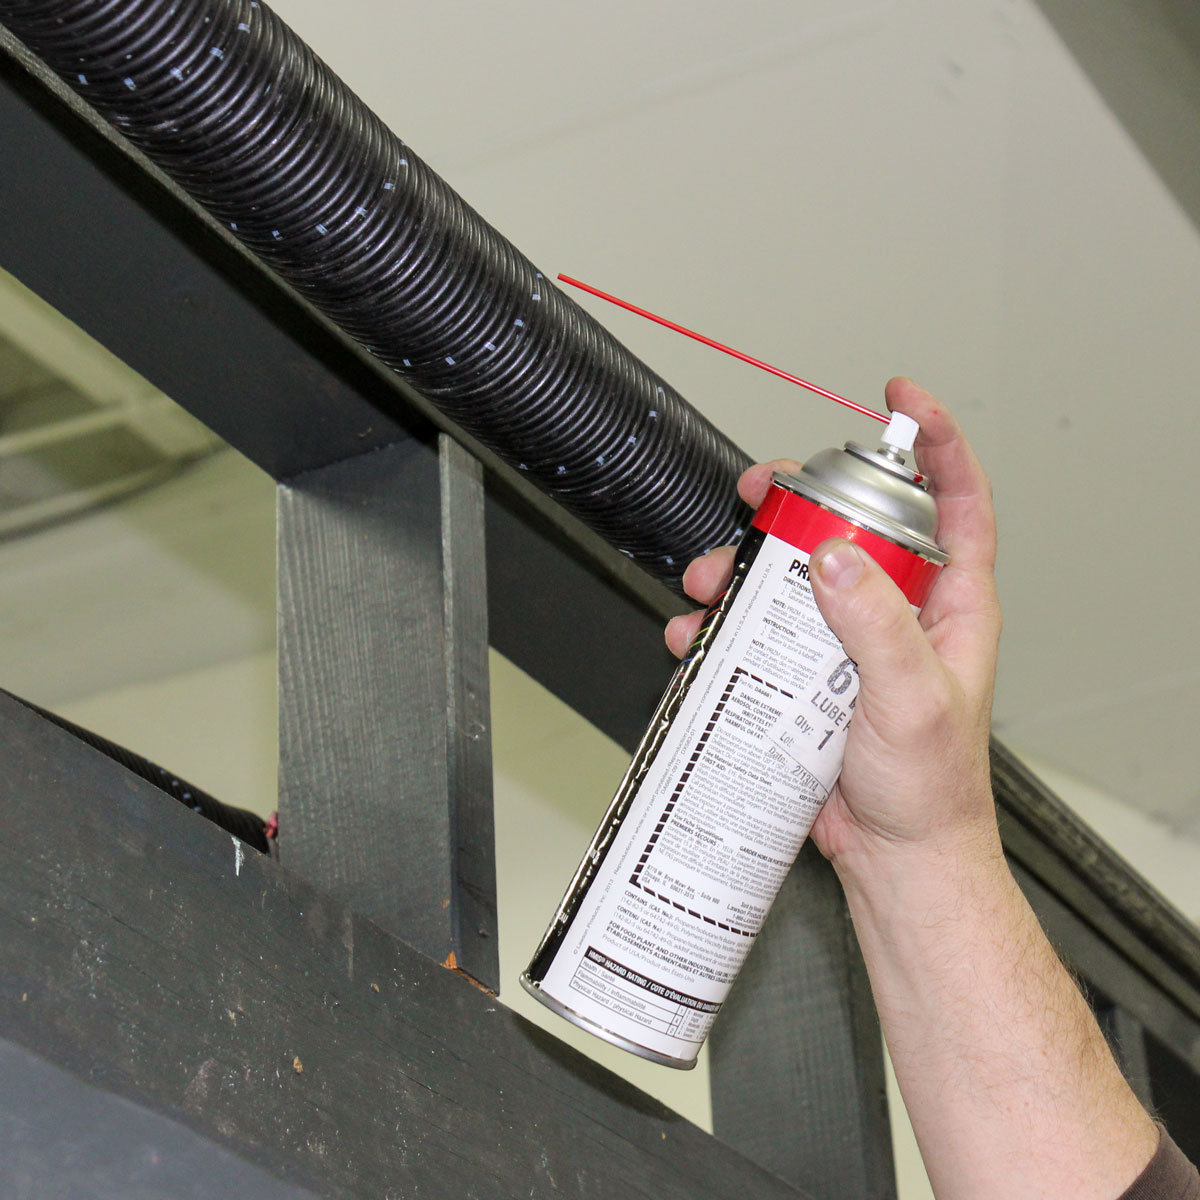
Step 6: Lubricate Moving Parts
After completing the previous steps to fix a crooked garage door, it’s important to lubricate the moving parts of the door. Proper lubrication helps reduce friction, ensure smooth operation, and prolong the lifespan of the components. By lubricating the door’s moving parts, you can maintain its alignment and prevent future issues.
Follow these instructions to lubricate the moving parts of your garage door:
- Start by gathering the appropriate lubricant for your garage door. It’s recommended to use a silicone-based lubricant specifically designed for garage doors. Avoid using WD-40 or other general-purpose lubricants as they can attract dust and cause buildup.
- Clean the tracks and rollers with a clean cloth to remove any dirt, debris, or old lubricant. Wipe away any excess residue, ensuring that the surfaces are clean before applying new lubricant.
- Apply a small amount of lubricant to the rollers, hinges, and other moving parts of the garage door. Be sure to cover all the necessary components, but avoid overapplying as excessive lubrication can attract dirt and create a mess.
- Open and close the garage door a few times to distribute the lubricant evenly on all the moving parts. This will help ensure smooth operation and proper alignment.
- If your garage door has torsion springs, avoid applying lubricant directly to the springs. The lubricant can cause the springs to become slippery and compromise their effectiveness. Instead, focus on lubricating the other moving parts around the springs.
- Regularly check and maintain the lubrication of your garage door. Depending on the climate and usage, it’s recommended to lubricate the door every six months or as needed.
Proper lubrication of the moving parts will not only improve the door’s performance but also reduce noise and minimize wear and tear on the components. It’s an essential step in keeping your garage door in top shape.
With the completion of this step, your crooked garage door should now be fixed, properly aligned, and operating smoothly. Enjoy the convenience and functionality of a straight garage door!
Read more: How To Fix Garage Door Opener
Conclusion
Fixing a crooked garage door is a task that can be accomplished with a little patience, effort, and the right approach. By following the steps outlined in this guide, you can effectively address the common causes of a crooked door and restore proper alignment and functionality to your garage door.
Throughout the process, it’s important to keep safety in mind. Be cautious when working with garage door components, especially when dealing with springs and other high-tension parts. If you are unsure or uncomfortable with any of the steps, it’s best to seek the assistance of a professional garage door technician.
Remember that prevention is key to avoiding future issues with your garage door. Regular maintenance, such as lubricating the moving parts and inspecting for loose or damaged hardware, can help prevent the door from becoming crooked in the first place. Additionally, addressing any minor alignment issues promptly can prevent them from turning into major problems down the line.
By properly maintaining your garage door and addressing crookedness as soon as it arises, you can prolong the lifespan of the door, ensure smooth operation, and enhance the curb appeal of your home.
We hope this guide has provided you with the knowledge and guidance needed to tackle the task of fixing a crooked garage door. Remember to approach the job with care and always prioritize your safety. With the right tools, materials, and a systematic approach, you can enjoy the benefits of a straight and reliable garage door.
Frequently Asked Questions about How To Fix Crooked Garage Door
Was this page helpful?
At Storables.com, we guarantee accurate and reliable information. Our content, validated by Expert Board Contributors, is crafted following stringent Editorial Policies. We're committed to providing you with well-researched, expert-backed insights for all your informational needs.


0 thoughts on “How To Fix Crooked Garage Door”