Articles
How To Fix A Sagging Garage Door
Modified: February 23, 2024
Learn how to fix a sagging garage door with these helpful articles. Find step-by-step guides and expert tips to restore your door's functionality.
(Many of the links in this article redirect to a specific reviewed product. Your purchase of these products through affiliate links helps to generate commission for Storables.com, at no extra cost. Learn more)
Introduction
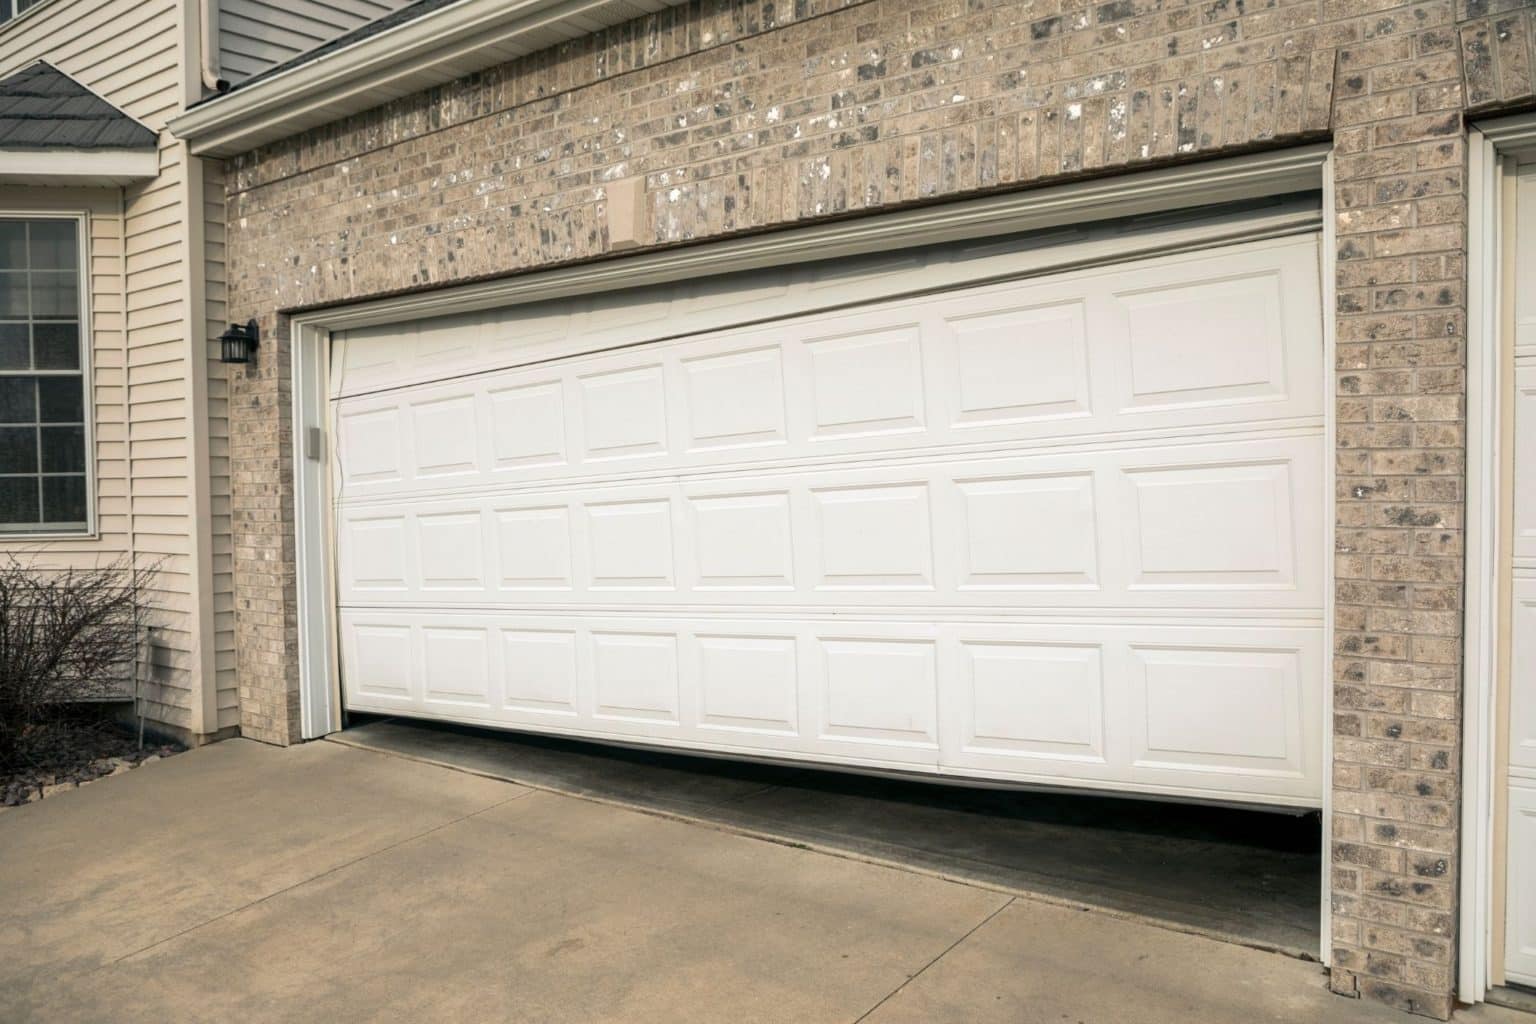
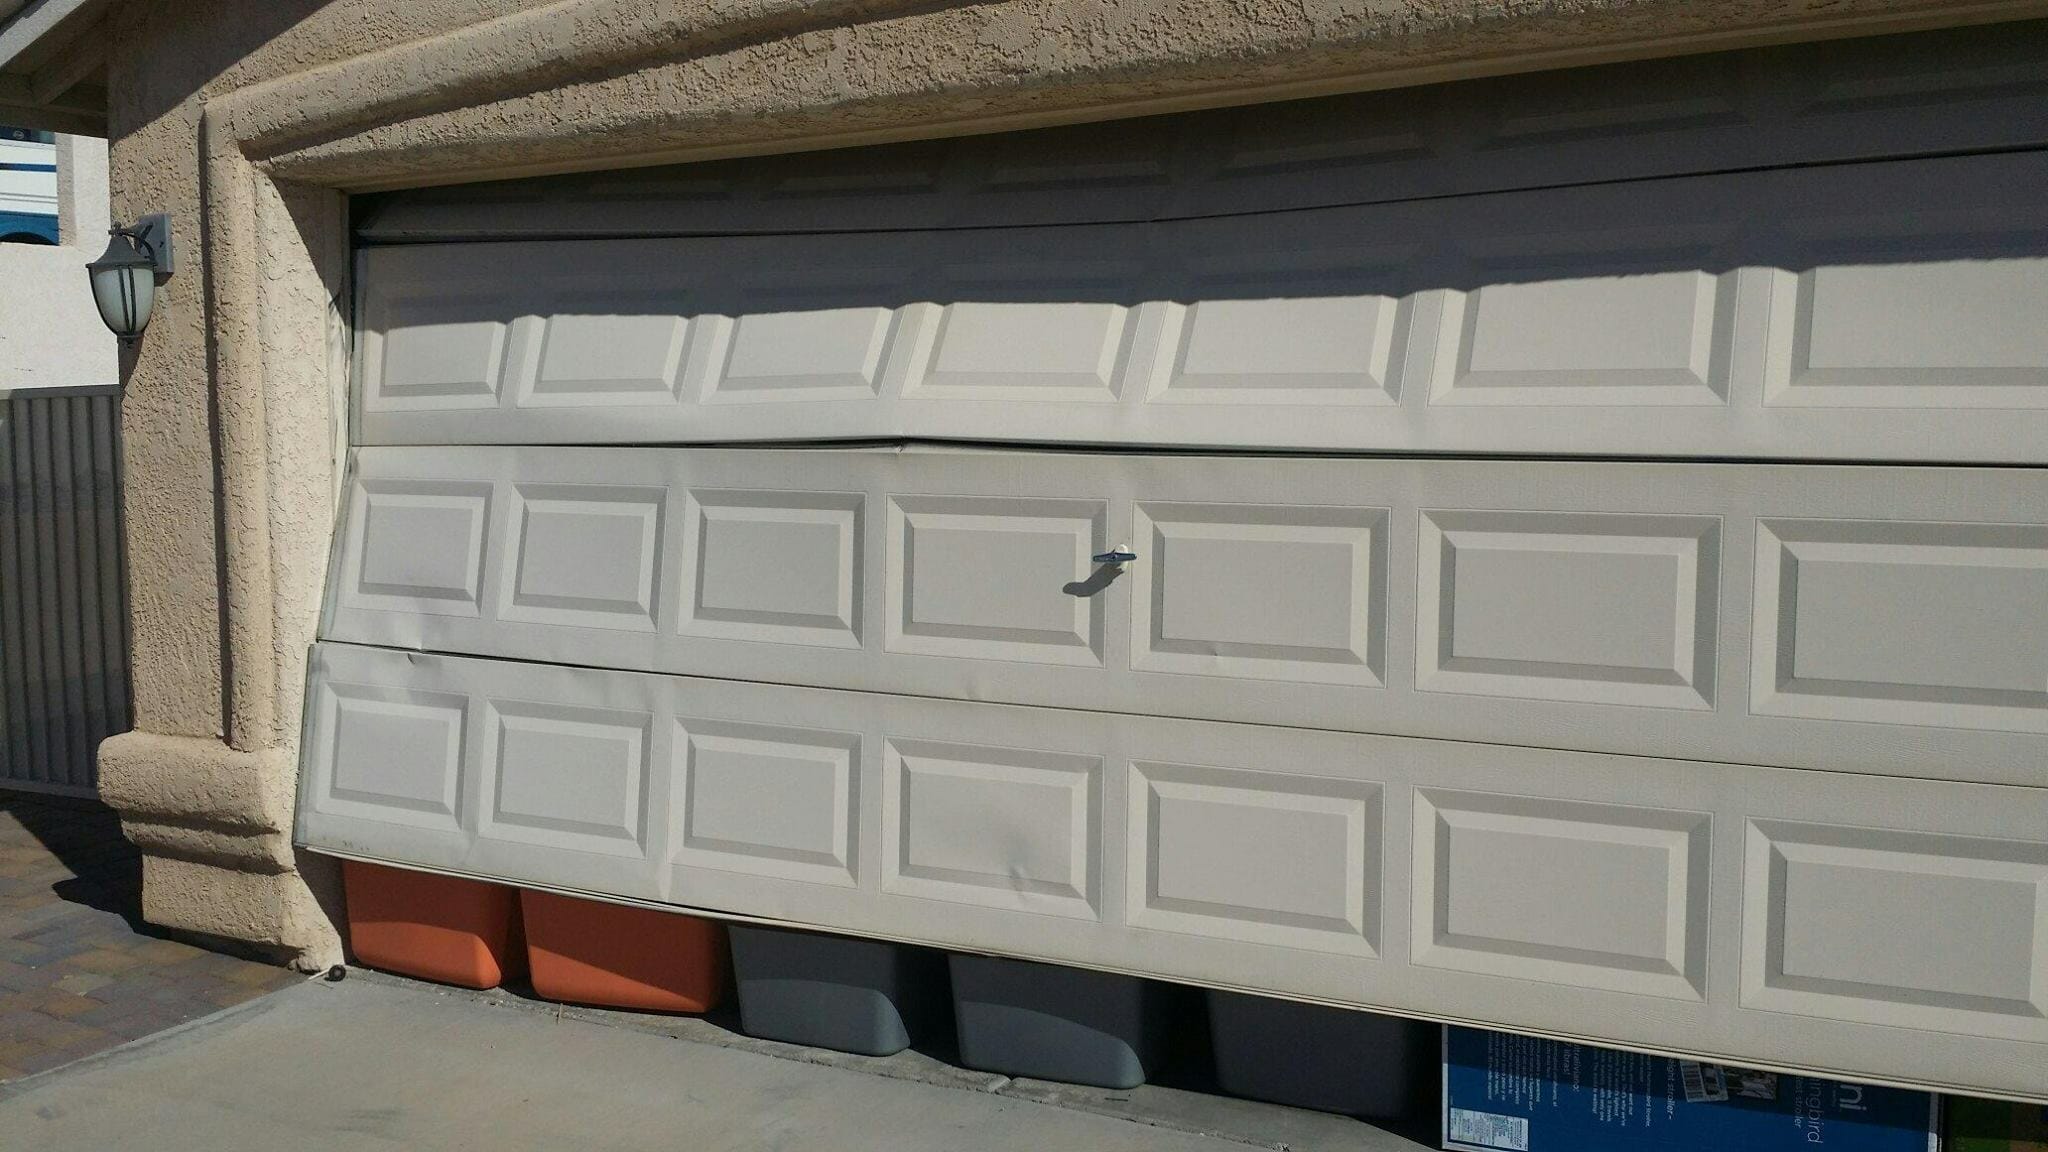
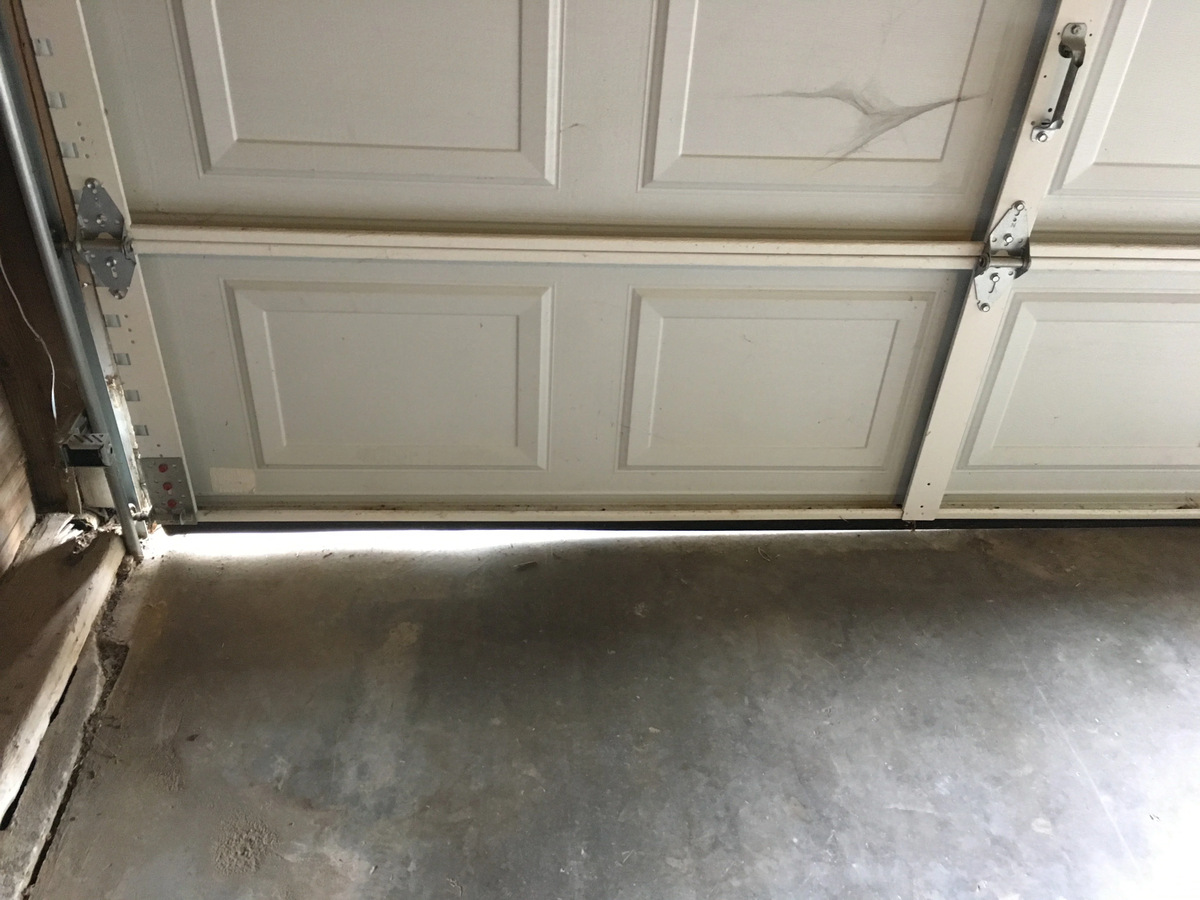
Having a sagging garage door can be a frustrating issue for homeowners. Not only does it affect the functionality of the door, but it can also compromise the security and safety of your garage. When a garage door starts to sag, it may become difficult to open or close, and it can even pose a risk of damage to your vehicle or belongings.
There are several common causes of a sagging garage door. Over time, the weight of the door, along with regular use and the elements, can place strain on the hinges and rollers. Inadequate or worn-out hardware, such as loose hinges, screws, or bolts, can also contribute to the problem. Additionally, a misaligned or unbalanced garage door may result in uneven pressure being placed on certain parts, leading to sagging.
If you’re facing this issue, the good news is that fixing a sagging garage door is a manageable task that can be done without professional help. All you need is some basic tools and materials, along with a little bit of time and patience.
In this article, we will guide you through the step-by-step process of fixing a sagging garage door. From inspecting and identifying the problem to making the necessary adjustments and repairs, we will cover everything you need to know to get your garage door back in proper working condition.
Before we get started, it’s important to note that garage doors can be heavy and potentially dangerous to work with. Always prioritize your safety and take necessary precautions, such as wearing protective gear and seeking assistance when needed. If you’re unsure about any step or encounter a more complex issue, it’s best to consult a professional garage door specialist.
Key Takeaways:
- Fixing a sagging garage door involves inspecting, tightening, adjusting, and replacing components to restore functionality and prevent future issues. Prioritize safety and consider professional help for complex problems.
- Regular maintenance and timely repairs can prolong the lifespan of your garage door, ensuring optimal functionality and safety for your home and belongings. Address sagging promptly to prevent further damage and inconvenience.
Read more: How To Fix Garage Door
Common Causes of a Sagging Garage Door
Understanding the common causes of a sagging garage door can help you diagnose the problem more effectively and take the appropriate steps to fix it. Here are some of the main factors that can contribute to a garage door sagging:
- Worn-out or damaged rollers: Over time, the rollers that guide the garage door along the tracks can become worn or damaged. When this happens, the door may not roll smoothly, causing stress on certain parts and leading to sagging.
- Loose hinges and hardware: Properly functioning hinges and hardware are essential for a garage door to operate smoothly. If the hinges, screws, or bolts become loose, the door may start to sag due to the lack of support and stability.
- Torsion spring issues: The torsion spring is responsible for counterbalancing the weight of the garage door, making it easier to open and close. If the torsion spring is not properly adjusted or becomes worn, it can affect the door’s balance and result in sagging.
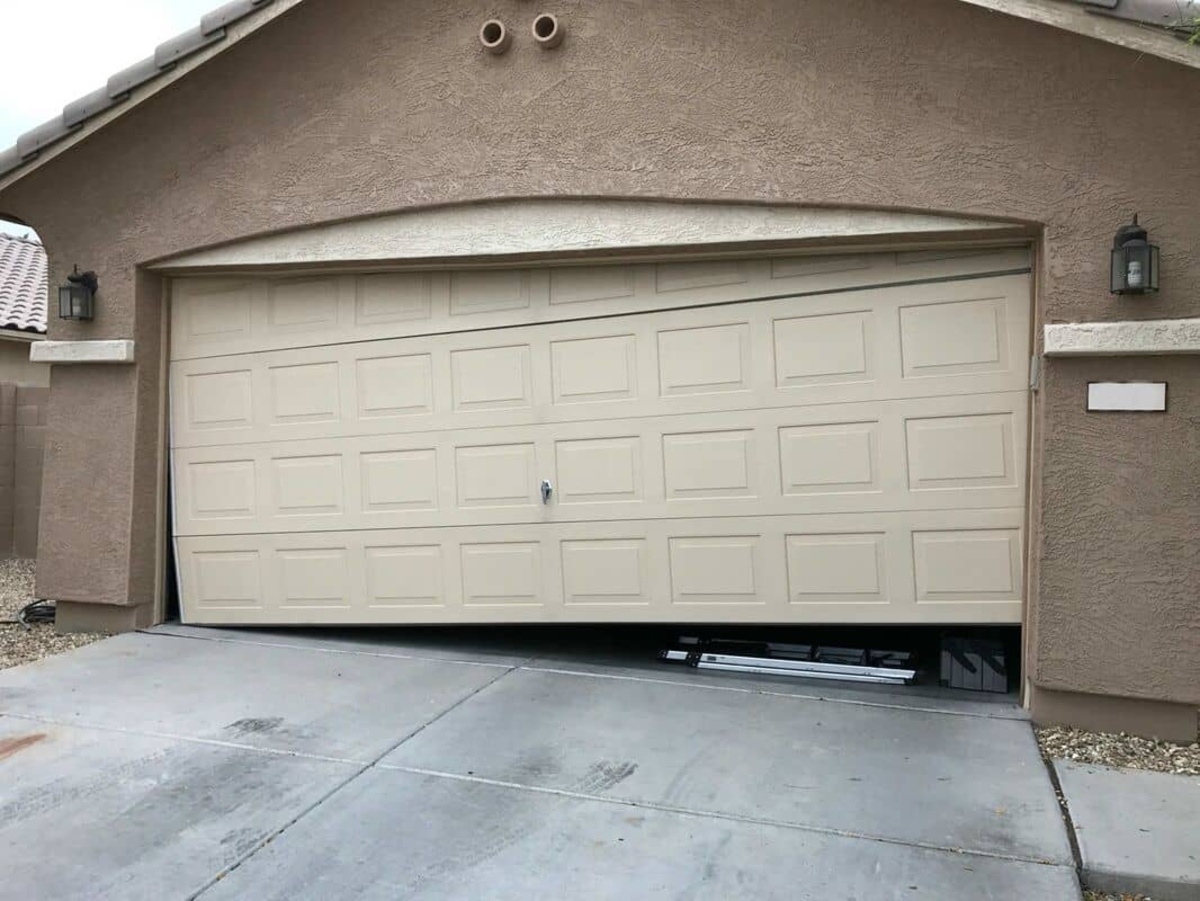
- Imbalanced door: An imbalanced garage door can put uneven pressure on different parts of the system, causing the door to sag. This imbalance can be caused by various factors, such as worn-out cables, misaligned tracks, or an improperly adjusted torsion spring.
- Lack of reinforcement: Some garage doors may lack proper reinforcement, especially in older or poorly constructed doors. Without adequate reinforcement, the door may start to sag over time, particularly in the middle or along the sections.
By identifying the underlying cause of your sagging garage door, you can address the specific issue and take the appropriate steps to fix it. In the next sections, we will guide you through the process of inspecting and identifying the problem, as well as the necessary repairs and adjustments to rectify the sagging issue.
Tools and Materials
Before you begin fixing a sagging garage door, it’s important to gather the necessary tools and materials. Here are the items you’ll need:
- Screwdriver: A screwdriver will be used to tighten loose screws and bolts on the hinges and other hardware.
- Adjustable wrench: An adjustable wrench is necessary for tightening nuts and bolts on the garage door.
- Pliers: Pliers are useful for grabbing and manipulating small parts such as rollers.
- Lubricant: A lubricant such as silicone spray or garage door lubricant will help to keep the moving parts of the garage door functioning smoothly.
- Ladder: Depending on the height of your garage door, you may need a ladder to access certain areas for inspection and repair.
- Replacement rollers: If your rollers are worn or damaged, you may need to replace them. Make sure to purchase rollers that are compatible with your specific garage door model.
- Reinforcement brackets: If your door lacks reinforcement, you may need to purchase reinforcement brackets to add additional support and prevent sagging.
- Safety gear: Ensure that you have safety goggles to protect your eyes and work gloves to safeguard your hands during the repair process.
Having these tools and materials readily available will make the process of fixing your sagging garage door more efficient and convenient. Once you have gathered everything you need, you can proceed to the next steps of inspecting and identifying the problem.
Step 1: Inspecting and Identifying the Problem
The first step in fixing a sagging garage door is to thoroughly inspect and identify the underlying problem. By taking the time to assess the condition of your garage door, you’ll be able to pinpoint the specific issues causing the sagging. Here’s how you can do it:
- Observe the door: Start by opening and closing the garage door multiple times, paying attention to any unusual sounds, jerky movements, or signs of misalignment. Take note of any areas where the door appears to sag or hangs unevenly.
- Check the hinges and hardware: Inspect the hinges, screws, and bolts that hold the garage door together. Look for any loose or damaged components that may be contributing to the sagging. Use a screwdriver or wrench to tighten any loose hardware that you find.
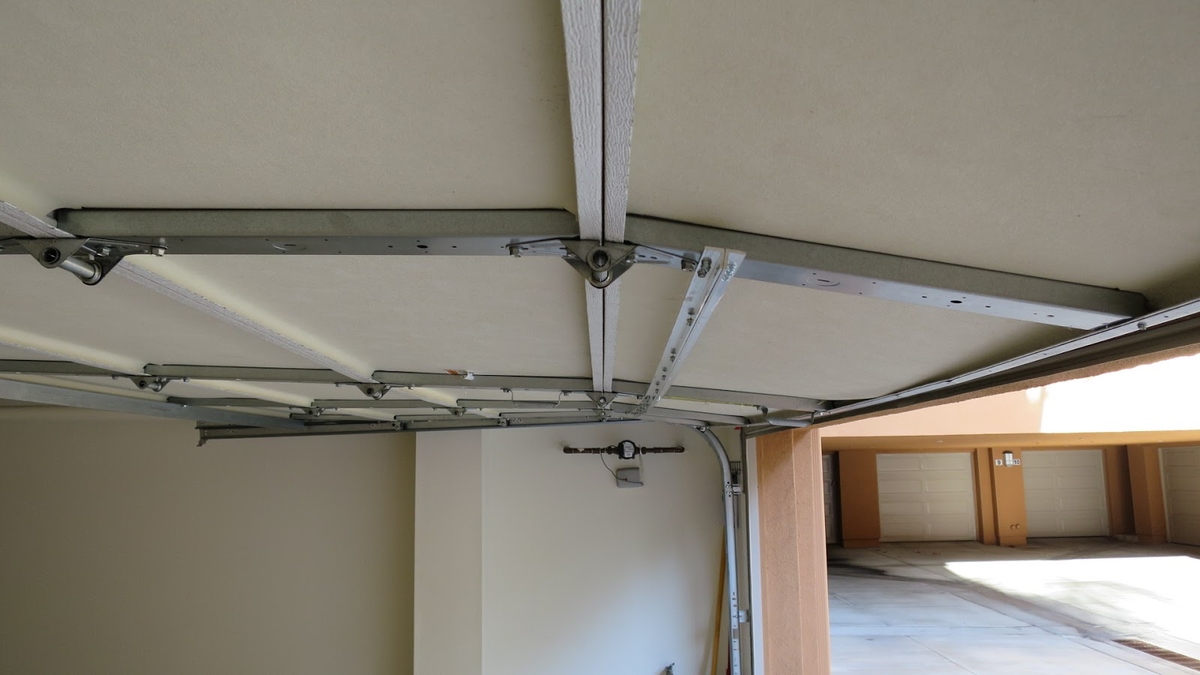
- Examine the rollers and tracks: Carefully inspect the rollers and tracks along which the garage door moves. Look for signs of wear, damage, or misalignment. If the rollers are worn or damaged, they may need to be replaced. Clean any debris or buildup that may be causing the door to roll unevenly.
- Check the torsion spring: If you suspect that the torsion spring is the cause of the sagging, it’s important to exercise caution as adjusting or replacing the spring can be dangerous. Look for signs of wear or damage on the spring and observe if the door balances properly when manually lifted.
- Inspect for reinforcement: If your garage door lacks proper reinforcement, examine the panels to see if additional support is needed. Look for signs of bending or warping that indicate a lack of reinforcement.
By thoroughly inspecting your garage door, you’ll be able to identify the specific areas that require attention. This will help you determine the appropriate steps to take in order to fix the sagging. In the next steps, we will guide you through the process of tightening hinges and hardware, adjusting the torsion spring, replacing worn or damaged rollers, adding reinforcement brackets, and balancing the garage door to resolve the sagging issue.
Step 2: Tightening Hinges and Hardware
One of the common causes of a sagging garage door is loose hinges and hardware. Over time, the constant movement and vibration of the door can cause screws and bolts to loosen, compromising the stability and alignment of the door. By tightening the hinges and hardware, you can restore the support and prevent further sagging. Here’s how you can do it:
- Inspect the hinges: Carefully examine each hinge on the garage door and track system. Look for any loose screws or bolts that may be causing the hinge to wiggle or move when the door is operated.
- Tighten the screws and bolts: Using a screwdriver or adjustable wrench, carefully tighten the screws and bolts on each hinge. Start from the top hinge and work your way down to the bottom, ensuring that each fastener is securely tightened.
- Check other hardware: In addition to the hinges, inspect other hardware such as brackets, tracks, and support beams. Tighten any loose screws or bolts that you come across, ensuring that all components are securely fastened.
- Test the door: After tightening the hinges and hardware, test the garage door by opening and closing it a few times. Pay attention to any improvement in its movement and alignment. If the sagging persists, proceed to the next steps for further adjustments.
Tightening the hinges and hardware is a simple yet effective step in addressing a sagging garage door. By ensuring that all components are properly secured, you can improve the stability and functionality of the door. However, if the sagging issue persists, it may be necessary to adjust the torsion spring or replace worn rollers to restore proper balance and alignment. We will explore these steps in the following sections.
Check the tension of the garage door springs and adjust if necessary to fix a sagging garage door. Springs can lose tension over time, causing the door to sag.
Read more: How To Fix Sagging Bookshelves
Step 3: Adjusting the Torsion Spring
If tightening the hinges and hardware did not fully resolve the sagging issue, the next step is to adjust the torsion spring. The torsion spring plays a crucial role in counterbalancing the weight of the garage door, ensuring smooth operation and proper alignment. Here’s how you can adjust the torsion spring:
- Caution: Adjusting the torsion spring can be dangerous and should only be done by experienced individuals. If you are not confident in your ability to work with the torsion spring, it is best to seek professional help.
- Identify the spring: Locate the torsion spring above the garage door. It is usually found parallel to the ceiling and placed horizontally across the torsion bar.
- Set up safety precautions: Before proceeding with any adjustments, make sure to wear safety goggles and gloves to protect yourself from any potential injury. Place a sturdy ladder underneath the torsion spring for support and stability.
- Determine the direction of adjustment: It’s important to note that adjusting the torsion spring involves winding or unwinding it to achieve the desired tension. Determine whether you need to increase or decrease tension based on the sagging and balance of the door.
- Use a winding bar: Insert the appropriate size winding bar into one of the holes on the winding cone of the torsion spring. Make sure the bar is securely in place.
- Adjust the tension: Slowly and carefully rotate the winding bar in the appropriate direction, either to increase or decrease tension. Each quarter turn of the bar will have an effect on the tension of the spring, so make small adjustments and observe the door’s balance.
- Test the door: After making an adjustment, test the garage door by opening and closing it multiple times. Pay attention to the level of sag and the overall balance of the door. Continue making small adjustments to the torsion spring until the desired balance is achieved.
- Recheck and finalize: Once you have achieved the desired balance and reduced the sag, double-check the tightness of all the hardware, including the torsion spring and its winding cone. Make sure everything is secure before moving on to the next step.
Adjusting the torsion spring requires careful attention and proper technique. If you are not experienced or comfortable working with the torsion spring, it is highly recommended to seek professional assistance. Mishandling the torsion spring can result in serious injury or property damage. However, if you successfully adjust the torsion spring and the sagging issue persists, continue to the next steps for further troubleshooting and repairs.
Step 4: Replacing Worn or Damaged Rollers
If your garage door continues to sag even after adjusting the hinges and torsion spring, the problem may lie with worn or damaged rollers. Rollers that are worn out or not functioning properly can cause the garage door to operate unevenly and result in sagging. Here’s how you can replace worn or damaged rollers:
- Determine the type of rollers: There are two main types of garage door rollers: nylon rollers and steel rollers. Identify the type of rollers installed on your garage door before purchasing replacement parts.
- Secure the garage door: Use a ladder to reach the area where the rollers are located. Secure the garage door in place using vice grips or clamps to prevent it from moving while you work.
- Remove the old rollers: To remove the old rollers, use pliers to bend and remove the retaining clips that hold them in place. Once the clips are removed, slide the rollers out of the track.
- Install the new rollers: Insert the new rollers into the track, making sure they are aligned properly. Use a lubricant such as silicone spray on the track to ensure smooth operation.
- Attach the retaining clips: Once the new rollers are in place, insert the retaining clips to secure them. Ensure that the clips are securely fastened to prevent the rollers from coming loose.
- Test the door: After replacing the worn or damaged rollers, test the garage door by opening and closing it multiple times. Pay attention to any improvement in its movement and alignment. The sagging should be significantly reduced, if not completely resolved.
- Replace all rollers if necessary: If you notice that some rollers are worn or damaged while others are still in good condition, it is recommended to replace all the rollers at the same time to ensure uniformity and optimal performance.
Replacing worn or damaged rollers is a straightforward process that can greatly improve the smooth operation of the garage door and reduce sagging. Make sure to choose high-quality replacement rollers that are compatible with your specific garage door model. Once you have replaced the rollers, proceed to the next step to add reinforcement brackets for added support.
Step 5: Adding Reinforcement Brackets
If your garage door is still sagging even after adjusting the hinges, torsion spring, and replacing the rollers, it may be necessary to add reinforcement brackets. Reinforcement brackets provide additional support to prevent the door from sagging and improve its overall stability. Here’s how you can add reinforcement brackets:
- Determine the location: Identify the areas on the garage door panels that need reinforcement. Typically, these are the sections that show the most significant signs of sagging.
- Measure and mark: Use a measuring tape to determine the proper placement of the reinforcement brackets. Mark the locations where the brackets will be attached. Ensure that they are evenly spaced and aligned.
- Attach the brackets: Following the manufacturer’s instructions, screw the reinforcement brackets into the marked locations on the garage door panels. Make sure the brackets are securely fastened to provide proper support.
- Test the door: After adding the reinforcement brackets, test the garage door by opening and closing it a few times. Pay attention to the level of sag and observe if the door operates more smoothly and evenly. The reinforcement brackets should help reduce the sagging and improve the stability of the door.
- Additional adjustments if needed: If the sagging persists or if you notice any other issues with the garage door’s functionality, double-check the tightness of all the hardware, including the hinges, rollers, and brackets. Make any necessary adjustments to ensure everything is securely in place.
Adding reinforcement brackets can provide the necessary extra support to keep your garage door from sagging. It is a relatively simple step that can make a significant difference in the overall performance and longevity of the door. However, if the sagging problem persists, it may be necessary to seek professional help to diagnose and address any underlying structural issues.
In the next step, we will guide you through the process of balancing the garage door to further alleviate sagging and ensure optimal functionality.
Step 6: Balancing the Garage Door
After taking all the necessary steps to address the sagging of your garage door, it’s crucial to ensure that the door is properly balanced. A balanced garage door distributes weight evenly, minimizing strain on the components and reducing the likelihood of future sagging. Here’s how you can balance your garage door:
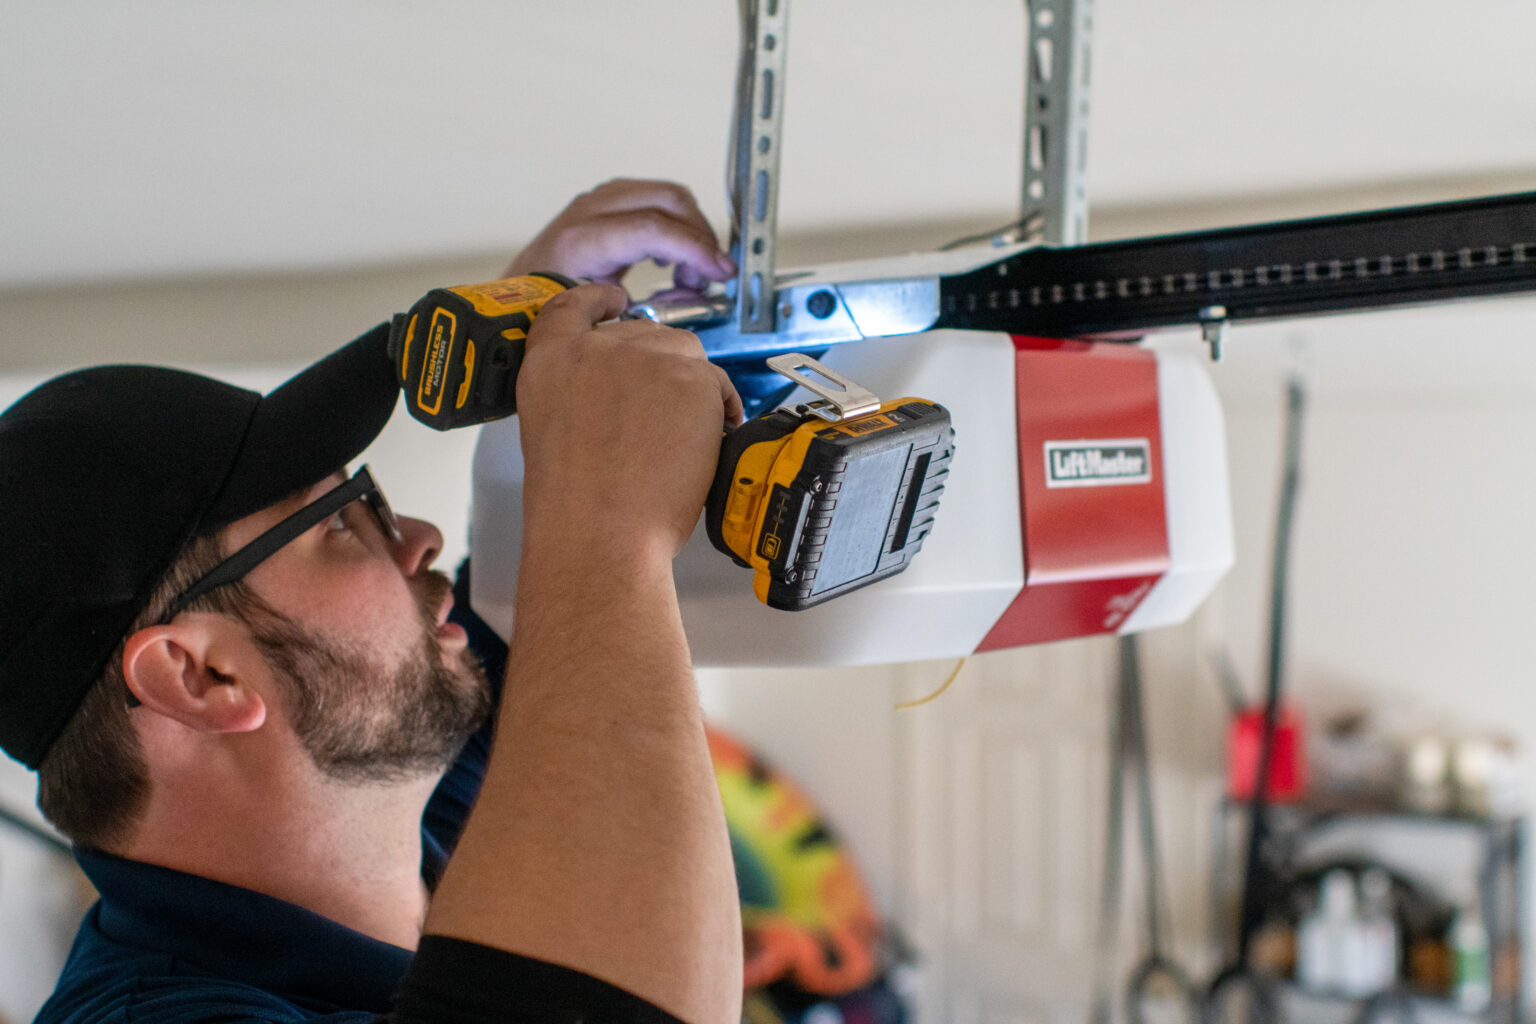
- Disconnect the opener: Start by disconnecting the garage door opener from the door. This will allow you to manually operate the door and test its balance.
- Lift the door: Lift the garage door manually to about halfway open and then release it. Observe how the door moves and if it remains in the position you stopped at. A balanced door will stay in place while an imbalanced door will either rise or fall on its own.
- Adjust the tension: If the door falls or rises on its own, you’ll need to adjust the torsion spring tension. Use caution as this step can be dangerous. Increase or decrease tension in small increments, following the manufacturer’s instructions for your specific garage door model.
- Test again: After making adjustments to the torsion spring tension, repeat the process of lifting the door manually and releasing it. Continue adjusting the tension until the door remains in the halfway open position without increasing or decreasing on its own.
- Reconnect the opener: Once the door is properly balanced, reconnect the garage door opener to the door. Test the door’s operation using the opener to ensure that it functions smoothly and without any signs of sagging.
Properly balancing your garage door is essential for its long-term functionality and to prevent sagging. If you find it difficult to balance the door or are unsure about any step in the process, it’s best to consult a professional garage door technician for assistance.
By following these six steps – inspecting and identifying the problem, tightening hinges and hardware, adjusting the torsion spring, replacing worn or damaged rollers, adding reinforcement brackets, and balancing the garage door – you can effectively fix a sagging garage door. Remember, regular maintenance and periodic inspections will help prolong the lifespan of your garage door and prevent future sagging issues.
However, if you encounter any complex issues or are uncertain about tackling the repairs yourself, it’s always recommended to reach out to a professional garage door specialist who can safely and effectively resolve the problem.
Read more: How To Fix A Bent Garage Door
Conclusion
A sagging garage door can be a frustrating problem, but with the right knowledge and tools, it can be fixed. By following the steps outlined in this guide, you can effectively address the common causes of a sagging garage door and restore its functionality and stability.
From inspecting and identifying the problem to tightening hinges and hardware, adjusting the torsion spring, replacing worn or damaged rollers, adding reinforcement brackets, and balancing the door, each step plays a crucial role in resolving the issue of sagging. It’s important to take your time during the process and ensure that each adjustment is done carefully and accurately.
While it’s possible to fix a sagging garage door on your own, it’s essential to prioritize your safety. Use caution when working with heavy components and potentially dangerous tools. If at any point you feel uncomfortable or unsure about a particular step, don’t hesitate to seek professional assistance.
Remember, regular maintenance and preventive care are key to keeping your garage door in optimal condition. Periodically inspect your garage door for signs of wear or damage, and address any minor issues promptly to prevent them from escalating into more significant problems.
By maintaining your garage door and addressing sagging in a timely manner, you can prolong its lifespan, improve its functionality, and ensure the safety and security of your home and belongings.
Frequently Asked Questions about How To Fix A Sagging Garage Door
Was this page helpful?
At Storables.com, we guarantee accurate and reliable information. Our content, validated by Expert Board Contributors, is crafted following stringent Editorial Policies. We're committed to providing you with well-researched, expert-backed insights for all your informational needs.


0 thoughts on “How To Fix A Sagging Garage Door”