Articles
How To Fix Ice Maker Kenmore
Modified: August 25, 2024
Learn how to fix your Kenmore ice maker with these informative articles. Get step-by-step instructions and troubleshooting tips to save money and avoid a service call.
(Many of the links in this article redirect to a specific reviewed product. Your purchase of these products through affiliate links helps to generate commission for Storables.com, at no extra cost. Learn more)
Introduction
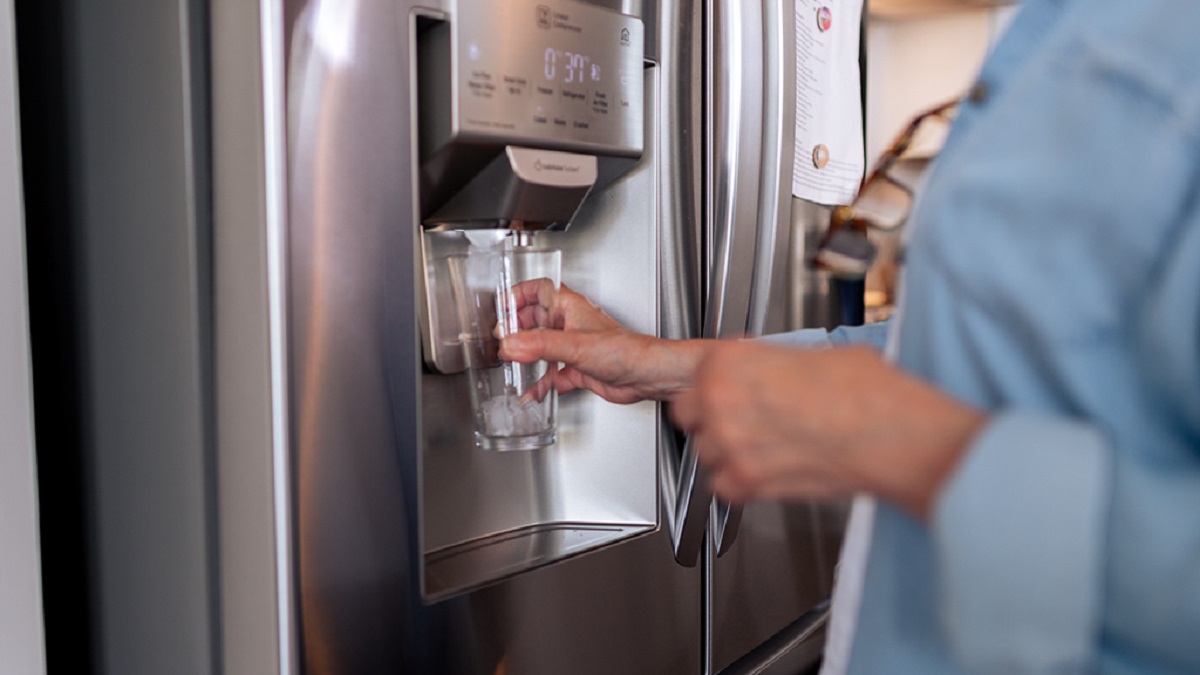
Welcome to this comprehensive guide on how to fix an ice maker in a Kenmore refrigerator. The ice maker is an essential component of any refrigerator, providing us with a steady supply of ice cubes for our beverages and cooling needs. However, like any other appliance, ice makers can encounter problems and stop working efficiently over time.
Fortunately, many common issues with Kenmore ice makers can be resolved with some basic troubleshooting and maintenance. In this article, we will walk you through the process of troubleshooting and fixing your Kenmore ice maker, step by step, to get it back up and running smoothly.
Before we delve into the troubleshooting steps, it’s important to understand some of the common problems that can occur with Kenmore ice makers. By familiarizing yourself with these issues, you can better diagnose and fix the specific problem you may be experiencing.
Let’s get started by exploring some of the common problems with Kenmore ice makers.
Key Takeaways:
- Troubleshoot and maintain your Kenmore ice maker by checking the water supply, testing the optics, and cleaning the freezer to ensure optimal performance and hygienic ice production.
- Address common issues with Kenmore ice makers, such as no ice production, misshapen ice cubes, and bad odors, by following step-by-step troubleshooting and maintenance procedures.
Read more: How To Remove Kenmore Ice Maker
Common Problems with Kenmore Ice Makers
Kenmore ice makers, like any other appliance, can face a range of issues that can affect their performance. Here are some of the most common problems you might encounter:
- No ice production: One of the most frustrating problems is when your ice maker stops producing ice altogether. This can be caused by various factors such as a malfunctioning water supply, a faulty water inlet valve, or a problem with the ice maker module.
- Ice cubes are too small or misshapen: If your ice cubes come out small or misshapen, it could indicate a problem with the water fill adjustment or a low water pressure issue. This can result in the ice cubes being partially melted or not fully formed.
- Ice smells or tastes bad: If your ice cubes have an unpleasant odor or taste, it could be due to impurities in the water supply or a dirty ice maker. Regular cleaning is essential to prevent build-up of bacteria or mold that can affect the quality of the ice.
- Ice maker leaks water: Leaking water from the ice maker can be caused by a faulty water inlet valve, a blocked water line, or an issue with the ice maker’s internal components. It’s important to address this problem promptly to prevent any damage to your refrigerator.
- Ice maker is noisy: Unusual noises such as humming, buzzing, or clicking sounds coming from the ice maker can indicate problems with the motor, fan, or other mechanical components. These issues should be addressed to prevent further damage and ensure efficient operation.
Now that we have identified some of the common problems with Kenmore ice makers, let’s move on to the next section to prepare the ice maker for troubleshooting.
Preparing the Ice Maker for Troubleshooting
Before diving into the troubleshooting process, it’s important to ensure that your Kenmore ice maker is properly prepared. Follow these steps to get started:
- Turn off the ice maker: Locate the power switch or control panel on your Kenmore refrigerator and switch off the ice maker. This will prevent any potential accidents or damage during the troubleshooting process.
- Empty the ice bin: Remove any ice cubes or ice build-up from the ice bin. This will make it easier to access the ice maker and perform the necessary inspections and tests.
- Disconnect the water supply: Locate the water supply line connected to the ice maker. Depending on the model of your Kenmore refrigerator, you may need to turn off the water supply valve or disconnect the water line to prevent any water leakage during the troubleshooting process.
- Gather the necessary tools: Make sure you have the appropriate tools on hand for troubleshooting, such as a multimeter for testing electrical connections, a screwdriver for removing panels, and cleaning supplies for maintenance tasks.
- Review the user manual: Familiarize yourself with the user manual specific to your Kenmore refrigerator model. The manual will provide you with detailed instructions and diagrams that will assist you in troubleshooting and fixing the ice maker.
With these steps completed, you are now ready to begin the troubleshooting process. In the next section, we will cover the basic troubleshooting steps to identify and resolve the problem with your Kenmore ice maker.
Basic Troubleshooting Steps
When troubleshooting your Kenmore ice maker, it’s important to start with the basic steps to identify the underlying issue. Follow these troubleshooting steps to get started:
- Check for power: Ensure that your Kenmore refrigerator is receiving power. Check if the power cord is properly plugged in and the circuit breaker is not tripped. If there is no power, you may need to troubleshoot the electrical connections or call a professional technician.
- Inspect for visible damage: Carefully examine the ice maker for any visible damage, such as broken or loose parts, leaks, or signs of wear and tear. If you notice any damage, it may require repair or replacement of the affected components.
- Test the ice maker switch: Locate the ice maker switch or control on your Kenmore refrigerator and ensure it is turned on. Sometimes, the ice maker switch can be accidentally turned off, resulting in no ice production.
- Check the temperature settings: Verify that the freezer temperature is set to the optimal range for ice production. The ideal temperature for ice making is around 0°F (-18°C). Adjust the temperature settings if necessary.
- Cycle the ice maker: Manually initiate an ice-making cycle by pressing the ice maker reset button or using the cycle control on your Kenmore refrigerator. Observe if the ice maker starts to fill with water and if the ice cubes are properly formed and ejected. This test can help determine if the issue lies with the ice maker module.
By following these basic troubleshooting steps, you can narrow down the potential problems with your Kenmore ice maker. If the issue persists or you need to delve deeper into the troubleshooting process, continue reading the next sections for more specific steps and tests.
Checking the Water Supply
A common cause of problems with Kenmore ice makers is an issue with the water supply. To ensure that the water supply is not the cause of the problem, follow these steps to check it:
- Inspect the water line: Examine the water line connected to the ice maker for any kinks, bends, or damage. Ensure that the water line is properly connected and not obstructed in any way.
- Check the water filter: If your Kenmore refrigerator is equipped with a water filter, it may require replacement or cleaning. Refer to the user manual for instructions on how to change or clean the water filter. A clogged or dirty filter can impede the water flow to the ice maker.
- Verify water pressure: Ensure that your Kenmore refrigerator is receiving adequate water pressure. Insufficient water pressure can affect the ice maker’s performance. Test the water pressure by using a water pressure gauge or contacting a professional plumber.
- Test the water inlet valve: The water inlet valve controls the flow of water into the ice maker. Use a multimeter to test the continuity of the valve. If the valve is faulty or not functioning properly, it may need to be replaced.
- Inspect the water supply valve: If your Kenmore refrigerator has a water supply valve, check if it is fully open. A partially closed valve can result in low water flow or no water reaching the ice maker. Make sure the valve is open and functioning correctly.
By checking the water supply and addressing any issues found, you can ensure that your Kenmore ice maker has a consistent and uninterrupted water flow. If the problem persists after checking the water supply, continue troubleshooting following the next sections.
Read more: How Do I Reset My Kenmore Ice Maker
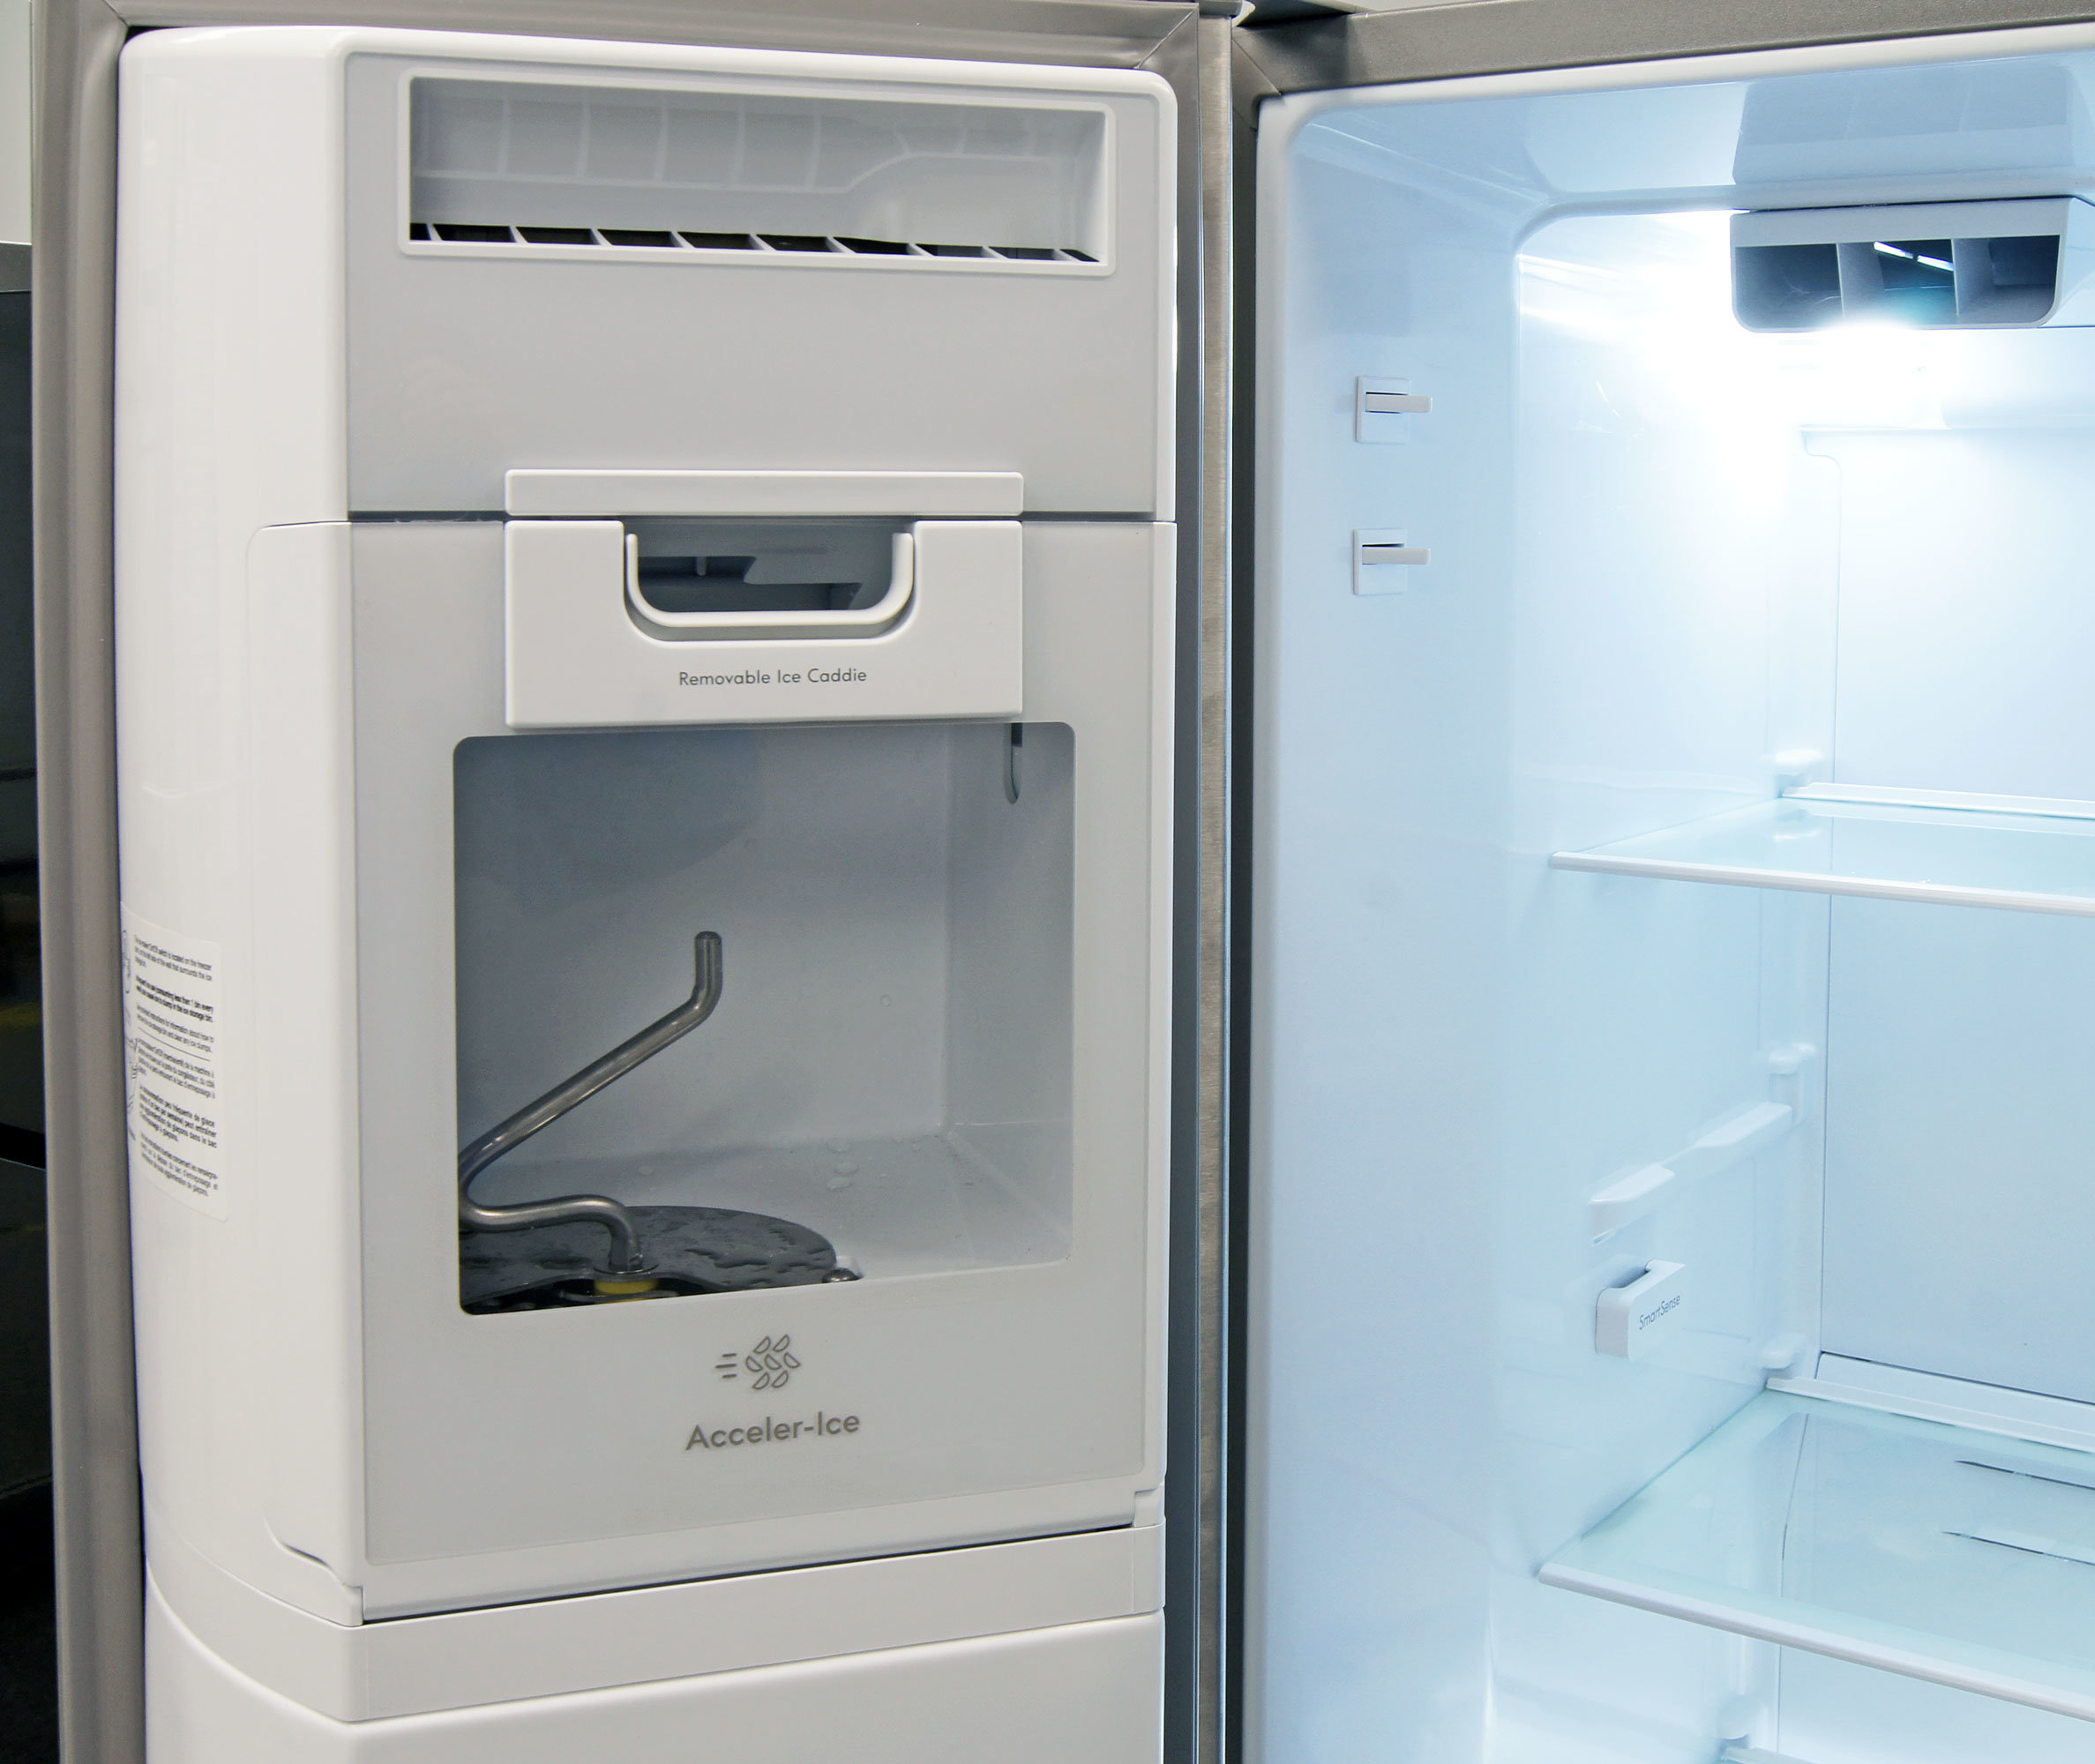
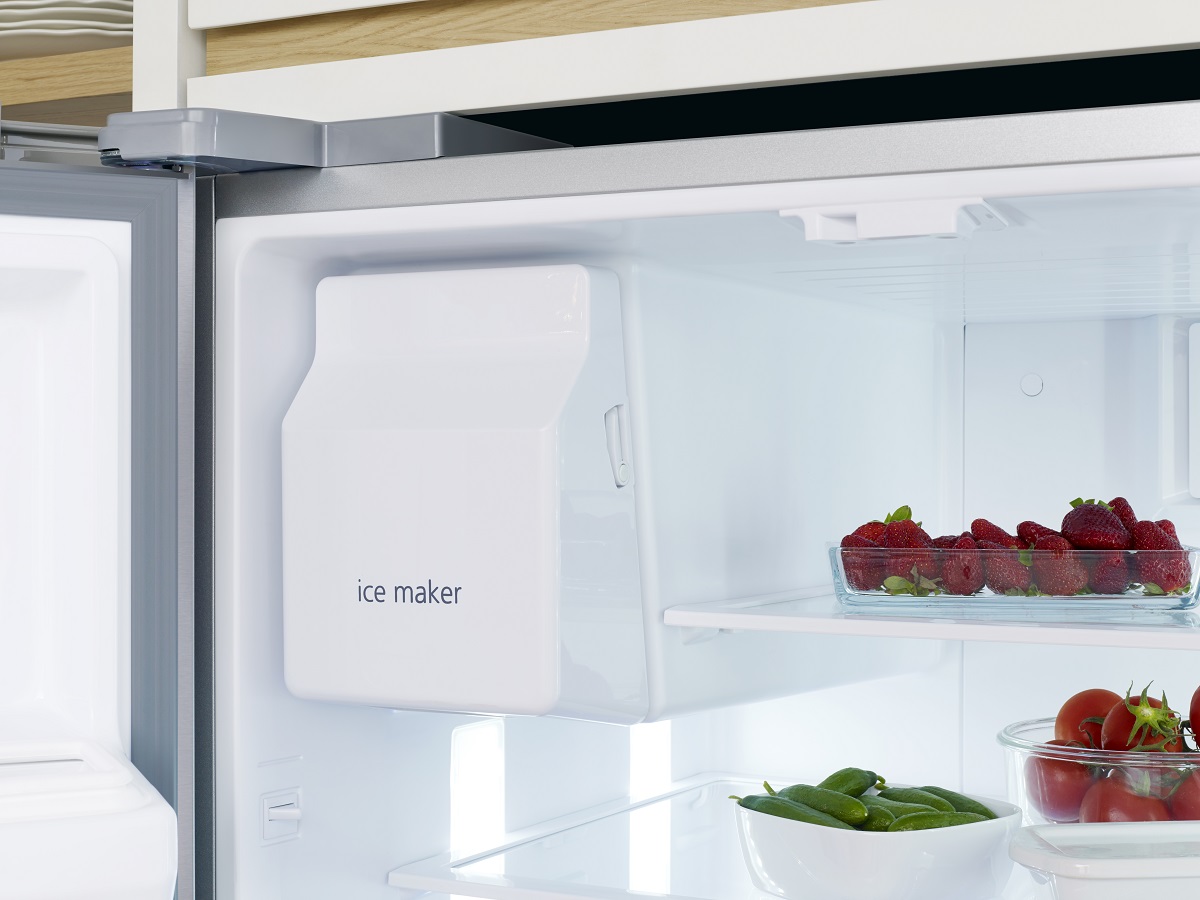
Inspecting the Water Inlet Valve
The water inlet valve is a crucial component of your Kenmore ice maker that controls the flow of water into the ice maker. If there are issues with the water inlet valve, it can disrupt the ice-making process. Here are the steps to inspect the water inlet valve:
- Locate the water inlet valve: Depending on the model of your Kenmore refrigerator, the water inlet valve is typically located at the back of the refrigerator, behind an access panel. Refer to the user manual or online resources to locate the exact position of the valve in your specific model.
- Turn off the water supply: Before inspecting the water inlet valve, make sure to turn off the water supply to prevent any water leakage. You can shut off the water supply valve or disconnect the water line if necessary.
- Visually inspect the valve: Carefully examine the water inlet valve for any signs of damage, such as cracks, leaks, or loose connections. If you notice any damage, it may require replacing the valve to ensure proper water flow to the ice maker.
- Clean the valve: Over time, mineral deposits or sediments can accumulate within the water inlet valve, causing blockages and affecting the water flow. Use a soft brush or cloth to clean the valve and remove any debris that may be obstructing the water flow.
- Test the valve with a multimeter: Use a multimeter to test the continuity of the water inlet valve. Follow the instructions provided in the user manual or seek guidance from a professional technician to perform the test accurately. If the valve fails the continuity test, it may need to be replaced.
By inspecting and, if necessary, cleaning or replacing the water inlet valve, you can ensure that the water flow to your Kenmore ice maker is uninterrupted. If the problem with your ice maker persists, continue reading the following sections for more troubleshooting steps.
Check the water supply line for any kinks or blockages, and ensure the water filter is not clogged. Also, make sure the ice maker is receiving power and the freezer is set to the correct temperature.
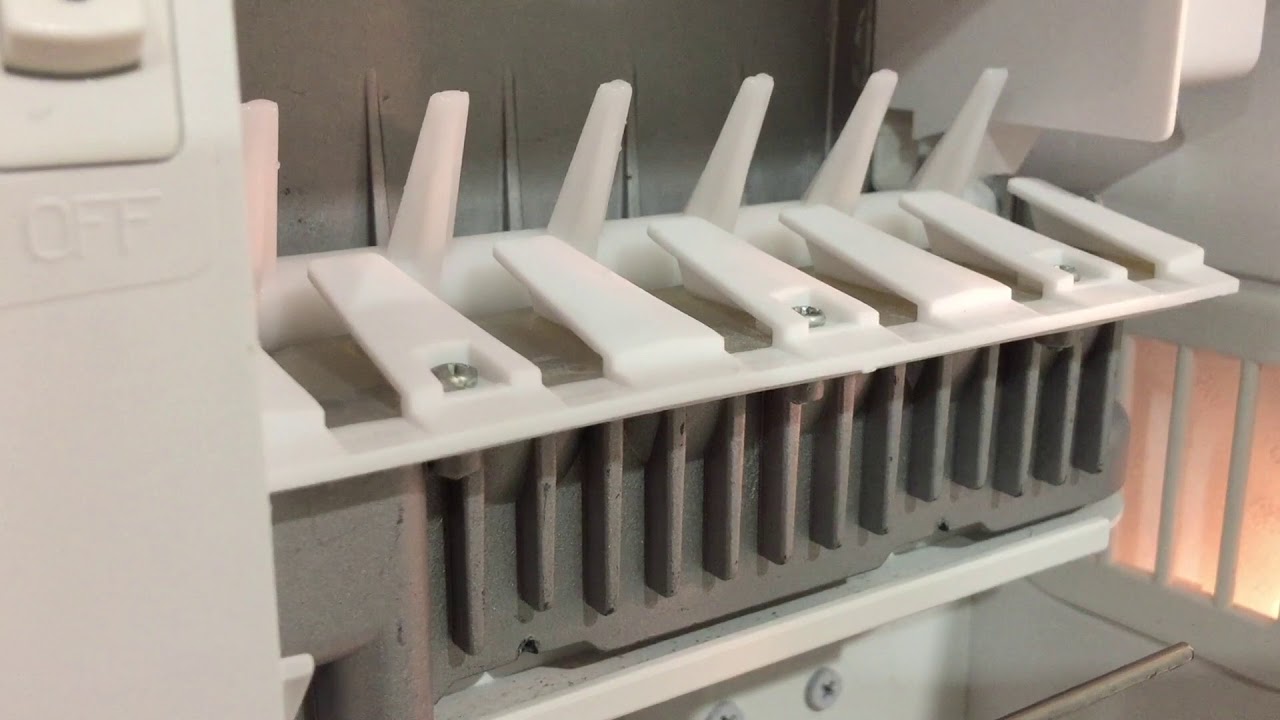
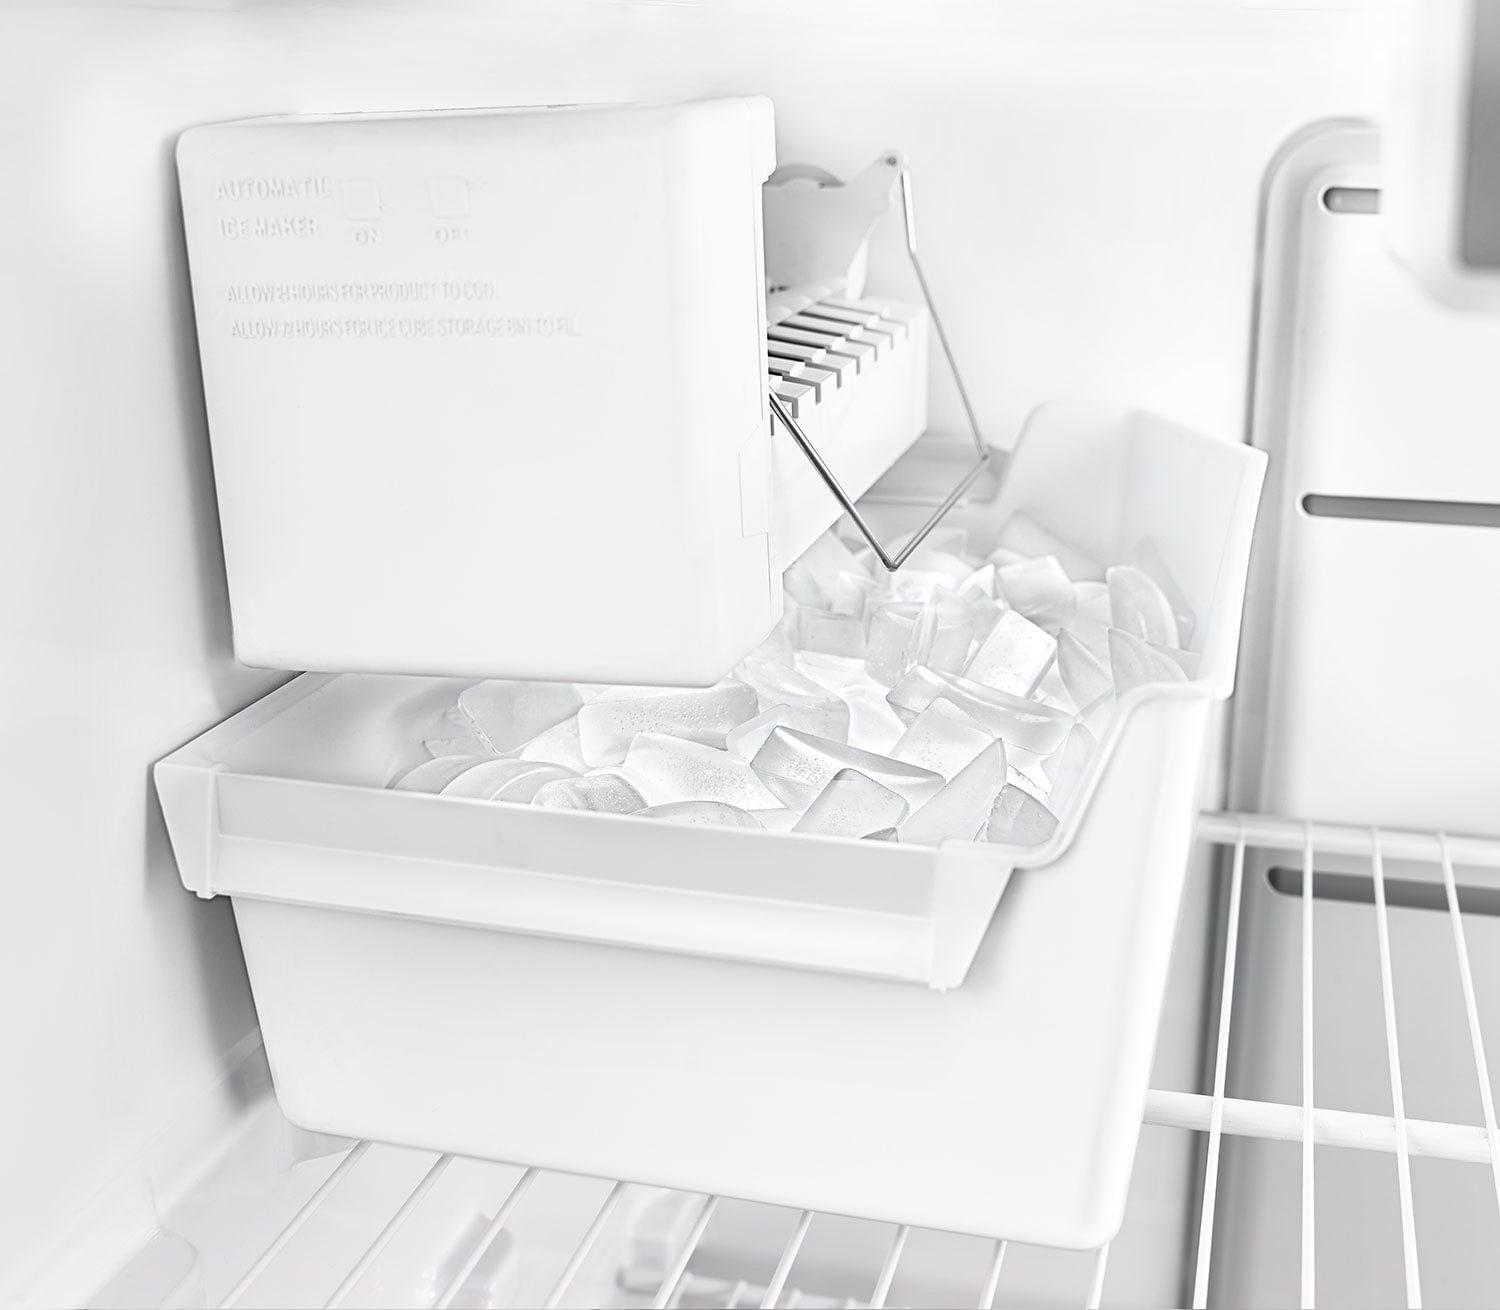
Testing the Ice Maker’s Optics
The optics system in your Kenmore ice maker helps to detect the level of ice in the bin and signal the ice maker to stop producing more ice when it’s full. If the optics system is not functioning properly, it can lead to issues with ice production. Here’s how to test the ice maker’s optics:
- Locate the optics system: Depending on the model of your Kenmore refrigerator, the optics system is usually located on the top right-hand side of the freezer. It consists of an emitter and a receiver unit.
- Access the optics system: Remove any storage bins or shelves that may obstruct access to the optics system. Carefully remove the cover or panel to expose the emitter and receiver units.
- Verify proper alignment: Ensure that the emitter and receiver units are properly aligned. They should be directly facing each other without any obstructions in between. Adjust the position if necessary to achieve a clear, uninterrupted line of sight.
- Test the emitter and receiver: Use a multimeter to test the continuity of the emitter and receiver units. Follow the instructions provided in the user manual or seek guidance from a professional technician to perform the test accurately. If either the emitter or receiver fails the continuity test, it may need to be replaced.
- Clean the optics system: Dust, dirt, or debris can accumulate on the optics system, obstructing the signal between the emitter and receiver units. Gently clean the optics system using a soft cloth to remove any build-up and ensure proper functioning.
- Reset the optics system: After cleaning or making any necessary adjustments, reset the optics system by following the instructions in the user manual. This will clear any error codes and allow the ice maker to resume normal operation.
By testing and ensuring the proper functioning of the optics system, you can address any issues related to ice level detection and improve the overall performance of your Kenmore ice maker. If the problem persists, continue troubleshooting with the next section.
Resetting the Ice Maker
If your Kenmore ice maker is experiencing issues, resetting it can often help resolve minor glitches and restore its functionality. Here’s how you can reset the ice maker:
- Locate the reset button: Find the reset button on your Kenmore ice maker. The location of the button may vary depending on the model, but it is typically situated near the ice maker unit or on the control panel.
- Press and hold the reset button: Press and hold the reset button for approximately 10 seconds. You may need to use a small pointed object to access the button if it is recessed or not easily pressed with your finger.
- Wait for the ice maker to reset: After holding the reset button, wait for a few minutes to allow the ice maker to reset completely. You may hear a series of clicks or other sounds as the ice maker goes through the reset process.
- Observe the ice maker’s operation: Once the reset process is complete, observe the ice maker to see if it starts producing ice or if the issue you were experiencing has been resolved. Give it some time to see if it functions as expected.
- Monitor ice production: Check the ice bin periodically to ensure that ice is being produced and accumulated. If you notice a consistent and adequate ice production, then the reset process was successful.
Resetting the ice maker is often a simple yet effective troubleshooting step that can help resolve common issues. However, if the problem persists after resetting the ice maker, there may be underlying problems that require further inspection and troubleshooting.
Continue reading the next section to learn about cleaning the ice maker and freezer, as this can also contribute to the overall performance of your Kenmore ice maker.
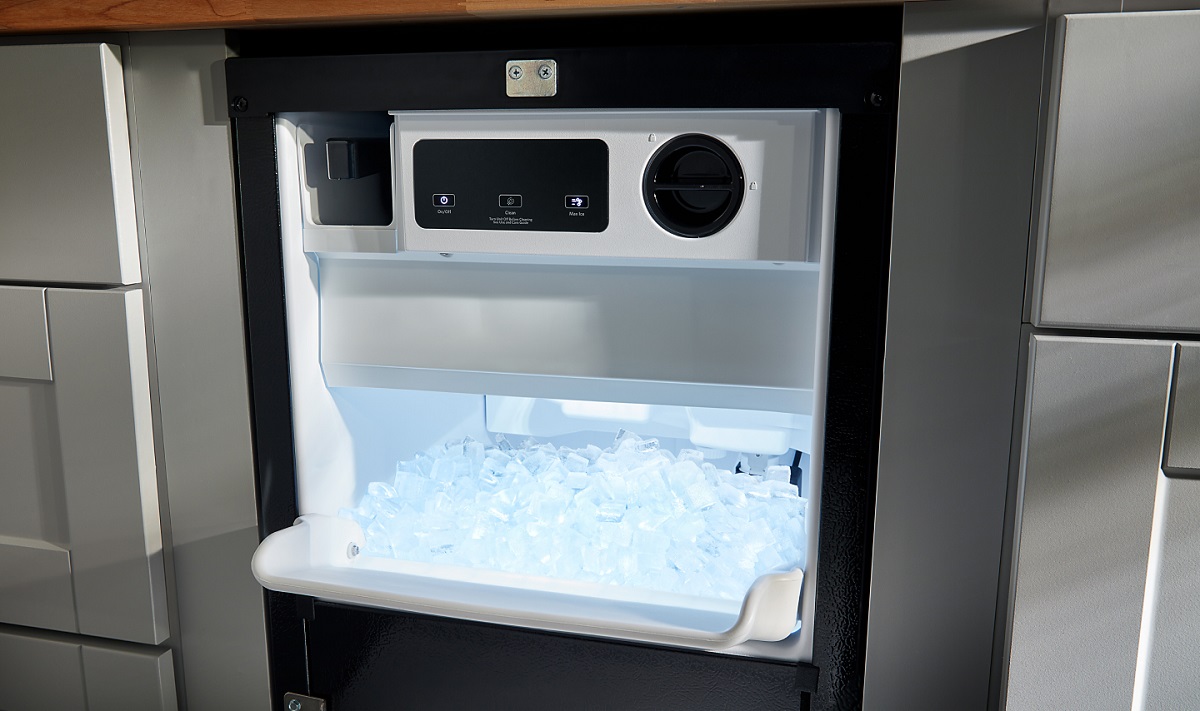
Cleaning the Ice Maker and Freezer
Regular cleaning of your Kenmore ice maker and freezer is essential to maintain its performance and ensure hygienic ice production. Over time, dust, debris, and food particles can accumulate, leading to potential issues. Here’s a step-by-step guide on how to clean your ice maker and freezer:
- Disconnect the power: Before starting the cleaning process, unplug your Kenmore refrigerator or turn off the power to ensure safety.
- Empty and remove the ice bin: Remove the ice bin from the freezer and empty any ice cubes. Set the ice bin aside for cleaning separately.
- Wipe down the ice bin: Using a mild detergent and warm water, clean the ice bin thoroughly. Rinse it with clean water and dry it before placing it back into the freezer.
- Remove food items: Take out all food items from the freezer and store them in a cool place while you clean the inside of the freezer.
- Clean the interior: Wipe down the interior of the freezer with a mixture of warm water and mild detergent, paying attention to removing any spills, stains, or debris. Rinse with clean water and dry the interior thoroughly.
- Clean the ice maker components: Use a soft cloth or sponge to wipe down the ice maker’s exterior, as well as any visible components such as the ice maker module, ice chute, and water inlet. Remove any residue or build-up that may be present.
- Check and clean the seal: Inspect the door seal or gasket of the freezer for any signs of dirt or residue. Clean it using mild soap and water, ensuring a proper seal when the door is closed.
- Allow for proper drying: Allow the cleaned areas to air dry completely before placing the ice bin back into the freezer and returning the food items.
- Plug the refrigerator back in: Once everything is clean and dry, plug your Kenmore refrigerator back in and turn on the power.
Regular cleaning of the ice maker and freezer not only keeps your ice maker functioning optimally but also helps maintain the quality and taste of the ice it produces. If you continue to experience issues with your ice maker after cleaning, further troubleshooting or professional assistance may be required.
In the following section, we will explore the steps to replace the ice maker module if necessary. However, keep in mind that replacing components should only be done if you have ample knowledge and experience with appliance repairs, or it’s best to seek professional help.
Read also: 9 Amazing Kenmore Elite Ice Maker for 2025
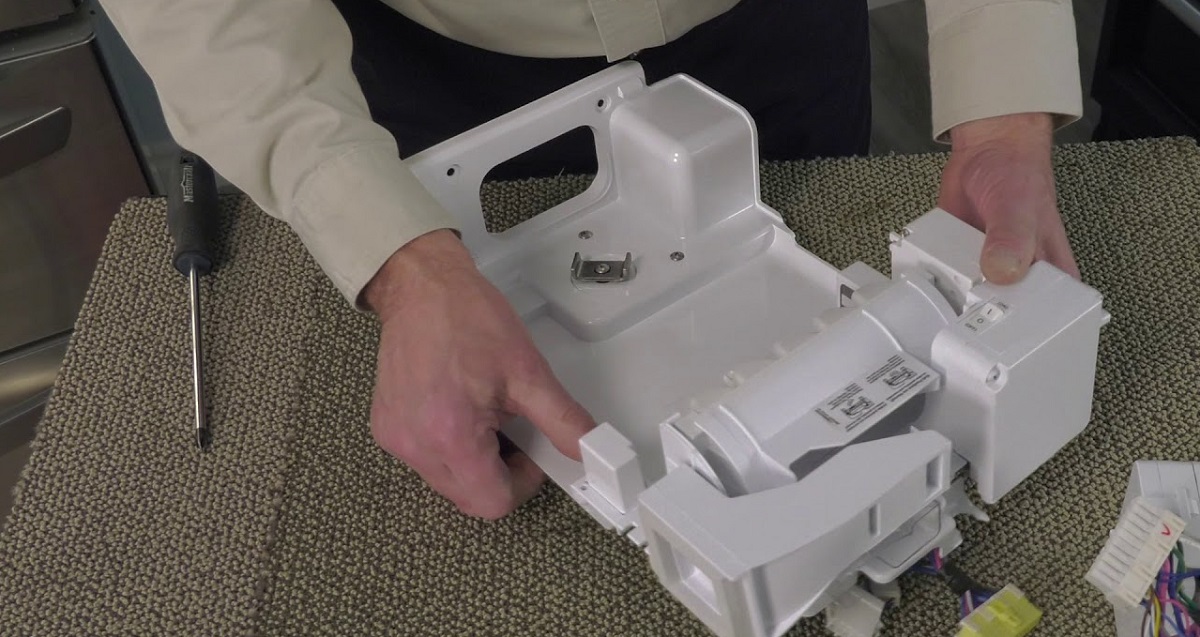
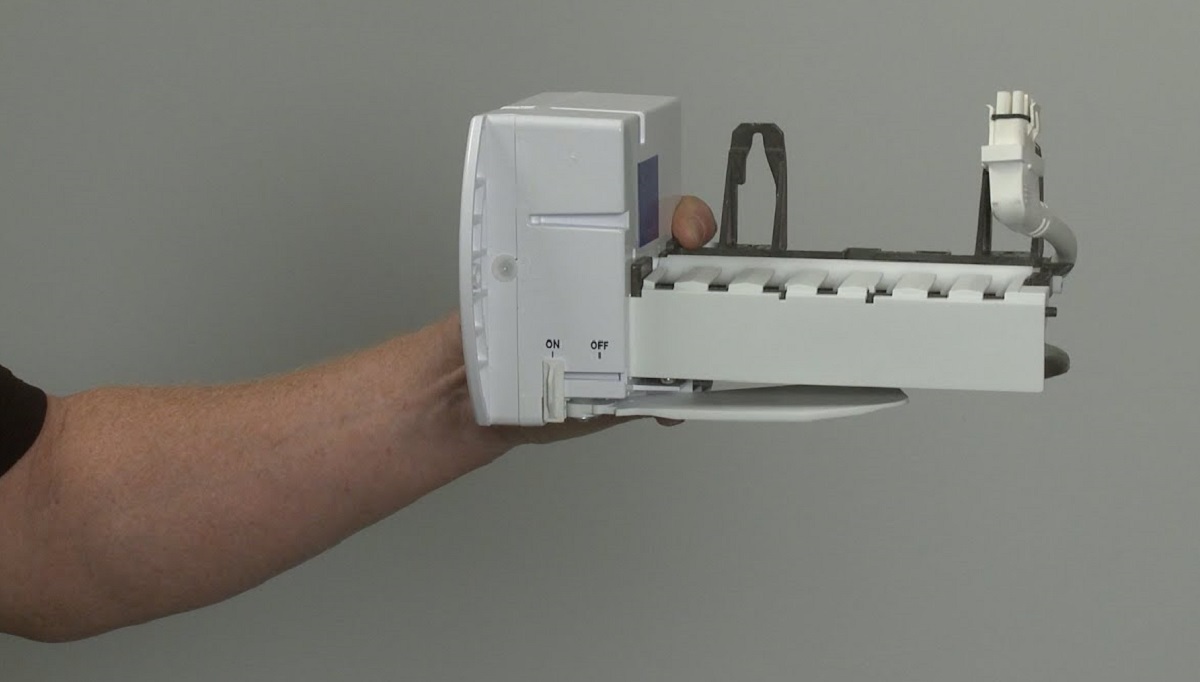
Replacing the Ice Maker Module
If you have gone through the troubleshooting steps and determined that the ice maker module in your Kenmore refrigerator needs to be replaced, here’s a guide on how to do it:
- Ensure safety precautions: Before starting any repairs, unplug your Kenmore refrigerator and turn off the water supply to the ice maker to ensure your safety.
- Remove the ice maker: Locate the mounting screws or clips that secure the ice maker module to the freezer wall. Use a screwdriver or other appropriate tools to remove the screws or release the clips, allowing you to detach the ice maker from the freezer.
- Disconnect the electrical connections: Carefully disconnect the electrical connectors that supply power to the ice maker module. Take note of their locations and how they are connected to the module for easy reinstallation later.
- Remove the old ice maker module: Once the electrical connections are detached, you can completely remove the old ice maker module from the freezer. Take care not to damage any surrounding components or wiring during this process.
- Install the new ice maker module: Take the new ice maker module and position it in the same location where the old module was installed. Ensure that it is properly aligned with the mounting holes or clips on the freezer wall.
- Connect the electrical connections: Reconnect the electrical connectors to their respective terminals on the new ice maker module. Make sure the connections are secure and properly seated.
- Secure the ice maker module: Use the mounting screws or clips to secure the new ice maker module to the freezer wall. Double-check that it is firmly in place to prevent any movement or instability.
- Restore power and water supply: Plug your Kenmore refrigerator back in and turn on the water supply to the ice maker. Ensure that the water line is properly connected and that there are no leaks.
- Test the new ice maker module: After completing the installation, allow some time for the ice maker to initiate a new ice-making cycle. Observe if the ice maker fills with water and starts producing ice cubes as expected.
Replacing the ice maker module can be a more involved repair process, especially if you are not familiar with appliance repairs. If you are uncertain or uncomfortable with performing this task, it is always recommended to seek professional assistance. They have the knowledge and experience to handle the replacement with expertise.
In the next section, we will conclude this guide with a summary of the troubleshooting and maintenance steps we have covered so far.
Conclusion
In conclusion, troubleshooting and fixing an ice maker in a Kenmore refrigerator can sometimes be a straightforward process that can be done at home. By following the steps outlined in this comprehensive guide, you can address common problems with your Kenmore ice maker and restore its functionality.
We started by discussing the common problems that can occur with Kenmore ice makers, such as no ice production, misshapen ice cubes, bad odors or tastes, water leaks, and noise issues. Understanding these problems can help you identify and tackle the specific issue you are experiencing.
We then moved on to the preparation stage, where we discussed how to prepare the ice maker for troubleshooting by turning off the power, emptying the ice bin, disconnecting the water supply, and gathering the necessary tools.
Next, we covered the basic troubleshooting steps to help diagnose the problem. This included checking for power, inspecting for visible damage, testing the ice maker switch, verifying temperature settings, and manually cycling the ice maker.
Subsequently, we delved into checking the water supply, inspecting the water inlet valve, testing the ice maker’s optics, and resetting the ice maker. These steps allow you to address common issues related to water flow, valve functionality, optical sensors, and minor glitches that can occur.
We also acknowledged the importance of maintaining a clean ice maker and freezer, providing guidance on how to clean these components to ensure optimal performance and hygienic ice production.
Lastly, we discussed the process of replacing the ice maker module for more advanced repairs, emphasizing the importance of seeking professional assistance if needed.
By following the steps and tips provided throughout this guide and combining it with your own troubleshooting efforts, you should be able to identify and resolve many common problems with your Kenmore ice maker. However, if the issues persist or you are unsure of how to proceed, it is always recommended to consult a professional technician for assistance.
Remember, a well-functioning ice maker can provide you with a steady supply of ice cubes, ensuring that you can enjoy chilled beverages and keep your food fresh for longer.
Now that you've got a handle on fixing your Kenmore ice maker, why stop there? Dive deeper into appliance care with our guide on keeping your fridge's ice maker spotless. Regular cleaning is a crucial part of refrigerator maintenance, ensuring smooth operation and fresh-tasting ice. If your ice maker is still acting up, our troubleshooting guide can help. Learn the ins and outs of getting your ice maker working again, saving you both time and money on repairs. Don't miss out on these essential tips!
Frequently Asked Questions about How To Fix Ice Maker Kenmore
Was this page helpful?
At Storables.com, we guarantee accurate and reliable information. Our content, validated by Expert Board Contributors, is crafted following stringent Editorial Policies. We're committed to providing you with well-researched, expert-backed insights for all your informational needs.

0 thoughts on “How To Fix Ice Maker Kenmore”