Articles
How To Fix A Kitchenaid Ice Maker
Modified: October 24, 2024
Learn how to fix your Kitchenaid ice maker with these helpful articles. Find step-by-step instructions and troubleshooting tips for common issues.
(Many of the links in this article redirect to a specific reviewed product. Your purchase of these products through affiliate links helps to generate commission for Storables.com, at no extra cost. Learn more)
Introduction
Welcome to the comprehensive guide on how to fix a Kitchenaid Ice Maker. Having a fully functional ice maker in your kitchen is essential for cooling down beverages, making ice cream, and creating refreshing summer drinks. However, like any other appliance, Kitchenaid Ice Makers can encounter problems over time.
In this article, we will discuss the most common issues that can arise with Kitchenaid Ice Makers and provide step-by-step instructions on how to troubleshoot and fix them. Whether your ice maker is not producing ice, making strange noises, or experiencing other malfunctions, we’ve got you covered.
But before we dive into the troubleshooting process, let’s talk about some of the tools and materials you will need to have on hand.
Key Takeaways:
- Troubleshoot and fix common Kitchenaid Ice Maker issues by checking power supply, testing water inlet valve, and examining ice maker assembly. Reset or seek professional help if problems persist.
- Gather necessary tools, inspect water supply line, and clean or replace water filter to ensure optimal performance of your Kitchenaid Ice Maker. Follow step-by-step instructions for effective troubleshooting and repair.
Read more: How To Clean A Kitchenaid Ice Maker
Common Problems with Kitchenaid Ice Makers
Kitchenaid Ice Makers are known for their reliability, but like any other appliance, they can experience issues that may hinder their performance. Here are some of the common problems that you might encounter with your Kitchenaid Ice Maker:
- No Ice Production: One of the most common issues is when your ice maker fails to produce any ice. This can be caused by various factors such as a malfunctioning water supply line, a defective water inlet valve, or a clogged water filter.
- Slow or Inconsistent Ice Production: If your ice maker is producing ice, but at a slower rate or with inconsistencies in ice cube size, it may indicate a problem with the ice maker assembly or the control module.
- Leaking Water: Another common problem is when water leaks from your ice maker. This can be caused by a damaged water supply line, a faulty water inlet valve, or a clogged or frozen water line.
- Strange Noises: Unusual noises coming from your ice maker, such as grinding, buzzing, or knocking sounds, can signal an issue with the motor, fan, or other mechanical components.
- Frozen or Clumped Ice: If your ice cubes are freezing together or forming large clumps, it may indicate an insufficient water flow or a problem with the ice maker assembly.
Understanding these common problems will help you in diagnosing and fixing the issue with your Kitchenaid Ice Maker. Now, let’s move on to the tools and materials you’ll need to have for the troubleshooting process.
Tools and Materials Needed
Before you start troubleshooting and fixing your Kitchenaid Ice Maker, it’s important to gather the necessary tools and materials. Having these items on hand will make the process smoother and more efficient. Here’s a list of what you’ll need:
- Flathead screwdriver: This tool will come in handy for removing any screws or panels that need to be accessed during the troubleshooting process.
- Adjustable wrench: An adjustable wrench will be necessary for loosening and tightening connections, such as the water supply line or the water inlet valve.
- Needle-nose pliers: These pliers will be useful for manipulating small components, such as removing clogged debris from the water line or adjusting delicate mechanisms.
- Multimeter: A multimeter is an essential tool for testing the voltage and continuity of electrical components, such as the water inlet valve or the ice maker control module.
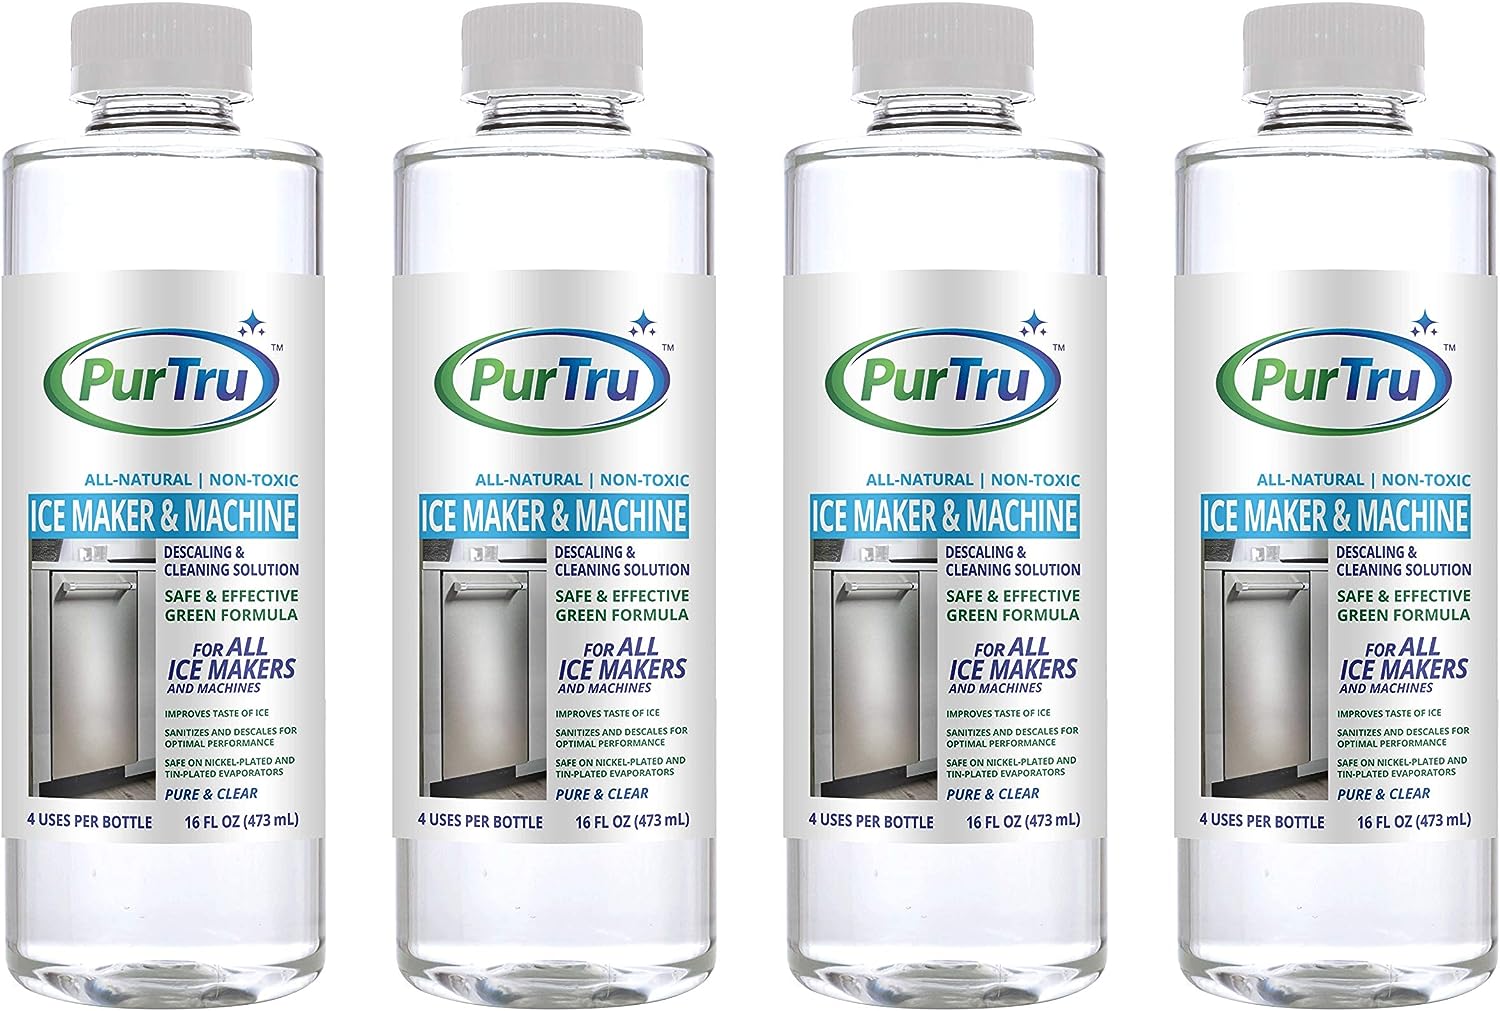
- Cleaning solution: Depending on the issue, you may need a cleaning solution to remove any mineral deposits or debris that may be causing blockages or malfunctions.
- Replacement parts: In some cases, you may need to replace certain components in your ice maker. Make sure to have any necessary replacement parts, such as a new water filter or a new ice maker assembly, readily available.
By gathering these tools and materials beforehand, you will be well-prepared to tackle the troubleshooting process and successfully fix your Kitchenaid Ice Maker. Now, let’s move on to the step-by-step instructions on how to fix the common problems with your ice maker.
Steps to Fix a Kitchenaid Ice Maker
Now that you have all the necessary tools and materials, let’s dive into the step-by-step process to fix the common problems with your Kitchenaid Ice Maker. Follow these instructions carefully to ensure a successful repair:
- Check for Power Supply Issues: Begin by making sure that the ice maker is receiving power. Check the power cord and ensure that it is securely plugged into an operational power outlet.
- Inspect the Water Supply Line: Examine the water supply line for any kinks, twists, or blockages. If you notice any issues, straighten the line or remove the blockage to ensure a smooth water flow.
- Test the Water Inlet Valve: Use a multimeter to test the water inlet valve for continuity. If it does not show continuity, it may be faulty and need to be replaced.
- Clean or Replace the Water Filter: If your ice maker is equipped with a water filter, inspect it for clogs or signs of wear. Clean the filter or replace it if necessary, following the manufacturer’s instructions.
- Examine the Ice Maker Assembly: Remove the ice maker assembly from the freezer and visually inspect it for any signs of damage or ice buildup. Clean the assembly and ensure that all components are functioning properly.
- Check the Ice Maker Control Module: Use a multimeter to test the ice maker control module for proper voltage and continuity. If it is not receiving power or shows signs of malfunction, consider replacing it.
- Look for Clogged or Frozen Water Lines: Trace the water lines connected to the ice maker and check for any blockages or frozen areas. Thaw any frozen sections and clear any clogs that may be preventing water flow.
- Reset the Ice Maker: In some cases, resetting the ice maker can resolve minor issues. Refer to the manufacturer’s instructions on how to reset your specific model.
- Call for Professional Assistance if Necessary: If you have followed all the steps and are still unable to fix the issue, it’s best to seek professional help from a qualified appliance repair technician.
By following these steps, you can address common problems with your Kitchenaid Ice Maker and restore its functionality. Remember to refer to the manual that came with your ice maker for any specific instructions or troubleshooting tips. With patience and careful attention to detail, you’ll have your ice maker up and running in no time.
Check for Power Supply Issues
One of the first steps in troubleshooting your Kitchenaid Ice Maker is to check for power supply issues. Without a proper power connection, the ice maker will not be able to function. Follow these steps to ensure that the power supply is not the cause of the problem:
- Verify Power Cord Connection: Start by checking the power cord connection. Ensure that it is securely plugged into a working electrical outlet. If the connection is loose, make sure to push it in fully to establish a solid connection.
- Check Circuit Breaker: If the power cord is securely connected but the ice maker is still not working, check the circuit breaker or fuse box. Make sure the circuit breaker for the ice maker is in the “ON” position. If a fuse is blown, replace it with a new one of the correct rating.
- Test Other Appliances: If other appliances connected to the same power source are working, it indicates that the power supply is likely not the issue. However, if no other appliances are working, there may be a problem with the electrical circuit or the power source itself, and you should contact a licensed electrician to resolve the issue.
- Inspect Power Cord: Carefully examine the power cord for any frayed, damaged, or worn-out sections. If any damage is found, it is crucial to replace the power cord with a new one to avoid potential safety hazards.
By checking for power supply issues, you can eliminate this as a potential cause of the problem with your Kitchenaid Ice Maker. If the power supply is not the issue, you can move on to the next troubleshooting steps to determine the root cause and find a solution.
Read more: Where To Buy Kitchenaid Ice Maker Cleaner
Inspect the Water Supply Line
The water supply line is an integral part of your Kitchenaid Ice Maker, as it provides the necessary water for ice production. If there is an issue with the water supply line, it can affect the functioning of the ice maker. To ensure proper water flow, follow these steps to inspect the water supply line:
- Locate the Water Supply Line: Start by identifying the water supply line connected to your ice maker. It is typically located at the back of the appliance, near the bottom.
- Examine the Water Supply Line: Inspect the water supply line for any visible signs of damage, such as kinks, pinches, or leaks. These can disrupt the flow of water to the ice maker. If you notice any issues, take corrective measures accordingly.
- Straighten any Kinks or Twists: If you find any kinks or twists in the water supply line, gently straighten them out. This will ensure a smooth and uninterrupted water flow to your ice maker.
- Check for Blockages: Use caution while inspecting the water supply line for blockages. Sediment or mineral deposits can accumulate over time and clog the line, restricting water flow. If you notice any blockages, carefully remove them to restore normal water flow.
- Verify Water Pressure: Insufficient water pressure can also affect the ice maker’s performance. Ensure that the water pressure is within the recommended range specified in the user manual. If the water pressure is too low, you may need to consult a plumber to address the issue.
By inspecting the water supply line, you can address any visible issues that may be hindering water flow to your Kitchenaid Ice Maker. Once you have ensured that the water supply line is free from damage and obstructions, you can proceed to the next troubleshooting steps to further diagnose and fix the problem.
Test the Water Inlet Valve
The water inlet valve is responsible for controlling the flow of water into your Kitchenaid Ice Maker. If the valve is not functioning correctly, it can hinder ice production. To determine if the water inlet valve is the culprit, follow these steps to test it:
- Locate the Water Inlet Valve: The water inlet valve is typically located at the back of the refrigerator, near the bottom. It is connected to the water supply line.
- Turn Off the Water Supply: Before testing the water inlet valve, it’s important to turn off the water supply to the refrigerator. This can usually be done by shutting off the water valve connected to the main water line.
- Remove the Water Supply Line: Carefully disconnect the water supply line from the inlet valve. Have a bucket or towel ready to catch any excess water that may spill out.
- Test for Continuity: Use a multimeter set to the ohms setting to test the water inlet valve for continuity. Place the multimeter probes on the terminals of the valve. If the multimeter displays a reading of zero or close to zero, it indicates that the valve has continuity and is functioning properly. If there is no reading or a high resistance reading, the valve may be defective and will need to be replaced.
- Inspect for Debris or Blockages: While the water supply line is detached, visually examine the inlet valve for any debris or blockages. Use a soft brush or cloth to gently clean the valve if necessary. Clearing any obstructions can help restore proper water flow.
- Reconnect the Water Supply Line: Once you have tested and cleaned the water inlet valve, reattach the water supply line, ensuring a secure connection.
- Turn On the Water Supply: Turn the water supply back on and check to see if water is flowing into the ice maker. Monitor the ice maker’s performance to see if the water inlet valve was the cause of the issue.
By testing the water inlet valve, you can determine if it is functioning properly or if it needs to be replaced. If the water inlet valve is not the issue, you can proceed with further troubleshooting steps to identify the source of the problem with your Kitchenaid Ice Maker.
Check the water supply to the ice maker and ensure it is connected properly. Also, clean the ice maker and remove any built-up ice or debris.
Clean or Replace the Water Filter
The water filter in your Kitchenaid Ice Maker plays an important role in ensuring clean and pure water for ice production. Over time, the filter can become clogged with sediment, reducing water flow and affecting the performance of the ice maker. To clean or replace the water filter, follow these steps:
- Locate the Water Filter: The water filter is typically located inside the refrigerator, either in the upper right corner or the bottom grille. Refer to your refrigerator’s user manual if you are unsure of its exact location.
- Determine the Type of Water Filter: Different Kitchenaid models may use different types of water filters. Determine the type of water filter used in your ice maker by referring to the user manual or checking the label on the existing filter.
- Clean the Water Filter: If your water filter is reusable and in good condition, you can clean it to remove any buildup or debris. Follow the manufacturer’s instructions for cleaning the specific type of water filter you have.
- Replace the Water Filter: If your water filter is not reusable or is damaged, it is recommended to replace it. Purchase a compatible replacement water filter from an authorized retailer or directly from Kitchenaid.
- Follow Installation Instructions: Install the cleaned or new water filter according to the manufacturer’s instructions. Ensure that it is securely and properly installed in the designated slot.
- Flush the Water Filter: Once the water filter is installed, it is important to flush it before use. Run water through the filter for a few minutes to remove any air bubbles and to ensure clean water flow.
Cleaning or replacing the water filter can help restore proper water flow and improve the performance of your Kitchenaid Ice Maker. Remember to follow the recommended schedule for cleaning or replacing the water filter to ensure continued efficient operation of your ice maker.
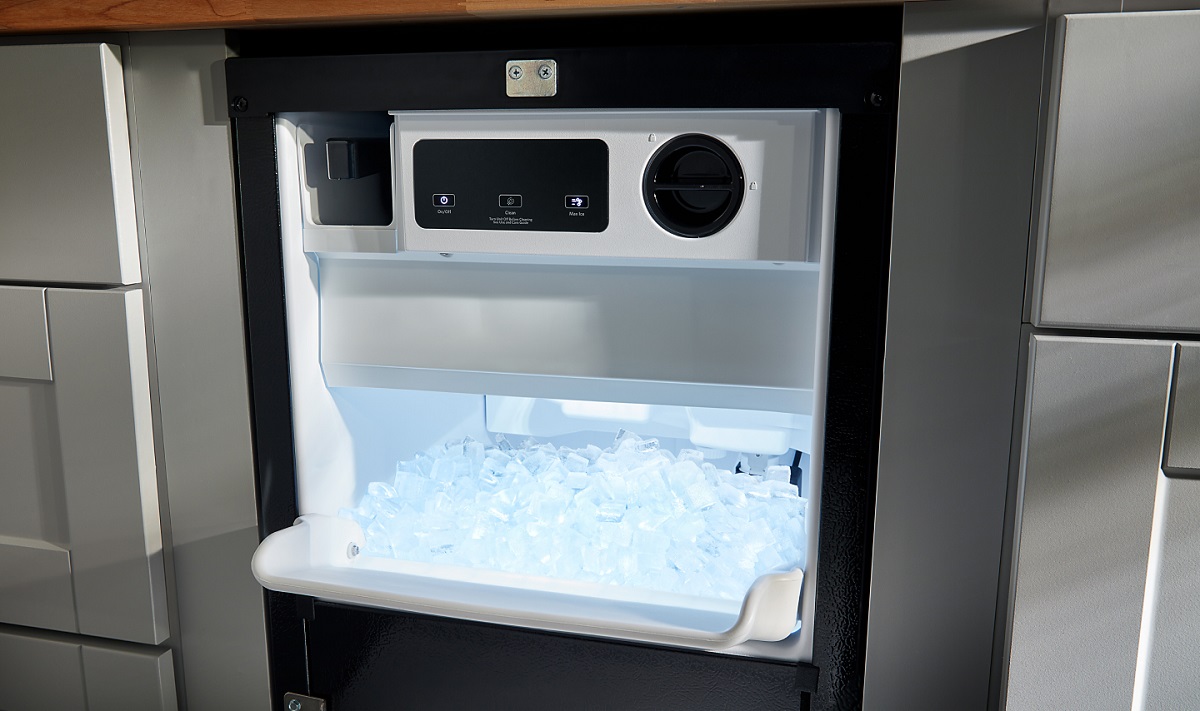
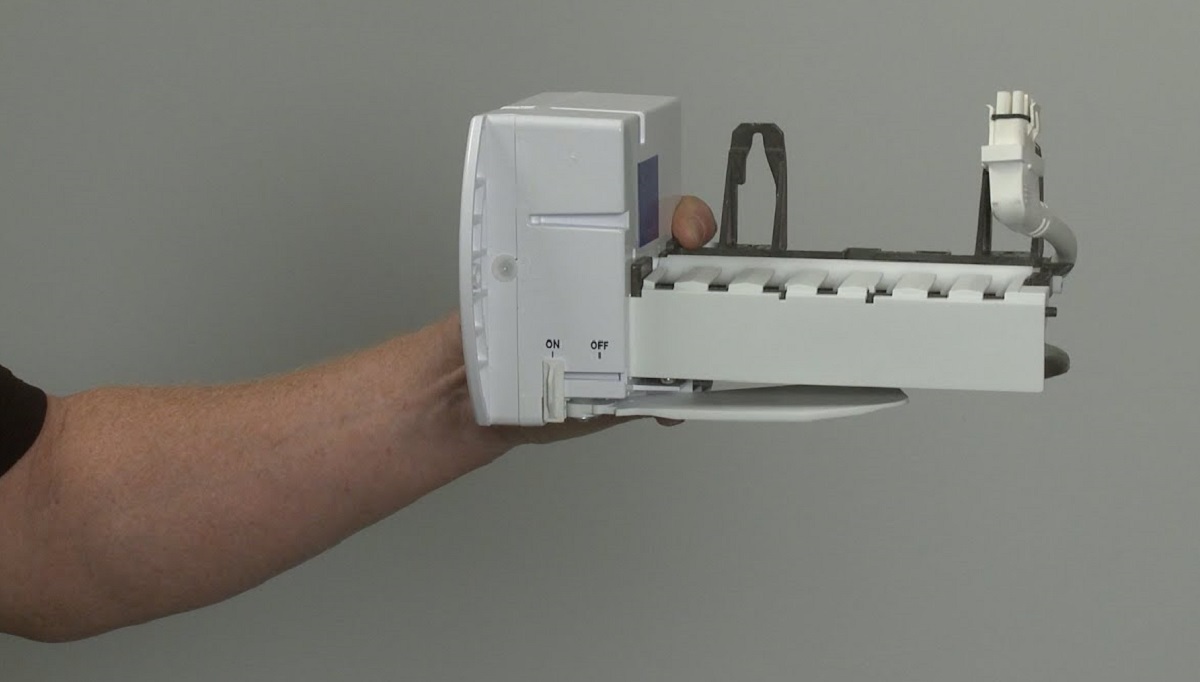
Examine the Ice Maker Assembly
The ice maker assembly in your Kitchenaid Ice Maker is responsible for the actual production and dispensing of ice. If there are any issues with the assembly, it can disrupt the ice-making process. To examine the ice maker assembly, follow these steps:
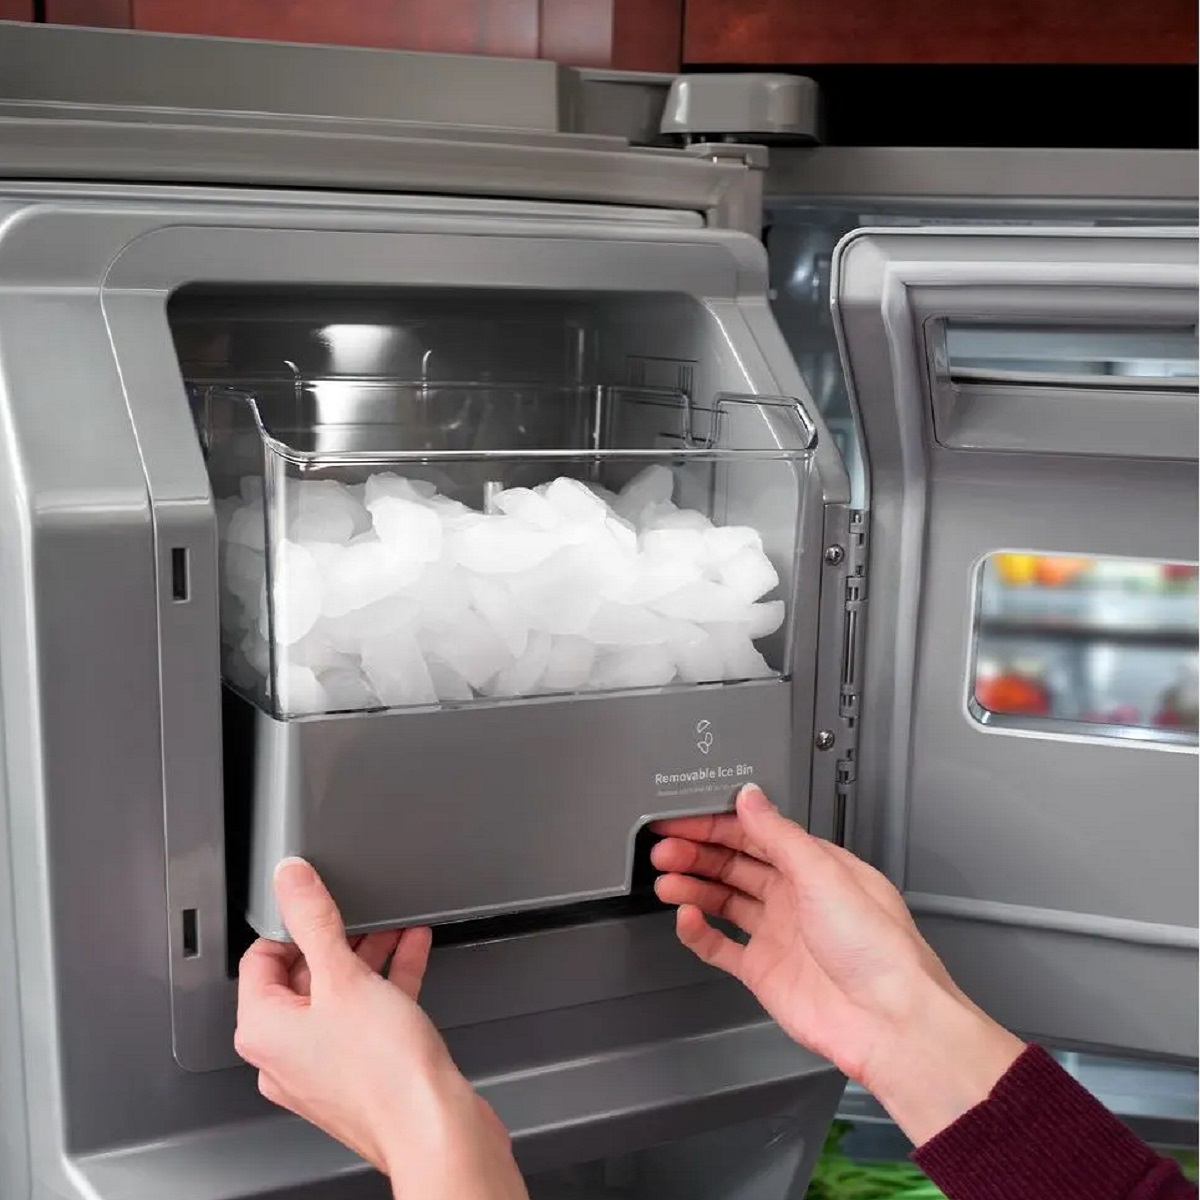
- Access the Ice Maker Assembly: Depending on your Kitchenaid model, you may need to remove a panel or drawer to access the ice maker assembly. Refer to your refrigerator’s user manual for specific instructions on how to access the assembly.
- Inspect for Ice Buildup or Blockages: Once you have access to the ice maker assembly, inspect it for any signs of ice buildup or blockages that may be affecting its operation. Ice buildup can impede the movement of the ice maker components and prevent ice production.
- Clean the Ice Maker Assembly: If you notice any ice buildup or blockages, use a soft cloth or sponge to clean the affected areas. Gently remove any ice or debris that may be obstructing the proper functioning of the assembly.
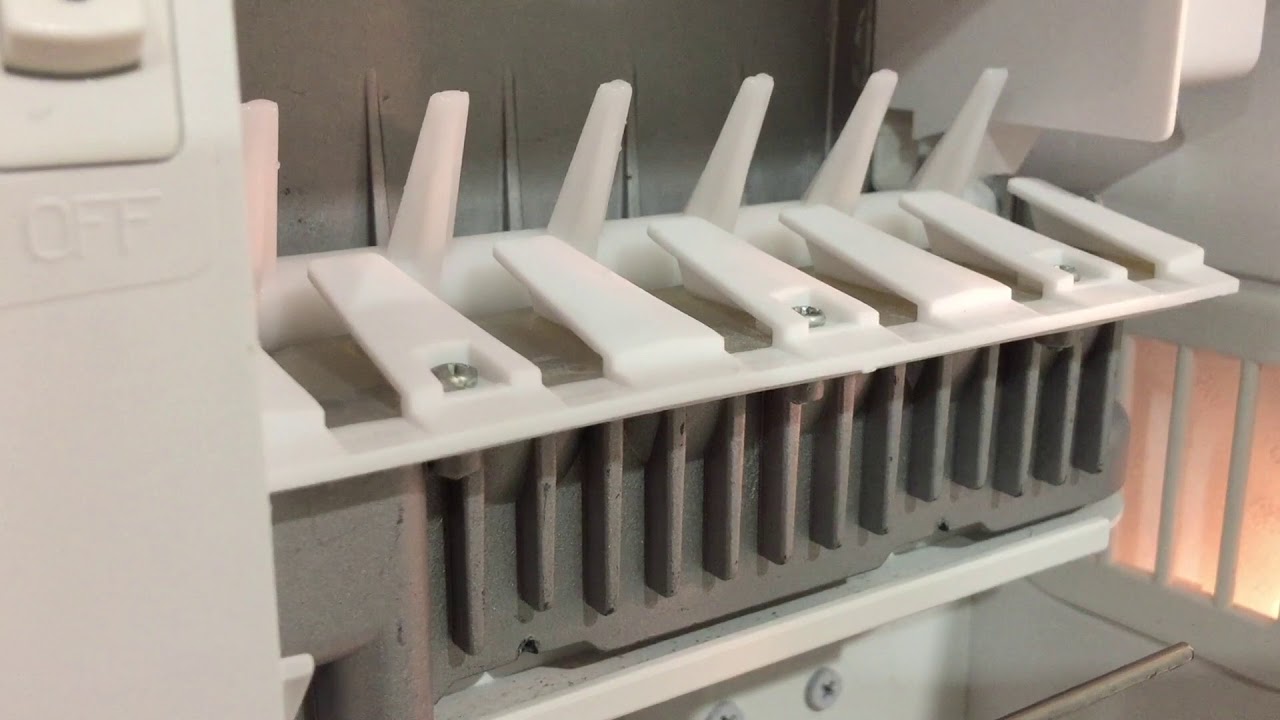
- Check the Ice Ejector Mechanism: The ice ejector mechanism is responsible for pushing the ice out of the ice maker tray. Ensure that it moves freely and is not stuck or jammed. Use a small brush or toothpick to clear any obstructions that may be hindering the mechanism’s movement.
- Inspect the Ice Cube Mold: Examine the ice cube mold for any cracks or damages. A damaged mold can lead to irregular ice cube shapes or improper ice production. If any issues are detected, consider replacing the ice cube mold.
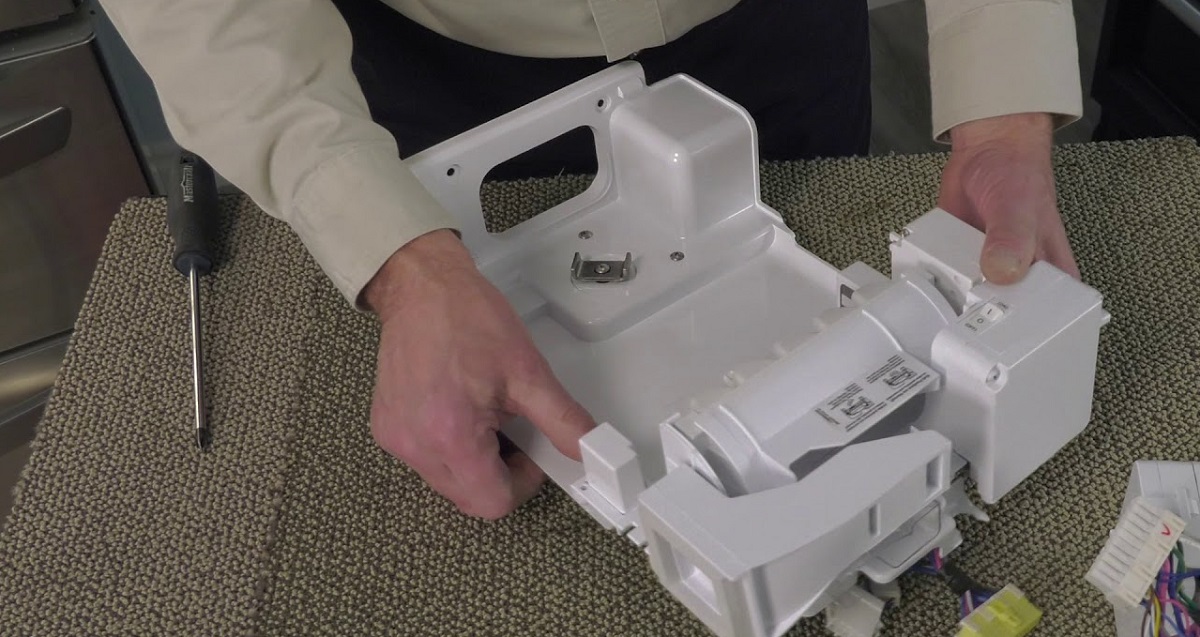
- Reassemble the Ice Maker Assembly: Once you have inspected and cleaned the ice maker assembly, carefully reassemble any panels or drawers that were removed to access it. Ensure that all components are properly aligned and secured.
By examining the ice maker assembly, you can identify and address any issues that may be causing problems with your Kitchenaid Ice Maker’s ice production. Cleaning and ensuring proper functioning of the components can help restore the ice maker’s performance and ensure the production of high-quality ice cubes.
Check the Ice Maker Control Module
The ice maker control module in your Kitchenaid Ice Maker is responsible for managing the ice-making process. If there are issues with the control module, it can lead to problems with ice production or abnormal ice cube sizes. To check the ice maker control module, follow these steps:
- Locate the Ice Maker Control Module: The ice maker control module is usually located on the front or side of the ice maker. Refer to your refrigerator’s user manual for the exact location.
- Inspect the Control Module for Visible Damage: Visually examine the control module for any signs of damage, such as burned or corroded components. If you notice any visible damage, the control module may need to be replaced.
- Test the Control Module for Voltage: Use a multimeter set to the voltage setting to test the control module for power. Follow the manufacturer’s instructions for testing the specific control module of your Kitchenaid Ice Maker. If the control module is not receiving power, it may need to be replaced.
- Test the Control Module for Continuity: Use a multimeter set to the ohms setting to test the control module for continuity. Check for continuity between the appropriate terminals indicated in the user manual. If there is no continuity or an abnormal reading, the control module may need to be replaced.
- Reset the Control Module: In some cases, a malfunctioning control module can be reset to resolve minor issues. Refer to the user manual for instructions on how to reset the control module of your specific Kitchenaid Ice Maker model.
By checking the ice maker control module, you can determine if it is functioning properly or if it needs to be replaced. If the control module is the source of the problem, replacing it can help restore the optimal functionality of your Kitchenaid Ice Maker.
Look for Clogged or Frozen Water Lines
Clogged or frozen water lines can significantly impact the performance of your Kitchenaid Ice Maker. If the water lines are obstructed, it can restrict water flow, leading to issues with ice production. To address this problem, follow these steps:
- Inspect the Water Lines: Begin by examining the water lines connected to your ice maker. Look for any visible signs of clogs or ice buildup.
- Thaw Frozen Water Lines: If you notice any frozen water lines, gently thaw them to restore water flow. Depending on the severity of the freezing, you can use a hairdryer on low heat or place a warm towel around the frozen area. Be cautious and avoid using excessive heat that may damage the lines.
- Clear Obstructions: If there are any visible clogs or debris in the water lines, use a soft brush or toothbrush to gently remove the obstructions. Be careful not to damage the lines or create further blockages.
- Flush the Water Lines: Once any clogs or ice have been cleared, flush the water lines. Run water through the lines for a few minutes to ensure that any remaining debris or air bubbles are flushed out.
- Verify Water Pressure: Check the water pressure from the water lines connected to your ice maker. Insufficient water pressure can contribute to clogs or freezing. Ensure that the water pressure is within the recommended range specified in the user manual. If the water pressure is low, contact a plumber to address the issue.
By looking for clogged or frozen water lines and taking appropriate steps to address the issue, you can restore proper water flow to your Kitchenaid Ice Maker. This will ensure that the ice maker can function optimally and produce ice without any hindrances.
Reset the Ice Maker
If you’ve gone through the troubleshooting steps and your Kitchenaid Ice Maker is still not functioning correctly, it may be time to try resetting the ice maker. This process can help resolve minor issues and restore the ice maker to its normal operation. Follow these steps to reset your ice maker:
- Locate the Reset Button: Look for the reset button on your ice maker. It is typically a small, round button located on the front or side of the unit. Refer to the user manual if you are having trouble finding it.
- Press and Hold the Reset Button: Using your finger or a small tool, press and hold the reset button for about 10-15 seconds. This will initiate the reset process.
- Wait for the Ice Maker to Reset: After holding the reset button, wait for a few minutes to allow the ice maker to complete the reset process. You may hear some clicking or whirring sounds as the ice maker resets.
- Monitor the Ice Maker’s Operation: Once the reset is complete, monitor the ice maker to see if the issue has been resolved. Check if it starts producing ice and if the ice cubes are of the correct size and consistency.
Resetting the ice maker can often clear any temporary glitches or issues that may be affecting its performance. If the ice maker still doesn’t function properly after the reset, you can proceed with other troubleshooting steps or consider seeking professional assistance.
Call for Professional Assistance if Necessary
If you have followed all the previous troubleshooting steps and are still unable to resolve the issue with your Kitchenaid Ice Maker, it may be time to seek professional assistance. Professional technicians have the expertise and specialized tools to properly diagnose and fix complex problems. Here are some signs that it’s time to call for professional help:
- Continued Malfunction: If your ice maker is still not working after attempting all the troubleshooting steps, it indicates a more significant underlying issue that requires professional attention.
- Electrical or Mechanical Problems: If you suspect that the problem lies with the electrical or mechanical components of the ice maker, it’s best to let a professional handle the repairs to avoid any potential safety hazards.
- Lack of Technical Knowledge: If you are not familiar with appliance repairs or do not have the necessary tools and expertise, it is advisable to call a professional technician who can accurately diagnose and fix the problem.
- Out of Warranty: If your ice maker is no longer covered by the manufacturer’s warranty, opting for professional repairs can be a cost-effective solution compared to replacing the entire unit.
- Time Constraints: If you are unable to dedicate the time and effort required for complex troubleshooting and repairs, it is more convenient to hire a professional who can quickly resolve the issue.
When calling for professional assistance, make sure to provide them with detailed information about the problem, the steps you have already taken to troubleshoot, and any error codes or unusual behavior you have observed. This will help the technician to better understand the issue and come prepared with the necessary tools and replacement parts.
Remember, a professional technician can efficiently diagnose and repair your Kitchenaid Ice Maker, ensuring that it functions optimally and provides you with a continuous supply of ice.
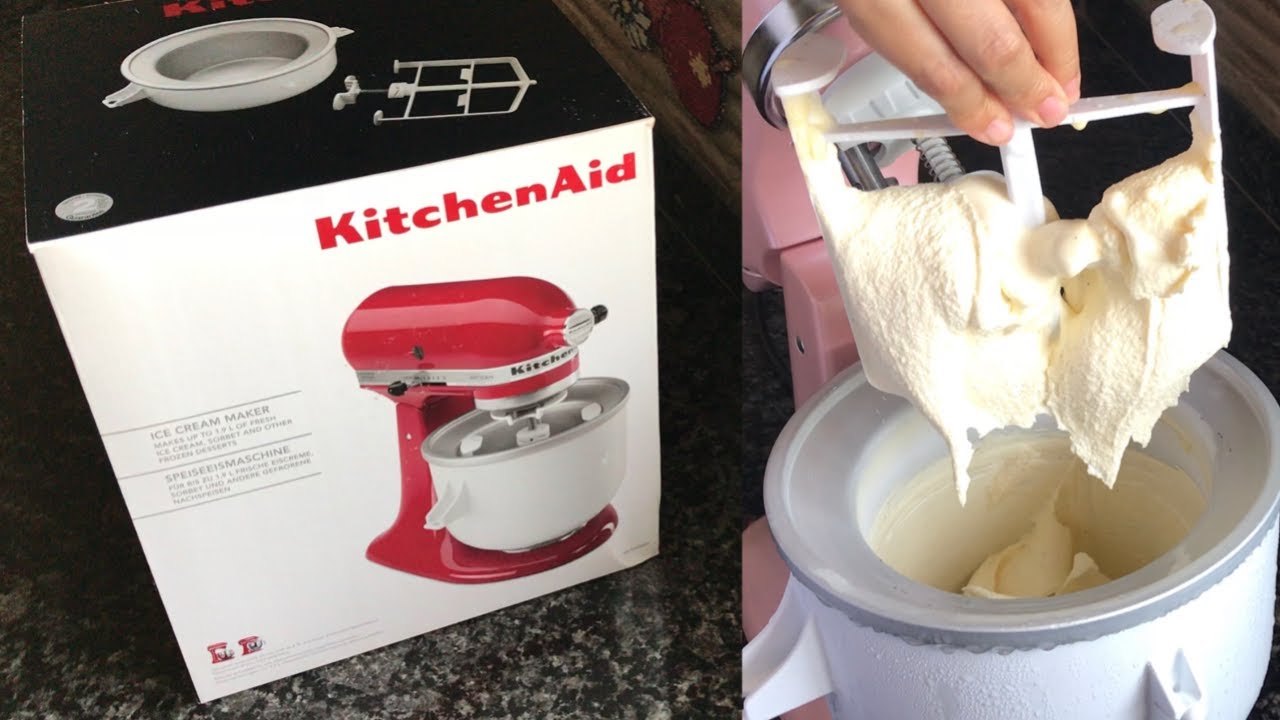
Read more: How To Use The Kitchenaid Ice Cream Maker
Conclusion
Having a properly functioning Kitchenaid Ice Maker is essential for keeping your drinks cool and refreshing. However, when issues arise with the ice maker, it can be frustrating and inconvenient. By following the troubleshooting steps outlined in this guide, you can effectively diagnose and fix common problems with your Kitchenaid Ice Maker.
We started by checking for power supply issues and inspecting the water supply line. Then, we tested the water inlet valve and cleaned or replaced the water filter. Next, we examined the ice maker assembly and checked the ice maker control module. We also looked for clogged or frozen water lines and learned how to reset the ice maker. Finally, we discussed the importance of calling for professional assistance if necessary.
Remember, safety is of utmost importance when working with electrical appliances. Always disconnect power sources and follow proper safety procedures outlined in the user manual or provided by professionals. If you are not confident in your abilities, it is best to seek professional help to avoid any potential risks or further damage to your appliance.
By diligently following the troubleshooting steps and seeking professional assistance if needed, you can restore your Kitchenaid Ice Maker to its optimal functioning state. Enjoy the convenience of a fully functional ice maker, providing you with ice-cold refreshments whenever you need them.
Now that you've got a handle on fixing your Kitchenaid ice maker, why not consider upgrading? Dive into our curated selection where we review top Kitchenaid ice makers set to shine in 2024. For those facing broader cooling appliance issues, our comprehensive guide on refrigerator repairs will surely come in handy. These resources are packed with insights to ensure your kitchen appliances run smoothly, saving you time and hassle.
Frequently Asked Questions about How To Fix A Kitchenaid Ice Maker
Was this page helpful?
At Storables.com, we guarantee accurate and reliable information. Our content, validated by Expert Board Contributors, is crafted following stringent Editorial Policies. We're committed to providing you with well-researched, expert-backed insights for all your informational needs.


0 thoughts on “How To Fix A Kitchenaid Ice Maker”