Furniture
How To Fix An Old Dresser Drawers
Modified: August 27, 2024
Learn how to fix the drawers of your old dresser and bring new life to your furniture. Follow our step-by-step guide to restore functionality and beauty.
(Many of the links in this article redirect to a specific reviewed product. Your purchase of these products through affiliate links helps to generate commission for Storables.com, at no extra cost. Learn more)
Introduction
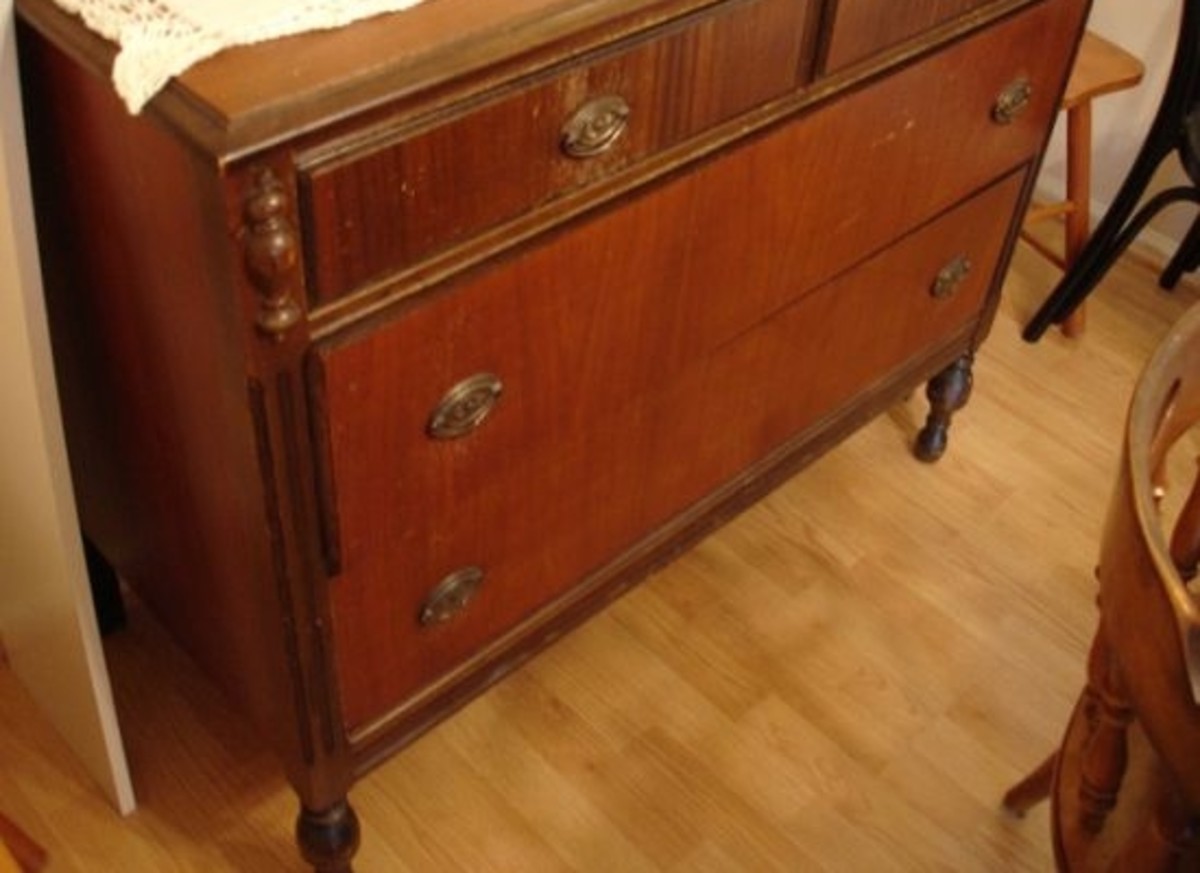
Welcome to this comprehensive guide on how to fix an old dresser drawer. If you have a beloved dresser that has seen better days, you don’t have to throw it away or buy a new one. With a little bit of time, effort, and some basic tools and supplies, you can restore the functionality and beauty of your dresser drawers.
Old dresser drawers often suffer from common issues such as loose joints, broken or damaged parts, cracked surfaces, or worn-out finishes. However, with some simple repair techniques, you can transform your old dresser into a functional and aesthetically pleasing piece of furniture.
Before you dive into the restoration process, it’s important to assess the extent of the damage. Take the time to carefully inspect each drawer to identify any issues that need to be addressed. This will help you determine the appropriate steps and materials required to fix your dresser drawers.
In this guide, we will walk you through each step of the process, from assessing the damage to reassembling the drawers and dresser. We will provide you with useful tips, expert advice, and practical instructions to ensure a successful restoration project. So, let’s get started and bring new life to your old dresser drawers!
Key Takeaways:
- Revive your old dresser drawers by assessing, repairing, and refinishing with expert techniques. Bring new life to your furniture and enjoy the satisfaction of a successful restoration project.
- Transform your old dresser into a functional and visually appealing piece of furniture with thorough assessment, diligent repairs, and thoughtful refinishing. Enjoy the fruits of your labor and the renewed beauty of your restored dresser.
Read more: How To Add Drawer Slides To An Old Dresser
Assessing the Damage
Before you begin the repair process, it’s important to thoroughly assess the damage to your old dresser drawers. This will help you understand the extent of the repairs needed and determine the appropriate course of action. Here are some common issues to look out for:
- Loose joints: Check the corners and edges of the drawers for any signs of wobbling or looseness. Loose joints can affect the functionality and stability of the drawers.
- Broken or damaged parts: Inspect the drawer fronts, sides, and bottoms for any cracks, splits, or missing pieces. Pay attention to hardware such as handles or knobs that may need replacing.
- Cracked surfaces: Examine the surfaces of the drawers for any visible cracks or blemishes. These can be addressed with proper sanding and filling techniques.
- Worn-out finish: If the finish on your dresser drawers is dull, scratched, or faded, it may require refinishing or painting to restore its original beauty.
Once you have identified the specific issues, make a list of the repairs needed for each drawer. This will help you plan and prioritize the necessary steps. Keep in mind that some drawers may require more extensive repairs than others.
It’s also important to consider the overall condition of the dresser as a whole. Assess whether any structural repairs are needed, such as reinforcing the frame or repairing the drawer tracks. By evaluating the entire piece, you can ensure that your repairs are thorough and long-lasting.
Take measurements of the drawers and note down any specific hardware requirements. This will help you determine the amount and type of supplies you need for the restoration project.
By thoroughly assessing the damage before starting the repairs, you can ensure that you have a clear understanding of what needs to be done. This will make the entire process smoother and more efficient, resulting in beautifully restored dresser drawers that can stand the test of time.
Gathering Necessary Tools and Supplies
Once you have assessed the damage to your old dresser drawers, it’s time to gather the necessary tools and supplies to tackle the repair and restoration process. Having the right equipment on hand will make the project easier and more efficient. Here are some essential tools and supplies you will need:
- Screwdriver set: A set of screwdrivers in various sizes will come in handy for removing hardware, disassembling the drawers, and making repairs.
- Hammer: A hammer is essential for tapping loose joints back into place or removing stubborn nails or staples.
- Wood glue: High-quality wood glue is essential for reattaching loose joints and securing any broken or damaged parts.
- Sanding block or sandpaper: To prepare the surfaces for refinishing, you will need a sanding block or sandpaper in varying grits. Coarse grits are used for initial sanding, while finer grits are used for a smooth finish.
- Putty knife: A putty knife is useful for applying wood filler to fill in cracks, holes, or gaps in the drawer surfaces.
- Wood filler: Choose a high-quality wood filler to repair any damaged or uneven surfaces. Make sure it matches the color and texture of the wood for a seamless finish.
- Paintbrushes and/or foam rollers: Depending on whether you plan to paint or stain your dresser drawers, have a selection of paintbrushes and/or foam rollers in various sizes for smooth and even application.
- Primer: If you are painting the drawers, a primer is essential to create a smooth and even base for the paint. Choose a primer suitable for your chosen paint type.
- Paint or stain: Select a paint or stain that suits your desired finish and complements the overall aesthetic of the dresser. Consider using a durable and easy-to-clean paint or a high-quality wood stain to enhance the natural beauty of the wood.
- Protective finish: To seal and protect the newly refinished drawers, opt for a clear polyurethane or varnish. Make sure it is compatible with your chosen paint or stain.
Additionally, you may need other tools such as clamps, a level, a tape measure, a putty or wax crayon for touch-ups, and safety gear such as gloves, goggles, and a dust mask.
Before starting the restoration project, make sure you have all the necessary tools and supplies readily available. This will save you time and allow you to work smoothly without interruptions. Having everything on hand also ensures that the repair and restoration process can be completed efficiently, resulting in beautifully transformed dresser drawers.
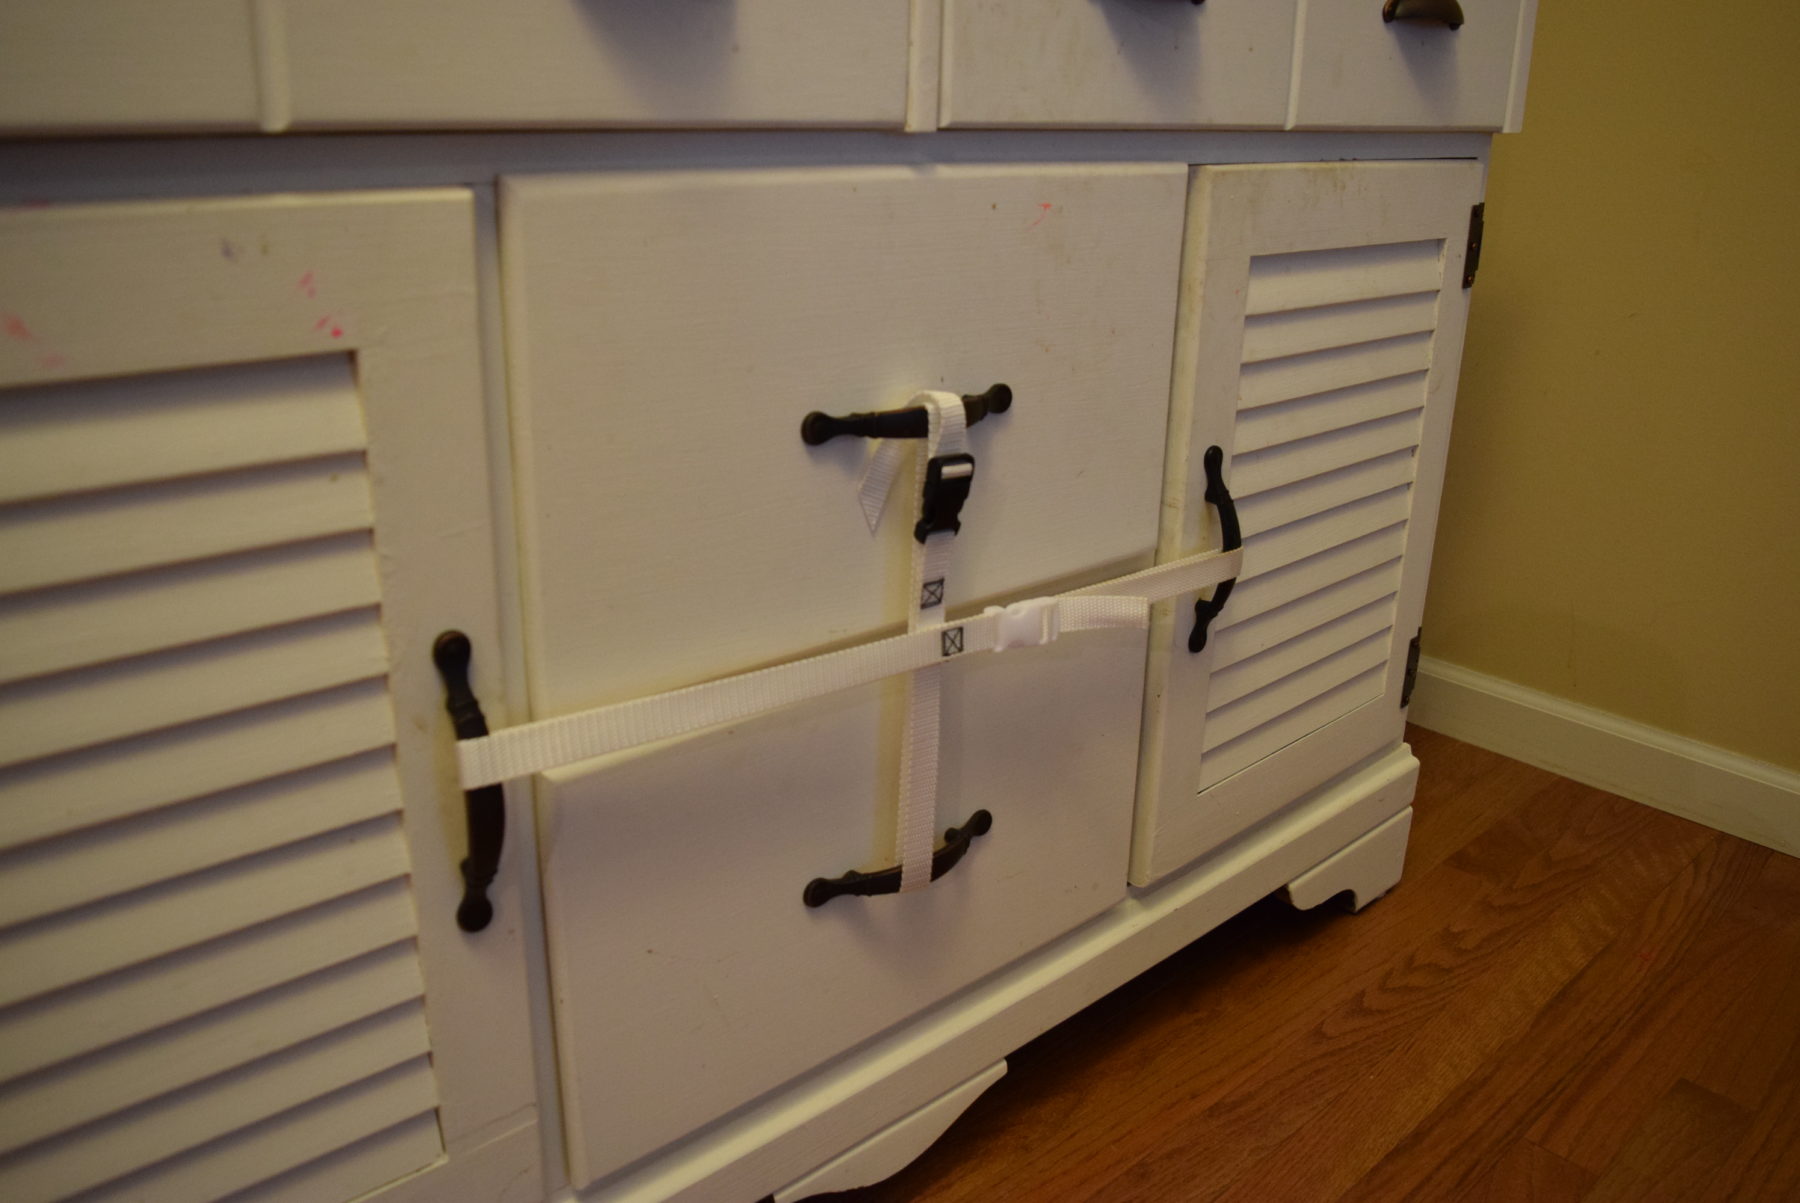
Removing the Drawers
Before you can start repairing and restoring your old dresser drawers, you will need to remove them from the dresser itself. This will give you better access to work on each drawer individually and ensure that you can complete the repairs more effectively. Here’s a step-by-step guide on how to remove the drawers:
- Empty the drawers: Begin by emptying the contents of each drawer. This will make it easier to handle and remove them from the dresser.
- Open the drawer fully: Pull out each drawer as far as possible, ensuring it is fully extended to avoid any obstructions.
- Look for release mechanisms: Examine the sides or the back of each drawer for any release mechanisms. These are often in the form of sliders, levers, or tabs that need to be manipulated to release the drawer from its tracks or runners.
- Push the release mechanisms: Depending on the type of release mechanism, push, slide, or squeeze it to disengage the drawer from the tracks. This may require a bit of force or finesse, so be gentle and patient.
- Remove the drawer: Once the release mechanisms have been activated, carefully pull the drawer towards you until it is completely out of the dresser. Be mindful of any hardware or protruding elements that may snag or catch as you remove the drawer.
- Repeat the process: Follow the same steps for each drawer in the dresser, ensuring that you keep track of the precise order and location of each drawer for easy reassembly.
As you remove each drawer, inspect the tracks, runners, and guides for any damage or signs of wear. If necessary, take note of any repairs or replacements that need to be made to ensure the smooth operation of the drawers.
Remember to handle each drawer with care, as they can be heavy and fragile depending on their size and construction. If needed, enlist the help of a friend or family member to assist you in removing the drawers safely.
With the drawers successfully removed from the dresser, you are now ready to move on to the next steps in the repair and restoration process. By taking the time to remove the drawers properly, you set the foundation for a successful and thorough transformation of your old dresser.
Repairing Loose Joints
One common issue with old dresser drawers is loose joints. Over time, the glue or fasteners used to hold the joints together may weaken, causing the drawers to wobble or become unstable. Repairing loose joints is crucial to restoring the functionality and stability of your dresser drawers. Here’s a step-by-step guide on how to fix loose joints:
- Disassemble the drawer: Start by removing any hardware such as knobs or pulls from the drawer. This will make it easier to work on the joints.
- Inspect the joints: Carefully examine each joint in the drawer to identify the loose areas. Look for any gaps or signs of separation between the pieces of wood.
- Clean the joint surfaces: Use a soft cloth or sandpaper to clean the joint surfaces and remove any dirt, debris, or old glue residue. This will ensure a proper bond when reassembling the joint.
- Apply wood glue: Apply a generous amount of high-quality wood glue to the joint surfaces. Use a brush or a small stick to spread the glue evenly.
- Reassemble the joint: Press the joint back together firmly, making sure the pieces align properly. Wipe away any excess glue that squeezes out of the joint.
- Secure the joint: Use clamps or heavy objects to apply pressure to the joint and hold it in place while the glue sets. Follow the manufacturer’s instructions for the recommended drying time.
- Repeat for other loose joints: If there are multiple loose joints in the drawer, repeat the same process for each one.
- Allow the glue to fully cure: Once the glue has dried, remove the clamps and allow the joint to fully cure for the recommended time. This will ensure a strong and durable bond.
After the glue has fully cured and the joints are secure, you can reassemble the drawer and move on to the next steps in the restoration process. The repaired joints will provide stability and ensure that your dresser drawers function properly.
If you encounter any stubborn or complex joint issues, it may be helpful to consult a professional or seek guidance from a woodworking expert. They can provide additional advice and techniques for repairing and reinforcing loose joints.
By taking the time to repair loose joints, you are not only addressing a common problem in old dresser drawers but also laying the foundation for a successful restoration project. Your repaired joints will ensure that your dresser drawers remain solid and functional for years to come.
Read more: How To Fix A Dresser Drawer Slides
Replacing Broken or Damaged Parts
In some cases, repairing loose joints may not be enough to restore the functionality and appearance of your old dresser drawers. If you have broken or severely damaged parts, it may be necessary to replace them. Here’s a step-by-step guide on how to replace broken or damaged parts in your dresser drawers:
- Identify the broken or damaged parts: Carefully assess the extent of the damage and identify the specific parts that need to be replaced. This could include drawer fronts, sides, bottoms, or hardware such as handles or knobs.
- Remove the damaged parts: Use a screwdriver or appropriate tools to remove any screws, nails, or fasteners that are holding the damaged parts in place. Gently pry or unscrew them without causing further damage.
- Measure and cut replacement parts: Take accurate measurements of the damaged parts to ensure the new replacements fit properly. Use a saw or appropriate cutting tool to cut the replacement parts to the required size and shape.
- Prep the replacement parts: Sand the edges and surfaces of the replacement parts to create smooth and even surfaces. Remove any rough spots or splinters that could interfere with the reassembly process.
- Attach the replacement parts: Apply wood glue to the joints and surfaces where the replacement parts will be attached. Carefully align the new parts and secure them in place using screws or nails, following the same attachment method as the original piece.
- Allow the glue to dry: If you use wood glue to secure the replacement parts, follow the drying time recommended by the manufacturer. This will ensure a strong and durable bond.
- Refinish the replaced parts: If the replaced parts differ in appearance from the rest of the dresser, it may be necessary to refinish or paint them to match. Sand the surfaces of the new parts and apply the appropriate finish or paint, following the instructions on the product.
- Reattach hardware: Once the replaced parts are dry and finished, reattach any hardware such as handles or knobs as needed. Ensure they are securely fastened.
By replacing broken or damaged parts, you can restore the structural integrity and functionality of your dresser drawers. The newly replaced parts will seamlessly blend with the rest of the piece, giving your dresser a refreshed and cohesive look.
If you’re unsure about your ability to undertake the replacement process, it may be beneficial to consult a professional carpenter or furniture restoration expert. They can provide guidance and assistance to ensure the proper replacement of the damaged parts.
With the broken or damaged parts successfully replaced, you can now proceed to the next steps in the restoration process, such as sanding, filling, and refinishing the dresser drawers.
Sanding the Surfaces
After addressing any loose joints and replacing broken or damaged parts in your old dresser drawers, it’s time to prepare the surfaces for refinishing. Sanding the surfaces is a crucial step in the restoration process as it helps to remove any roughness, unevenness, or old finish, allowing for a smooth and pristine result. Here’s a step-by-step guide on how to sand the surfaces of your dresser drawers:
- Prepare your work area: Find a well-ventilated space, preferably outdoors or in a well-ventilated room. Lay down a drop cloth or newspaper to protect your work surface from dust or debris.
- Gather your materials: You’ll need sandpaper or a sanding block in various grits, ranging from coarse to fine. The exact grits will depend on the condition of the surfaces and the level of smoothness you desire.
- Start with the coarsest grit: Begin sanding the surfaces of your dresser drawers with the coarsest grit sandpaper. Use even, steady strokes in the direction of the wood grain. This will help remove any roughness, nicks, or imperfections on the surface.
- Gradually move to finer grits: As you progress, switch to progressively finer grit sandpaper. This will help smooth out the surfaces and remove any scratches left by the previous grit. Continue sanding with each finer grit until you achieve the desired smoothness.
- Keep the surface even: Pay attention to maintaining an even sanding pressure across the surfaces. This will prevent uneven results or dips in the wood. Take extra care around corners and edges to avoid over-sanding or creating grooves.
- Check your progress: Periodically stop sanding and run your hand across the surfaces to feel for smoothness. Hold the surfaces up to the light to check for any remaining imperfections or scratches that need further sanding.
- Remove sanding dust: Once you are satisfied with the level of smoothness, use a soft brush or cloth to remove sanding dust from the surfaces. Ensure that all dust particles are cleared before moving on to the next steps.
Sanding the surfaces of your dresser drawers not only creates a smooth texture but also helps to prep the wood for better paint or stain adhesion. It also allows the finish to penetrate evenly, resulting in a more professional and polished look.
Remember to take breaks while sanding to rest your hands and reduce fatigue. It’s important to wear protective gear, including safety goggles and a dust mask, to shield yourself from flying debris and inhaling sawdust.
With the surfaces of your dresser drawers successfully sanded, you’re now ready to move on to the next steps in the restoration process, such as filling in cracks and holes or applying a primer.
If the old dresser drawers are sticking, try rubbing a bar of soap along the tracks to help them slide more smoothly.
Filling in Cracks and Holes
After sanding the surfaces of your dresser drawers, it’s time to address any cracks, holes, or gaps that may be present. Filling in these imperfections is an essential step in the restoration process, as it helps to create a smooth and flawless surface for refinishing. Here’s a step-by-step guide on how to fill in cracks and holes:
- Clean the surfaces: Before filling in any cracks or holes, ensure that the surfaces are clean and free from dust or debris. Use a soft cloth or brush to remove any remaining sanding dust.
- Select the appropriate filler: Choose a high-quality wood filler that matches the color and grain of your dresser drawers. You may also opt for a two-part epoxy filler for larger or deeper repairs.
- Prepare the filler: Follow the manufacturer’s instructions to prepare the filler. This may involve mixing the components together or simply opening the container.
- Apply the filler: Use a putty knife or a small spatula to apply the filler to the cracks or holes. Press the filler into the imperfections, ensuring that it completely fills the voids. Smooth the surface of the filler, removing any excess with the putty knife.
- Allow the filler to dry: The drying time will vary depending on the type of filler used. Follow the instructions provided by the manufacturer to ensure that the filler has fully dried and hardened.
- Sand the filled areas: Once the filler has dried, use sandpaper or a sanding block to gently sand the filled areas. This will help level the filler with the surrounding surface and create a smooth transition.
- Inspect and repeat if necessary: After sanding, inspect the filled areas for any remaining imperfections or unevenness. If needed, repeat the filling and sanding process until you achieve a seamless and flawless finish.
- Remove sanding dust: Once you are satisfied with the results, wipe away any sanding dust using a soft brush or cloth.
Filling in cracks and holes not only improves the aesthetic appearance of your dresser drawers but also enhances their overall durability. By addressing these imperfections, you ensure that the surfaces are ready for the next steps in the restoration process, such as priming and painting or staining.
Remember to carefully follow the instructions provided by the manufacturer when working with wood fillers or epoxy fillers. It’s also important to work in a well-ventilated area and wear protective gear, including gloves and a dust mask, during the filling and sanding process.
With the cracks and holes successfully filled, you can now proceed with the next stages of restoring your old dresser drawers, such as applying a primer or moving on to the painting or staining process.
Priming the Dresser Drawers
Priming is a crucial step in the restoration process, as it helps to create a smooth and even base for painting or staining your dresser drawers. Primer provides adhesion, seals the wood, and helps the paint or stain adhere better, ensuring a durable and professional finish. Here’s a step-by-step guide on how to prime your dresser drawers:
- Prepare your work area: Find a well-ventilated space and lay down a drop cloth or newspaper to protect your work surface from primer spillage.
- Gather your supplies: You’ll need a high-quality primer suitable for the type of paint or stain you plan to apply, a paintbrush or foam roller, and painting tools such as a paint tray and stirring stick.
- Inspect the surfaces: Before applying primer, carefully inspect the surfaces of your dresser drawers for any remaining imperfections or rough spots. If necessary, lightly sand those areas to ensure a smooth surface.
- Mix and prepare the primer: Follow the manufacturer’s instructions for mixing the primer, if required. Stir the primer thoroughly to ensure an even consistency.
- Apply the primer: Dip your paintbrush or foam roller into the primer, removing any excess on the side of the paint tray. Apply a thin, even coat of primer to the surfaces of each drawer, working in the direction of the wood grain.
- Allow the primer to dry: Follow the drying time recommended by the manufacturer. Ensure that the primer is completely dry and cured before proceeding to the next steps.
- Inspect and repeat if necessary: After the first coat of primer has dried, inspect the surfaces for any areas that may require additional priming. If needed, apply a second coat of primer and allow it to dry completely.
- Lightly sand the primed surfaces: Once the final coat of primer has dried, use a fine-grit sandpaper or sanding block to lightly sand the primed surfaces. This will create a smooth texture, ensuring the best possible adhesion for the paint or stain.
- Remove sanding dust: After sanding, wipe away any sanding dust using a soft brush or cloth. It’s important to have clean and dust-free surfaces before proceeding to the painting or staining process.
Priming your dresser drawers provides a solid foundation for the final paint or stain application. It helps to improve the coverage, color vibrancy, and durability of the finish. Additionally, primer can also act as a barrier, preventing any stains or chemicals from bleeding through the paint or stain.
When selecting a primer, choose one that is compatible with the paint or stain you plan to use. If you are uncertain, consult with a professional at your local paint or home improvement store for guidance.
With the dresser drawers successfully primed, you are now ready to move on to the exciting part of the restoration process—painting or staining your dresser drawers to bring them back to life!
Read more: How Deep Are Dresser Drawers
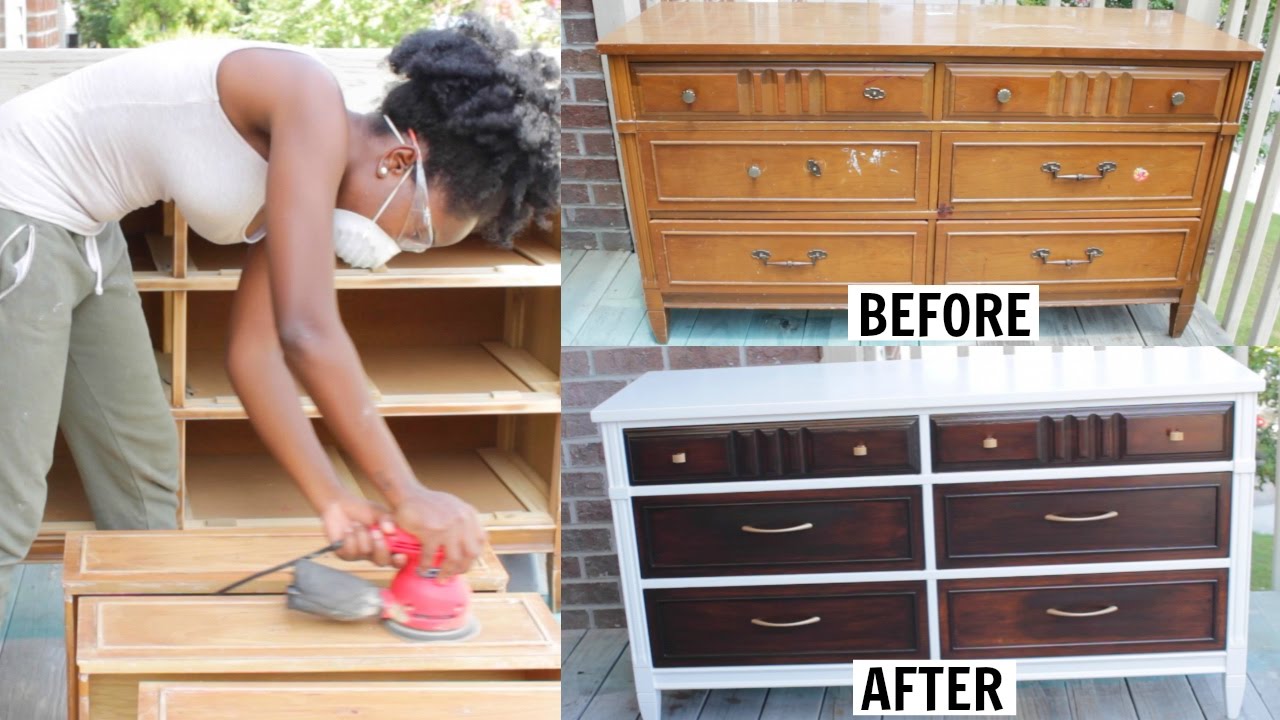
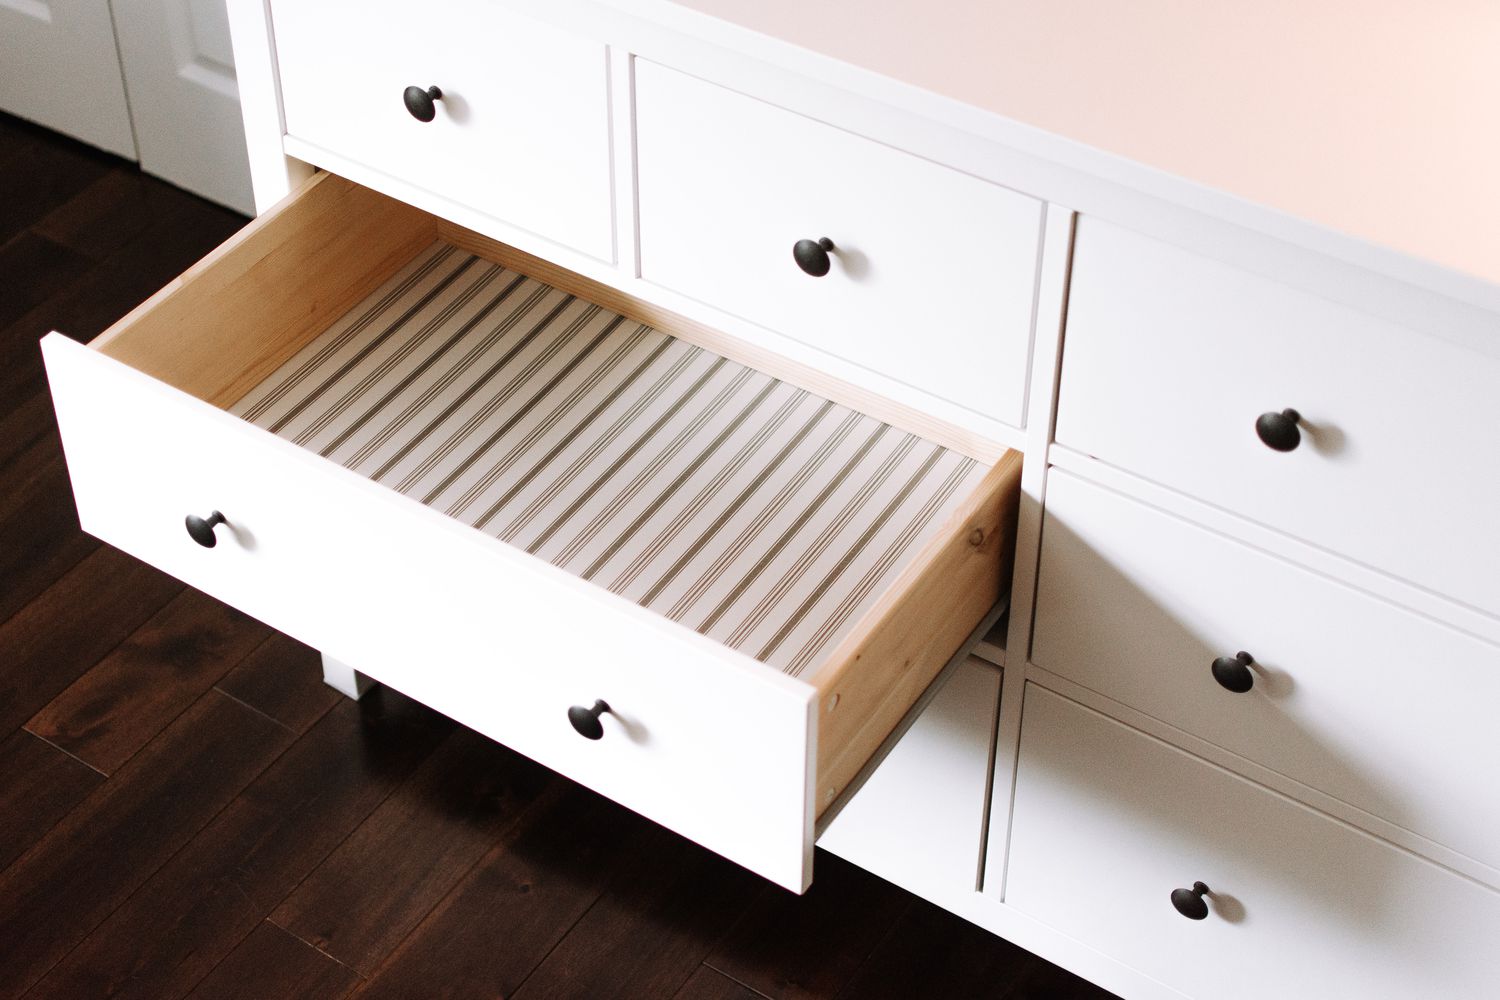
Painting or Staining the Drawers
The painting or staining process is where you can truly transform the look of your dresser drawers and infuse them with your personal style. Whether you choose to paint them in a vibrant color or showcase the natural beauty of the wood with a stain, this step will breathe new life into your old furniture. Here’s a step-by-step guide on how to paint or stain your dresser drawers:
- Choose your paint or stain: Select a high-quality paint or stain that suits your desired aesthetic. Consider factors such as your preferred color scheme, the type of wood used in your dresser, and the overall style of the room.
- Prepare your work area: Find a well-ventilated space and lay down a drop cloth or newspaper to protect your work surface from paint or stain drips and spills.
- Prime (if necessary): If you are painting raw wood or applying a light-colored paint over a dark finish, it’s recommended to apply a primer to ensure proper coverage and color vibrancy. Follow the instructions provided by the manufacturer for applying the primer.
- Stir the paint or stain: Whether you’re using paint or stain, give it a good stir to ensure a consistent color and texture throughout.
- Painting the drawers:
- Using a paintbrush or foam roller, apply a thin, even coat of paint to the surfaces of each drawer. Work in the direction of the wood grain for a smoother finish.
- Allow the first coat to dry completely. If needed, apply additional coats of paint until you achieve the desired color and coverage. Be sure to let each coat dry thoroughly before applying the next one.
- Staining the drawers:
- Using a brush or clean cloth, apply the stain to the surfaces of each drawer, following the direction of the wood grain. Work in small sections to ensure the stain is evenly applied.
- Allow the stain to penetrate the wood for the recommended amount of time indicated on the product label. Wipe away any excess stain with a clean cloth.
- If a darker or deeper color is desired, apply additional coats of stain, allowing each coat to dry completely before applying the next one. Remember to wipe off any excess stain between coats.
- Allow the paint or stain to dry: Ensure that the paint or stain is completely dry and cured before proceeding to the next steps. Follow the drying time recommended by the manufacturer.
- Apply a protective finish: To protect the painted or stained surfaces and enhance their longevity, apply a clear protective finish such as polyurethane or varnish. Follow the manufacturer’s instructions for the application method and drying time.
Painting or staining your dresser drawers allows you to express your creativity and customize the look of your furniture. Consider coordinating the color or finish with your room decor, or use the opportunity to make a bold statement with a contrasting hue.
Remember to work in a well-ventilated area and wear appropriate protective gear, including gloves and a mask, when working with paint or stain. Follow the instructions provided by the manufacturer for the specific paint or stain products you are using.
Once the paint or stain is dry and the protective finish is applied, you can move on to the final step in the restoration process—reassembling the drawers and adding the finishing touches to your newly transformed dresser!
Applying a Protective Finish
Applying a protective finish is the final step in the restoration process of your dresser drawers. This crucial step helps to seal and protect the painted or stained surfaces, ensuring their longevity and durability. A protective finish adds a layer of sheen and enhances the overall appearance of your restored furniture. Here’s a step-by-step guide on how to apply a protective finish:
- Choose the right finish: Select a clear protective finish that is suitable for the type of paint or stain you used on your dresser drawers. Common options include polyurethane, varnish, or lacquer.
- Prepare your work area: Find a well-ventilated space and lay down a drop cloth or newspaper to protect your work surface.
- Gather your supplies: You’ll need the protective finish of your choice, a clean brush or foam applicator, and a stirring stick.
- Stir the protective finish: Before applying the protective finish, thoroughly stir it to ensure an even consistency.
- Apply a thin, even coat: Dip your brush or foam applicator into the protective finish, removing any excess on the side of the container. Apply a thin, even layer of the finish to the surfaces of each drawer, working in the direction of the wood grain.
- Allow the first coat to dry: Follow the manufacturer’s instructions for the recommended drying time. Ensure that the finish is completely dry and cured before applying additional coats.
- Lightly sand between coats: Once the first coat is dry, gently sand the surfaces with a fine-grit sandpaper or sanding block. This helps to create a smooth surface for subsequent coats and promotes better adhesion.
- Apply additional coats as needed: Repeat the process of applying thin, even coats of the protective finish, allowing each coat to dry and lightly sanding between coats. The number of coats will depend on the level of protection and sheen you desire.
- Inspect and touch up if necessary: After the final coat has dried, inspect the surfaces for any imperfections or areas that may require touch-ups. If needed, carefully sand any rough spots and apply a small amount of protective finish to those areas.
- Allow the protective finish to fully cure: Follow the manufacturer’s instructions for the recommended curing time. This ensures that the protective finish hardens and provides maximum durability.
Applying a protective finish not only enhances the appearance of your dresser drawers but also safeguards them against daily wear and tear, moisture, and other environmental factors. The finish provides a protective barrier, making it easier to clean and maintain your restored furniture in the long run.
Be sure to work in a well-ventilated area and wear appropriate protective gear, such as gloves and a mask, when applying the protective finish. Follow the instructions provided by the manufacturer for the specific product you are using.
With the protective finish applied and completely cured, you can now move on to the final step—reassembling the drawers and placing them back in your beautifully restored dresser!
Reassembling the Drawers and Dresser
After completing the various stages of restoration, including repairing, sanding, painting or staining, and applying a protective finish to your dresser drawers, it’s time to reassemble them and put your restored furniture back together. Here’s a step-by-step guide on how to reassemble the drawers and dresser:
- Gather your tools and supplies: Ensure you have all the necessary tools, such as a screwdriver, screws, and any replacement hardware you may need. It’s also helpful to have an assistant to help with holding and aligning the pieces during reassembly.
- Inspect and clean the drawer tracks: Check the drawer tracks in the dresser to ensure they are clean and free of dirt or debris. Wipe them down with a soft cloth if necessary.
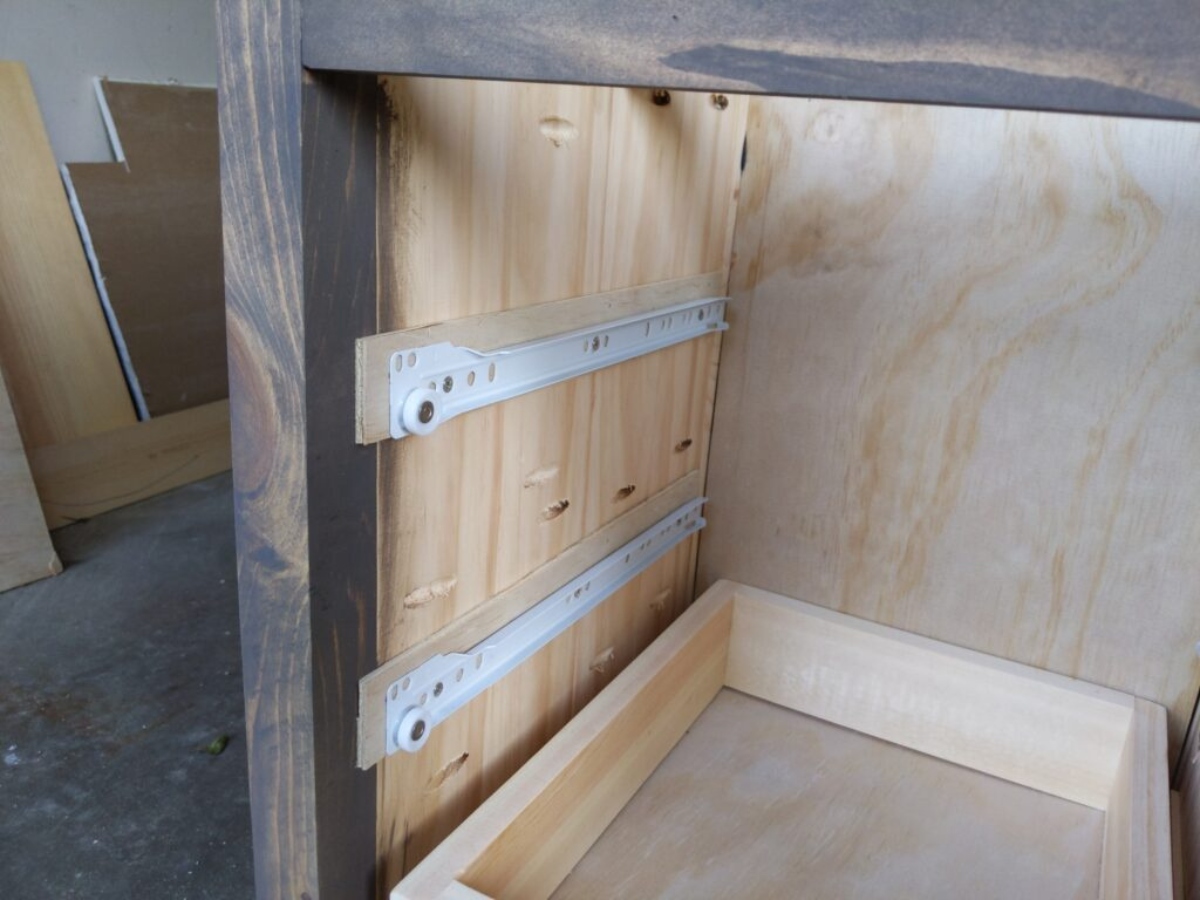
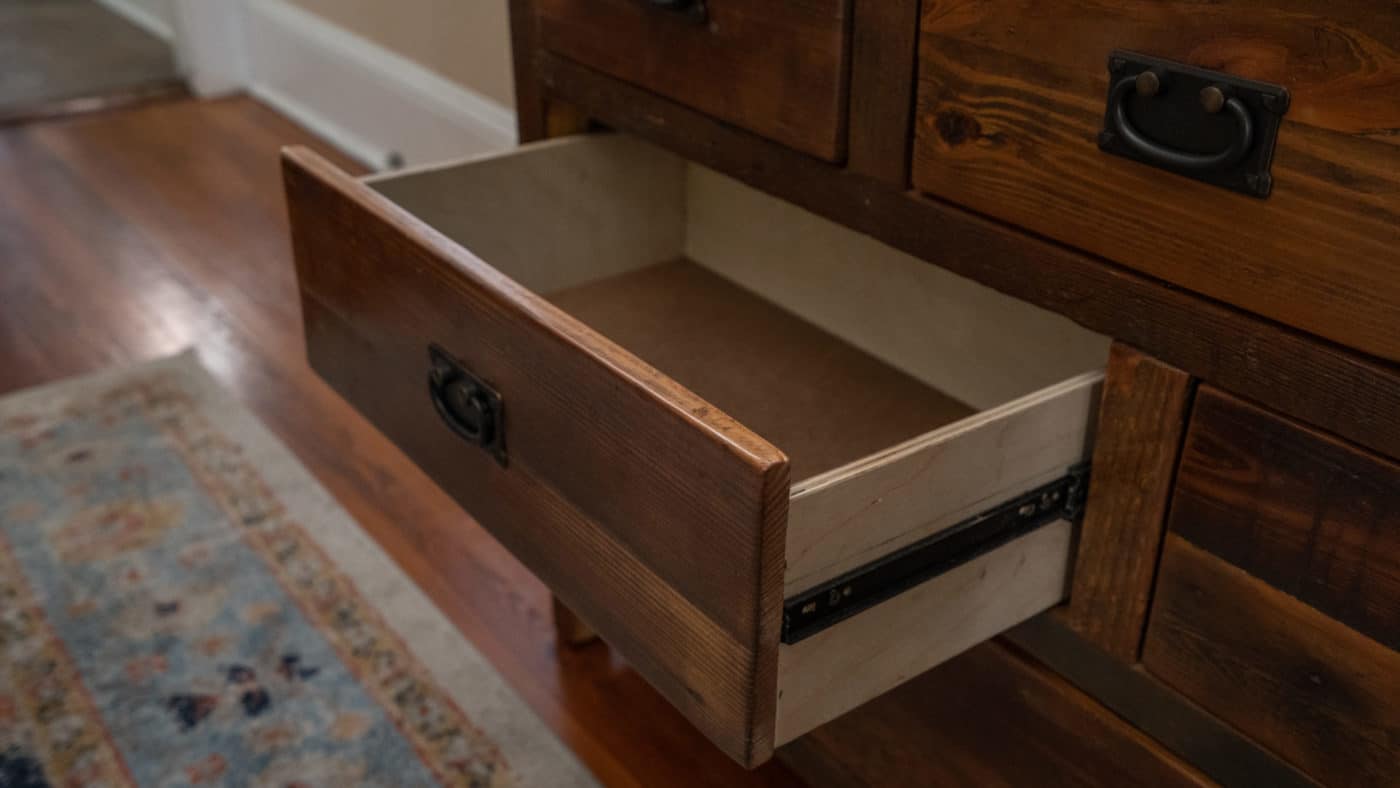
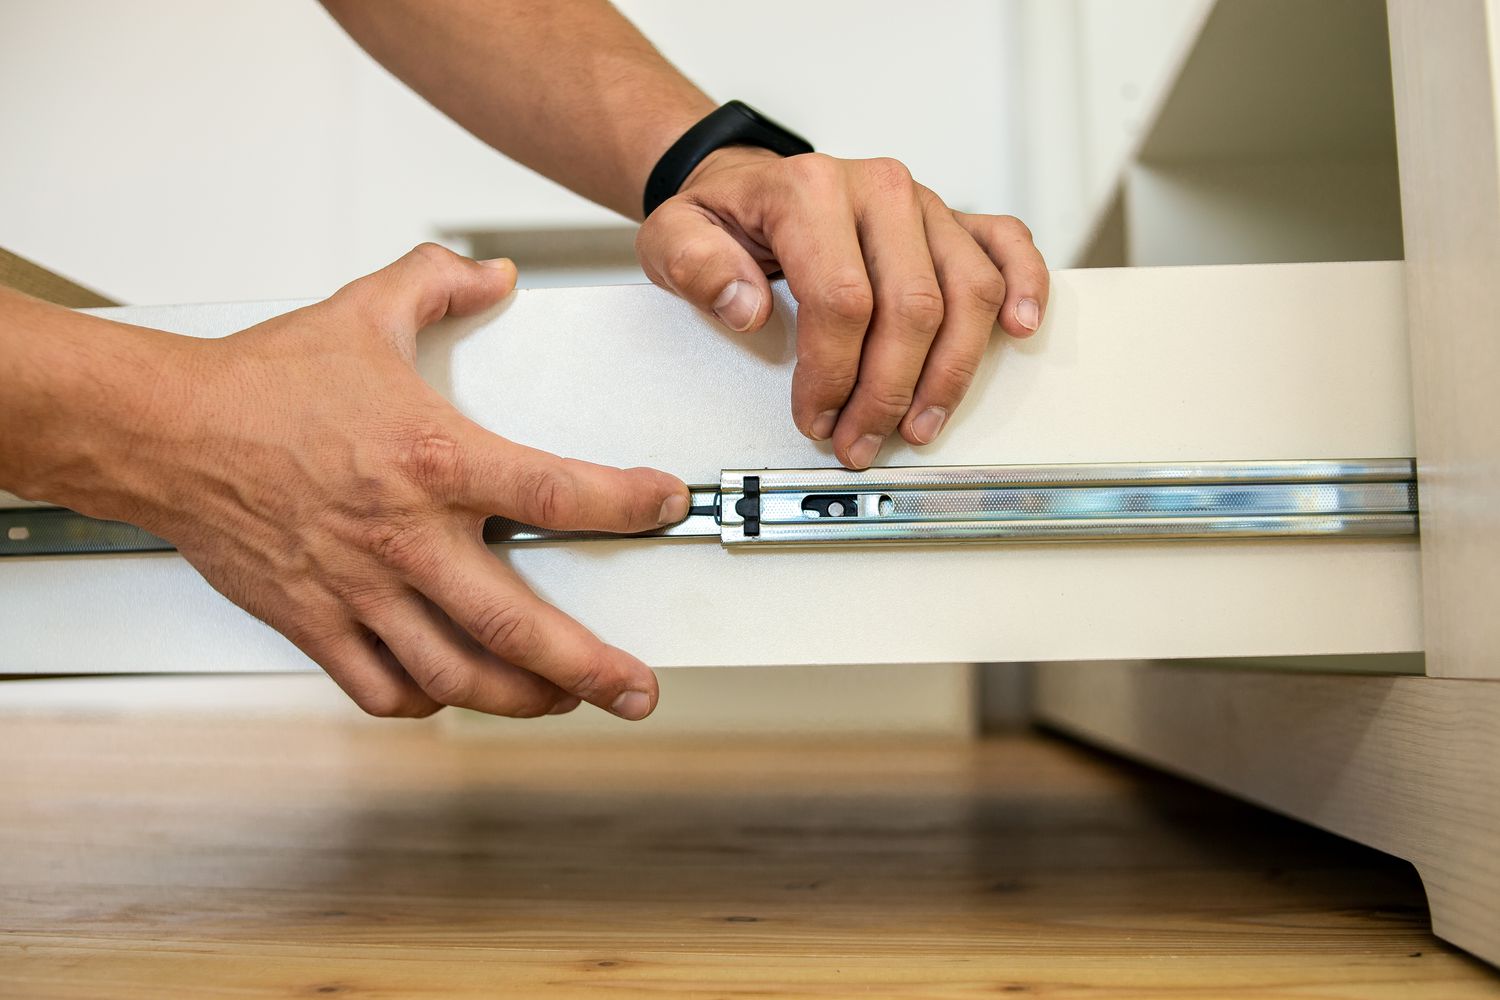
- Attach drawer slides or runners: If your dresser has drawer slides or runners, attach them to the inside of the dresser following the manufacturer’s instructions. Make sure they are properly aligned and securely fastened.
- Insert the drawers: Carefully align each drawer with its designated space in the dresser. Slide the drawer into place, ensuring that it glides smoothly along the drawer slides or runners.
- Check for proper alignment: Ensure that the drawers are aligned evenly and sit flush with the front of the dresser. Make any necessary adjustments to ensure a proper fit.
- Reattach hardware: Once the drawers are in place, reattach the hardware, such as handles or knobs, to each drawer. Ensure that they are securely fastened.
- Test the functionality: Open and close each drawer to test its smoothness and functionality. Make any adjustments if needed to ensure they operate properly.
- Inspect and touch up as necessary: Inspect the dresser and drawers for any final imperfections or areas that may require touch-ups. If necessary, address these areas with touch-up paint or stain.
Reassembling the drawers and dresser is the final step in the restoration process, and it marks a significant milestone in returning your furniture to its former glory. Take the time to carefully align and ensure a proper fit, as this will ensure the functionality and longevity of your restored dresser.
Once the drawers are securely in place and the hardware is reattached, step back and admire your beautifully restored dresser. You have successfully brought new life to your furniture, and it’s now ready to serve you for years to come.
Remember to follow any specific instructions or guidelines provided by the manufacturer for reassembling the drawers and dresser, especially if you are working with specialized hardware or unique furniture designs.
With the reassembly complete, enjoy the satisfaction of transforming your old dresser into a functional and visually appealing piece of furniture. Take pride in your hard work and the restored beauty of your dresser!
Conclusion
Congratulations on successfully restoring your old dresser drawers! Through careful assessment, diligent repairs, and thoughtful refinishing, you have revived a piece of furniture that holds both sentimental and practical value. By following the steps outlined in this comprehensive guide, you have transformed your old dresser into a functional and visually pleasing addition to your home.
Assessing the damage, gathering the necessary tools and supplies, and removing the drawers were important initial steps in the restoration process. By thoroughly understanding the condition of your dresser, you were able to plan and prioritize the repairs needed. Repairing loose joints and replacing broken or damaged parts ensured the stability and longevity of your dresser drawers.
Sanding the surfaces and filling in cracks and holes created a smooth canvas, allowing you to prime and paint or stain your dresser drawers. Applying a protective finish provided durability and enhanced the overall appearance of your restored furniture.
Finally, reassembling the drawers and dresser brought everything together, uniting the restored components into a fully functional and aesthetically pleasing piece of furniture. Take a moment to step back and appreciate the transformation you’ve achieved.
Throughout this restoration journey, you demonstrated both craftsmanship and creativity. You combined your furniture knowledge with the practical tips and techniques outlined in this guide to breathe new life into your old dresser drawers.
Remember, the skills and knowledge you acquired during this restoration process can be applied to future furniture projects. The satisfaction you experienced in bringing new life to your dresser is just the beginning of a world of possibilities for your DIY endeavors.
Thank you for joining us on this comprehensive guide to fixing and restoring your old dresser drawers. We hope it has been informative, inspiring, and empowering. Enjoy the fruits of your labor and the renewed beauty of your restored dresser for years to come!
Frequently Asked Questions about How To Fix An Old Dresser Drawers
Was this page helpful?
At Storables.com, we guarantee accurate and reliable information. Our content, validated by Expert Board Contributors, is crafted following stringent Editorial Policies. We're committed to providing you with well-researched, expert-backed insights for all your informational needs.


0 thoughts on “How To Fix An Old Dresser Drawers”