
Articles
How To Hang Mirror On The Ceiling
Modified: May 6, 2024
Learn how to hang a mirror from the ceiling with step-by-step instructions and expert tips in this informative article. Discover the best techniques for securely mounting your mirror.
(Many of the links in this article redirect to a specific reviewed product. Your purchase of these products through affiliate links helps to generate commission for Storables.com, at no extra cost. Learn more)
Introduction
When it comes to adding a touch of elegance and functionality to a room, hanging a mirror from the ceiling can be a brilliant choice. Not only does it create a unique focal point, but it also maximizes the use of space and adds a sense of depth to the room. Whether you’re looking to create a statement piece or simply want to make a room appear larger, this guide will walk you through the process of hanging a mirror from the ceiling.
Hanging a mirror from the ceiling may seem like a daunting task, but with the right materials, tools, and a step-by-step approach, it can be easily accomplished. In this article, we will cover all the necessary steps, providing you with the knowledge and confidence to complete the installation successfully.
Please keep in mind that safety should always be a top priority. If you’re unsure about any step or don’t feel confident in your abilities, it’s best to consult a professional or seek assistance. Now, let’s dive into the process of hanging a mirror from the ceiling!
Key Takeaways:
- Elevate your room’s aesthetics and functionality by hanging a mirror from the ceiling. Follow our step-by-step guide for a secure and visually appealing installation.
- Prioritize safety and take necessary precautions throughout the process. Regularly check the mirror’s stability and make adjustments to maintain its position and balance.
Read more: How To Hang Gym Mirrors
Step 1: Gather necessary materials
Before you begin installing the mirror, it’s crucial to gather all the necessary materials. Having everything prepared ahead of time will streamline the process and prevent any delays or interruptions. Here’s a list of the materials you’ll need:
- Measuring tape or ruler
- Screwdriver or drill
- Stud finder
- Mounting brackets or hanging hardware
- Screws or toggle bolts
- Level
- Wire or cable
- Wire or cable connectors
- Ceiling hooks or mounts
- Pencil
- Protective eyewear and gloves (optional)
Once you have all the necessary materials, you can proceed to the next step with confidence, knowing that you’re fully equipped to hang the mirror from the ceiling.
It’s essential to check if you have all the tools and materials listed above. If you’re missing any item, make sure to purchase or borrow it before starting the installation process. This will save you from any unnecessary interruptions, ensuring a smooth and efficient installation.
Keep in mind that the specific materials required may vary depending on the size and weight of the mirror, as well as the type of ceiling you have. It’s always a good idea to read the manufacturer’s instructions or consult with a professional for any specific recommendations.
Step 2: Determine the optimal location
Before you proceed with hanging the mirror from the ceiling, it’s important to determine the ideal location for installation. Consider the following factors:
- Functionality: Think about the purpose of the mirror. Do you want it to reflect natural light or create a focal point in the room? Consider how the mirror will interact with other elements in the space.
- Height: Measure the height of the ceiling and the desired height for the mirror. Take into account the average eye level of the people who will be using the mirror. Additionally, make sure the mirror won’t obstruct any doors, windows, or other fixtures in the room.
- Wall studs or ceiling joists: If possible, identify the location of wall studs or ceiling joists. These are sturdy structural elements that can provide the necessary support for the weight of the mirror. Use a stud finder to locate them.
Once you’ve considered these factors, mark the chosen location with a pencil. You can use a level to ensure the markings are straight and aligned. Take a step back and assess the proposed position to make sure it fits well within the overall aesthetic and functionality of the room.
It’s worth noting that if you’re hanging a particularly heavy or large mirror, you may need to consult with a professional to determine the safest and most suitable location for installation. They can provide expert advice based on the specific characteristics of your mirror and ceiling.
By taking the time to carefully evaluate and select the optimal location, you’ll ensure that the mirror not only enhances the aesthetics of the room but also serves its purpose effectively.
Step 3: Prepare the ceiling for installation
Once you have determined the optimal location for hanging the mirror, it’s time to prepare the ceiling for installation. By properly preparing the ceiling, you will ensure a secure and stable mounting for the mirror. Follow these steps:
- Clear the area: Remove any furniture or objects from beneath the chosen location. This will provide you with a clear workspace and prevent any accidents or obstructions during the installation process.
- Find the ceiling material: Determine the type of material your ceiling is made of. Common types include drywall, plaster, or concrete. This information will guide you in selecting the appropriate hardware for hanging the mirror.
- Use protective measures: If you’re working with heavy-duty tools or equipment, such as a drill, it’s advisable to wear protective eyewear and gloves. Safety should always be a priority when working on any home improvement project.
- Mark the attachment points: Using a pencil, mark the spots where you will be attaching the mirror’s hanging hardware. Take precise measurements and ensure the markings align with the chosen location from Step 2.
- Locate the ceiling joists or studs: If possible, locate the ceiling joists or studs above the marked points for added support. You can use a stud finder for this step. If the mirror is too heavy for a single joist, you may need to consider alternative mounting techniques or consult a professional.
By adequately preparing the ceiling, you lay the foundation for a safe and secure installation. This step is crucial, as it ensures that the mirror will be properly anchored and able to withstand the test of time.
When hanging a mirror from the ceiling, use a sturdy anchor and ensure it is securely fastened to the ceiling joists to prevent it from falling. Use appropriate hardware and consider the weight of the mirror.
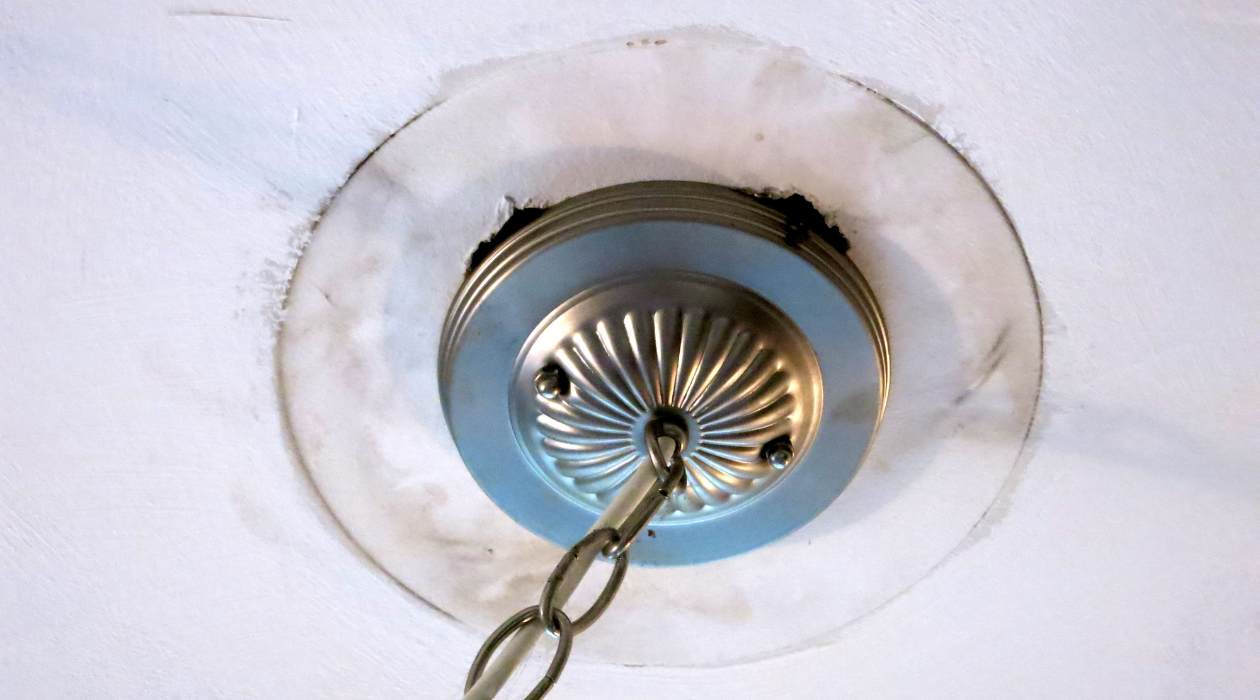
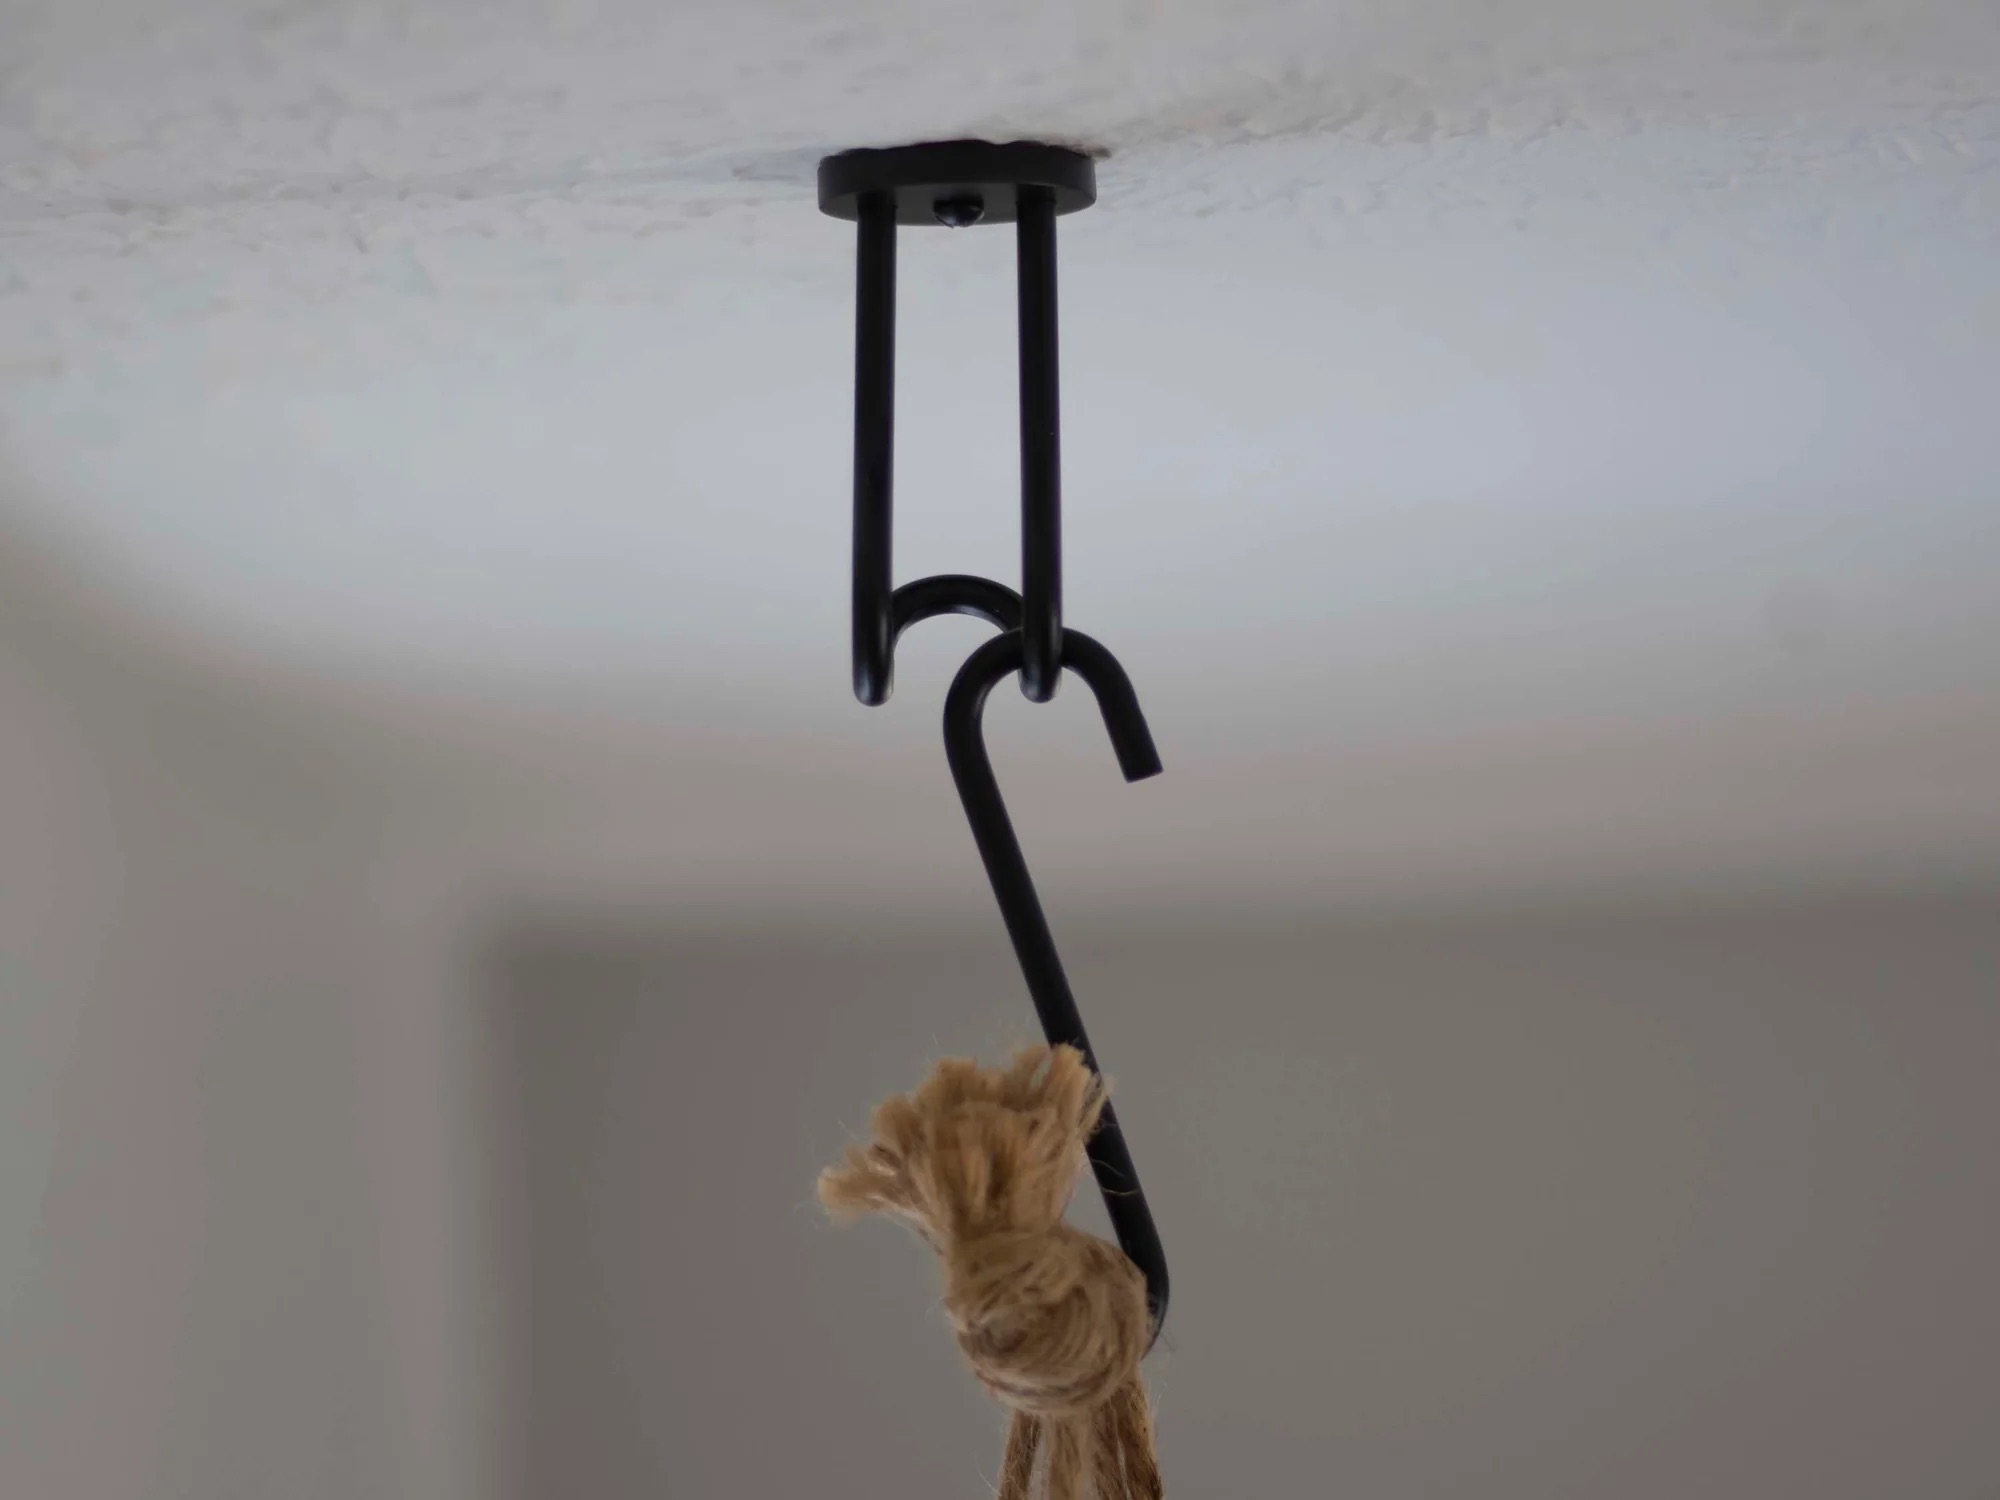
Step 4: Install the hanging hardware
With the ceiling prepared, it’s time to install the hanging hardware for the mirror. The type of hardware you use will depend on the weight and size of the mirror, as well as the ceiling material. Follow these steps:
- Choose the appropriate hanging hardware: Refer to the manufacturer’s instructions or consult with a professional to select the right hardware for your specific mirror. Common options include mounting brackets, D-rings, or French cleats.
- Align the hardware with the marked points: Place the mounting hardware on the ceiling, aligning it with the previously marked attachment points. Ensure that the hardware is level and centered.
- Secure the hardware: Use a screwdriver or drill (depending on the ceiling material) to attach the hardware to the ceiling. Make sure the screws or bolts are securely fastened, providing sufficient support for the weight of the mirror.
- Double-check stability: Once the hanging hardware is installed, give it a gentle tug or shake to ensure it’s firmly attached. If there is any wobbling or instability, readjust the hardware or seek professional guidance.
It’s important to follow the manufacturer’s instructions for installing the specific hanging hardware you chose. If you are unsure or need guidance, don’t hesitate to consult with a professional to ensure a secure and reliable installation.
Remember, the strength and stability of the hardware are essential for holding the weight of the mirror. Taking the time to install it correctly will provide peace of mind and prevent any potential accidents or damage in the future.
Read more: How To Install A Mirror On The Ceiling
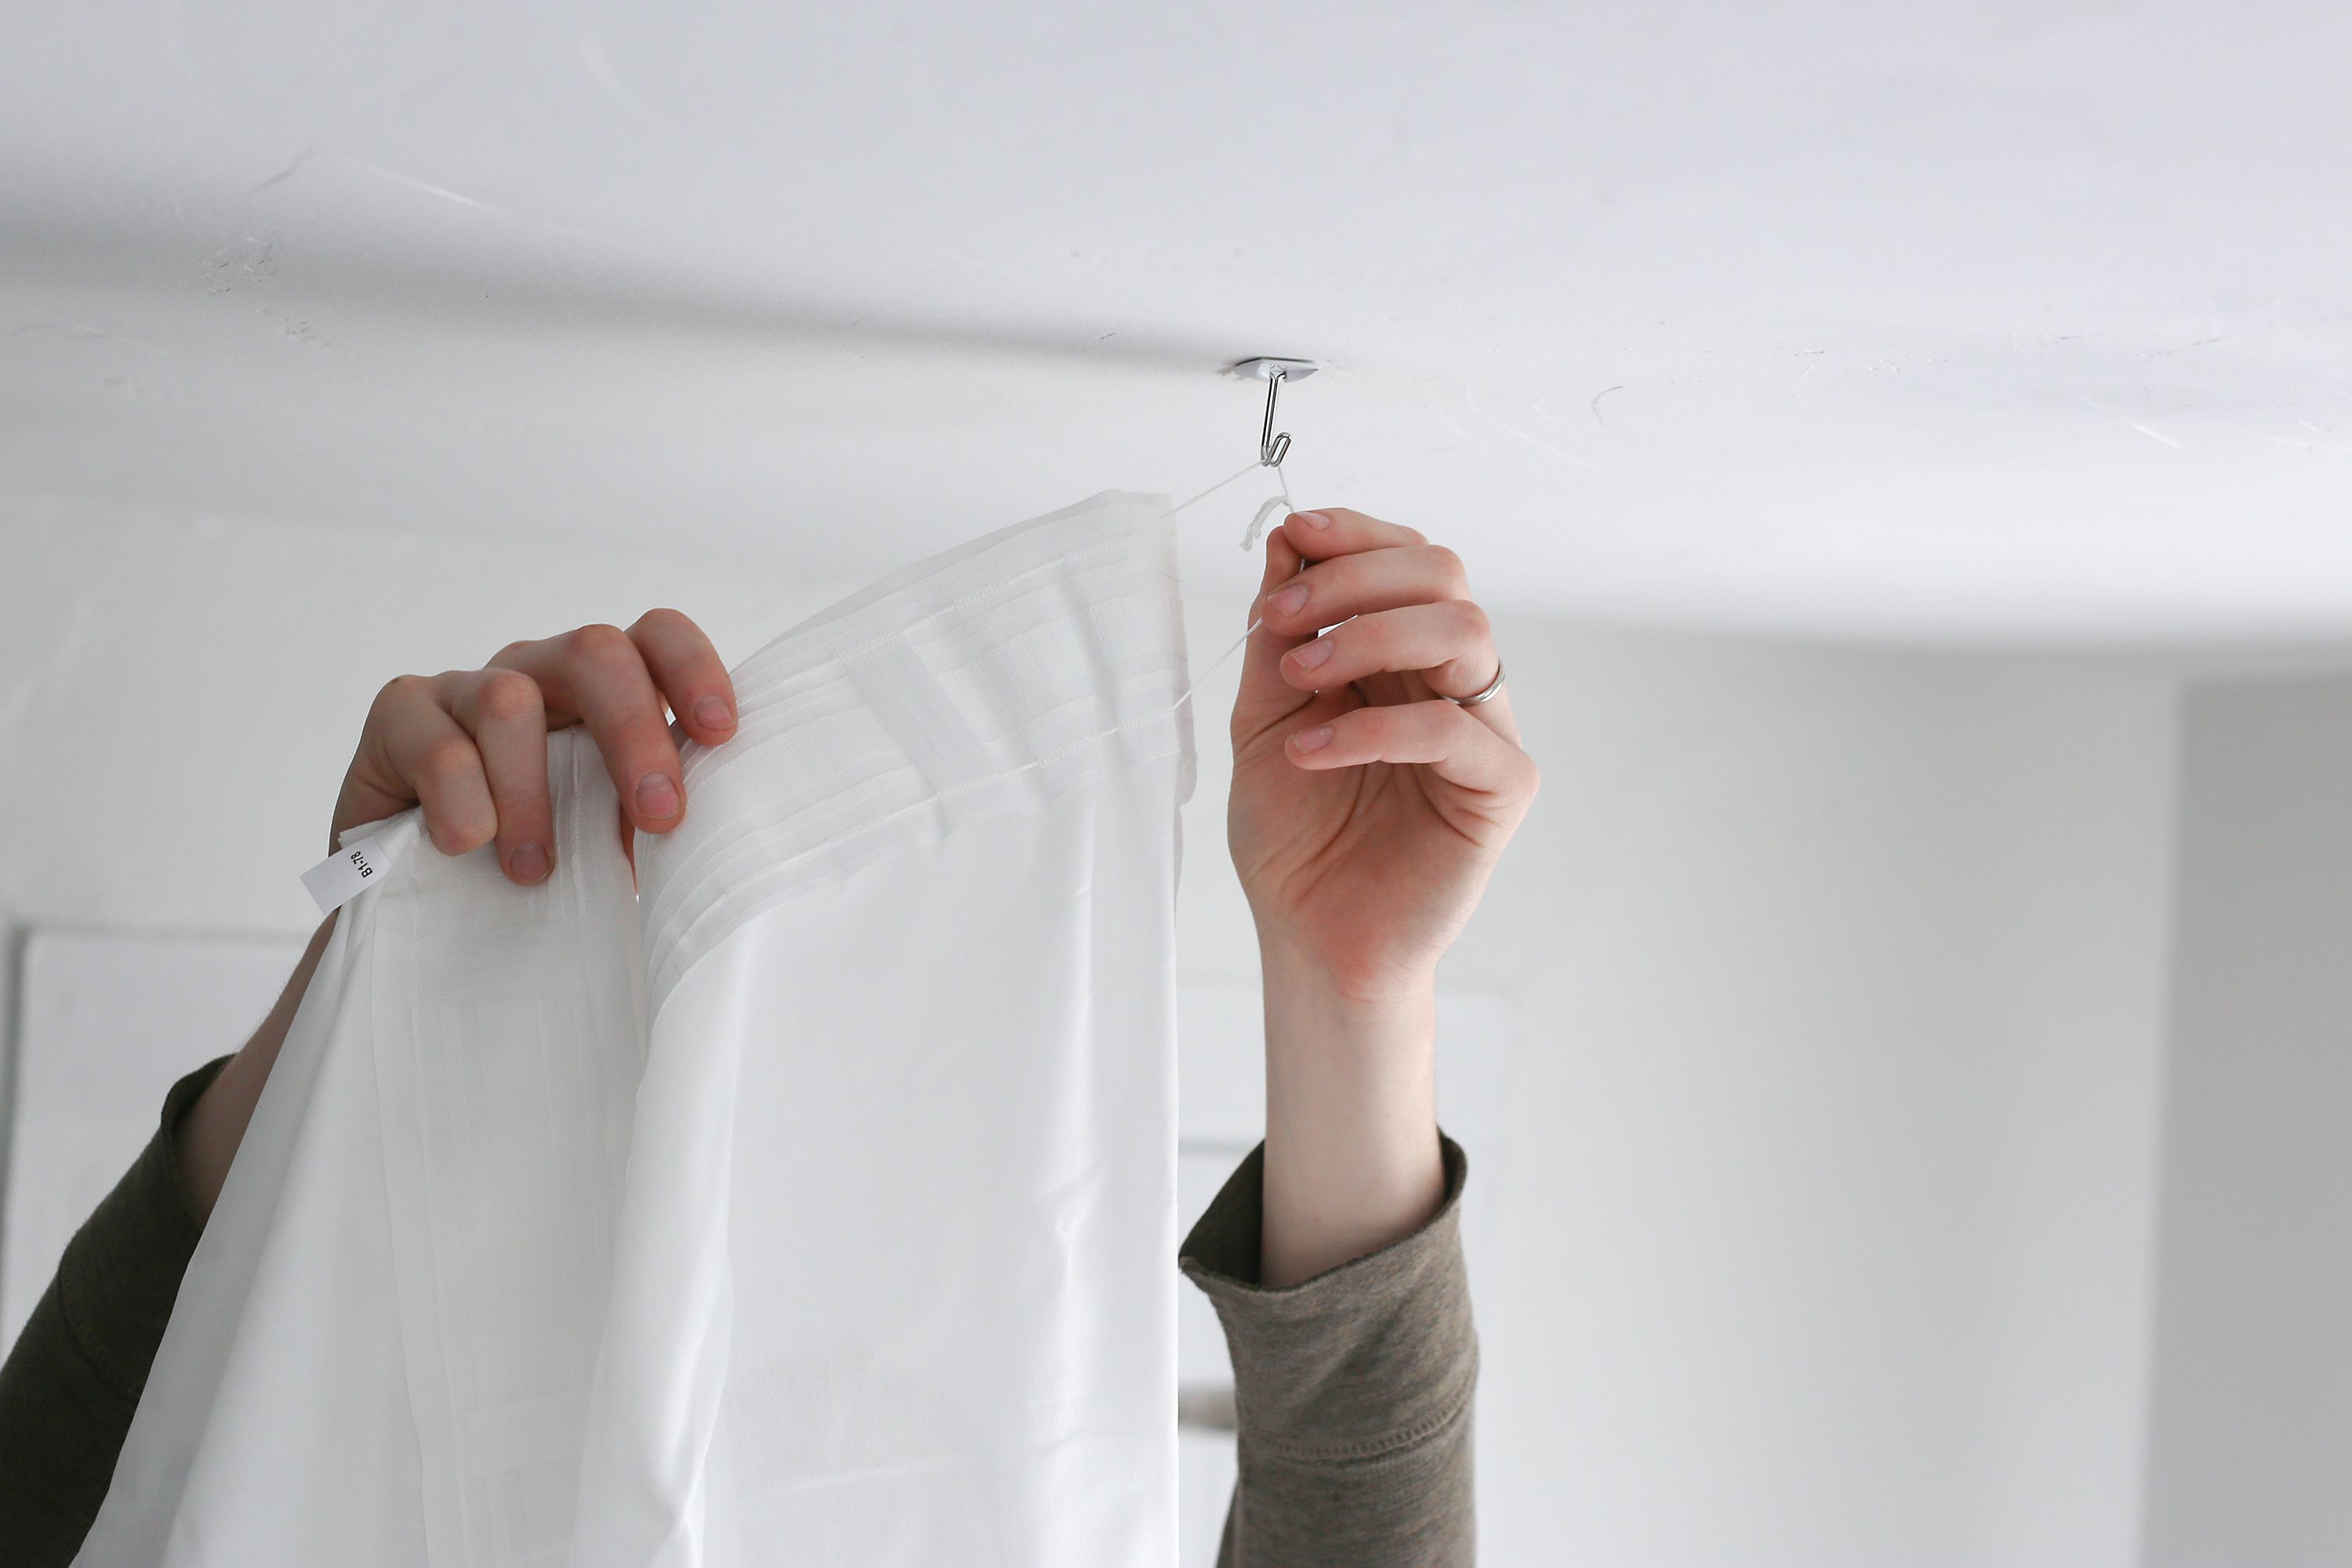
Step 5: Hang the mirror from the ceiling
Now that the hanging hardware is securely in place, it’s time to hang the mirror from the ceiling. Follow these steps to ensure a successful installation:
- Attach the wire or cable to the mirror: Depending on the type of hanging hardware you’ve chosen, you may need to attach a wire or cable to the back of the mirror. Ensure that it is securely fastened and evenly distributed to maintain balance.
- Loop the wire or cable onto the hanging hardware: Take the wire or cable and loop it onto the hooks or mounts of the installed hardware. Double-check that the mirror is level and positioned correctly.
- Adjust the wire or cable tension: If necessary, adjust the tension of the wire or cable to ensure the mirror hangs straight and at the desired height. Use wire or cable connectors to secure the tension in place.
- Confirm stability: Gently shake the mirror to ensure it’s securely suspended from the ceiling. Check for any wobbling or tilting and make adjustments as needed.
It’s crucial to take your time during this step and ensure the mirror is properly positioned and securely hung. If you’re unsure about the process or need assistance, don’t hesitate to ask for help from a professional.
Once the mirror is hanging securely, step back and admire your work! Take a moment to appreciate how it enhances the room and reflects your personal style. With proper installation, your ceiling-hung mirror will add a distinctive touch to your space.
Step 6: Ensure stability and adjust as needed
After hanging the mirror from the ceiling, it’s essential to ensure its stability and make any necessary adjustments. This step will ensure the longevity and safety of your mirror installation. Follow these guidelines:
- Check for levelness: Use a level to confirm that the mirror is level horizontally and vertically. Adjust the positioning if needed to ensure a straight and balanced appearance.
- Assess for wobbling: Give the mirror a gentle shake to check for any wobbling or movement. If the mirror feels unstable, first ensure that the hanging hardware is securely attached to the ceiling. If necessary, you may need to readjust the wire or cable tension for balanced support.
- Inspect the attachment points: Regularly inspect the attachment points on the ceiling and the mirror’s hanging hardware for any signs of loosening or damage. If you notice any issues, address them promptly to prevent accidents or potential damage to the mirror.
- Make adjustments as needed: Over time, the mirror might shift slightly or require readjustments. Keep an eye on its positioning and stability, and make any necessary adjustments to maintain its optimal condition.
Remember, ensuring the stability of the hanging mirror is crucial to prevent accidents and ensure its longevity. Regular maintenance and periodic checks will help maintain its position and appearance in the room.
If you’re unsure about any aspect of the stability or adjustment process, or if you notice any significant issues, it’s always a good idea to consult with a professional who can provide guidance and assistance.
By following these steps and regularly checking for stability and making necessary adjustments, you can enjoy your ceiling-hung mirror with confidence and peace of mind.
Conclusion
Hanging a mirror from the ceiling can be a brilliant way to add a unique and stylish touch to any room. By following the step-by-step process outlined in this guide, you can successfully install a ceiling-hung mirror and enjoy its aesthetic and functional benefits.
Throughout the installation process, it’s important to prioritize safety and take the necessary precautions. If you’re unsure about any step or lack confidence in your abilities, it’s best to consult with a professional or seek assistance.
From gathering the necessary materials to determining the optimal location, preparing the ceiling, installing the hanging hardware, and finally hanging the mirror, each step plays a crucial role in ensuring a secure and visually appealing installation.
Remember to regularly check the stability of the mirror and make any necessary adjustments to maintain its position and balance. By keeping an eye on its condition and addressing any issues promptly, you can enjoy your ceiling-hung mirror for years to come.
Whether you’re looking to create a statement piece or make a room appear larger, a ceiling-hung mirror offers a unique and captivating addition to your space. By following the steps in this guide and considering your specific needs and preferences, you can successfully hang a mirror from the ceiling and transform your room into a stylish, functional, and visually stunning environment.
Now, armed with this knowledge, it’s time to embark on your mirror hanging project and elevate the aesthetics of your space to new heights!
Now that you've mastered hanging mirrors on the ceiling, why not explore other ways mirrors can spice up your decor? Our next article, "12 Amazing Decorative Mirrors for 2024," features a collection of unique and stylish mirrors that are perfect for any room. From minimalist designs to lavish statement pieces, find inspiration to transform your space with just a few clever additions. Don't miss out on these eye-catching options to enhance your home's aesthetic appeal.
Frequently Asked Questions about How To Hang Mirror On The Ceiling
Was this page helpful?
At Storables.com, we guarantee accurate and reliable information. Our content, validated by Expert Board Contributors, is crafted following stringent Editorial Policies. We're committed to providing you with well-researched, expert-backed insights for all your informational needs.


0 thoughts on “How To Hang Mirror On The Ceiling”