Articles
How To Install A Skylight Tube
Modified: August 28, 2024
Learn how to install a skylight tube with our informative articles. Get step-by-step instructions and expert tips for a successful installation.
(Many of the links in this article redirect to a specific reviewed product. Your purchase of these products through affiliate links helps to generate commission for Storables.com, at no extra cost. Learn more)
Introduction
Welcome to our comprehensive guide on how to install a skylight tube! Skylight tubes are a fantastic way to bring natural light into any dark or dimly lit space in your home. Whether you want to brighten up a small room, hallway, or even a closet, a skylight tube can make a significant difference in the ambiance and functionality of the space.
In this article, we will take you through a step-by-step process of installing a skylight tube, from gathering the necessary tools and materials to completing the finishing touches. You don’t need to be a professional contractor to tackle this project, but some basic DIY skills and a willingness to follow instructions will go a long way.
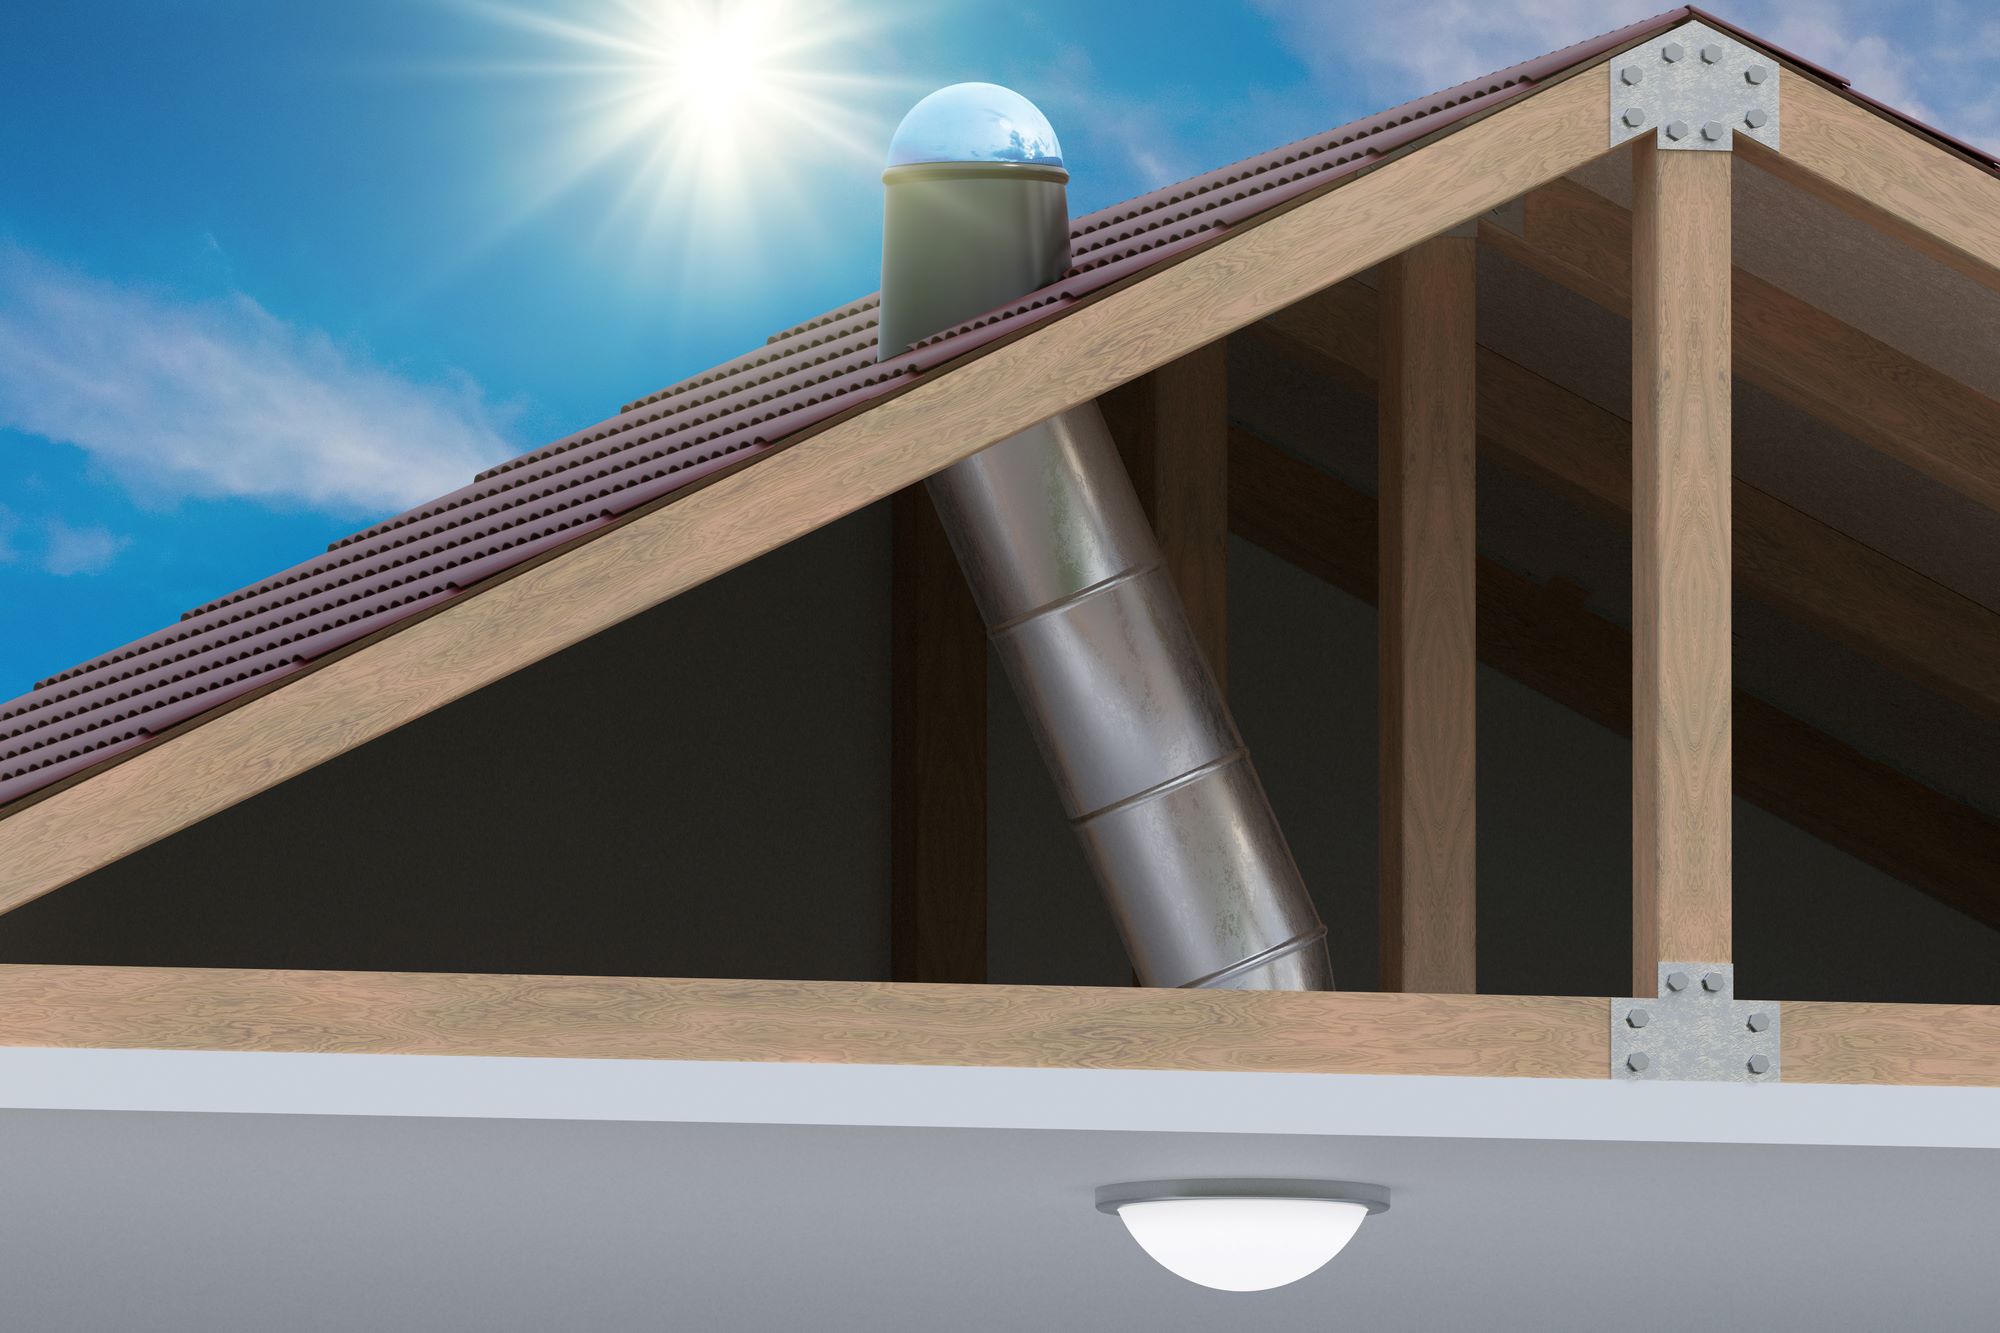
Before we dive into the installation process, let’s briefly discuss what a skylight tube is and why it’s a popular choice for homeowners. A skylight tube, also known as a sun tube or solar tube, is a cylindrical tube that captures natural light from the roof and channels it into a room through a diffuser, dispersing the light evenly.
Skylight tubes are highly efficient in bringing in natural light, even in areas where traditional skylights may not be suitable due to space constraints or where direct sunlight is not desired. Additionally, they are more affordable and easier to install compared to larger skylights, making them a popular choice for homeowners looking to improve their home’s lighting.
So, if you’re ready to brighten up your home and allow natural light to flow into even the darkest corners, let’s get started with the installation process!
Key Takeaways:
- Installing a skylight tube can transform any dimly lit space into a vibrant area filled with natural light, enhancing the ambiance and functionality of the room. With careful preparation and attention to detail, the installation process can be efficient and rewarding.
- Skylight tubes offer a practical and cost-effective solution for bringing natural light into areas where traditional windows or skylights may not be feasible. By following the step-by-step guide, homeowners can enjoy the benefits of improved lighting, energy efficiency, and a connection to the outdoors.
Read more: Which Is Better Solar Tube Or Skylight
Step 1: Gather the necessary tools and materials
Before you begin the installation of a skylight tube, it’s essential to have all the necessary tools and materials on hand. This will ensure a smooth and efficient installation process. Here’s a list of what you’ll need:
- A skylight tube kit: This will typically include the tube, dome, flashing, diffuser, and other necessary components. Make sure to choose a kit suitable for the size of the space you want to install the skylight tube in.
- Measuring tape: This is required to measure and mark the installation area accurately.
- Safety goggles and gloves: It’s crucial to protect your eyes and hands during the installation process.
- A ladder: Depending on the height of your ceiling, you may need a ladder to access the roof and the installation site.
- A reciprocating saw or jigsaw: This will be used to cut an opening in the roof for the skylight tube.
- A drill: You’ll need a drill to create pilot holes and secure the skylight tube frame.
- Screwdriver: This will be used to screw in the mountings and other components.
- Roofing cement or sealant: To weatherproof the skylight tube, you’ll need a reliable roofing cement or sealant.
- Safety harness: If you’re working on a steep or high roof, a safety harness is essential to prevent accidents.
- Insulation and drywall materials: Depending on your installation site, you may need insulation and drywall materials for finishing the interior.
Ensure that you have all these tools and materials ready before you begin the installation process. This will save you time and effort and ensure that you can complete the project without any interruptions.
Now that you have everything you need, you’re ready to move on to the next step: determining the location for the skylight tube.
Step 2: Determine the location for the skylight tube
When it comes to installing a skylight tube, choosing the right location is crucial. You’ll want to find a spot that receives ample natural light and is structurally suitable for installation. Here’s how you can determine the perfect location:
1. Assess the area: Take a look at the room or space where you want to install the skylight tube. Consider factors such as the amount of natural light currently entering the room, the layout of the space, and any potential obstacles that may hinder the installation, such as vents or electrical wiring.
2. Find the ideal position: Look for a spot on the ceiling where the skylight tube can be installed to maximize the distribution of natural light. The location should allow for even light distribution and avoid any obstructions in the line of sight to the roof.
3. Measure and mark: Use a measuring tape to measure the dimensions of the skylight tube frame. Use these measurements to find the center point of where the skylight tube will be installed on the ceiling. Mark this spot with a pencil or chalk.
4. Consider the roof structure: Take into account the roof structure above the chosen location. You’ll need to ensure that there are no structural elements, such as trusses or beams, that may obstruct the installation of the skylight tube. If there are any obstructions, you may need to adjust the location accordingly.
5. Evaluate the roof material: Different types of roofs require different installation methods. Consider the type of roof you have, whether it’s flat, sloped, or tiled, and ensure that the chosen location is suitable for the installation of the skylight tube on that particular roof type.
By carefully assessing the area and following these steps, you’ll be able to determine the most suitable location for installing the skylight tube. Once you have finalized the location, you can proceed to the next step: preparing the installation area.
Step 3: Prepare the installation area
Before you begin the actual installation of the skylight tube, it’s important to properly prepare the area to ensure a smooth and successful installation. Here’s what you need to do in this step:
1. Clear the area: Remove any furniture, decorations, or other items from the space where the skylight tube will be installed. Clearing the area will give you unrestricted access and make the installation process easier.
2. Protect the surrounding surfaces: Cover the floors and nearby walls or furniture with drop cloths or plastic sheets to protect them from any potential damage. This is especially important if the installation area is indoors.
3. Evaluate the ceiling structure: Inspect the ceiling structure above the installation area to ensure that it is strong and can support the weight of the skylight tube. Consult a professional if you have any concerns about the structural integrity of the ceiling.
4. Turn off the power: If there are any electrical fixtures, such as lights or switches, near the installation area, turn off the power to avoid any accidents while working on the skylight tube installation.
5. Determine access to the roof: Assess the easiest and safest way to access the roof. Ensure that you have a stable and secure ladder or scaffolding available if needed. If working at heights, it’s important to take necessary safety precautions and use a safety harness.
6. Gather your tools: Double-check that you have all the necessary tools and materials for the installation handy. This includes the skylight tube kit, measuring tape, safety goggles, gloves, reciprocating saw or jigsaw, drill, screwdriver, roofing cement or sealant, and any other tools listed in the kit instructions.
By properly preparing the installation area, you’ll create a safe and organized workspace to install the skylight tube. Taking the time to clear the area, protect surfaces, evaluate the ceiling structure, and gather the required tools will ensure a smoother installation process. Once you have completed the preparations, you’re ready to move on to the next step: installing the skylight tube frame.
Step 4: Install the skylight tube frame
Now that you have prepared the installation area, it’s time to install the skylight tube frame. The frame provides the structural support for the skylight tube and ensures a secure installation. Follow these steps to install the frame:
1. Position the frame: Take the skylight tube frame and position it on the marked center point of the ceiling. Ensure that the frame is aligned straight and level.
2. Mark the screw hole locations: Use a pencil or marker to mark the screw hole locations on the ceiling. These markings will serve as a guide for drilling the pilot holes.
3. Drill pilot holes: Use a drill with a suitable drill bit to create pilot holes on the marked screw hole locations. Make sure the pilot holes are slightly smaller than the screws that will be used to secure the frame.
4. Attach the frame: Place the skylight tube frame back onto the ceiling and align the pilot holes with the marked screw hole locations. Secure the frame to the ceiling by inserting screws into the pilot holes and tightening them. Make sure not to overtighten to avoid damaging the frame or ceiling.
5. Check the frame for stability: Once the frame is securely attached, check for any movement or instability. Wiggle the frame gently to ensure it is firmly fixed to the ceiling. If there is any movement, double-check the screws and tighten them if necessary.
6. Repeat for additional frames: If you are installing multiple skylight tubes, repeat these steps to install the frame for each tube. Make sure to mark and secure each frame correctly according to the manufacturer’s instructions.
By following these steps, you will successfully install the skylight tube frame. The frame provides a stable base for the rest of the skylight tube components, ensuring a secure installation. Once the frame is securely in place, you can move on to the next step: cutting an opening in the roof.
Read more: How To Install A Velux Skylight
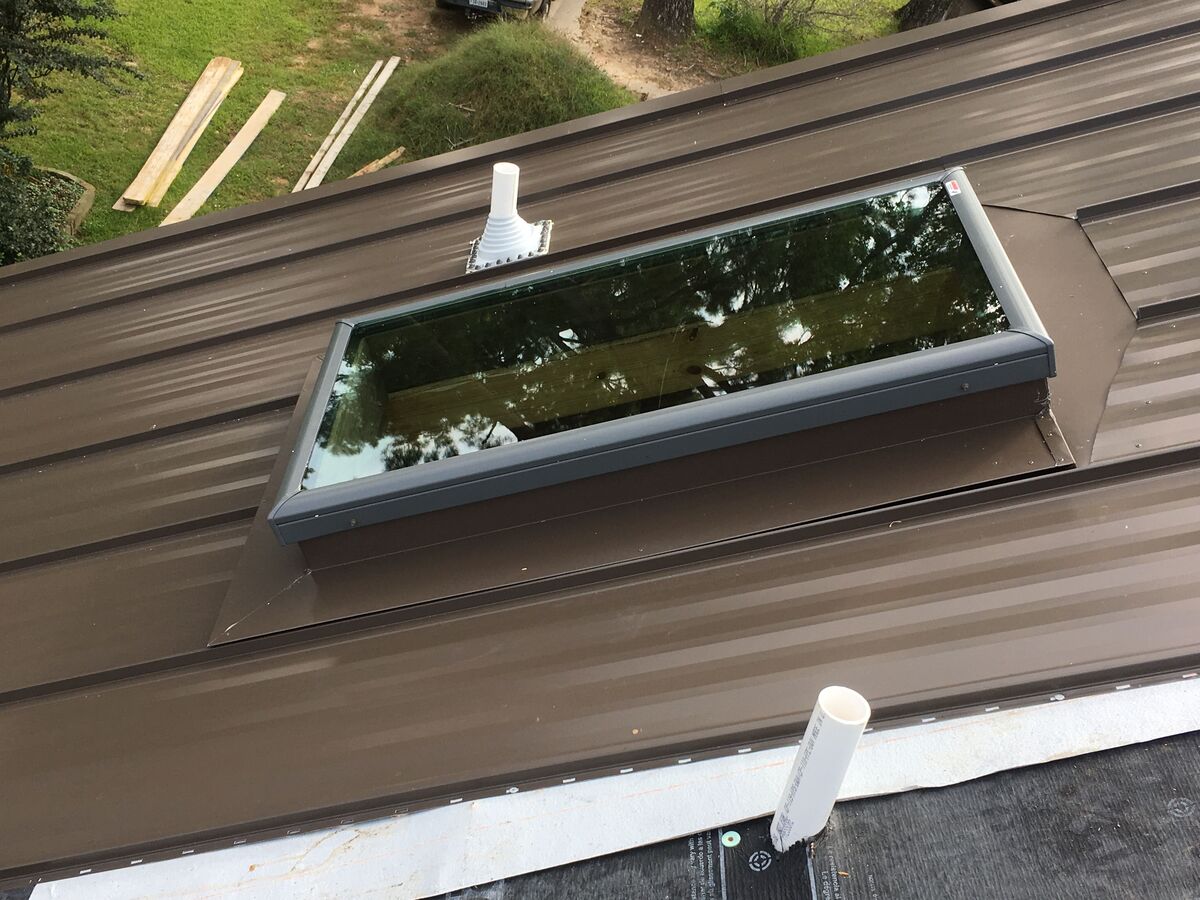
Step 5: Cut an opening in the roof
Now that the skylight tube frame is securely installed, it’s time to cut an opening in the roof to allow for the passage of natural light. This step requires careful measurements and precision to ensure a proper fit. Follow these steps to cut an opening in the roof:
1. Measure and mark: Using a measuring tape, measure the dimensions of the skylight tube dome. Transfer these measurements onto the roof, making sure to account for any additional clearance required by the manufacturer.
2. Locate the center point: Mark the center point of the skylight tube frame on the roof. This will serve as a guide for aligning the opening accurately.
3. Create a pilot hole: Using a drill with a suitable drill bit, create a pilot hole at the marked center point on the roof. This will act as a starting point for cutting the opening.
4. Cut the opening: Once the pilot hole is created, use a reciprocating saw or jigsaw to carefully cut along the marked dimensions. Take your time and follow the lines precisely to ensure a clean and accurate cut. Be mindful of any electrical or plumbing lines that may be present in the area. If unsure, consult a professional.
5. Remove the cut-out section: After cutting, carefully remove the cut-out section of the roof. This will create an opening for the skylight tube to be installed.
6. Inspect for any obstructions: Once the opening is cut, inspect the area inside the roof for any obstructions such as wires, pipes, or insulation. Clear away any obstacles that may hinder the installation of the skylight tube.
7. Check the fit: Place the skylight tube dome onto the opening in the roof to check the fit. Ensure that it aligns properly and sits flush with the roof surface.
By following these steps, you will successfully cut an opening in the roof for the skylight tube. Taking accurate measurements, making precise cuts, and ensuring a proper fit will result in a well-installed opening that allows natural light to flood into your space. With the opening completed, you’re now ready to move on to the next step: securing the flashing and weatherproofing the skylight tube.
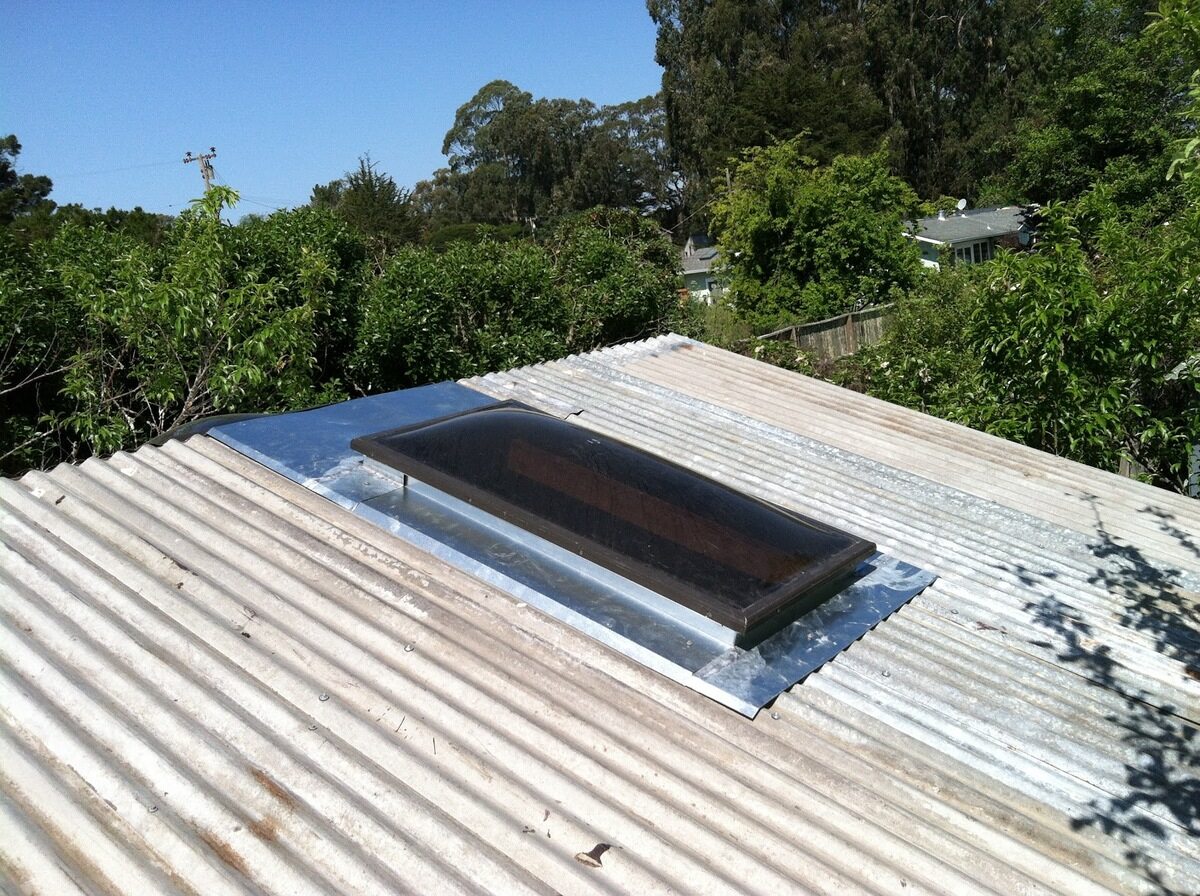
When installing a skylight tube, make sure to carefully measure and mark the location on the roof before cutting any holes. It’s important to follow the manufacturer’s instructions precisely to ensure a proper and secure installation.
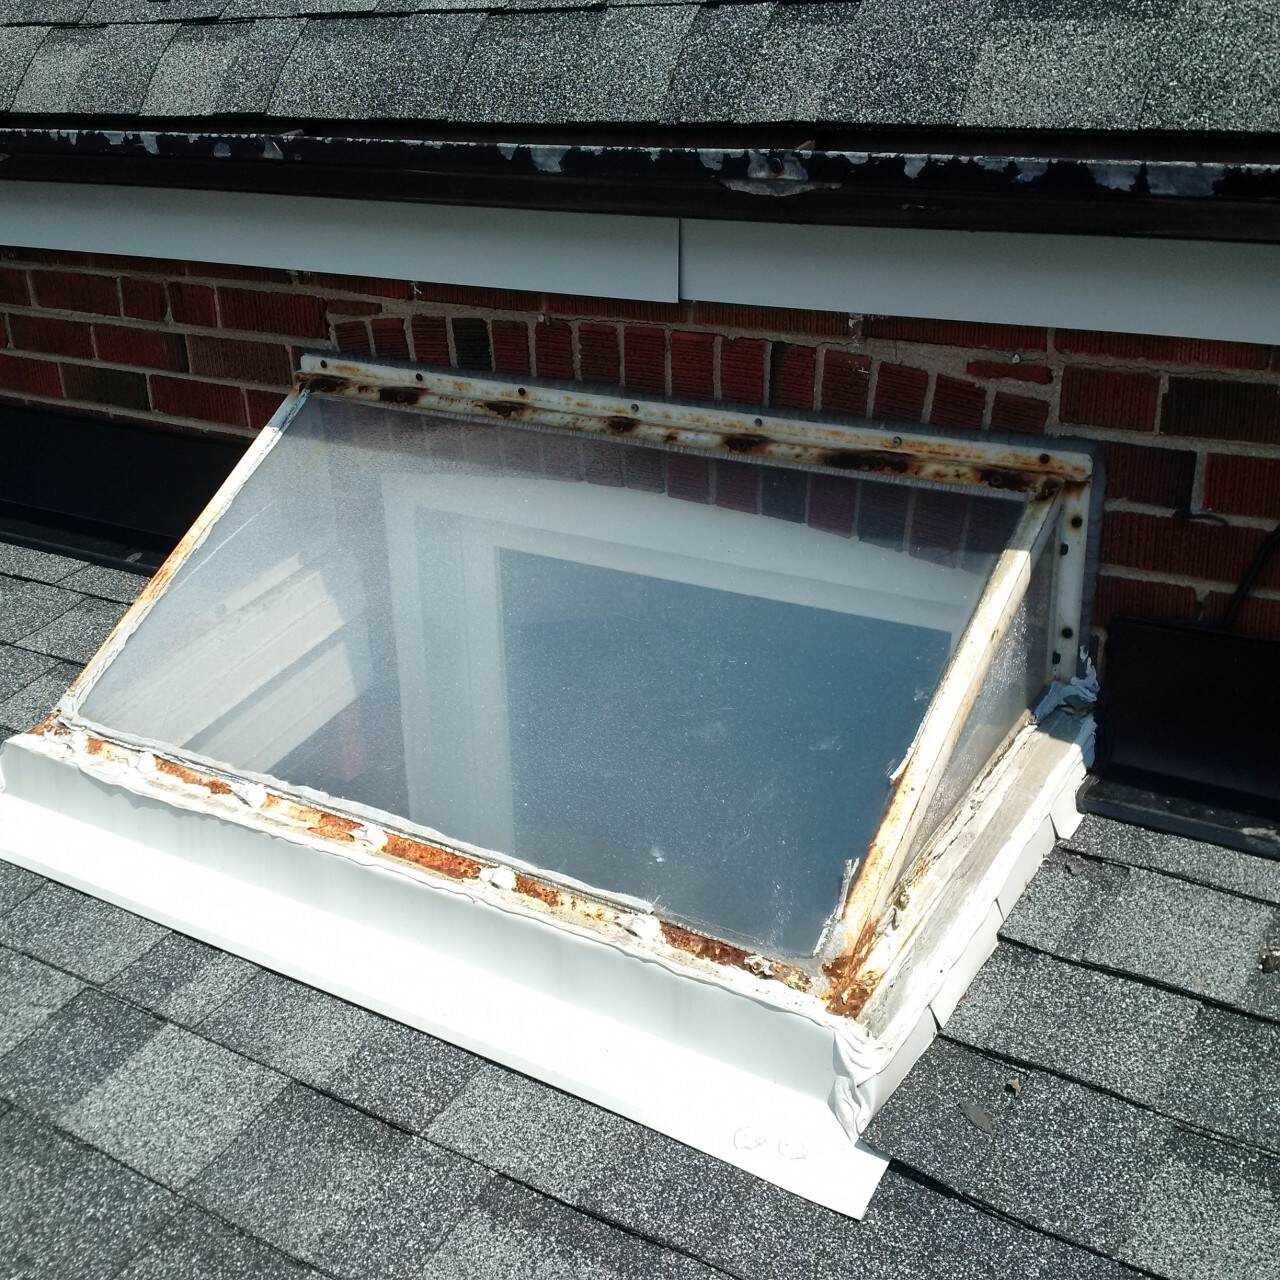
Step 6: Secure the flashing and weatherproof the skylight tube
With the opening cut in the roof, the next step is to secure the flashing and weatherproof the skylight tube. This is a crucial step to prevent any water leakage and ensure the longevity of the installation. Follow these steps to secure the flashing and weatherproof the skylight tube:
1. Prepare the flashing: Start by preparing the flashing that comes with the skylight tube kit. The flashing is a metal or rubber sheet that provides a watertight seal around the skylight tube. Follow the manufacturer’s instructions for assembling or shaping the flashing to fit the opening and roof type.
2. Position the flashing: Carefully place the flashing over the skylight tube opening, ensuring it aligns properly and covers the edges of the opening. The flashing should have a slight slope to allow for water runoff.
3. Secure the flashing: Use roofing nails or screws to secure the flashing firmly in place. Make sure to follow the recommended spacing and secure all edges of the flashing to create a tight seal.
4. Apply roofing cement or sealant: Apply a generous amount of roofing cement or sealant along the edges of the flashing. This will further enhance the watertight seal and protect against water infiltration. Use a putty knife or caulking gun to spread the cement or sealant evenly.
5. Inspect for gaps: Carefully inspect the flashing and the area around the skylight tube for any gaps or areas that may need additional sealing. Apply more roofing cement or sealant as needed to ensure a complete weatherproofing.
6. Test for water tightness: Before moving on, perform a water test to ensure the flashing and weatherproofing are effective. Use a hose to simulate rainfall and check for any water leaks or seepage around the skylight tube. If any issues are found, reapply sealant or consult a professional for assistance.
By following these steps, you will successfully secure the flashing and weatherproof the skylight tube. Taking the time to properly install and seal the flashing will provide protection against moisture and ensure a reliable skylight tube installation. With the flashing secured and weatherproofing complete, you’re ready to move on to the next step: installing the skylight tube dome.
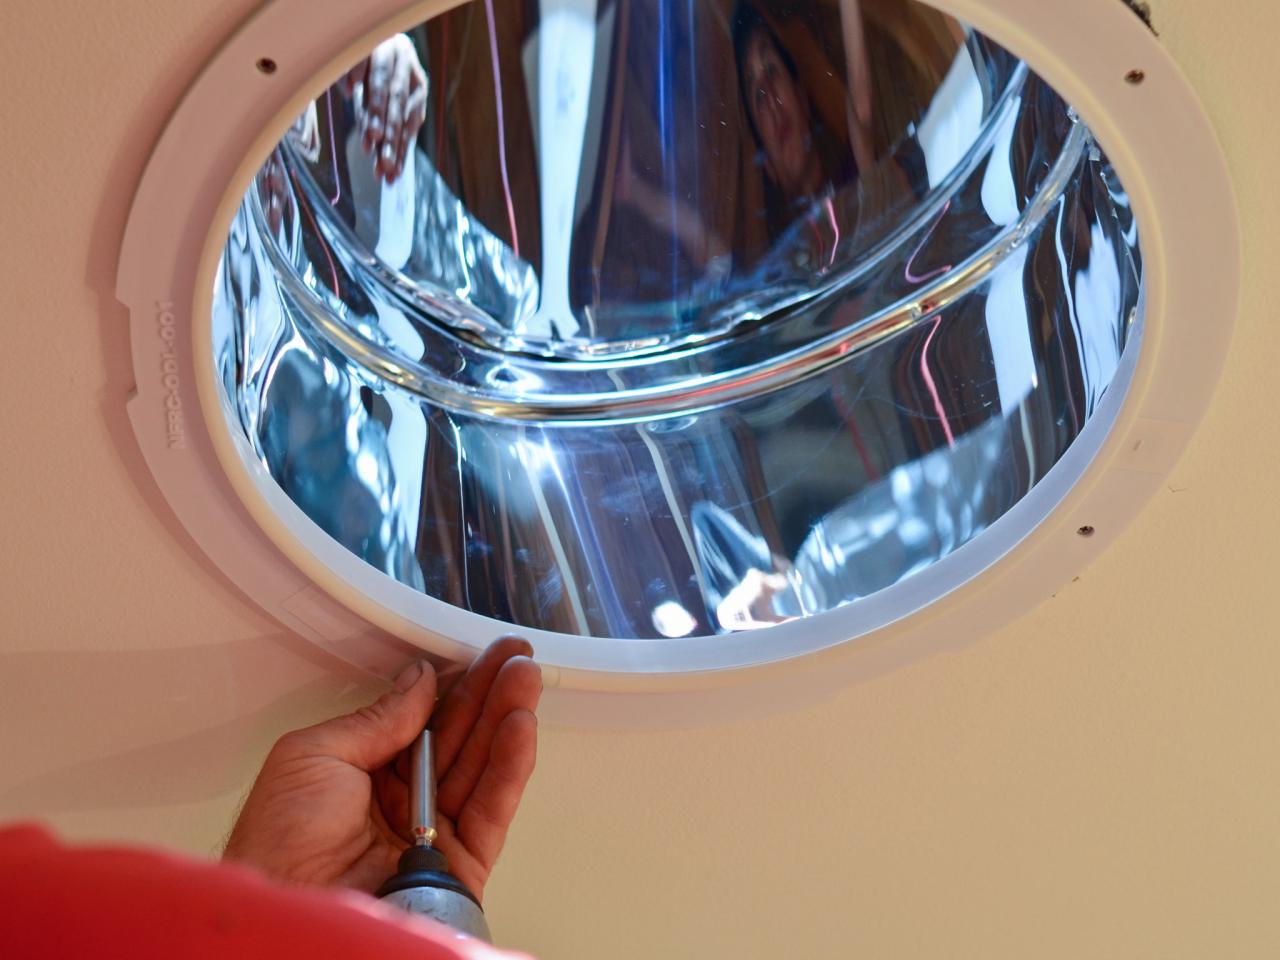
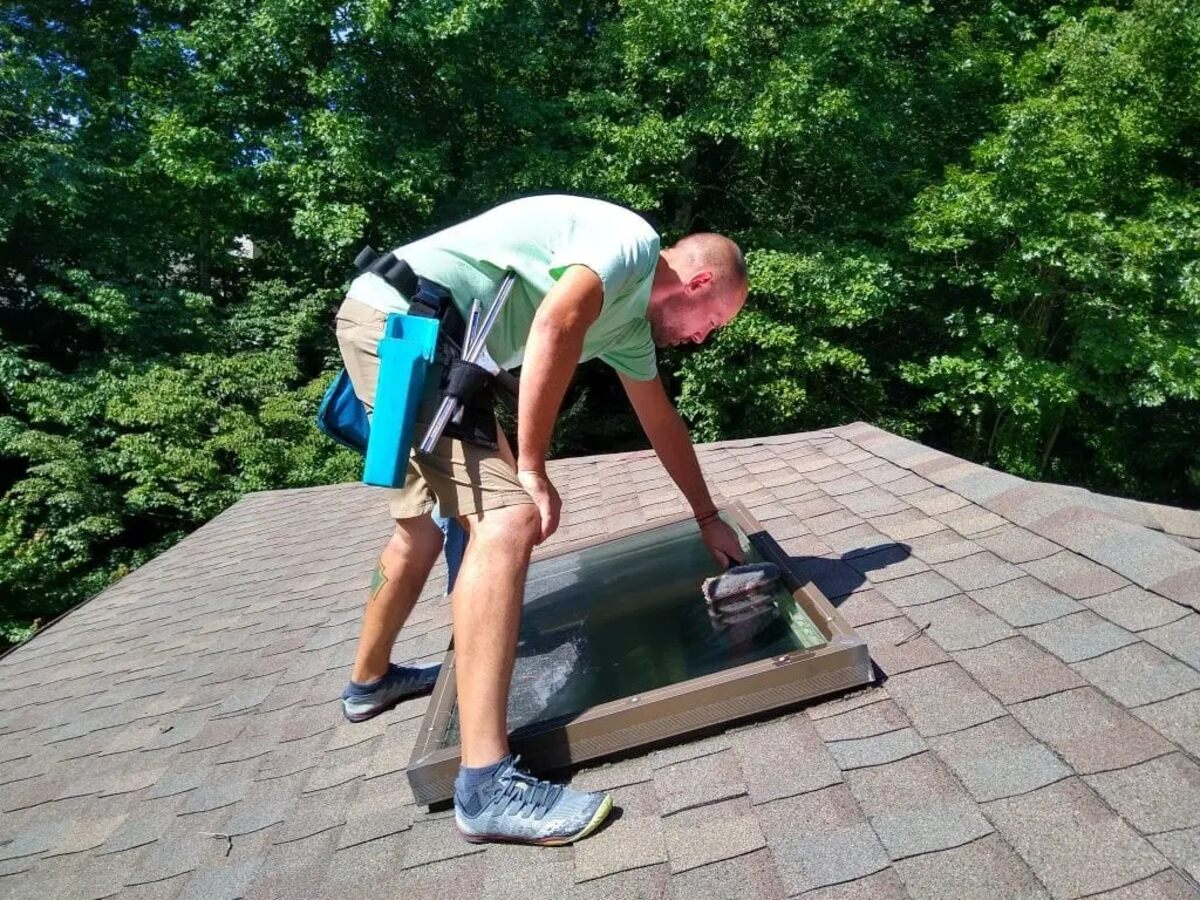
Step 7: Install the skylight tube dome
With the flashing and weatherproofing in place, it’s time to install the skylight tube dome. The dome serves as a protective cover and diffuses the natural light, ensuring a pleasing and even distribution of light in the space. Follow these steps to install the skylight tube dome:
1. Prepare the dome: Carefully remove the skylight tube dome from its packaging and inspect it for any damage or defects. Clean the dome if necessary to ensure optimal clarity.
2. Position the dome: Place the skylight tube dome over the opening in the roof, ensuring that it aligns properly with the skylight tube frame and is centered. The dome should securely fit onto the frame, creating a snug seal.
3. Secure the dome: Follow the manufacturer’s instructions to secure the skylight tube dome. This may involve using screws, clips, or other fasteners provided in the skylight tube kit. Carefully attach the dome to the frame, ensuring it is tightly secured but not over-tightened to avoid damaging the dome.
4. Check for proper fit: Once the skylight tube dome is secured, inspect it to ensure a proper fit. Make sure there are no gaps or misalignments between the dome and the frame. Double-check that the dome sits flush with the roof surface and does not obstruct the passage of light.
5. Test for functionality: Before proceeding, perform a functional test of the skylight tube. Turn off any artificial lighting in the space and observe how the natural light enters through the dome. Make any necessary adjustments to the dome positioning or alignment to optimize the amount of light entering the room.
6. Clean the dome: Once the skylight tube dome is installed and functioning correctly, clean it regularly to maintain optimal light transmission. Use a mild, non-abrasive cleaner and a soft cloth or sponge to gently wipe the dome, removing any dust or debris.
By following these steps, you will successfully install the skylight tube dome. Ensuring a proper fit and alignment of the dome will not only enhance the aesthetics of the skylight tube but also maximize the amount of natural light entering the space. With the dome installed, you’re one step closer to enjoying the benefits of a brighter and more vibrant room.
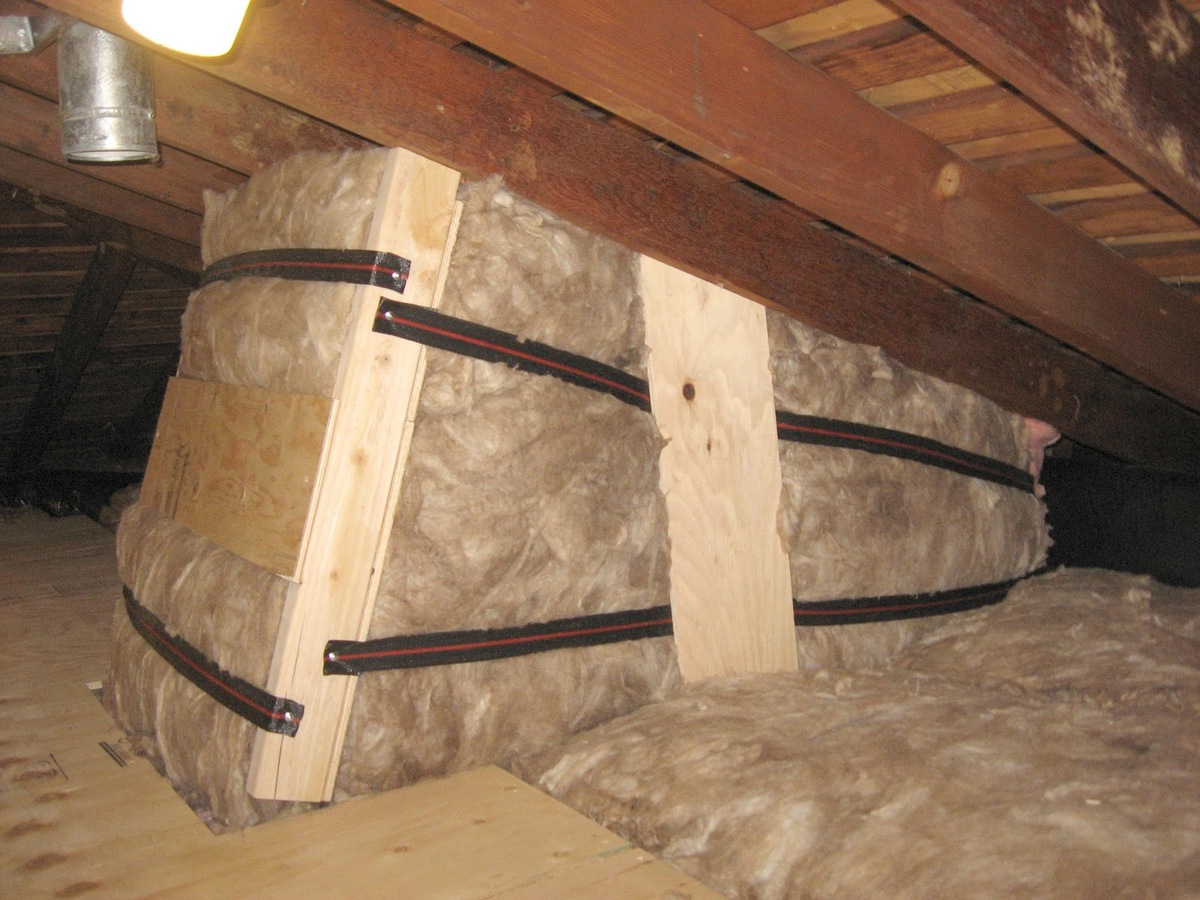
Step 8: Seal and insulate the skylight tube
After installing the skylight tube dome, it’s important to seal and insulate the skylight tube to ensure energy efficiency, prevent air leaks, and maintain a comfortable indoor environment. Here’s how you can seal and insulate the skylight tube:
1. Apply insulating foam: Start by applying insulating foam around the perimeter of the skylight tube frame on the interior side. This foam helps to create an airtight seal and prevents drafts. Follow the foam manufacturer’s instructions for proper application.
2. Check for gaps: Inspect the skylight tube installation for any gaps between the frame and the ceiling. Fill any gaps or openings with foam or caulk to ensure a tight seal. This will help prevent air leakage and minimize heat loss or gain.
3. Insulate the tube: Insulate the skylight tube itself to prevent heat transfer and improve energy efficiency. Wrap insulation around the skylight tube, ensuring it is snug and covers the entire length. Use insulation designed for this purpose, such as reflective insulation or rigid foam insulation.
4. Secure with tape: Use tape to secure the insulation in place. Ensure that the tape is properly sealed and does not leave any gaps. This will help maintain the insulation’s effectiveness and prevent it from detaching over time.
5. Seal any exterior gaps: Check the exterior of the skylight tube installation for any gaps or openings between the flashing and the roof. Apply roofing sealant or caulking to seal any gaps and create a watertight and weather-resistant seal. This will prevent water leakage and protect against potential damage.
6. Inspect the seal: Once the sealing and insulation are complete, inspect the skylight tube installation both from the interior and exterior to ensure a proper seal. Check for any signs of air leakage, gaps, or areas that may need additional sealing. Make any necessary adjustments or touch-ups as needed.
By following these steps, you will effectively seal and insulate the skylight tube, ensuring energy efficiency and a comfortable indoor environment. Proper sealing and insulation will minimize heat loss or gain, prevent air leaks, and contribute to the overall performance and longevity of the skylight tube installation. With the skylight tube sealed and insulated, you’re ready to move on to the final step: completing the interior finishing.
Read more: How To Install Skylight In Metal Roof
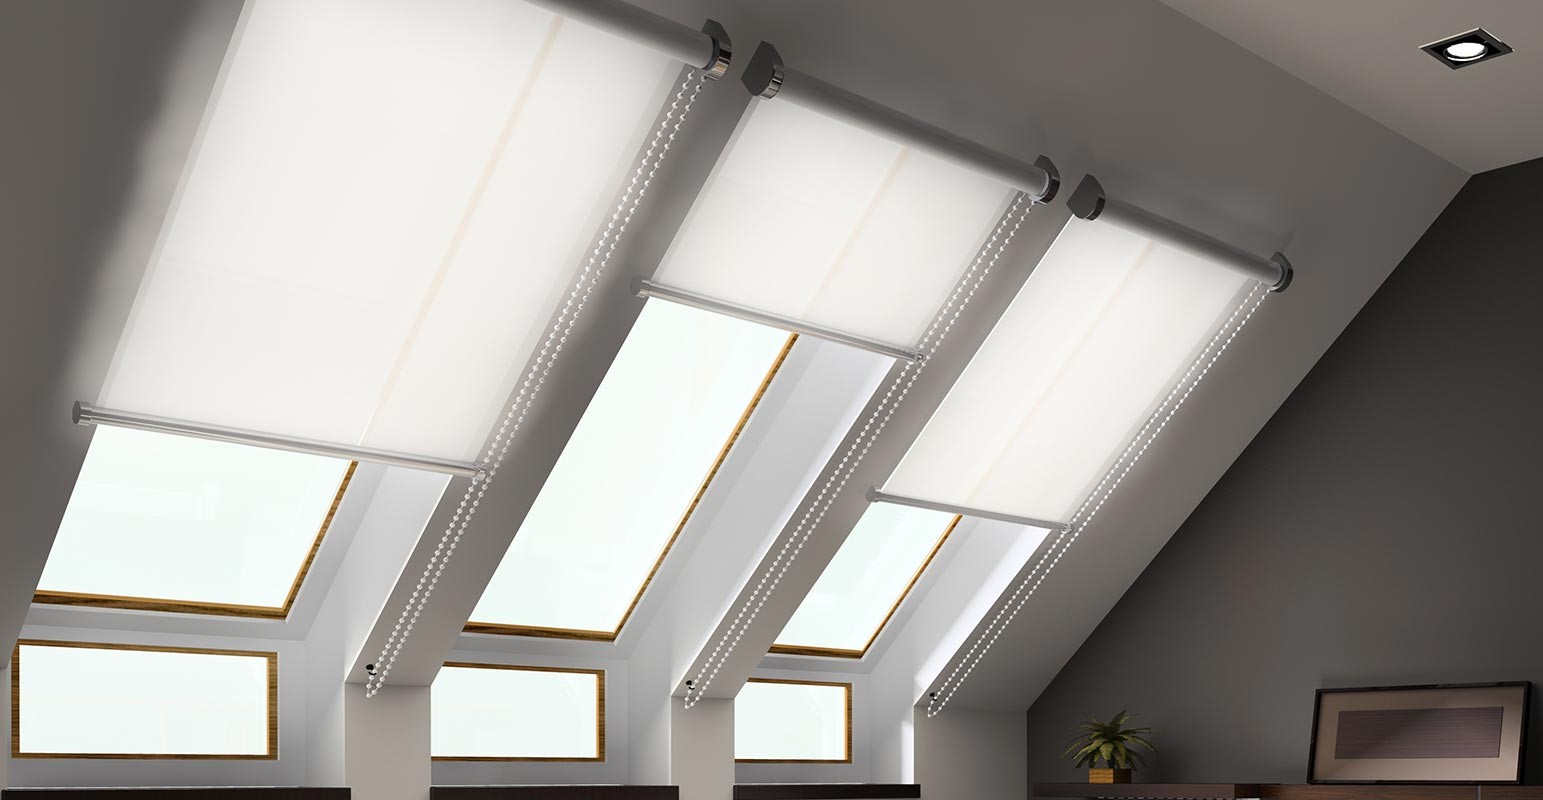
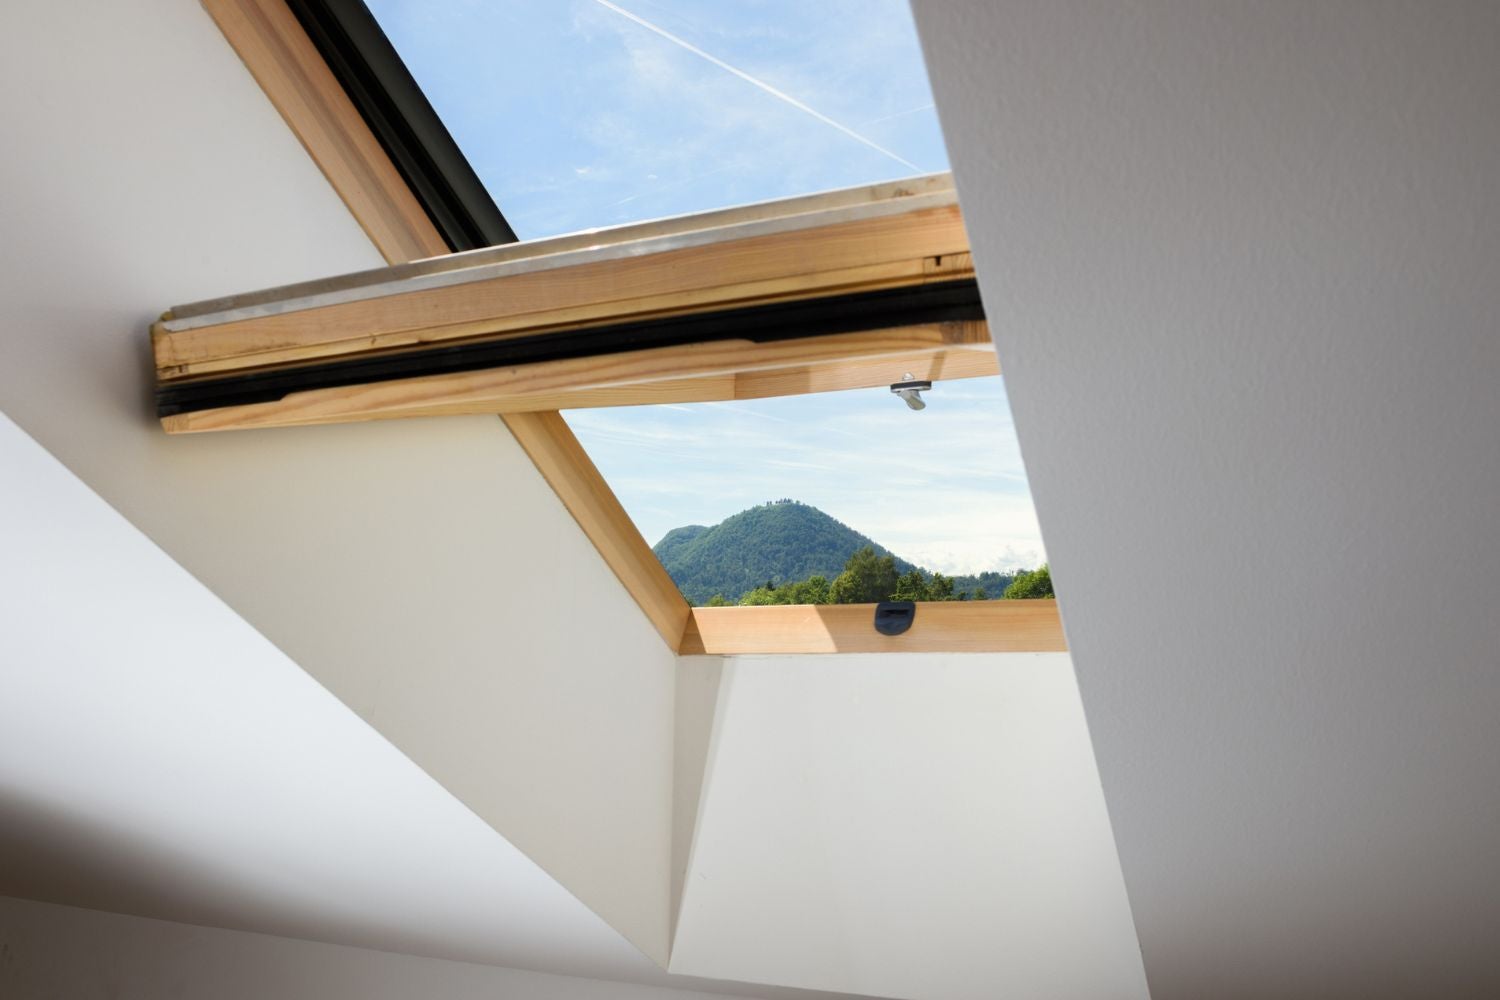
Step 9: Complete the interior finishing
After sealing and insulating the skylight tube, it’s time to complete the interior finishing to ensure a polished and cohesive look. This step involves adding finishing touches to the surrounding area of the skylight tube. Follow these steps to complete the interior finishing:
1. Trim and moldings: Install trim or moldings around the skylight tube frame to conceal any gaps or rough edges. Use trim pieces that match the surrounding décor and ensure a seamless transition between the skylight tube and the ceiling or wall.
2. Paint or wallpaper: If desired, paint or wallpaper the area around the skylight tube to blend it with the rest of the room’s aesthetic. Choose colors or patterns that complement the overall design scheme and create a harmonious appearance.
3. Lighting fixtures: Consider installing additional lighting fixtures near the skylight tube to enhance the functionality and ambiance of the space. This can include recessed lights, pendant lights, or track lighting that work in conjunction with the natural light from the skylight tube.
4. Decorative elements: Add decorative elements such as plants, artwork, or shelving around the skylight tube to make it a focal point in the room. Choose items that highlight the natural light and enhance the overall aesthetics of the space.
5. Clean and maintain: Regularly clean and maintain the skylight tube and its surrounding area to keep it looking its best. Dust the skylight tube, clean the dome from the inside and outside, and ensure that the area remains free from obstructions or debris that may diminish the effect of the natural light.
6. Enjoy the natural light: Once the interior finishing is complete, take the time to appreciate and enjoy the beauty and benefits of the natural light streaming through the skylight tube. Embrace the enhanced brightness, improved mood, and energy efficiency that it brings to the space.
By following these steps, you will complete the interior finishing of the skylight tube installation, creating a cohesive and visually appealing space. The finishing touches will blend the skylight tube seamlessly into the surrounding area while making the most of the natural light it brings. With the interior finishing complete, you can now fully embrace and enjoy the benefits of your new skylight tube.
Conclusion
Congratulations on successfully installing your skylight tube! By following the step-by-step guide provided in this article, you have transformed a dark and dimly lit space into a bright and vibrant area filled with natural light. The installation process may have required some time and effort, but the results are well worth it.
Skylight tubes are an excellent solution for bringing natural light into rooms or spaces where traditional windows or skylights may not be feasible. They offer numerous benefits, including improved lighting, enhanced mood, increased energy efficiency, and a connection to the outdoors.
Throughout the installation process, we covered a range of essential steps, from gathering the necessary tools and materials to completing the interior finishing. By carefully following each step, you ensured a secure and efficient installation, resulting in a skylight tube that will provide years of enjoyment.
Remember to regularly maintain and clean your skylight tube to keep it in optimal condition. Also, take the time to appreciate the beauty of natural light streaming through the skylight tube and the positive impact it has on your living space.
We hope this guide has been helpful in assisting you with your skylight tube installation. Enjoy the benefits of the increased natural light, improved atmosphere, and the energy efficiency that comes with it. Happy living in your well-lit space!
Frequently Asked Questions about How To Install A Skylight Tube
Was this page helpful?
At Storables.com, we guarantee accurate and reliable information. Our content, validated by Expert Board Contributors, is crafted following stringent Editorial Policies. We're committed to providing you with well-researched, expert-backed insights for all your informational needs.


0 thoughts on “How To Install A Skylight Tube”