Articles
How To Install Skylight On Roof
Modified: February 23, 2024
Learn how to install a skylight on your roof with these informative articles. Gain valuable insight and expert tips for a successful installation.
(Many of the links in this article redirect to a specific reviewed product. Your purchase of these products through affiliate links helps to generate commission for Storables.com, at no extra cost. Learn more)
Introduction
Welcome to the world of natural light and fresh air! Adding a skylight to your roof can not only brighten up your living space but also improve the overall ambiance of your home. Whether you want to enhance a dark room or create a stunning architectural feature, installing a skylight can be a great investment.
However, the process of installing a skylight may seem daunting if you’re not familiar with roofing projects. But fear not! In this article, we’ll walk you through the steps to successfully install a skylight on your roof.
Before you begin, it’s essential to assess whether your roof is suitable for a skylight installation. Factors such as the slope, condition, and structural integrity of your roof should be considered. If you are unsure, it’s advisable to consult with a professional roofer or contractor to ensure that your roof can support a skylight.
Once you have determined that your roof is ready for a skylight, you can gather the necessary materials and tools. These typically include a skylight unit, flashing, roofing nails, a utility knife, measuring tape, a chalk line, and a screwdriver. It’s crucial to choose high-quality materials to ensure the durability and longevity of your skylight.
Now that you have everything you need, let’s dive into the step-by-step process to install a skylight on your roof.
Key Takeaways:
- Installing a skylight involves assessing your roof, gathering materials, measuring and marking the location, cutting the opening, installing flashing, placing the skylight unit, securing it, waterproofing, and adding finishing touches.
- Proper installation, waterproofing, and maintenance are crucial for the longevity and performance of your skylight. Enjoy the benefits of natural light, improved ambiance, and a connection with the outdoor environment.
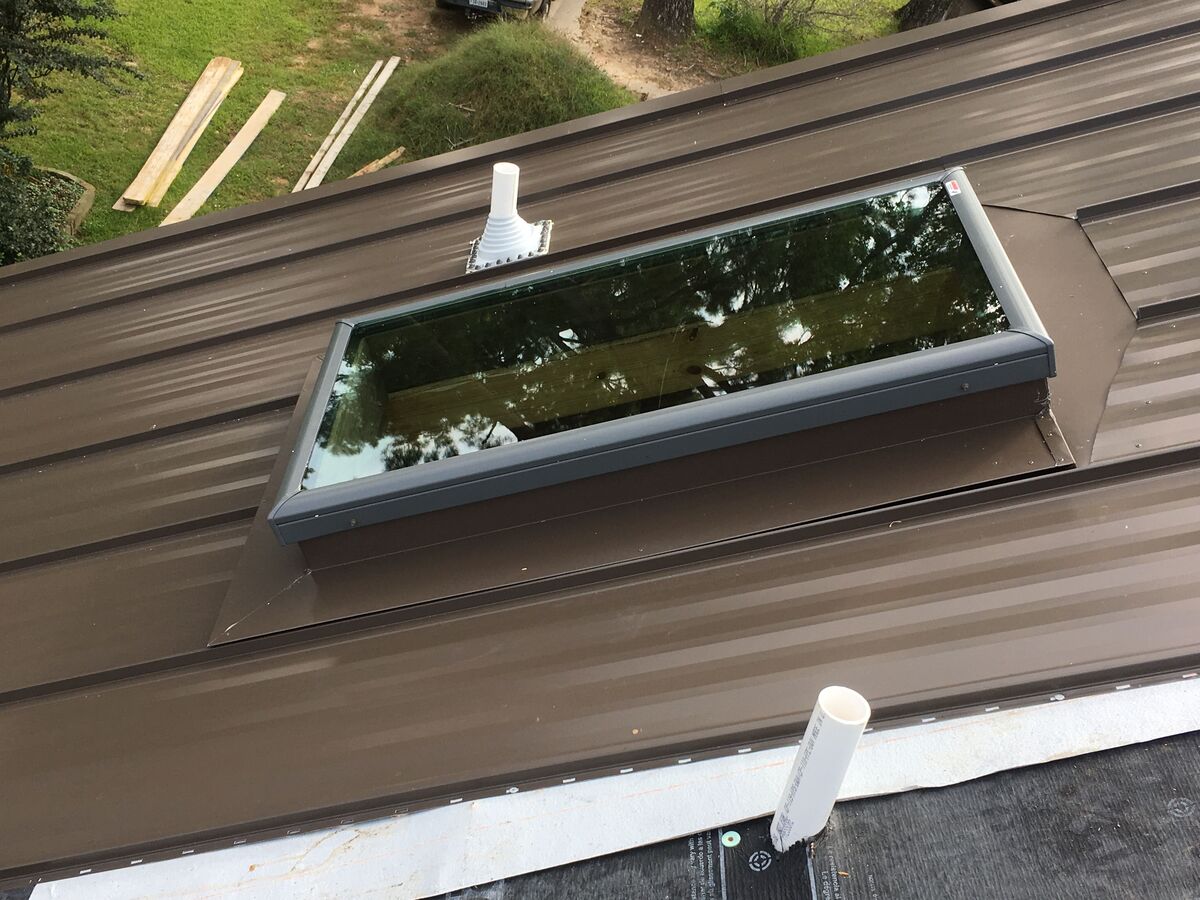
Read more: How To Install Skylight In Metal Roof
Step 1: Assessing your roof
The first step in installing a skylight is to thoroughly assess the condition of your roof. It’s crucial to ensure that your roof is structurally sound and can accommodate a skylight without compromising its integrity.
Start by inspecting the slope of your roof. Skylights are typically installed on roofs with a slope between 15 to 60 degrees. If your roof has a slope outside this range, you may need to consider alternative options or consult with a professional to determine the best course of action.
Next, examine the condition of your roof. Look for any signs of damage, such as leaks, rot, or weakened areas. If you notice any issues, it’s essential to repair them before proceeding with the skylight installation. Ignoring existing roof problems can lead to further damage and costly repairs in the future.
In addition to the slope and condition, you’ll also need to consider the direction and position of your roof in relation to the sun. This will determine how much sunlight the skylight will receive throughout the day. If you want to maximize natural light, choose a location on your roof that gets ample sunlight.
Lastly, identify any potential obstructions on your roof, such as vents, chimneys, or nearby trees. These obstructions may affect the placement of the skylight and could require additional adjustments or considerations during the installation process.
By thoroughly assessing your roof, you can ensure that it’s in good condition and suitable for a skylight installation. Taking the time to evaluate these factors will not only help you choose the right skylight but also ensure a smooth and successful installation process.
Step 2: Gathering materials and tools
Once you have assessed your roof and determined that it’s ready for a skylight, it’s time to gather all the necessary materials and tools for the installation process.
Here’s a list of the essential items you’ll need:
1. Skylight unit: Choose a skylight that fits the dimensions of the opening you will create on your roof. Consider factors such as style, material, and energy efficiency when selecting the skylight.
2. Flashing: Flashing is a waterproofing material that surrounds the skylight and prevents water from seeping into your home. Make sure to choose flashing that is compatible with your roof type.
3. Roofing nails: You’ll need roofing nails to secure the flashing and skylight to your roof. Ensure that the nails are long enough to penetrate through the roofing materials and into the support structure.
4. Utility knife: A utility knife will be handy for cutting materials such as roofing shingles or underlayment during the installation process.
5. Measuring tape: Accurate measurements are crucial when marking the location for your skylight opening. Use a measuring tape to ensure precision.
6. Chalk line: A chalk line is a useful tool for marking straight lines on your roof surface, which will guide you when cutting the opening and placing the skylight.
7. Screwdriver: Depending on the type of skylight you choose, you may need a screwdriver to secure the skylight and flashing to your roof.
Make sure to purchase high-quality materials to ensure the durability and longevity of your skylight installation. Additionally, check if any additional tools or materials are recommended by the manufacturer of your skylight unit.
Once you have collected all the necessary items, you’re ready to move on to the next step: measuring and marking the skylight location.
Step 3: Measuring and marking the skylight location
Accurate measurements and precise markings are essential for a successful skylight installation. In this step, we’ll guide you through the process of measuring and marking the location for your skylight.
Before you start, ensure that you have the necessary tools, including a measuring tape, chalk line, and a pencil.
Here’s how to proceed:
1. Determine the desired location: Consider factors such as the room below, the direction of natural light, and any potential obstructions when choosing the location for your skylight. Once you have decided, head up to the roof.
2. Find the centerline of the skylight: Measure the width of your skylight unit and divide it by two. Use the measuring tape to mark the centerline of the skylight opening across the roof surface. This will serve as a guide for cutting the opening.
3. Measure and mark the dimensions: Extend the measurement from step 2 to both sides of the centerline, marking the width of the skylight opening. Repeat this on either side to mark the length of the skylight opening. Ensure that the dimensions are accurate and align with the size of your skylight unit.
4. Create an outline: Using the chalk line, connect the marked points to create an outline of the skylight opening. This will serve as a visual guide when cutting into the roof.
It is crucial to double-check your measurements and markings before proceeding to the next step. A slight error in measurement can lead to problems during the installation process.
Remember to take all necessary safety precautions while working on the roof, including wearing appropriate personal protective equipment and ensuring stable footing.
Once you have accurately measured and marked the skylight location, you’re ready to move on to the next step: cutting an opening in the roof.
Step 4: Cutting an opening in the roof
With the skylight location measured and marked, it’s time to cut an opening in your roof. This step requires precision and careful execution to ensure a clean and accurate cut.
Before you begin, ensure that you have the necessary tools, including a utility knife, circular saw, or reciprocating saw, along with appropriate safety gear such as eye protection and gloves.
Here’s a step-by-step guide on cutting the opening for your skylight:
1. Start from the inside: Begin by heading inside your home or attic and identifying the marked skylight location on the ceiling. This will serve as a reference point for cutting the opening from the outside.
2. Find the rafters: Locate the rafters in the area where you’ll be cutting the skylight opening. You can use a stud finder or measure from nearby walls to identify the position of the rafters.
3. Transfer measurements to the roof: Using a measuring tape, transfer the measurements of the skylight opening from the inside to the outside of the roof. Ensure that the marked points align with the rafters to provide support for the skylight unit.
4. Create pilot holes: Use a drill to create pilot holes at the corners of the marked skylight opening. This will serve as a starting point for cutting with a saw and help prevent accidental damage to the surrounding roof materials.
5. Cut the opening: Carefully use a circular saw or reciprocating saw to cut along the marked outline of the skylight opening. Take your time and follow the line precisely to avoid any mistakes or damage to the roof structure.
6. Remove the roof section: Once the opening is cut, carefully remove the section of the roof that you’ve just cut out. Trim any excess roofing materials or shingles as necessary to ensure a clean and even edge.
Remember to exercise caution and be mindful of your surroundings during this step. If you are uncomfortable or unsure about cutting the roof, it’s always recommended to seek assistance from a professional.
With the opening cut, you’re now ready to move on to the next step: installing the flashing around the skylight.
Read more: How To Install A Velux Skylight
Step 5: Installing the flashing
Installing flashing is a crucial step in the skylight installation process, as it helps to ensure a watertight seal and prevent water from entering your home. Flashing serves as a protective barrier between the skylight and the roof, keeping moisture at bay.
Before you start, gather the necessary materials, including the flashing kit that is specifically designed for your skylight model, a hammer, and roofing nails.
Follow these steps to properly install the flashing:
1. Read the instructions: Before proceeding, carefully read the instructions provided with the flashing kit. Different skylights may require specific installation methods, so it’s important to follow the manufacturer’s guidelines.
2. Position the base flashing: Place the base flashing on the roof, ensuring that it lines up with the skylight opening. The base flashing should cover the entire perimeter of the opening, extending outwards onto the roof surface. Align the edges of the flashing with the edges of the skylight opening.
3. Secure the base flashing: Use roofing nails to secure the base flashing in place. Hammer the nails through the pre-drilled holes in the flashing, making sure to drive them firmly but not too tightly. Space the nails evenly along the flashing to ensure a secure attachment.
4. Install the side and top flashing: Depending on your skylight model, you may have separate pieces of flashing for the sides and top. Install these pieces according to the manufacturer’s instructions, ensuring that they fit snugly against the base flashing and the skylight unit.
5. Check for proper alignment: Once the flashing is installed, check that it is aligned correctly and flush with the roof surface. Make any necessary adjustments to ensure a proper fit.
6. Double-check for gaps: Inspect the flashing to ensure that there are no gaps or openings where water could potentially enter. If any gaps are found, use caulk or sealant recommended by the manufacturer to seal them properly.
Proper installation of flashing is crucial to prevent leaks and ensure the longevity of your skylight. Take the time to carefully follow the instructions provided with the flashing kit to ensure a secure and watertight installation.
With the flashing in place, you’re now ready to move on to the next step: placing the skylight unit.
When installing a skylight on a roof, make sure to carefully follow the manufacturer’s instructions and use the appropriate flashing to ensure a watertight seal around the opening. Proper installation is key to preventing leaks and ensuring the skylight functions properly.
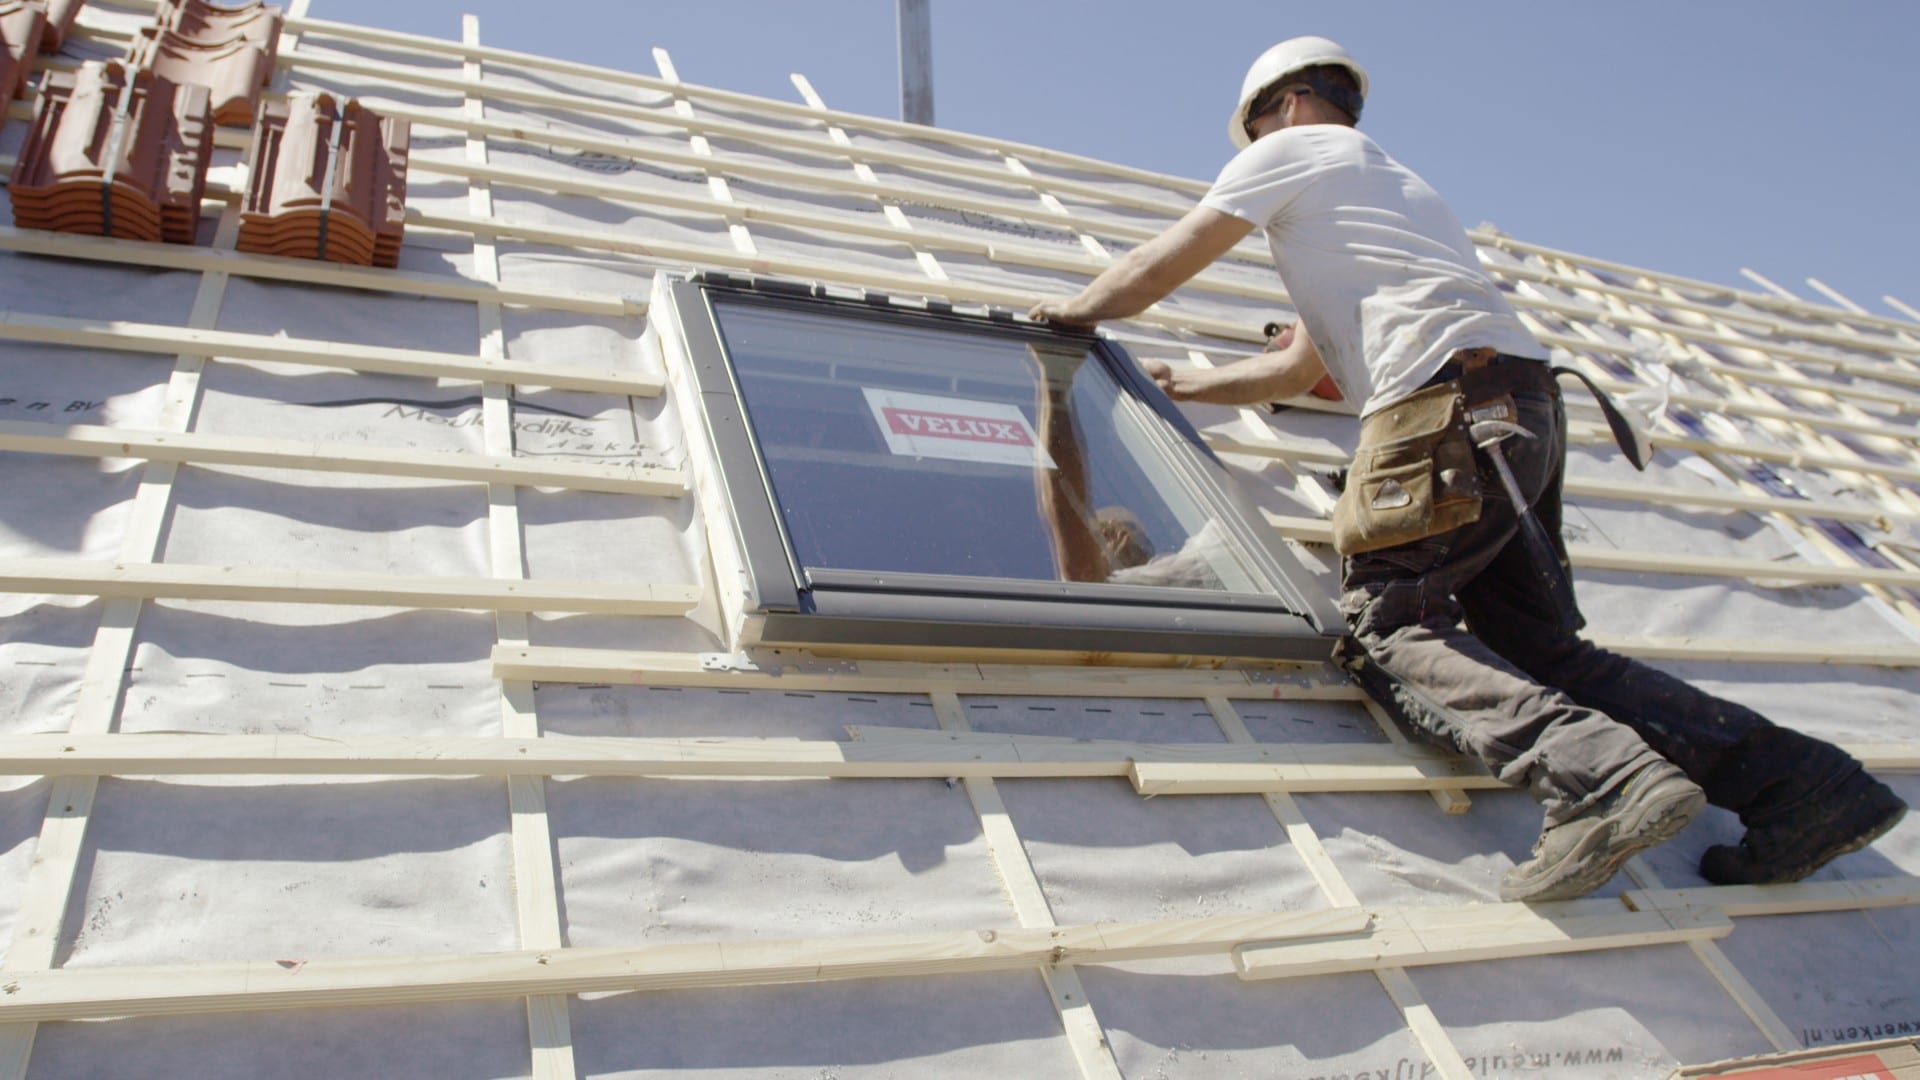
Step 6: Placing the skylight unit
Now that the flashing is securely installed, it’s time to place the skylight unit into the opening you’ve created on the roof. This step requires careful handling to ensure a proper fit and alignment.
Before you begin, make sure you have the skylight unit and any additional hardware or components that came with it.
Follow these steps to place the skylight unit:
1. Position the skylight: Carefully lift the skylight unit and position it onto the base flashing. Align the edges of the skylight unit with the opening you’ve cut on the roof. Ensure that the skylight is centered within the opening.
2. Check for proper fit: Once positioned, check that the skylight unit fits properly within the opening. The edges of the skylight should be flush with the roof surface and secure against the base flashing.
3. Secure the skylight: Depending on the skylight model, there may be specific guidelines for securing the unit to the roof. Follow the manufacturer’s instructions to fasten the skylight unit in place. This may involve using screws or other hardware provided with the skylight.
4. Test functionality: Once the skylight unit is secured, test its functionality. Open and close the skylight to ensure that it operates smoothly and securely. Ensure that the seal is tight when closed to prevent any potential leaks.
5. Inspect for gaps: After placing the skylight unit, inspect the area around the edges for any gaps or openings. The skylight should fit tightly against the flashing and provide a secure seal. If any gaps are found, use appropriate sealant or caulk to seal them properly.
Take your time during this step to ensure that the skylight unit is correctly positioned and securely fastened. Proper placement is crucial to prevent water infiltration and ensure the longevity of your skylight.
With the skylight unit in place, you’re ready to move on to the next step: securing the skylight.
Step 7: Securing the skylight
After placing the skylight unit in the opening, it’s important to secure it firmly to the roof to ensure stability and prevent any potential issues in the future. This step involves properly fastening the skylight unit and ensuring that it is securely attached.
Before you begin, make sure you have the necessary tools and hardware, such as screws or other fastening materials provided with your skylight unit.
Here’s a step-by-step guide to securing the skylight:
1. Follow manufacturer’s instructions: Before proceeding, carefully read the manufacturer’s instructions provided with your skylight unit. Different models may have specific guidelines for securing the unit to the roof.
2. Locate the pre-drilled holes: Many skylight units come with pre-drilled holes for fastening. Locate these holes on the skylight frame or flanges, which are designed for attaching the unit to the roof.
3. Align the holes: Place the skylight unit back into position, ensuring that the pre-drilled holes on the frame or flanges align with the corresponding locations on the roofing surface.
4. Insert screws or fasteners: Insert screws or other approved fasteners into the pre-drilled holes, securing the skylight unit to the roof. Use the appropriate tools, such as a screwdriver or drill, to securely tighten the fasteners.
5. Check for proper alignment: Once the screws or fasteners are in place, check the skylight unit for proper alignment. Ensure that it is level and flush with the roof surface. Make any necessary adjustments as needed.
6. Follow any additional instructions: Depending on the skylight model, there may be additional steps or recommendations for securing the unit. Follow these instructions provided by the manufacturer to ensure proper installation.
It is crucial to adhere to the manufacturer’s instructions when securing the skylight unit. This will ensure that it is properly attached to the roof and minimizes the risk of any potential issues, such as leaks or loosening over time.
With the skylight securely fastened, you’re now ready to move on to the next step: waterproofing and sealing the skylight installation.
Step 8: Waterproofing and sealing
Proper waterproofing and sealing of the skylight installation is essential to ensure that your skylight remains watertight and free from any leaks. This step involves applying sealant and taking preventative measures to protect against water infiltration.
Before you begin this step, gather the necessary materials, including roofing sealant, a caulk gun, and a putty knife.
Follow these steps to properly waterproof and seal your skylight installation:
1. Clean the surrounding area: Before applying any sealant, ensure that the area around the skylight is clean and free from any debris or dirt. Use a brush or a clean cloth to wipe away any loose particles.
2. Apply roofing sealant: Load the caulk gun with roofing sealant. Starting from the bottom of the skylight, apply a continuous bead of sealant along the edge where the skylight meets the roof surface. Work your way around the skylight, ensuring a complete seal.
3. Smooth the sealant: Use a putty knife or a smoothing tool to evenly spread and smooth the sealant along the edges. This helps to ensure a watertight seal and give a clean and finished appearance to the skylight installation.
4. Inspect for gaps or cracks: Carefully inspect the sealant for any gaps, cracks, or areas that might require additional sealing. If you notice any deficiencies, apply more sealant to those areas as needed.
5. Check for proper drainage: Ensure that the skylight and the surrounding flashing have proper water drainage channels. This helps to direct water away from the skylight and prevents accumulation, reducing the risk of leaks.
6. Stay vigilant: Regularly inspect the sealant and the skylight installation for any signs of wear or deterioration. If you notice any issues, promptly address and repair them to maintain the integrity and waterproofing of the skylight.
Proper waterproofing and sealing will help to protect your skylight from any water damage or leaks, ensuring its longevity and functionality. Take the time to apply sealant correctly, and if you’re unsure, consult a professional for guidance.
With the skylight properly sealed, you’re ready to move on to the final step: adding the finishing touches to your skylight installation.
Read more: How To Install A Skylight Tube
Step 9: Finishing touches
With the skylight installation complete, it’s time to add the final finishing touches to ensure that your skylight not only functions properly but also enhances the aesthetic appeal of your space.
Here are some essential finishing touches to consider:
1. Trim and molding: Install trim or molding around the interior edges of the skylight to create a clean and polished look. Choose a style and material that complements your existing décor and adds a touch of elegance to the room.
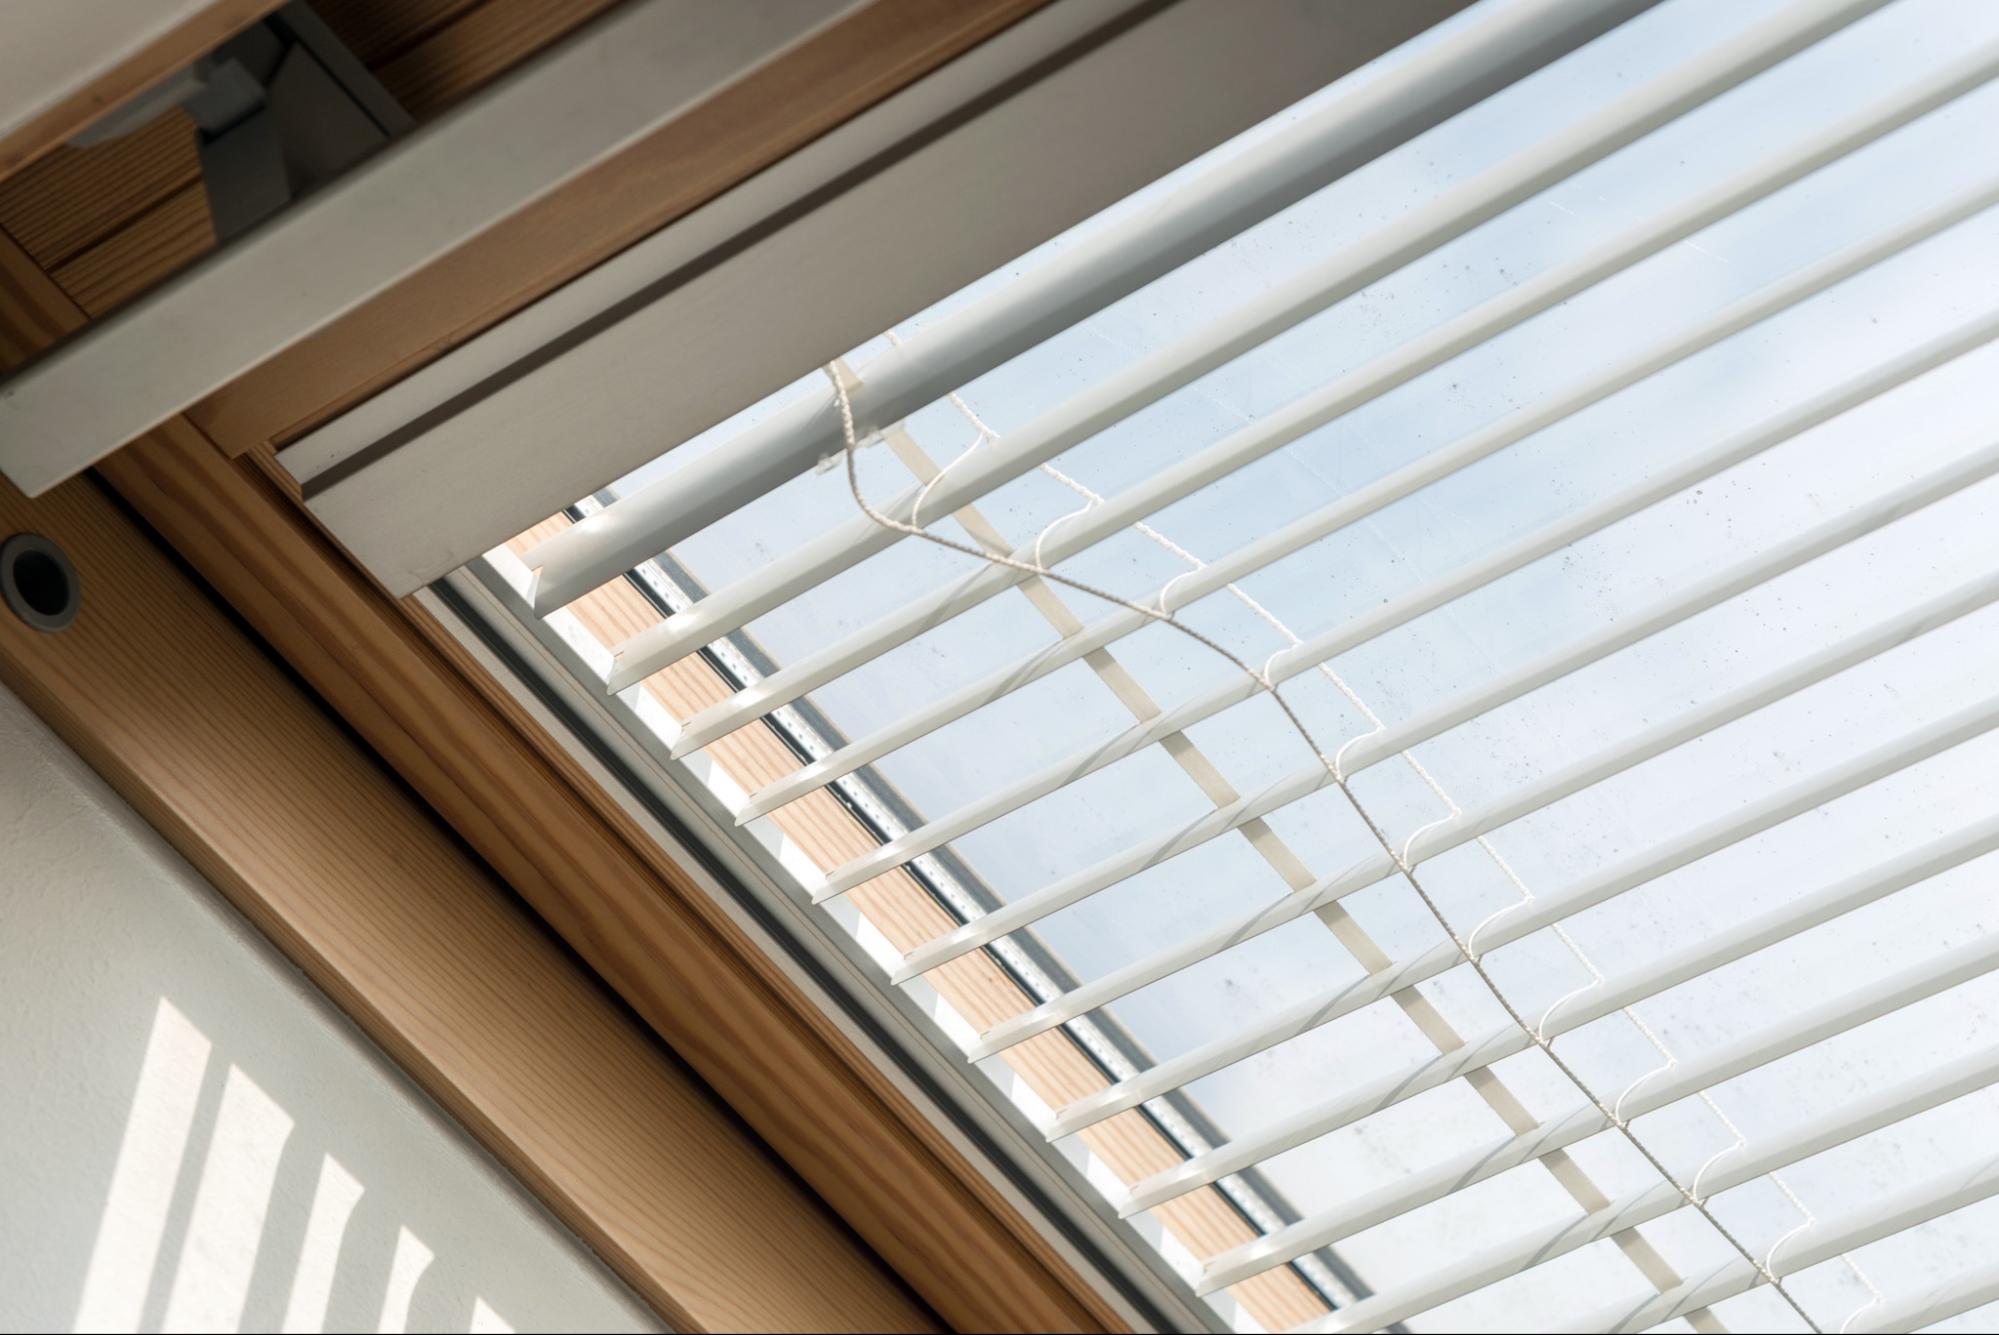
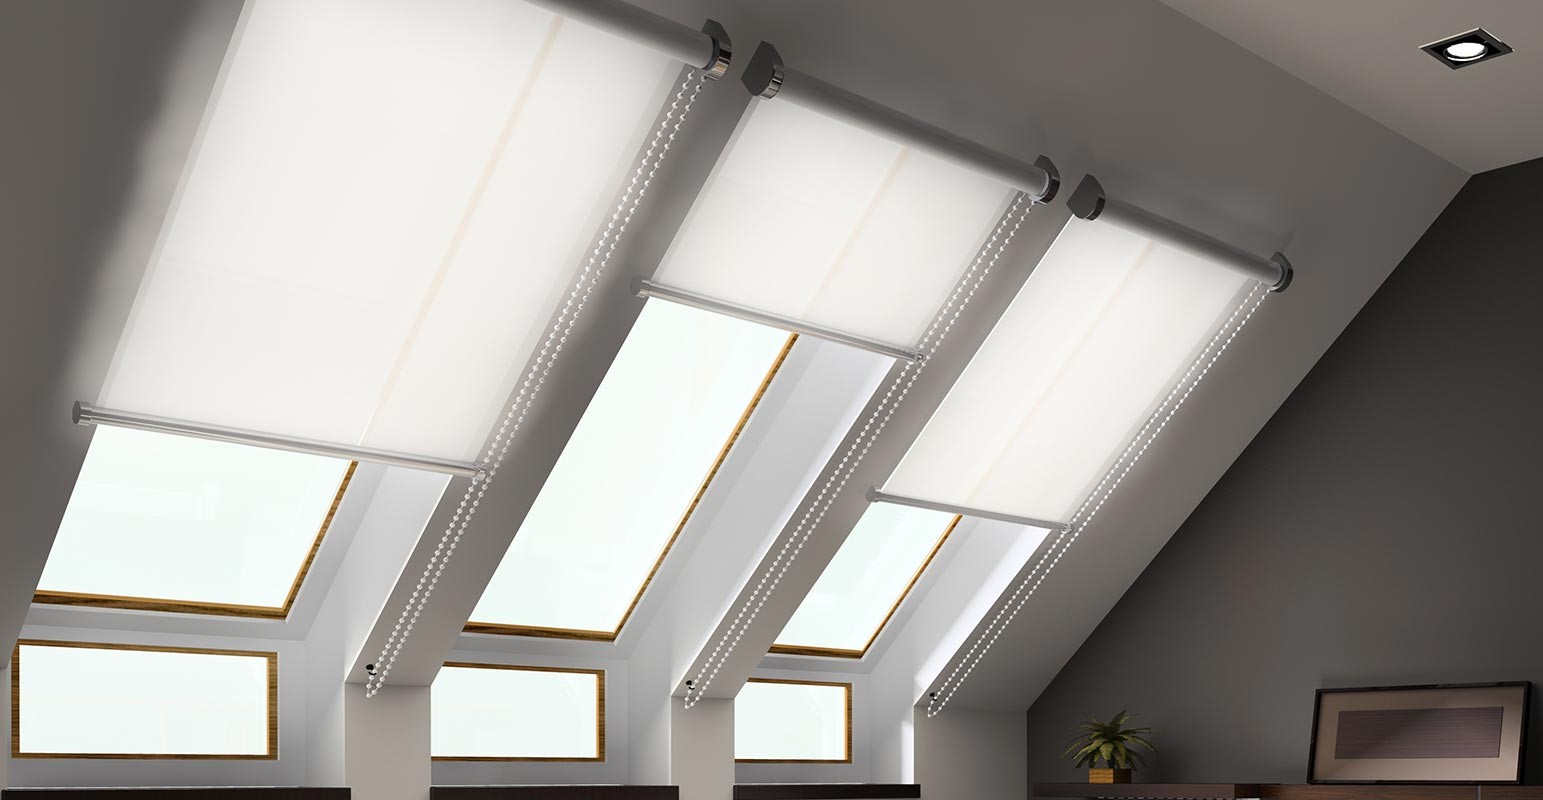
2. Interior blinds or shades: To control the amount of light and privacy, consider installing blinds or shades specifically designed for skylights. These can be operated manually or electrically, allowing you to adjust the amount of natural light entering the room effortlessly.
3. Decorative features: Enhance the visual appeal of your skylight installation by adding decorative features or architectural enhancements. Consider installing a light fixture, hanging plants, or an artistic stained glass panel to create a unique focal point and add a personal touch.
4. Maintenance and cleaning: Regular maintenance and cleaning are essential to ensure the longevity of your skylight. Clear away any debris or leaves that may accumulate on the exterior of the skylight. Depending on your skylight model, you may need to periodically clean the interior glass as well.
5. Enjoy your skylight: Once all the finishing touches are complete, it’s time to enjoy the benefits of your skylight installation. Bask in the natural light, relish the beautiful views, and savor the improved ambiance that now graces your home.
Remember to refer to the manufacturer’s guidelines and recommendations for any specific care and maintenance instructions for your skylight model. Following these instructions will help ensure the optimal performance and longevity of your skylight.
Congratulations! You have successfully installed a skylight on your roof, bringing in natural light and enhancing the overall beauty of your space. Sit back, relax, and enjoy the transformative effects of your new skylight!
Note: It’s important to consult with professionals or experts when undertaking a skylight installation, especially if you have little to no experience with roofing projects. Their expertise will ensure that your skylight is installed safely and effectively.
Conclusion
Installing a skylight on your roof can be a rewarding project that brings in natural light, improves the ambiance of your space, and adds aesthetic appeal to your home. By following the step-by-step process outlined in this article, you can successfully install a skylight and enjoy the benefits it offers.
Throughout the installation process, it’s important to assess your roof, gather the necessary materials and tools, measure and mark the skylight location accurately, cut an opening in the roof with precision, install the flashing to provide a waterproof barrier, place and secure the skylight unit to ensure stability, waterproof and seal the installation to prevent leaks, and add the finishing touches to enhance the overall aesthetics.
Remember to adhere to the manufacturer’s guidelines and seek professional assistance if needed, especially if you’re new to roofing projects. Proper installation, waterproofing, and ongoing maintenance will play a crucial role in the performance and longevity of your skylight.
With your new skylight, you can enjoy the benefits of increased natural light, improved ventilation, energy savings through reduced reliance on artificial light, and a renewed connection with the outdoor environment. The added visual appeal and the ability to enjoy starry nights or watch the raindrops dance on your skylight will create a unique and memorable experience.
So go ahead, let the light in, bring the beauty of the sky into your home, and create a space that is illuminated and energized by the natural world above.
Note: Always consult with professionals or experts when undertaking a skylight installation to ensure the safety and proper installation of your skylight.
Frequently Asked Questions about How To Install Skylight On Roof
Was this page helpful?
At Storables.com, we guarantee accurate and reliable information. Our content, validated by Expert Board Contributors, is crafted following stringent Editorial Policies. We're committed to providing you with well-researched, expert-backed insights for all your informational needs.


0 thoughts on “How To Install Skylight On Roof”