
Articles
How To Install A Velux Skylight
Modified: October 20, 2024
Learn how to properly install a Velux skylight with our comprehensive articles. Get step-by-step instructions and expert tips for a successful installation.
(Many of the links in this article redirect to a specific reviewed product. Your purchase of these products through affiliate links helps to generate commission for Storables.com, at no extra cost. Learn more)
Introduction
Welcome to this comprehensive guide on how to install a Velux skylight. Installing a skylight can bring natural light, ventilation, and a sense of openness to a space. Velux is a renowned brand that offers high-quality skylights designed to enhance the aesthetics and functionality of any room. Whether you want to brighten up a dark attic, add natural light to a bathroom, or create a stunning focal point in your living room, installing a Velux skylight can transform your space.
This step-by-step guide will walk you through the installation process, from choosing the right skylight size to adding the finishing touches. Before you begin, it’s important to gather all the necessary tools and materials to ensure a smooth installation. Let’s dive in!
Key Takeaways:
- Transform any room with natural light, ventilation, and elegance by confidently installing a Velux skylight using the comprehensive step-by-step guide. Enjoy the benefits of increased openness and soothing ambiance.
- Ensure a successful installation by gathering the necessary tools, preparing the location, and following each crucial step, from choosing the right size to adding finishing touches. Embrace the beauty of natural light and enjoy the transformative power of your new Velux skylight.
Read more: How To Install Velux Skylight Blinds
Step 1: Tools and Materials Needed
Before you start the installation process, make sure you have the following tools and materials:
- Cordless drill
- Screwdriver
- Measuring tape
- Pry bar
- Roofing nails
- Roofing cement
- Roofing flashing
- Roofing sealant
- Level
- Caulk gun
- Protective gear (safety goggles, gloves, etc.)
- Ventilation tube (if applicable)
- Skylight installation kit (comes with brackets, screws, and hardware)
Gather all these tools and materials before starting the installation. This will ensure that you have everything you need close at hand, allowing you to work efficiently and without any unnecessary interruptions.
Step 2: Choosing the Right Skylight Size
Choosing the correct size for your Velux skylight is crucial for a successful installation. The skylight size should be proportionate to the size of the room and the desired amount of natural light. Follow these steps to determine the appropriate size:
- Measure the rough opening of the ceiling where the skylight will be installed. This is the opening between the rafters.
- Consider the room’s square footage. As a general rule, the skylight should be about 5% to 10% of the room’s floor area for optimal natural light.
- Take into account the pitch of your roof. A lower pitched roof will require a larger skylight to compensate for the decrease in light penetration.
- Consider the furniture layout and potential obstructions in the room. Ensure that the skylight placement won’t interfere with furniture or other fixtures.
Once you have these measurements and considerations in mind, consult the Velux size chart to determine the appropriate skylight size. The size chart will provide the recommended skylight dimensions based on your rough opening measurements, roof pitch, and desired light performance.
It’s always a good idea to consult with a professional if you are unsure about the size or any other aspects of the skylight installation. They can provide guidance and ensure that you choose the right skylight to meet your specific needs.
Step 3: Preparing the Installation Location
Before installing your Velux skylight, it’s important to properly prepare the installation location. This ensures a secure and watertight fit. Follow these steps to prepare the area:
- Choose the ideal location for your skylight. Consider factors such as room layout, roof structure, and aesthetic appeal. Velux skylights are typically installed on the roof slope, between the rafters.
- Locate the rafters in the area where the skylight will be installed. Use a stud finder or measure from a known reference point to find the center point of each rafter.
- Mark the center points of the rafters on the roof surface. This will serve as a reference for the skylight frame installation.
- Clear away any debris or obstructions from the installation area. Remove roofing materials, such as shingles or tiles, that may be covering the marked rafters.
- Ensure that the roof is in good condition and free of any leaks. If there are any existing leaks or damaged roofing materials, repair them before proceeding with the skylight installation.
- Inspect the underside of the roof decking to ensure it is sturdy and in good condition. Reinforce or replace any weakened or damaged sections if necessary.
By properly preparing the installation area, you will create a solid foundation for the skylight and minimize the risk of leaks or structural issues in the future. Take your time to complete these steps thoroughly to ensure a successful installation.
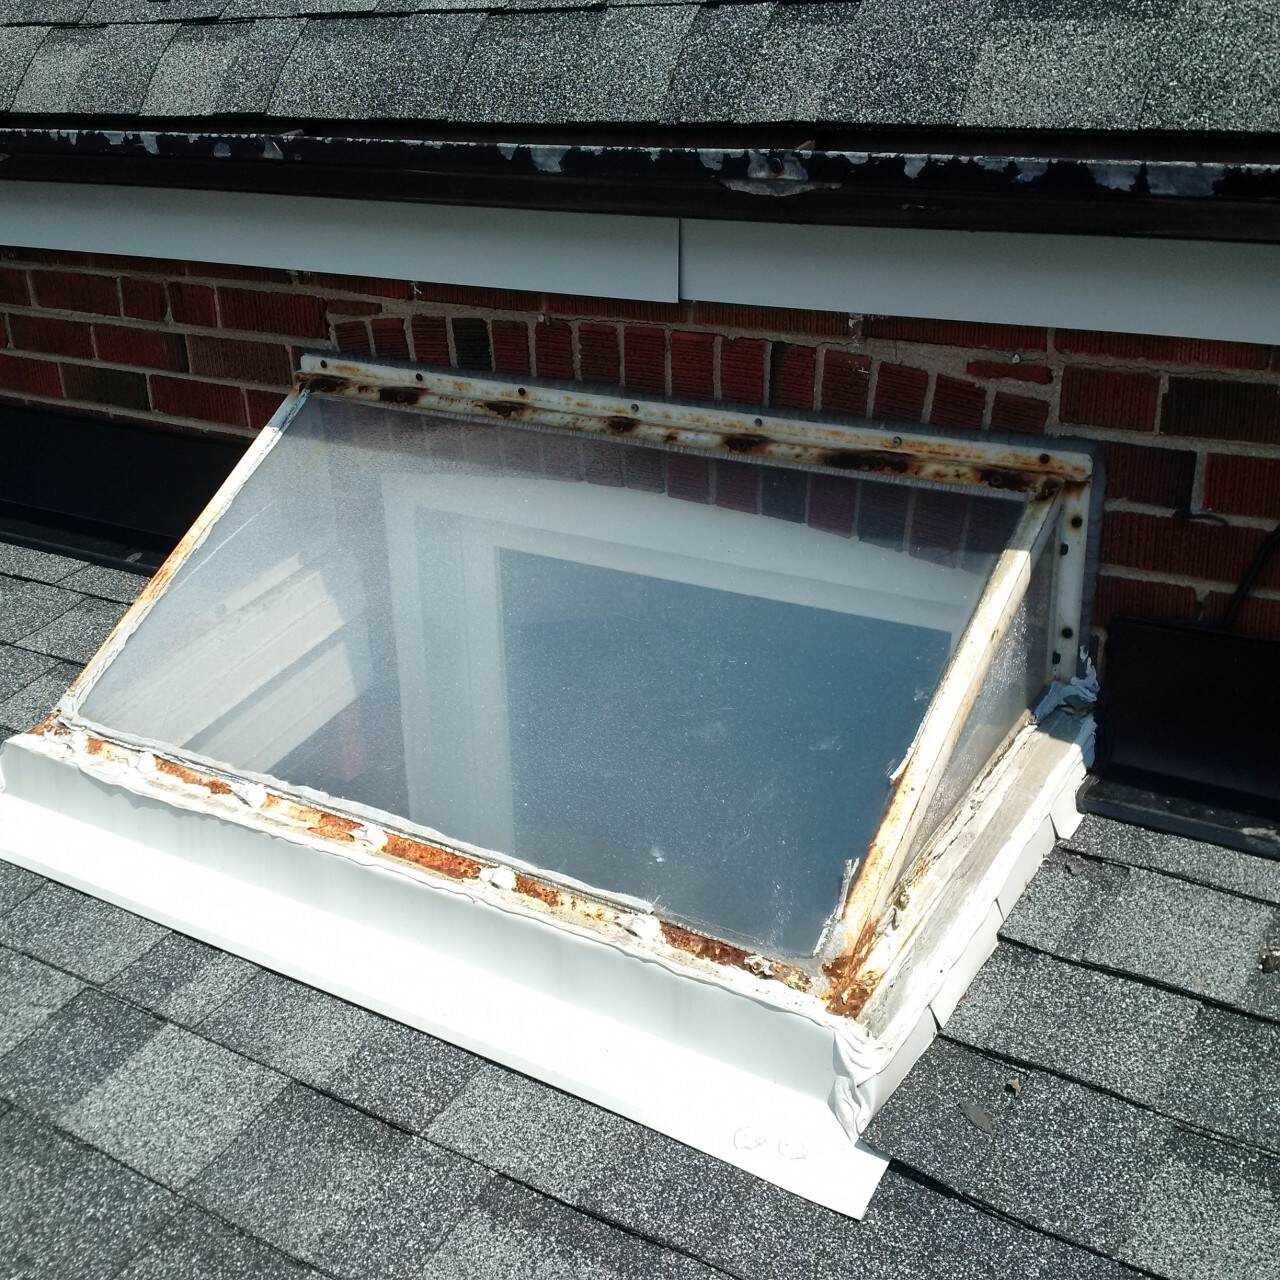
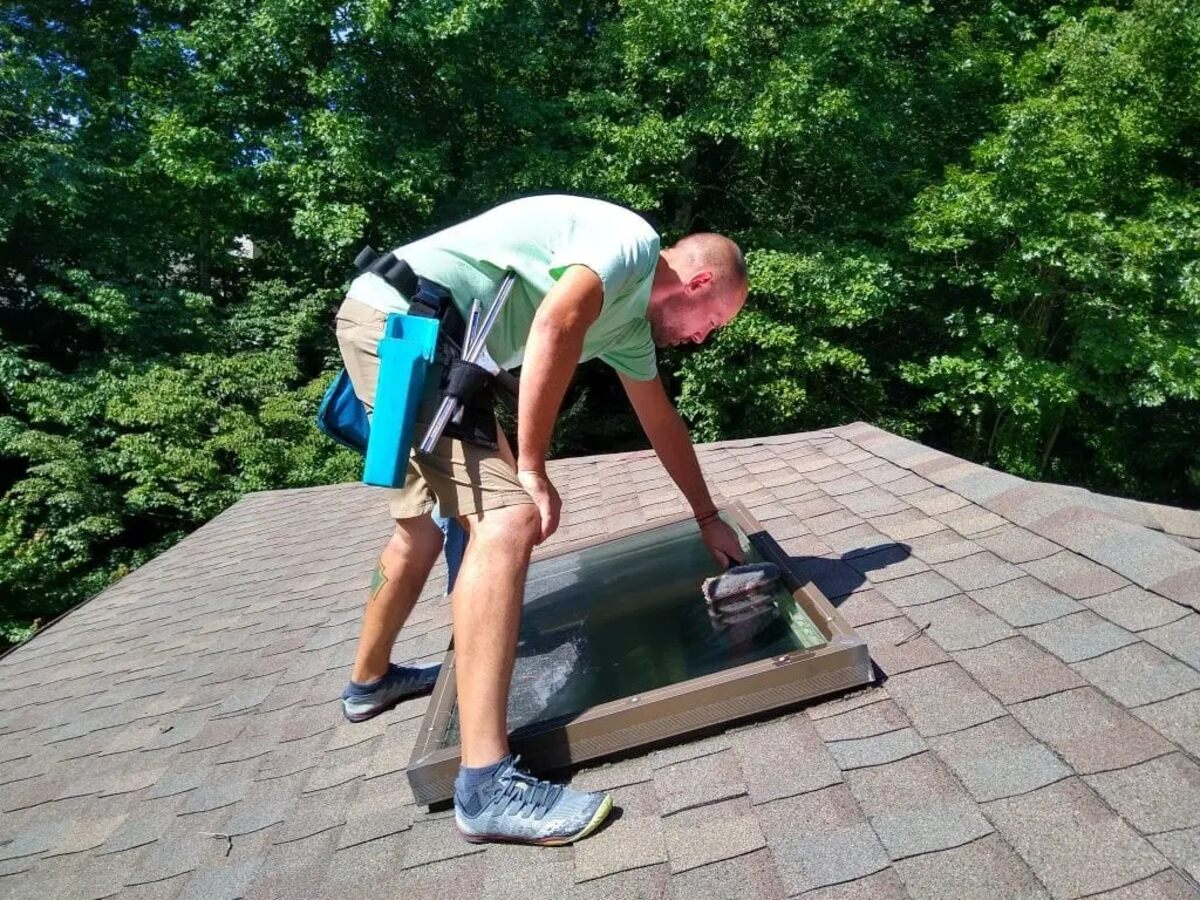
Step 4: Removing the Roofing Materials
Once you have prepared the installation location, the next step is to remove the roofing materials in order to create a clear space for the skylight. Follow these steps to safely remove the necessary roofing materials:
- Put on protective gear such as safety goggles and gloves before starting the removal process.
- Use a pry bar or roofing shovel to lift and remove the roofing materials (shingles, tiles, etc.) that are covering the area where the skylight will be installed.
- Take care not to damage or displace the surrounding roofing materials as you remove the ones directly above the installation area.
- Continue removing the roofing materials until you reach the rafters that were previously marked in Step 3.
- Inspect the exposed area to ensure that the rafters are clean, free of debris, and in good condition.
- If needed, use a roofing saw or snips to trim any protruding nails or excess material that may obstruct the skylight installation.
Properly removing the roofing materials ensures a clean and secure installation area for the skylight. Take your time during this step to avoid any damage to the surrounding roof structure and to ensure that the skylight can be installed smoothly.
Read more: How To Reset Velux Skylight
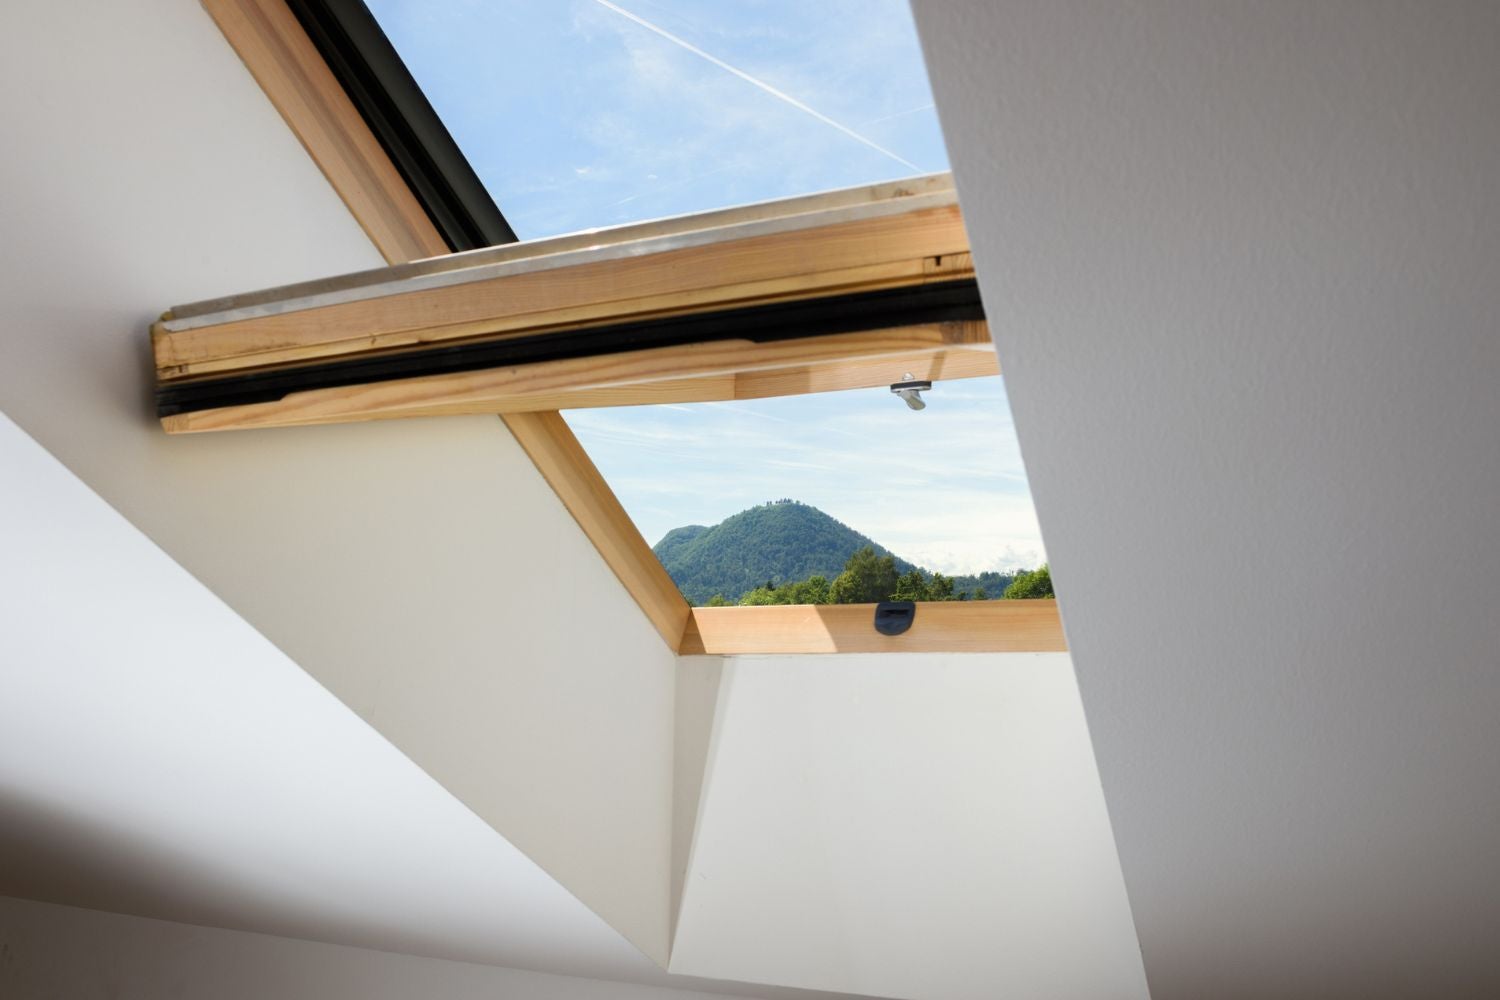
Step 5: Installing the Skylight Frame
Now that you have prepared the installation area and removed the roofing materials, it’s time to install the skylight frame. The frame provides the support and structure for the skylight and ensures a secure and watertight fit. Follow these steps to properly install the skylight frame:
- Position the skylight frame on the marked rafters, aligning it with the opening in the roof.
- Ensure that the frame is level and centered within the opening.
- Secure the frame to the rafters using the provided screws or brackets. Make sure to follow the manufacturer’s instructions for proper installation.
- Double-check the alignment and levelness of the skylight frame to ensure it is properly secured.
It’s important to ensure a tight fit and proper alignment of the skylight frame to prevent any gaps or leaks. Take your time during this step and make any necessary adjustments before moving on to the next stage of the installation process.
Once the skylight frame is securely installed, you can proceed to the next steps of the installation process, including securing the flashing and installing the skylight glass pane.
When installing a Velux skylight, make sure to carefully follow the manufacturer’s instructions and use the recommended flashing kit to ensure a watertight seal around the skylight.
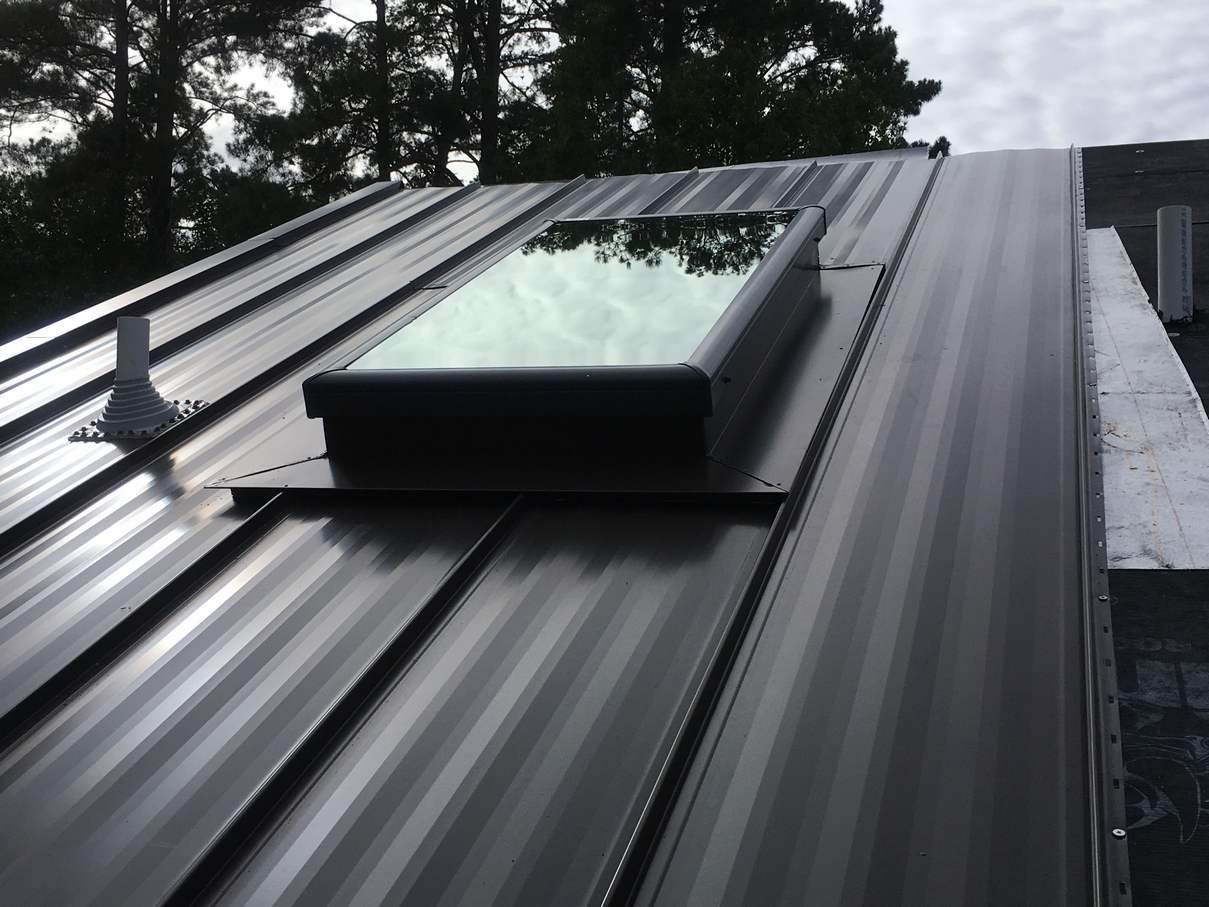
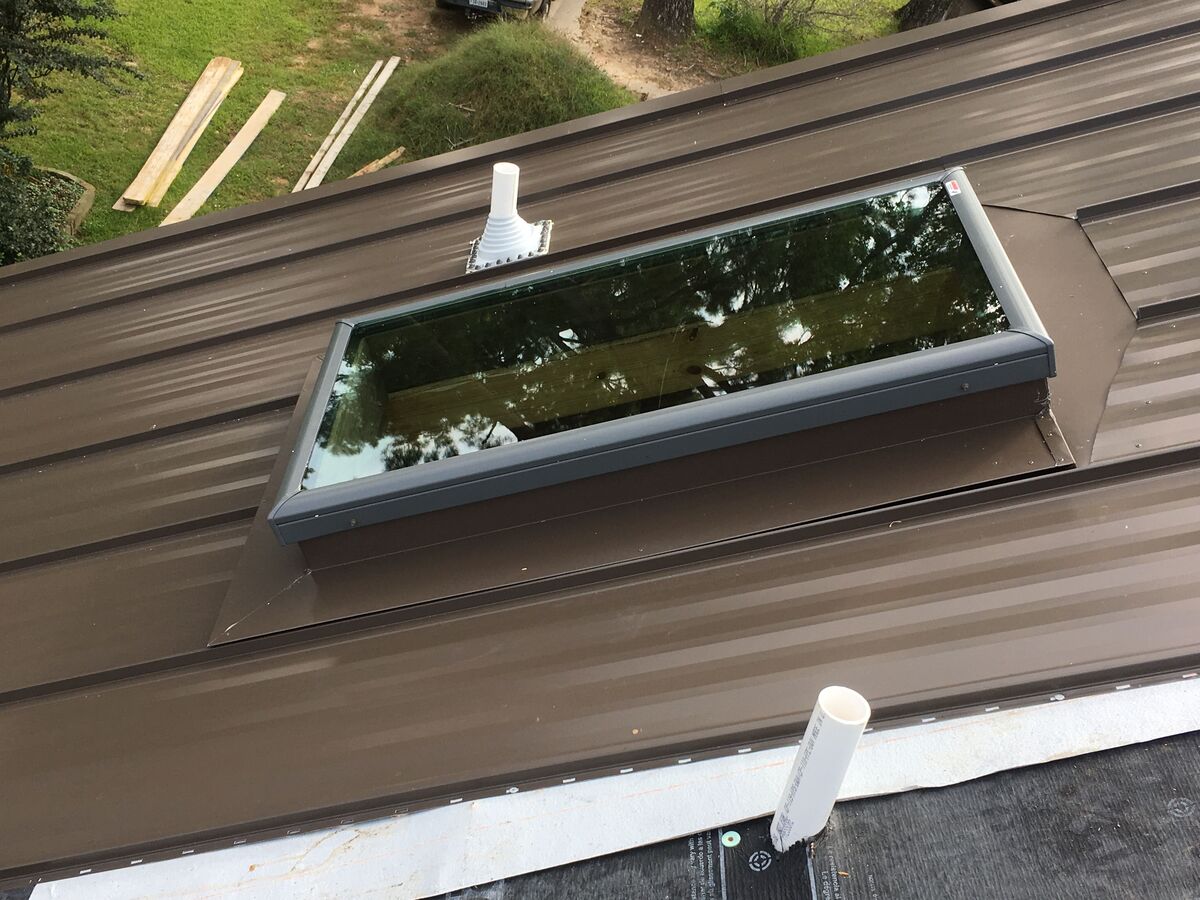
Step 6: Securing the Flashing
Securing the flashing is an important step in the skylight installation process. Flashing provides a waterproof barrier around the skylight frame, preventing any water from seeping into the roof. Follow these steps to properly secure the flashing:
- Cut the flashing material to the appropriate size and shape according to the manufacturer’s instructions.
- Place the flashing around the skylight frame, ensuring that it covers the entire frame and extends onto the roof surface.
- Secure the flashing to the frame by using roofing nails or screws, making sure to follow the recommended spacing and placement as specified by the manufacturer.
- Apply roofing cement or sealant around the edges of the flashing to create a watertight seal.
- Use a caulk gun to apply sealant to any gaps or joints in the flashing to further enhance its waterproofing capabilities.
Properly securing the flashing is crucial to prevent any water infiltration or leaks around the skylight. Take your time during this step and ensure that the flashing is securely attached and sealed. This will provide added protection and peace of mind in any weather conditions.
Once the flashing is securely installed, you can move on to the next step of the skylight installation process, which involves installing the skylight glass pane.
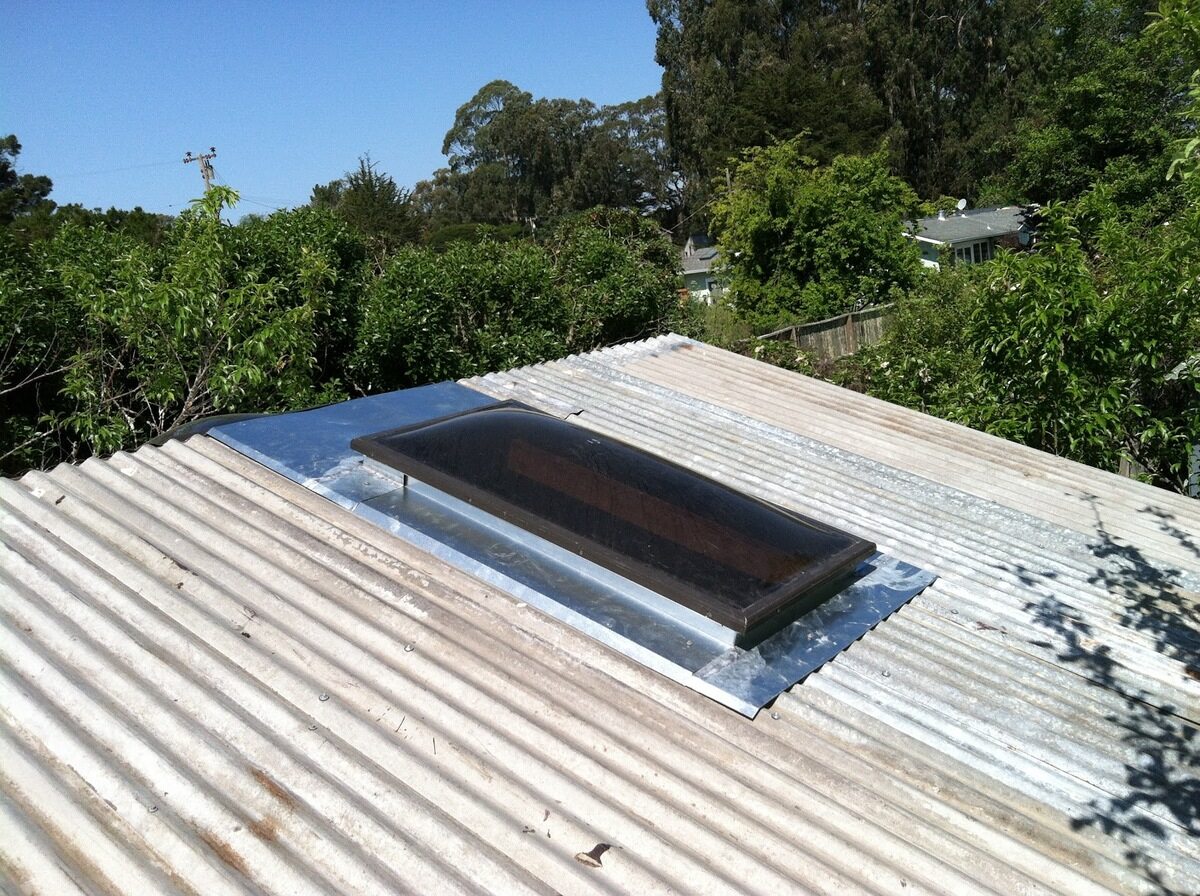
Step 7: Installing the Skylight Glass Pane
After securing the flashing, it’s time to install the skylight glass pane. This step brings the natural light into your space while ensuring a tight seal and proper insulation. Follow these steps to install the skylight glass pane:
- Carefully place the skylight glass pane onto the frame, ensuring a proper fit and alignment.
- Follow the manufacturer’s instructions for securing the glass pane to the frame. This may involve using screws or brackets.
- Make sure that the glass pane is securely fastened and that there are no gaps or loose sections.
- Apply a bead of silicone sealant along the edges of the glass pane to create a watertight and airtight seal.
- Smooth out the sealant using a caulk gun or a putty knife, ensuring that it is evenly spread and tightly adhered to the frame and glass.
Installing the skylight glass pane requires precision and careful handling to avoid any damage or improper sealing. Take your time during this step and ensure that the glass pane is securely attached and properly sealed to provide optimal insulation and protection.
Once the skylight glass pane is successfully installed, you are ready to move on to the next steps of the installation process, such as insulating and sealing the skylight, as well as installing the interior trim.
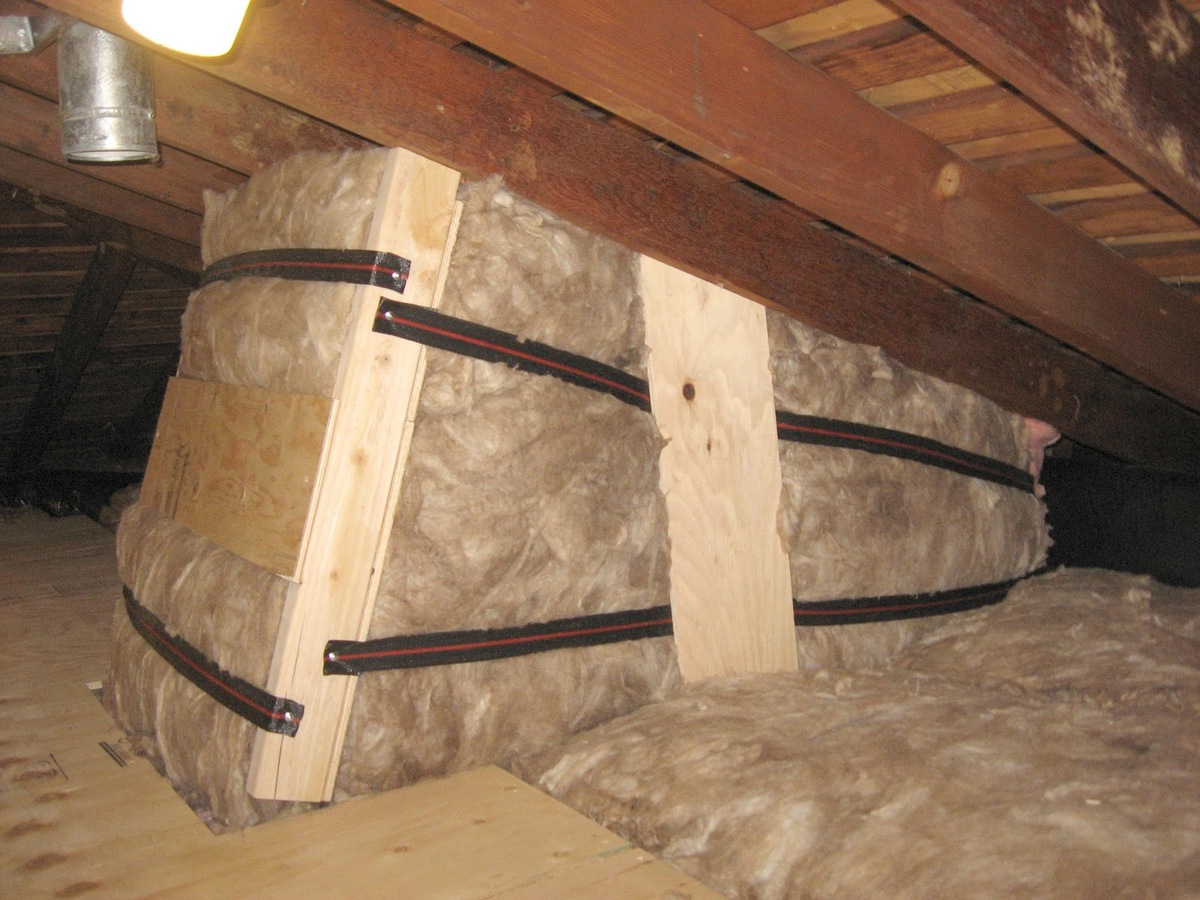
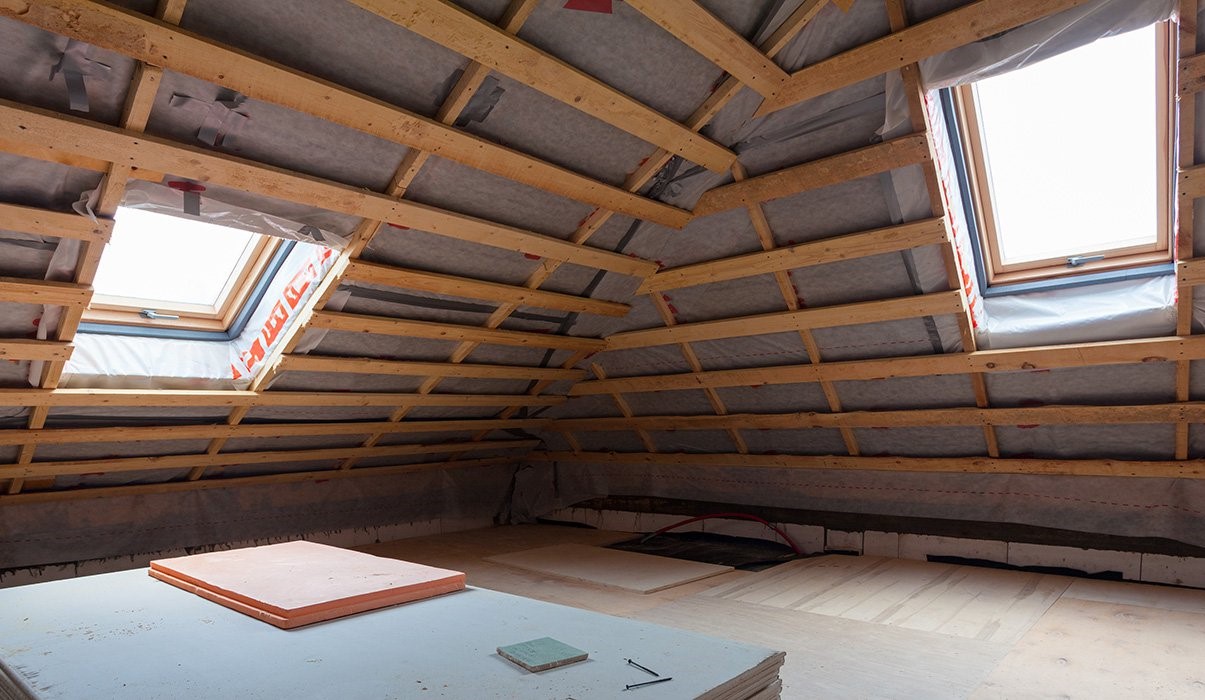
Step 8: Insulating and Sealing the Skylight
Insulating and sealing the skylight is a crucial step to ensure energy efficiency, prevent drafts, and maintain a comfortable indoor environment. Proper insulation and sealing will also help to prevent any moisture penetration. Follow these steps to effectively insulate and seal your skylight:
- Apply insulation material around the frame of the skylight to prevent any drafts or air leakage. Use insulation foam or insulation strips specifically designed for skylights.
- Seal any gaps or openings between the skylight frame and the surrounding roof structure using a high-quality roofing sealant. This will create a watertight and airtight barrier.
- Inspect the interior side of the skylight frame and seal any gaps or joints using caulk or sealant appropriate for the material of the surrounding surface (e.g., drywall, wood).
- Ensure that the insulation material is properly installed and covers all exposed areas between the skylight frame and the rafters, providing effective thermal insulation.
- Check for any remaining gaps or openings and seal them with additional insulation or sealant as needed.
Proper insulation and sealing will enhance the energy efficiency of your skylight and prevent any unwanted drafts or moisture infiltration. It’s important to pay attention to detail during this step to ensure a well-insulated and tightly sealed skylight.
Once the skylight is properly insulated and sealed, you can proceed to the next step, which involves installing the interior trim.
Read also: 10 Superior Velux Skylight For 2025
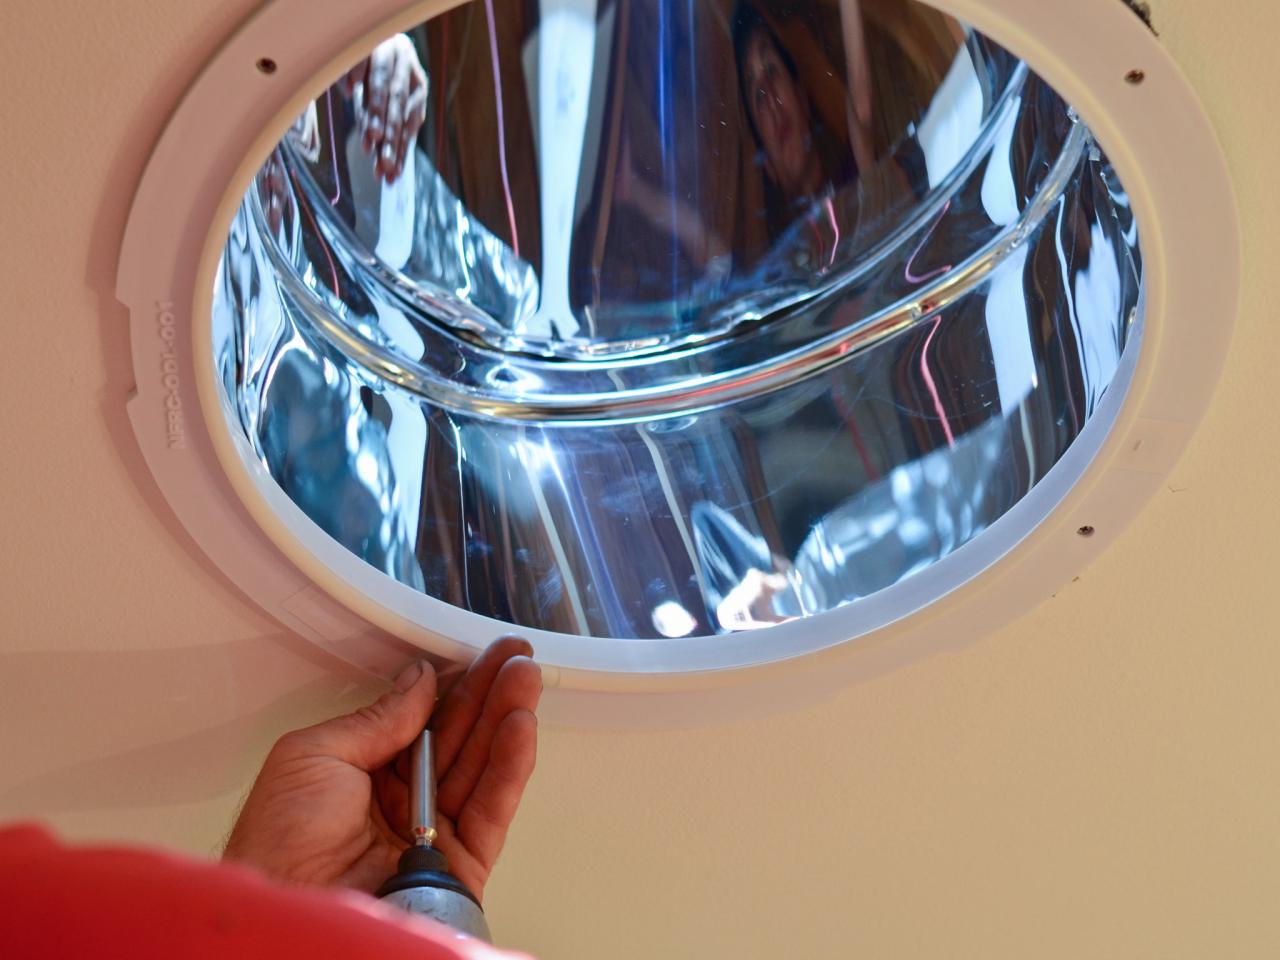
Step 9: Installing the Interior Trim
Installing the interior trim around the skylight adds a finishing touch to the overall appearance of your skylight installation. The interior trim helps to cover any gaps or rough edges and provides a clean and polished look. Follow these steps to install the interior trim:
- Measure and cut the trim pieces to fit around the skylight frame, taking into account any angles or corners.
- Place the trim pieces around the skylight frame, ensuring a snug fit and proper alignment.
- Secure the trim pieces to the surrounding surface using finishing nails or screws, ensuring that the trim is tightly and securely attached.
- If needed, use a putty or wood filler to fill any nail holes or gaps in the trim.
- Once the trim is installed, sand it down if necessary to create a smooth and seamless finish.
- Apply a coat of paint or stain to the trim, if desired, to match the surrounding decor and enhance the overall aesthetics.
Installing the interior trim completes the skylight installation process, giving it a polished and professional appearance. Take your time during this step to ensure that the trim is properly aligned, securely attached, and finishes off the skylight installation in a visually pleasing manner.
With the interior trim in place, your skylight is now ready for use and will provide you with the benefits of natural light and ventilation for years to come.
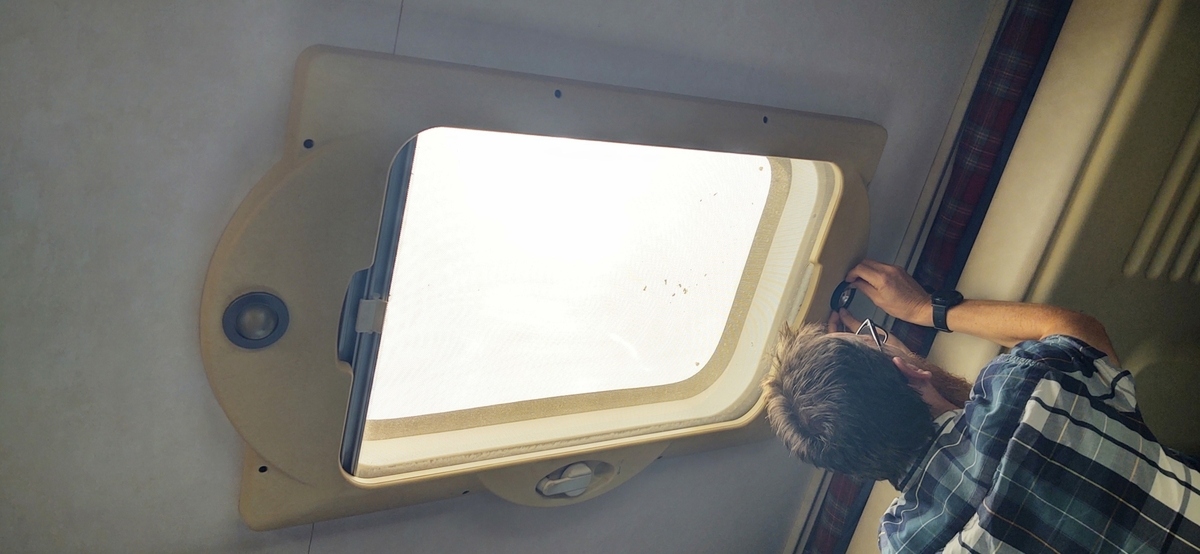
Step 10: Testing and Finishing Touches
After completing the installation of your Velux skylight, it’s important to test its functionality and make any necessary adjustments. This final step ensures that your skylight is in optimal working condition and meets your expectations. Follow these steps for testing and adding finishing touches:
- Test the operation of the skylight by opening and closing it several times to ensure smooth and seamless functionality.
- Check for any signs of air leaks or water infiltration during the testing process.
- Inspect the skylight from both the interior and exterior, ensuring that there are no visible gaps, cracks, or signs of damage.
- If necessary, make any adjustments to the skylight’s operation, such as tightening screws or lubricating hinges, to ensure optimal performance.
- Clean the skylight glass pane and the surrounding frame using a mild glass cleaner or warm, soapy water, and a soft cloth.
- Consider installing blinds or shades to control the amount of light and privacy in the room.
- Add any final decorative touches, such as curtains or trim, to enhance the aesthetic appeal of the skylight installation.
By thoroughly testing the skylight and making any necessary adjustments, you can be confident that your installation is functioning properly and ready for use. Taking care of the finishing touches, such as cleaning and adding additional elements, will help to enhance the overall appearance and functionality of your skylight.
Congratulations! You have successfully installed your Velux skylight, and now you can enjoy the benefits of natural light, ventilation, and a heightened sense of openness in your space.
Conclusion
Installing a Velux skylight is a rewarding project that can transform any room by adding natural light, ventilation, and a touch of elegance. By following the step-by-step guide outlined in this article, you have learned how to install a Velux skylight with confidence.
From choosing the right skylight size to insulating, sealing, and adding finishing touches, each step plays a crucial role in ensuring a successful installation. By gathering the necessary tools and materials, preparing the installation location, and removing roofing materials, you have set the stage for a smooth installation process.
With the skylight frame securely installed and the flashing properly sealed, you have created a waterproof barrier that will protect your home from any potential leaks. Installing the skylight glass pane adds the final touch, allowing natural light to fill your space and create a soothing ambiance.
Insulating and sealing the skylight ensures energy efficiency and prevents drafts, while the installation of the interior trim provides a polished and finished look. Testing the functionality of the skylight and making any necessary adjustments ensures that it operates smoothly and meets your expectations.
By following these steps, you have successfully installed your Velux skylight and can now enjoy the benefits of increased natural light, improved ventilation, and a heightened sense of openness in your space. Whether it’s a dark attic, a bathroom longing for brightness, or a living room in need of a stunning focal point, the Velux skylight brings beauty and functionality into your home.
Remember, if you ever feel unsure or overwhelmed during the installation process, it’s always a good idea to consult with a professional who can provide guidance and ensure a safe and successful installation. Now, go ahead, embrace the beauty of natural light, and enjoy the transformative power of your new Velux skylight.
Now that you've mastered installing a Velux skylight, why not enhance your space further with stunning views? Our latest article on roof windows offers a range of options that will transform any room into a scenic retreat. Don't miss out on these breathtaking upgrades that not only bring natural light but also an expansive perspective of the sky above. Perfect for those eager to add a touch of elegance and openness to their homes.
Frequently Asked Questions about How To Install A Velux Skylight
Was this page helpful?
At Storables.com, we guarantee accurate and reliable information. Our content, validated by Expert Board Contributors, is crafted following stringent Editorial Policies. We're committed to providing you with well-researched, expert-backed insights for all your informational needs.


0 thoughts on “How To Install A Velux Skylight”