Home>Articles>How To Install An Air Admittance Valve To Fix A Slow-Draining Sink
Articles
How To Install An Air Admittance Valve To Fix A Slow-Draining Sink
Modified: August 31, 2024
Learn how to install an air admittance valve in just a few easy steps to resolve the issue of a slow-draining sink. Find more helpful articles on plumbing fixes.
(Many of the links in this article redirect to a specific reviewed product. Your purchase of these products through affiliate links helps to generate commission for Storables.com, at no extra cost. Learn more)
Introduction
Welcome to our comprehensive guide on how to install an air admittance valve (AAV) to fix a slow-draining sink. If you’ve noticed that your sink is taking longer than usual to drain, it could be due to a problem with the venting system. Typically, sinks rely on a complicated network of pipes and vents to maintain proper drainage by allowing air to enter the system. However, if the venting system becomes blocked or malfunctions, it can result in slow-draining sinks and even unpleasant odors.
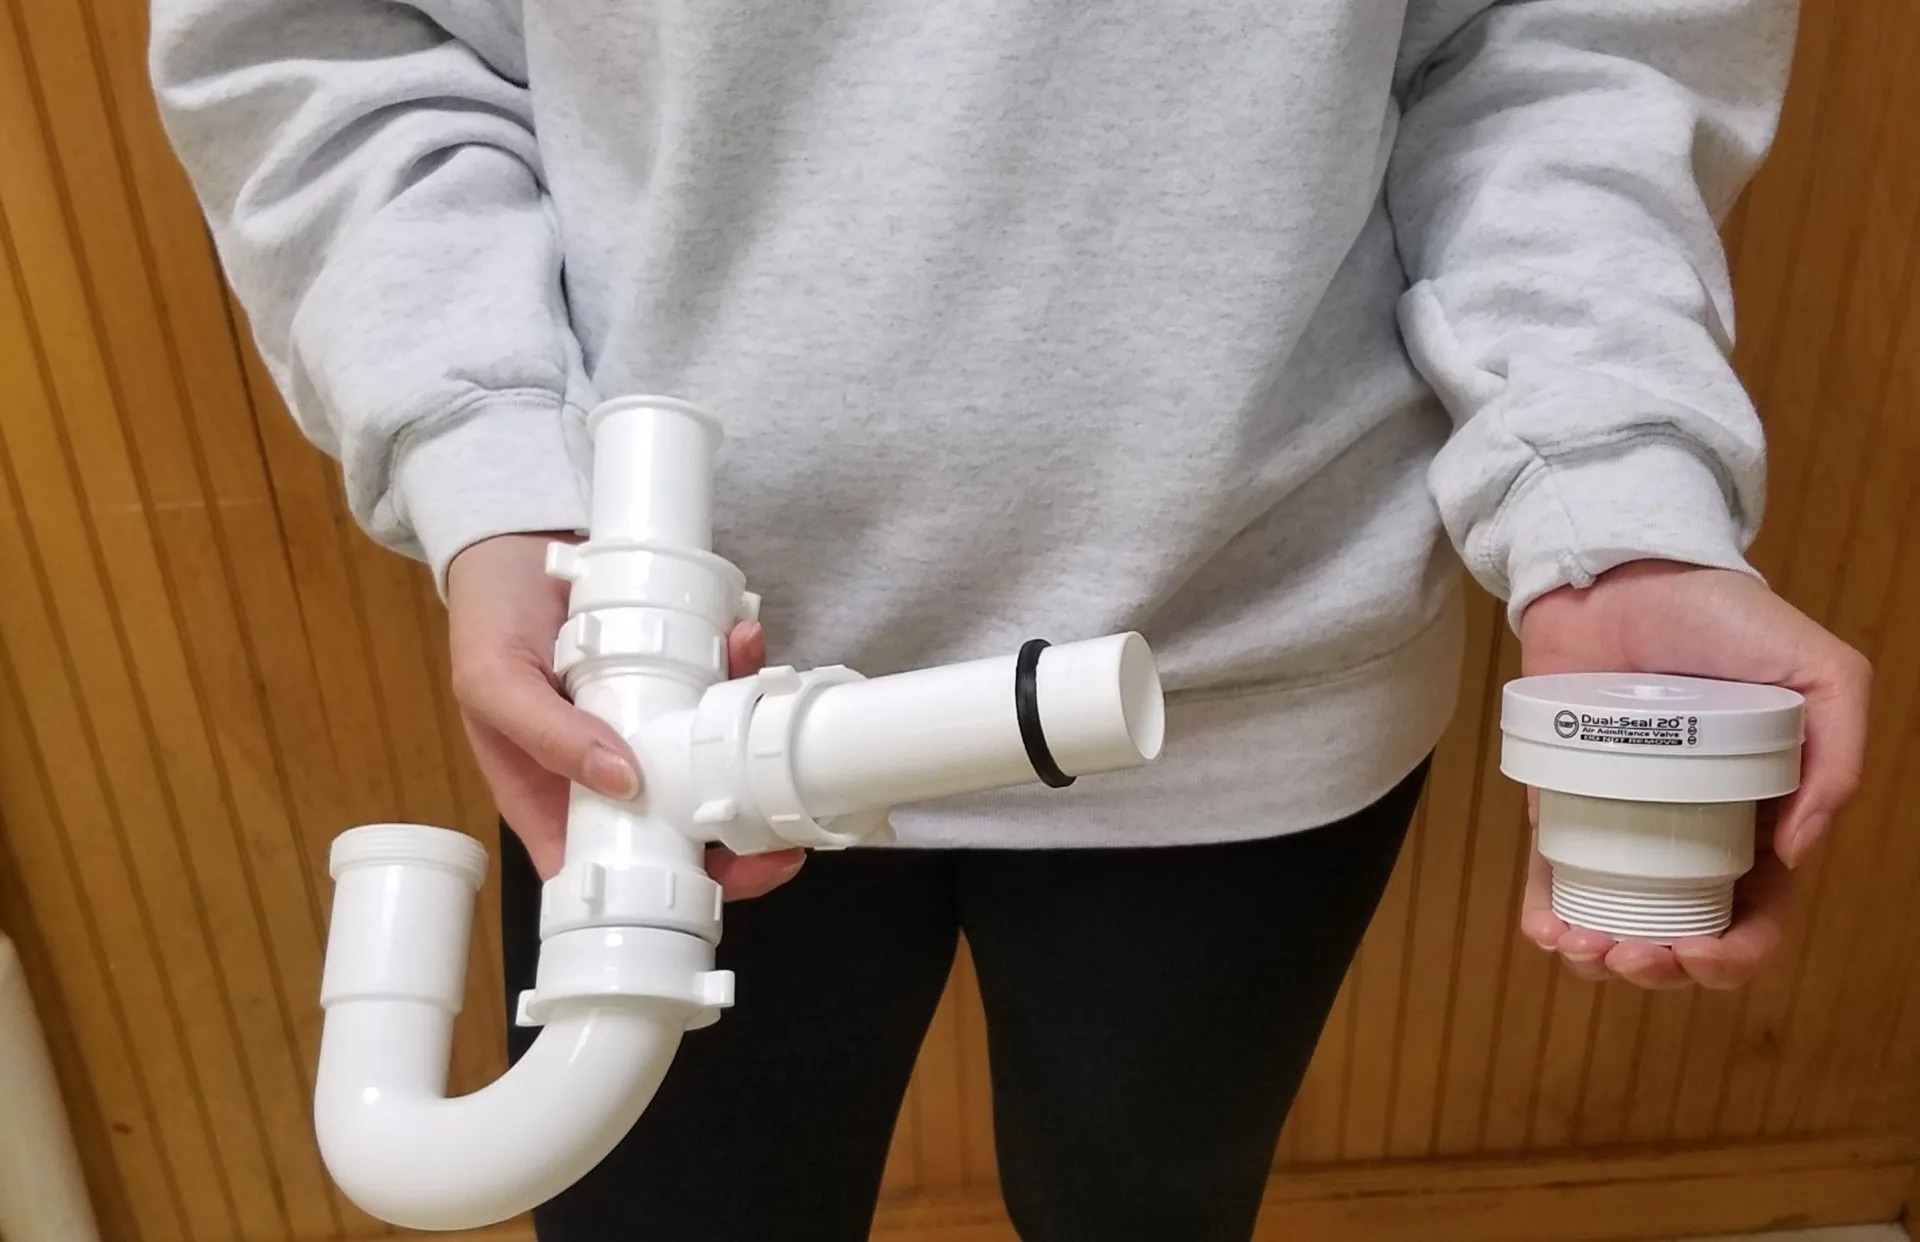
This is where an air admittance valve comes in handy. An AAV is a simple device that can be installed in place of a traditional vent pipe, providing air flow into the plumbing system without the need for an external vent. It essentially acts as a one-way valve, allowing air to enter the system when needed while preventing sewer gases from escaping into your home.
In this article, we’ll walk you through the step-by-step process of installing an air admittance valve to fix a slow-draining sink. We’ll cover everything you need to know, from the tools and materials required to the actual installation process. So, let’s get started!
Key Takeaways:
- Installing an air admittance valve (AAV) can efficiently fix a slow-draining sink by providing proper air flow and preventing sewer gases from entering your home. Follow the step-by-step guide for a successful installation.
- It’s crucial to gather the necessary tools and materials, turn off the water supply, locate the drainage problem, and carefully install and test the AAV to ensure optimal sink drainage. Regular maintenance is key to a well-functioning plumbing system.
Read more: How To Clear A Slow-Draining Bathroom Sink
Overview of Air Admittance Valve
Before we dive into the installation process, let’s first understand what an air admittance valve (AAV) is and how it works. An AAV is a device used in plumbing systems to regulate the air pressure within the pipes, ensuring proper drainage and preventing the entry of sewer gases into the living space.
Traditionally, plumbing systems have relied on vent pipes that extend from the drainage system outside of the building. These vent pipes allow air to enter the system, balancing the pressure and facilitating the smooth flow of water and waste. However, in some cases, installing a vent pipe may not be feasible or may require significant modifications to the building’s structure.
That’s where an air admittance valve comes in. An AAV is designed to replace traditional vent pipes in situations where an external vent is not possible or practical. It consists of a valve mechanism that opens to allow air into the plumbing system when there is negative pressure (such as when a sink is draining) and closes to prevent the escape of sewer gases when there is positive pressure (such as when water is filling up the pipes).
The use of an air admittance valve offers several advantages. Firstly, it eliminates the need for extensive vent pipe installation, reducing both labor and material costs. Additionally, it provides flexibility in plumbing design, allowing for easier retrofitting or modifications in existing structures.
AAVs are typically made of durable materials such as PVC or ABS plastic, which are resistant to corrosion and chemical damage. They are also available in various sizes to accommodate different pipe diameters and plumbing configurations.
It’s important to note that air admittance valves are code-regulated and must meet local plumbing standards. The specific requirements may vary based on your location, so it’s essential to check with your local plumbing authority before installing an AAV.
In the next sections, we’ll guide you through the installation process of an air admittance valve to fix a slow-draining sink. Before we begin, let’s gather the necessary tools and materials.
Tools and Materials Needed
Before you start installing an air admittance valve, it’s crucial to gather all the necessary tools and materials. Here’s a list of what you’ll need:
Tools:
- Adjustable wrench
- Hacksaw or pipe cutter
- Screwdriver (flathead or Phillips, depending on the screws used)
- Teflon tape
- Plumber’s putty (optional)
- Measuring tape or ruler
Materials:
- Air admittance valve (make sure it complies with local plumbing codes)
- PVC or ABS pipes (if needed for adjusting the plumbing configuration)
- PVC or ABS fittings (if needed)
- PVC or ABS cement (if needed)
- Rubber couplings (if needed)
Make sure to have all the tools and materials readily available before you begin the installation process. This will help you work efficiently and complete the job without any interruptions. Additionally, ensure that the air admittance valve you choose meets the local plumbing code requirements to ensure compliance and safety.
With everything ready, we can now proceed to the step-by-step process of installing the air admittance valve to fix your slow-draining sink. Let’s begin by turning off the water supply.
Read more: How To Install A Kitchen Sink Drain
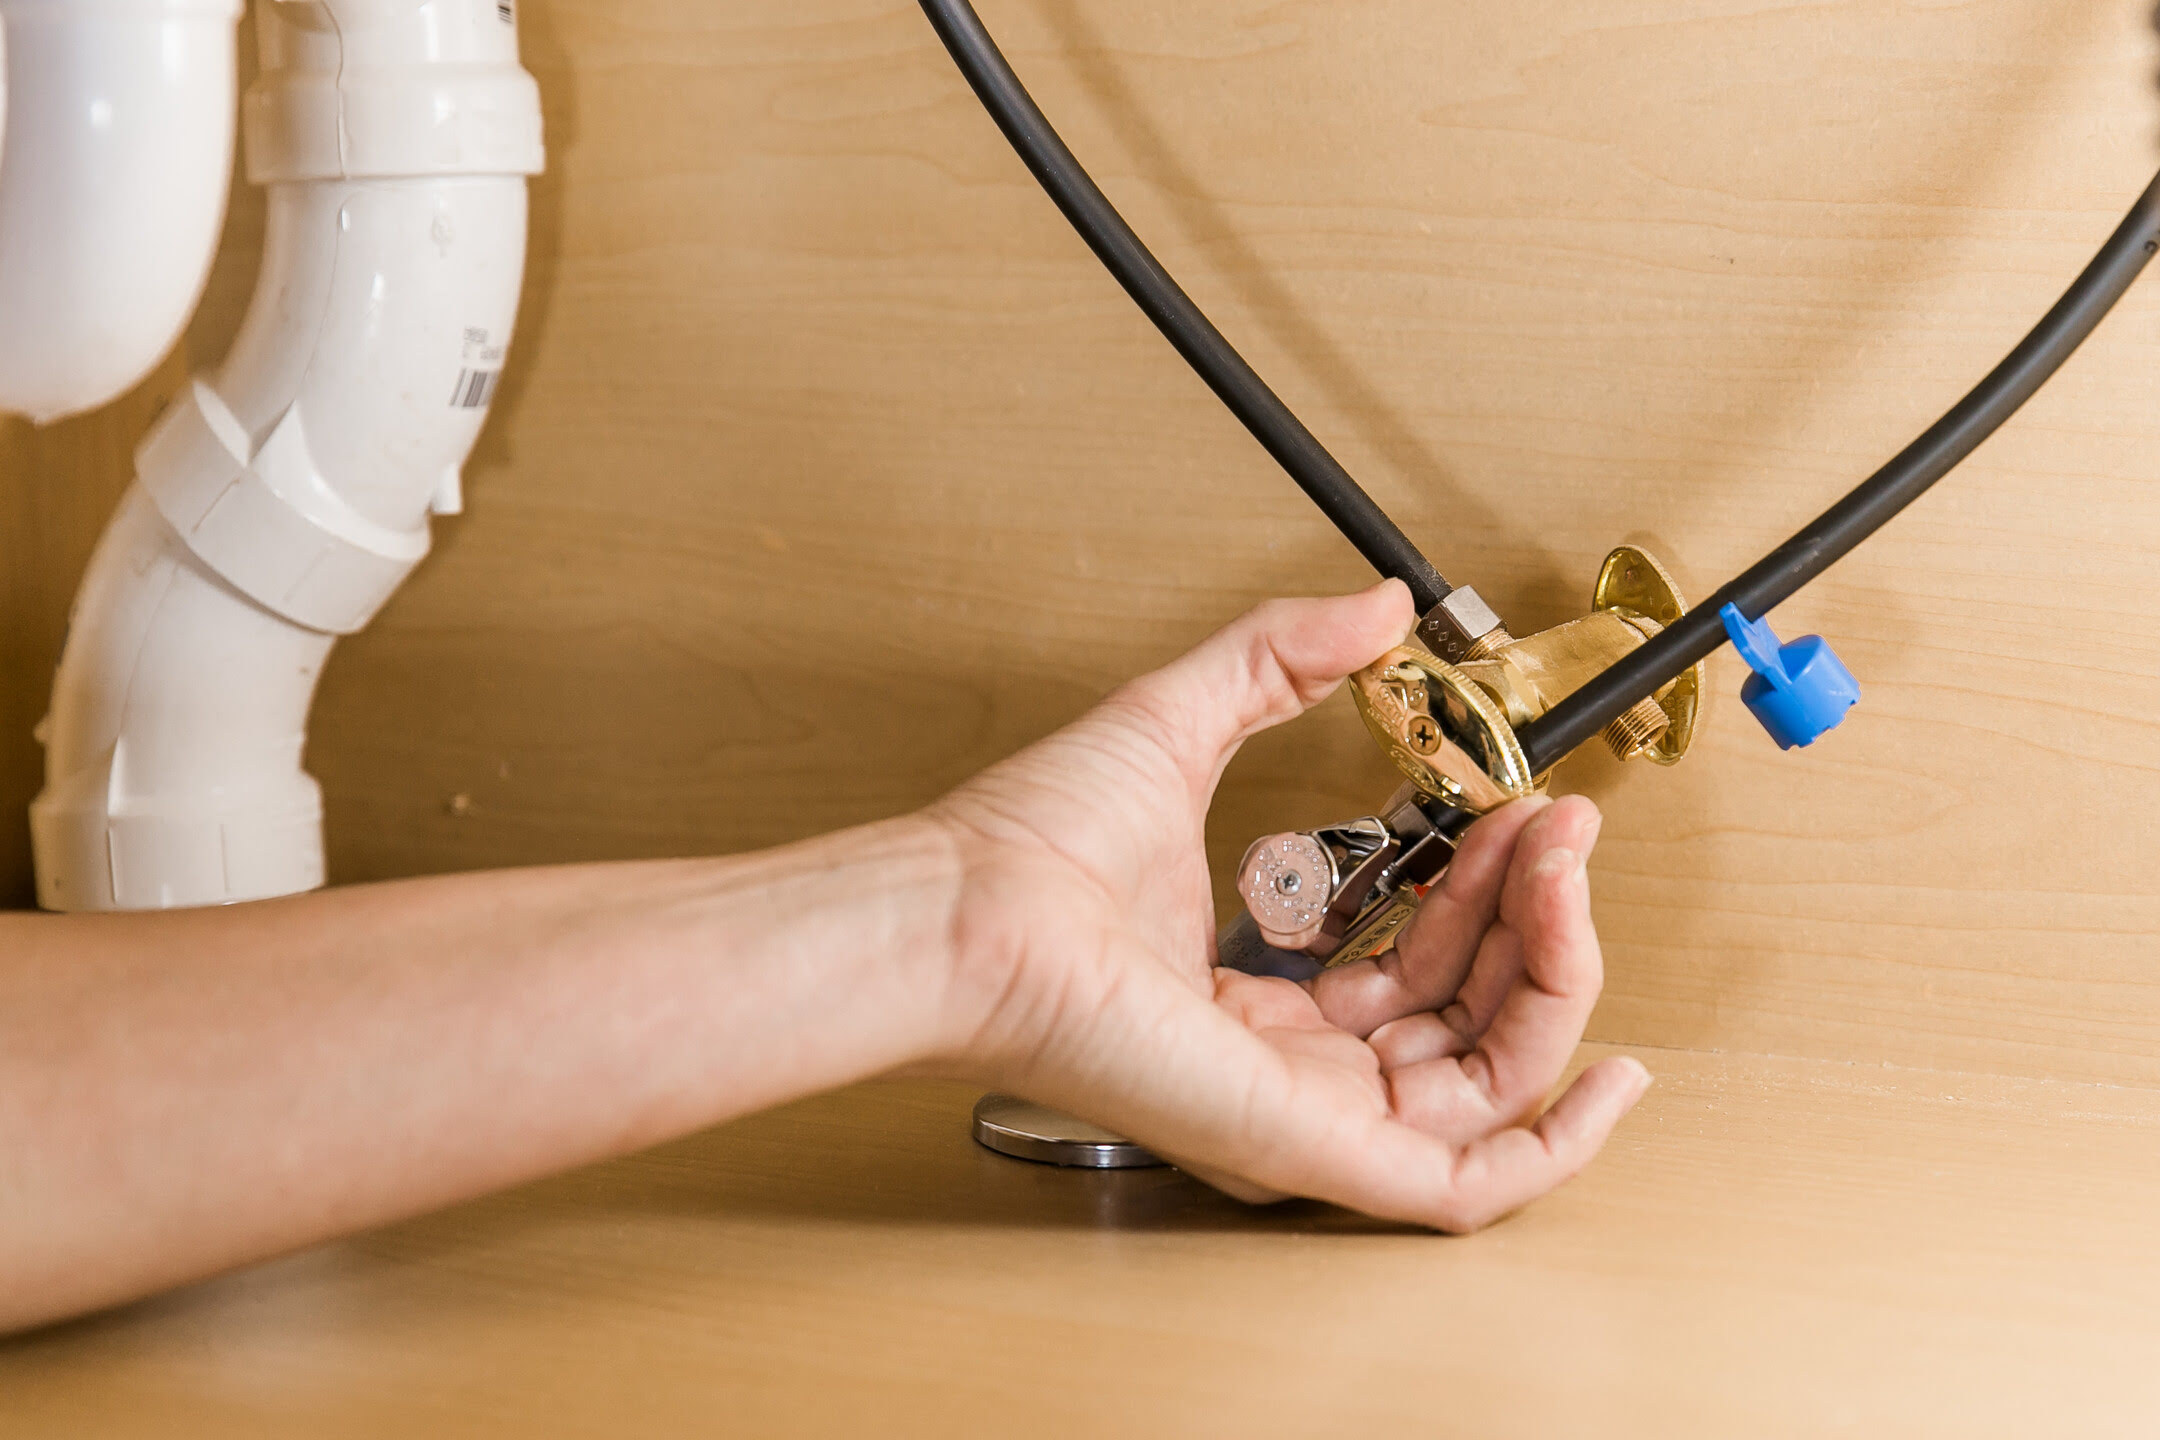
Step 1: Turn off the Water Supply
Before you can begin installing an air admittance valve, it’s essential to turn off the water supply to the sink. This is a necessary precaution to avoid any water leakage or accidents during the installation process.
Here’s how you can turn off the water supply:
- Locate the shut-off valves: Look under the sink for two small valves connected to the hot and cold water supply lines. These valves are typically located near the back wall or along the pipes.
- Close the shut-off valves: Turn each valve clockwise (right) until they are fully closed. This will shut off the flow of water to the sink. If you can’t find individual shut-off valves, you may need to shut off the main water supply to your home temporarily.
Once the water supply is turned off, you can proceed with confidence knowing that there won’t be any water flow during the installation process. This step ensures the safety and prevents any potential water damage.
With the water supply turned off, you’re ready to move on to step 2: locating the problem causing the slow-draining sink.
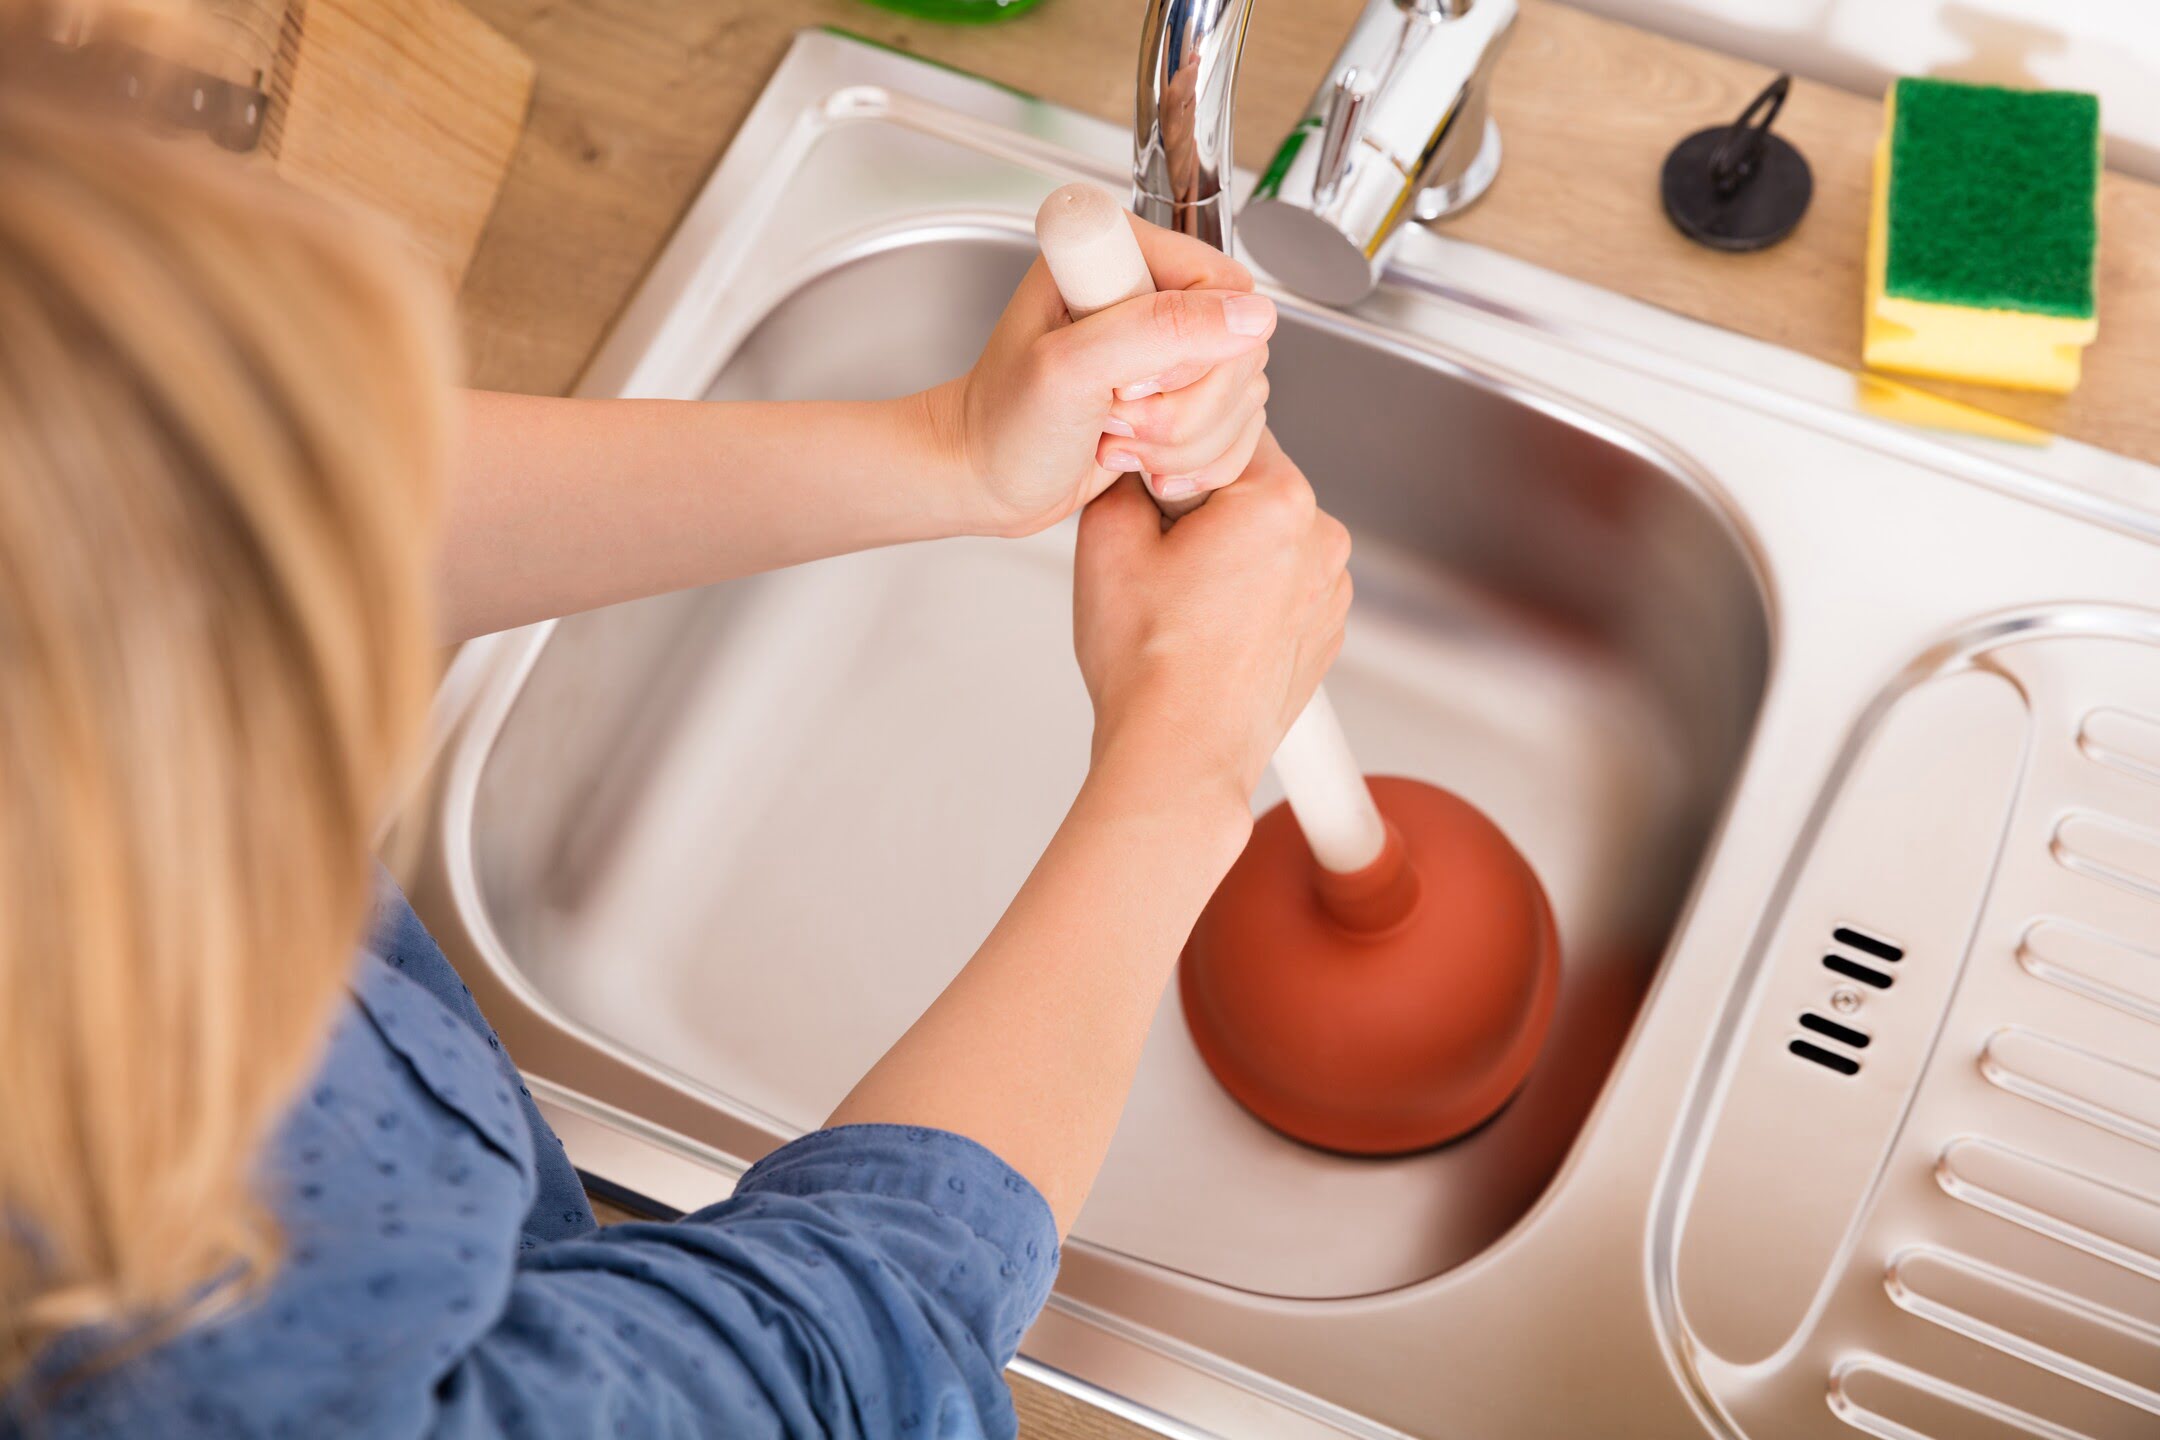
Step 2: Locate the Problem
Now that the water supply is turned off, it’s time to locate the problem that is causing the slow-draining sink. Several factors can contribute to this issue, including a clogged drain pipe, a blocked vent pipe, or a faulty trap. Identifying the specific cause will help you determine the appropriate solution and whether installing an air admittance valve is the right course of action.
Here are a few methods to help you locate the problem:
1. Observation:
Start by observing the sink and its drainage pattern. Notice if the water flows slowly or if there are any gurgling sounds during drainage. This can indicate a clog or blockage in the pipes.
2. Test other fixtures:
If your slow-draining sink is part of a larger plumbing system, check if other fixtures, such as toilets or showers, are also draining slowly. If multiple fixtures are affected, it could indicate a main drain line blockage.
Read more: How To Fix Stuck Water Valve Under Sink
3. Check the trap:
Inspect the P-trap, which is the curved section of pipe located under the sink. Look for any visible clogs or debris that could be obstructing the flow of water. Clean the trap if necessary, using gloves and a drain snake or pipe brush.
4. Examine the vent pipe:
If the trap and drain pipe appear clear, the problem could be related to the venting system. Check the vent pipe connected to the sink to see if it’s obstructed or clogged. An obstructed vent can disrupt the pressure balance in the plumbing system, causing slow drainage.
By thoroughly examining these areas, you can gain insights into the underlying issue causing the slow-draining sink. If you discover a blockage or clog in the vent pipe or if the main drain line is affected, installing an air admittance valve may be a suitable solution to improve the sink’s drainage. However, if the problem persists or is more complex, it’s advisable to consult a professional plumber for further assistance.
Once you’ve identified the problem, you can move on to the next steps on how to install an air admittance valve to fix your slow-draining sink.
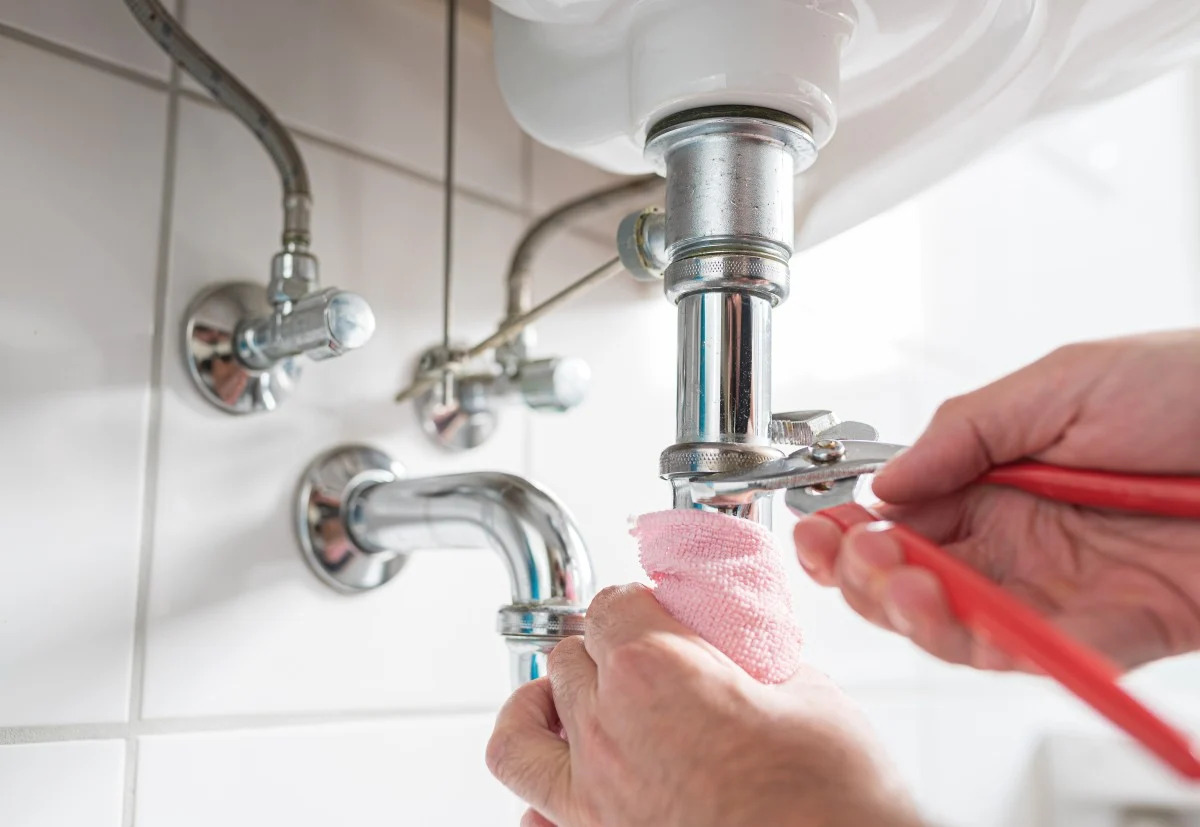
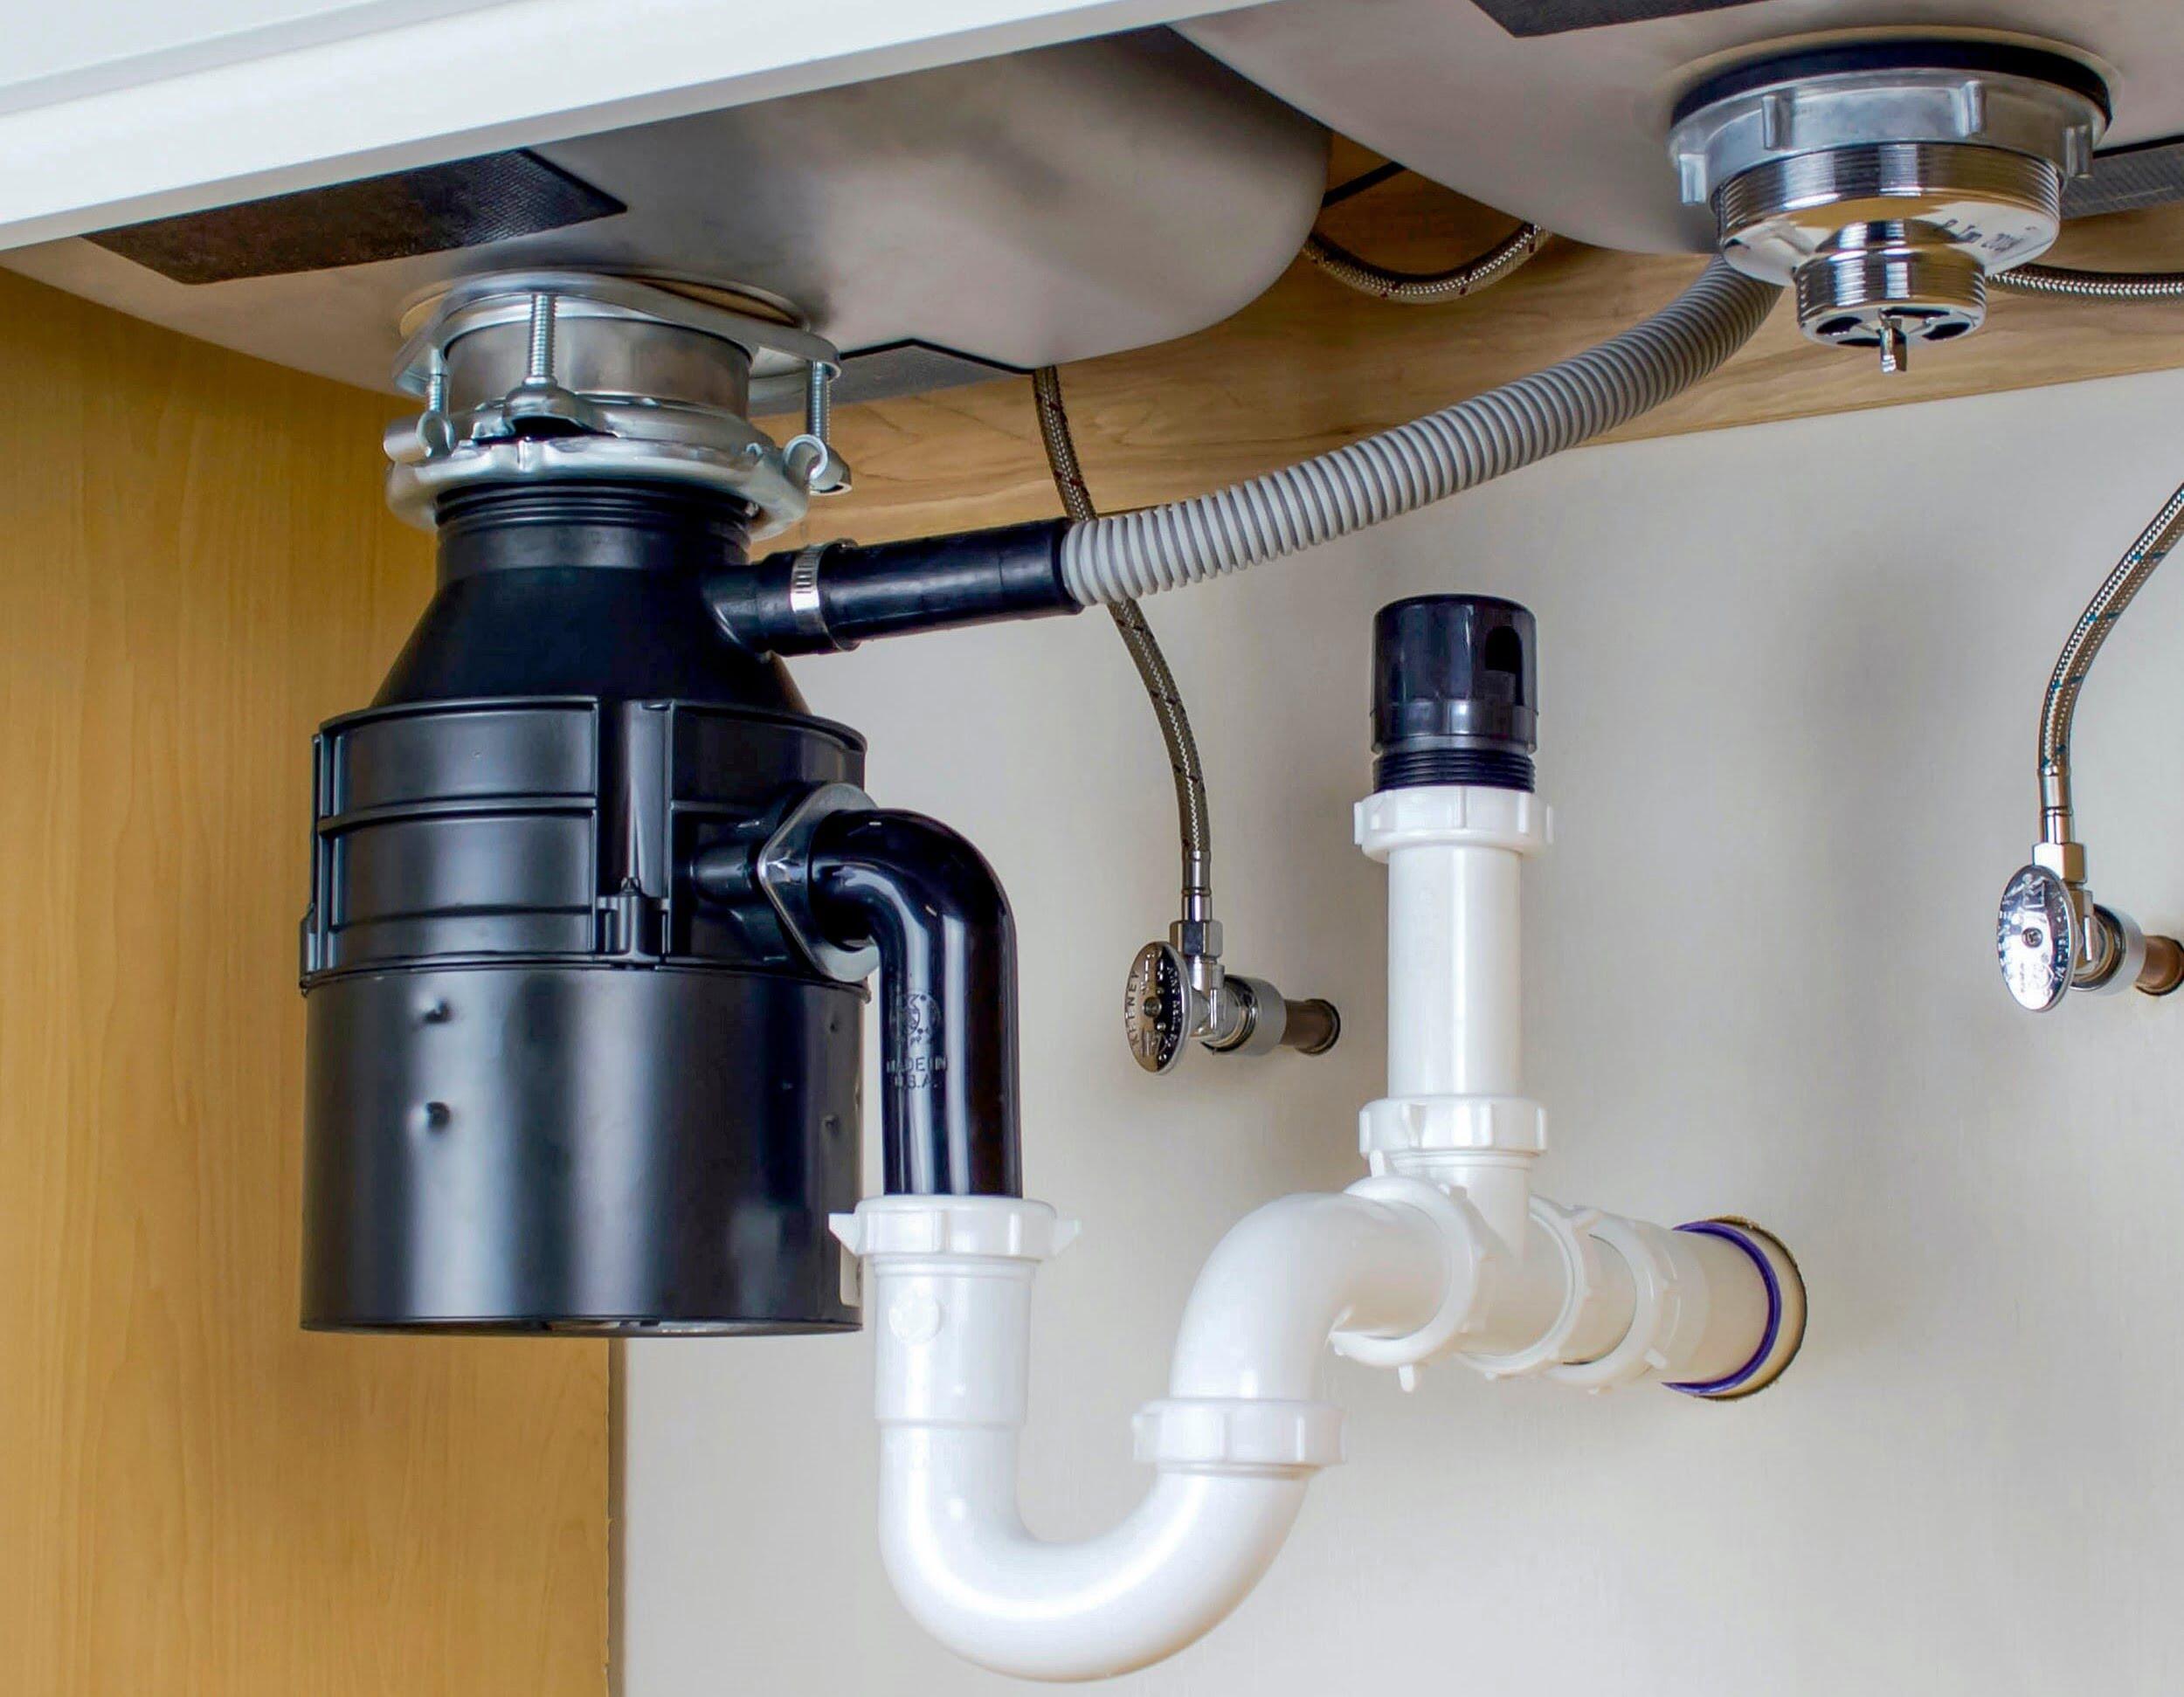
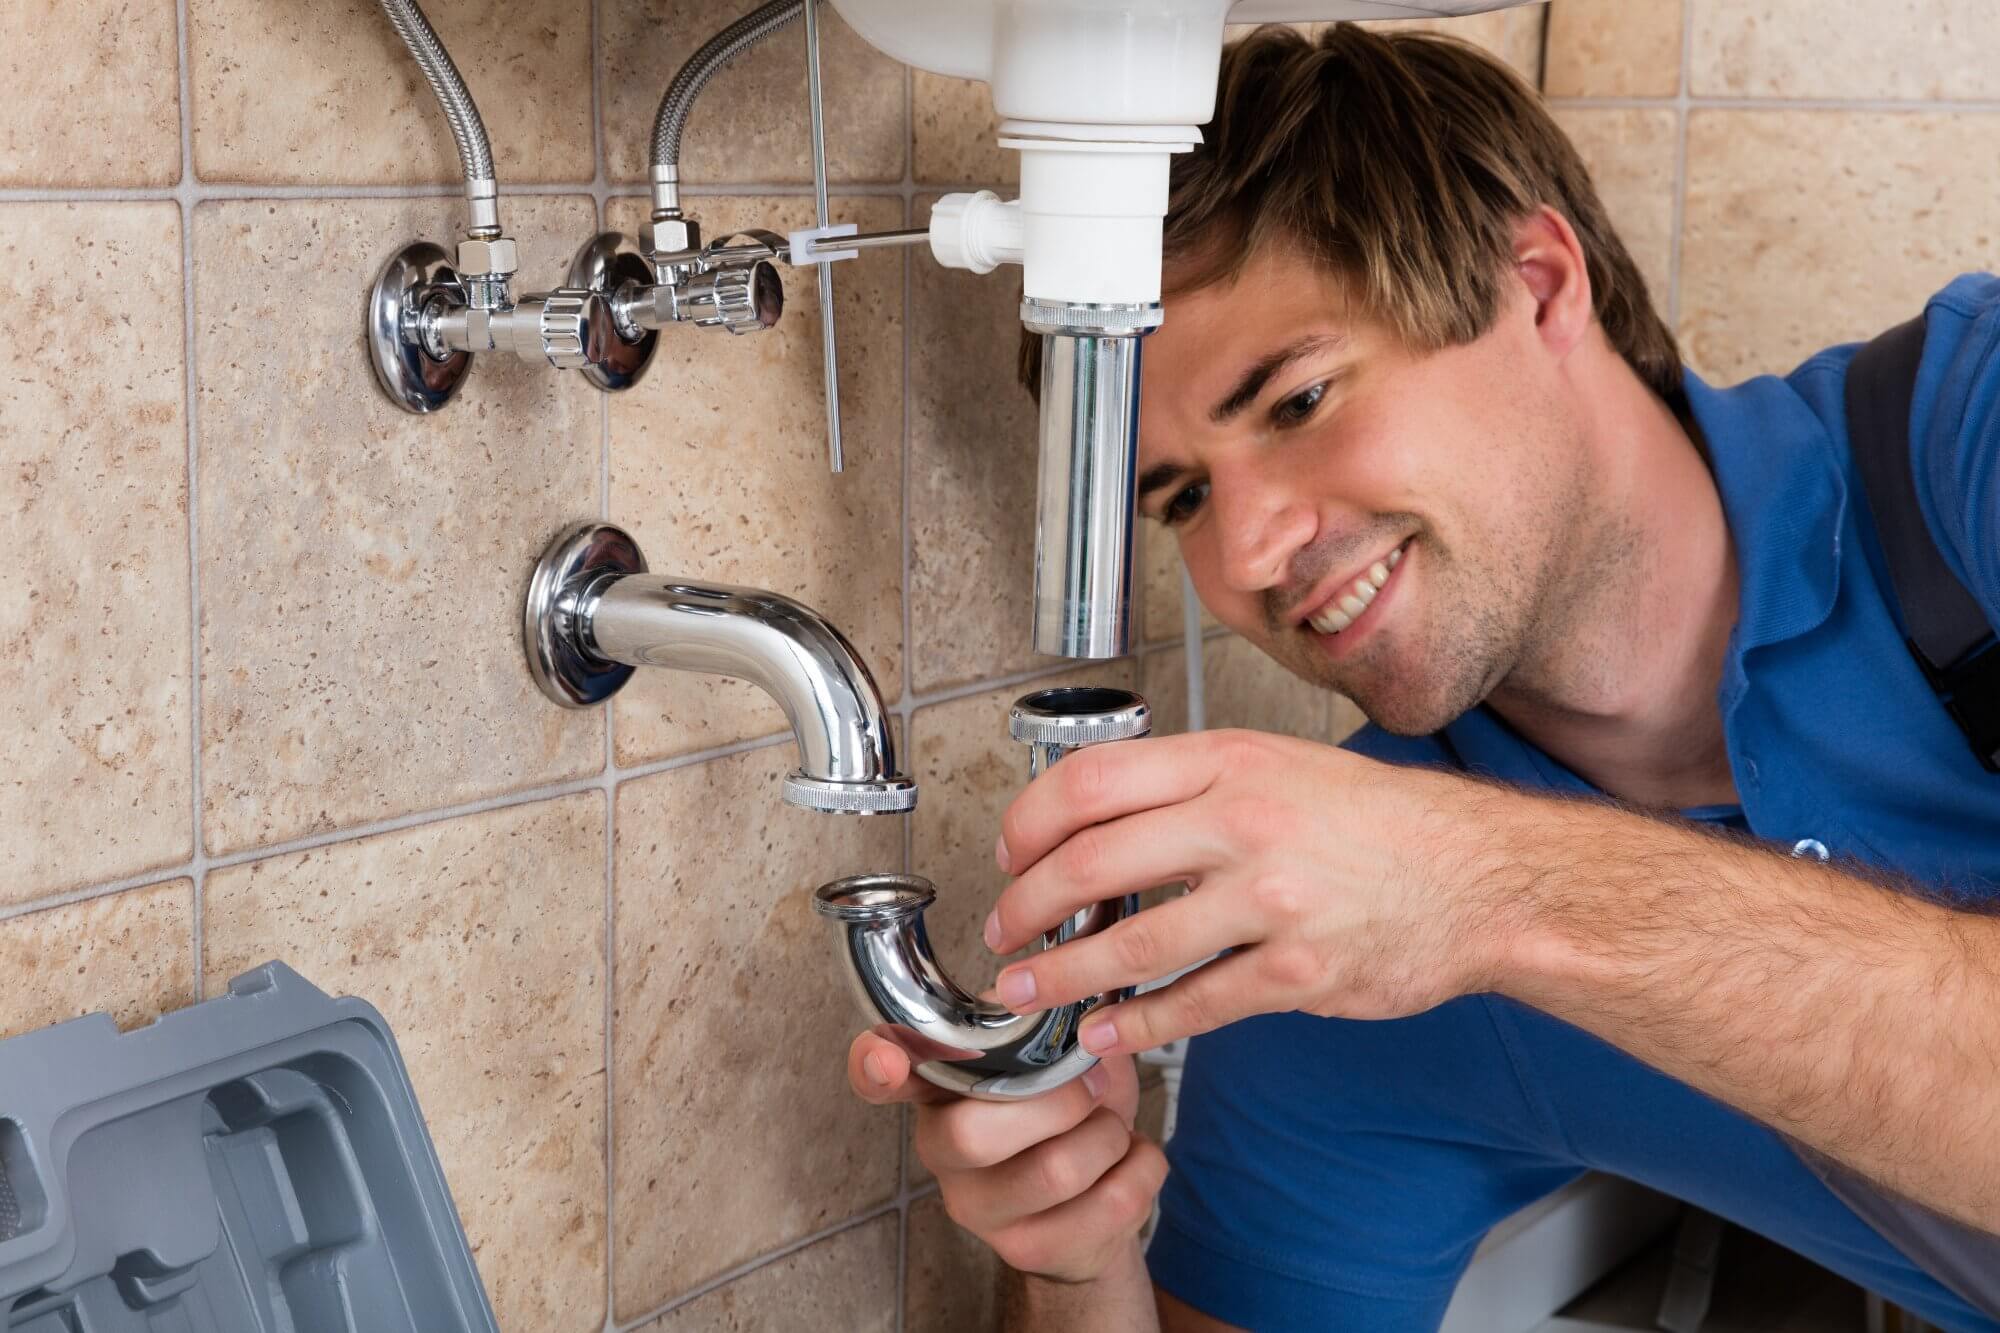
Step 3: Remove the Trap
In this step, you will need to remove the trap from under the sink. The trap is a curved pipe that helps prevent sewer gases from entering your home while allowing water and waste to flow through. Removing the trap will provide you with access to the drain pipe and enable you to install the air admittance valve.
Follow these steps to remove the trap:
- Place a bucket or a small container under the trap to catch any water or debris that may spill out.
- Using an adjustable wrench, loosen the compression fittings or slip nuts on both ends of the trap. Turn them counterclockwise (left) to loosen them.
- Once the fittings are loosened, carefully remove the trap from the drain pipe. Gently twist and pull it away to detach it completely.
- Inspect the trap for any clogs or debris. If you notice any blockages, use a drain snake or pipe brush to clean it out.
- Empty the contents of the trap into the bucket or container you placed underneath.
Removing the trap will allow you to gain access to the drain pipe and assess its condition more closely. It’s a good opportunity to clean the trap and remove any accumulated debris or clogs that may be contributing to the slow drainage.
Remember to handle the trap and any debris carefully, as it may contain bacteria or foul odors. You can wear gloves for added protection.
With the trap removed, you’re now ready to move on to the next step, which is installing the air admittance valve.
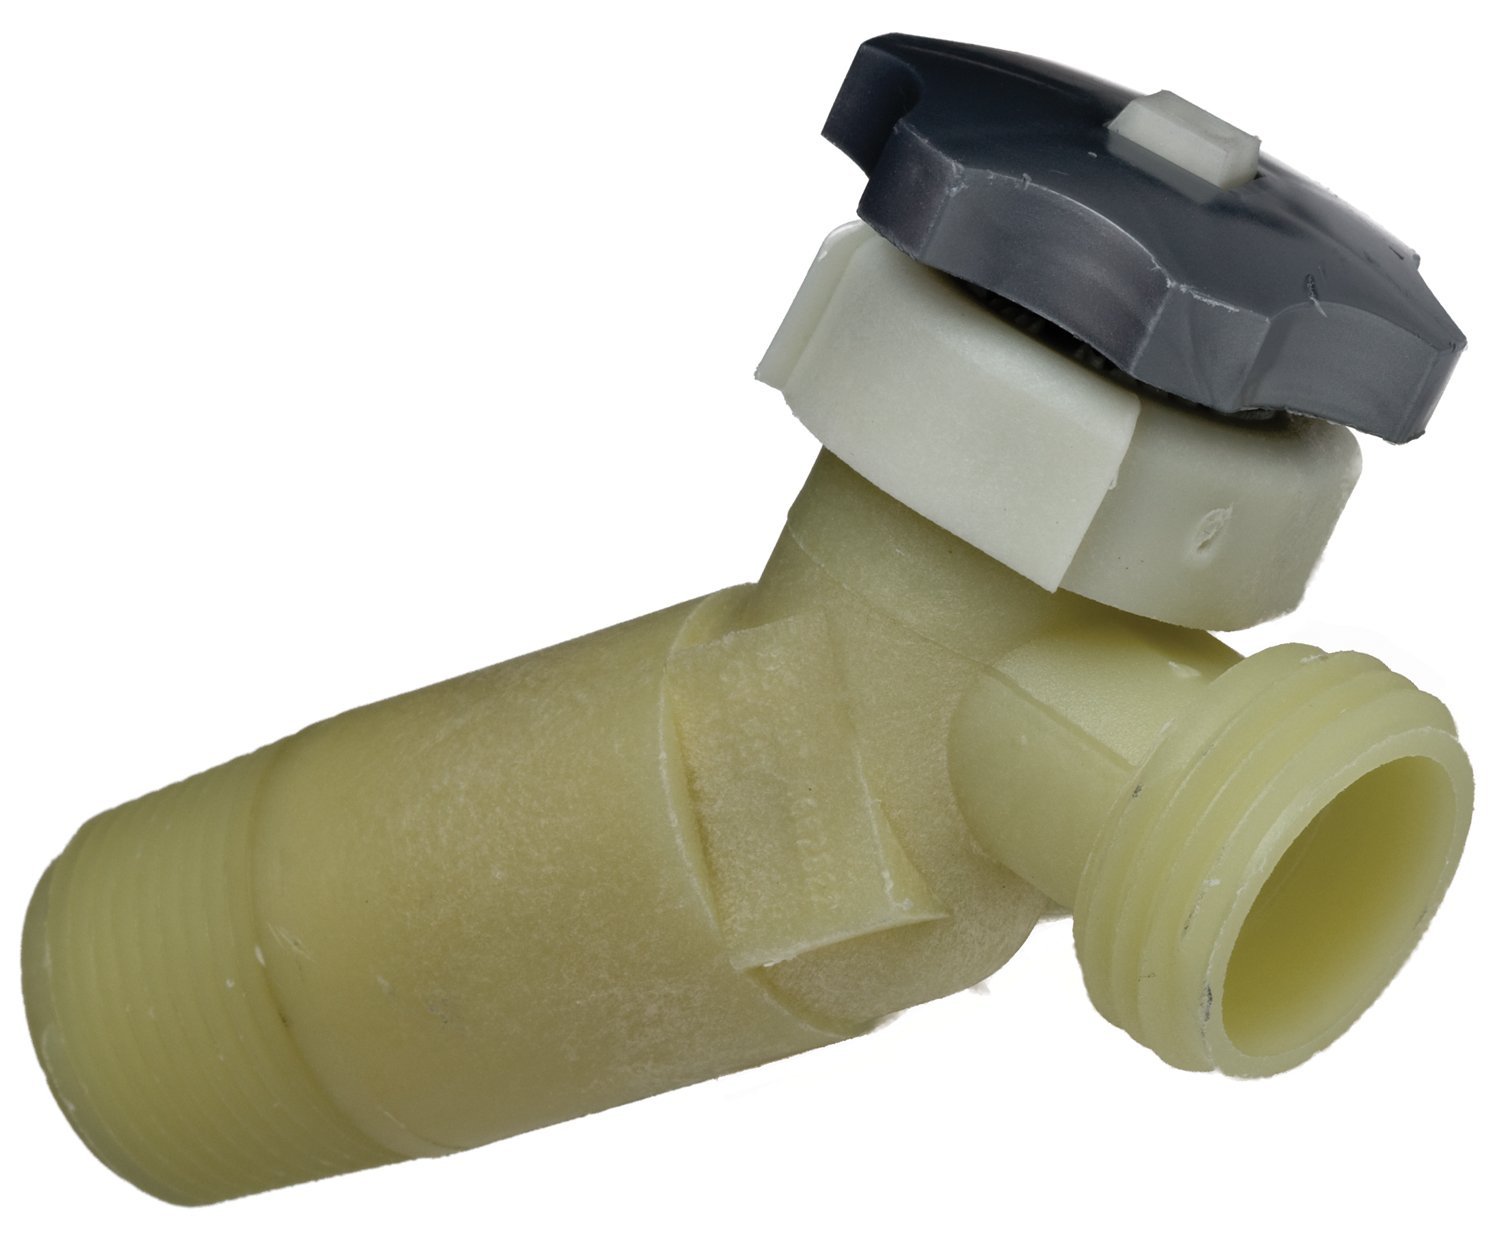
Step 4: Install the Air Admittance Valve
With the trap removed, you can now proceed to install the air admittance valve (AAV) to fix the slow-draining sink. The AAV will provide the necessary air flow into the plumbing system, allowing for proper drainage and preventing sewer gases from escaping into your home.
- Start by inspecting the drain pipe where the trap was connected. Ensure it is clean and free from any debris or obstructions.
- Apply Teflon tape to the threads of the drain pipe. This will create a watertight seal when the AAV is attached.
- Take the air admittance valve and screw it onto the drain pipe. Align the threads carefully to ensure a proper fit.
- Hand tighten the AAV, and then use an adjustable wrench to give it a final quarter-turn to secure it firmly in place. Be careful not to overtighten, as it can damage the AAV or the drain pipe.
- Ensure that the AAV is positioned upright and in a vertical orientation. This ensures its proper functioning. Follow the manufacturer’s instructions for any specific positioning requirements.
It’s important to note that the installation process may vary based on the specific AAV model you are using. Always refer to the manufacturer’s instructions for detailed guidance on installing their product.
Once the AAV is securely installed, you can now proceed to the next step of reassembling the trap.
Note: Local plumbing codes may have specific regulations regarding the installation of air admittance valves. Make sure to adhere to these regulations to ensure compliance and safety.
Read more: How To Fix A Leaking Toilet Valve
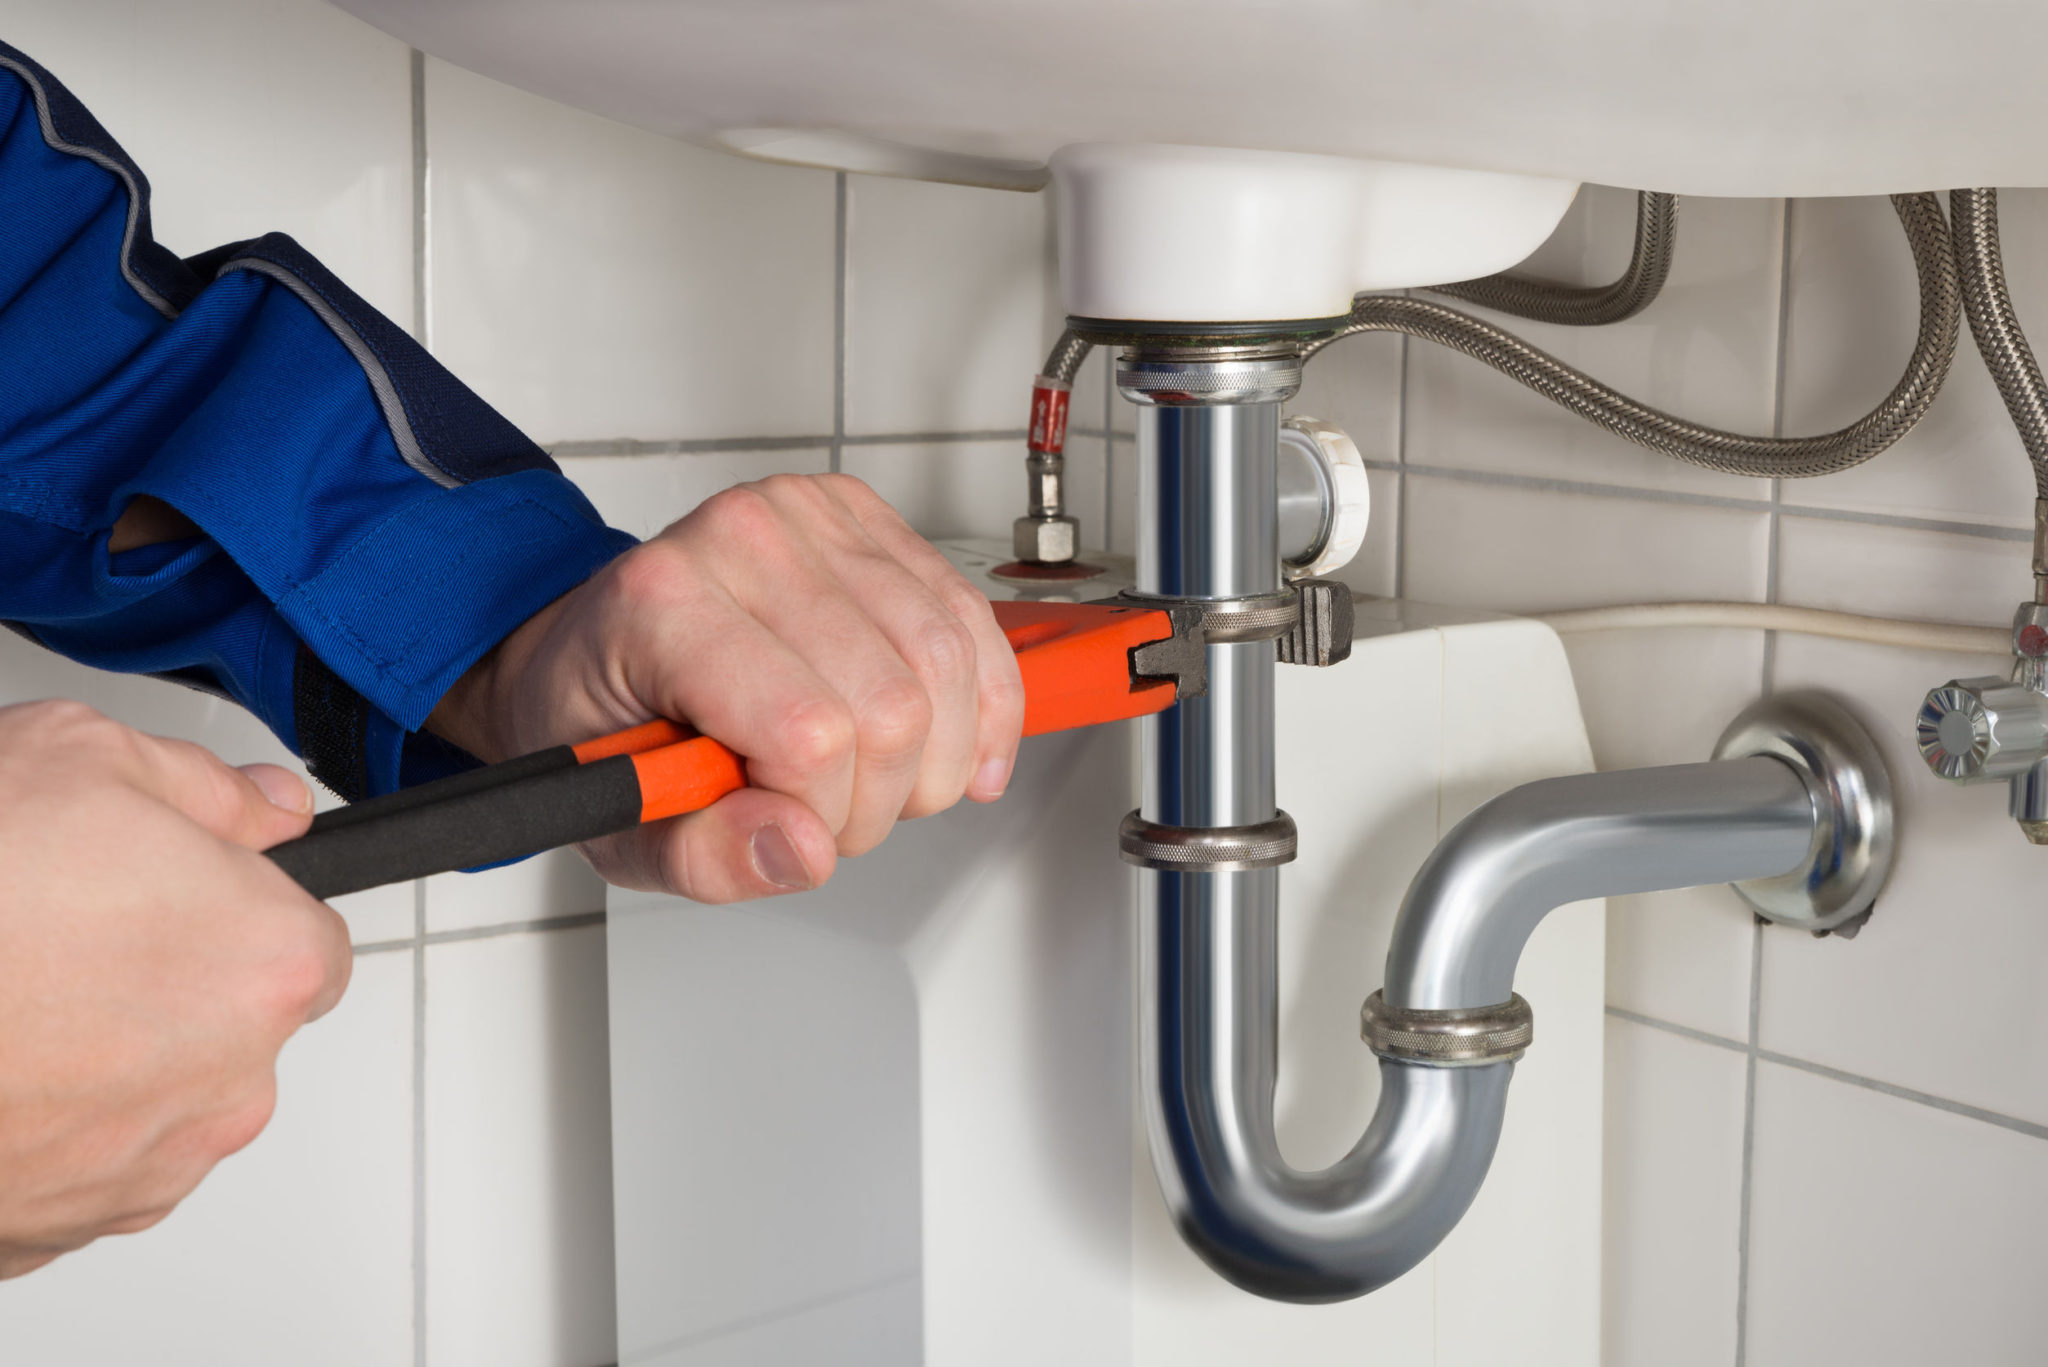
Step 5: Reassemble the Trap
With the air admittance valve (AAV) installed, it’s time to reassemble the trap under the sink. The trap plays a crucial role in preventing sewer gases from entering your home while allowing water and waste to flow through. Restoring the trap will ensure proper drainage and maintain the integrity of your plumbing system.
- Take the trap and align it with the drain pipe and the AAV. Ensure that the trap connections align properly with both ends.
- Tighten the compression fittings or slip nuts on both ends of the trap. Use an adjustable wrench to turn them clockwise (right) until they are snug. Avoid overtightening to prevent damage to the fittings or pipes.
- Give the trap a gentle twist or wiggle to ensure it is securely in place. Check for any leaks at the connections. If you notice any leakage, tighten the fittings slightly more.
- If needed, apply a small amount of plumber’s putty around the connections to create a watertight seal.
Once the trap is reassembled and securely in place, verify that all connections are tight and free of leaks. This will help maintain the integrity of your plumbing system and ensure proper drainage from the sink.
Now, let’s move on to the final step: testing the sink drainage.
When installing an air admittance valve to fix a slow-draining sink, make sure to follow the manufacturer’s instructions carefully and ensure that the valve is properly vented to allow air to enter the drain system.
Step 6: Test the Sink Drainage
After completing the installation of the air admittance valve (AAV) and reassembling the trap, it’s important to test the sink drainage to ensure everything is functioning properly. This step will determine if the AAV has resolved the slow-draining issue and if the sink is now draining efficiently.
- Turn on the water supply to the sink by reopening the shut-off valves. Slowly turn each valve counterclockwise (left) to open them fully.
- Let the water run in both hot and cold positions and observe the sink drainage. Ensure that the water is flowing freely and smoothly down the drain without any backups or unusual noises.
- If you notice any issues with the sink drainage, such as slow draining or gurgling sounds, it could indicate a problem with the installation or another underlying issue. In this case, you may need to double-check the AAV installation, inspect the trap connections for leaks, or consult a professional plumber for further assistance.
- Once you are satisfied with the sink drainage and everything is functioning properly, clean up any residual water or debris from the installation process.
Testing the sink drainage is a critical step to ensure that the air admittance valve has effectively resolved the slow-draining issue. By thoroughly assessing the sink’s performance, you can be confident that the installation was successful and that your plumbing system is functioning optimally.
Congratulations! You have successfully installed an air admittance valve to fix your slow-draining sink. With the AAV in place, you can enjoy efficient drainage and a properly functioning plumbing system.
As a final note, it’s important to periodically inspect and maintain your plumbing system to prevent any future issues. Regularly clean the trap, check for leaks, and ensure the air admittance valve is in proper working condition.
We hope this guide has been helpful to you. If you have any other plumbing concerns or need further assistance, don’t hesitate to reach out to a professional plumber for expert advice.
Happy plumbing!
Conclusion
Fixing a slow-draining sink can be a frustrating problem, but with the installation of an air admittance valve (AAV), you can restore proper drainage and eliminate unpleasant odors. In this comprehensive guide, we have walked you through the step-by-step process of installing an AAV to fix your slow-draining sink.
We began by providing an overview of air admittance valves and their role in plumbing systems. We discussed the advantages of using AAVs, such as their cost-effectiveness and flexibility in plumbing design. It’s crucial to ensure that the AAV you choose complies with the local plumbing codes to ensure safety and compliance.
We then outlined the tools and materials you will need for the installation process. Having all the necessary tools and materials readily available ensures a smooth and efficient installation.
The step-by-step instructions covered in detail how to turn off the water supply, locate the problem causing the slow drainage, remove and clean the trap, install the air admittance valve, and reassemble the trap. We emphasized the importance of following manufacturer instructions and local plumbing codes during the installation process.
Finally, we discussed the significance of testing the sink drainage to ensure that the AAV has effectively resolved the slow-draining issue. If any problems persist, it may be necessary to re-evaluate the installation or seek professional assistance.
By following these steps carefully and thoroughly, you can successfully install an air admittance valve and enjoy improved sink drainage. It’s important to maintain your plumbing system by periodically cleaning the trap, checking for leaks, and ensuring the AAV is in proper working condition.
We hope this guide has empowered you to tackle your slow-draining sink and provided valuable insights to address the issue effectively. If you have any further plumbing concerns or need additional guidance, it’s always recommended to consult with a professional plumber.
Happy plumbing, and may your sink drain quickly and efficiently!
Now that you've mastered installing an air admittance valve, why not tackle more home projects yourself? Our guide on DIY home improvement offers practical tips and tricks for enhancing your living space, all while keeping costs down. Whether you're looking to update your kitchen, revamp your bathroom, or just give your home a fresh new look, our step-by-step articles are here to help. Get your tools ready and transform your home into a place you love even more!
Frequently Asked Questions about How To Install An Air Admittance Valve To Fix A Slow-Draining Sink
Was this page helpful?
At Storables.com, we guarantee accurate and reliable information. Our content, validated by Expert Board Contributors, is crafted following stringent Editorial Policies. We're committed to providing you with well-researched, expert-backed insights for all your informational needs.


0 thoughts on “How To Install An Air Admittance Valve To Fix A Slow-Draining Sink”