Articles
How To Fix A Sink
Modified: October 20, 2024
Learn how to fix a sink with informative articles on plumbing tips and tricks. Find step-by-step instructions to troubleshoot and repair sink issues.
(Many of the links in this article redirect to a specific reviewed product. Your purchase of these products through affiliate links helps to generate commission for Storables.com, at no extra cost. Learn more)
Introduction
Welcome to the ultimate guide on how to fix a sink! A sink is an essential component of any kitchen or bathroom, providing us with a convenient way to clean dishes, wash our hands, and carry out various household tasks. However, just like any other fixture, sinks can encounter issues over time, such as leaks, clogs, or broken components. Knowing how to fix these problems yourself can save you time, money, and the hassle of calling a professional. In this article, we will walk you through the step-by-step process of diagnosing and repairing common sink issues.
Before we begin, it’s essential to gather the necessary tools and materials for the job. Having these items on hand will make the repair process smoother and more efficient. Here are some tools you may need:
- Adjustable wrench
- Screwdriver set
- Plunger
- Plumber’s tape
- Pipe wrench
- Bucket or towels for water cleanup
- Replacement parts (if required)
Now that you have your tools ready, let’s dive into the step-by-step process of fixing a sink.
Key Takeaways:
- Equip yourself with essential tools and materials, assess the issue, shut off the water supply, and clear the workspace to successfully fix a leaky faucet, unclog a blocked drain, or replace broken sink components.
- By following the step-by-step guide, exercising caution, and seeking professional help when needed, you can confidently tackle sink repairs, ensuring the longevity and optimal performance of your sink.
Read more: How To Fix A Sinking Driveway
Tools and Materials Needed
Before you start fixing your sink, it’s important to gather all the necessary tools and materials. Having everything prepared in advance will save you time and ensure a smooth repair process. Here are the tools and materials you may need:
Tools:
- Adjustable wrench: This tool is essential for loosening and tightening nuts and bolts.
- Screwdriver set: A set of screwdrivers with various sizes and types will come in handy for removing screws.
- Plunger: For unclogging sinks, a plunger can create the necessary pressure to dislodge debris.
- Plumber’s tape: This special tape is used to create a watertight seal on threaded pipe connections.
- Pipe wrench: A pipe wrench is designed for gripping and turning pipes, making it useful for removing and installing plumbing fixtures.
- Bucket or towels: Having a bucket or towels nearby will help contain any water spills or leaks that may occur during the repair process.
- Replacement parts: Depending on the issue you are facing, you may need to have replacement parts on hand, such as a new faucet, drain trap, or gasket.
Materials:
- Teflon tape: Also known as plumber’s tape, Teflon tape is used to create a tight seal on threaded connections.
- Cleaning supplies: It’s always a good idea to have some cleaning supplies, such as a mild detergent and a sponge or cloth, to clean the sink and surrounding area before and after the repair.
- Silicone caulk: If you need to reseal any gaps or seams around the sink, silicone caulk will do the job.
By having these tools and materials ready, you’ll be equipped to tackle any sink repair with confidence. Now, let’s move on to diagnosing the issue!
Step 1: Assess the Issue
Before diving into any repairs, it’s important to assess the issue with your sink. Understanding the problem will help you determine the appropriate course of action and ensure that you have the necessary tools and materials for the job. Here are a few common sink issues and how to identify them:
Read more: How To Fix Sink Sprayer
Leaky Faucet:
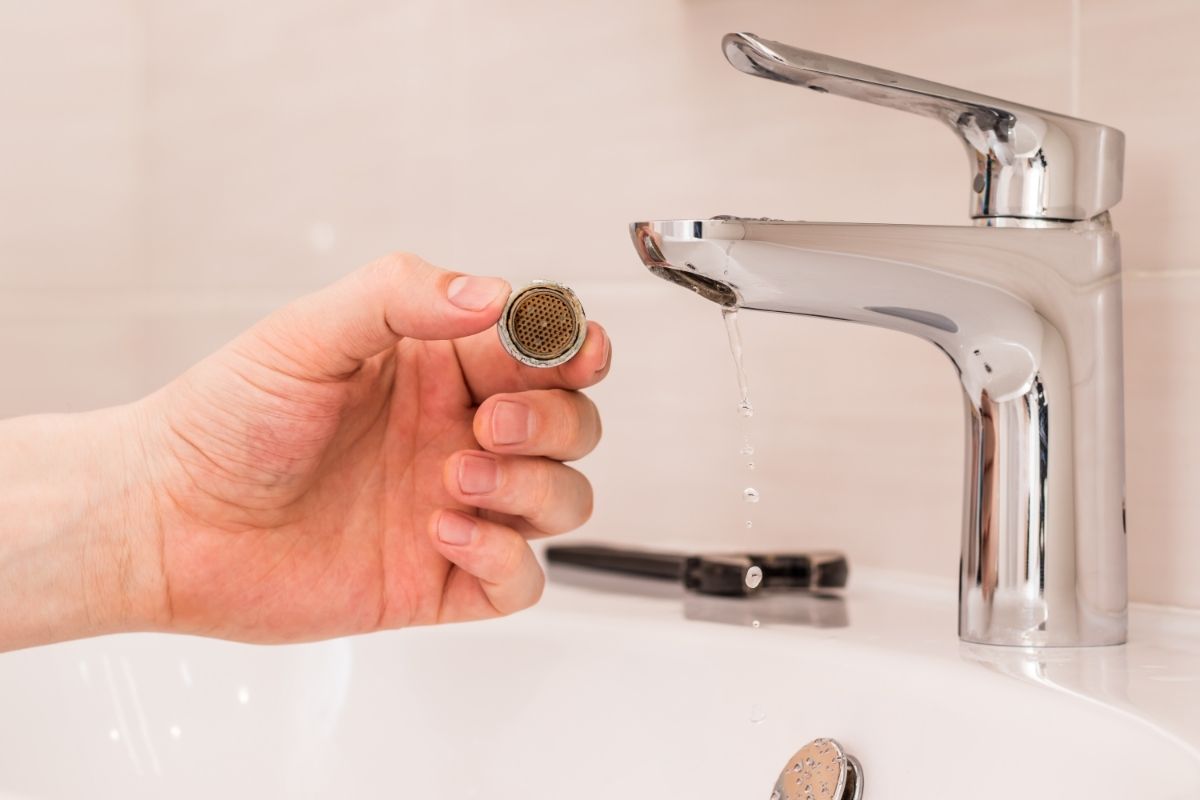
A leaky faucet is a common problem that can be easily identified. When your faucet is turned off but water continues to drip, you have a leak. To determine the source of the leak, examine the faucet closely. If the water is coming from the spout, the issue is likely with the valve or cartridge inside. If the water is leaking from the base of the faucet, the problem may be a worn-out o-ring or loose connections.
Clogged Drain:
A clogged drain is another common issue that can cause water to back up in your sink. Slow drainage or standing water in the sink are signs of a clog. To confirm a clog, try running water in the sink and observe how it drains. If the water doesn’t flow freely or if you hear gurgling sounds, there’s likely a blockage in the drain pipe.
Broken Component:
If there are visible signs of damage, such as a cracked sink basin, a broken drain pipe, or a loose faucet handle, you may need to replace a broken component. Inspect the sink area carefully to identify any broken or malfunctioning parts.
Once you have assessed the issue with your sink, you can move on to the appropriate repair steps. In the following sections, we will guide you through the process of fixing a leaky faucet, unclogging a drain, and replacing broken components. Let’s get started!
Step 2: Shut Off the Water Supply
Before you begin any repairs on your sink, it’s crucial to shut off the water supply. Doing so will prevent any further water damage and allow you to work on the sink without any water flowing through the pipes. Here’s how to shut off the water supply:
- Locate the water valves: Look under the sink for the water valves. There are usually two valves, one for hot water and one for cold water. These valves control the flow of water to the sink.
- Turn off the water valves: Using your hand or an adjustable wrench, turn the water valves clockwise until they are fully closed. This will shut off the water supply to the sink.
In some cases, the water valves may be difficult to turn, especially if they haven’t been used in a while. If you encounter resistance, try using a wrench or pliers for additional leverage. However, be gentle to avoid damaging the valves.
Once you have successfully shut off the water supply, it’s a good practice to test the faucet to ensure there is no water flow. Turn on the faucet handles to both the hot and cold positions and verify that no water comes out. This step will give you peace of mind knowing that the water supply has been effectively cut off.
By shutting off the water supply, you minimize the risk of water leaks or accidental flooding during the repair process. It’s always better to be safe than sorry when it comes to working with plumbing fixtures. Now that the water supply has been shut off, we can move on to the next step.
Read more: How To Fix Cracked Sink
Step 3: Clear Out the Area Under the Sink
When tackling sink repairs, it’s essential to have ample space to work comfortably. Before you begin any repairs, take the time to clear out the area under the sink to create a clutter-free workspace. Here’s how you can clear out the area:
- Remove stored items: Begin by removing any stored items or cleaning supplies from under the sink. This includes items such as buckets, cleaning products, and other miscellaneous items. Set them aside in a safe location.
- Organize pipes and hoses: Take a close look at the pipes and hoses under the sink. If they appear disorganized or tangled, use zip ties or pipe clamps to secure and organize them. This step will make it easier to access the necessary components without any obstructions.
- Protect the floor: Place a towel, old sheet, or bucket underneath the sink to catch any water or debris that may fall during the repair process. This will help prevent any damage to the floor or surrounding area.
By clearing out the area under the sink, you create a more accessible and efficient workspace. This will allow you to maneuver comfortably and work on the necessary repairs without any obstructions. Additionally, protecting the floor will help keep your workspace clean and minimize any potential mess or damage.
With the area under the sink cleared and organized, we’re ready to move on to the next step in fixing the sink. Let’s continue the repair process with step 4, where we’ll locate the source of the problem.
Step 4: Locate the Source of the Problem
Now that you have prepared the workspace, it’s time to locate the source of the problem in your sink. By identifying the specific issue, you can determine the appropriate repair method and gather any necessary replacement parts. Here’s how you can effectively locate the source of the problem:
Read more: How To Fix Sink Sprayer
Leaky Faucet:
Begin by examining the faucet closely. Check for any visible signs of leaks, such as water dripping from the spout or base. Gently move the handles and observe if the leaking occurs only when the faucet is turned on or whether it persists when the faucet is off. This will help you pinpoint the location of the leak, which could be related to the valve, cartridge, o-ring, or connections.
Clogged Drain:
If you suspect a clogged drain, fill the sink with some water and then release it. Observe how the water drains – if it drains slowly or if it backs up, you likely have a clog. Additionally, listen for any gurgling sounds or foul odors coming from the drain. This will indicate that there is a blockage in the drain pipe that needs to be addressed.
Broken Component:
If you notice any visible damage, such as a cracked sink basin, a broken drain pipe, or a loose faucet handle, it’s easy to identify the broken component. Take note of the specific part that needs to be replaced and inspect it closely to determine the extent of the damage.
By carefully assessing your sink, you can identify the problem area and determine the appropriate repair steps. If you’re unsure about the exact issue or need guidance, it may be helpful to consult a professional plumber or refer to online resources for further assistance.
Once you have located the source of the problem, you’re ready to proceed with the specific repair method. In the upcoming steps, we’ll guide you through fixing a leaky faucet, unclogging a drain, and replacing broken sink components. Let’s move on to step 5 and learn how to fix a leaky faucet!
Step 5: Fix a Leaky Faucet
A leaky faucet can be frustrating and wasteful, but fortunately, it’s a common problem that can be fixed with a few simple steps. Here’s how you can fix a leaky faucet:
1. Turn off the water supply:
Before you begin any faucet repair, make sure to turn off the water supply using the shut-off valves located under the sink. This will prevent any water from flowing while you work on the faucet.
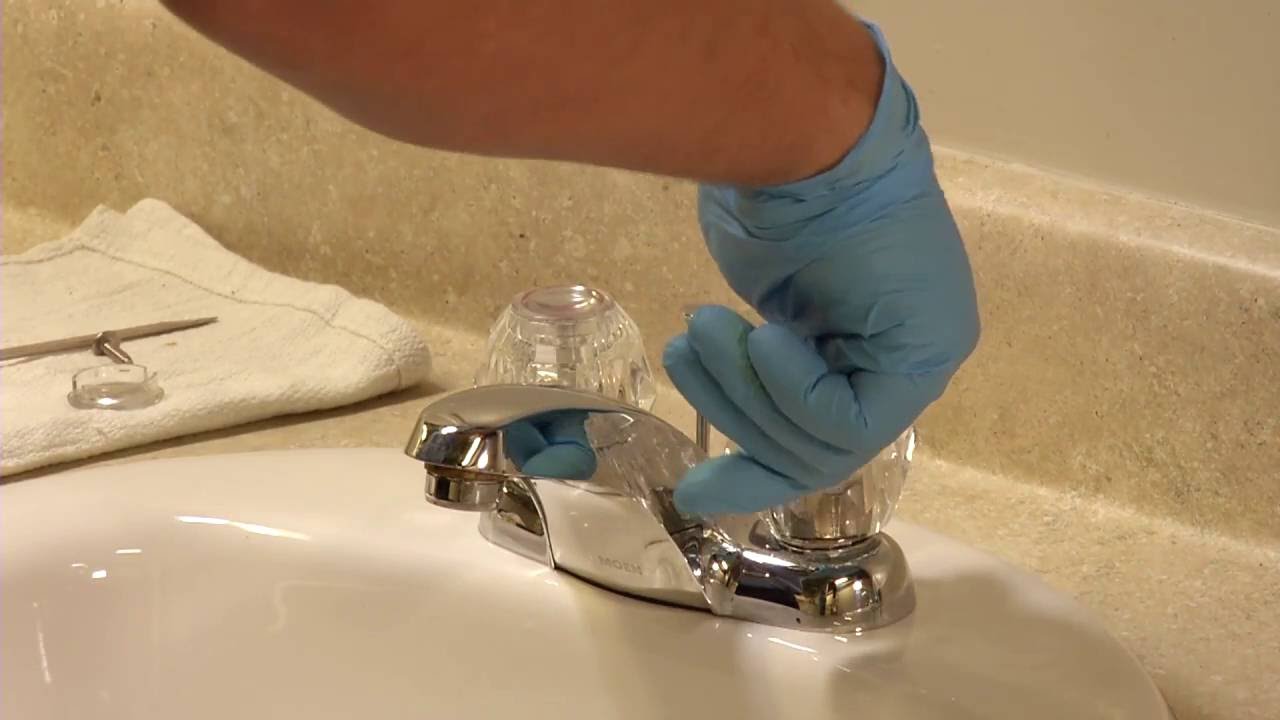
2. Disassemble the faucet:
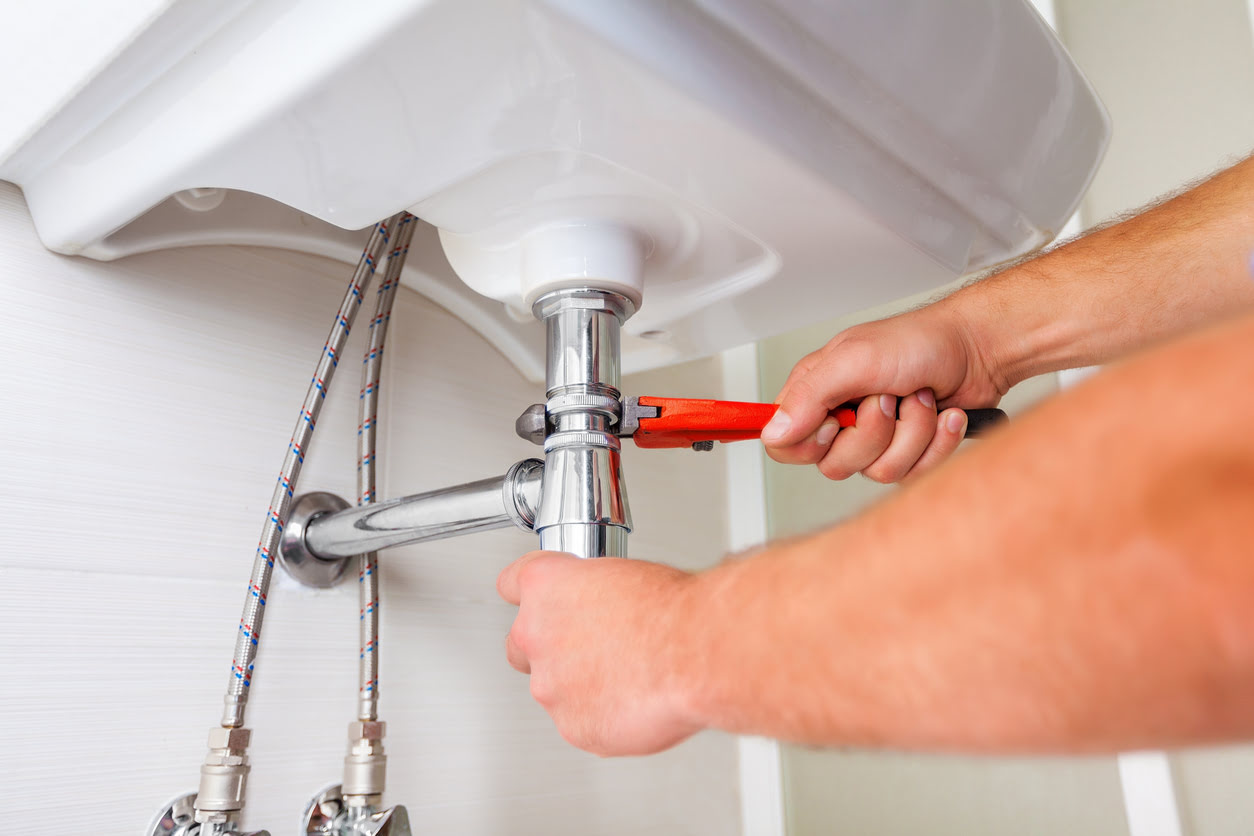
Start by removing the decorative cap on the faucet handle, which can usually be gently pried off with a flathead screwdriver. Underneath, you’ll find a screw that needs to be unscrewed to remove the handle. Once the handle is off, use an adjustable wrench to loosen and remove the retaining nut or collar that holds the cartridge or valve assembly in place.
Read more: How To Fix A Bathroom Sink
3. Inspect the cartridge or valve assembly:
Once you’ve removed the cartridge or valve assembly, examine it for any signs of damage or wear. Look for worn rubber O-rings, cracked or broken seals, or mineral buildup that may be causing the leak. Depending on the issue, you may need to replace the entire assembly or simply replace the faulty component.
4. Replace the faulty component:
If the cartridge or valve assembly is damaged, you’ll need to replace it with a new one. Visit your local hardware store or contact the faucet manufacturer to find the exact replacement part. Follow the manufacturer’s instructions to install the new cartridge or valve assembly.
5. Reassemble the faucet:
Once you’ve replaced the faulty component, carefully reassemble the faucet in the reverse order of disassembly. Make sure to tighten the retaining nut or collar securely, but be cautious not to overtighten, as this can cause damage.
6. Turn on the water supply:
After you’ve reassembled the faucet, turn the water supply back on by reopening the shut-off valves under the sink. Test the faucet by turning it on and off, checking for any leaks or drips. If there are no leaks, your faucet is now fixed!
By following these steps and paying attention to the details, you can successfully fix a leaky faucet. Remember to take your time and exercise caution during the repair process. If you encounter any difficulties or are unsure about any steps, it’s always advisable to consult a professional plumber for assistance.
With your faucet now in good working condition, let’s move on to step 6 and learn how to unclog a blocked drain!
Read more: How To Fix Sink Handle
Step 6: Unclog a Blocked Drain
A blocked drain can be a major inconvenience, causing water to back up in your sink and preventing it from draining properly. Luckily, you can often resolve this issue on your own without the need for a plumber. Here’s how you can unclog a blocked drain:
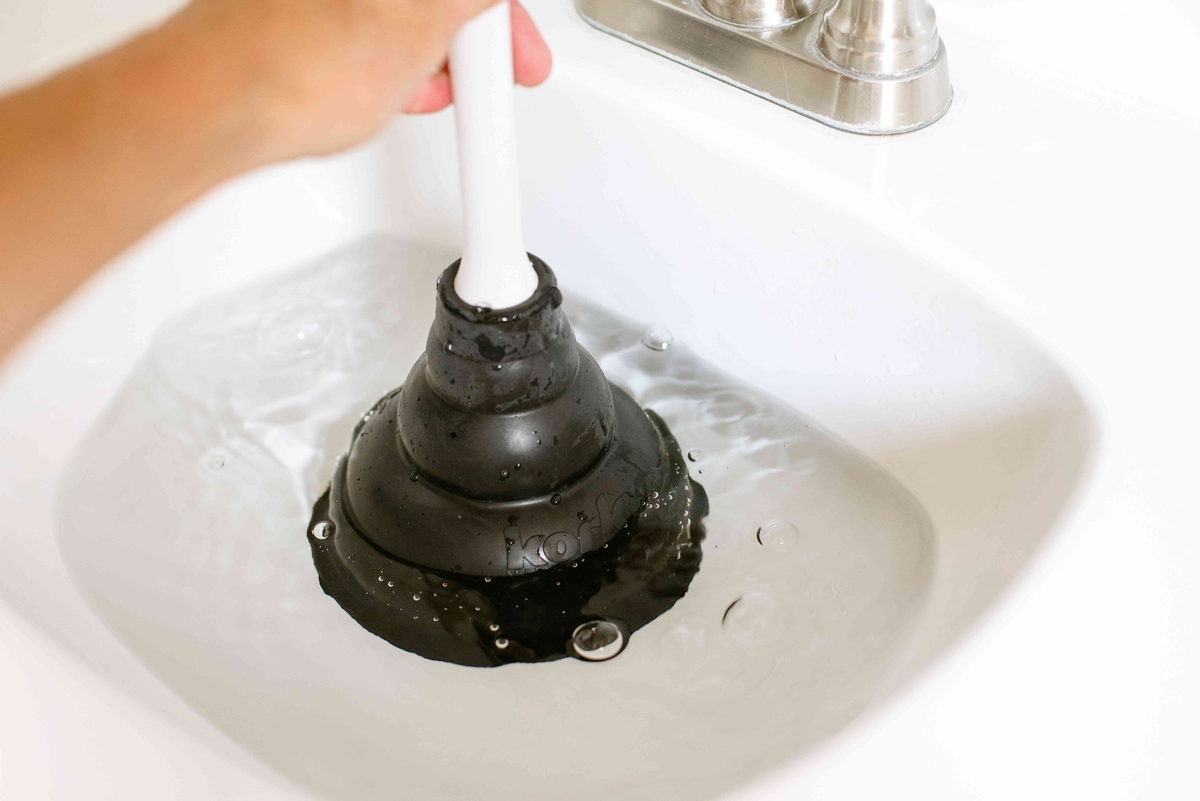
1. Try using a plunger:
Start by using a plunger to unclog the drain. Place the plunger over the drain opening and push down firmly, then pull up forcefully. Repeat this plunging motion several times to create pressure that can dislodge the blockage. After a few plunges, remove the plunger and check if the water starts to drain.
2. Use a drain snake or wire coat hanger:
If plunging doesn’t work, you can try using a drain snake or a straightened wire coat hanger to manually remove the clog. Insert the snake or wire into the drain, twisting and turning it as you push it in further. Once you feel resistance, rotate and wiggle to break up the clog. Then, slowly pull out the snake or wire and dispose of any debris that comes out.
3. Apply a natural drain cleaner:
If the clog persists, you can try using a natural drain cleaner to dissolve the blockage. Mix equal parts of baking soda and vinegar and pour the mixture down the drain. Let it sit for about 30 minutes, then flush it with hot water. The combination of baking soda and vinegar creates a chemical reaction that can break down organic materials and clear minor blockages.
Read more: How To Fix A Sinking Porch
4. Use a chemical drain cleaner:
If the clog is stubborn and the previous methods didn’t work, you can opt for a chemical drain cleaner. Be cautious when using chemical cleaners, as they can be harsh and may damage your pipes if used incorrectly. Follow the instructions on the product carefully and consider wearing protective gloves and eyewear.
5. Seek professional help:
If all else fails or if you’re uncomfortable with attempting to unclog the drain on your own, it’s best to seek professional help. A plumber will have the necessary tools and expertise to tackle more severe clogs safely.
By following these steps, you can often unclog a blocked drain and restore proper water flow to your sink. Remember to exercise caution when using chemical drain cleaners and, if needed, consult a professional for assistance. With the drain unclogged, we can move on to step 7 and learn how to replace a broken sink component.
Step 7: Replace a Broken Sink Component
If you have identified a broken component in your sink, such as a cracked sink basin, a malfunctioning drain pipe, or a loose faucet handle, it’s important to replace it promptly. Here are the steps to follow when replacing a broken sink component:
1. Turn off the water supply:
Before you begin any replacement work, make sure to turn off the water supply to the sink using the shut-off valves located underneath. This will prevent any water from flowing while you work on the sink.
Read more: How To Fix A Sink Disposal
2. Remove the damaged component:
Depending on the specific component that needs replacement, you may need to disassemble the sink to access it. Use the appropriate tools, such as an adjustable wrench or screwdriver, to remove any nuts, bolts, or screws holding the damaged component in place.
3. Clean and prepare the area:
Once you have removed the damaged component, clean the area thoroughly to ensure a proper fit for the replacement. Remove any debris, old sealant, or adhesive leftover from the previous component. Use a mild detergent and a sponge or cloth to clean the surface.
4. Install the new component:
Take the new replacement component and carefully install it according to the manufacturer’s instructions. Follow the recommended guidelines for attaching any necessary connectors, applying sealants or adhesives, and securing the component in place. Use the appropriate tools and techniques to ensure a tight and secure fit.
5. Reassemble and test:
After installing the replacement component, reassemble any surrounding parts that were removed during the disassembly process. Double-check that all connections are tightened properly. Once everything is back in place, turn on the water supply and test the sink to ensure that the new component is functioning correctly and that there are no leaks or issues.
If you are unsure about the replacement process or encounter any difficulties, it’s always best to consult the manufacturer’s instructions or seek assistance from a professional plumber who can ensure proper installation.
By following these steps, you can successfully replace a broken sink component and restore your sink to proper working condition. Taking care of these replacements promptly will help prevent further damage and ensure the longevity of your sink. With the broken component replaced, let’s proceed to the next step and learn how to reassemble and test the sink.
Read more: How To Fix A Bathroom Sink Leak
Step 8: Reassemble and Test
After completing the necessary repairs or component replacements, it’s time to reassemble the sink and test it to ensure everything is in proper working order. Follow these steps to reassemble and test your sink:
1. Reattach the components:
If you had to disassemble any parts during the repair process, carefully reattach them using the appropriate tools and techniques. Ensure all connections are secure and properly tightened, but be careful not to overtighten and risk damaging the components or causing leaks.
2. Turn on the water supply:
Once you have reassembled the sink, it’s time to turn on the water supply. Open the shut-off valves fully to allow water to flow into the sink. Pay close attention to any connections or joints to ensure there are no visible leaks.
3. Test the functionality:
Give your sink a thorough test to make sure it functions as expected. Turn on the faucet and check for any leaks from the spout or base. Test the hot and cold water handles to ensure they operate smoothly. If you repaired a clogged drain, run water down the sink and observe how it drains to ensure there are no further blockages.
Read more: How To Fix Cracks In Porcelain Sink
4. Check for leaks:
Monitor the sink closely for a few minutes to see if any leaks develop. Pay attention to any connections, valves, or pipes that may be prone to leaking. If you notice any leaks, make sure to tighten the appropriate connections or seek professional help if needed.
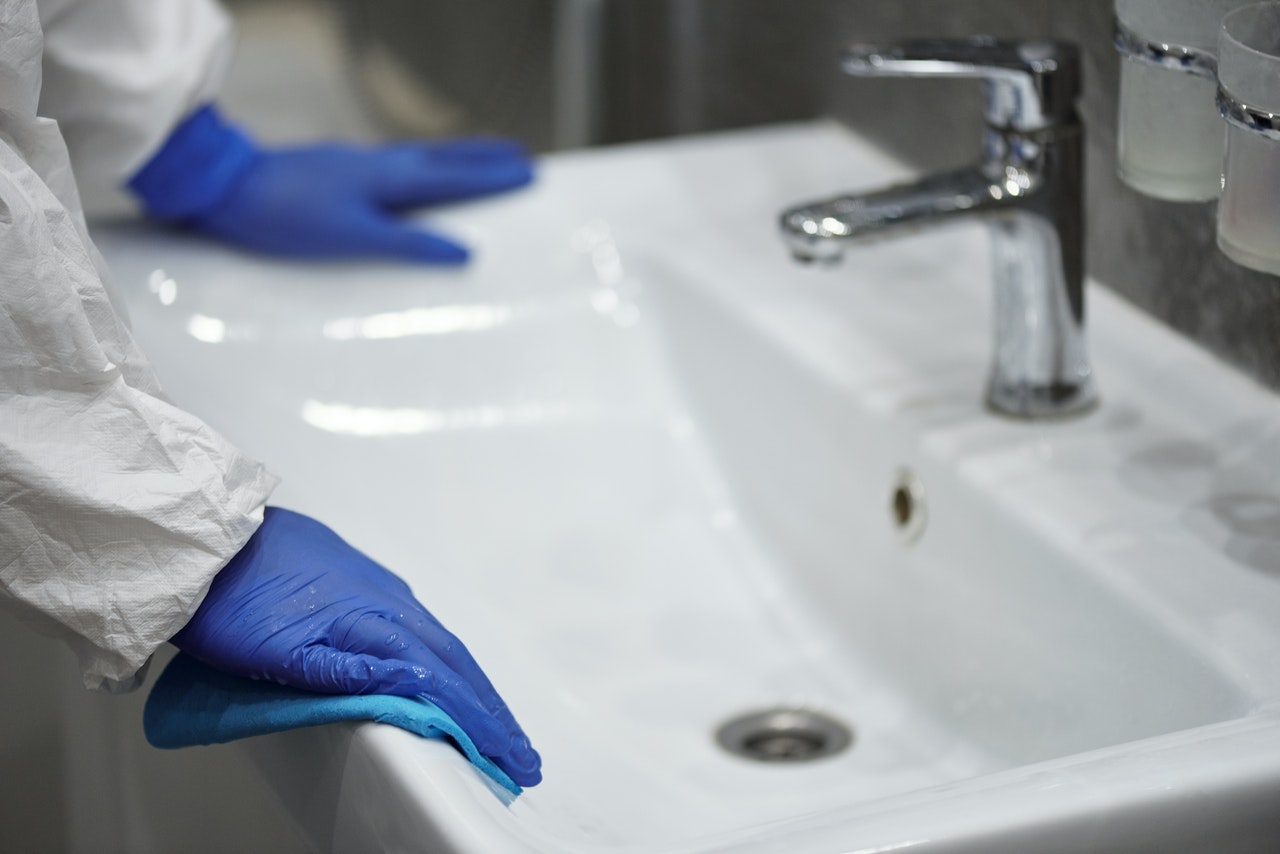
5. Clean up and finalize:
Once you have ensured that the sink is functioning properly and there are no leaks, it’s time to clean up the area around the sink and put away any tools or materials used during the repair process. Wipe down the sink surface, clean any spills, and organize your workspace.
Congratulations! You have successfully reassembled and tested your sink. By following these steps, you have resolved any issues, replaced broken components, and restored your sink to proper working condition.
Remember, if you encounter any difficulties or are unsure about any steps, it’s always advisable to consult a professional plumber for assistance. Proper maintenance and care of your sink will help extend its lifespan and prevent future issues. By being proactive and addressing any problems promptly, you can ensure your sink remains functional and efficient for years to come.
With the sink reassembled, it’s time to conclude this guide. We hope that this step-by-step process has provided you with the knowledge and confidence to tackle sink repairs and keep your sink in excellent working condition.
Conclusion
Fixing a sink may seem like a daunting task, but armed with the right knowledge and tools, you can successfully address common sink issues yourself. Throughout this comprehensive guide, we have covered the step-by-step process of diagnosing and repairing various sink problems, from leaky faucets to clogged drains and broken components.
By following the outlined steps, you can assess the problem, shut off the water supply, clear out the area under the sink, locate the source of the issue, fix a leaky faucet, unclog a blocked drain, and replace broken sink components. Taking the time to gather the necessary tools and materials, as well as exercising caution and attention to detail, will help you achieve successful results.
Remember, safety should always be a priority during any repair project. If you are unsure about any step or encounter difficulties, don’t hesitate to seek the assistance of a professional plumber. They have the expertise and experience to handle more complex plumbing issues and ensure the job is done correctly.
Proper maintenance and care of your sink are crucial to ensure its longevity and optimal performance. Regularly cleaning the sink, checking for any leaks, and addressing minor issues promptly can help prevent major problems down the line. Additionally, incorporating good habits like using drain guards to catch debris and avoiding pouring harsh chemicals down the drain can help prevent clogs and damage to your sink.
With the knowledge gained from this guide, you can now tackle sink repairs with confidence and save money on professional plumbing services. Remember, proper repairs and maintenance not only contribute to the functionality of your sink but also enhance the overall aesthetics and value of your kitchen or bathroom.
So, the next time you encounter a sink problem, don’t panic. Take a deep breath, refer back to this guide, and follow the steps carefully. With a bit of patience, effort, and the right approach, you’ll be able to fix your sink and restore it to its optimal condition.
Frequently Asked Questions about How To Fix A Sink
Was this page helpful?
At Storables.com, we guarantee accurate and reliable information. Our content, validated by Expert Board Contributors, is crafted following stringent Editorial Policies. We're committed to providing you with well-researched, expert-backed insights for all your informational needs.


0 thoughts on “How To Fix A Sink”