Articles
How To Install An Under Cabinet Range Hood?
Modified: October 28, 2024
Learn how to properly install a range hood under your kitchen cabinet with our informative articles. Ensure proper ventilation and enhance your cooking experience.
(Many of the links in this article redirect to a specific reviewed product. Your purchase of these products through affiliate links helps to generate commission for Storables.com, at no extra cost. Learn more)
Introduction
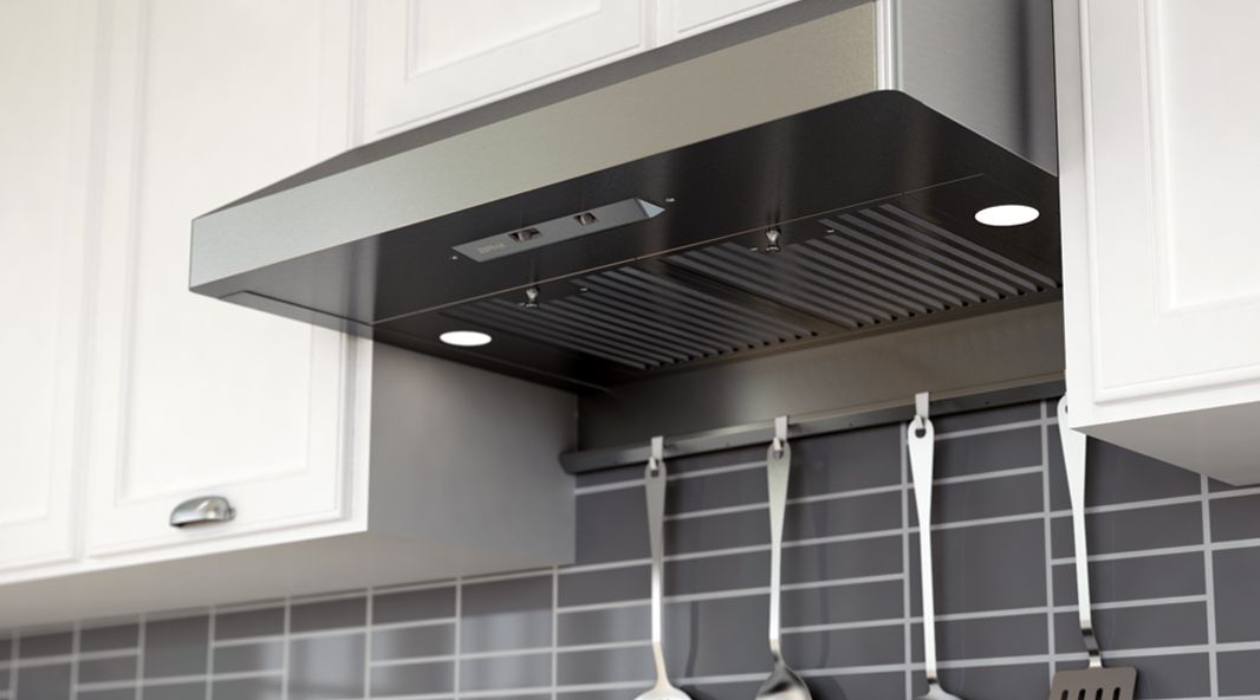
Installing a range hood under the cabinet is an excellent way to improve the air quality and ventilation in your kitchen. Range hoods are designed to remove smoke, odors, and grease from the air, ensuring a cleaner and healthier cooking environment. If you’ve never installed a range hood before, don’t worry! With the right tools, materials, and a step-by-step guide, you can easily complete this installation yourself.
In this article, we will walk you through the process of installing a range hood under the cabinet. We will cover everything from gathering the required tools and materials to testing the range hood for proper functionality. So, let’s get started with step one!
Key Takeaways:
- Installing a range hood under the cabinet can greatly improve air quality and ventilation in your kitchen. With the right tools and step-by-step guidance, you can successfully complete this installation yourself, ensuring a cleaner and healthier cooking environment.
- Prioritize safety and accuracy throughout the installation process, from measuring and marking the installation area to testing the range hood for proper functionality. Regular maintenance of the range hood and filters is essential to ensure optimal performance and air quality in your kitchen.
Read more: How To Install Under Cabinet Range Hood
Step 1: Gather the Required Tools and Materials
Before you begin the installation process, it’s important to gather all the necessary tools and materials. Having everything on hand will ensure a smooth and efficient installation. Here are the tools and materials you will need:
- Range hood
- Tape measure
- Drill
- Screwdriver
- Pencil
- Hacksaw
- Ductwork
- Duct tape or metal foil tape
- Screws
- Wire nuts
- Electrical wire
- Level
- Safety goggles
- Masking tape
- Stud finder
Make sure you have all the tools and materials listed above before moving on to the next step. This will save you time and ensure a successful installation.
Step 2: Measure and Mark the Installation Area
Once you have gathered all the necessary tools and materials, it’s time to measure and mark the installation area for your range hood. Proper measurements are crucial to ensure a secure and level installation. Here’s how to do it:
- Start by locating the centerline of your cooktop. Measure the width of your cooktop and mark the center point on the wall.
- Use a tape measure to determine the height of your range hood. This will vary depending on the specific model you are installing. Typically, range hoods are installed at a height of 24-30 inches from the cooktop surface.
- Measure the distance from the centerline mark to the desired height, and make a vertical mark on the wall at this point.
- Next, measure the depth of your range hood. This will determine how far out from the wall the hood will extend.
- Using the depth measurement, mark a horizontal line on the wall at the desired distance from the vertical mark. This will be the installation area for your range hood.
It’s important to ensure that the marked area is free from any obstructions such as cabinets, light fixtures, or electrical outlets. Take the time to double-check the measurements and marks before proceeding to the next step.
Step 3: Remove Cabinet Doors and Shelves
With the installation area measured and marked, the next step is to remove the cabinet doors and shelves that may obstruct the installation of the range hood. Here’s how to do it:
- Start by emptying the cabinets and removing any items that may be stored on the shelves or inside the cabinet.
- Using a screwdriver, unscrew and remove the hinges that attach the cabinet doors to the cabinet frame. Set the doors aside in a safe place.
- If your cabinets have adjustable shelves, remove them by lifting up and tilting them slightly to release them from the support brackets or pegs.
- For fixed shelves, use a screwdriver or pry bar to carefully remove any screws or nails that secure the shelves to the cabinet frame.
- Once the doors and shelves have been removed, set them aside in a safe area. This will provide you with a clear and open space to work on the range hood installation.
Remember to keep track of the screws, hinges, and other hardware that were removed. You will need them later when reinstalling the cabinet doors and shelves. It’s also a good idea to label the doors and shelves to ensure they are put back in their original positions.
With the cabinet doors and shelves removed, you are now ready to proceed with the installation of the range hood. Onto the next step!
Step 4: Prepare the Mounting Location
Before you can mount the range hood, it’s important to prepare the installation area to ensure a secure and stable attachment. Here’s how to prepare the mounting location:
- Locate the wall studs within the marked installation area using a stud finder. The range hood needs to be attached to the studs for proper support.
- Mark the positions of the studs on the wall using a pencil.
- With the stud locations marked, hold the range hood against the wall at the desired height and position. Ensure that it is centered both vertically and horizontally.
- Using a pencil or a screwdriver, mark the position of the mounting holes on the wall through the screw holes on the back of the range hood.
- Carefully set the range hood aside and grab your drill. Use an appropriate drill bit to create pilot holes at the marked positions on the wall. These pilot holes will guide the screws during the mounting process.
- If your range hood requires any additional holes for wiring or ventilation, mark and drill those as well, following the manufacturer’s instructions.
Once the mounting location is prepared with the necessary pilot holes, you are ready to move on to the next step: mounting the range hood. Ensure that the pilot holes align with the wall studs for a secure installation.
Read also: 12 Amazing Range Hood Under Cabinet for 2025
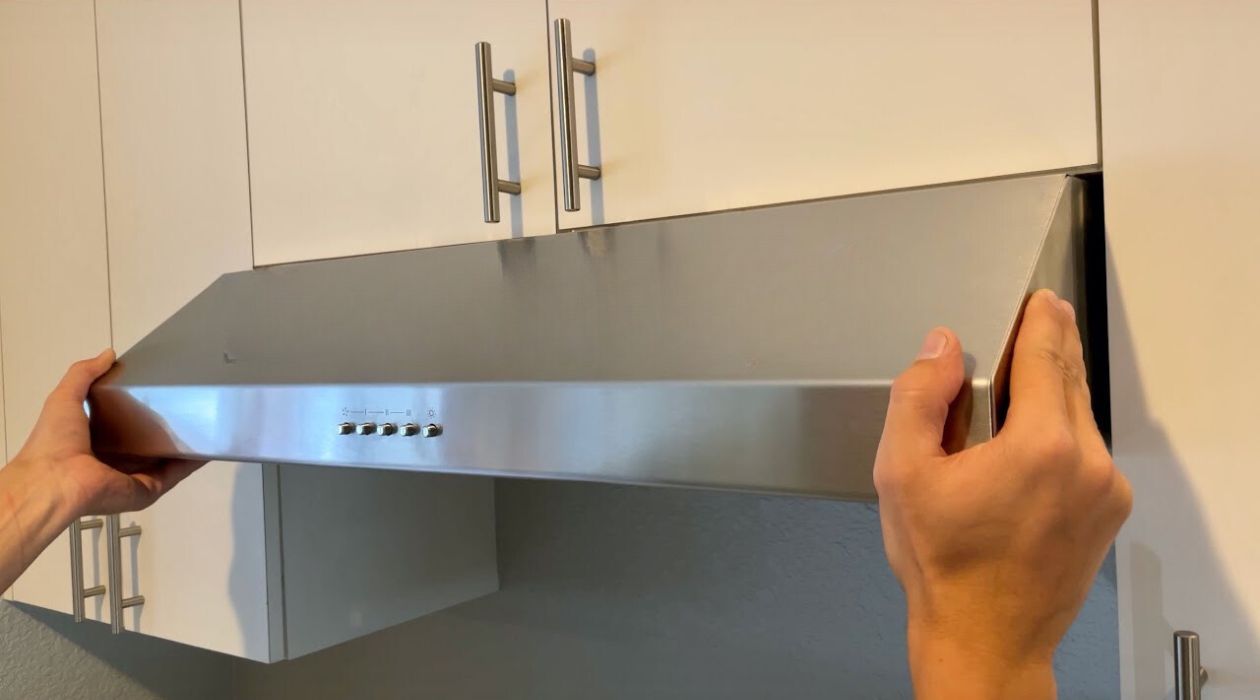
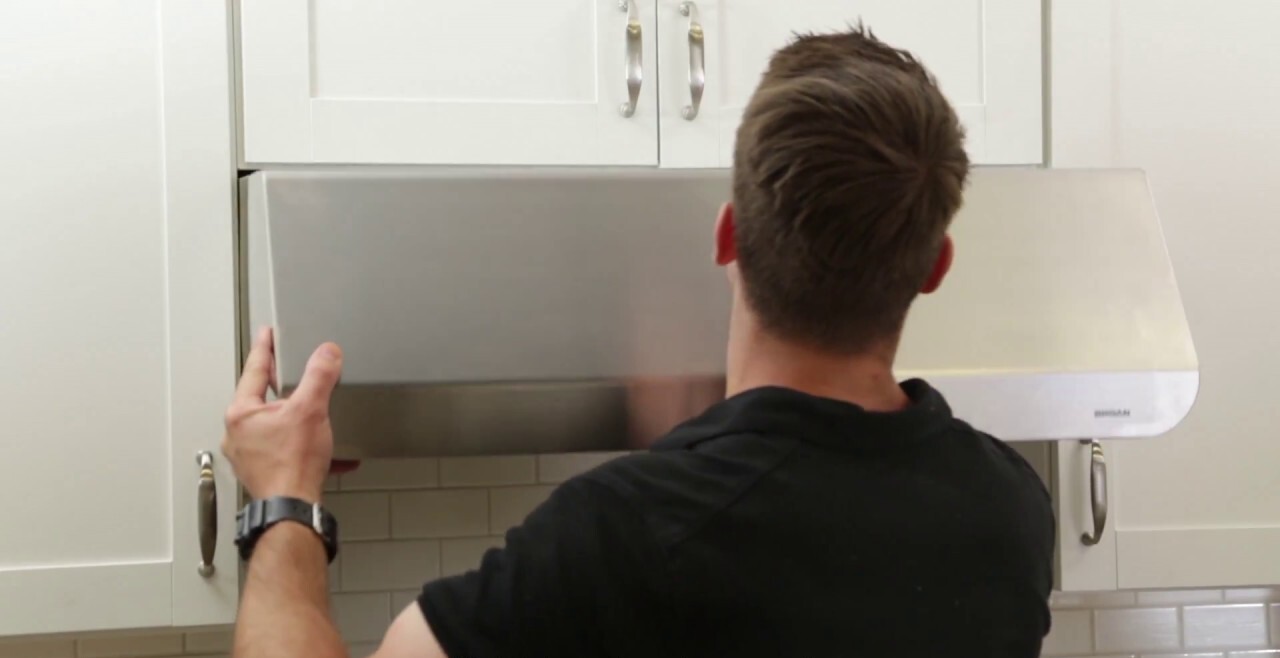
Step 5: Mount the Range Hood
With the mounting location prepared, it’s time to mount the range hood onto the wall. Follow these steps to ensure a secure and stable installation:
- With the help of a friend or family member, hold the range hood up against the wall, aligning the mounting holes with the pilot holes you drilled in the previous step.
- Insert screws through the mounting holes on the range hood and into the pilot holes on the wall. Start by screwing in the top screws first to hold the hood in place.
- Using a level, check that the range hood is straight both vertically and horizontally. Make any necessary adjustments by loosening or tightening the screws.
- Once the range hood is level, continue screwing in the remaining screws to fully secure it to the wall. Ensure that the screws are tight, but be careful not to overtighten and damage the range hood or wall.
It’s important to refer to the manufacturer’s instructions for any specific guidelines or recommendations regarding the mounting process. If the range hood came with a mounting bracket, make sure to install it properly before mounting the hood.
Once the range hood is securely mounted, take a step back and admire your progress. The hard part is over! Now, it’s time to move on to the next steps in the installation process.
When installing a range hood under a cabinet, make sure to measure the space accurately and ensure that there is proper ventilation for the hood. It’s also important to follow the manufacturer’s instructions carefully for a safe and effective installation.
Step 6: Connect the Ductwork
Connecting the ductwork is an essential step in the installation of a range hood. It allows for proper ventilation and ensures that the smoke, odors, and grease are effectively expelled from your kitchen. Follow these steps to connect the ductwork:
- Measure the distance between the range hood exhaust opening and the exterior wall or ceiling where the duct will be vented.
- Using a hacksaw or tin snips, cut the ductwork to the appropriate length. Make sure to wear safety goggles to protect your eyes from any metal shards.
- Attach the ductwork to the exhaust opening on the range hood. Secure it with duct tape or metal foil tape to ensure a tight and secure connection.
- If necessary, use duct elbows or flexible ductwork to navigate around any obstacles, ensuring a clear path for the air to flow through.
- If the ductwork needs to go through a wall, cut a hole with a diameter slightly larger than the duct to create a proper opening.
- Secure the ductwork to the wall or ceiling using clamps or metal straps. This will prevent the ductwork from shifting or coming loose over time.
It’s important to use the appropriate size and type of ductwork recommended by the manufacturer for your specific range hood. Additionally, make sure that the ductwork is installed in accordance with local building codes and regulations.
Once the ductwork is properly connected, you are one step closer to enjoying a well-ventilated kitchen. Next, let’s move on to the installation and connection of the venting.
Step 7: Install and Connect the Venting
Installing and connecting the venting is crucial to ensure that the air from your range hood is properly directed outside of your home. Here’s how to install and connect the venting:
- Choose the most suitable venting method for your kitchen setup. Common options include wall vents, roof vents, or soffit vents.
- If you are using a wall vent, position it on the exterior wall in a location where the venting can easily reach.
- Measure and mark the location for the venting hole on the exterior wall. Use a hole saw or jigsaw to carefully cut the hole.
- Attach the vent cap to the exterior wall, securing it tightly to prevent any air leaks.
- Connect the venting from the range hood to the vent cap, ensuring a secure and tight fit. Use duct tape or metal foil tape to seal the connection.
- If you are using roof or soffit venting, follow similar steps, but ensure that you are positioning and installing it in the appropriate area.
- Once the venting is installed and connected, double-check all connections and ensure that there are no gaps or leaks.
It’s important to refer to the manufacturer’s instructions for any specific guidelines or recommendations regarding the installation and connection of the venting. Additionally, make sure that the venting is done in compliance with local building codes and regulations.
With the venting properly installed and connected, your range hood will effectively expel smoke, odors, and grease from your kitchen. The next step is to install the range hood filters. Let’s move on to that!
Step 8: Install the Range Hood Filters
Range hood filters are designed to trap grease, smoke particles, and other airborne contaminants, ensuring clean and fresh air in your kitchen. Installing and maintaining these filters is an important step for the proper functioning of your range hood. Follow these steps to install the range hood filters:
- Refer to the manufacturer’s instructions to determine the type of filters your range hood requires. They may be aluminum, charcoal, or a combination of both.
- Remove the filter cover or access panels on the underside of the range hood.
- Take out the old filters, if present, and dispose of them properly.
- Clean the area where the filters are placed, removing any grease or debris that may have accumulated.
- Insert the new filters into their designated slots, ensuring they are properly aligned and fitted.
- Replace the filter cover or access panels, securing them in place.
It’s important to check and follow the manufacturer’s instructions for any specific guidelines regarding the installation and maintenance of the range hood filters. Some filters may be washable and reusable, while others may need to be replaced at regular intervals.
Remember that clean and well-maintained filters not only improve the air quality in your kitchen but also help to prolong the lifespan of your range hood. Make sure to clean or replace the filters as recommended by the manufacturer.
With the filters installed, your range hood is now effectively capturing and filtering out airborne contaminants. Next, let’s move on to testing the range hood to ensure it’s working properly.
Read also: 12 Best Under-Cabinet Range Hood for 2025
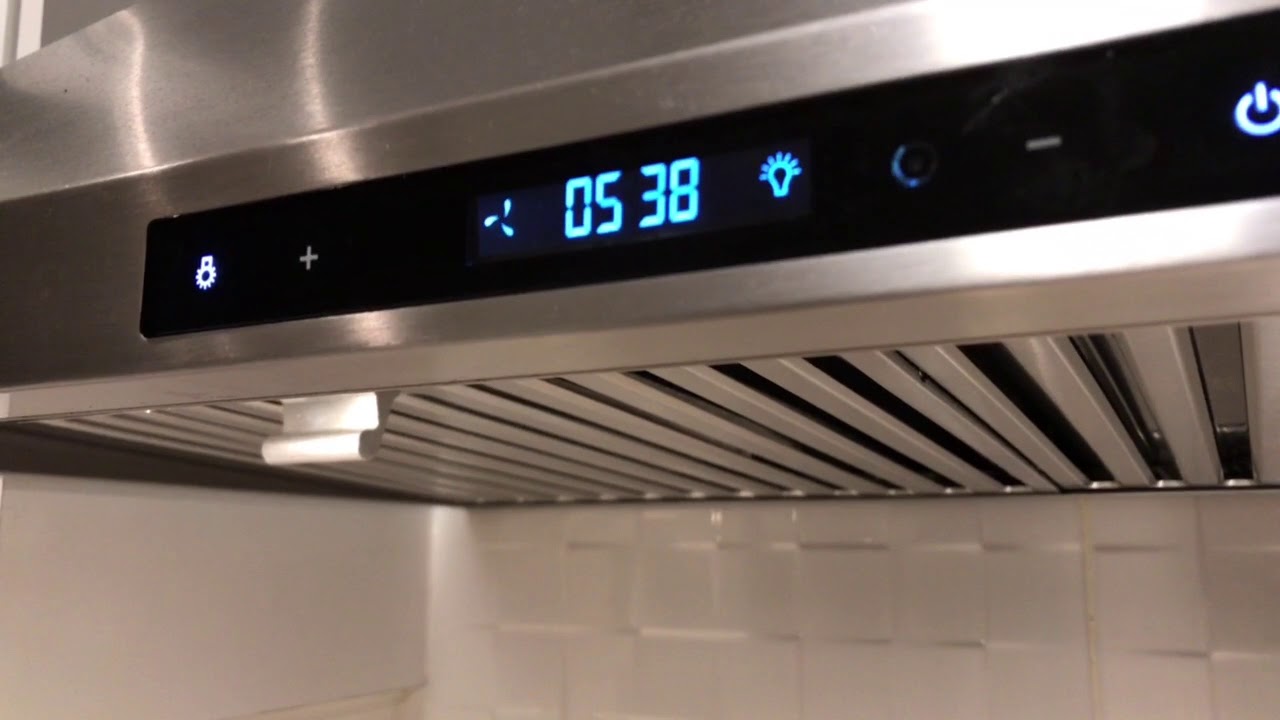
Step 9: Test the Range Hood
Testing the range hood is an important final step to ensure that it is functioning properly and effectively removing smoke, odors, and grease from your kitchen. Here’s how to test your range hood:
- Ensure that the range hood is properly plugged into an electrical outlet or connected to the electrical supply according to the manufacturer’s instructions.
- Turn on the range hood by flipping the switch or pressing the power button. Check that the lights and fan are working.
- Activate the different fan speeds to test their functionality. Start with the lowest speed and gradually increase to the highest setting.
- Place a pot of boiling water or a skillet with some oil on the stove to create steam or smoke.
- Turn on the range hood fan to the highest setting and observe how effectively it removes the steam or smoke from the cooking area.
- Check for any unusual noises, vibrations, or smells during the testing process. These could indicate a problem with the range hood.
- If you are satisfied with the performance of the range hood, turn off the fan and lights.
It’s important to note that range hoods have different fan capacities and airflow rates. Make sure to choose a range hood that is appropriate for the size and layout of your kitchen to ensure optimal performance.
If you encounter any issues or concerns during the testing process, refer to the manufacturer’s troubleshooting guide or consult a professional for assistance.
With the range hood successfully tested and confirmed to be working properly, you are ready to complete the installation process by reattaching the cabinet doors and shelves.
Let’s move on to the final step of the installation process!
Step 10: Reinstall Cabinet Doors and Shelves
With the range hood installation complete, it’s time to reattach the cabinet doors and shelves to restore the functionality and appearance of your kitchen. Follow these steps to reinstall the cabinet doors and shelves:
- Retrieve the cabinet doors and shelves that were removed earlier in the installation process.
- Refer to any labels or markings you made to ensure that each door and shelf is returned to its original position.
- Align the hinges on the cabinet doors with the hinge plates on the cabinet frame.
- Screw the hinges back into place, making sure they are securely attached.
- If your shelves were adjustable, reinsert them into the support brackets or pegs. Ensure they are level and secure.
- For fixed shelves, reinstall them by placing them in their original position and securing them with screws or nails.
- Double-check that all doors and shelves are properly aligned, level, and secure.
Take the time to clean the cabinet doors and shelves before reattaching them to ensure a fresh and tidy look in your kitchen. Wipe them down with a damp cloth or use a mild cleaning solution if necessary.
With the cabinet doors and shelves back in place, step back and admire your newly installed range hood and the enhanced functionality it brings to your kitchen.
Remember to regularly clean and maintain your range hood and filters to ensure optimal performance over time. Refer to the manufacturer’s instructions for specific cleaning recommendations and maintenance schedules.
Congratulations! You have successfully completed the installation of a range hood under the cabinet. Enjoy the improved air quality, ventilation, and cooking experience in your kitchen!
If you have any questions or concerns during the installation process, it’s always wise to consult a professional for guidance and assistance.
Thank you for reading, and happy cooking!
Conclusion
Installing a range hood under the cabinet is a rewarding project that can greatly enhance the functionality and air quality in your kitchen. By following the step-by-step guide outlined in this article, you have learned how to successfully install and connect a range hood, from gathering the necessary tools and materials to reinstalling cabinet doors and shelves.
Throughout the installation process, it’s crucial to prioritize safety and accuracy. Double-check measurements, secure all connections, and consult the manufacturer’s instructions for specific guidelines. Additionally, it’s important to adhere to local building codes and regulations.
With a properly installed range hood, you can enjoy a cleaner and healthier cooking environment. The range hood efficiently removes smoke, odors, and grease, protecting your kitchen surfaces and preventing the spread of cooking byproducts throughout your home.
Remember to regularly clean and maintain your range hood and filters to ensure optimal performance. Clean filters promote better air circulation and prevent the buildup of dirt and grease which can affect the efficiency of your range hood.
Installing a range hood under the cabinet not only improves air quality but also adds an aesthetic appeal to your kitchen. It provides a focal point and can complement your overall kitchen design.
We hope this article has provided you with valuable insights and guidance for successfully installing a range hood under the cabinet. Enjoy the benefits of a well-ventilated kitchen and happy cooking!
Disclaimer: The steps and instructions provided here are general guidelines. It’s important to note that every range hood installation may have specific requirements and instructions provided by the manufacturer. Always refer to the manufacturer’s instructions and consult a professional if you have any doubts or concerns.
Frequently Asked Questions about How To Install An Under Cabinet Range Hood?
Was this page helpful?
At Storables.com, we guarantee accurate and reliable information. Our content, validated by Expert Board Contributors, is crafted following stringent Editorial Policies. We're committed to providing you with well-researched, expert-backed insights for all your informational needs.


0 thoughts on “How To Install An Under Cabinet Range Hood?”