
Articles
How To Install Range Hood Insert
Modified: October 20, 2024
Learn how to install a range hood insert with our detailed articles. Get step-by-step instructions and expert tips for a successful installation.
(Many of the links in this article redirect to a specific reviewed product. Your purchase of these products through affiliate links helps to generate commission for Storables.com, at no extra cost. Learn more)
Introduction
Welcome to our comprehensive guide on how to install a range hood insert! Range hood inserts play a crucial role in a well-functioning kitchen by effectively removing smoke, airborne grease, and odors that are produced during cooking. Installing a range hood insert not only improves air quality but also adds a stylish and elegant touch to your kitchen space.
Whether you’re upgrading your existing range hood or installing a new one, this step-by-step guide will provide you with all the information you need to successfully complete the installation process. We will cover everything from the preparation stage to the final testing, ensuring that you have a clear understanding of each step along the way.
Before we dive into the installation process, it’s important to note that this guide assumes you have a basic understanding of the tools and materials necessary for the job. If you’re not comfortable with any of the steps or unsure about your abilities, it’s always best to consult with a professional to ensure a safe and proper installation.
Now, let’s get started on transforming your kitchen with the installation of a range hood insert!
Key Takeaways:
- Proper preparation, precise measurements, and careful installation are essential for successfully installing a range hood insert. Prioritize safety, follow manufacturer instructions, and enjoy a clean and stylish kitchen space.
- Testing the range hood insert after installation is crucial to ensure proper functionality. Familiarize yourself with the controls, check ventilation, and make necessary adjustments for optimal performance.
Read also: 15 Superior Range Hood Inserts For 2025
Step 1: Prepare for installation
Before you begin the actual installation process, it’s crucial to properly prepare your kitchen for the range hood insert. This step ensures that you have everything you need and creates a safe and efficient working environment. Here’s what you need to do:
- Gather the necessary tools and materials: Before you start, make sure you have all the required tools and materials on hand. This may include a screwdriver, power drill, measuring tape, level, stud finder, ducting materials, ventilation pipe, electrical wiring, and mounting brackets. Having everything ready will save you time and prevent interruptions during the installation process.
- Turn off the power: Safety should always be a top priority. Before starting any electrical work, switch off the power supply to the area where you’ll be installing the range hood insert. Locate the appropriate circuit breaker in your electrical panel and flip the switch to the “off” position. Double-check that the power is truly off using a non-contact voltage tester.
- Clear the workspace: Remove any objects or obstacles from the area where the range hood insert will be installed. This includes dishes, utensils, cooking appliances, or any other items that may hinder the installation process or pose a safety risk. Ensure that the workspace is clean and free of clutter.
- Read the manufacturer’s instructions: Each range hood insert will come with specific instructions provided by the manufacturer. It’s essential to read these instructions carefully before proceeding with the installation. Familiarize yourself with the product, its components, and any specific requirements or recommendations provided by the manufacturer.
By adequately preparing for the installation, you’ll be equipped with the necessary tools and knowledge to move on to the next steps seamlessly. Taking the time to gather materials, turn off the power, clear the workspace, and read the manufacturer’s instructions will help ensure a smooth and successful installation process.
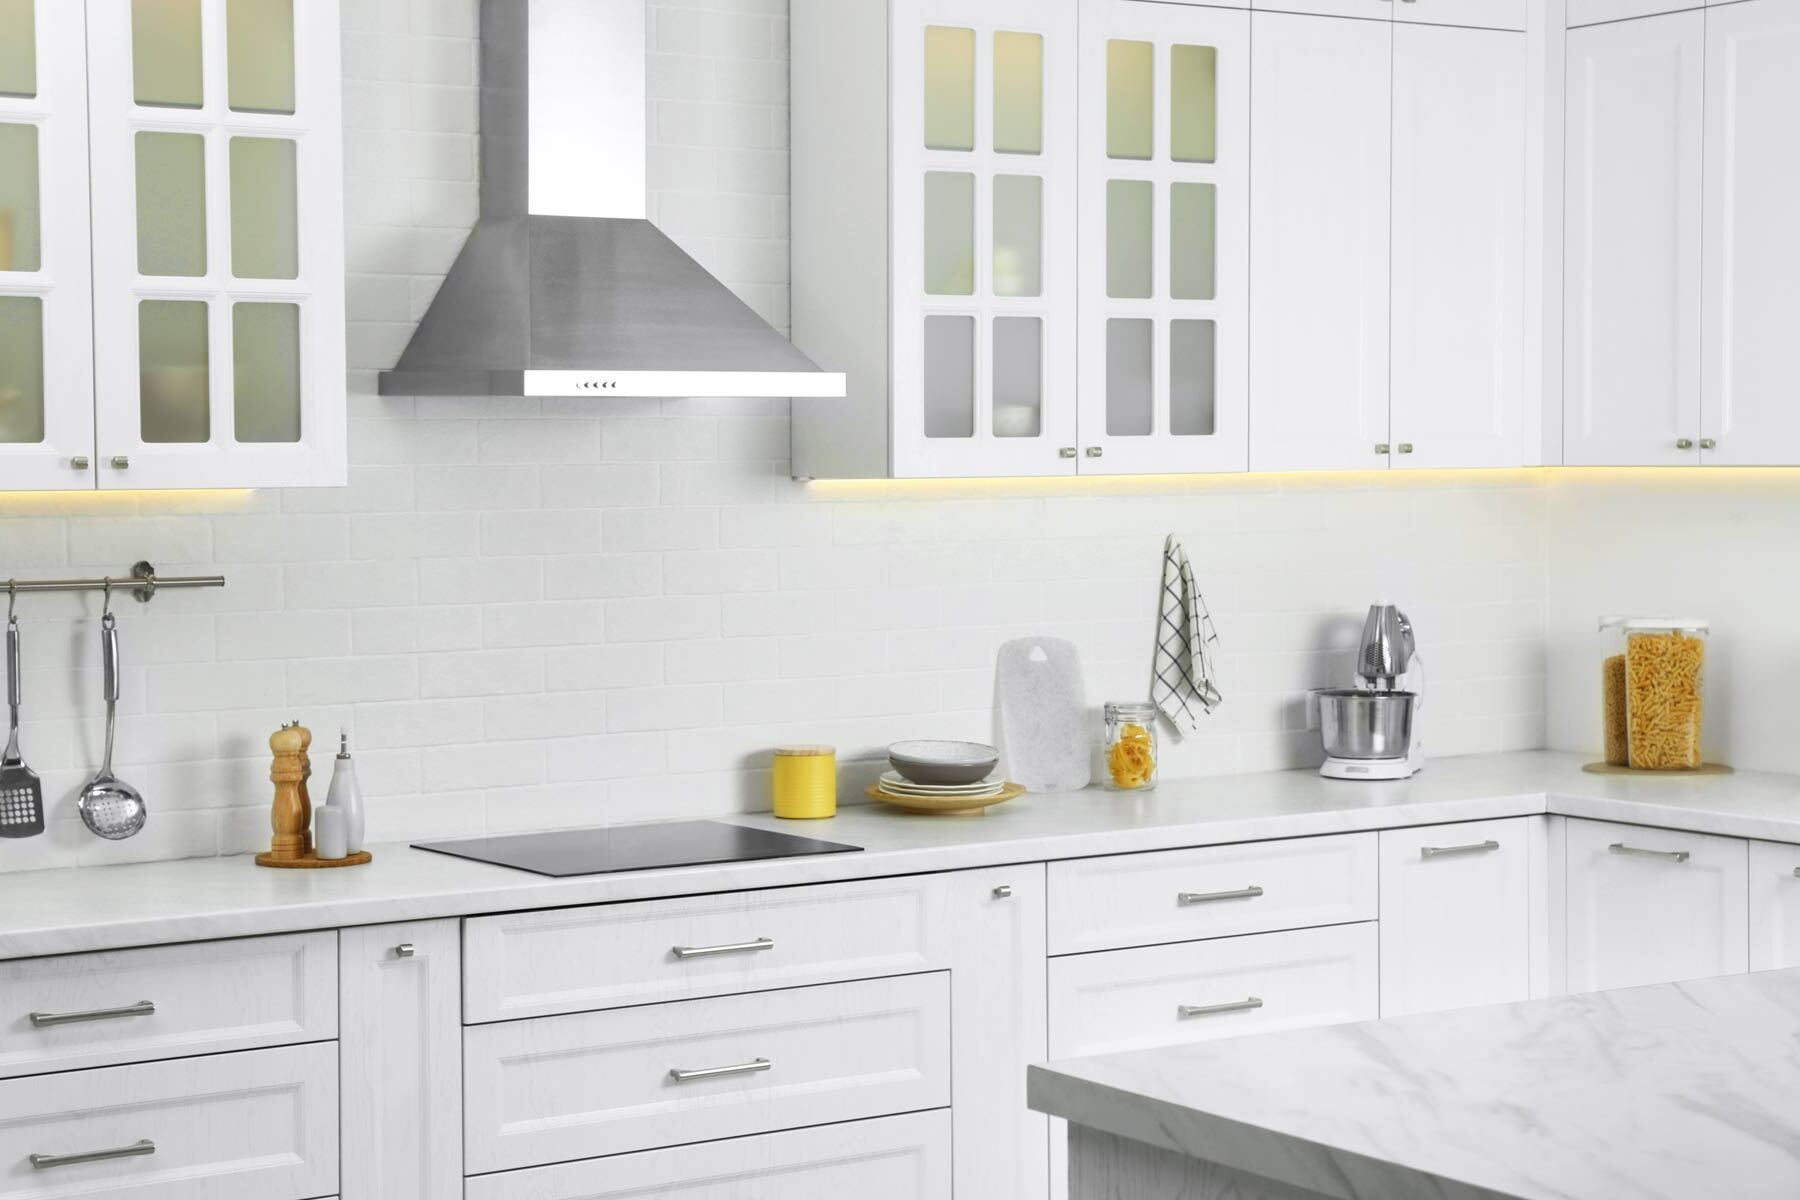
Step 2: Choose the right location
Selecting the appropriate location for your range hood insert plays a vital role in its functionality and aesthetic appeal. Here’s what you need to consider when choosing the right spot:
- Position above the cooktop: The primary purpose of a range hood insert is to capture and remove smoke, grease, and odors that are produced while cooking. As such, it’s crucial to position the insert directly above the cooktop or range. This placement ensures optimal ventilation and efficient extraction of pollutants.
- Height from the cooktop: The distance between the bottom of the range hood insert and the cooktop is an important factor to consider. The ideal height typically ranges from 24 to 30 inches (61 to 76 cm) above the cooking surface. This distance provides sufficient clearance for users while also effectively capturing the smoke and vapors produced during cooking.
- Clearance from cabinets and other objects: Ensure that there is enough clearance around the range hood insert to prevent interference with surrounding cabinets or other objects. Follow the manufacturer’s guidelines for specific clearance requirements, but typically you should leave at least 18 to 24 inches (46 to 61 cm) of space on each side.
- Proximity to an exterior wall for venting: If your range hood insert requires venting to the outside, consider the proximity to an exterior wall. This will determine the ease of installing the vent duct. Ideally, the range hood insert should be positioned near an exterior wall to minimize the length of the duct run and ensure efficient airflow.
- Kitchen layout and aesthetics: Lastly, take into account the overall kitchen layout and aesthetic considerations. Choose a location that complements the style and design of your kitchen. Consider factors such as sight lines, ceiling height, and any architectural features that may impact the positioning of the range hood insert.
By carefully selecting the right location for your range hood insert, you can ensure optimal functionality, efficient ventilation, and a visually appealing integration within your kitchen space. Take into account the position above the cooktop, height from the cooktop, clearance from cabinets, proximity to an exterior wall for venting, and overall kitchen aesthetics to make an informed decision.
Step 3: Take measurements
Precise measurements are crucial when installing a range hood insert to ensure a proper fit and alignment. Taking accurate measurements will guide you in selecting the right size insert and ensuring that the venting and electrical connections are correctly positioned. Here’s what you need to do:
- Measure the width of the range: Start by measuring the width of your cooking range or cooktop. This measurement will help you determine the appropriate width of the range hood insert. Typically, the width of the insert should be equal to or slightly greater than the width of the range to ensure effective coverage and extraction.
- Measure the depth of the range hood space: Measure the depth of the space where you plan to install the range hood insert. This measurement will help you ensure that the insert will fit properly within the designated area. Take into account any cabinets or obstacles that may limit the available depth.
- Measure the height of the space: Determine the vertical measurement from the cooktop to the ceiling or the bottom of the upper cabinets. This measurement will help you determine the appropriate height for the range hood insert and ensure sufficient clearance above the cooking surface.
- Measure the distance to an exterior wall: If your range hood insert requires venting to the outside, measure the distance from the intended installation location to an exterior wall. This measurement will help you determine the length of the vent duct needed and ensure proper routing for efficient airflow.
- Identify electrical requirements: Check the electrical specifications provided by the manufacturer. Determine if you have the necessary wiring in place or if any modifications need to be made. Take note of the location of existing electrical outlets to ensure that they are within reach of the range hood insert.
Accurate measurements are vital to ensure a seamless installation process. By measuring the width of the range, the depth and height of the installation space, the distance to an exterior wall for venting, and identifying electrical requirements, you can determine the appropriate size of the range hood insert and make necessary preparations for a successful installation.
Step 4: Prepare the range hood insert
Before installing the range hood insert, it’s necessary to prepare it for the installation process. This step involves unpacking the insert, inspecting its components, and making any necessary adjustments. Here’s what you need to do:
- Unpack the range hood insert: Carefully unpack the range hood insert, ensuring that you remove all packaging materials. Take care not to damage any components during this process.
- Inspect the components: Thoroughly inspect all the components of the range hood insert. Check for any visible damage or defects. This includes the hood itself, fan motor, filters, lights, and any additional features or attachments that came with the unit. If you notice any issues, contact the manufacturer for assistance.
- Make adjustments if needed: Depending on the specific requirements of your kitchen and the range hood insert, you may need to make some adjustments before installation. This could involve adjusting the height of the chimney extension, repositioning the fan motor or lights, or modifying any other component to ensure proper fit and functionality.
- Assemble the necessary parts: Follow the manufacturer’s instructions to assemble any parts that require attachment. This may include attaching the chimney extension, attaching the filters, or securing any additional accessories.
- Clean the range hood insert: Before proceeding with the installation, give the range hood insert a good cleaning to remove any dust or debris that may have accumulated during packaging or storage. This will ensure that the insert is in optimal condition and that it will perform efficiently.
Taking the time to properly prepare the range hood insert before installation will help ensure that all components are intact, any necessary adjustments are made, and the unit is clean and ready for use. By carefully inspecting and assembling the components, you can move forward with the installation process smoothly and with confidence.
Read more: How To Install ZLINE Range Hood
Step 5: Install the vent duct
Proper installation of the vent duct is essential for the effective and efficient operation of your range hood insert. The duct carries the captured smoke, grease, and odors outside your home, ensuring a clean and odor-free kitchen. Follow these steps to install the vent duct:
- Determine the ducting route: Plan the path for the vent duct from the range hood insert to an exterior wall or rooftop. Consider the most direct and efficient route that minimizes bends and obstructions.
- Measure and cut the ducting materials: Using a tape measure, measure the required length of the vent duct. Ensure the measurements are accurate and allow for proper installation without any kinks or restrictions. Use a pair of tin snips to cut the ducting materials to the appropriate length.
- Attach the duct sections: Connect the sections of the vent duct together using metal foil tape or clamps. Ensure a tight and secure connection to prevent air leaks. If necessary, use duct elbows or other fittings to navigate around obstacles or create angled turns.
- Secure the vent duct: Use metal hangers or straps to secure the vent duct along its path. Mount the hangers or straps to studs or other secure surfaces to provide stability and prevent sagging or misalignment. Ensure that the vent duct maintains a slight upward slope to allow for proper airflow.
- Create an exterior opening: If there is no existing opening for the vent duct in an exterior wall, you will need to create one. Use a reciprocating or circular saw to cut through the wall, following the measurements and guidelines provided by the manufacturer.
- Attach the vent cap: Install an appropriate vent cap on the exterior wall to prevent pests, debris, and water from entering the vent duct. Ensure that the vent cap is securely attached and properly sealed to maintain the integrity of the ducting system.
- Seal any gaps: Inspect the entire vent duct system for any gaps or openings. Use metal foil tape or an approved duct sealant to seal any leaks. This will prevent air leakage and ensure optimal performance of the range hood insert.
Installing the vent duct correctly is essential for the proper functioning of your range hood insert. By carefully planning the ducting route, measuring and cutting the ducting materials, attaching the sections securely, securing the vent duct, creating an exterior opening, attaching a vent cap, and sealing any gaps, you can ensure that the vent duct system operates efficiently and effectively removes smoke, grease, and odors from your kitchen.
When installing a range hood insert, make sure to carefully measure the space and choose a model that fits properly. It’s also important to follow the manufacturer’s instructions for installation to ensure proper function and safety.
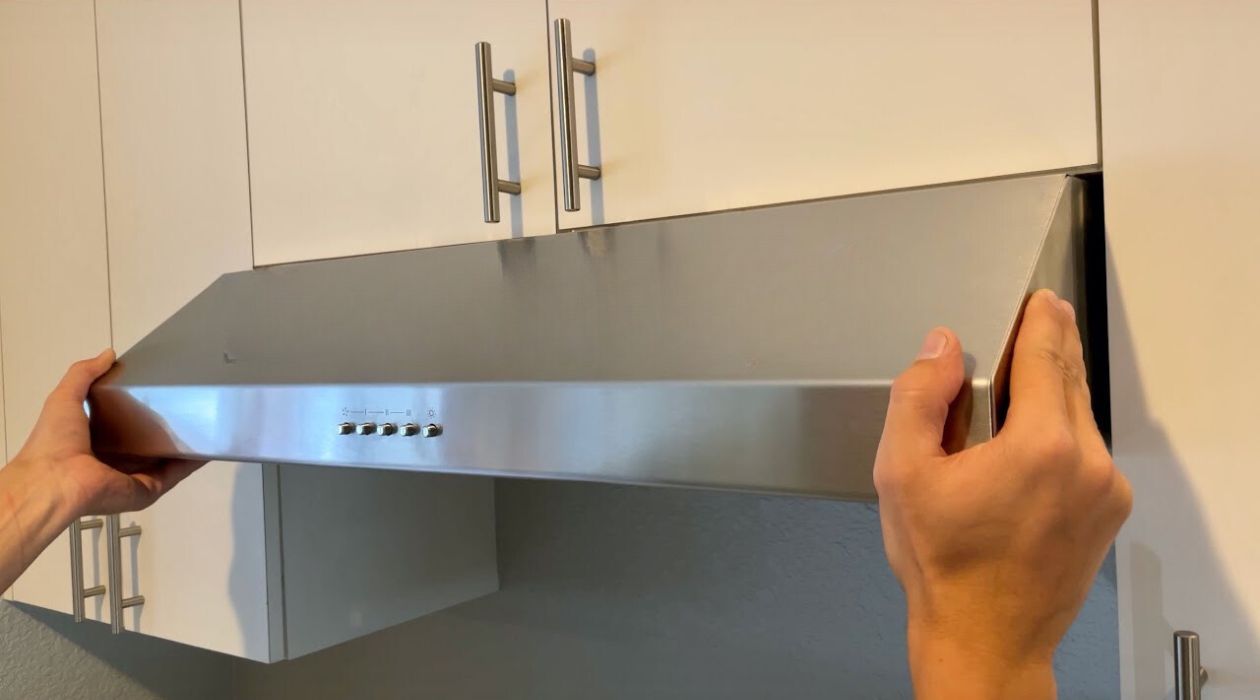
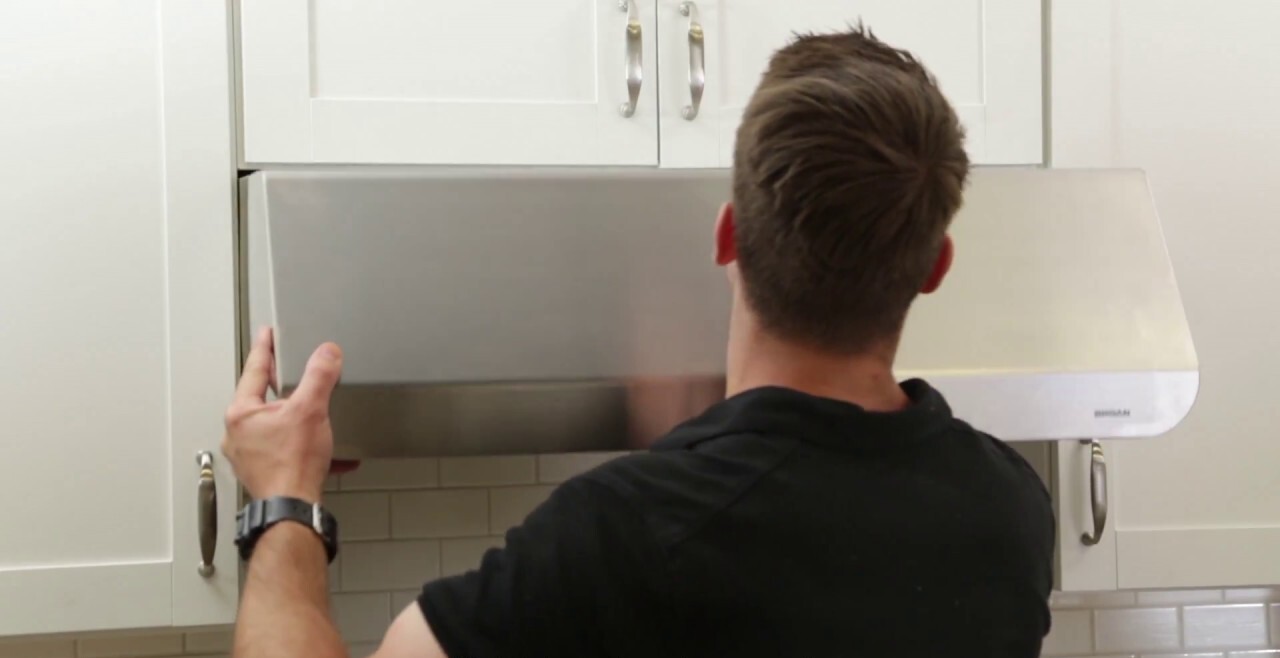
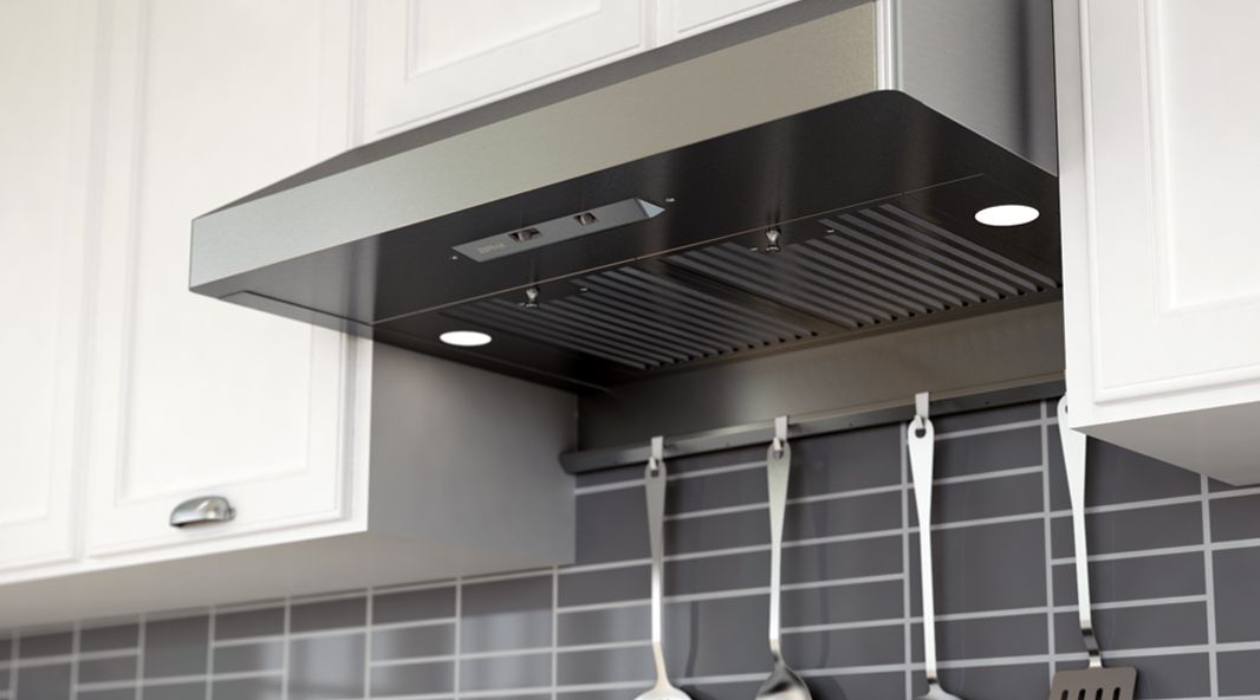
Step 6: Install the range hood insert
Now that you have prepared the range hood insert and installed the vent duct, it’s time to proceed with the installation of the insert itself. Follow these steps to securely install the range hood insert in your kitchen:
- Position the range hood insert: Carefully position the range hood insert in the designated spot, aligning it with the vent duct. Make sure it is centered and level, using a level tool to ensure accuracy.
- Mark the mounting holes: Use a pencil or marker to mark the location of the mounting holes on the wall or cabinet above the range hood insert. Refer to the manufacturer’s instructions for the specific mounting hole placement.
- Pre-drill the holes: Using a power drill, pre-drill the marked holes to make it easier to insert the screws during the mounting process. Use an appropriate drill bit size to match the size of the mounting screws provided by the manufacturer.
- Attach the mounting bracket: Install the mounting bracket on the wall or cabinet according to the pre-drilled holes. Secure it in place using the provided screws. Ensure that the bracket is level and properly aligned with the range hood insert.
- Hang the range hood insert: Carefully lift the range hood insert and hook it onto the mounted bracket. Ensure that it is securely in place and properly aligned. If necessary, have someone assist you in holding the insert while you secure it.
- Tighten the screws: Using a screwdriver, tighten the screws on the mounting bracket to secure the range hood insert in place. Ensure that the screws are tightened evenly to maintain a stable and balanced installation.
- Check for stability: Give the range hood insert a gentle shake to ensure that it is stable and secure. Make any necessary adjustments or retighten the screws if needed.
Once you have completed the installation of the range hood insert, step back and visually inspect the unit to ensure that it is installed correctly and aligned properly. Take pride in your work as you see the transformation it brings to your kitchen space.
Now that the range hood insert is securely installed, you are ready to move on to the next step—connecting the electrical wiring.
Step 7: Secure the range hood insert
After successfully installing the range hood insert, it’s important to ensure that it is securely fastened in place. This step will help prevent any accidental movement or dislodging of the insert. Here’s how you can secure the range hood insert:
- Check for stability: Verify that the range hood insert is level and properly aligned. Make any necessary adjustments to ensure it sits securely against the wall or cabinet.
- Locate the mounting screw holes: Depending on the specific design of your range hood insert, there may be additional mounting screw holes on the bottom or sides of the unit. These holes are typically meant to secure the insert and provide extra stability.
- Align the mounting bracket: If your range hood insert has additional mounting screw holes, align the corresponding mounting bracket on the wall or cabinet. Make sure the bracket is level and properly aligned with the insert.
- Pre-drill the holes: Use a power drill to pre-drill the marked holes for the additional mounting screws. Ensure that the drill bit matches the size of the screws provided by the manufacturer to avoid damaging the insert or the mounting bracket.
- Secure the range hood insert: Insert the provided screws into the pre-drilled holes and use a screwdriver to tighten them securely. Make sure not to overtighten the screws, as this may damage the insert or the mounting bracket.
- Double-check stability: Give the range hood insert a gentle shake to test its stability. Ensure that it is securely fastened and does not move or wobble. If you notice any instability, reinforce the mounting screws or make any necessary adjustments to ensure a stable installation.
By securing the range hood insert properly, you can ensure its stability and longevity. Taking the time to align the mounting bracket, pre-drill the holes, and tighten the screws securely will provide you with the peace of mind that your range hood insert is securely fastened and ready to perform its function effectively.
Now that the range hood insert is securely mounted, it’s time to move on to the next step—connecting the electrical wiring.
Step 8: Connect the electrical wiring
Connecting the electrical wiring is a crucial step in the installation process of your range hood insert. It ensures the safe and proper functioning of the unit. Here’s a step-by-step guide to help you connect the electrical wiring:
- Turn off the power: Before working with any electrical connections, make sure to turn off the power supply to the area where you will be installing the range hood insert. Locate the corresponding circuit breaker in your electrical panel and flip the switch to the “off” position. Double-check the power is indeed off using a non-contact voltage tester.
- Find the electrical junction box: Locate the electrical junction box near the range hood insert installation area. It is usually located within the wall or above the range. Remove the cover of the junction box to access the wiring inside.
- Identify the electrical wiring: Inside the junction box, you will find electrical wires, typically including a black (hot), white (neutral), and green or uncoated copper (grounding) wire. Identify these wires and understand their respective functions.
- Prepare the range hood insert wiring: Strip the insulation from the ends of the range hood insert’s electrical wires, exposing about half an inch of bare wire. Make sure the wires are clean and free of any damage or fraying.
- Match the wires: Match the color-coded wires from the range hood insert to the corresponding wires in the electrical junction box. Connect the black wire from the range hood to the black wire in the junction box, the white wire to the white wire, and the green or uncoated copper wire to the grounding wire.
- Secure the wire connections: Twist the matching wires together clockwise and securely fasten them with wire nuts. Make sure the connections are tight and that no exposed wires are visible. If necessary, wrap electrical tape around the wire nuts for added security.
- Tuck the wires into the junction box: Carefully tuck the connected wires back into the junction box. Avoid any pinching or squeezing of the wires. Ensure that they have enough space and are not strained or stretched.
- Replace the junction box cover: Once all the wiring connections have been made and tucked into the junction box, replace the cover and secure it tightly using the provided screws.
- Turn on the power: After completing the electrical connections and ensuring everything is securely in place, go back to the electrical panel and turn on the power to the area where the range hood insert is installed. Test the range hood insert to ensure proper operation.
Connecting the electrical wiring correctly is crucial to ensure a safe and functional installation of your range hood insert. Always prioritize safety and, if needed, consult a professional electrician for guidance to ensure compliance with local electrical codes.
With the electrical wiring successfully connected, you’re one step closer to enjoying the benefits of your newly installed range hood insert.
Read more: How To Install Island Range Hood
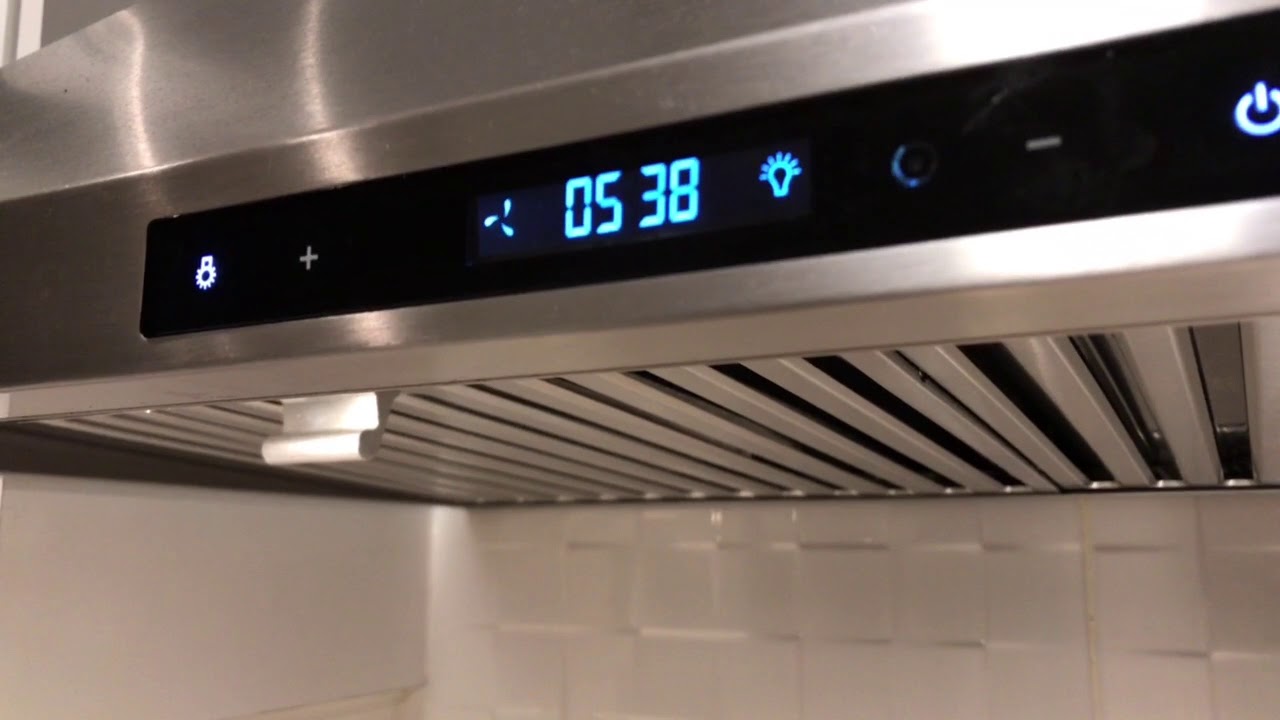
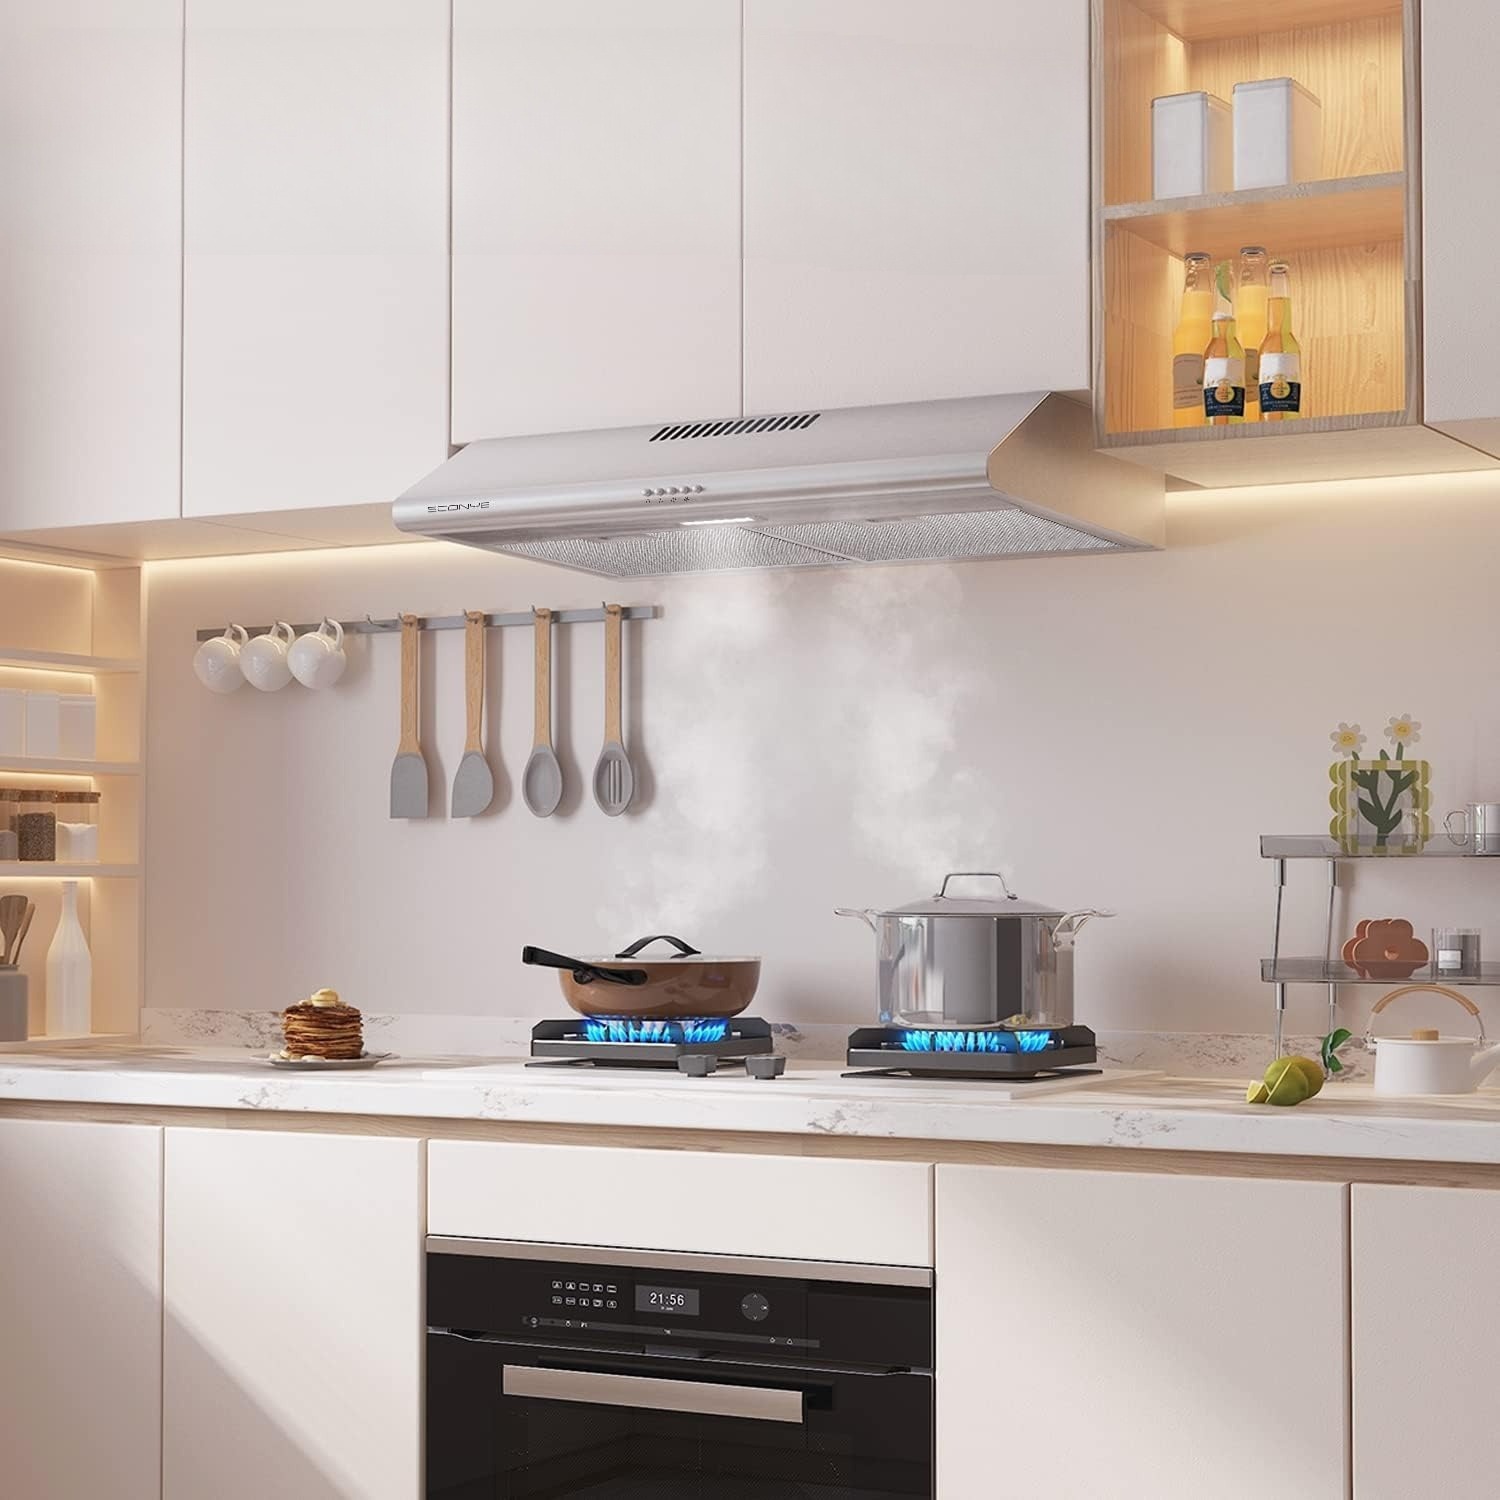
Step 9: Test the range hood insert
Once you have completed the installation and electrical connection of your range hood insert, it’s essential to test the unit to ensure it is functioning correctly. Follow these steps to test the range hood insert:
- Turn on the power: Ensure that the power to the range hood insert is turned on. If you had turned off the power during the installation process, go back to the electrical panel and switch it back on.
- Check the controls and settings: Familiarize yourself with the controls and settings of your range hood insert. Depending on the model, you may have buttons or switches to control the fan speed, lights, and other features. Ensure that these controls are accessible and functioning properly.
- Turn on the range hood insert: Start by turning on the fan at its lowest setting. Listen for any unusual noises or vibrations that may indicate a problem. Gradually increase the fan speed to test its functionality. Observe the airflow and feel for adequate suction above the cooktop.
- Test the lights: Turn on the lights, if your range hood insert has them. Ensure that they illuminate properly and provide adequate brightness to illuminate the cooking area.
- Check the venting: Verify that the vent duct is securely connected and that there are no leaks or obstructions. Feel for any air leakage around the vent cap on the exterior of your house. Ensure that the venting system is effectively removing smoke, grease, and odors from the kitchen.
- Inspect for any abnormalities: Look for any irregularities, such as excessive noise, excessive vibration, or smoke escaping from unintended areas. Take note of any issues that need to be addressed or might indicate a malfunction.
- Ensure proper ventilation: Check that the range hood insert is effectively removing cooking fumes, smoke, and odors from the kitchen. Observe how well the unit ventilates the cooking area and ensures a clean and fresh environment.
- Make necessary adjustments: If you encounter any issues or notice any deficiencies during the testing process, make the necessary adjustments or consult the manufacturer’s instructions for troubleshooting guidance. This may involve adjusting the fan speed, checking the wiring connections, or addressing any other concerns that arise.
By thoroughly testing your range hood insert, you can ensure that it is functioning correctly and meeting your expectations. It allows you to address any potential issues early on and make any necessary adjustments. Take the time to familiarize yourself with the controls, check the functionality of the fan and lights, inspect the venting system, and make necessary adjustments to ensure optimal performance.
Congratulations! You have now successfully installed and tested your range hood insert. Enjoy the benefits of a clean and odor-free kitchen with improved air quality.
Conclusion
Congratulations on successfully completing the installation of your range hood insert! By following the step-by-step guide outlined in this article, you have transformed your kitchen into a more functional and aesthetically pleasing space. The range hood insert will effectively remove smoke, grease, and odors, leaving you with a clean and fresh cooking environment.
Throughout the installation process, you learned how to prepare for installation, choose the right location, take accurate measurements, prepare the range hood insert, install the vent duct, secure the range hood insert, connect the electrical wiring, and test the unit for proper functionality.
Remember, safety is paramount during any installation project involving electrical work. If you are unsure about any step or lack the necessary expertise, it is always advisable to seek the assistance of a professional electrician or contractor.
Now that your range hood insert is successfully installed, take some time to appreciate the improved air quality and the stylish addition it brings to your kitchen space. Keep in mind that regular maintenance, including cleaning the filters and ducts, will ensure the continued optimal performance and longevity of your range hood insert.
Thank you for following this comprehensive guide. We hope it has been informative and helpful in your journey to install a range hood insert. Enjoy your newly transformed kitchen!
Frequently Asked Questions about How To Install Range Hood Insert
Was this page helpful?
At Storables.com, we guarantee accurate and reliable information. Our content, validated by Expert Board Contributors, is crafted following stringent Editorial Policies. We're committed to providing you with well-researched, expert-backed insights for all your informational needs.


0 thoughts on “How To Install Range Hood Insert”