Articles
How To Install A Vissani Range Hood
Modified: May 6, 2024
Learn how to install a Vissani range hood with our informative articles, providing step-by-step instructions for a seamless setup.
(Many of the links in this article redirect to a specific reviewed product. Your purchase of these products through affiliate links helps to generate commission for Storables.com, at no extra cost. Learn more)
Introduction
Welcome to the step-by-step guide on how to install a Vissani range hood. A range hood is an essential appliance in any kitchen as it helps to remove smoke, odors, and grease from the air while cooking. Installing a range hood not only improves the air quality in your kitchen, but it also adds a stylish and modern touch to the overall aesthetic.
Before you begin the installation process, it’s important to gather all the necessary tools and materials to ensure a smooth and efficient installation. This guide will walk you through the entire installation process, from preparing the area to securing the range hood in place.
So, let’s dive in and learn how to install a Vissani range hood!
Key Takeaways:
- Proper preparation is essential for installing a Vissani range hood. From gathering tools to measuring and clearing the installation area, attention to detail ensures a smooth and safe installation process.
- Thoroughly reading and understanding the installation instructions, assembling the range hood components, and testing its functionality are crucial steps in achieving a successful and functional Vissani range hood installation.
Read more: How To Install ZLINE Range Hood
Tools and Materials Needed
Before starting the installation process, make sure you have the following tools and materials ready:
- Drill
- Screwdriver
- Measuring tape
- Pencil
- Stud finder
- Ladder or step stool
- Level
- Wire stripper
- Electrical tape
- Wire nuts
- Range hood installation kit (included with the Vissani range hood)
It’s important to have all the necessary tools and materials ready before you begin the installation. This will prevent any delays and ensure a smooth and successful installation process.
Once you have gathered all the tools and materials, let’s move on to the next step.
Step 1: Prepare the Area
The first step in installing a Vissani range hood is to prepare the area where the range hood will be mounted. Follow these steps:
- Turn off power: Before starting any electrical work, make sure to turn off the power to the area where the range hood will be installed. This can be done by flipping the circuit breaker labeled for the kitchen or by unplugging the power source.
- Measure the height: Use a measuring tape to measure the height from the bottom of the range hood to the cooking surface. This will ensure that the range hood is installed at the correct height for maximum efficiency.
- Locate studs: Use a stud finder to locate the studs in the wall where the range hood will be mounted. Mark the stud locations with a pencil.
- Clear the area: Remove any cabinets or shelves above the stove to create a clear space for the range hood installation. Make sure the area is free from obstructions.
- Cover the cooking surface: Place a protective cover over the cooking surface to prevent any damage or scratches during the installation process.
Preparing the area before installation is crucial to ensure a smooth and safe installation process. Once you have completed these steps, you are ready to move on to the next step.
Step 2: Read the Installation Instructions
Before proceeding with the installation of your Vissani range hood, it is important to carefully read and understand the installation instructions provided by the manufacturer. These instructions will provide specific details and guidelines for your particular model of range hood.
Here are a few key points to keep in mind as you review the installation instructions:
- Familiarize yourself with the components: Take note of all the components included with the range hood and make sure you have everything you need for installation.
- Identify any additional tools or materials required: Some range hood installations may require additional tools or materials that are not included in the package. Take note of any such requirements and ensure you have them on hand.
- Understand the installation process: Carefully read through the step-by-step instructions provided by the manufacturer. Pay attention to any specific measurements, wiring diagrams, or guidelines for mounting the range hood.
- Take note of any safety precautions: The installation instructions may include important safety precautions that you need to be aware of during the installation process. This can include things like wearing protective gloves or using proper safety equipment.
By thoroughly reading and understanding the installation instructions, you will have a clear understanding of the installation process and be better prepared to proceed with the next steps.
Once you have familiarized yourself with the installation instructions, you can move on to the next step of assembling the range hood.
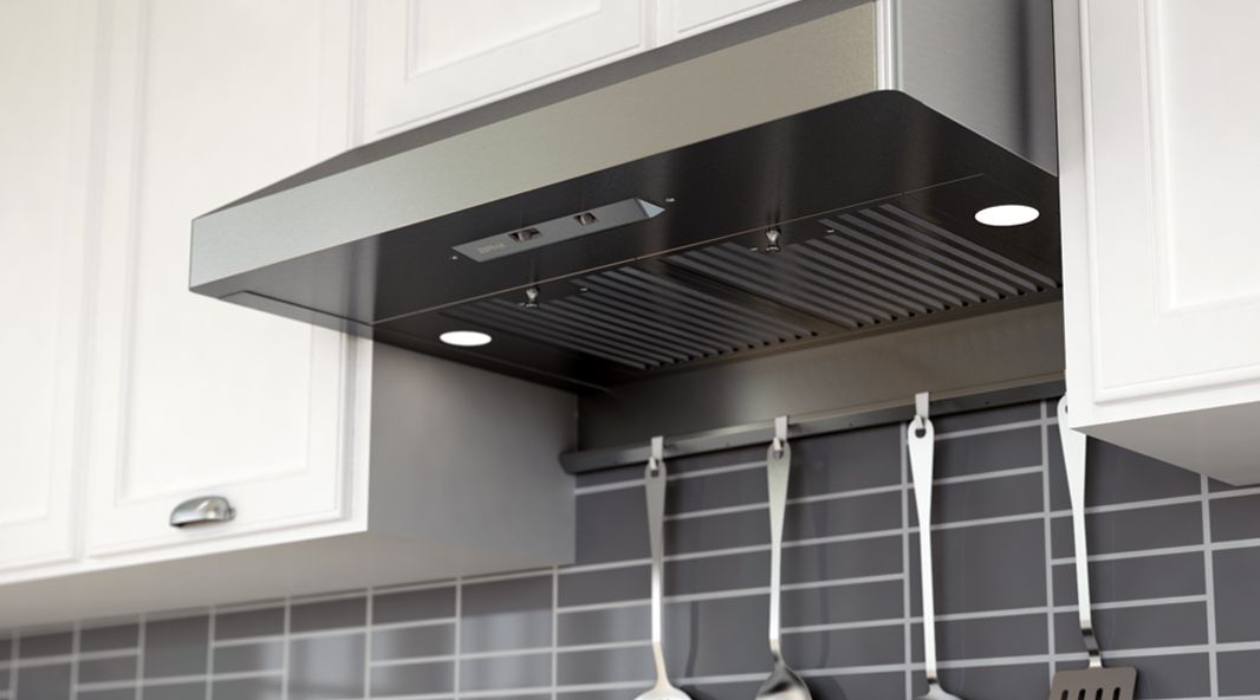
Step 3: Assemble the Range Hood
Now that you have familiarized yourself with the installation instructions, it’s time to assemble your Vissani range hood. Follow these steps to ensure a proper assembly:
- Unbox the range hood: Carefully remove the range hood from its packaging, making sure to remove any protective films or covers.
- Inspect the components: Check all the components to ensure that everything is included and in good condition. This includes the main body of the range hood, the fan, grease filters, and any other accessories or parts.
- Attach the fan: Depending on the model, you may need to attach the fan to the range hood. Follow the manufacturer’s instructions for proper installation.
- Install the grease filters: Some range hoods come with removable grease filters that help to trap grease and prevent it from entering the exhaust system. Install the grease filters according to the manufacturer’s instructions.
- Attach any additional accessories: If your range hood comes with additional accessories such as lights or a duct cover, now is the time to attach them. Follow the provided instructions for proper installation.
Assembling the range hood correctly is vital for its proper functioning and longevity. Take your time to ensure that each component is properly installed according to the manufacturer’s instructions.
Once you have successfully assembled the range hood, you are ready to move on to the next step of mounting it in place.
Read more: How To Install Range Hood Insert
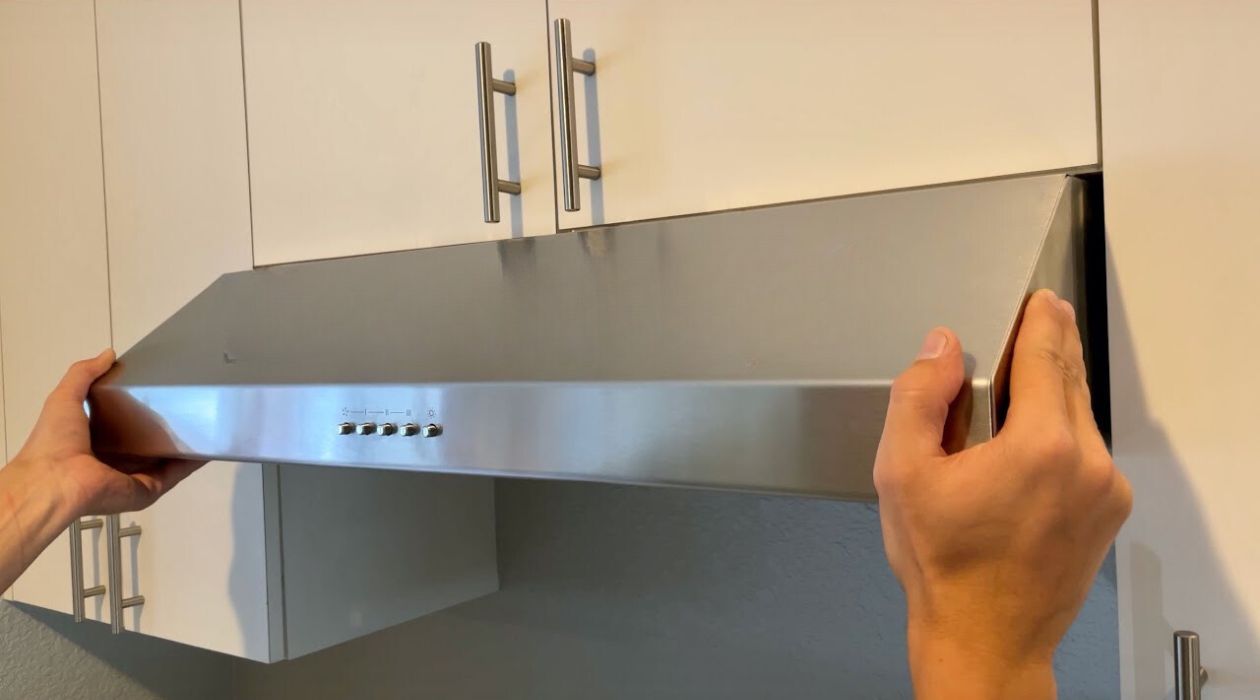
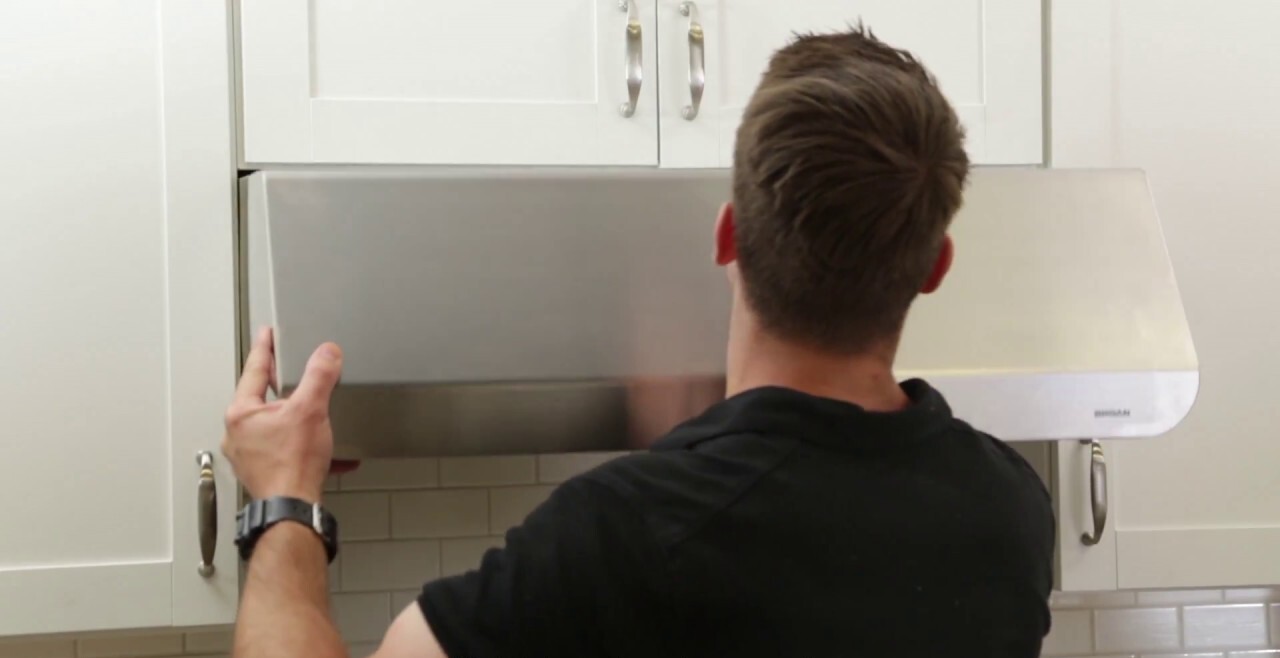
Step 4: Mount the Range Hood
With the range hood assembled, it’s time to mount it in place. Follow these steps to securely mount your Vissani range hood:
- Position the range hood: Hold the range hood against the wall at the desired height and align it with the marked stud locations. Use a level to ensure that the range hood is perfectly horizontal.
- Mark the mounting holes: With the range hood in position, use a pencil to mark the locations of the mounting holes on the wall. These holes will be used to securely attach the range hood.
- Drill pilot holes: Use a drill with the appropriate drill bit size to create pilot holes at the marked locations. These pilot holes will make it easier to insert screws into the wall.
- Secure the range hood: With the pilot holes drilled, hold the range hood back in position and insert screws through the mounting holes. Tighten the screws using a screwdriver until the range hood is firmly secured to the wall.
It’s important to ensure that the range hood is securely mounted to prevent any accidents or instability. Double-check that the range hood is level and properly aligned with the cooking surface before moving on to the next step.
Once the range hood is securely mounted, you can proceed to the next step of connecting the wiring.
When installing a Vissani range hood, make sure to carefully follow the manufacturer’s instructions and use the appropriate tools for the job. It’s also important to ensure proper ventilation and secure mounting for safety and efficiency.
Step 5: Connect the Wiring
Now that the Vissani range hood is securely mounted, it’s time to connect the wiring. Follow these steps to ensure a safe and proper electrical connection:
- Turn off the power: Before working with any electrical components, make sure to turn off the power to the area where the range hood is installed. You can do this by flipping the circuit breaker labeled for the kitchen or by unplugging the power source.
- Locate the wiring access point: Most range hoods have a wiring access point located at the back or top of the unit. Remove the cover to access the wiring compartment.
- Prepare the wires: Strip the insulation off the end of the electrical wires. Use a wire stripper to remove about 1/2 inch of insulation from the ends of both the range hood wires and the house wires.
- Connect the wires: Twist the corresponding wires together, matching the black wires with black wires, white wires with white wires, and any additional colored wires as specified in the installation instructions. Secure the connections with wire nuts and wrap them with electrical tape for added protection.
- Secure the wiring: Once the connections are made, carefully tuck the wires back into the wiring access point and secure any covers or panels that were removed.
It’s essential to follow electrical safety precautions and make sure all the connections are secure before restoring power to the range hood. Double-check all the wiring to ensure there are no loose or exposed wires.
With the wiring properly connected, you can move on to the next step of testing the range hood.
Step 6: Test the Range Hood
After completing the wiring connection, it’s important to test your Vissani range hood to ensure that it is functioning properly. Follow these steps to perform a test:
- Restore power: Turn the power back on at the circuit breaker or plug in the power source for the range hood.
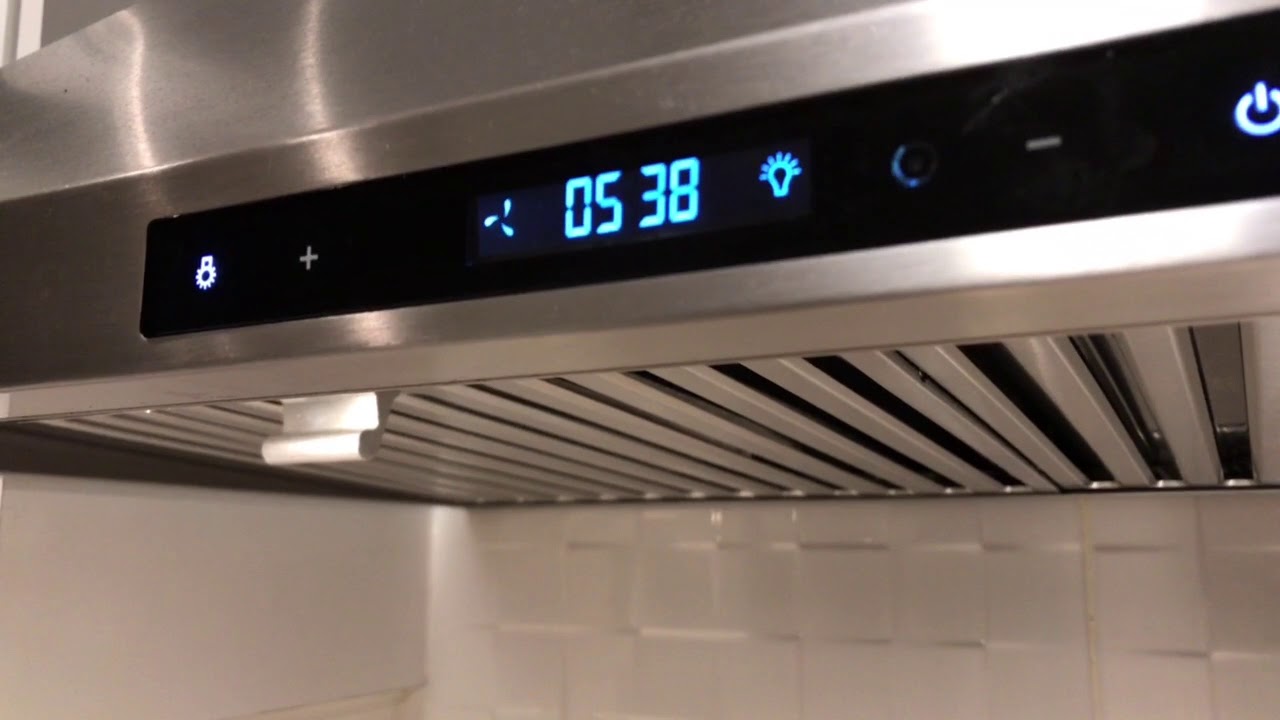
- Turn on the range hood: Use the controls on the range hood to turn it on. This may involve pressing a power button or adjusting the fan speed and lighting options.
- Observe the function: Pay close attention to the operation of the range hood. Check if the fan is running smoothly and if the lights are working as they should. Listen for any unusual sounds or vibrations.
- Check for proper ventilation: While the range hood is running, stand near the cooking surface and check for proper ventilation. Ensure that the range hood is effectively removing smoke, odors, and grease from the air.
If you notice any issues during the testing phase, such as a malfunctioning fan or faulty lighting, refer to the troubleshooting section of the installation instructions or seek assistance from a professional. It’s crucial to address any problems before proceeding with the installation.
If everything is functioning properly during the test, you are ready to move on to securing the range hood in place.
Step 7: Secure the Hood in Place
With the range hood tested and confirmed to be functioning properly, it’s time to secure it in its final position. Follow these steps to ensure a secure installation:
- Tighten the mounting screws: Using a screwdriver, tighten the mounting screws on the range hood to ensure it is firmly secured to the wall or cabinet.
- Adjust the position: If needed, make any final adjustments to the position of the range hood to ensure it is centered and aligned with the cooking surface.
- Check stability: Give the range hood a gentle shake to check its stability. It should not wobble or move excessively. If necessary, tighten the mounting screws further to achieve a stable installation.
Ensuring that the range hood is securely in place is important for its long-term functionality and safety. A properly secured range hood will stay in position and effectively ventilate the kitchen area.
Once you have secured the range hood, you can proceed to the final steps of checking and cleaning up the installation area.
Read more: How To Install Island Range Hood
Step 8: Final Checks and Clean-Up
After securing the range hood in its final position, it’s time to perform some final checks and clean up the installation area. Follow these steps to ensure everything is in order:
- Inspect the installation: Take a moment to carefully inspect the range hood installation. Look for any visible gaps or misalignments. If you notice any issues, make the necessary adjustments or seek professional assistance.
- Clean the range hood: Wipe down the surface of the range hood to remove any dust, fingerprints, or smudges. Use a mild detergent or cleaner appropriate for the material of the range hood. Avoid using abrasive cleaners that could damage the surface.
- Remove protective covers: If you had placed any protective covers over the cooking surface or surrounding area, remove them carefully to avoid any damage or mess.
- Restore power and functionality: Once the installation area is clean and tidy, restore power to the range hood by turning on the circuit breaker or plugging in the power source. Test the range hood one final time to ensure that it is still functioning properly.
By conducting these final checks and cleaning up the installation area, you can ensure that your Vissani range hood is installed correctly and ready for use.
Congratulations! You have successfully installed a Vissani range hood. Enjoy improved air quality and a stylish addition to your kitchen!
Conclusion
Installing a Vissani range hood is a straightforward process that can greatly enhance your kitchen’s functionality and aesthetics. By following the step-by-step guide outlined in this article, you can successfully install your range hood and enjoy the benefits it offers.
Throughout the installation, it is crucial to prioritize safety and carefully follow the manufacturer’s instructions. Make sure to gather all the necessary tools and materials, prepare the area, and read the installation instructions thoroughly before beginning the installation process.
Each step, from assembling the range hood to securing it in place, plays a vital role in ensuring a properly functioning and stable installation. Take your time to perform each step with precision and attention to detail.
Once the range hood is mounted and wired correctly, remember to test its functionality to verify optimal performance. If any issues arise during testing, consult the manufacturer’s troubleshooting guide or seek professional assistance.
Finally, perform a final check of the installation, clean up the area, and restore power to the range hood. By completing these steps, you can enjoy the benefits of a well-installed Vissani range hood, including improved air quality and a stylish addition to your kitchen.
Thank you for following this comprehensive guide on how to install a Vissani range hood. Enjoy your newly installed range hood and happy cooking!
Now that you've mastered installing a Vissani range hood, why not expand your DIY skills with more kitchen upgrades? For those keen on optimizing kitchen space and enhancing cooking efficiency, learning how to install under cabinet range hood is a perfect next step. Our detailed guide walks you through each phase, ensuring you handle every tool and screw with confidence. Don't miss out on this opportunity to boost your kitchen's functionality and aesthetic.
Frequently Asked Questions about How To Install A Vissani Range Hood
Was this page helpful?
At Storables.com, we guarantee accurate and reliable information. Our content, validated by Expert Board Contributors, is crafted following stringent Editorial Policies. We're committed to providing you with well-researched, expert-backed insights for all your informational needs.


0 thoughts on “How To Install A Vissani Range Hood”