Articles
How To Install Brick Siding
Modified: October 19, 2024
Learn how to install brick siding with our informative articles. Get step-by-step instructions and expert tips for a flawless installation.
(Many of the links in this article redirect to a specific reviewed product. Your purchase of these products through affiliate links helps to generate commission for Storables.com, at no extra cost. Learn more)
Introduction
Welcome to our comprehensive guide on how to install brick siding. Brick siding is a popular choice for homeowners who desire a timeless and durable exterior for their homes. Not only does it add a touch of elegance and sophistication, but it also provides excellent insulation and weather resistance.
Installing brick siding may seem like a daunting task, but with the right tools and a step-by-step approach, you can achieve professional-looking results. In this article, we will walk you through the entire installation process, from preparing the surface to adding the finishing touches.
Before we begin, it’s important to note that installing brick siding requires some basic knowledge of construction and masonry. If you’re not familiar with these techniques, it’s recommended to consult a professional or enlist the help of an experienced contractor.
Now let’s gather our tools and materials and get started!
Key Takeaways:
- Proper preparation, accurate measurements, and meticulous attention to detail are essential for a successful brick siding installation. From surface inspection to mortar application, each step contributes to a durable and visually appealing outcome.
- Safety, maintenance, and professional guidance are crucial for the long-term beauty and longevity of brick siding. Completing the finishing touches and regular upkeep ensure that your home’s exterior remains timeless and elegant.
Read more: How To Install Vinyl Siding Over Brick
Tools and Materials Needed
Before embarking on the installation of brick siding, you will need to gather a few essential tools and materials. Having these items prepared beforehand will ensure a smooth and efficient installation process. Here are the tools and materials you will need:
- Bricks: Purchase enough bricks to cover the desired area of your home. It’s recommended to buy around 5% more bricks than you think you’ll need to account for any breakage or mistakes.
- Mortar: Choose a high-quality mortar specifically designed for bricklaying. You will need enough to fill in the gaps between the bricks.
- Masonry trowel: This tool is essential for applying and spreading the mortar onto the brick surface.
- Brick chisel: A brick chisel is used to cut bricks to the desired size and shape.
- Hammer: You will need a hammer to strike the brick chisel and make clean cuts in the bricks.
- Level: A level is used to ensure that the bricks are installed in a straight and even manner.
- Masonry brush: A stiff-bristled brush is necessary for cleaning the bricks and removing excess mortar.
- Measuring tape: Accurate measurements are crucial for properly installing brick siding. A measuring tape will help you ensure precise cuts and alignment.
- Safety equipment: Don’t forget to prioritize your safety. Wear protective gloves and safety glasses to shield your hands and eyes from any potential hazards.
These are the essential tools and materials that you will need for installing brick siding. It’s important to have everything ready before starting the installation process to avoid unnecessary delays.
Step 1: Preparing the Surface
Before you can begin the installation of brick siding, it’s crucial to prepare the surface to ensure a secure and long-lasting installation. Here are the steps to follow:
- Inspect the Existing Surface: Begin by thoroughly inspecting the existing surface where you plan to install the brick siding. Look for any signs of damage, such as cracks or water leakage. It’s important to address these issues before proceeding with the installation.
- Clean the Surface: Use a pressure washer or a stiff-bristled brush and a mild detergent to clean the surface. Remove any dirt, dust, and debris that may hinder the adhesion of the bricks and mortar. Allow the surface to dry completely before moving on to the next step.
- Apply a Moisture Barrier: Depending on your location and climate, it may be necessary to apply a moisture barrier to prevent water infiltration. Consult local building codes for specific requirements and guidelines on moisture barriers.
- Repair and Seal: Inspect for any cracks or holes in the surface and repair them using an appropriate filler or mortar. Once the repairs are complete, apply a suitable surface sealer to protect against moisture and extend the longevity of the installation.
- Check for Level: Use a level to ensure that the surface is level and even. This step is crucial as it will determine the accuracy and alignment of the brick siding. Make any necessary adjustments or repairs to ensure a level surface.
By properly preparing the surface, you create a solid foundation for the brick siding installation. This step sets the stage for a successful and aesthetically pleasing outcome.
Step 2: Measuring and Planning
Accurate measurements and careful planning are essential for a successful brick siding installation. This step will help you determine the exact quantity of bricks needed and ensure proper alignment and spacing. Follow these steps to measure and plan effectively:
- Measure the Area: Use a measuring tape to determine the dimensions of the area where you will be installing the brick siding. Measure both the length and height, as well as any openings such as windows or doors. Note down these measurements for reference.
- Calculate the Brick Quantity: Based on the measurements, calculate the number of bricks needed. Keep in mind that you may need some extra bricks for corner pieces or making cuts. It’s always wise to purchase a few extra bricks to account for any errors or breakages during the installation.
- Create a Layout Plan: Use graph paper or a computer program to create a layout plan for the brick siding. This will help you visualize the arrangement of the bricks, including the bond pattern and any decorative elements. Take into account any architectural features and ensure that the layout complements the overall design of your home.
- Mark Reference Lines: Once you have your layout plan, mark reference lines on the prepared surface using a chalk line or a straight edge. These lines will guide you during the installation process and ensure that the bricks are aligned properly.
- Consider Expansion Joints: Depending on the size of the brick siding installation, it may be necessary to include expansion joints. These gaps allow for thermal expansion and contraction of the bricks and help prevent cracking. Consult local building codes or seek professional advice to determine the appropriate placement and size of expansion joints.
By taking the time to measure accurately and plan your installation, you can avoid costly mistakes and achieve a well-organized and visually pleasing brick siding. Proper planning sets the stage for a smooth and efficient installation process.
Step 3: Cutting the Bricks
When installing brick siding, you will often encounter situations where bricks need to be cut to fit into specific areas or around obstacles. Cutting the bricks properly is crucial to ensure a tight and seamless installation. Follow these steps to cut the bricks:
- Measure and Mark: Measure the space where the brick needs to be cut and mark the cutting line using a pencil or a chalk. Double-check your measurements to ensure accuracy.
- Prepare the Brick Chisel and Hammer: Place the brick on a stable surface, such as a solid workbench, and hold it firmly. Position the brick chisel along the marked cutting line, making sure that the chisel’s edge is facing towards the waste side.
- Make a Scoreline: Use a hammer to strike the brick chisel firmly, creating a shallow scoreline along the cutting line. Repeat the process, gradually increasing the force until a deep scoreline is formed on the brick surface.
- Break the Brick: Hold the brick with one hand and support it from underneath. Firmly strike the waste side of the brick (opposite the scoreline) with a hammer. The force should be enough to break the brick along the scoreline smoothly.
- Smooth and Clean the Cut: Use a brick chisel or sandpaper to smooth out any rough edges or imperfections on the cut surface of the brick. Clean away any loose debris or dust before proceeding.
It’s important to practice caution and wear protective gloves and safety glasses during the cutting process. Improper handling of tools or lack of protective gear can result in injuries. If you’re not confident in your ability to cut bricks or have a large number of cuts to make, consider hiring a professional mason to ensure precise cuts and a professional finish.
By following these steps, you can confidently cut bricks to the appropriate size and shape to fit into specific areas and achieve a seamless brick siding installation.
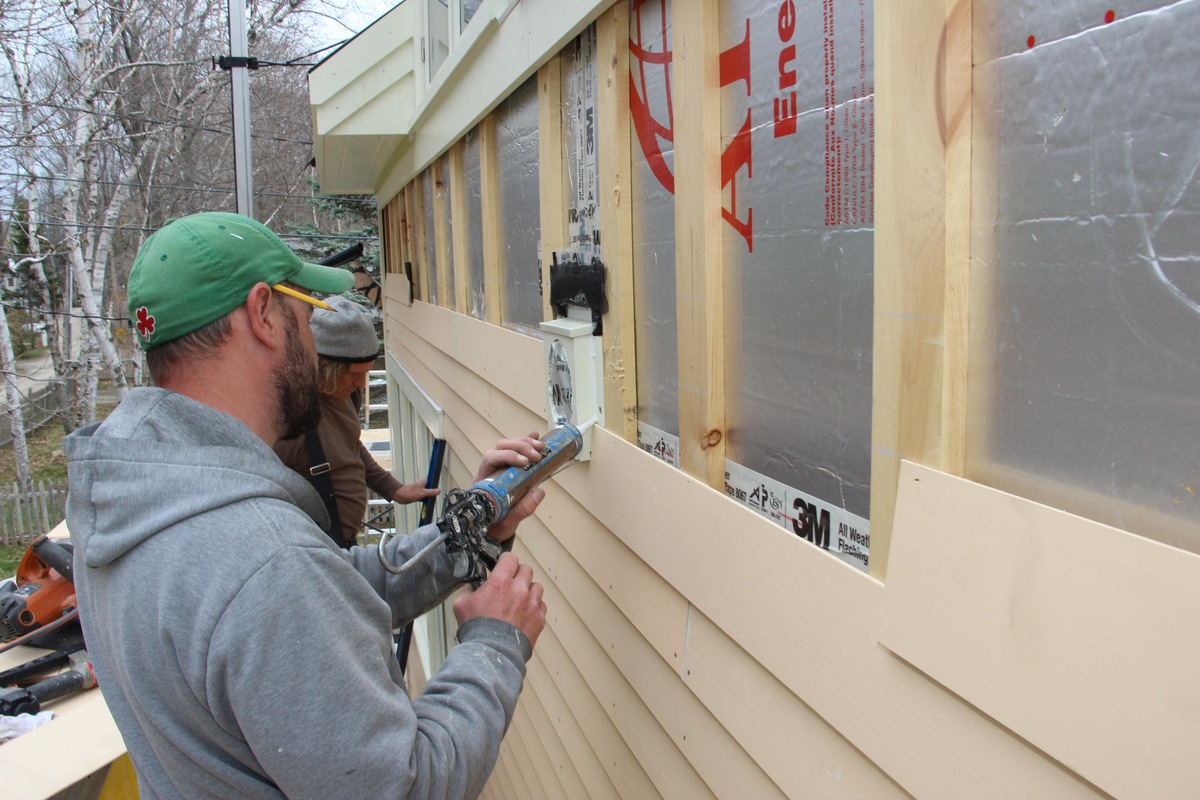
When installing brick siding, make sure to properly prepare the surface by cleaning and leveling it. Use a waterproof membrane and metal flashing to protect against moisture. Always follow manufacturer’s guidelines for installation.
Read more: Brick Siding Ideas
Step 4: Applying Mortar
Applying mortar is a critical step in the installation of brick siding, as it provides the necessary adhesive and support for the bricks. Follow these steps to properly apply the mortar:
- Mix the Mortar: Follow the manufacturer’s instructions to mix the mortar in a clean bucket or mixing tray. Use a trowel or a mixing paddle attachment on a drill to achieve a smooth and consistent texture. Let the mortar sit for a few minutes to allow any additives to activate.
- Load the Mortar: Load the mortar onto the masonry trowel, ensuring an even distribution across the blade. Hold the trowel at a slight angle and use the edge of the trowel to spread a layer of mortar onto the prepared surface. Work in small sections to prevent the mortar from drying out before you can lay the bricks.
- Create a Mortar Bed: With the trowel, create a mortar bed by pressing the blade onto the applied mortar and smoothing it out. The thickness of the mortar bed should be consistent and slightly thicker than the brick’s height.
- Apply Mortar to Bricks: Apply a layer of mortar onto the end or side of a brick, known as buttering, using the trowel. Make sure the mortar covers the entire surface that will come into contact with the mortar bed and neighboring bricks.
- Place the Brick: Carefully position the buttered brick onto the mortar bed, pressing it firmly but not forcefully. Use a slight twisting motion to ensure proper adhesion and alignment with adjacent bricks. The mortar should squeeze out slightly around the edges of the brick.
- Check for Level and Alignment: Use a level to check that the brick is in line with the reference lines and is level both horizontally and vertically. Adjust the position as needed and tap gently with a rubber mallet to secure it further.
- Remove Excess Mortar: Use a trowel or jointing tool to remove any excess mortar that may have squeezed out between the bricks. Run the tool along the joints, smoothing and shaping the mortar to achieve a neat and uniform appearance.
Work in small sections at a time, applying mortar and laying bricks in a systematic manner. This allows you to maintain control over the mortar consistency and ensure a consistent bond throughout the installation process.
Remember to work efficiently, as mortar can dry quickly. If the mortar starts to harden, discard it and mix a fresh batch. Properly applying mortar is key to achieving a structurally sound and visually appealing brick siding installation.
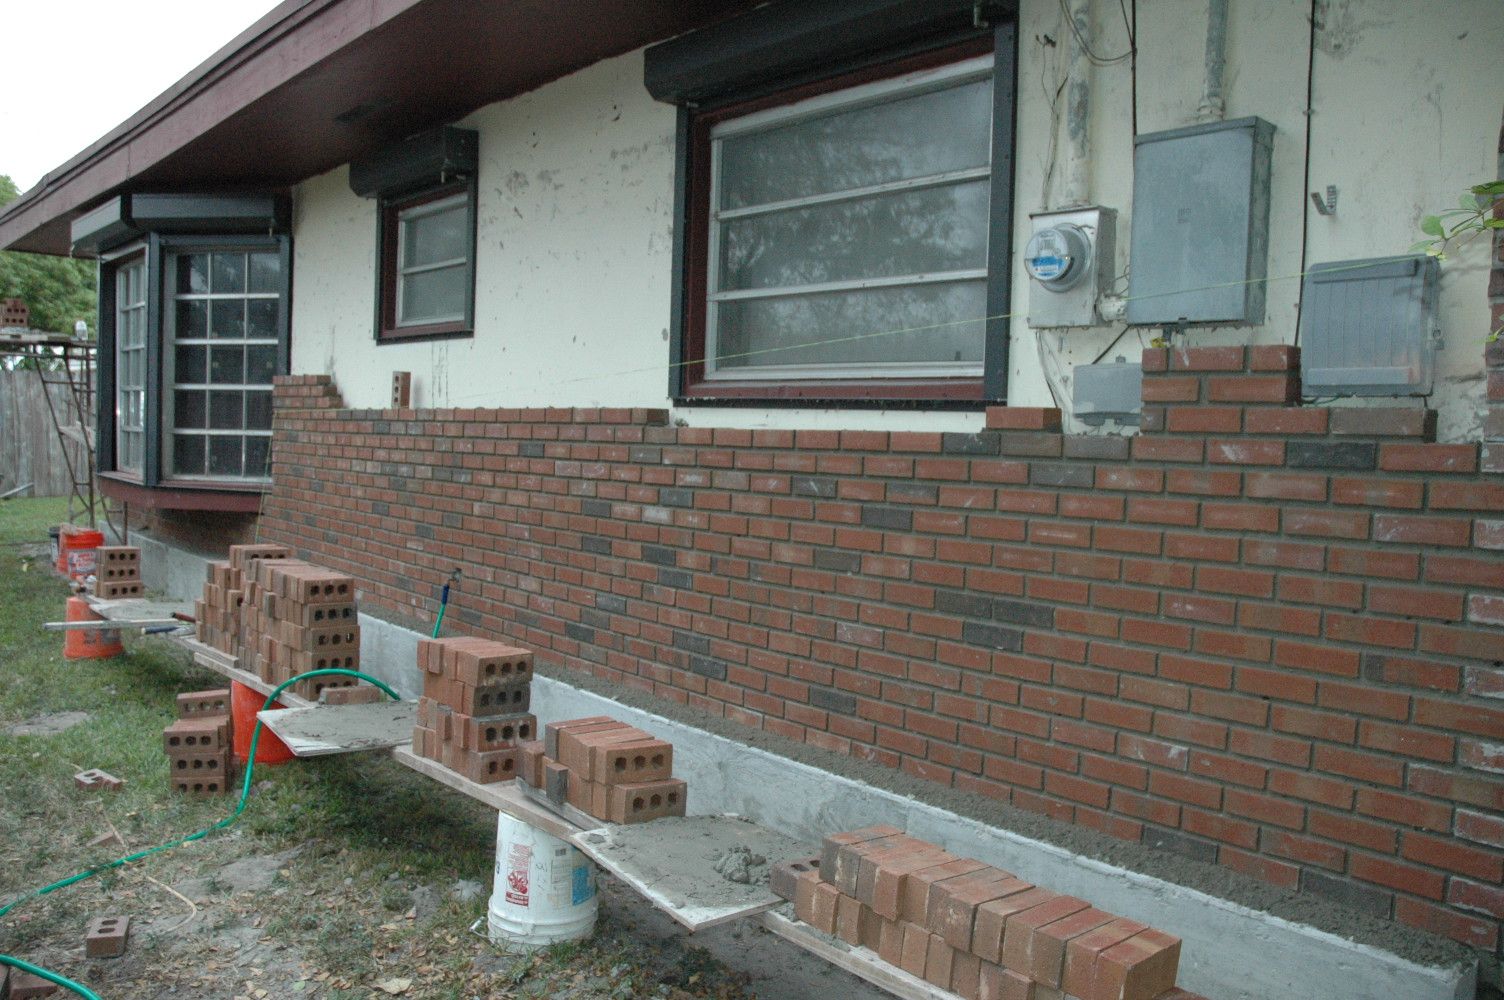
Step 5: Installing the First Row
The first row of bricks sets the foundation for the entire brick siding installation. It’s crucial to ensure that this row is installed accurately and securely. Follow these steps to install the first row of bricks:
- Apply Mortar Bed: Start by applying a mortar bed along the reference line for the first row of bricks. Use a trowel to create a layer of mortar that is slightly thicker than the height of the bricks.
- Place the Bricks: Lay the bricks one by one onto the mortar bed, starting from one end of the wall. Press the bricks firmly into the mortar bed, making sure they are aligned with the reference lines and each other. Use a level to check for both horizontal and vertical alignment.
- Check for Level: As you lay each brick, use a level to ensure that it is level both horizontally and vertically. Adjust the position of the bricks as needed and tap them gently with a rubber mallet to secure them in place.
- Ensure Proper Spacing: Maintain consistent spacing between the bricks by using spacers or wooden dowels. This will allow for the expansion and contraction of the bricks and provide uniformity in the appearance of the brick siding.
- Remove Excess Mortar: Use a trowel or a jointing tool to remove any excess mortar that may have squeezed out between the bricks. Carefully run the tool along the joints, smoothing and shaping the mortar for a clean and professional finish.
- Clean the Bricks: Use a stiff-bristled brush to clean off any mortar residue or debris from the surface of the bricks. This will help maintain the appearance of the brick siding and prevent the mortar from hardening on the bricks.
Take your time and pay attention to detail when installing the first row of bricks. This will ensure a solid foundation for the rest of the brick siding installation and contribute to a professional-looking end result.
Once the first row is securely in place, you can proceed to install the subsequent rows, following the same steps and maintaining proper alignment and spacing. The careful installation of each row will contribute to the overall strength and aesthetic appeal of your brick siding.
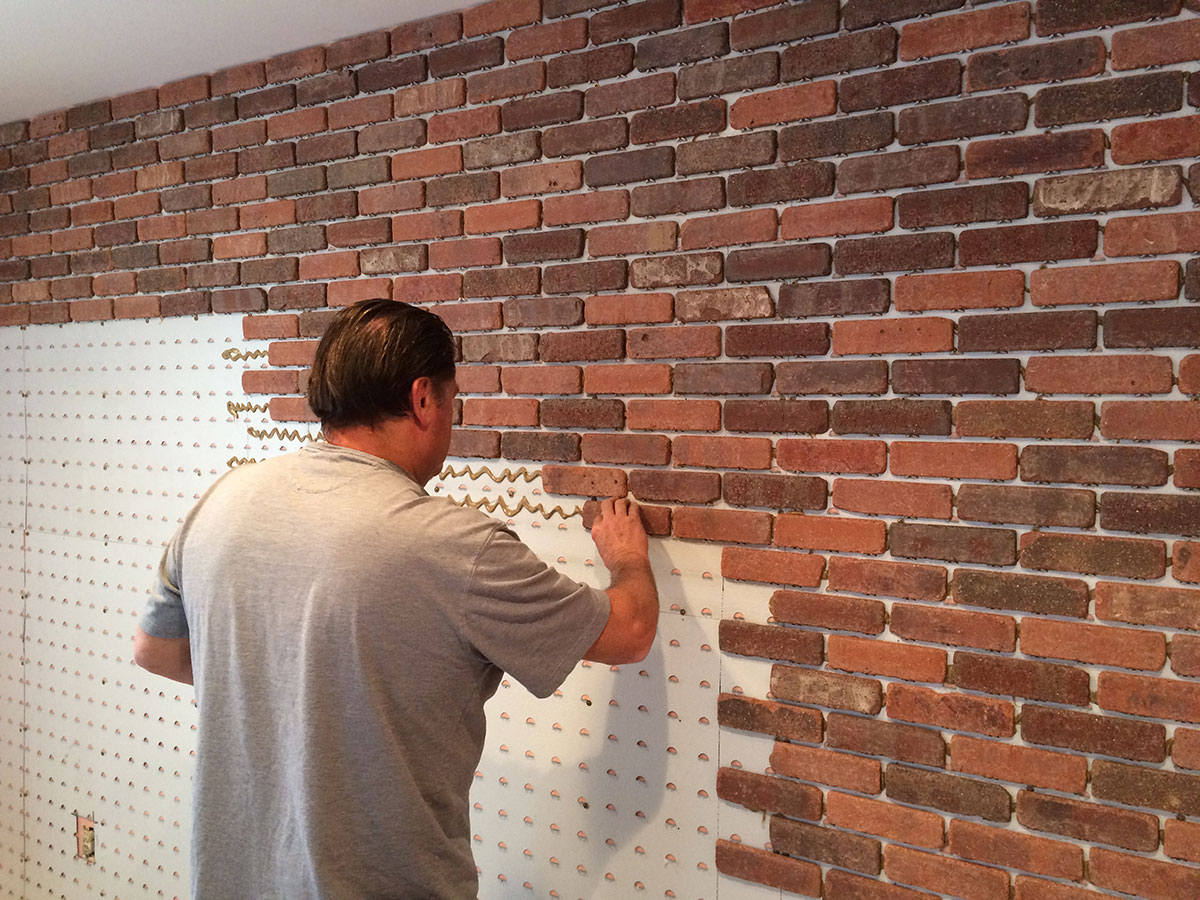
Step 6: Installing the Subsequent Rows
After successfully installing the first row of bricks, you can proceed to install the subsequent rows to build up the brick siding. Follow these steps to ensure a seamless and sturdy installation:
- Apply Mortar: Apply a layer of mortar on top of the first row of bricks, using a trowel. Make sure the mortar is evenly spread and has a uniform thickness.
- Place the Bricks: Carefully place the bricks on the mortar bed, starting from one end and working your way across the wall. Align the bricks with the reference lines and the previous row, ensuring a consistent bond and level installation.
- Check for Level and Alignment: Use a level to check that each brick is level both horizontally and vertically. Adjust the position of the bricks as necessary, tapping them gently with a rubber mallet to secure them in place.
- Maintain Proper Spacing: Place spacers or wooden dowels between the bricks to maintain consistent spacing. This will ensure proper expansion and contraction of the bricks and create a uniform appearance for the brick siding.
- Remove Excess Mortar: Use a trowel or a jointing tool to scrape off any excess mortar that may have squeezed out between the bricks. Clean the joints and smooth the mortar to achieve a neat and professional finish.
- Repeat the Process: Continue applying mortar and laying bricks row by row until you reach the desired height or complete the entire brick siding installation. Be mindful of the recommended brick bonding pattern and alternate the placement of bricks to enhance the strength and visual appeal of the installation.
- Clean the Bricks: As you progress, periodically clean the bricks using a stiff-bristled brush to remove any mortar residue or dirt. This will help maintain the appearance of the brick siding and prevent any permanent staining.
Take your time and work diligently, ensuring that each row of bricks is aligned, level, and properly spaced. Proper installation of the subsequent rows will contribute to the structural integrity and aesthetic beauty of the brick siding.
Continue these steps row by row until you reach the desired height or complete the entire brick siding installation. Remember to periodically step back and visually inspect the progress to ensure consistency and high-quality workmanship.
Step 7: Finishing Touches
Once you have installed all the rows of bricks for your siding, it’s time to focus on the finishing touches. These final steps will enhance the overall appearance and durability of your brick siding. Follow these guidelines to complete the installation:
- Inspect the Brickwork: Take a close look at the entire brickwork to identify any irregularities or areas that require attention. Check for any loose bricks, gaps, or uneven mortar joints.
- Address Loose Bricks: If you notice any bricks that are not securely in place, remove them and reapply mortar to properly secure them. Ensure they are aligned with neighboring bricks and level with the reference lines.
- Repoint the Mortar Joints: If there are any gaps or unevenness in the mortar joints, use a pointing trowel or jointing tool to fill them with fresh mortar. Make sure the mortar color matches the existing mortar for a seamless blend.
- Brush the Brick Surface: Use a stiff-bristled brush to clean the entire brick surface, removing any loose mortar, dust, or debris. This will give your brick siding a clean and polished appearance.
- Apply a Protective Sealant: Consider applying a protective sealant to the brick siding. This will help preserve the bricks, prevent moisture penetration, and enhance their longevity. Follow the manufacturer’s instructions for the application of the sealant.
- Perform Regular Maintenance: Regularly inspect and maintain your brick siding by checking for any signs of deterioration or damage. Clean the bricks periodically to prevent the build-up of dirt or moss. Address any issues promptly to ensure the longevity and beauty of your brick siding.
Completing these finishing touches will not only improve the aesthetic appeal of your brick siding but also ensure its long-term durability and strength. Remember to follow any specific maintenance recommendations provided by the manufacturer or a professional mason.
Congratulations! You have successfully installed brick siding, transforming the exterior of your home with its timeless elegance and durability. Enjoy the beauty and benefits of your brick siding for years to come.
Read more: How To Replace Siding With Brick
Conclusion
Installing brick siding can greatly enhance the appearance and durability of your home’s exterior. It provides a timeless and sophisticated look while offering excellent insulation and weather resistance. By following the step-by-step guide in this article, you can confidently undertake the installation process.
From preparing the surface to applying mortar, cutting bricks, and installing each row, every step is crucial in achieving a secure and visually appealing brick siding. Taking the time to measure accurately, plan the layout, and ensure proper alignment will result in a professional-looking installation.
During the installation, it’s important to work safely, wearing protective gear and using the appropriate tools. Additionally, regular maintenance and inspections of your brick siding will help to prolong its lifespan and preserve its aesthetic appeal.
With the proper knowledge and attention to detail, you can successfully install brick siding and enjoy its benefits for years to come. Whether you’re looking to update the exterior of your home or seeking to enhance its curb appeal, brick siding is an excellent choice that offers both beauty and longevity.
Remember, if you feel unsure about any step or lack the necessary skills and experience, it’s always recommended to consult a professional or enlist the help of an experienced contractor. They can provide valuable guidance and ensure the best results for your brick siding installation.
Now you’re ready to transform your home with the timeless elegance and durability of brick siding. Begin the installation process and enjoy the lasting beauty and value that it brings to your home.
Frequently Asked Questions about How To Install Brick Siding
Was this page helpful?
At Storables.com, we guarantee accurate and reliable information. Our content, validated by Expert Board Contributors, is crafted following stringent Editorial Policies. We're committed to providing you with well-researched, expert-backed insights for all your informational needs.


0 thoughts on “How To Install Brick Siding”