Home>Construction & Tools>Building Materials>How To Install Brick Pavers
Building Materials
How To Install Brick Pavers
Modified: January 23, 2024
Learn how to install brick pavers with our comprehensive guide. Find the best building materials and step-by-step instructions for a successful project.
(Many of the links in this article redirect to a specific reviewed product. Your purchase of these products through affiliate links helps to generate commission for Storables.com, at no extra cost. Learn more)
Introduction
Welcome to the comprehensive guide on installing brick pavers! Whether you’re revamping your patio, creating a stunning walkway, or enhancing your outdoor space, brick pavers offer a timeless and durable solution. With their versatility and aesthetic appeal, brick pavers can elevate the charm and functionality of any area.
Installing brick pavers is a rewarding DIY project that allows you to unleash your creativity while adding value to your property. By following the step-by-step instructions in this guide, you’ll gain the knowledge and confidence to tackle this endeavor with ease.
From meticulous planning to the final touches, each stage of the installation process plays a crucial role in ensuring a long-lasting and visually impressive result. By understanding the intricacies of excavation, base preparation, laying techniques, cutting methods, and finishing touches, you’ll be equipped to transform your vision into a stunning reality.
So, roll up your sleeves, gather your tools, and let’s embark on this enriching journey of installing brick pavers. Get ready to witness the transformation of your outdoor space and revel in the satisfaction of a job well done!
Key Takeaways:
- Brick pavers can enhance your outdoor space with timeless beauty and structural strength. Your creativity and effort will result in a stunning and durable surface that captivates for years to come.
- Installing brick pavers is a rewarding DIY project that brings personal satisfaction. Ongoing care and maintenance will ensure your outdoor oasis remains a functional and visually appealing space.
Read more: How To Install Timber And Brick Paver Steps
Step 1: Planning and Preparation
Before diving into the physical aspects of installing brick pavers, meticulous planning and thorough preparation are essential for a successful outcome. Here’s a breakdown of the key considerations:
- Design Concept: Begin by envisioning the layout and design of your project. Consider the shape, patterns, and overall aesthetic you wish to achieve. Sketching out a rough design or using design software can help visualize the end result.
- Material Calculation: Accurately calculate the quantity of brick pavers, sand, and base materials required for the project. It’s advisable to account for a small surplus to accommodate any cutting or replacement needs.
- Site Preparation: Assess the area where the brick pavers will be installed. Ensure proper drainage, and address any existing issues such as uneven terrain or poor soil conditions.
- Utility Check: Before excavation, identify and mark the locations of underground utilities such as electrical cables, water lines, and gas pipes to avoid accidental damage.
- Permitting and Regulations: Check local building codes and obtain any necessary permits for the installation. Compliance with regulations ensures the longevity and safety of the project.
By devoting ample time to planning and preparation, you’ll lay a solid foundation for the subsequent stages of the installation process. This thoughtful approach minimizes unexpected challenges and sets the stage for a seamless transition to the next step: Excavation and Base Preparation.
Step 2: Excavation and Base Preparation
With the planning phase complete, it’s time to roll up your sleeves and commence the physical groundwork for laying the brick pavers. This step involves meticulous excavation and the preparation of a stable base to ensure the longevity of the installation. Here’s a detailed overview:
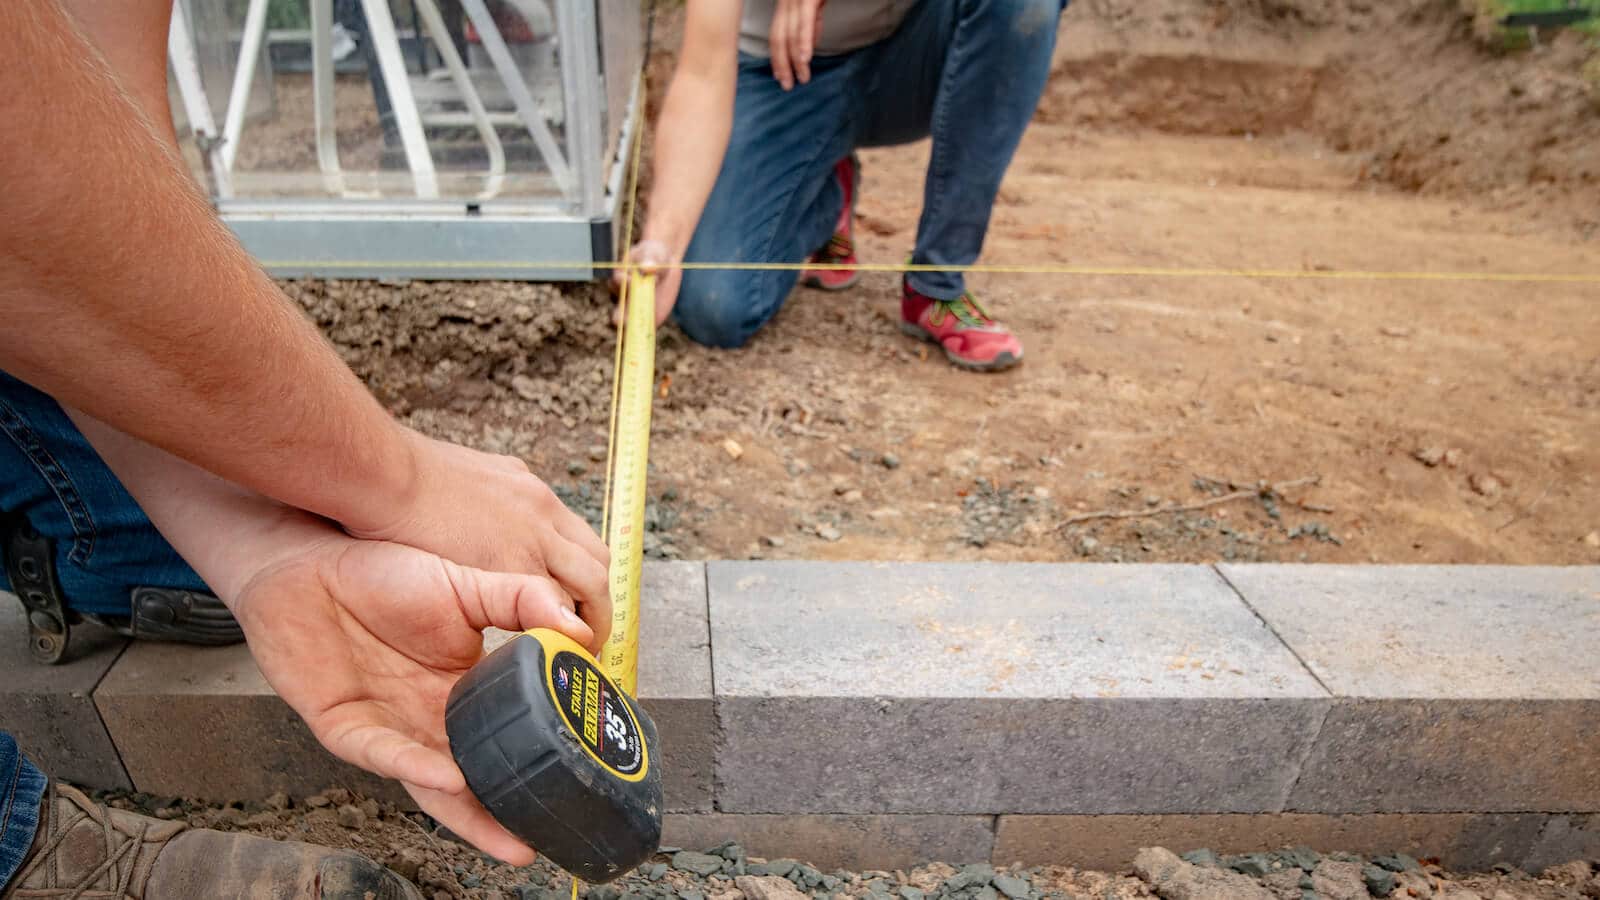
- Excavation: Using a shovel, excavate the marked area to a depth that accommodates the pavers, base material, and sand. The depth will vary based on the thickness of the pavers and the required base depth, typically around 6 to 8 inches.
- Base Compaction: Once the excavation is complete, use a plate compactor to firmly compact the soil at the base of the excavated area. This step is crucial for creating a stable foundation that minimizes shifting and settling over time.
- Base Material: Add a layer of base material, such as crushed gravel or limestone, to the excavated area. Spread and level the base material to achieve a uniform depth, using a screed board and a rake to ensure even distribution.
- Compaction: Employ the plate compactor once again to compact the base material thoroughly. This process eliminates air gaps and enhances the load-bearing capacity of the base, promoting the structural integrity of the paver installation.
- Edge Restraints: Install edge restraints, such as plastic, metal, or concrete paver restraints, along the perimeter of the excavated area. These restraints prevent the pavers from shifting and maintain the integrity of the layout.
By meticulously executing the excavation and base preparation, you’re establishing a robust foundation that sets the stage for the seamless installation of the brick pavers. This meticulous groundwork ensures the structural stability and longevity of your project, paving the way for the next phase: Laying the Pavers.
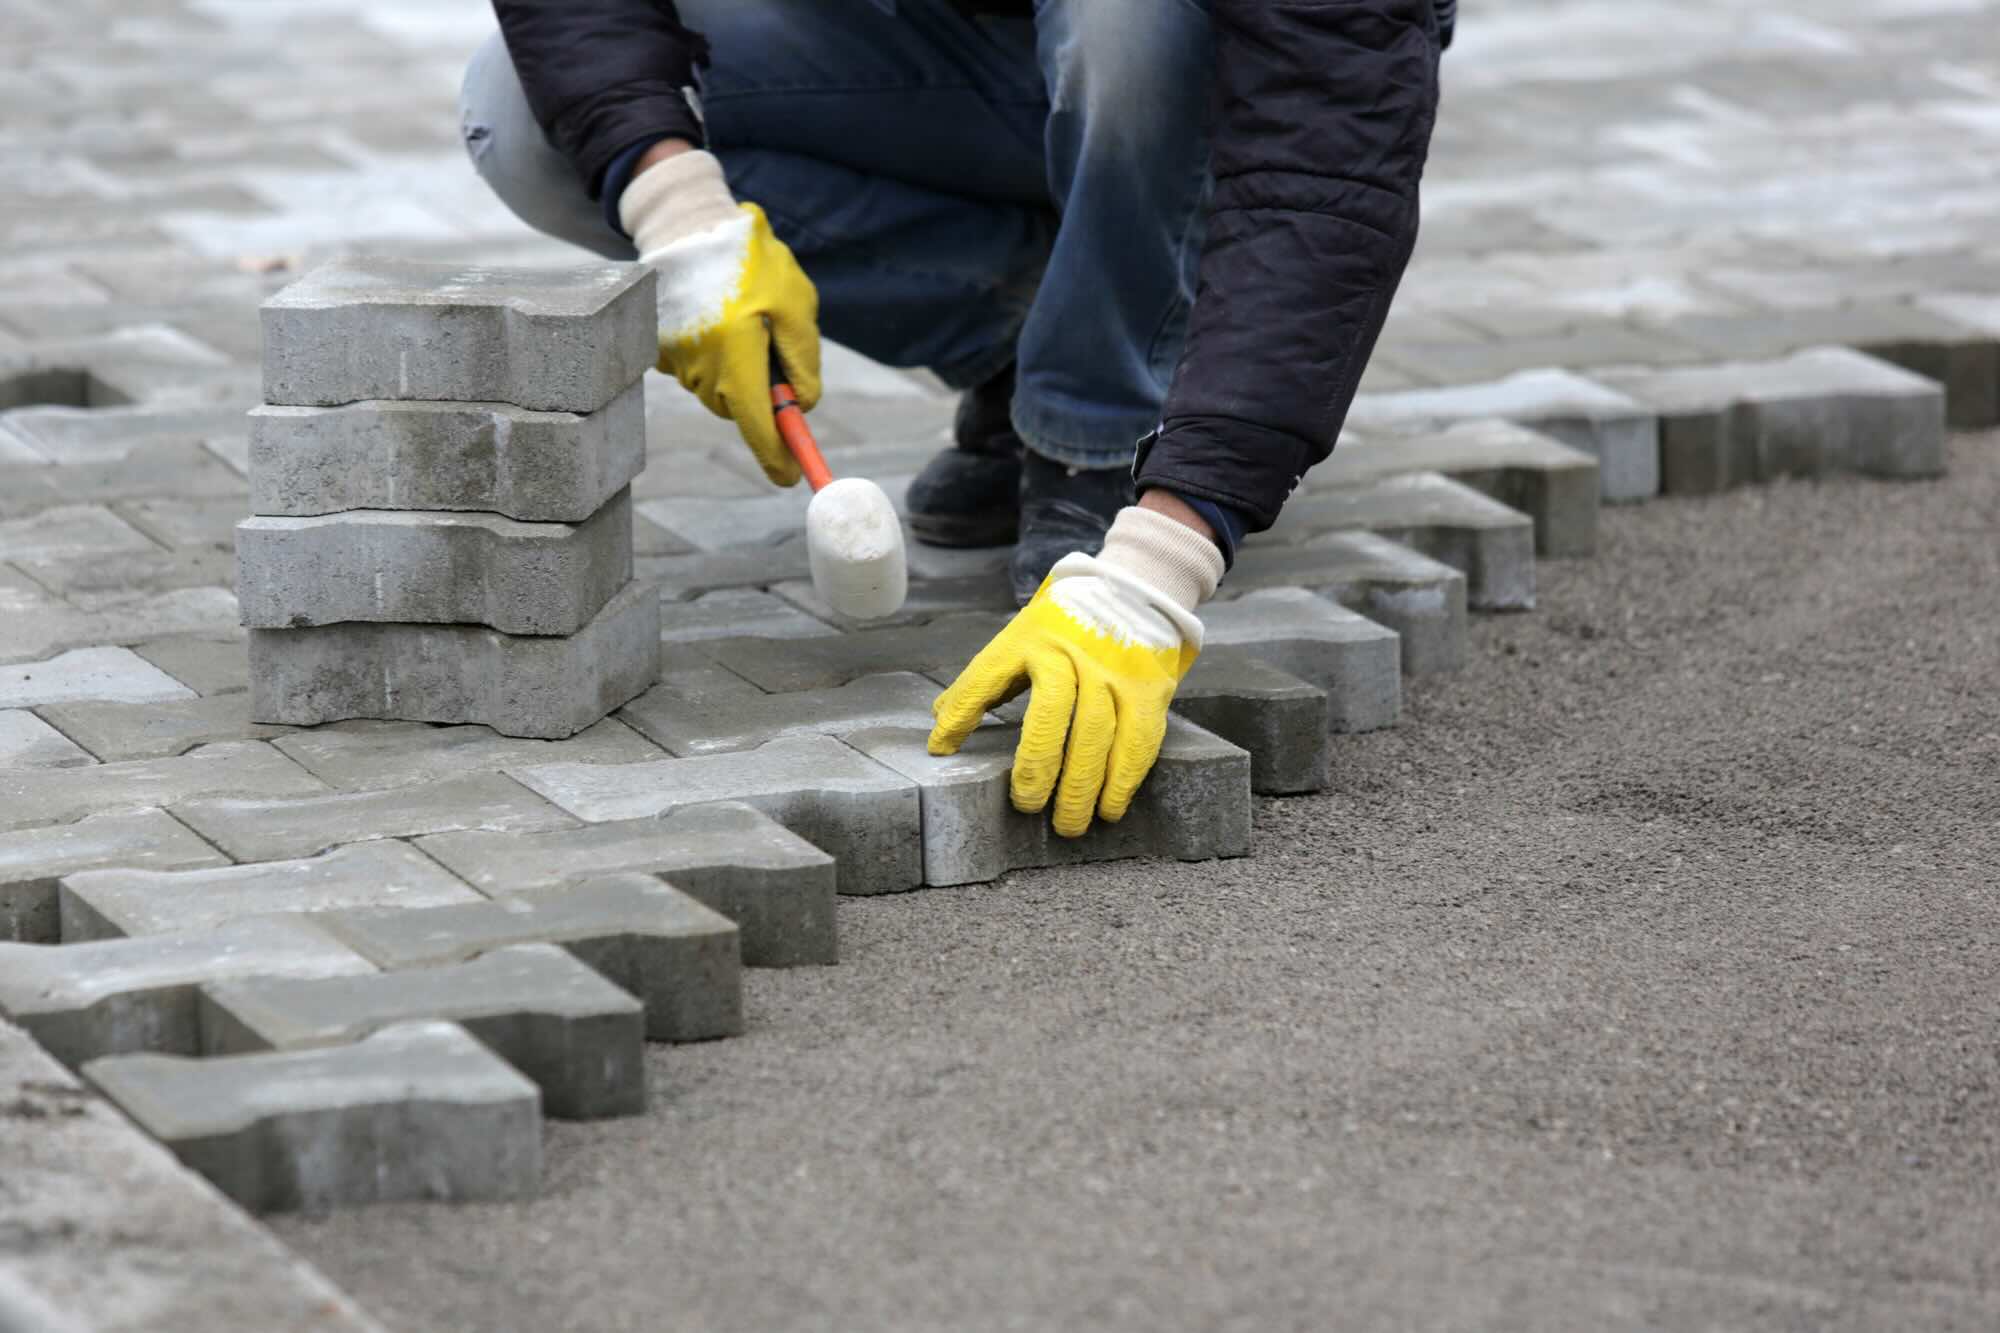
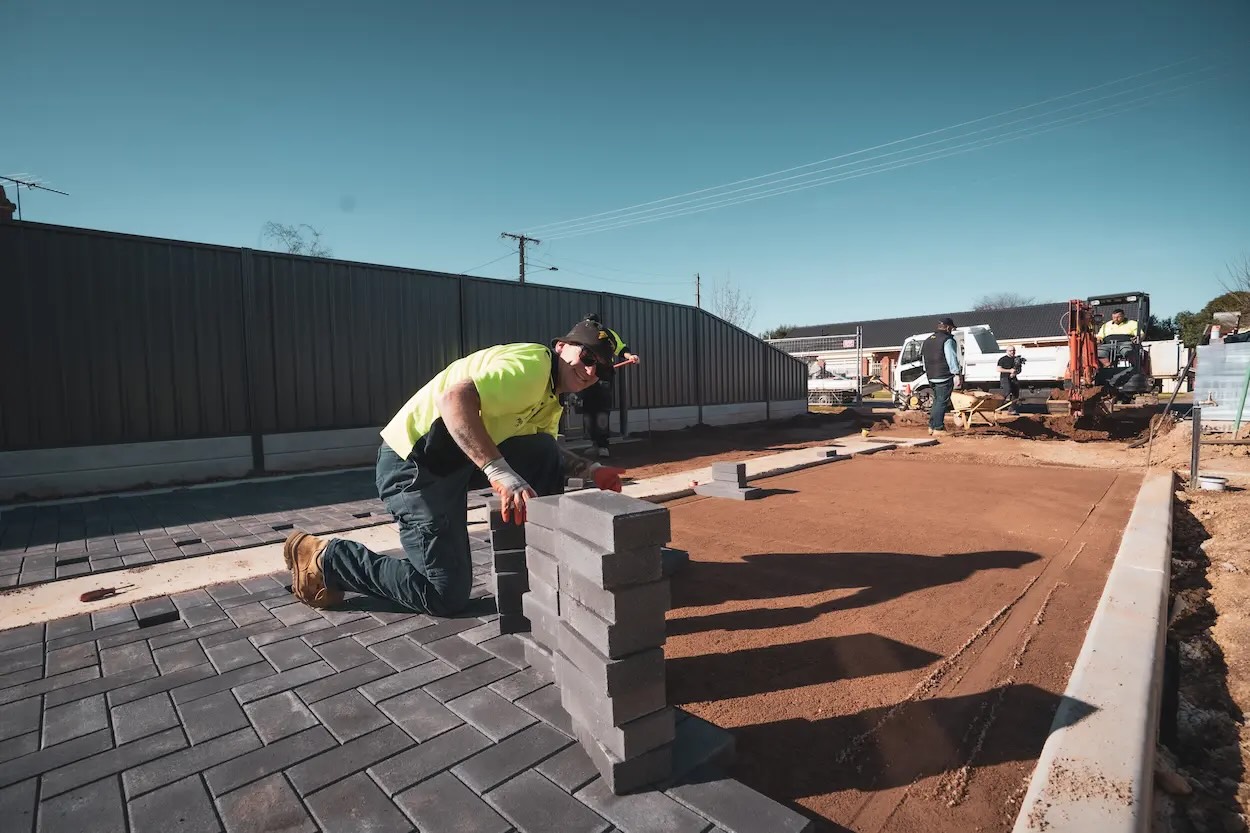
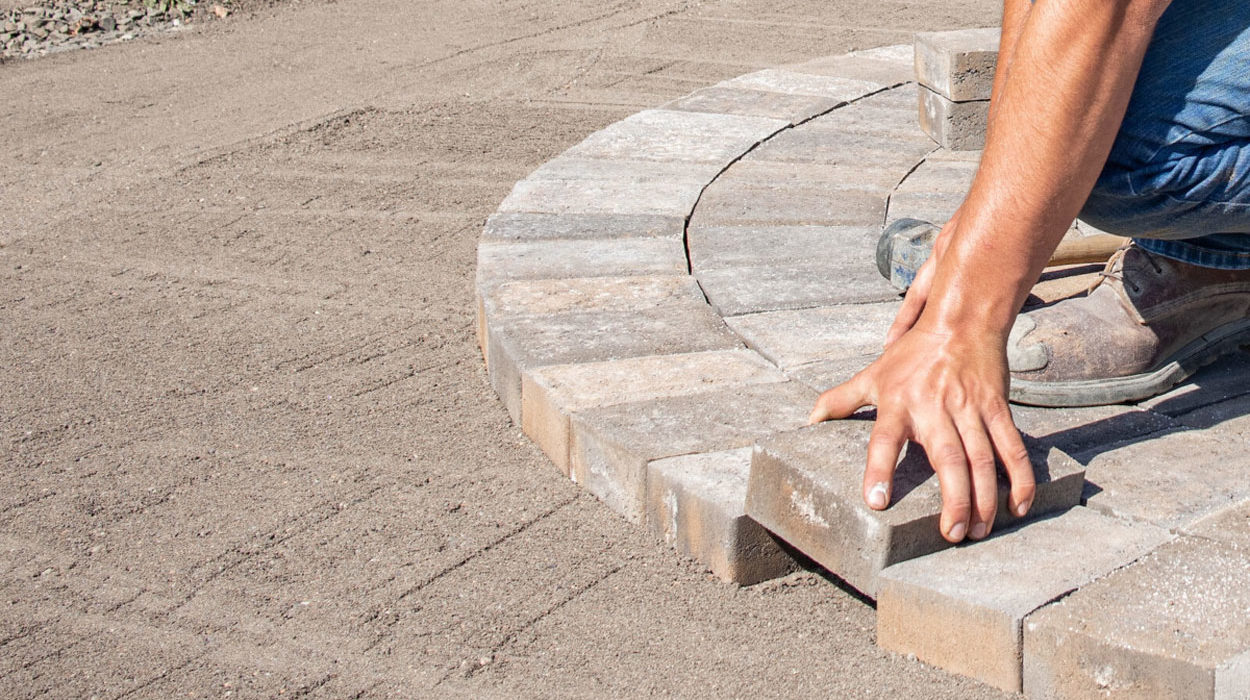
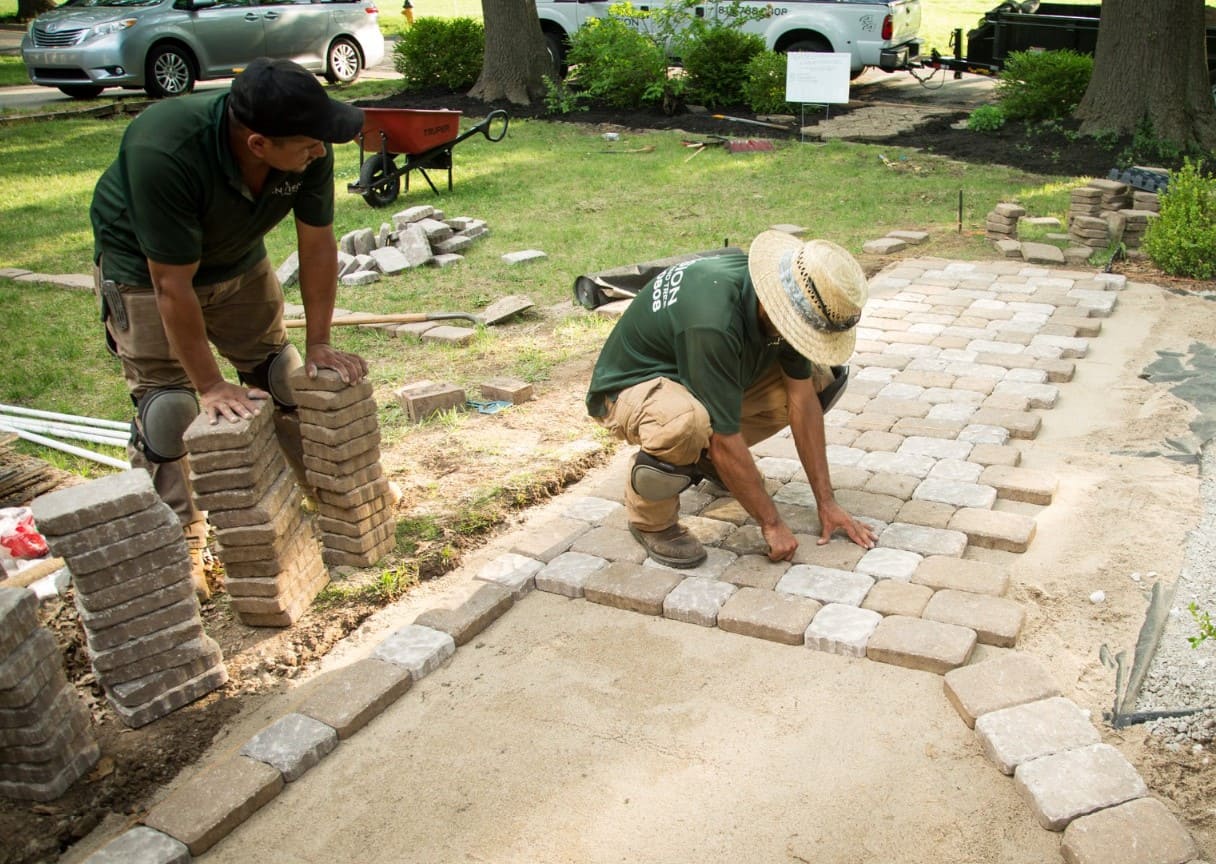
Step 3: Laying the Pavers
As you transition to the pivotal stage of laying the brick pavers, precision and attention to detail are paramount. The manner in which the pavers are laid not only influences the visual appeal of the project but also determines the structural integrity of the surface. Here’s a comprehensive guide to this crucial phase:
- Sand Bedding: Begin by spreading a layer of bedding sand over the compacted base. The sand provides a level surface for the pavers and allows for minor adjustments during the laying process.
- Starting Point: Identify the starting point for laying the pavers, typically at a straight edge or a focal point in the design. This initial alignment serves as a reference for the entire installation.
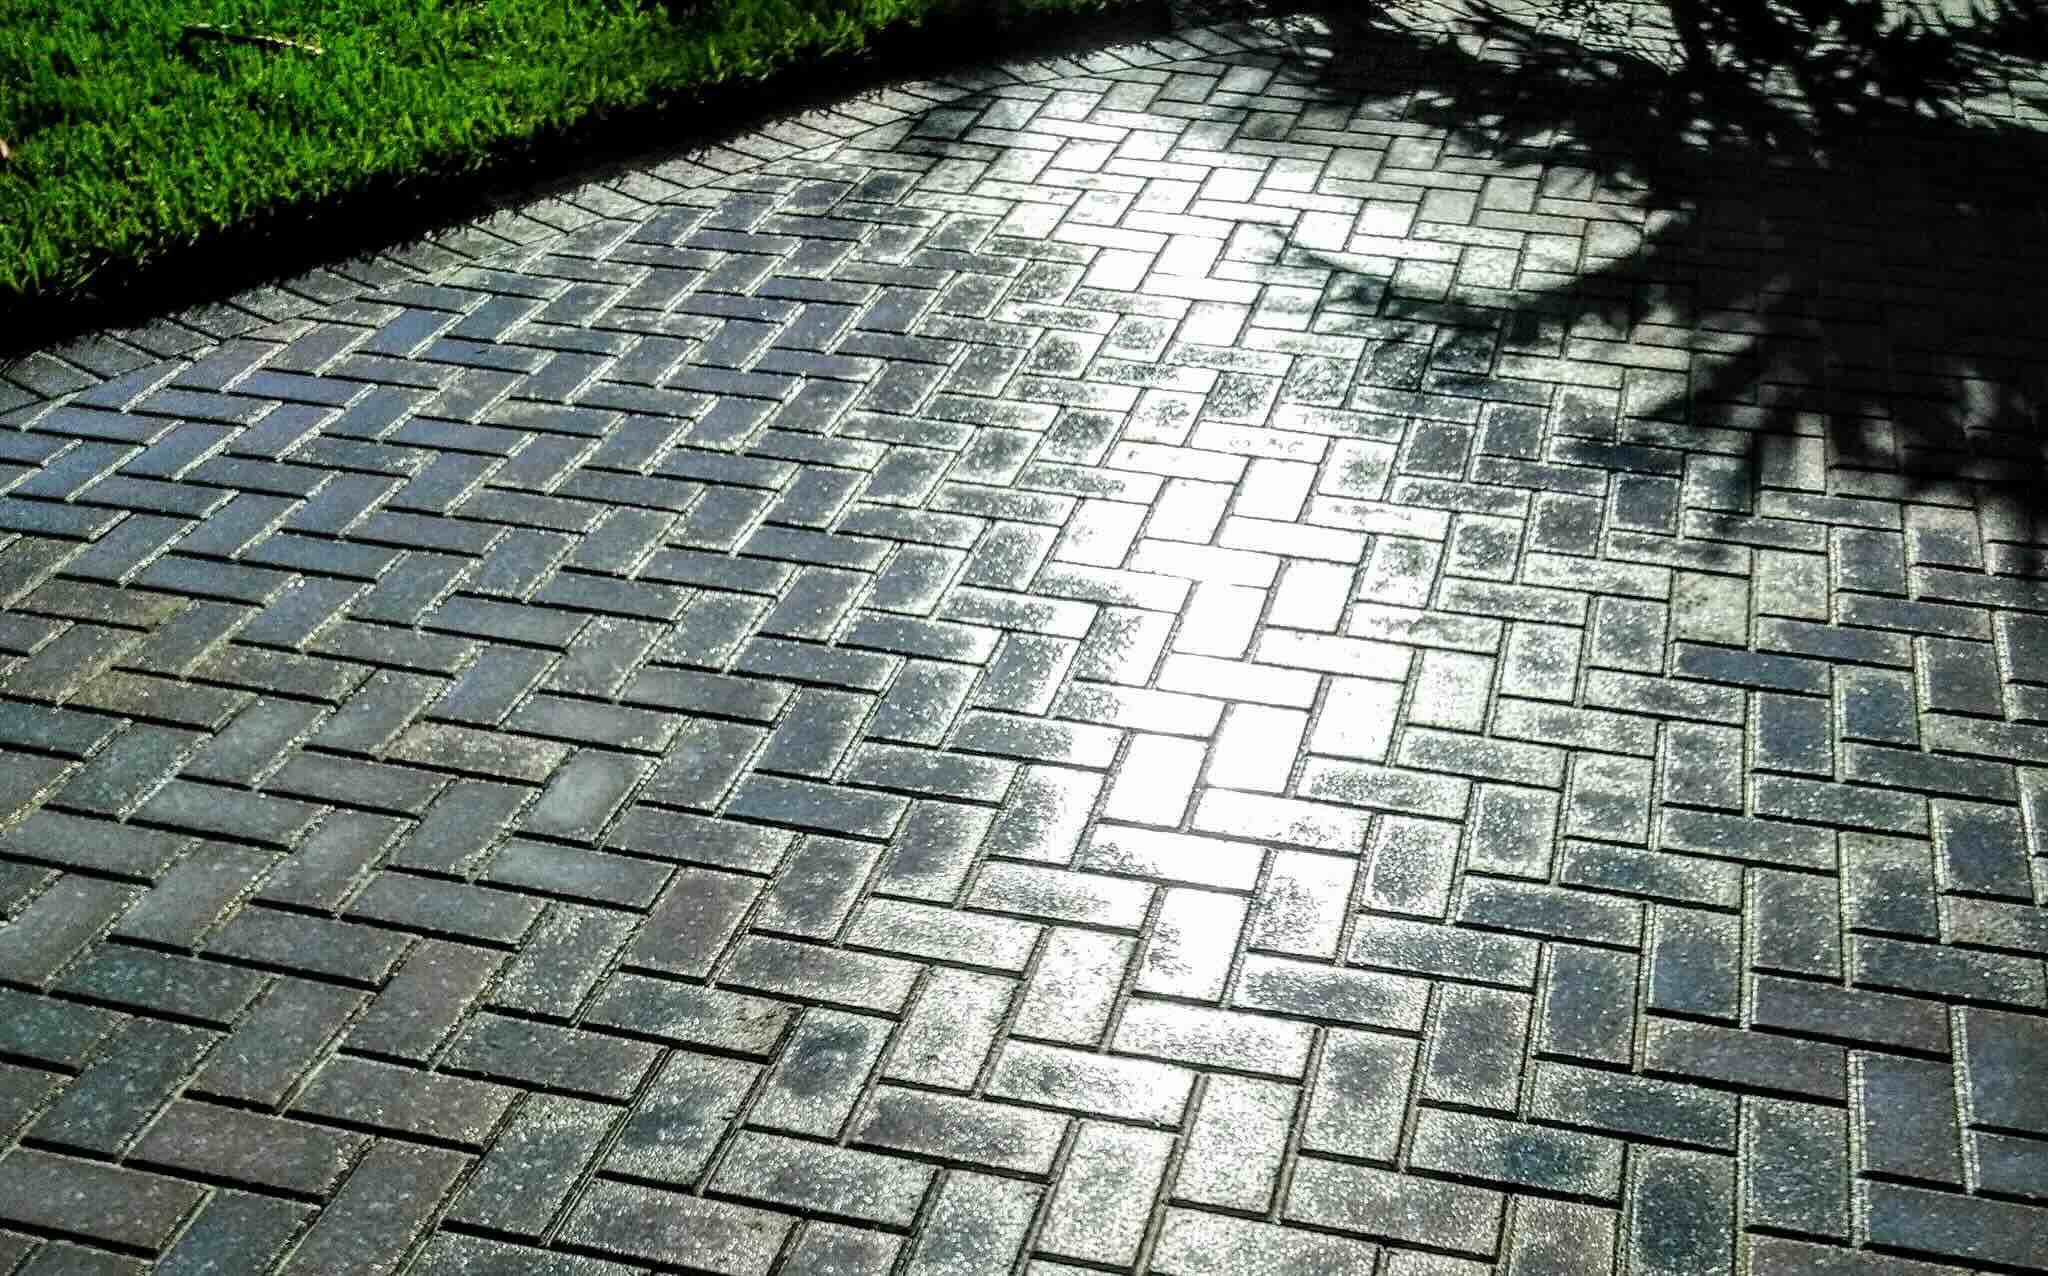
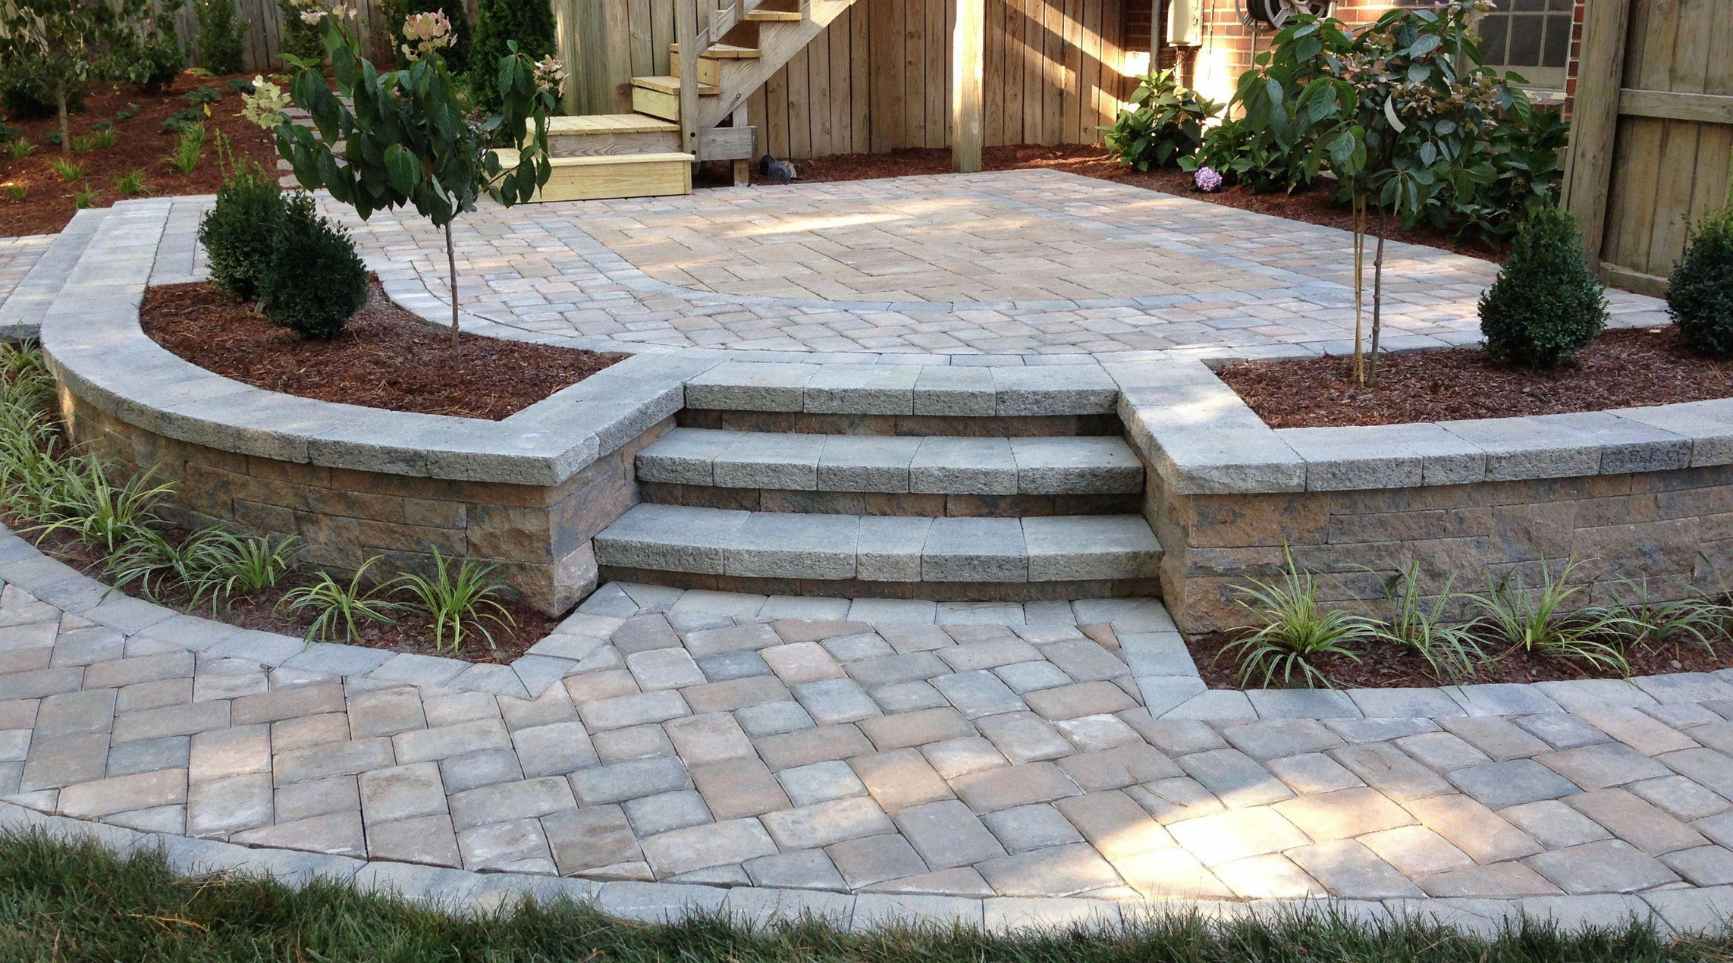
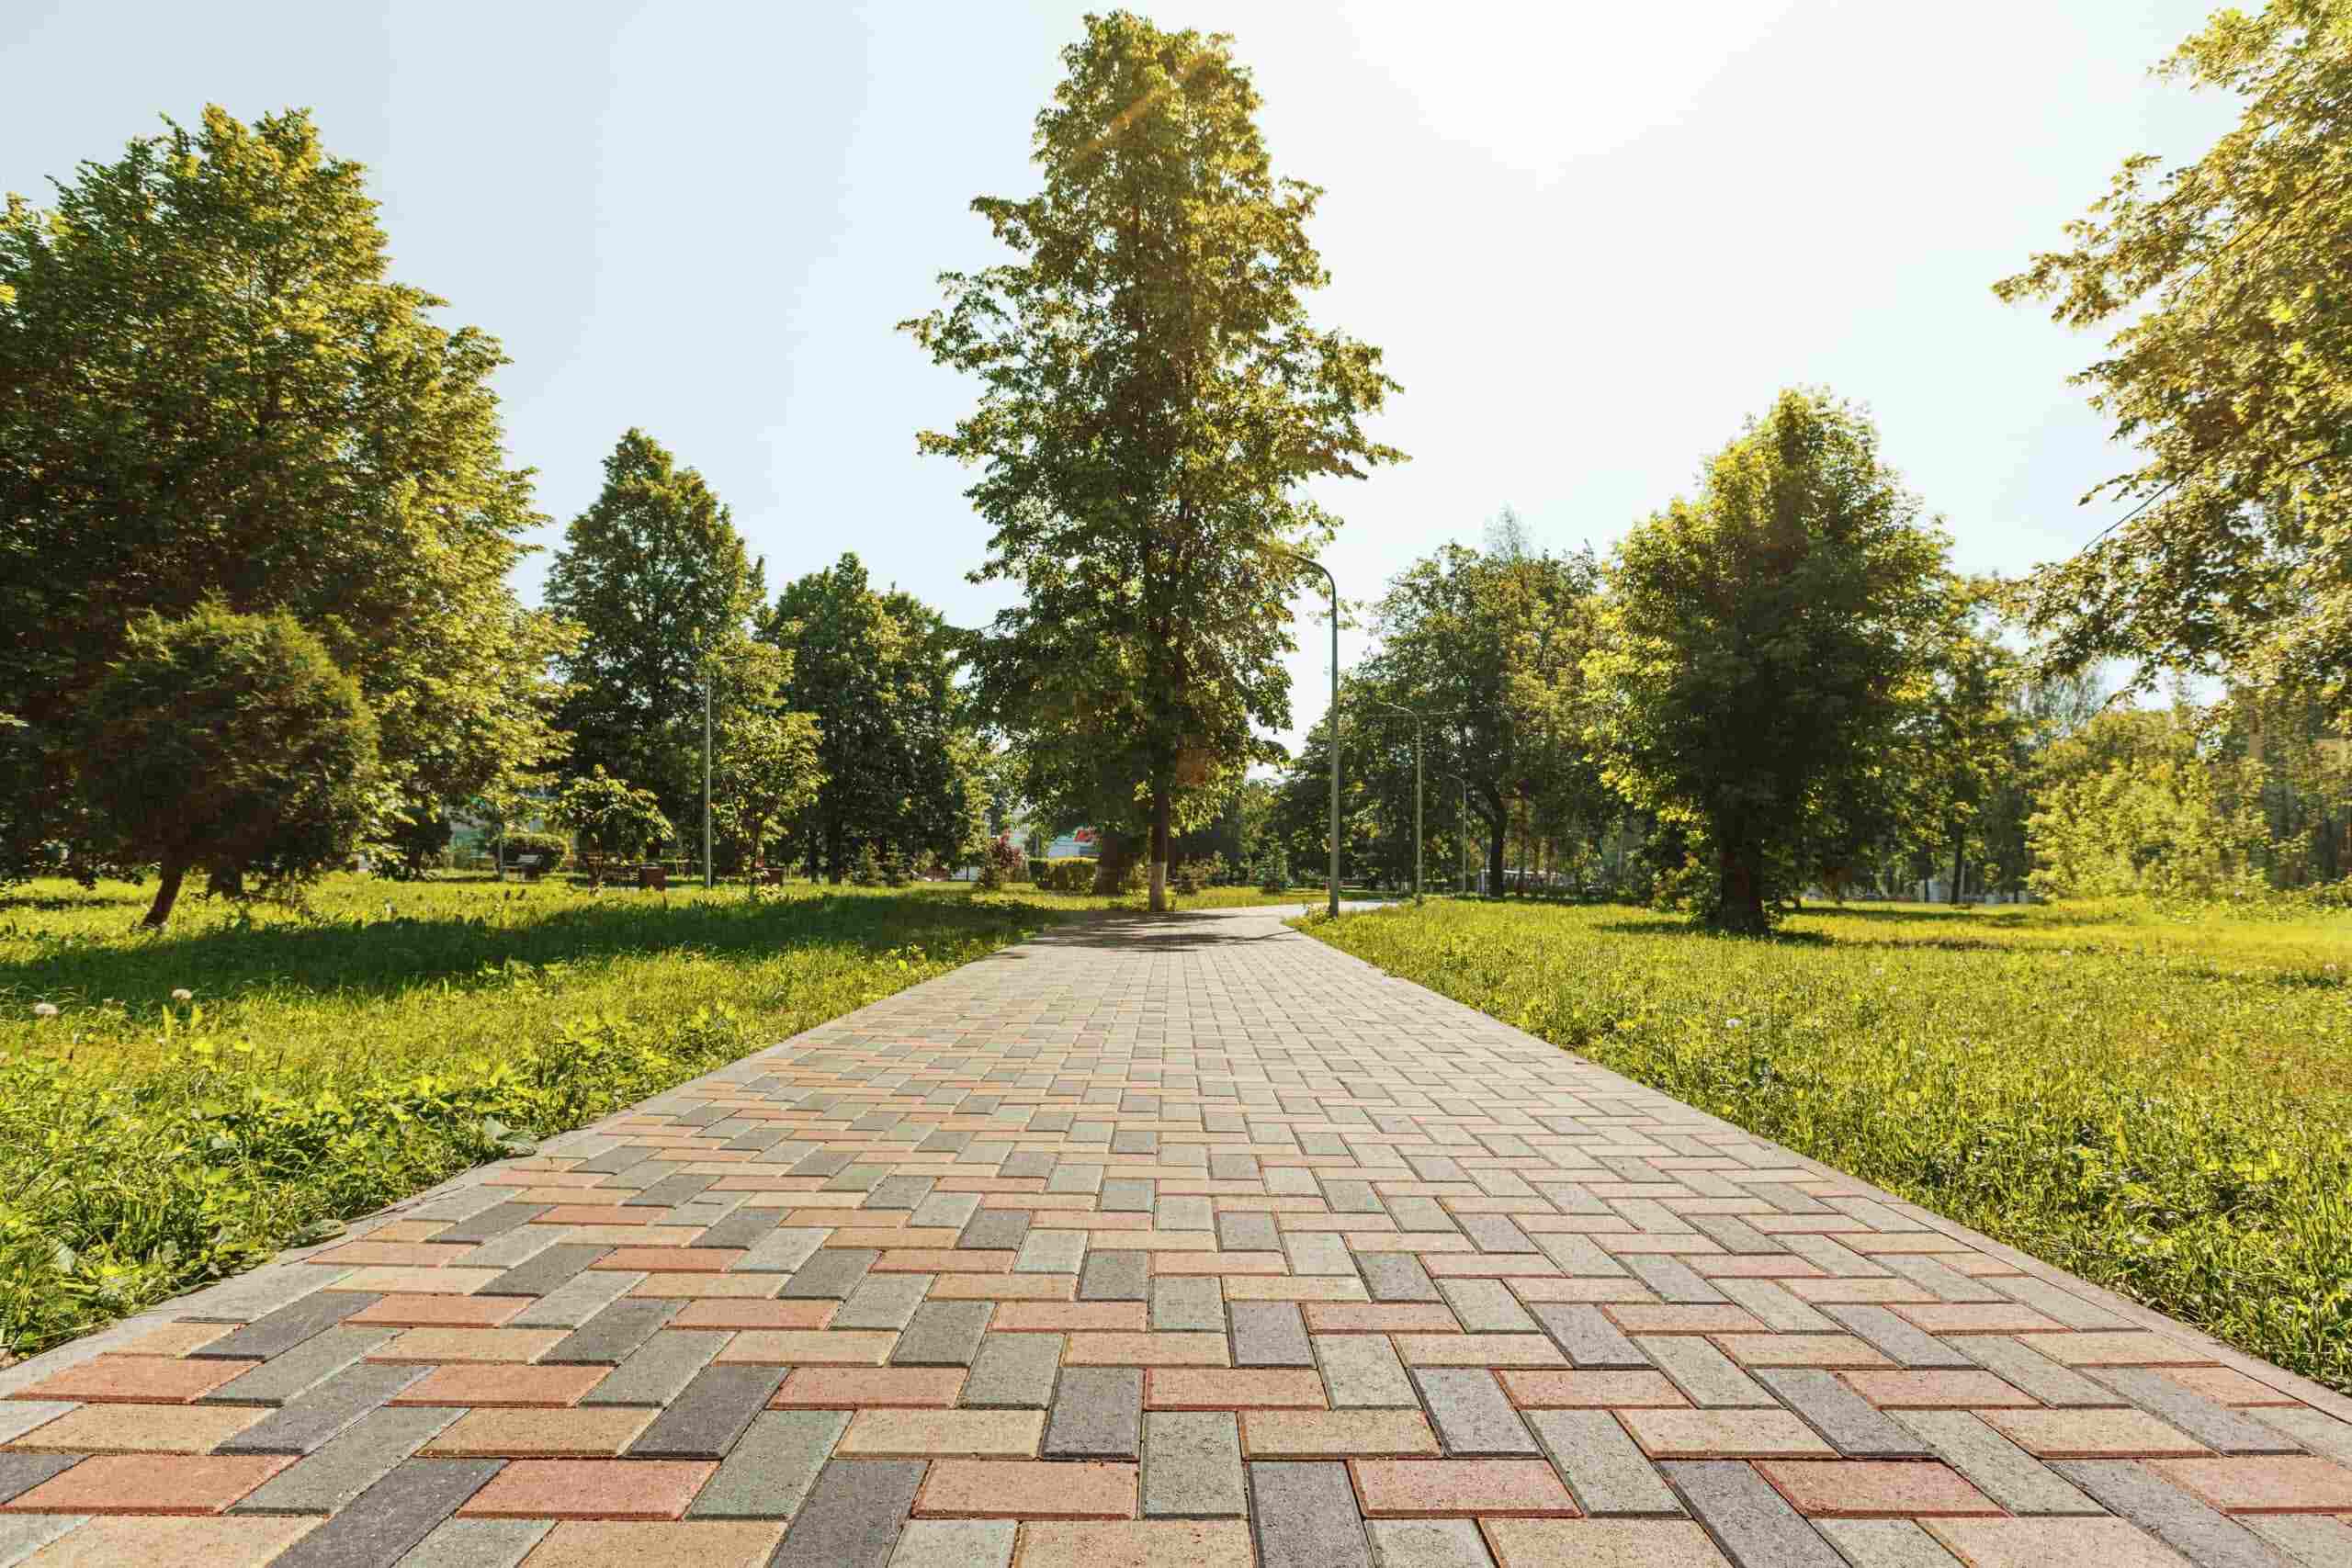
- Laying Pattern: Select a laying pattern that complements the design and dimensions of the area. Common patterns include running bond, herringbone, basket weave, and circular designs, each offering a distinct visual impact.
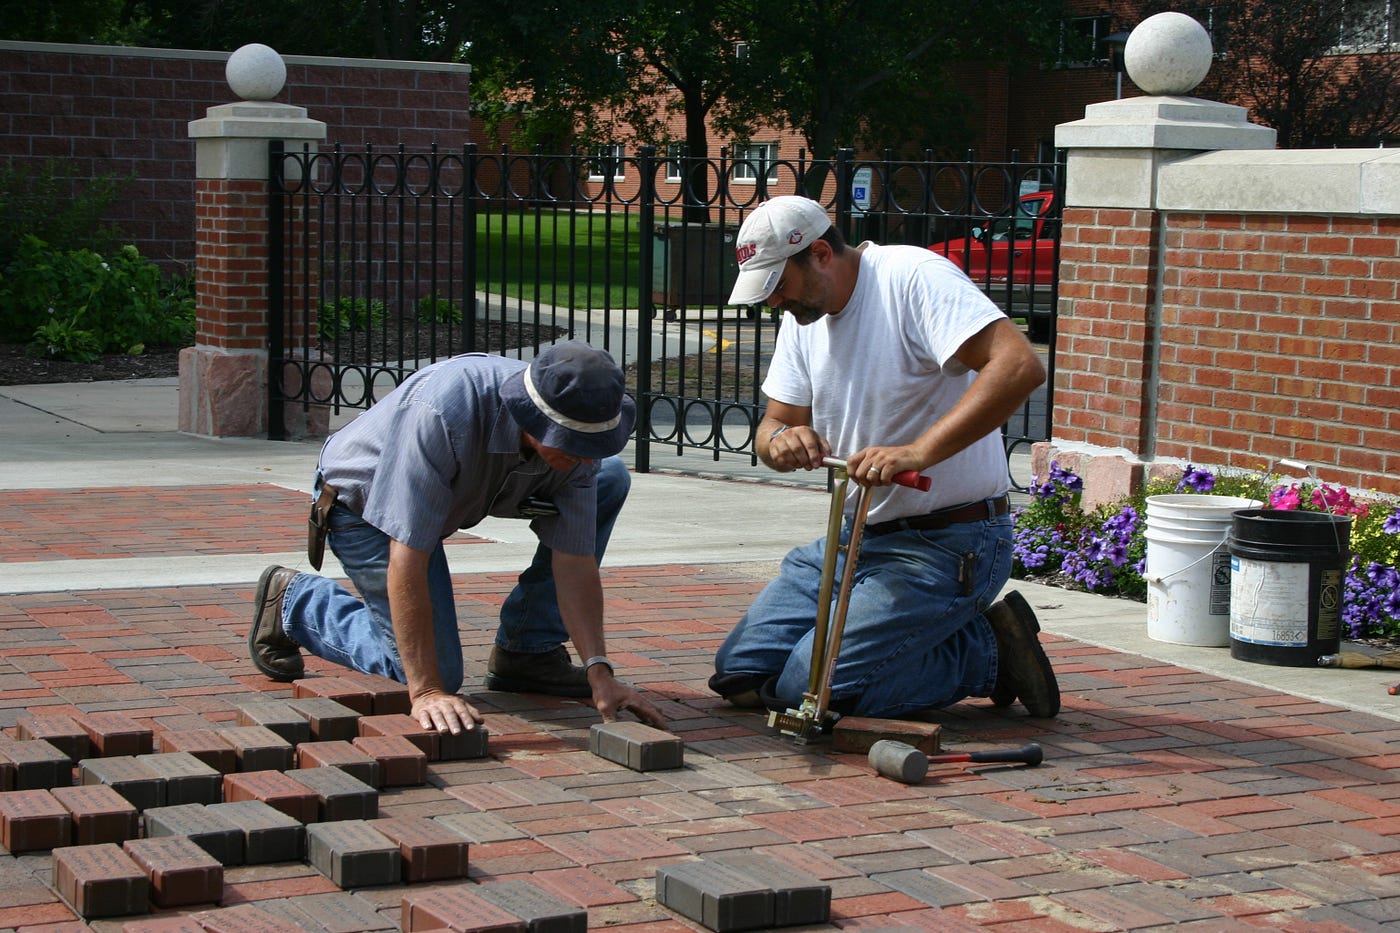
- Paver Placement: Carefully place each paver onto the bedding sand, ensuring a snug fit with minimal gaps between adjacent pavers. Use a rubber mallet to gently tap the pavers into position without disturbing the sand bedding.
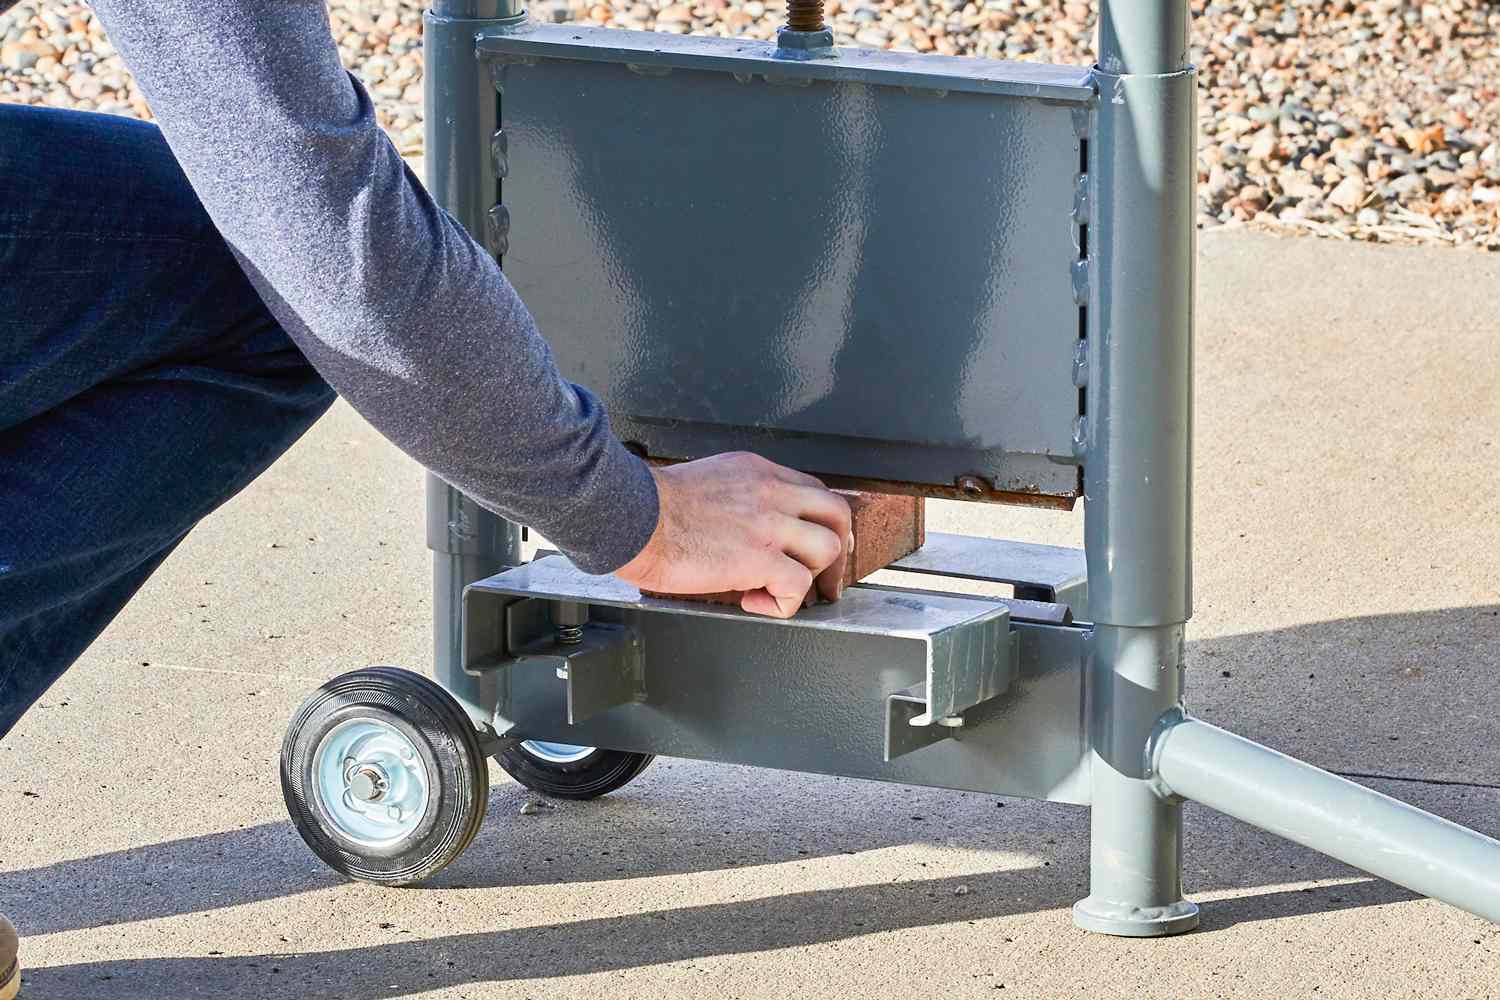
- Cutting: As the layout progresses, you may encounter areas that require partial pavers to fit the design. Utilize a masonry saw or paver splitter to accurately cut the pavers to the desired size, maintaining a seamless and tailored fit.
- Edge Restraints: As the pavers are laid, ensure they snugly abut the installed edge restraints, maintaining a consistent and aligned perimeter. This step reinforces the stability and uniformity of the entire installation.
By meticulously adhering to the laying techniques and design considerations, you’ll witness the transformation of the prepared base into a visually captivating surface. The precision and care invested in this phase form the foundation for the subsequent steps, propelling the project toward its completion.
Before installing brick pavers, make sure the area is properly prepared with a solid base of gravel and sand. Use a string and stakes to create straight lines for laying the pavers, and use a rubber mallet to ensure they are level. Fill the joints with sand to secure the pavers in place.
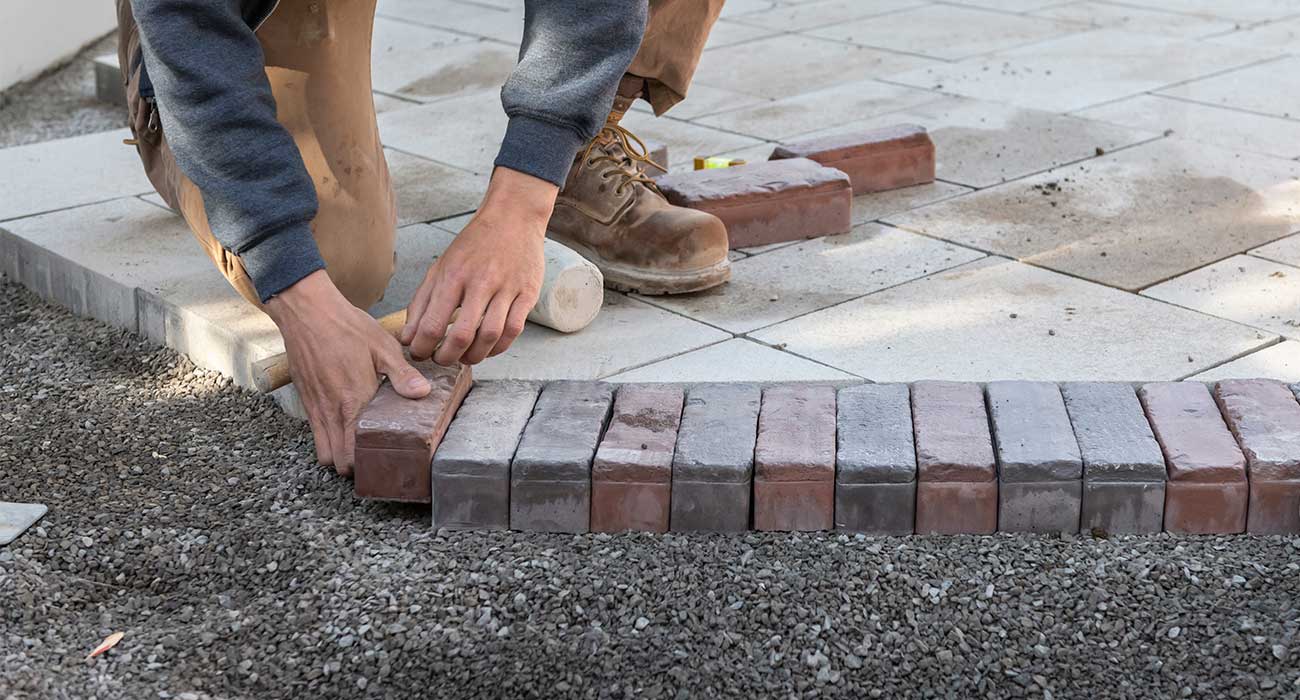
Step 4: Cutting and Edging
As the installation of the brick pavers progresses, the need for precise cutting and meticulous edging becomes increasingly apparent. This phase focuses on refining the layout, ensuring seamless transitions, and enhancing the overall aesthetics of the project. Here’s a detailed exploration of this critical step:
- Precision Cutting: Utilize a masonry saw or specialized paver splitter to execute precise cuts on the pavers, accommodating curves, angles, and irregular edges. This meticulous approach ensures a tailored fit and a visually cohesive layout.
- Edge Detailing: Pay close attention to the perimeter and edge details of the installation. Neatly cut and arrange the pavers along the edges to maintain a uniform and polished appearance, enhancing the visual appeal of the entire surface.
- Creative Borders: Explore creative border options to delineate the installed area. Contrasting paver colors, patterns, or specialized edge treatments can be employed to create visually striking borders that accentuate the overall design.
- Edging Restraints: Install additional or specialized edging restraints, such as soldier course pavers or concrete curbing, to reinforce the perimeter and provide a clean delineation between the paver surface and adjacent elements.
- Transition Elements: Address transitions to different surface levels or adjoining areas with meticulous edging and tailored cuts, ensuring a seamless and visually harmonious integration with the surrounding landscape.
By meticulously attending to the cutting and edging aspects, you’re refining the visual impact and structural integrity of the installation. The precision and creativity invested in this phase elevate the project to a new level of sophistication, setting the stage for the final stages of the installation process.
Read more: What Is A Brick Paver
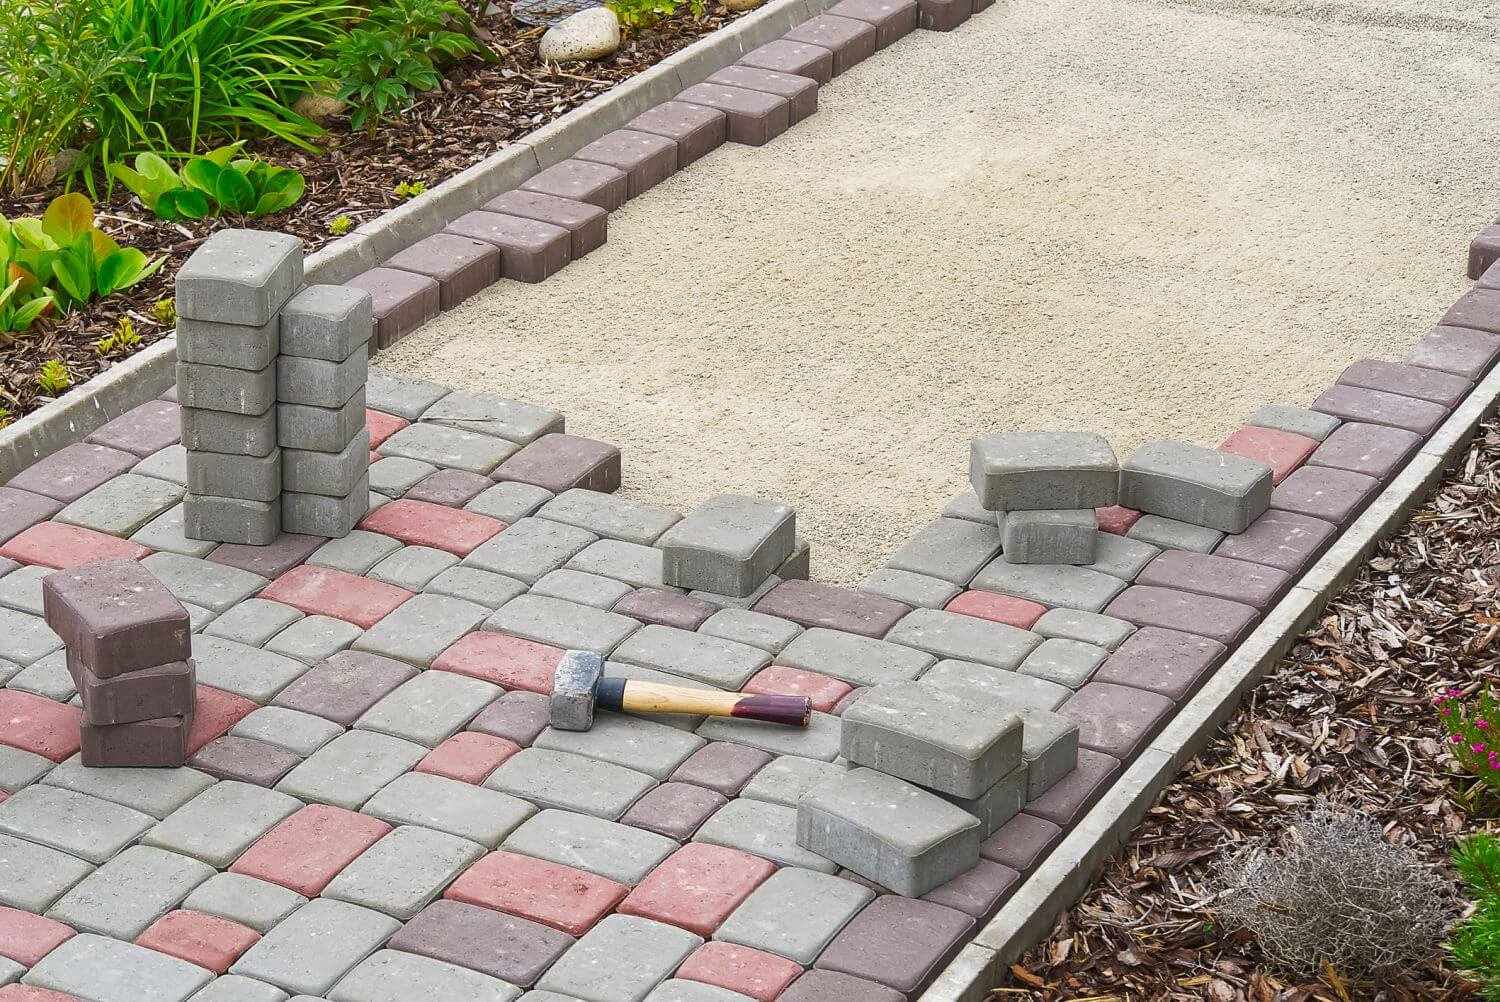
Step 5: Compacting and Sealing
As the installation of the brick pavers nears completion, the focus shifts to the critical tasks of compacting the surface and applying a protective sealant. These final steps are essential for enhancing the durability, stability, and visual allure of the installed pavers. Here’s a comprehensive overview of this pivotal phase:
- Surface Compaction: Utilize a plate compactor to firmly compact the laid pavers. This process ensures interlock and stability, minimizing the risk of shifting or settling over time. Multiple passes in different directions are recommended for thorough compaction.
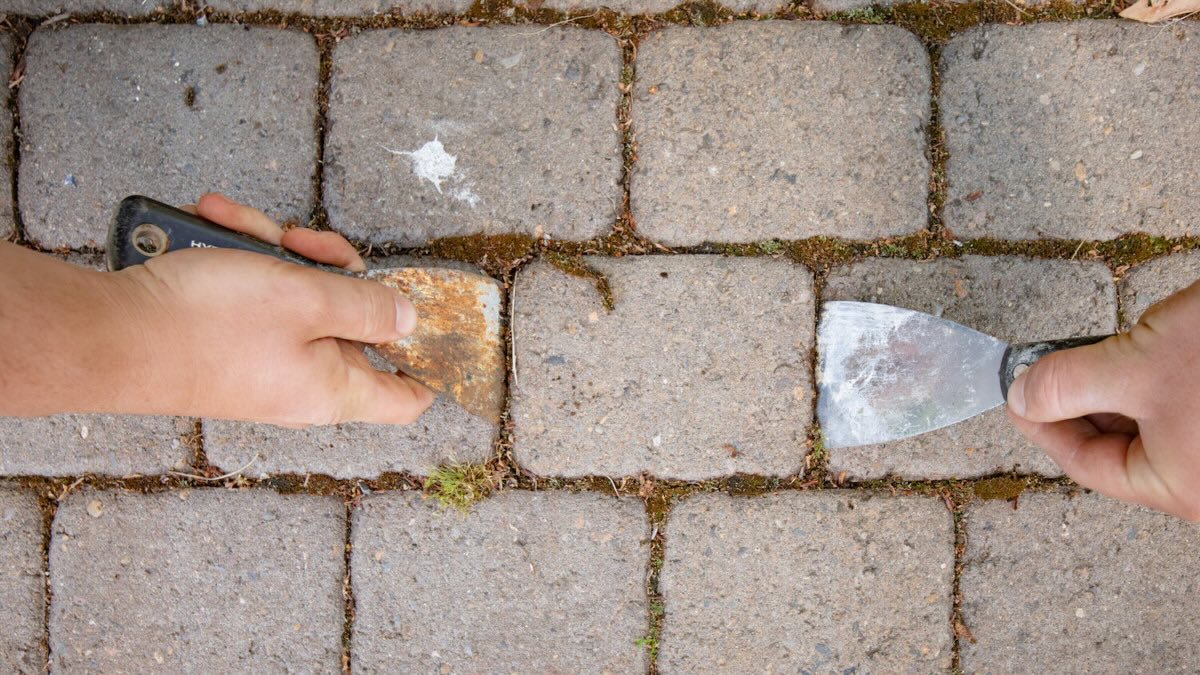
- Joint Sand Application: Spread polymeric jointing sand over the compacted paver surface. The sand fills the joints between the pavers, promoting interlock and preventing weed growth while allowing for minimal flexibility.
- Compaction and Sanding: Employ the plate compactor once again to vibrate and settle the jointing sand within the paver joints, ensuring a secure and uniform fill that enhances the stability and longevity of the installation.
- Sealing Application: Apply a high-quality sealant to the surface of the pavers. The sealant serves as a protective barrier, shielding the pavers from stains, color fading, and the detrimental effects of weather exposure.
- Sealant Distribution: Utilize a roller or sprayer to evenly distribute the sealant across the paver surface. Ensure thorough coverage, and follow manufacturer recommendations regarding the number of coats and reapplication intervals.
By conscientiously executing the compaction and sealing processes, you’re fortifying the structural resilience and visual allure of the installed brick pavers. These final touches elevate the project to a state of completion, ensuring a lasting and visually captivating enhancement to your outdoor space.
Conclusion
Congratulations on successfully navigating the intricate process of installing brick pavers! Your dedication, attention to detail, and creative vision have culminated in a stunning transformation of your outdoor space. As you reflect on this enriching journey, consider the following key takeaways:
- Enduring Beauty: The timeless appeal of brick pavers, coupled with your meticulous installation, has bestowed enduring beauty upon your outdoor environment. The visual impact and charm of the paver surface are sure to captivate and delight for years to come.
- Structural Integrity: The methodical groundwork, precision in laying and cutting, and the final touches of compaction and sealing have collectively reinforced the structural integrity of the installation. This robust foundation ensures longevity and resilience in the face of varying environmental factors.
- Personal Satisfaction: The satisfaction derived from witnessing your vision materialize into a tangible, functional, and aesthetically pleasing space is immeasurable. Your dedication and effort have yielded a tangible enhancement that enriches your daily life and leaves a lasting impression on visitors.
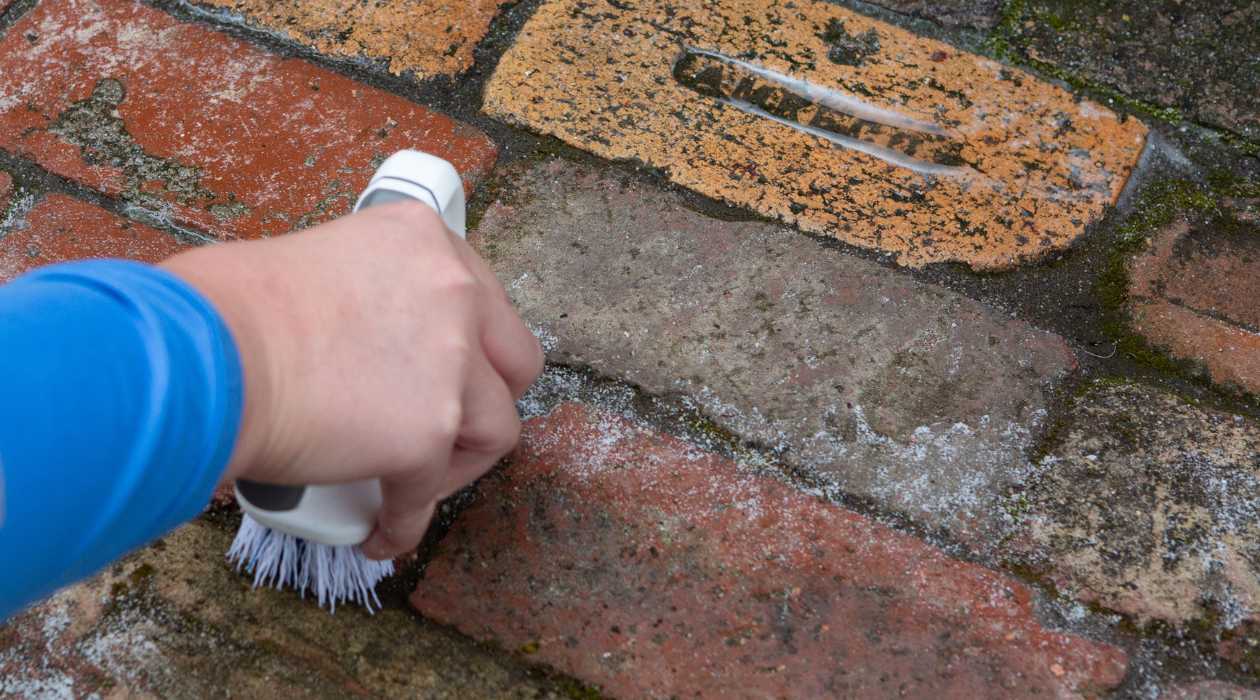
- Ongoing Care: While the installation process has reached its culmination, ongoing care and maintenance are essential to preserve the allure and functionality of the brick paver surface. Regular cleaning, joint sand replenishment, and periodic resealing will safeguard the investment and uphold its pristine condition.
As you bask in the satisfaction of a job well done, take a moment to admire the seamless integration of artistry, craftsmanship, and practicality that characterizes your newly installed brick pavers. Your outdoor space has been elevated into a realm of timeless elegance and enduring allure, a testament to your dedication and creativity.
Embrace the joy of this transformative accomplishment, and revel in the countless moments of relaxation, entertainment, and admiration that await in your revitalized outdoor oasis.
Frequently Asked Questions about How To Install Brick Pavers
Was this page helpful?
At Storables.com, we guarantee accurate and reliable information. Our content, validated by Expert Board Contributors, is crafted following stringent Editorial Policies. We're committed to providing you with well-researched, expert-backed insights for all your informational needs.
0 thoughts on “How To Install Brick Pavers”