Articles
How To Install Siding Panels
Modified: August 31, 2024
Learn how to install siding panels with our comprehensive articles. Get step-by-step instructions and expert advice for a successful siding installation.
(Many of the links in this article redirect to a specific reviewed product. Your purchase of these products through affiliate links helps to generate commission for Storables.com, at no extra cost. Learn more)
Introduction
Welcome to our comprehensive guide on how to install siding panels. Siding is an essential element of any home’s exterior, providing protection against the elements and enhancing its overall appearance. Whether you’re replacing old siding or installing it for the first time, this step-by-step tutorial will walk you through the process and help you achieve professional-looking results.
Before we dive into the installation process, it’s important to note that there are various types of siding materials available, such as vinyl, fiber cement, wood, and metal. Each material has its own unique characteristics, benefits, and installation requirements. For the purpose of this guide, we’ll be focusing on the general principles of installing siding panels, which can be applied to most siding materials.
Installing siding panels may seem like a daunting task, but with the right tools, materials, and techniques, it can be a manageable and rewarding DIY project. This guide will provide you with the knowledge and confidence to tackle the installation process and create a beautiful and long-lasting finish for your home.
Before you get started, it’s important to ensure that you have all the necessary materials and tools on hand. This includes siding panels, trim pieces, fasteners, caulking, a measuring tape, a level, a circular saw or snips for cutting the panels, a hammer or nail gun for securing them, and safety equipment such as gloves, safety glasses, and a ladder if needed.
Now that you have a general idea of what to expect, let’s proceed to the first step: gathering materials.
Key Takeaways:
- Proper preparation is essential for a successful siding installation. From gathering materials to inspecting the wall and measuring panels, attention to detail ensures a professional and long-lasting finish.
- Attention to alignment, securing, and finishing touches is crucial for a visually appealing siding installation. Consistency, precision, and regular maintenance contribute to the beauty and protection of your home’s exterior.
Read more: How To Install Glass Shower Panel
Step 1: Gathering Materials
Before you begin the installation process, it is essential to gather all the necessary materials and tools. This step ensures that you have everything you need on hand, making the installation process smoother and more efficient.
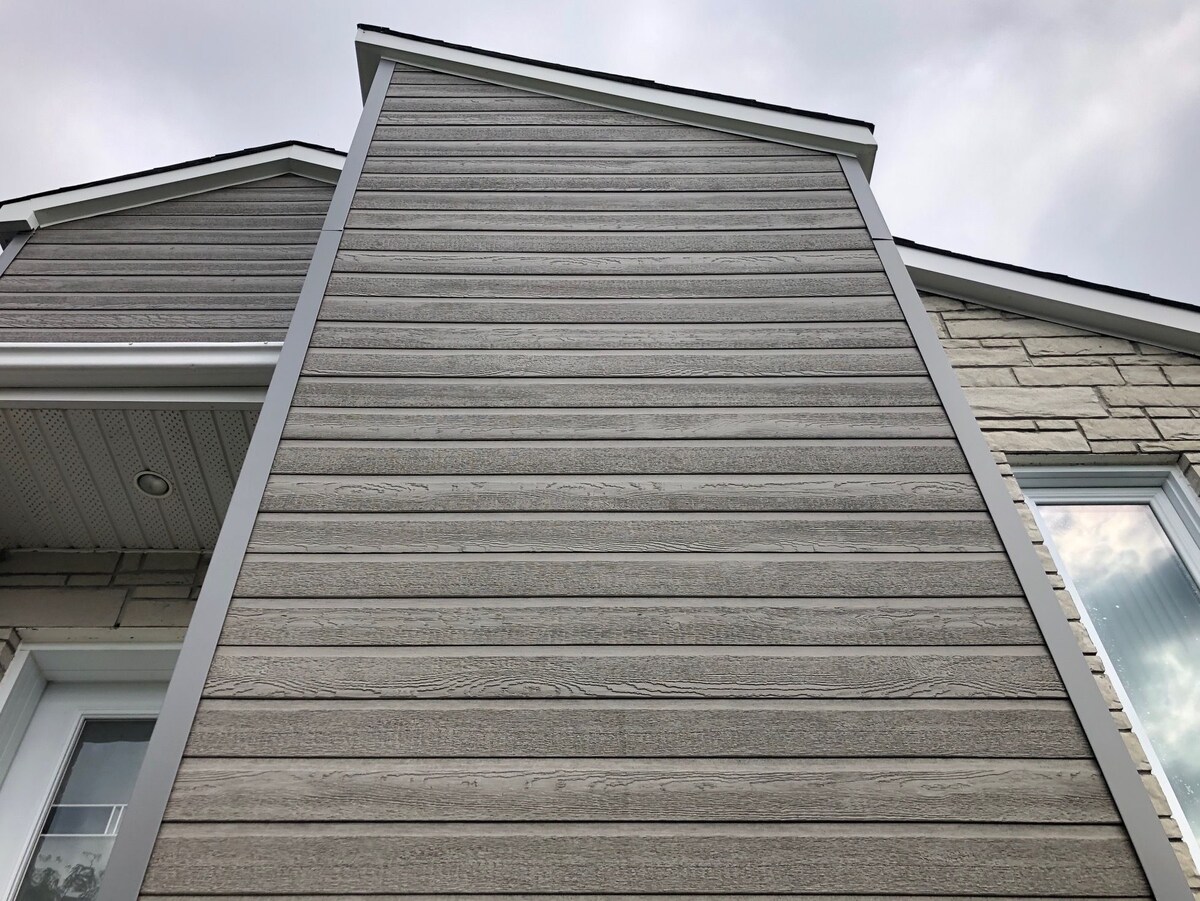
1. Siding Panels: The first and most crucial material you’ll need is the siding panels themselves. Choose a siding material that suits your preferences and fits the style of your home. Common options include vinyl, fiber cement, wood, and metal. Ensure that you have enough panels to cover the desired area, accounting for any waste or extra pieces for future repairs.
2. Trim Pieces: Along with the siding panels, you’ll also need trim pieces. Trim acts as a finishing touch, covering the edges and creating a more polished look. Trim pieces are available in various profiles and sizes, so choose ones that complement your siding panels and add aesthetic appeal.
3. Fasteners: Fasteners are used to secure the siding panels and trim to the wall. The type of fasteners you need depends on the siding material you’ve chosen. Common options include nails, screws, or specialized clips or hooks specifically designed for the type of siding you’re installing. Make sure to choose fasteners that are durable, weather-resistant, and suitable for your siding material.
4. Caulking: Caulk is a vital component for sealing gaps and joints in your siding installation. It helps prevent water penetration and ensures a tight and secure fit. Choose a high-quality, exterior-grade caulking material that is compatible with your siding material.
5. Measuring Tape: Accurate measurements are crucial for a successful siding installation. Use a measuring tape to measure the dimensions of your walls, taking into account any windows, doors, or other obstacles. This will help you determine the amount of siding material you need and ensure precise cuts.
6. Level: A level is an essential tool for ensuring that your siding installation is straight and level. It helps maintain a uniform and visually appealing appearance. Use a long level or a laser level to check the vertical and horizontal alignment of your panels as you install them.
7. Cutting Tools: Depending on the type of siding material you’re using, you’ll need appropriate cutting tools. For vinyl or fiber cement panels, a circular saw with a fine-tooth blade or snips can be used. Wood panels may require a miter or table saw. Additionally, have a utility knife on hand for making precise cuts or trim adjustments.
8. Hammer or Nail Gun: To secure the siding panels to the wall, you’ll need a hammer or a nail gun. Choose a hammer with a comfortable grip and a good balance. If you opt for a nail gun, make sure it is compatible with the fasteners you’re using and practice proper safety measures.
9. Safety Equipment: Lastly, prioritize your safety during the installation process. Wear gloves to protect your hands from sharp edges or splinters. Safety glasses are crucial for eye protection. If you’ll be working at heights, a stable ladder or scaffolding may be necessary to ensure your safety.
By gathering all these materials and tools before you begin, you’ll save time and prevent unnecessary delays during the installation process. Now that you have everything you need, let’s move on to preparing the wall in step 2.
Step 2: Preparing the Wall
Before you can start installing siding panels, it’s important to properly prepare the wall to ensure a successful and long-lasting installation. Taking the time to prepare the wall will not only improve the overall appearance of the finished project, but it will also help protect your home against potential damage.
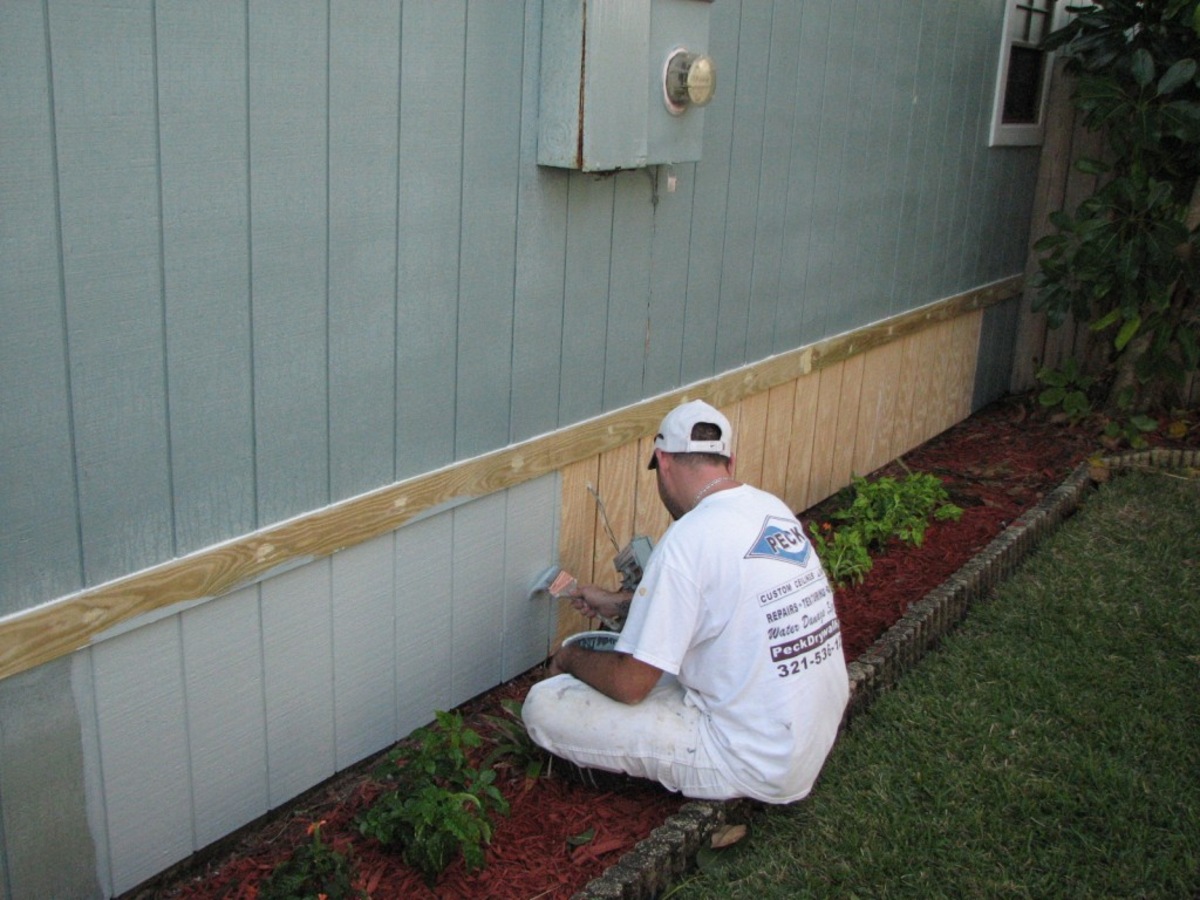
1. Remove Existing Siding: If you’re replacing old siding, you’ll need to remove it before installing new panels. Carefully remove the old siding using a pry bar or a siding removal tool. Pay attention to any damage or rot on the underlying wall, and address these issues before proceeding with the installation.
2. Inspect the Wall: Once the old siding is removed, thoroughly inspect the exposed wall for any signs of damage or rot. If you notice any moisture or structural issues, it’s important to address them before proceeding. Repair any damaged areas, replace rotted wood, and ensure that the wall is in good condition to support the new siding.
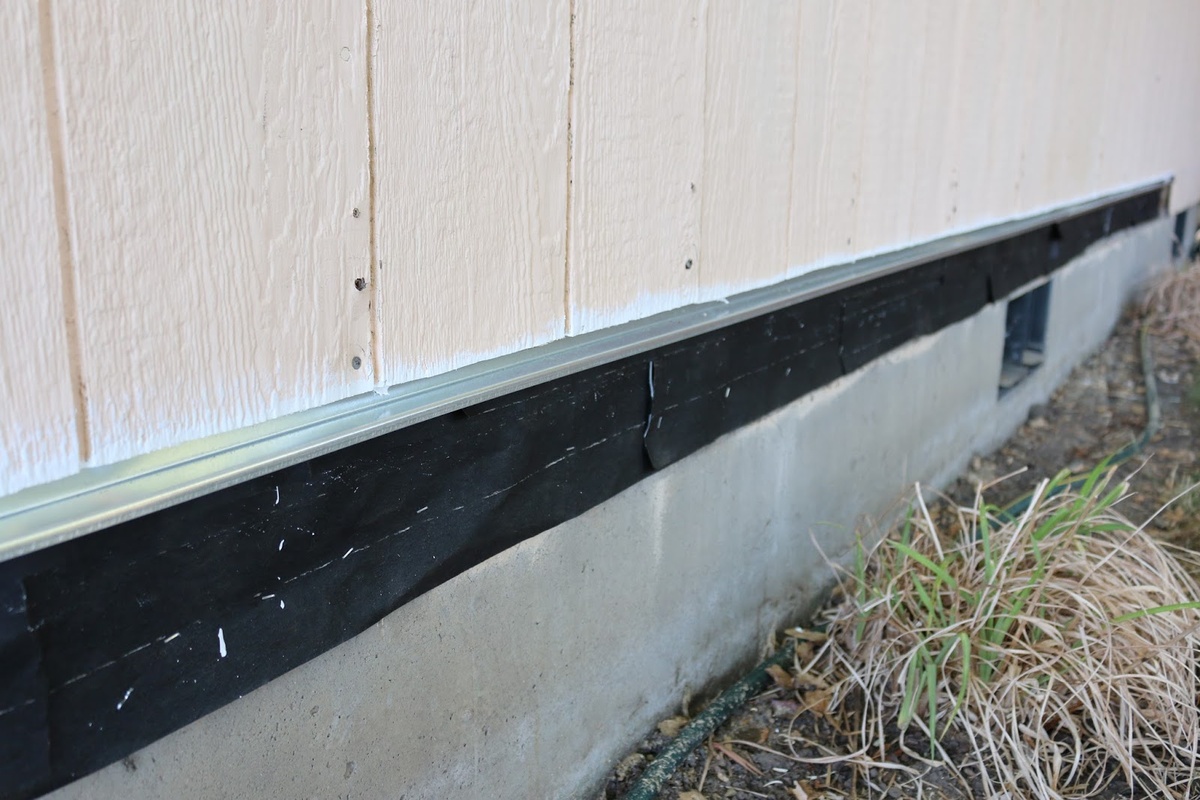
3. Install House Wrap: House wrap is an essential layer of protection that helps prevent moisture from seeping into the wall. It acts as a barrier between the siding panels and the underlying structure. Carefully install the house wrap according to the manufacturer’s instructions, ensuring that it covers the entire wall and is properly sealed around windows, doors, and other openings.
4. Flashing Installation: Flashing is a material used to redirect water away from vulnerable areas and prevent water infiltration. Install flashing around windows, doors, and other openings to ensure proper water drainage. Use flashing materials that are appropriate for your siding material and follow best practices for installation.
5. Insulate if Necessary: Depending on your region and climate, insulating the wall prior to installing the siding panels may be necessary. Insulation helps improve energy efficiency and can provide additional protection against moisture and drafts. Follow local building codes and insulation manufacturer guidelines for proper installation.
6. Check for Level and Straightness: Before proceeding, use a level to check that the wall is level and straight. Adjust as necessary to ensure that the siding panels will be installed correctly and have a clean, professional appearance.
By properly preparing the wall, you create a solid foundation for the siding panels and ensure a more seamless installation process. Taking the time to inspect and repair any damage, install house wrap and flashing, and address insulation needs will contribute to a successful and long-lasting siding installation. With the wall prepared, we can now move on to measuring and cutting the panels in step 3.
Step 3: Measuring and Cutting the Panels
Accurate measurements and precise cuts are essential for a seamless and professional-looking siding installation. In this step, we will guide you through the process of measuring the wall and cutting the siding panels to fit perfectly.
1. Measure the Wall: Start by measuring the length and height of each wall where the siding panels will be installed. Use a measuring tape to get precise measurements, and note them down. Factor in any windows, doors, or other obstacles that may require special attention.
2. Calculate the Number of Panels: Determine how many panels you will need for each wall. Divide the total length of each wall by the width of the siding panels to get the number of panels needed. Remember to account for any waste or extra panels for repairs or future use.
3. Cut the First Panel: Before cutting the first panel, measure the distance from the starting point to the corner of the wall, leaving a 1/4-inch gap for expansion. Transfer this measurement to the first panel and mark the cutting line. Use a circular saw with a fine-tooth blade or snips to make the cut. Ensure to follow all safety precautions and practice clean and straight cuts.
4. Continue Cutting the Panels: For subsequent panels, measure the remaining distance between the previous panel and the corner of the wall, again leaving a 1/4-inch expansion gap. Mark and cut each panel according to the measurements, ensuring that they align properly and have a consistent appearance.
5. Cutting Around Obstacles: When encountering windows, doors, or other obstacles, measure and mark the panels accordingly, allowing for a proper fit. Use a utility knife or a circular saw to make precise cuts, ensuring a neat and professional finish. Take extra care when cutting around irregular shapes or intricate details.
6. Test Fit the Panels: As you cut each panel, test fit it against the wall to verify its accuracy and fit. Make any necessary adjustments or recuts before proceeding to the installation phase.
Remember, it’s always better to measure twice and cut once to avoid any mistakes and wasted material. Take your time and ensure that each panel is cut accurately before moving on to the installation. With the panels cut to size, it’s time to move on to step 4: installing the first panel.
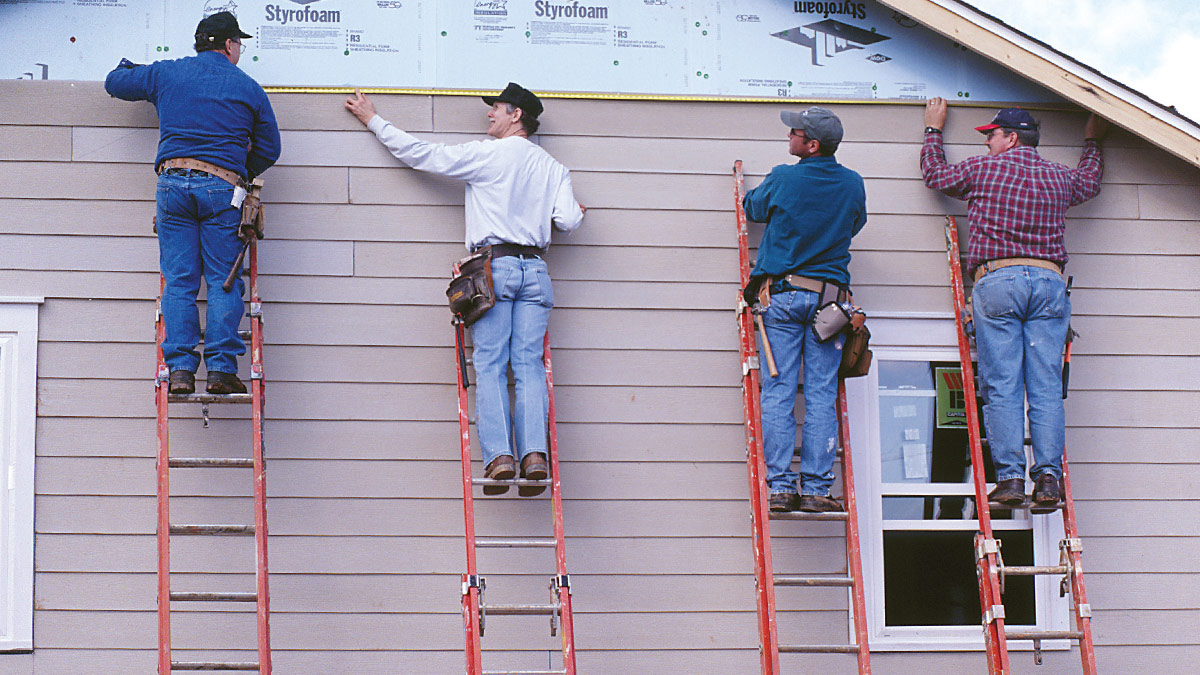
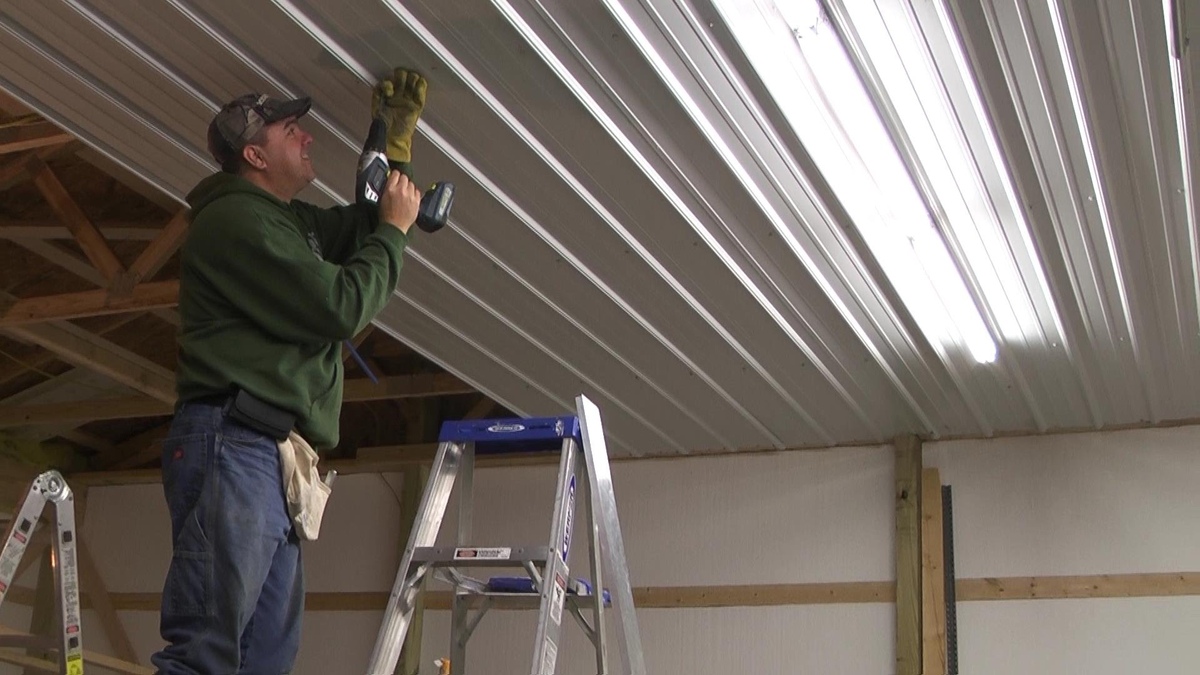
Step 4: Installing the First Panel
Now that you have your siding panels measured and cut to size, it’s time to start the installation process. In this step, we will guide you through the process of installing the first panel, setting the foundation for the rest of the siding installation.
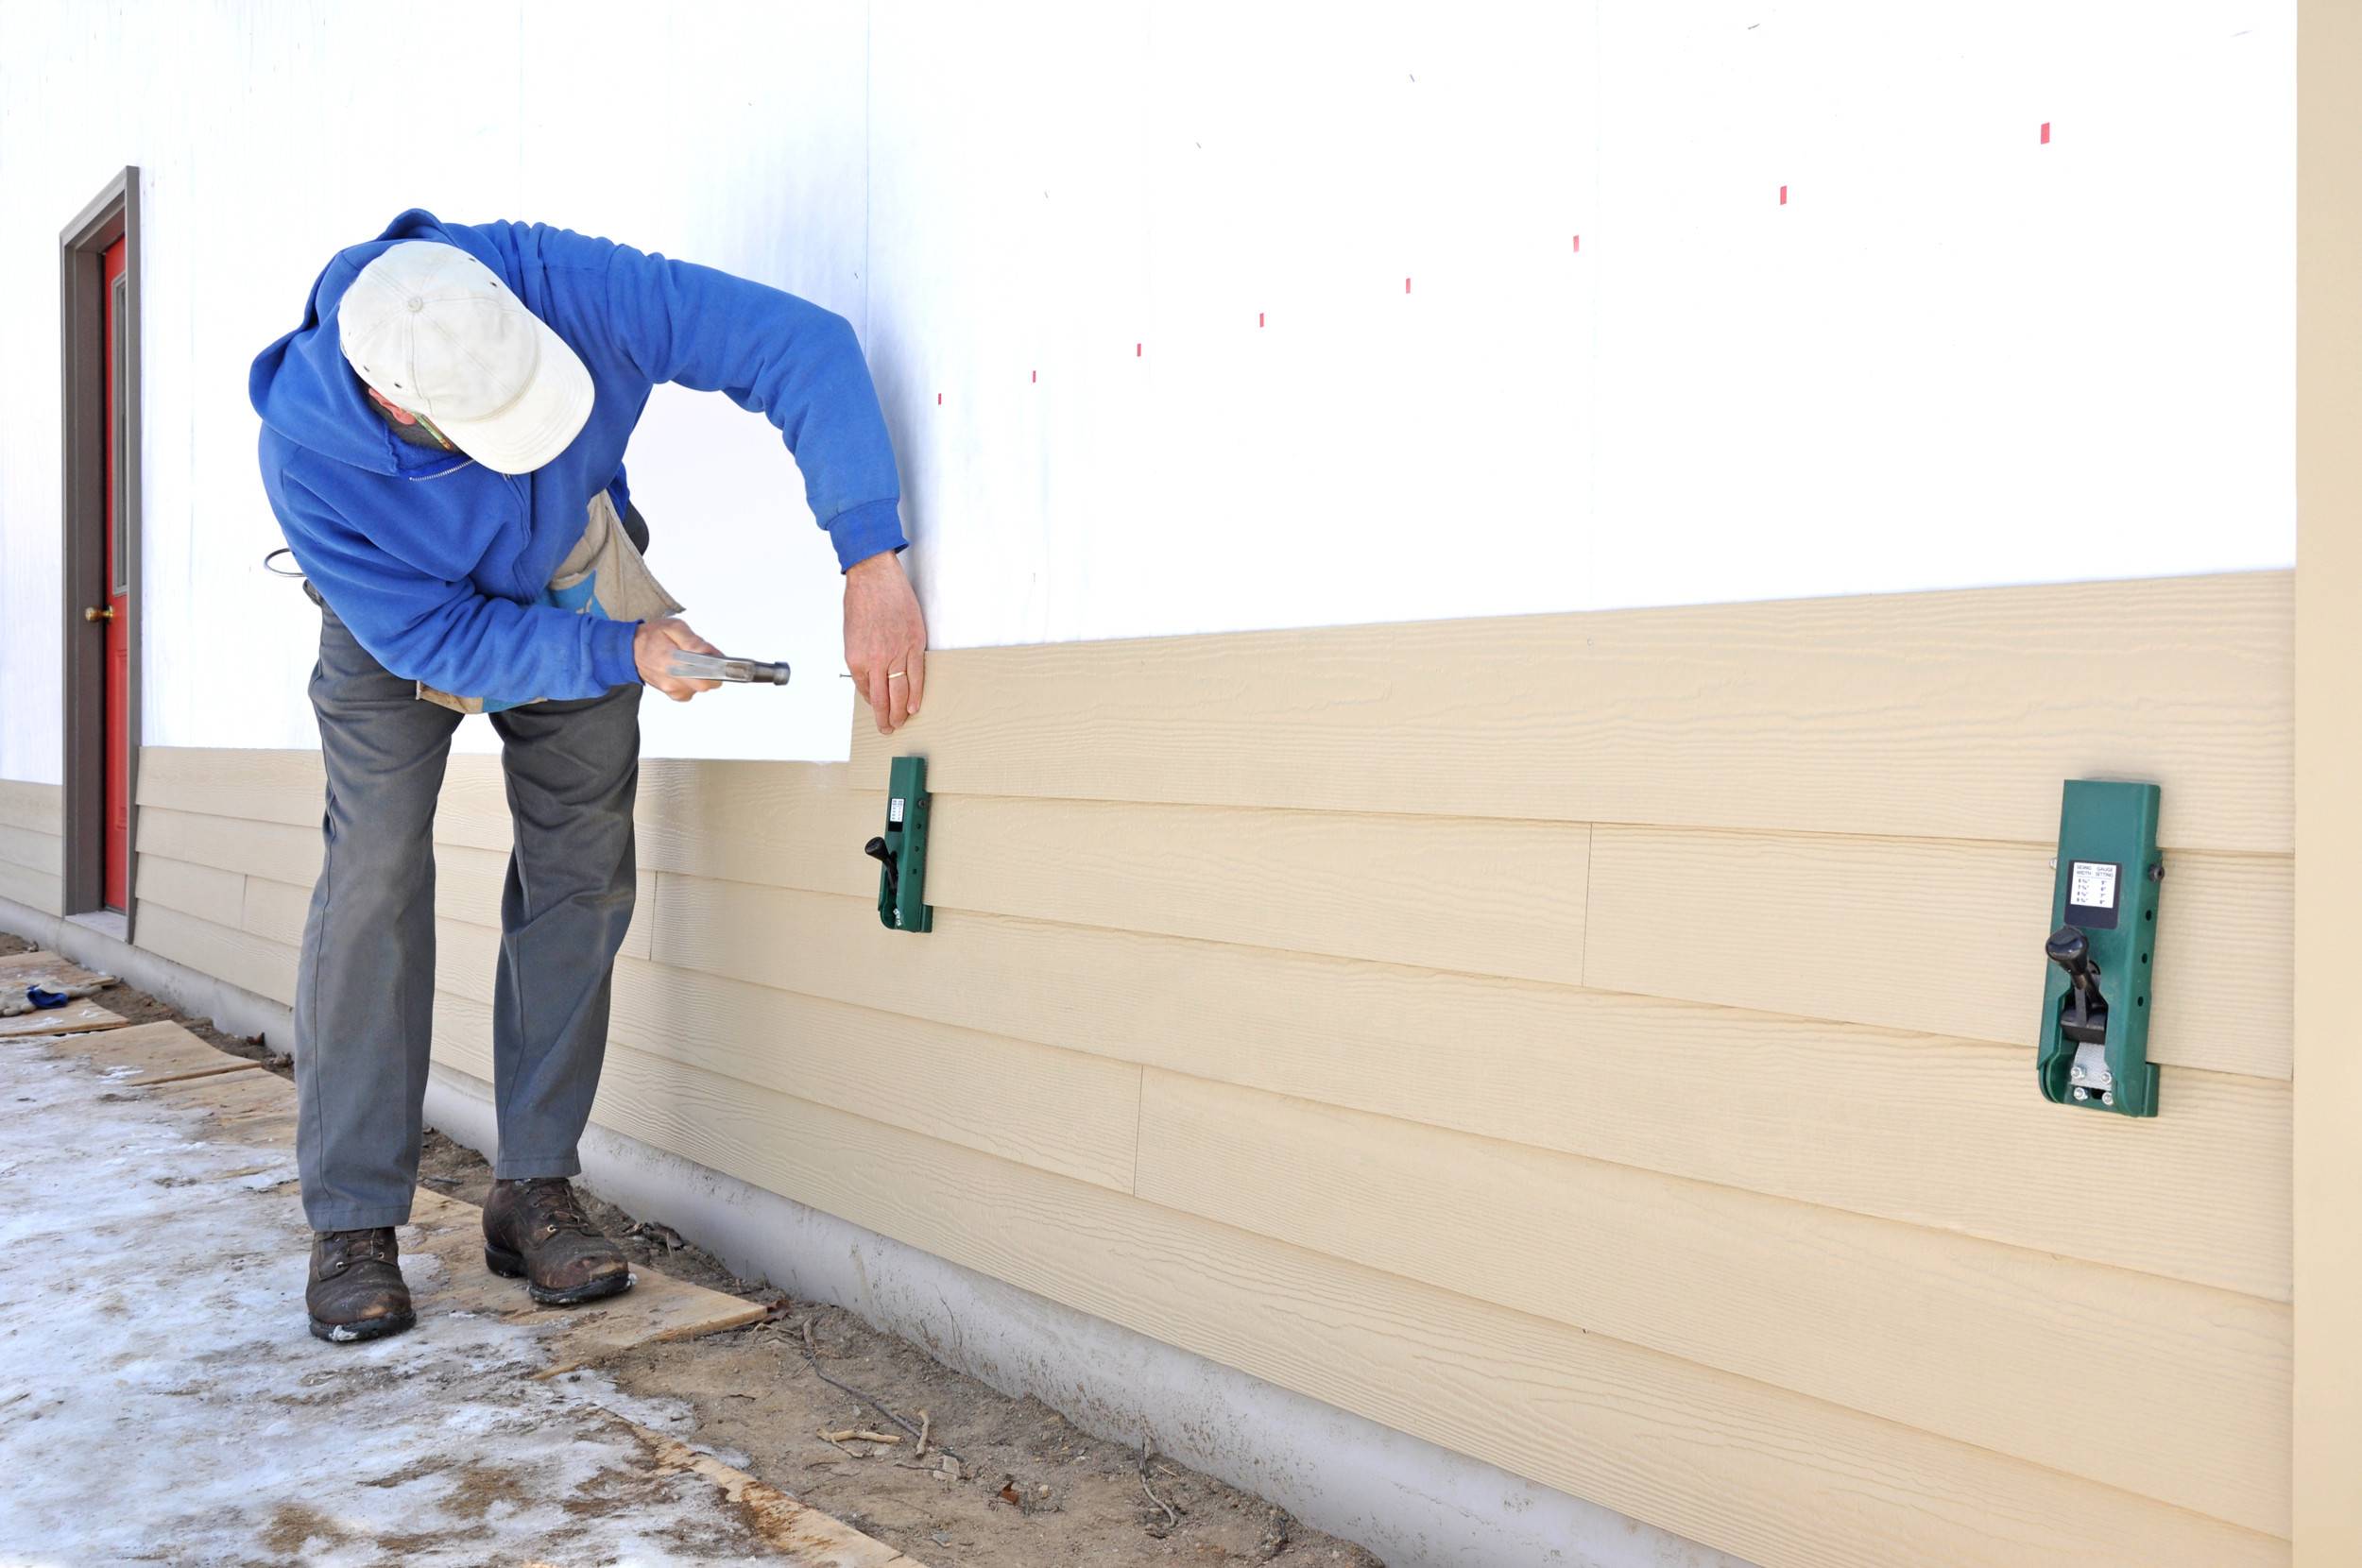
1. Start at a Corner: Begin by installing the first panel at a corner of the wall. Leave a 1/4-inch gap between the panel and any adjacent surfaces to allow for expansion and contraction. Use a level to ensure that the panel is straight and plumb.
2. Secure the Panel: Depending on the type of siding material you’re using, secure the panel to the wall using the appropriate fasteners. For example, if you’re working with vinyl siding, nail or screw the panel into the nailing flange along the top edge. Follow the manufacturer’s instructions and use spacing guidelines to ensure proper installation.
3. Check for Level and Alignment: After securing the first panel, use a level to ensure that it is level both horizontally and vertically. Adjust as needed to achieve a straight and even appearance. This initial panel will serve as a guide for the rest of the installation.
4. Overlap and Interlock: If you’re using siding with interlocking edges, ensure that the next panel overlaps and interlocks with the previous one. This helps create a watertight seal and a professional-looking finish. Secure the second panel in place, following the same guidelines as the first panel.
5. Trim if Necessary: If the last panel in the row is wider than the available space, trim it accordingly to fit. Measure and mark the excess length, and then use a circular saw or snips to make a clean cut. Ensure that the trimmed panel aligns properly with the adjacent panel.
6. Repeat for Additional Rows: Once the first row is complete, move on to the next row. Install the first panel of the second row, making sure it overlaps with the panel below and interlocks with adjacent panels. Continue this process until the entire wall is covered.
Throughout this process, remember to use a level to ensure that each panel is straight and level. Take your time to align and secure each panel properly, as this will set the foundation for the rest of the siding installation.
With the first panel in place, it’s time to move on to step 5: aligning and securing subsequent panels.
When installing siding panels, make sure to properly prepare the surface by removing any old siding and repairing any damaged areas. This will ensure a smooth and long-lasting installation.
Read more: How To Install Brick Siding
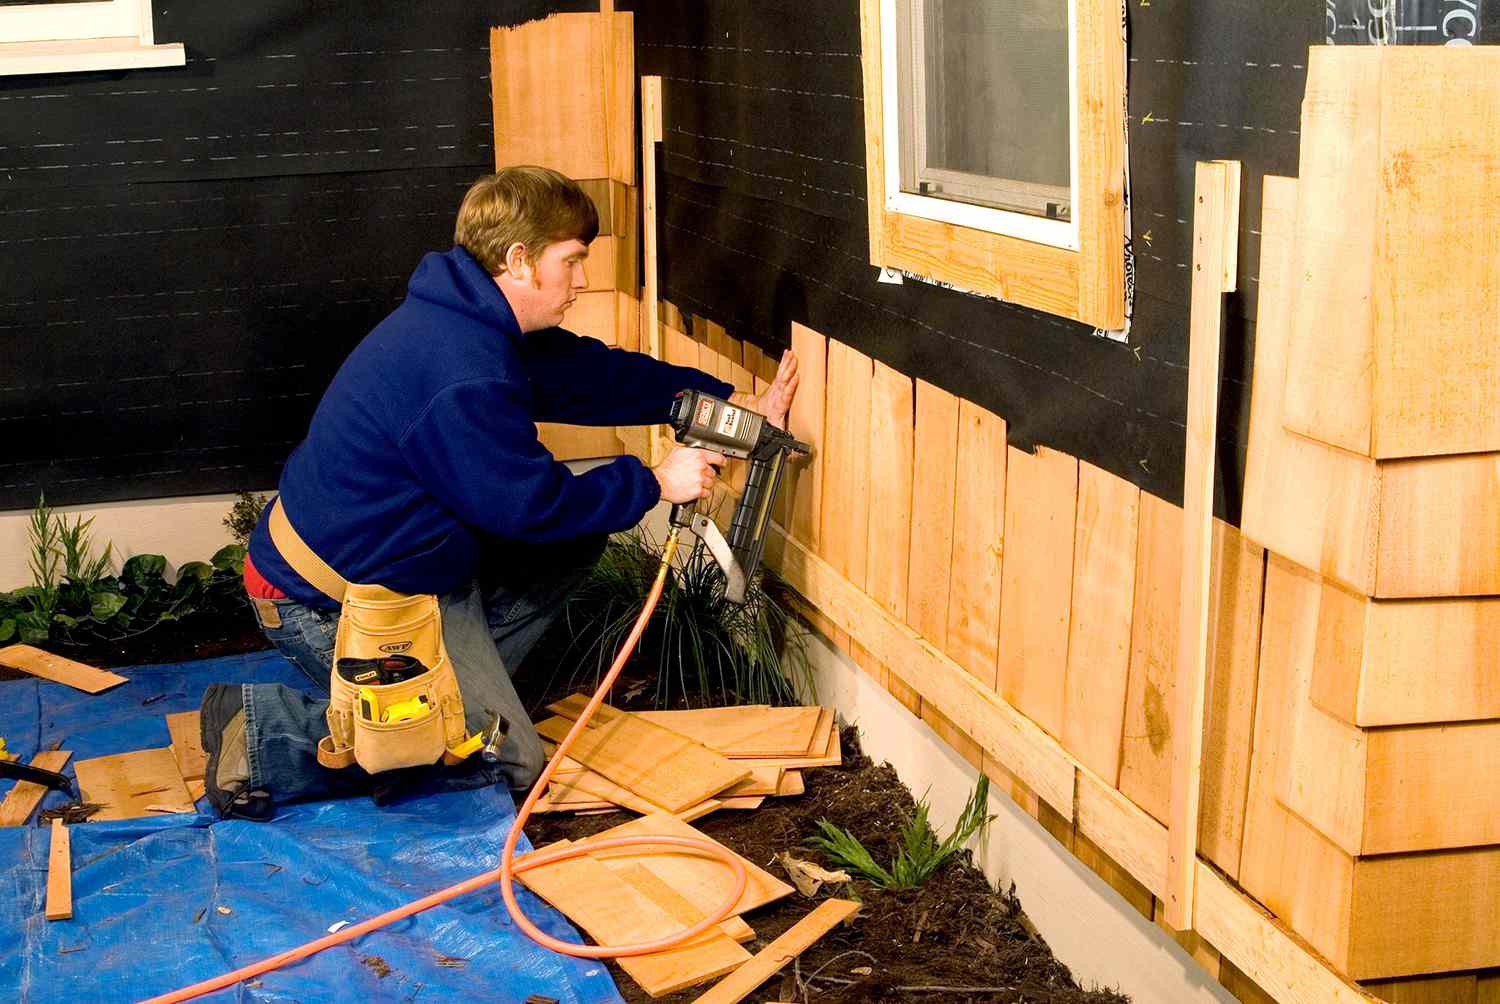
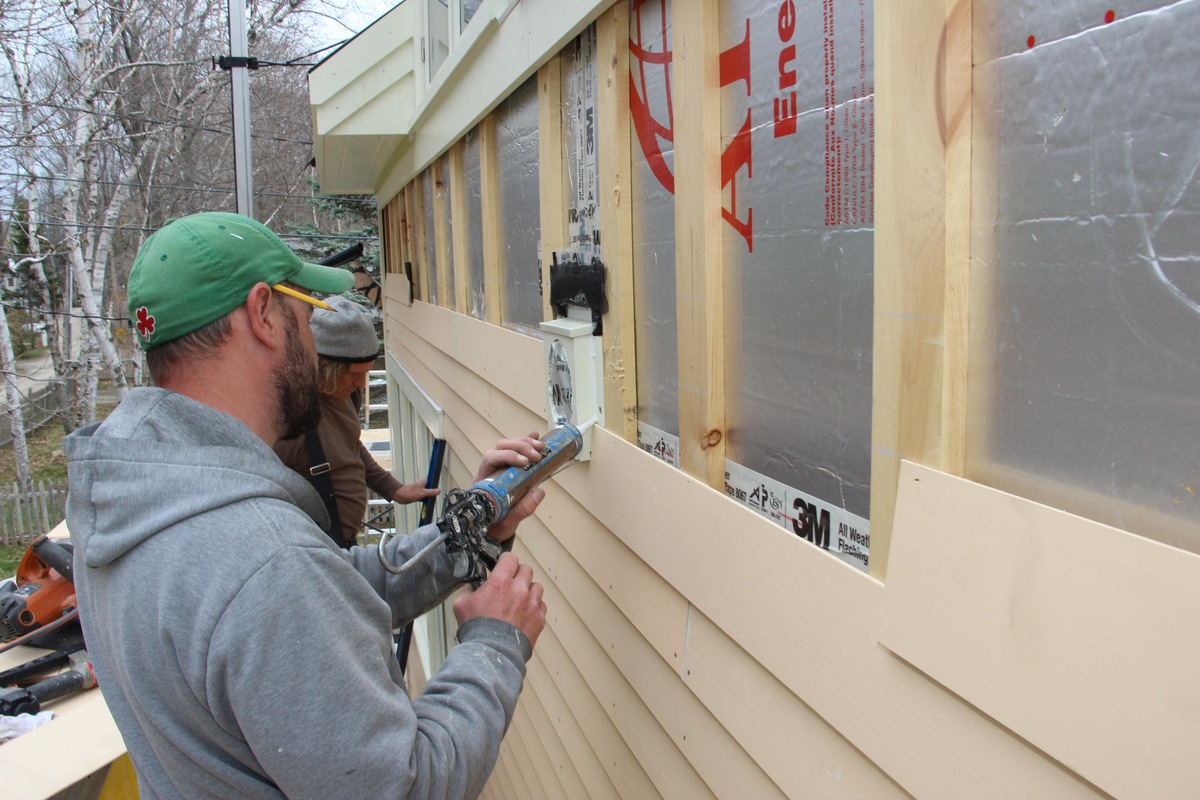
Step 5: Aligning and Securing Subsequent Panels
With the first panel installed, it’s time to align and secure the subsequent panels to create a seamless and professional-looking siding installation. In this step, we will guide you through the process of aligning and securing the panels for a visually appealing finish.
1. Overlap and Interlock: When installing each subsequent panel, ensure that it overlaps with the previous panel and interlocks with adjacent panels. This helps create a watertight seal and ensures a uniform appearance. Align the top edge of the new panel with the bottom edge of the panel above it.
2. Check for Level and Alignment: Use a level to ensure that each panel is straight and level both horizontally and vertically. Adjust as necessary to maintain a consistent and visually pleasing appearance. This step is crucial to achieve a professional finish.
3. Secure the Panels: Once the panel is aligned, secure it to the wall using the appropriate fasteners for your siding material. Follow spacing guidelines provided by the manufacturer, ensuring that the fasteners are evenly spaced and properly driven into the wall. Use a hammer or nail gun for the application of nails or screws according to the specific requirements of your siding material.
4. Maintain Consistent Overlaps: As you install each subsequent panel, ensure that the overlap between panels remains consistent. This helps maintain the integrity of the installation and provides a cohesive aesthetic. Take care to align the panels properly and avoid any gaps or uneven overlaps.
5. Address Trim Pieces: Depending on your siding design, you may need to install trim pieces between panels or at the corners of the wall. Follow the manufacturer’s instructions for installing trim, ensuring that it aligns properly with the siding panels and provides a clean and polished appearance.
6. Trim Around Windows and Doors: When reaching windows and doors, carefully cut the panels to fit around these openings. Measure and mark the necessary dimensions, then use a circular saw or snips to make the cut. Take your time and ensure that the trim fits snugly around the windows and doors for a professional look.
Throughout this step, pay close attention to the alignment and positioning of each panel. Consistency and accuracy are vital for a visually pleasing siding installation. Take the time to properly align and secure each subsequent panel, ensuring that the overlaps are consistent and the overall appearance is visually appealing.
With the panels aligned and secured, we can now move on to step 6: installing trim and accessories to enhance the overall look of your siding installation.
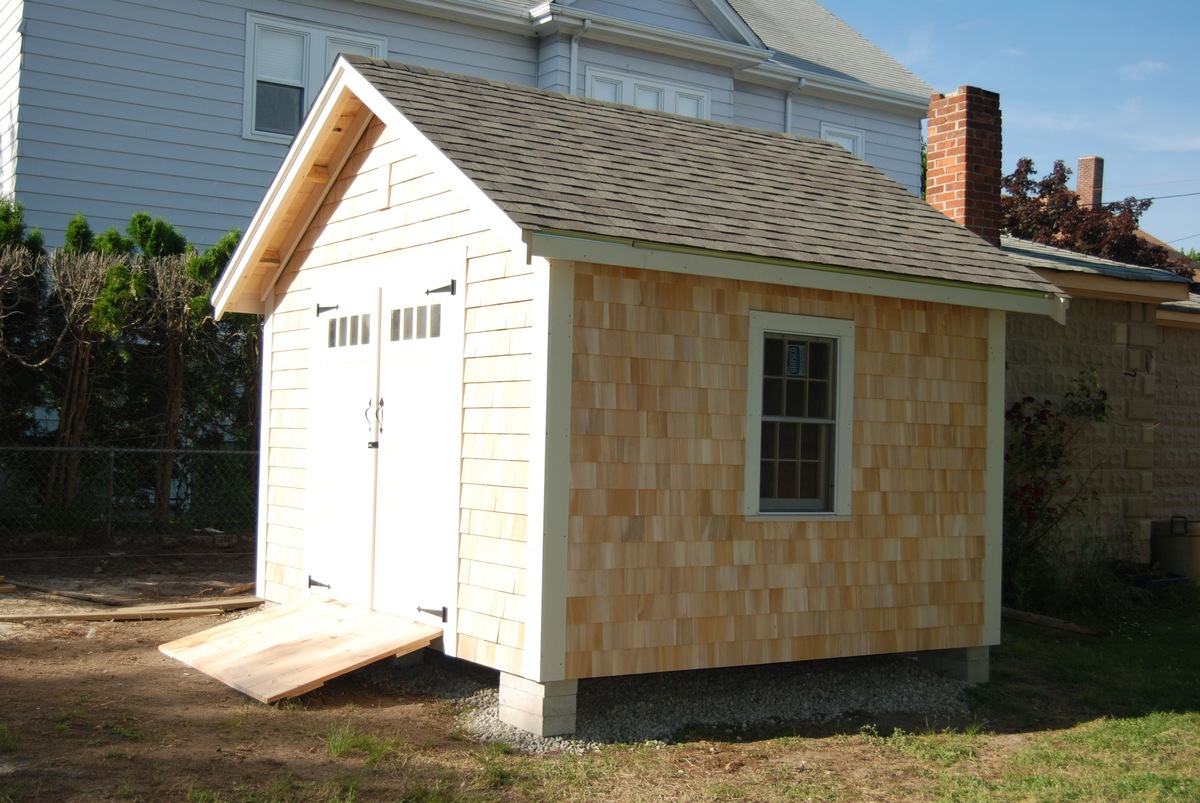
Step 6: Installing Trim and Accessories
Installing trim and accessories is an essential part of the siding installation process. Trim not only enhances the aesthetics of your siding but also provides a finished and polished look. In this step, we will guide you through the process of installing trim pieces and accessories.
1. Determine the Trim Pieces: Start by selecting the appropriate trim pieces for your siding installation. Trim pieces are available in various profiles and sizes, including corner trims, J-channels, and window/door trims. Choose trim pieces that complement your siding material and add visual interest.
2. Install Corner Trims: Begin by installing corner trims at the external corners of the wall. These trims provide a clean and professional finish while protecting the corners from potential damage. Secure the corner trims using the recommended fasteners for your chosen trim material.
3. Attach J-Channels: J-channels are used to receive and secure the cut edges of the siding panels around windows and doors. Install J-channels at the sides and top of each window and door opening. Ensure that these channels are level and properly aligned for a seamless look.
4. Apply Window and Door Trims: Install window and door trims around the windows and doors. These trims help create a polished and framed appearance while protecting the edges. Follow the manufacturer’s instructions for precise installation, ensuring that the trims align properly with the siding panels.
5. Add Drip Caps: Drip caps are accessories that divert water away from windows, doors, and other vulnerable areas. Install drip caps above windows and doors, providing an extra layer of protection against water infiltration. Carefully secure the drip caps to prevent water from seeping behind the siding panels.
6. Consider Additional Trims: Depending on the design and requirements of your siding installation, you may need additional trims or accessories. These can include soffit trims, fascia boards, or gable trims. Explore the specific needs of your project and install the appropriate trims to achieve a complete and cohesive look.
Throughout the installation of trim pieces and accessories, pay attention to proper alignment and secure attachment. Take the time to measure and cut the trims accurately, ensuring a seamless and professional finish.
Once the trim pieces and accessories are installed, we are almost done with the siding installation process. In the final step, we will cover some finishing touches and important considerations to complete your siding project.
Step 7: Finishing Touches
Congratulations! You’re in the final step of your siding installation process. In this step, we will go over some essential finishing touches and important considerations to ensure that your siding project is completed to perfection.
1. Clean the Siding: Before declaring your installation complete, thoroughly clean the siding panels. Use a mild detergent or specialized siding cleaner along with a soft brush or sponge to remove any dirt, debris, or excess caulk. Rinse the siding with clean water to ensure a fresh and spotless appearance.
2. Inspect the Installation: Take the time to inspect the entire siding installation. Check for any loose or insecure panels and trim pieces. Ensure that all fasteners are properly driven and that the gaps and overlaps are consistent. Address any areas that may need touch-ups or adjustments to maintain a tight and cohesive appearance.
3. Caulk and Seal: As a final step, apply caulk to seal any gaps or joints in the siding installation. This helps prevent moisture penetration and ensures a weather-resistant and energy-efficient installation. Use an exterior-grade caulk that is compatible with your siding material, following the manufacturer’s instructions for proper application.
4. Consider Painting or Staining: If you’re working with wood siding, consider painting or staining it to protect against weathering and add a personalized touch. Choose a high-quality paint or stain that is appropriate for your siding material and follow the manufacturer’s instructions for application. This step can significantly enhance the appearance and longevity of your siding.
5. Regular Maintenance: Siding requires routine maintenance to keep it looking its best. Be sure to regularly inspect the siding for any signs of damage, such as cracks, dents, or rot. Clean the siding periodically to remove dirt, mildew, and other contaminants. Address any issues promptly to prevent further damage and maintain the integrity of your siding installation.
Remember, the quality and longevity of your siding installation depend on proper maintenance and care. By incorporating these finishing touches and following regular upkeep, you can ensure that your siding remains beautiful and functional for years to come.
Congratulations once again on completing your siding installation! With the proper materials, tools, and techniques, you’ve achieved a professional-looking finish that enhances the beauty and protection of your home’s exterior.
If you have any further questions or need additional guidance, don’t hesitate to consult with a professional or refer to the manufacturer’s instructions for your specific siding material. Enjoy your newly installed siding and the benefits it brings to your home!
Conclusion
Installing siding panels is a rewarding and worthwhile home improvement project that can enhance the beauty, protection, and value of your home. Throughout this comprehensive guide, we have walked you through the step-by-step process of installing siding panels, from gathering materials to adding finishing touches.
We started by emphasizing the importance of gathering all the necessary materials and tools, ensuring you have everything on hand to make the installation process smooth and efficient. We then moved on to preparing the wall by removing existing siding, inspecting and repairing any damage, and installing house wrap and flashing to protect against moisture.
Next, we focused on measuring and cutting the panels with precision, ensuring a proper fit and professional appearance. Afterward, we tackled the installation of the first panel, setting the foundation for the rest of the siding installation.
We then delved into aligning and securing subsequent panels, emphasizing the importance of maintaining consistent overlaps, using a level for proper alignment, and securing the panels securely. We proceeded to the installation of trim and accessories, which added the finishing touches and enhanced the aesthetic appeal of the siding.
In the final steps of the process, we discussed the importance of performing finishing touches such as cleaning the siding, inspecting the installation, caulking and sealing, and considering painting or staining for long-lasting protection. We also emphasized the significance of regular maintenance to keep your siding looking its best.
By following these steps, exercising attention to detail, and taking the necessary precautions, you have successfully completed your siding installation project. Your home is now not only more visually appealing but also better protected from the elements.
Remember, if you ever feel unsure or overwhelmed during the installation process, it’s always a good idea to consult with a professional or refer to the manufacturer’s instructions for your specific siding material.
Thank you for choosing our comprehensive guide on how to install siding panels. We hope this article has provided you with the knowledge and confidence to tackle this rewarding DIY project and achieve exceptional results. Enjoy your newly installed siding and the many benefits it brings to your home!
Frequently Asked Questions about How To Install Siding Panels
Was this page helpful?
At Storables.com, we guarantee accurate and reliable information. Our content, validated by Expert Board Contributors, is crafted following stringent Editorial Policies. We're committed to providing you with well-researched, expert-backed insights for all your informational needs.


0 thoughts on “How To Install Siding Panels”