Articles
How To Install Siding On A Shed
Modified: October 28, 2024
Learn how to properly install siding on a shed with our step-by-step articles. Get expert advice and tips for a flawless installation.
(Many of the links in this article redirect to a specific reviewed product. Your purchase of these products through affiliate links helps to generate commission for Storables.com, at no extra cost. Learn more)
Introduction
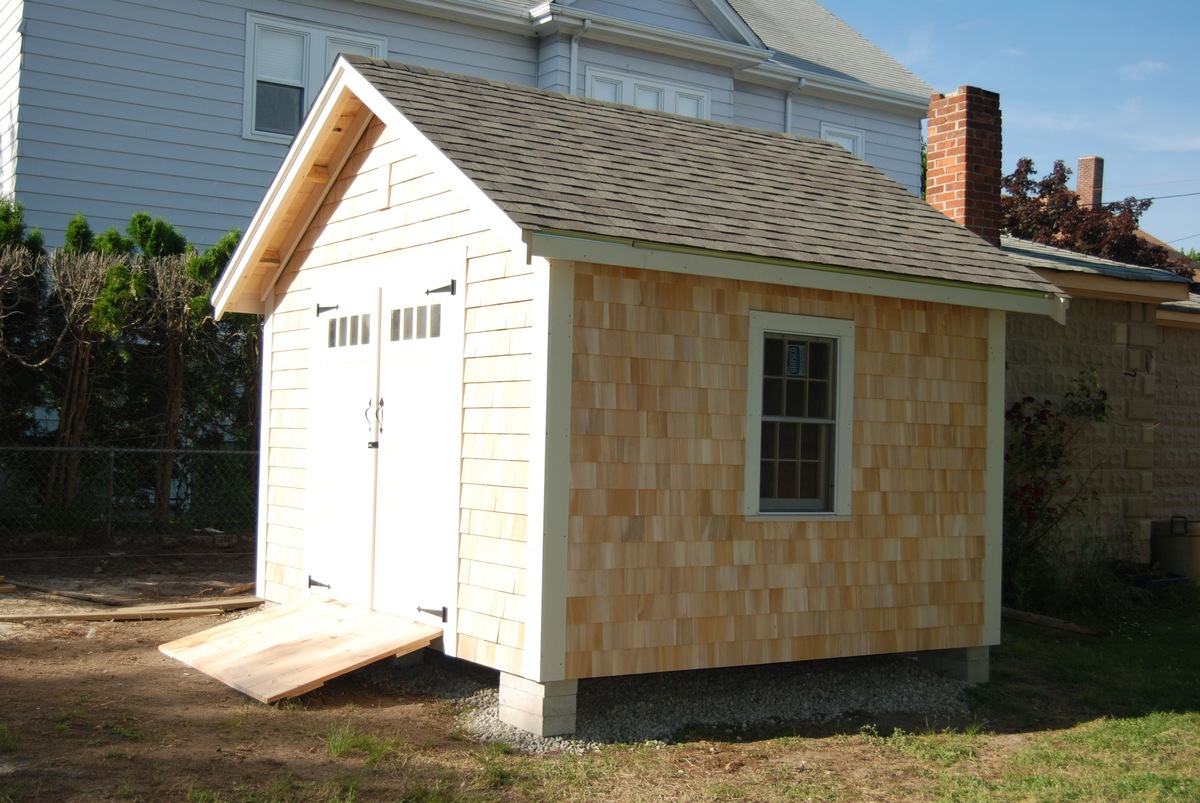
Installing siding on a shed is a great way to protect your shed from the elements, improve its appearance, and increase its durability. Whether you’re building a new shed or renovating an existing one, properly installing siding can make a significant difference in the overall quality and longevity of your shed. In this article, we’ll provide a step-by-step guide on how to install siding on a shed, along with a list of tools and materials you’ll need for the project.
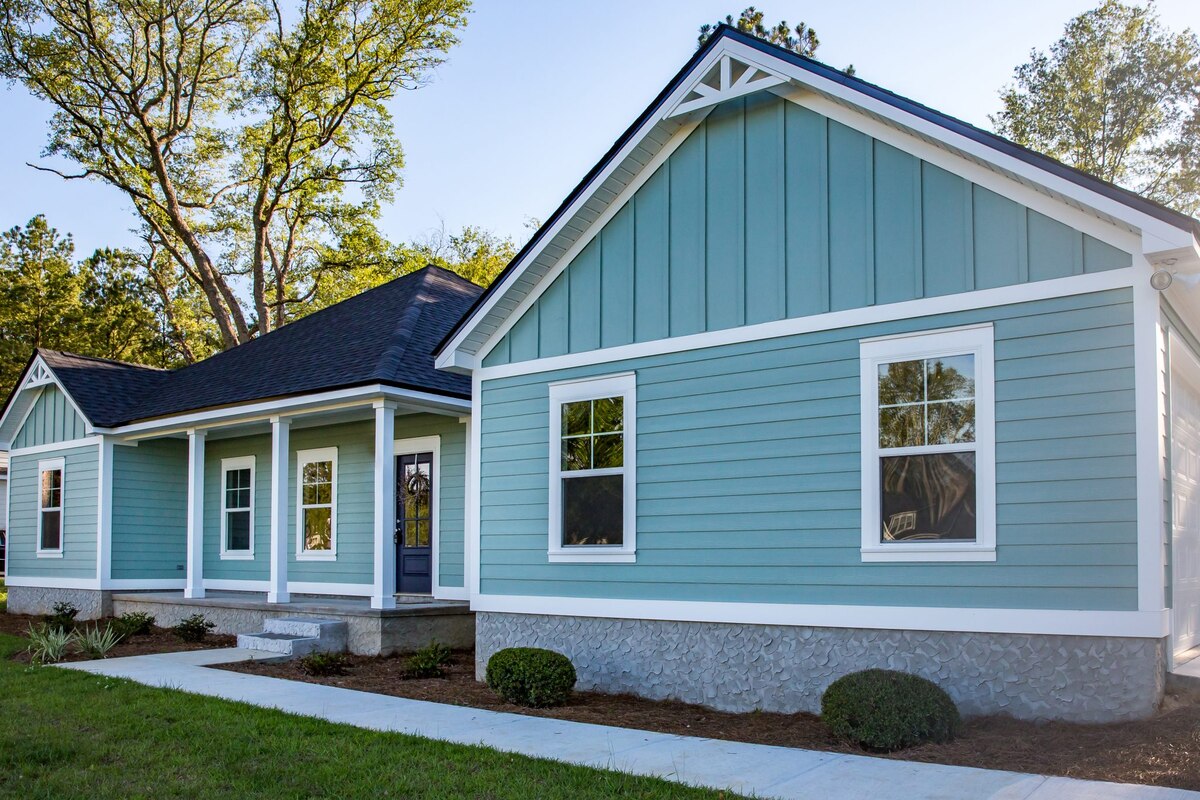
Before we dive into the installation process, it’s important to understand the benefits of siding. Siding not only serves as a protective barrier against rain, wind, and other natural elements, but it also adds insulation to the shed, making it more energy-efficient. Additionally, siding can enhance the aesthetic appeal of your shed, giving it a polished and professional look.
To ensure a successful siding installation, we’ll guide you through each step of the process, from preparing the shed for siding to installing the final touches. By following this guide, you’ll be able to transform your shed into a durable and visually appealing structure that will withstand the test of time.
But first, let’s take a look at the tools and materials you’ll need for the project.
Key Takeaways:
- Properly preparing the shed, measuring accurately, and choosing the right siding material are crucial for a successful and visually appealing siding installation. Attention to detail and careful execution are key.
- Installing siding on a shed not only enhances its durability but also adds to its aesthetic appeal. The finishing touches, such as painting and securing loose siding, are essential for a polished and professional result.
Read more: How To Install Metal Siding On A Shed
Tools and Materials Needed
Before you begin installing siding on your shed, it’s important to gather all the necessary tools and materials. Here’s a comprehensive list of what you’ll need:
Tools:
- Measuring tape
- Level
- Square
- Circular saw
- Utility knife
- Hammer
- Chalk line
- Drill
- Caulking gun
- Ladder or scaffolding (depending on the height of your shed)
- Clamps or fasteners
- Nail gun or hammer and nails
Materials:
- Siding material (such as vinyl, wood, or fiber cement)
- Corner posts
- J-Channel
- Trim
- Screws or nails
- Caulk
- Exterior-grade adhesive
- House wrap or moisture barrier
- Flashing tape
- Paint and primer (if applicable)
Having these tools and materials ready will ensure a smooth and efficient siding installation process. Additionally, make sure to choose high-quality materials that are suitable for the climate in your area and that match the overall design of your shed.
Now that you have all the necessary tools and materials, let’s move on to the first step: preparing the shed for siding installation.
Step 1: Preparing the Shed
Before you can start installing the siding on your shed, it’s important to properly prepare the structure to ensure a successful installation. Follow these steps to prepare your shed:
Read more: How To Install Vinyl Siding On A Shed Door
1. Clear the Area:
Remove any objects or debris from around the shed. This will give you plenty of space to work and prevent any obstructions during the installation process.
2. Clean the Shed:
Thoroughly clean the exterior of the shed to remove dirt, dust, and any loose particles. You can use a pressure washer or a simple mixture of water and mild detergent. Allow the shed to dry completely before moving on to the next step.
3. Inspect for Damage:
Carefully inspect the shed for any signs of damage, such as rot, cracks, or insect infestation. If you notice any issues, make the necessary repairs before proceeding with the siding installation. This will ensure a solid foundation for the siding and prevent any further damage to the shed.
4. Install House Wrap:
If your shed doesn’t already have a moisture barrier or house wrap, it’s highly recommended to install one before applying the siding. House wrap helps to protect the shed from moisture and acts as an additional layer of insulation. Follow the manufacturer’s instructions for proper installation.
By taking the time to prepare your shed, you’ll create a solid foundation for the siding installation process. This will help ensure a smooth and successful installation, resulting in a durable and weather-resistant shed. Now that the shed is prepared, let’s move on to the next step: measuring and calculating the siding requirements.
Read more: How To Put Siding On A Shed
Step 2: Measuring and Calculating Siding Requirements
Accurate measurements are crucial when it comes to installing siding on your shed. Taking the time to measure and calculate the siding requirements will help ensure that you have enough material for the job and minimize waste. Follow these steps to measure and calculate your siding requirements:
1. Measure the Height and Width:
Start by measuring the height and width of each side of your shed. Use a tape measure to get precise measurements. Measure from the top to the bottom for the height and from one edge to the other for the width. Record these measurements for each side of the shed.
2. Calculate the Square Footage:
To determine the total square footage of siding needed, multiply the height by the width for each side of the shed. Add up the square footage of all sides to get the total. It’s a good idea to add a little extra for waste and future repairs.
3. Consider Overlapping:
If you’re using siding that requires overlapping, such as clapboard or vinyl siding, take this into account when calculating the amount of siding needed. Consult the manufacturer’s instructions for the specific overlap requirements and adjust your calculations accordingly.
Read more: How To Install A Metal Shed
4. Determine Trim and J-Channel Requirements:
Don’t forget to measure and calculate the amount of trim and J-Channel needed for your shed. Trim is used to create clean edges and corners, while J-Channel is used to secure the siding panels. Measure the length of all the edges and corners that require trim and J-Channel and calculate the total amount needed.
By accurately measuring and calculating your siding requirements, you’ll ensure that you have enough material to complete the installation without unnecessary delays or additional trips to the store. With these calculations in hand, you’re ready to move on to the next step: choosing the right siding material.
Step 3: Choosing the Right Siding Material
Choosing the right siding material for your shed is important as it will determine the overall appearance, durability, and maintenance requirements of your shed. There are several siding options available, each with its own benefits and considerations. Here are some popular siding materials to consider:
1. Vinyl Siding:
Vinyl siding is a popular and cost-effective choice for shed exteriors. It is low-maintenance, durable, and available in a wide range of colors and textures. Vinyl siding is resistant to moisture, fading, and pests. It’s easy to install and can be cleaned with a hose and mild detergent.
2. Wood Siding:
Wood siding provides a classic and natural look to your shed. It is versatile and can be painted or stained to match your preference. Wood siding requires regular maintenance, including painting or staining, sealing, and protection against moisture, UV rays, and pests. Cedar and redwood are popular choices due to their natural resistance to rot and insects.
Read more: How To Install A Toilet In A Shed
3. Fiber Cement Siding:
Fiber cement siding is a durable and low-maintenance option for sheds. It is resistant to rot, impact, fire, and pests. Fiber cement siding can mimic the look of wood or other materials and is available in various styles and textures. It requires periodic repainting and sealing to maintain its appearance and protection.
4. Metal Siding:
Metal siding, such as steel or aluminum, offers excellent durability and resistance to extreme weather conditions. It is fire-resistant, low-maintenance, and can be available in a range of colors. Metal siding is quick to install and provides a modern and industrial aesthetic to your shed.
5. Composite Siding:
Composite siding blends the benefits of different materials, such as wood and plastic, to create a versatile and durable option. It offers the look of wood without the maintenance requirements and is resistant to rot, insects, and moisture. Composite siding is available in various styles and colors.
Consider factors such as cost, aesthetics, maintenance requirements, and durability when choosing the right siding material for your shed. Consult with local suppliers or professionals for more information on which option suits your specific needs.
Now that you have selected the siding material, it’s time to move on to the next step: installing the corner posts.
Step 4: Installing the Corner Posts
Corner posts are an essential component of shed siding installation, as they provide stability and support for the siding panels. Here’s a step-by-step guide on how to install the corner posts:
Read more: How To Install A Shed Roof
1. Determine the Placement:
Measure and mark the locations where the corner posts will be installed on each corner of the shed. Ensure that the posts are level and plumb to maintain a straight and even appearance for the siding panels.
2. Cut the Corner Posts:
Using a circular saw or a hand saw, cut the corner posts to the appropriate height for your shed. Make sure to trim them to match the desired finished height of the siding. Take into consideration the height of the foundation or base of your shed if applicable.
3. Attach the Corner Posts:
Position the first corner post at its designated location, ensuring it is flush against the shed’s edge. Use a level to ensure it is straight both horizontally and vertically. Secure the corner post to the shed using nails or screws, making sure it is firmly anchored. Repeat this process for each corner post.
4. Check for Alignment:
Double-check the alignment of the corner posts to ensure they are level and plumb. Making any necessary adjustments at this stage will help ensure a seamless installation of the siding panels.
Remember, the corner posts serve as the foundation for the siding installation. Properly installing and aligning them will result in a straight and professional finish for your shed. With the corner posts securely in place, it’s time to move on to the next step: installing the first row of siding.
Read more: How To Install A Storage Shed
Step 5: Installing the First Row of Siding
Now that the corner posts are in place, it’s time to start installing the first row of siding panels. This step sets the foundation for the rest of the siding installation process. Here’s how to install the first row of siding:
1. Start at a Corner:
Begin at one corner of the shed and position the first siding panel vertically against the corner post. Ensure that it is level and plumb. It’s recommended to leave a small gap between the bottom of the panel and the ground for better ventilation.
2. Fasten the Panel:
Using a nail gun or hammer and nails, secure the panel to the shed by placing fasteners through the pre-drilled holes or slots in the siding. Make sure to follow the manufacturer’s instructions for the recommended fastening spacing. Avoid overdriving the nails to prevent damage to the panel.
3. Continue to the Next Panel:
Move to the adjacent corner and position the next siding panel next to the first one. Ensure a snug fit between the panels by overlapping the end of the first panel with the beginning of the second panel. Secure the second panel to the shed with fasteners. Repeat this process for the rest of the first row.
Read more: How To Install A Shed Window
4. Check Alignment:
Regularly check the alignment and levelness of the siding panels as you install them. Adjust if necessary to maintain a straight and even appearance. Take your time to ensure the first row is installed correctly, as it will serve as a guide for the rest of the siding installation.
By following these steps, you will successfully install the first row of siding panels on your shed. This not only establishes the foundation for the remaining installation but also gives you a visual representation of the finished product. With the first row securely in place, you can now proceed to install the remaining rows of siding.
Step 6: Installing the Remaining Rows of Siding
With the first row of siding installed, you can now move on to installing the remaining rows. This step requires careful attention to detail to ensure a seamless and professional finish. Follow these steps to install the remaining rows of siding:
1. Measure and Cut the Siding:
Measure the height needed for the next row of siding by holding a full-length siding panel against the previously installed row, ensuring a small gap for expansion. Use a circular saw or utility knife to cut the siding to the appropriate height. Remember to double-check your measurements before making any cuts.
2. Apply Adhesive (If Applicable):
If your siding material requires adhesive, apply a thin, even layer to the back of the cut siding panel. This will help secure the panel in place and prevent movement or warping over time.
Read more: How To Install Brick Siding
3. Position and Fasten the Siding:
Place the cut siding panel in position, aligning it with the previous row and making sure it is level. Use a level or square to ensure proper alignment. Secure the panel to the shed using nails or screws, following the manufacturer’s guidelines for spacing and fastening.
4. Repeat the Process:
Continue measuring, cutting, adhesive application (if necessary), and fastening for each subsequent row of siding. Make sure to overlap the ends of the panels to create a seamless and weather-resistant barrier. Regularly check for alignment and levelness as you work your way up.
5. Trim Obstacles:
If you encounter obstacles such as windows, doors, or vents, carefully measure and cut the siding to fit around them. Use the appropriate tools, such as a jigsaw or snips, to make precise cuts for a clean and professional look. Ensure that any trim or J-channel is properly installed around these obstacles.
By following these steps, you will successfully install the remaining rows of siding on your shed. Take your time and pay attention to detail to ensure a well-finished exterior that not only protects but also enhances the aesthetics of your shed. With the siding in place, it’s time to move on to the next step: cutting and fitting siding pieces.
Step 7: Cutting and Fitting Siding Pieces
As you progress with the siding installation, you will inevitably encounter areas that require custom cuts and fittings. These include corners, edges, and areas around windows and doors. To ensure a precise and professional-looking siding installation, follow these steps for cutting and fitting siding pieces:
Read more: How To Install Siding On House
1. Measure and Mark:
Carefully measure the area where you need to make a custom cut or fitting. Use a pencil or marker to mark the measurements directly on the backside of the siding panel. Double-check your measurements to ensure accuracy.
2. Cut the Siding:
Using a circular saw, jigsaw, or utility knife, carefully cut along the marked lines. Take your time to ensure a clean and accurate cut. If necessary, use a file or sandpaper to smooth any rough edges.
3. Test the Fit:
After cutting the siding piece, test its fit in the desired location. Make any additional adjustments if needed to ensure a proper fit and seamless appearance. The siding panel should fit snugly and align with the surrounding panels.
4. Secure the Siding:
Once you’re satisfied with the fit, secure the siding piece in place using nails, screws, or appropriate fasteners. Follow the manufacturer’s guidelines for spacing and fastening. Ensure that the panel is level and aligned with the rest of the siding.
Read more: How To Install Siding Panels
5. Repeat the Process:
Continue with the same process of measuring, marking, cutting, and fitting for any other areas that require custom siding pieces. Take your time and ensure accuracy to achieve a professional finish throughout your shed.
Remember, precise cutting and fitting of siding pieces are crucial for a polished and visually appealing installation. It is well worth the effort to achieve a seamless and cohesive look for your shed. With the custom cuts and fittings complete, you’re ready to move on to the next step: installing J-Channel and trim.
Step 8: Installing J-Channel and Trim
Installing J-Channel and trim is an important step in the siding installation process. J-Channel provides a neat and finished edge for siding panels, while trim helps to create clean lines and cover gaps. Follow these steps to properly install J-Channel and trim on your shed:
1. Prepare the J-Channel:
Measure and cut the J-Channel pieces to the appropriate length for each side of the shed. Use a utility knife or tin snips to make clean and accurate cuts. Ensure that the J-Channel is slightly longer than the height or width of the siding panels to accommodate expansion and contraction.
2. Install the J-Channel:
Starting at one corner of the shed, position the J-Channel along the edge, ensuring it is level and plumb. Nail or screw the J-Channel into place, leaving a small gap between the J-Channel and the siding panel to allow for expansion. Continue installing J-Channel along each edge of the shed.
Read more: How To Install Composite Siding
3. Cut and Install Trim Pieces:
Measure and cut the trim pieces to fit around corners, windows, doors, and any other areas that require additional finishing. Double-check your measurements and make precise cuts for a clean and professional look. Secure the trim pieces in place using nails or screws, ensuring they are flush with the siding and J-Channel.
4. Seal the J-Channel and Trim:
Apply a thin bead of caulk along the top edge of the J-Channel and around each trim piece to seal any gaps and prevent moisture infiltration. Smooth the caulk with a caulking tool or your finger for a clean finish.
Read more: How To Install Siding Panels
5. Repeat the Process:
Continue installing J-Channel and trim on all sides of the shed, ensuring that each piece is securely fastened and properly sealed. Take your time to achieve a neat and professional appearance.
Installing J-Channel and trim not only enhances the visual appeal of your shed but also provides additional protection against the elements. With these finishing touches complete, your shed is almost ready for its final touches. Let’s move on to the last step: the finishing touches.
Step 9: Finishing Touches
The finishing touches are the final steps to complete the siding installation on your shed. These touches add the final polish and ensure that your shed looks professional and well-crafted. Follow these steps to add the finishing touches to your shed:
Read more: How To Install Cement Siding
1. Paint or Seal the Siding:
If your siding material requires painting or sealing, now is the time to do it. Choose a high-quality exterior-grade paint or sealant that is suitable for your siding material. Follow the manufacturer’s instructions for application and drying times. Painting or sealing the siding not only enhances its appearance but also provides an additional layer of protection.
2. Secure Loose or Damaged Siding:
Inspect the siding panels for any loose or damaged sections. If you notice any areas that need attention, use appropriate fasteners or adhesive to secure them in place. Repair or replace any damaged siding to maintain the integrity of your shed’s exterior.
3. Clean Up:
Remove any debris, tools, or materials left behind during the installation process. Keep the work area clean and tidy, ensuring that there are no potential hazards or obstructions around the shed.
4. Assess the Overall Appearance:
Stand back and assess the overall appearance of your shed. Check for any visible gaps, unevenness, or imperfections in the siding installation. Make any necessary adjustments or touch-ups to achieve the desired look.
Read more: How To Install Steel Siding
5. Enjoy Your Newly Sided Shed:
Once you’ve completed the finishing touches, step back and admire your newly sided shed. You’ve successfully installed siding, added the necessary trim and J-Channel, and completed the final touches. Your shed is now protected, visually appealing, and ready to be fully utilized.
By following these steps and paying attention to detail, you’ve transformed your shed into a durable and aesthetically pleasing structure. Regular maintenance and upkeep will ensure that your siding remains in excellent condition for years to come. Congratulations on a job well done!
Conclusion
Installing siding on your shed not only protects it from the elements but also enhances its appearance and durability. Throughout this guide, we have provided you with a comprehensive step-by-step process for installing siding on your shed. We started with the preparation of the shed, measuring and calculating the siding requirements, and selecting the right siding material for your specific needs. We then walked you through the installation of corner posts, the first row of siding, and the remaining rows. We covered cutting and fitting siding pieces, installing J-Channel and trim, and adding the finishing touches to complete the project.
Remember, meticulous attention to detail, proper measurements, and careful installation are key to achieving a professional and long-lasting result. Take your time during each step and consult the manufacturer’s guidelines for the specific materials you are using. It’s also crucial to ensure the shed is prepared properly before starting the installation process.
By following our guide, you’ve gained the knowledge and confidence to successfully install siding on your shed. Not only does this enhance the functionality and protection of your shed, but it also adds to its visual appeal. A well-maintained shed can serve multiple purposes, such as storage, workshop, or even a cozy backyard retreat.
Remember to regularly inspect and maintain your siding to ensure its longevity. By doing so, you can extend the lifespan of your shed and enjoy its benefits for years to come.
We hope that this guide has been informative and helpful for your shed siding installation project. Enjoy the fruits of your labor and the transformation of your shed into a beautiful and functional space!
Frequently Asked Questions about How To Install Siding On A Shed
Was this page helpful?
At Storables.com, we guarantee accurate and reliable information. Our content, validated by Expert Board Contributors, is crafted following stringent Editorial Policies. We're committed to providing you with well-researched, expert-backed insights for all your informational needs.

0 thoughts on “How To Install Siding On A Shed”