Articles
How To Install Shake Siding
Modified: January 19, 2024
Learn step-by-step how to install shake siding with our comprehensive articles. Get expert advice and tips to ensure a flawless installation.
(Many of the links in this article redirect to a specific reviewed product. Your purchase of these products through affiliate links helps to generate commission for Storables.com, at no extra cost. Learn more)
Introduction
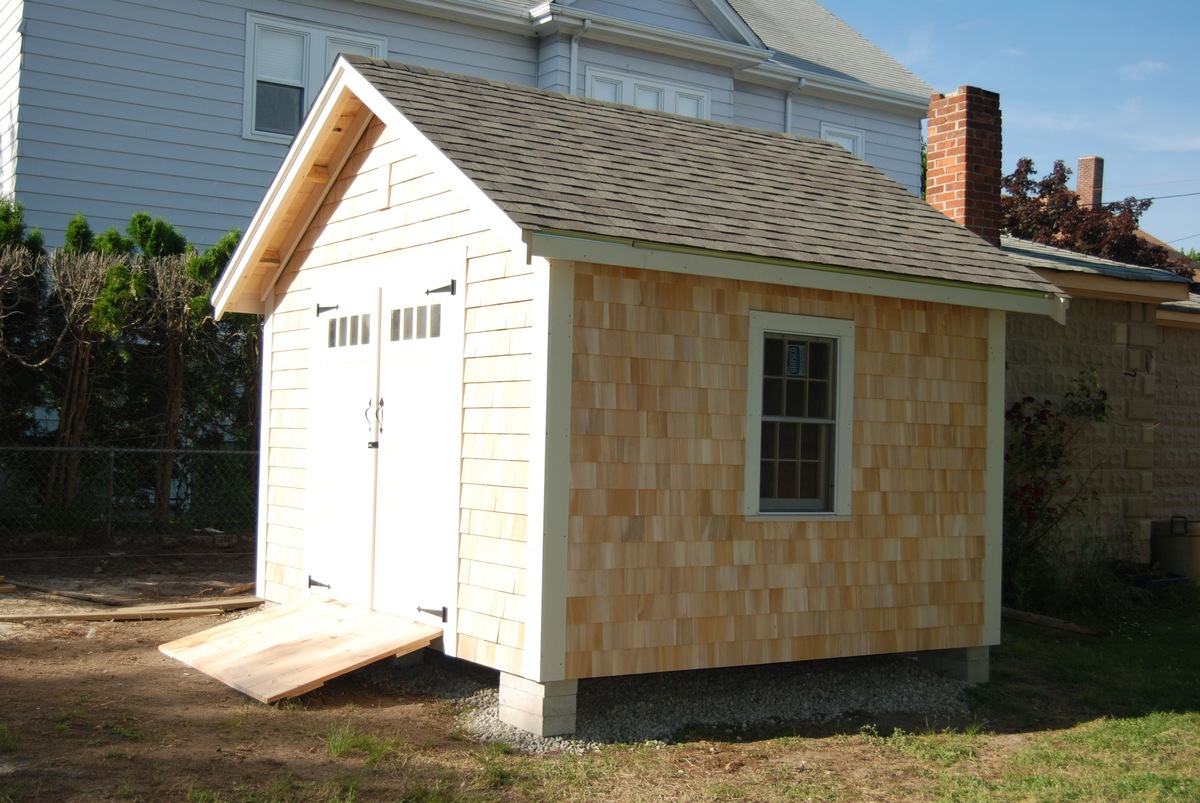
Welcome to the definitive guide on how to install shake siding! If you are looking to enhance the aesthetic appeal and durability of your home’s exterior, shake siding is an excellent choice. Not only does it provide a charming and rustic look, but it also offers protection against the elements.
Installing shake siding may seem like a daunting task, especially if you have little to no experience with home improvement projects. However, with the right materials, tools, and a step-by-step approach, you can successfully complete the installation and achieve professional-looking results.
This article will walk you through the entire process of installing shake siding, from gathering the necessary materials to making the finishing touches. Whether you are a seasoned DIY enthusiast or a beginner, our comprehensive guide will simplify the installation process so you can confidently tackle this project.
Before we dive into the details, it’s important to note that installing shake siding requires precision and attention to detail. Take your time, follow the instructions closely, and don’t hesitate to seek professional assistance if needed. With that said, let’s get started!
Key Takeaways:
- Installing shake siding requires meticulous preparation, precise measurements, and attention to detail. By following the step-by-step process outlined in this guide, you can achieve a professional-grade installation that enhances your home’s exterior.
- Completing the installation of shake siding involves not only attaching the panels but also making finishing touches, such as cleaning, sealing, and inspecting. Regular maintenance is essential for preserving the beauty and longevity of your siding.
Read more: How To Install Vinyl Cedar Shake Siding
Step 1: Gather the Necessary Materials
Before you begin installing shake siding, it’s important to gather all the necessary materials and tools. This will ensure that you have everything you need to complete the project efficiently and effectively. Here’s a list of the essential items you’ll need:
- Shake Siding: Purchase enough shake siding to cover the desired area of your home. Make sure to choose high-quality shake siding that is designed for exterior use and can withstand the weather conditions in your area.
- Starter Strip: The starter strip is necessary for properly securing the first row of shake siding. It provides a stable base for the rest of the siding installation.
- Corner Caps: Corner caps are used to cover and protect the corners of your home. They add a finished look to the overall siding installation.
- Nails or Screws: Depending on the type of shake siding you choose, you’ll need either nails or screws to secure the siding to the surface. Make sure to select nails or screws that are long enough to penetrate the siding and anchor it securely.
- Caulk: Caulk is necessary for filling in any gaps between the siding and the surface, as well as sealing any joints or corners. Choose a high-quality caulk that is specifically designed for outdoor use.
- Hammer or Screwdriver: You’ll need a hammer or screwdriver to drive in nails or screws during the installation process.
- Measuring Tape: Accurate measurements are crucial for ensuring that your shake siding installation is level and evenly spaced. A measuring tape will help you achieve precise results.
- Saw: You may need a saw to cut the shake siding to fit around windows, doors, or other obstacles on your home’s exterior.
- Protective Gear: Lastly, don’t forget to wear appropriate protective gear, such as gloves and safety glasses, to protect yourself during the installation process.
By gathering all of these materials before you start the installation, you’ll avoid unnecessary trips to the store and ensure a smoother workflow. Now that you have everything you need, let’s move on to the next step: preparing the surface.
Step 2: Prepare the Surface
Preparing the surface is a crucial step in ensuring a successful shake siding installation. A properly prepared surface will provide a stable foundation for the siding and allow for better adhesion. Here’s what you need to do:
- Clean the Surface: Start by thoroughly cleaning the surface where the shake siding will be installed. Remove any dirt, debris, or loose paint using a scrub brush and mild detergent. Rinse the surface with water and allow it to dry completely.
- Repair Any Damaged Areas: Inspect the surface for any signs of damage, such as rotted wood or cracks. Replace or repair any damaged areas before proceeding with the installation to ensure a level and sturdy surface.
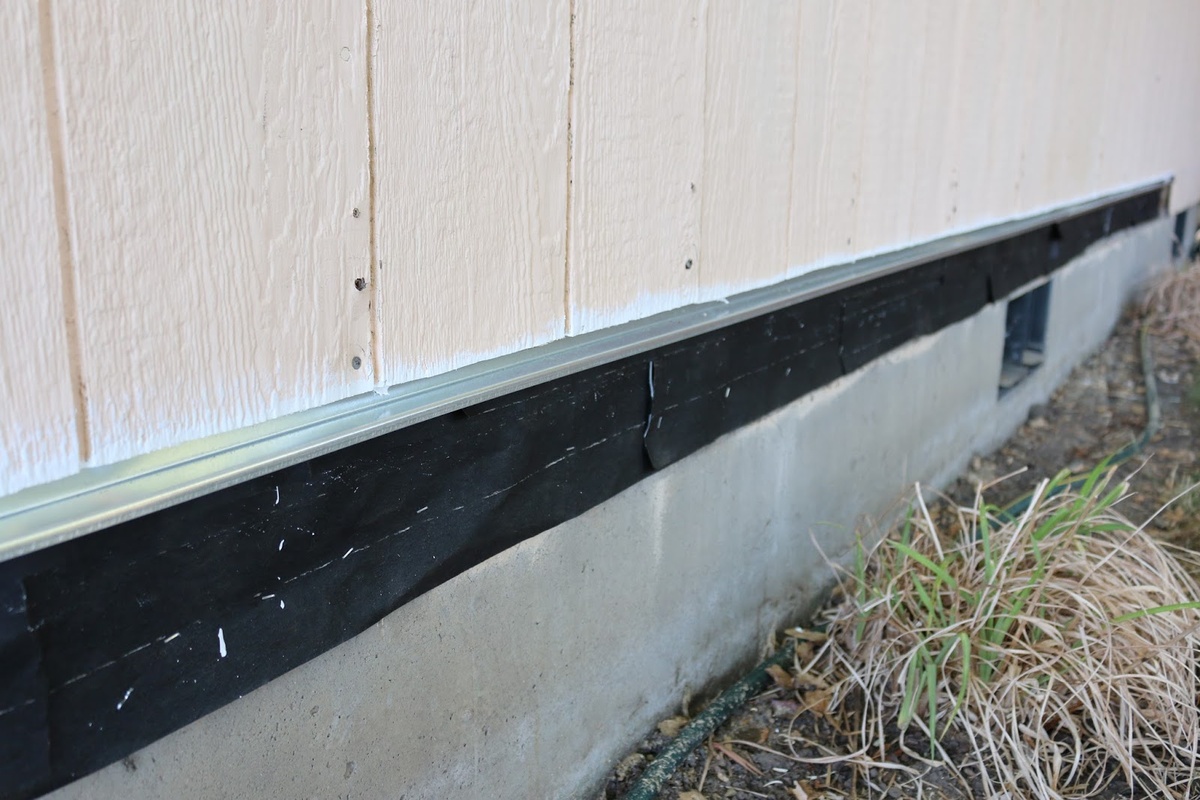
- Apply a Moisture Barrier: In areas with high moisture or a history of water infiltration, it’s important to apply a moisture barrier. This will help prevent water damage and ensure the longevity of your shake siding. Follow the manufacturer’s instructions for applying the moisture barrier.
- Check for Level and Square: Use a level and carpenter’s square to ensure that the surface is level and square. This will ensure a proper alignment and a clean, professional-looking finish. Make any necessary adjustments before moving on to the next step.
- Install Flashing: If your project requires it, install flashing around windows, doors, and other areas where water penetration is a concern. Flashing helps redirect water away from vulnerable areas and protects the underlying structure.
By taking the time to properly prepare the surface, you’ll avoid potential issues and ensure a smooth installation process. It will also help extend the lifespan of your shake siding by creating a durable and weather-resistant barrier. Once the surface is prepared, you’re ready to move on to the next step: installing the starter strip.
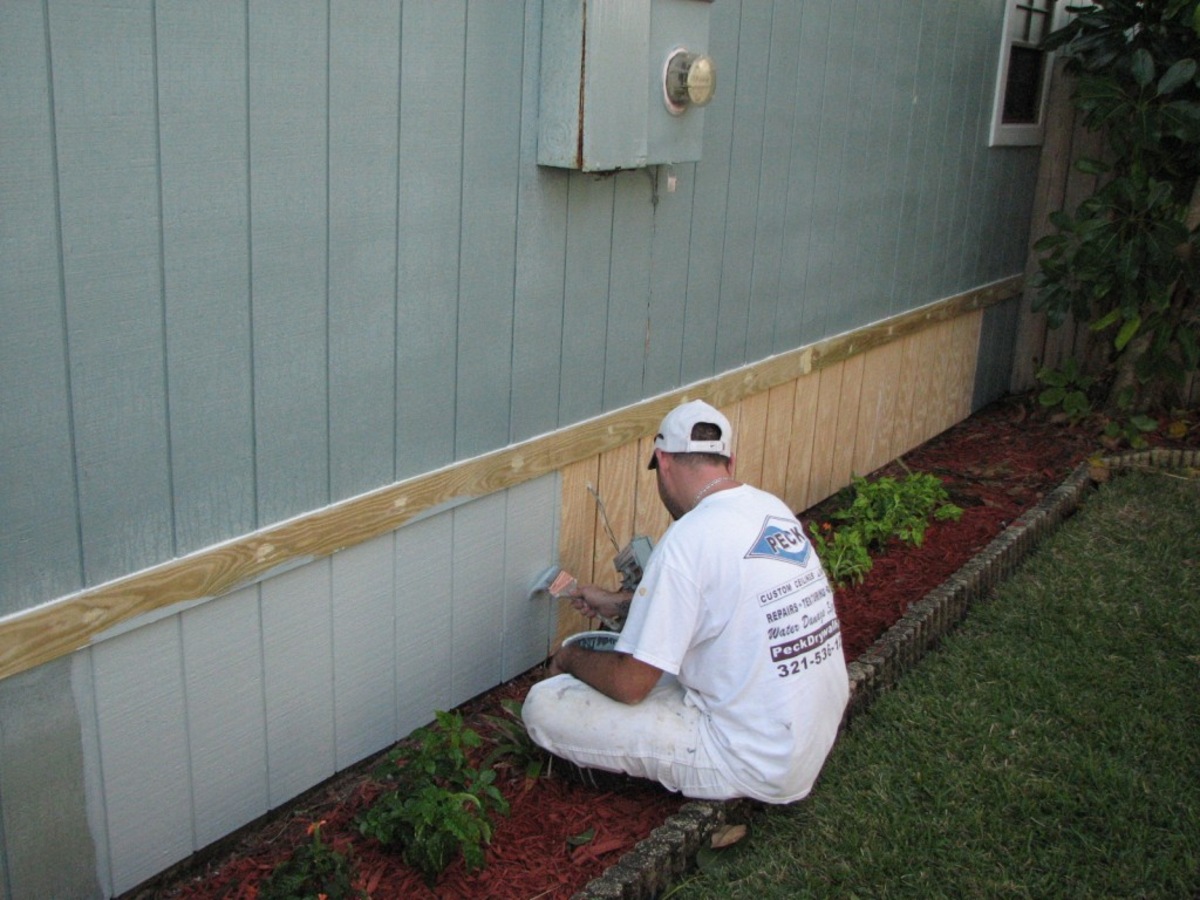
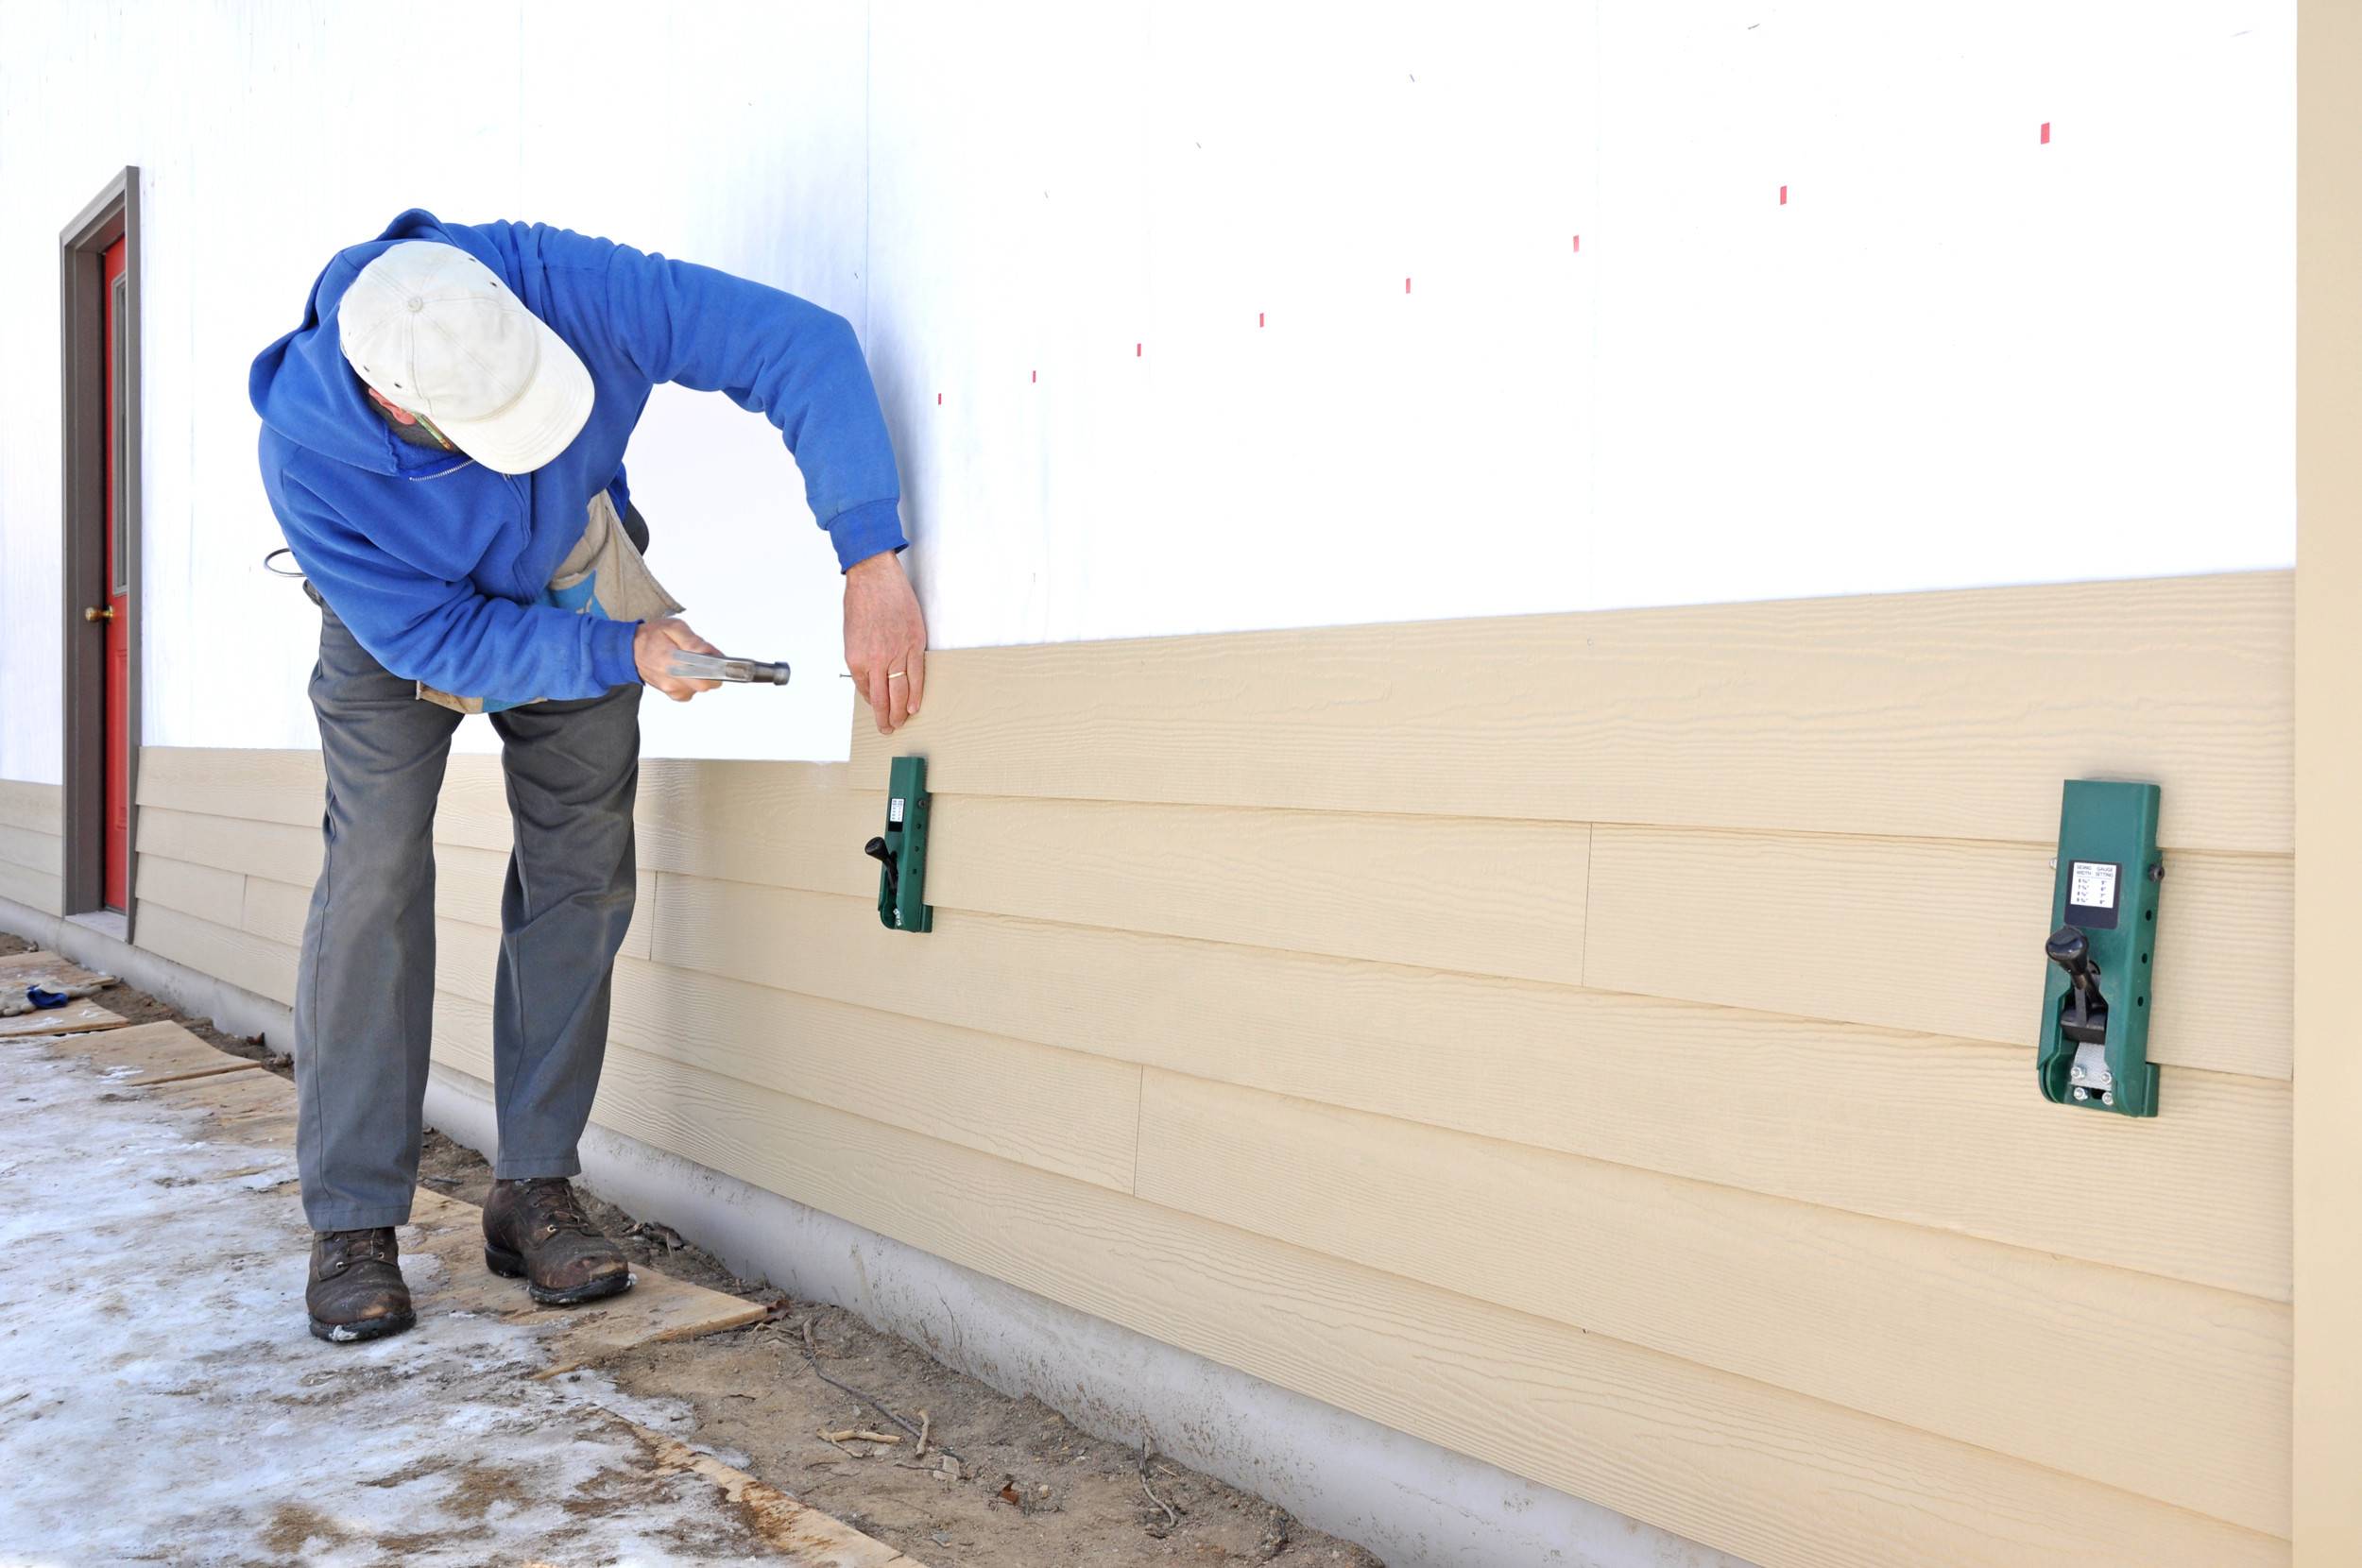
Step 3: Install the Starter Strip
Installing the starter strip is the first task in the process of installing shake siding. The starter strip creates a secure base for the siding and ensures a professional-looking finish. Here’s how you can install the starter strip:
- Measure and Mark: Begin by measuring and marking the bottom edge of the wall where you will be installing the starter strip. The height should be consistent with the desired placement of the first row of shake siding.
- Position the Starter Strip: Align the long edge of the starter strip with the marked line on the wall. Make sure the strip is level and perpendicular to the ground. Secure it in place using nails or screws, placing them approximately every 16 inches along the strip.
- Ensure a Gap: Leave a small gap between the starter strip and the surface of the wall. This gap allows for expansion and contraction of the siding due to temperature and humidity changes.
- Continue Installing the Starter Strip: Repeat the process of measuring, positioning, and securing the starter strip along the rest of the wall where the shake siding will be installed. Make sure each strip is level and properly aligned with the previous one.
- Trim the Starter Strip: If necessary, trim the starter strip to fit around corners or other obstacles on the wall. Use a saw or utility knife to make precise cuts.
- Check for Level: Double-check that all the starter strips are level and properly aligned. This will ensure a straight and even installation of the shake siding.
By installing the starter strip, you have created a solid foundation for the shake siding installation. It will provide stability and support for the rest of the siding and ensure a professional finish. With the starter strip in place, you’re now ready to move on to the next step: installing the shake siding itself.
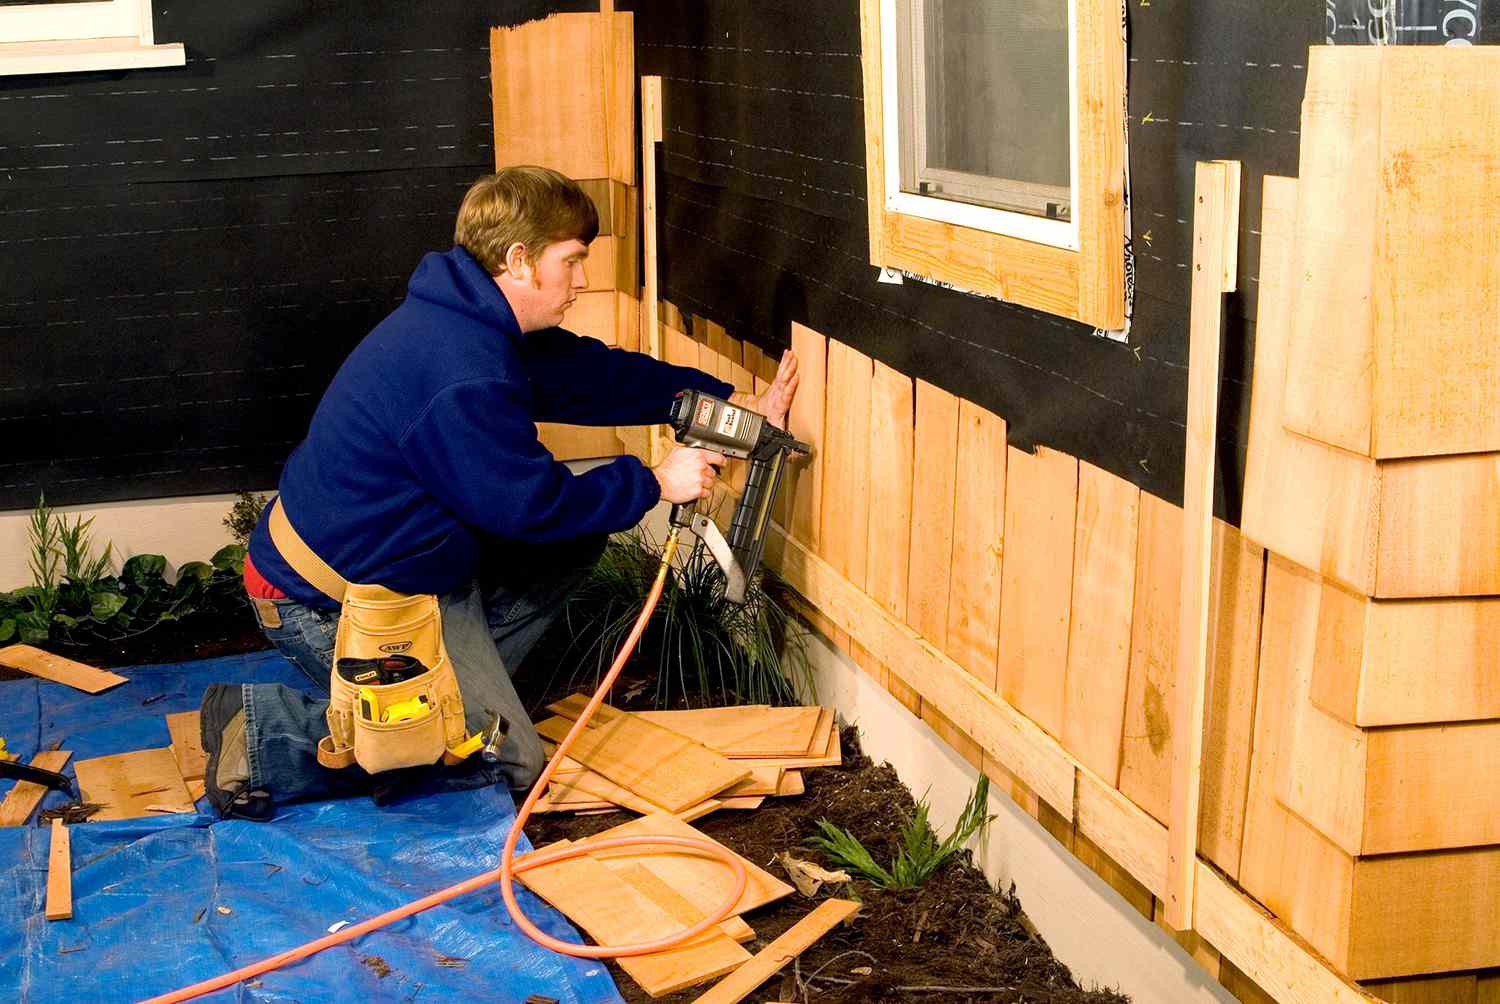
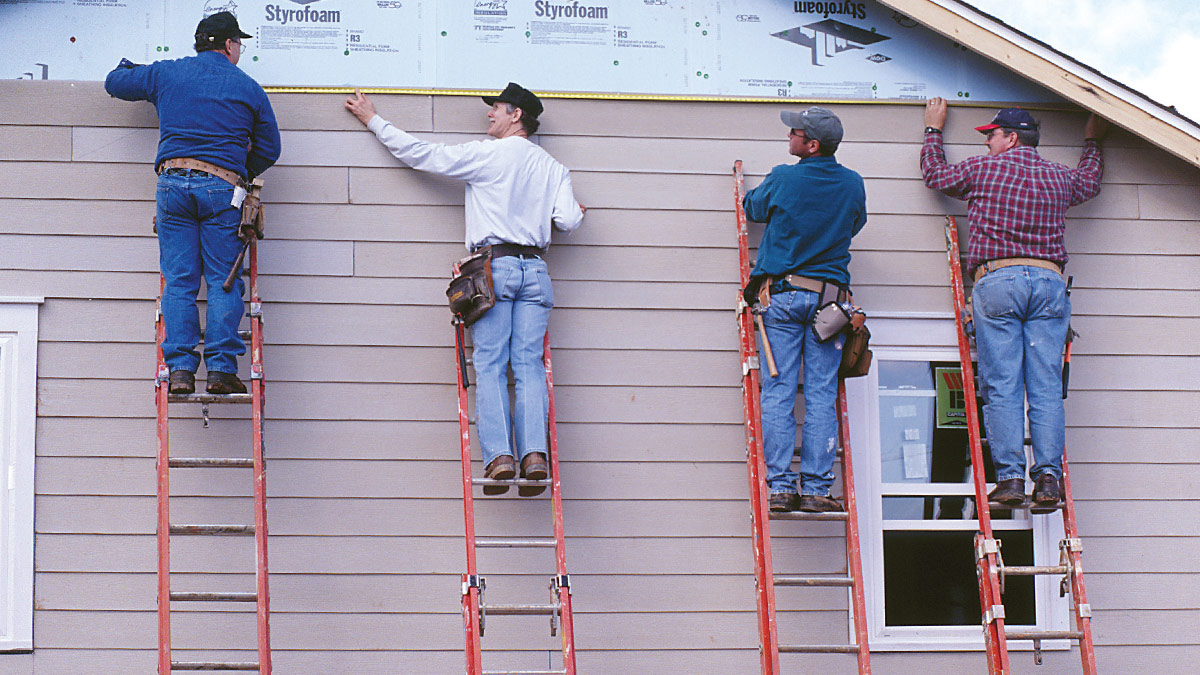
Step 4: Begin Installing the Shake Siding
Now that the starter strip is in place, it’s time to start installing the shake siding. This step involves attaching the siding panels to the wall, creating the outer layer and giving your home a charming and rustic appearance. Here’s how you can begin installing the shake siding:
- Measure and Cut: Measure the height of the wall and cut the first piece of shake siding accordingly. Be sure to leave a small gap at the top for expansion and contraction.
- Position the First Panel: Align the bottom of the first panel with the starter strip and hold it in place. Make sure it is level and centered before attaching it to the wall.
- Secure the Panel: Use nails or screws to secure the first panel to the wall. Place them through the thickest part of the shake siding, ensuring a solid attachment.
- Continue Installing Panels: Place the next panel next to the first one, overlapping the seams as recommended by the manufacturer. Secure it in place, making sure it is level and aligned with the previous panel.
- Repeat the Process: Continue measuring, cutting, positioning, and securing panels until you reach the top of the wall. Make sure to leave a small gap at the top for expansion and contraction.
- Ensure Even Spacing: As you install the shake siding, check for even spacing between each panel. This will give your siding an aesthetically pleasing look and prevent any gaps or inconsistencies.
- Trim the Last Panel: When you reach the end of a row or need to fit the last panel around an obstacle, carefully measure and cut the shake siding to fit. Use a saw or utility knife to make precise cuts.
- Check for Level and Plumb: Periodically check that the panels are level and plumb as you install them. This will ensure a straight and balanced appearance once the siding is completed.
By following these steps, you’ll be well on your way to installing beautiful shake siding on your home’s exterior. Remember to take your time and ensure each panel is securely attached and properly aligned with the previous ones. With the shake siding installed, you can move on to the next step: cutting the siding as needed.
When installing shake siding, be sure to properly prepare the surface by removing any old siding and repairing any damaged areas. This will ensure a smooth and secure installation.
Step 5: Cut the Shake Siding as Needed
During the shake siding installation process, you may encounter areas where the siding needs to be trimmed or cut to fit around windows, doors, corners, or other obstacles. This step will guide you through the process of cutting the shake siding to achieve a precise and seamless fit. Here’s what you need to do:
- Measure and Mark: Carefully measure the area where the shake siding needs to be cut. Use a measuring tape and a pencil to mark the appropriate measurements on the siding.
- Secure the Siding: To ensure stability and prevent splintering, place the shake siding on a stable surface or secure it with clamps or vice grips. This will help you achieve cleaner and more accurate cuts.
- Choose the Right Tool: Depending on the type and thickness of your shake siding, choose the appropriate tool for cutting. A circular saw with a fine-toothed blade, a jigsaw, or a sharp utility knife may be suitable options.
- Make the Cuts: Using a steady hand, carefully cut along the marked lines on the shake siding. Take your time and make smooth, controlled cuts to ensure a clean and precise fit.
- Test the Fit: After making the cuts, check whether the shake siding fits appropriately around the obstacle. Make any necessary adjustments or additional cuts to achieve a snug and seamless fit.
- Smooth Edges: If needed, use sandpaper or a file to smooth any rough or jagged edges on the cut pieces of shake siding. This will improve the overall appearance and ensure a professional finish.
Remember, precision is key when cutting shake siding. Take the time to double-check the measurements and make accurate cuts to achieve the desired fit. By properly cutting the shake siding, you’ll be able to seamlessly navigate around obstacles and enhance the overall appearance of your home’s exterior. With the siding cut and fitted in place, you’re ready to move on to the next step: installing corner caps.
Step 6: Install Corner Caps
Installing corner caps is an important step in completing the look of your shake siding installation. Corner caps not only provide a professional and finished appearance, but they also protect the corners of your home from potential damage. Here’s how you can install corner caps:
- Measure and Cut: Start by measuring the height of the corner from the bottom of the starter strip to the top edge of the shake siding. Use these measurements to determine the size of the corner caps you will need.
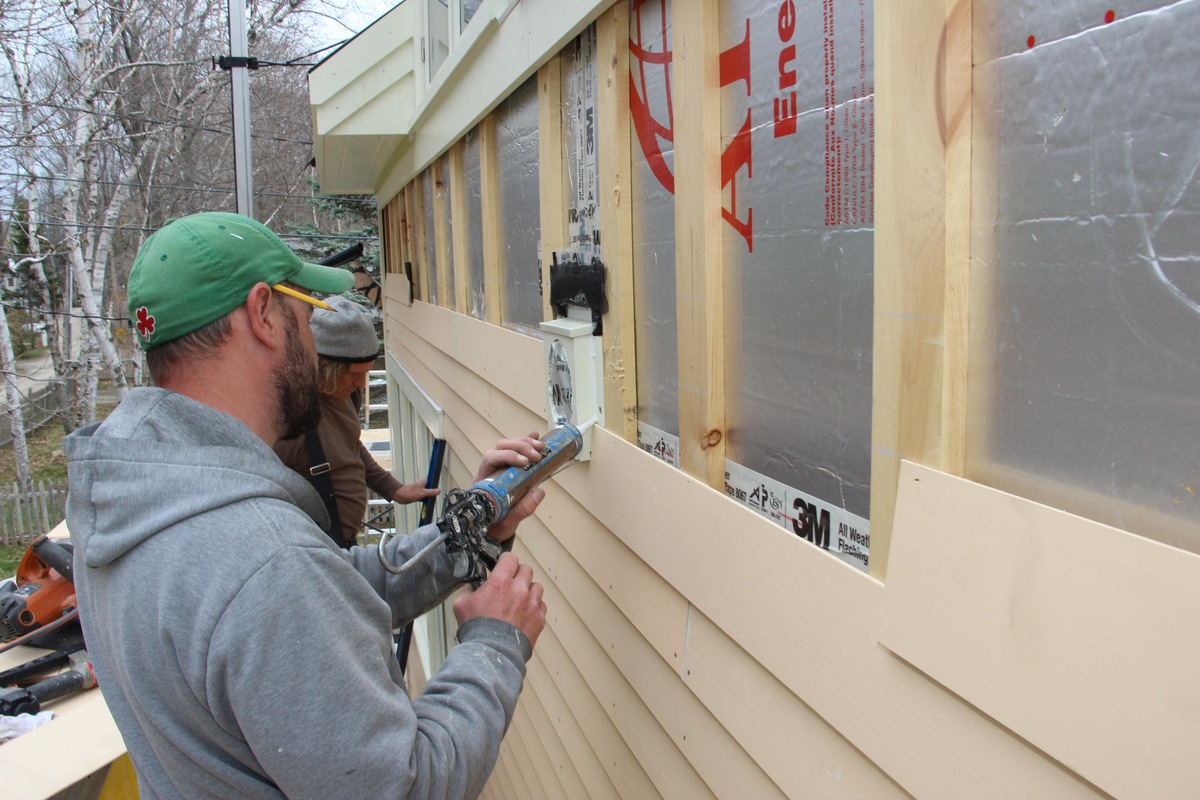
- Attach the Corner Caps: Apply a thin layer of adhesive or caulk to the back of the corner cap. Ensure even coverage to ensure a secure bond. Position the corner cap in place, ensuring that it aligns perfectly with the edge of the shake siding.
- Secure the Corner Caps: Use nails or screws to secure the corner caps to the corner of the house. Place the fasteners along the edges of the corner caps, ensuring they penetrate the siding and anchor securely into the structure beneath.
- Repeat the Process: Continue installing corner caps on all the corners of your home, making sure they are aligned and secured properly. Trim the corner caps if necessary to fit flush against the shake siding and create a seamless appearance.
- Seal the Gaps: Once all the corner caps are installed, use caulk to fill any gaps between the corner cap and the shake siding. This will provide a weather-tight seal and enhance the overall look of the installation.
By installing corner caps, you add a professional touch to your shake siding installation. They not only enhance the appearance of your home but also protect the corners from potential damage. Make sure to follow the manufacturer’s instructions when installing the corner caps and use high-quality materials for a long-lasting finish.
With the corner caps in place, your shake siding installation is almost complete. Now, let’s move on to the next step: completing the installation on all sides.
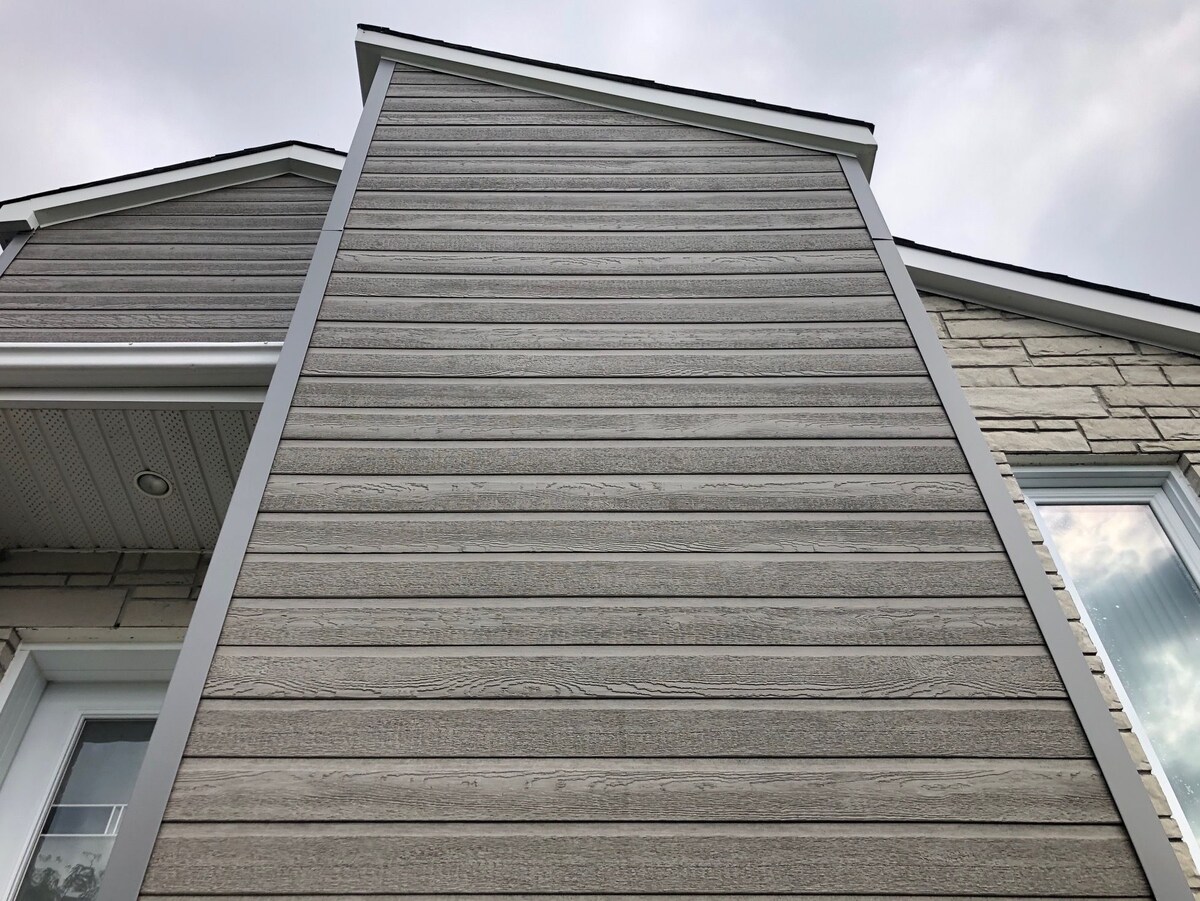
Step 7: Complete the Installation on All Sides
Completing the installation on all sides is the final step in your shake siding project. This step involves ensuring that the siding is properly installed and aligned on each side of your home. Here’s what you need to do:
- Inspect the Siding: Take a step back and inspect the shake siding on each side of your home. Look for any loose panels, gaps, or inconsistencies in the installation. If you notice any issues, secure the loose panels and make any necessary adjustments.
- Ensure Even Spacing: Check that the spacing between each panel is consistent and visually appealing. Adjust the placement of the panels if needed to achieve a uniform look and cover any remaining gaps.
- Check for Level and Plumb: Use a level and carpenter’s square to ensure that the shake siding is level and plumb on all sides. This will create a straight and balanced appearance that adds to the overall aesthetic of your home.
- Inspect Corners and Joints: Pay close attention to the corners and joints where shake siding meets one another. Ensure that they are properly aligned and secure. Use caulk to seal any gaps or joints that may be susceptible to water penetration.
- Make Adjustments: If you notice any areas that need further adjustment or refinement, address them promptly. This could include trimming panels, securing loose siding, or touching up caulk to create a seamless and professional finish.
By completing the installation on all sides, you are ensuring that your shake siding project is visually pleasing, structurally sound, and built to last. Take the time to carefully inspect each side of your home and make any necessary adjustments to achieve the desired outcome.
With the installation complete on all sides, you’re almost finished with your shake siding project. Now, let’s move on to the final step: making the finishing touches.
Step 8: Make Finishing Touches
In the final step of your shake siding installation, it’s time to make the finishing touches that will enhance the overall appearance and ensure a polished and professional result. Here are some important tasks to consider:
- Clean and Inspect: Clean the newly installed shake siding to remove any dirt, debris, or fingerprints. Inspect the siding for any imperfections or areas that may require additional attention.
- Touch Up Paint: If necessary, touch up any areas of the shake siding with matching paint. This will help blend any exposed wood, screw heads, or nail heads, ensuring a seamless and cohesive appearance.
- Seal and Caulk: Check for any gaps or cracks in the shake siding installation and apply a weather-resistant caulk to seal them. This will help protect against moisture infiltration and improve the overall longevity of the siding.
- Install Accessories: Consider adding accessories such as trim, shutters, or decorative accents to further enhance the aesthetic appeal of your shake siding. Ensure that these accessories complement the style and design of your home.
- Final Inspection: Take a step back and inspect the completed shake siding installation from a distance. Look for any remaining areas that may need attention or adjustment. Address these issues before considering the project complete.
- Maintain Regularly: To keep your shake siding looking its best and to prolong its lifespan, make a plan for regular maintenance. This may include cleaning, inspecting for damage or wear, and addressing any issues promptly.
By making these finishing touches, you’ll ensure that your shake siding installation is not only visually appealing but also protected and maintained for years to come. Regular maintenance will help extend the life of your siding and preserve its beauty.
Congratulations! You have successfully completed the installation of shake siding on your home. Take a moment to admire your hard work and enjoy the beautiful transformation it has brought to your exterior. By following these steps and paying attention to the details, you have achieved a professional-grade installation that will enhance the value and curb appeal of your home.
Remember, if you ever need to perform repairs, adjustments, or additional installations in the future, you can refer back to this guide as a valuable resource. Best of luck with your shake siding project!
Read more: What Is Cedar Shake Siding
Conclusion
Congratulations on completing the installation of shake siding on your home! By following the step-by-step guide provided in this article, you have learned how to transform the exterior of your house with a charming and durable siding option. Installing shake siding may seem like a daunting task, but with the right materials, tools, and approach, you have successfully achieved a professional-grade installation.
The process of installing shake siding involved gathering the necessary materials, preparing the surface, installing the starter strip, attaching the shake siding panels, cutting the siding as needed, installing corner caps, completing the installation on all sides, and making the finishing touches. With attention to detail, patience, and precision, you have created a beautiful and long-lasting exterior for your home.
Remember, proper maintenance is key to preserving the integrity and aesthetics of your shake siding. Regular inspections, cleaning, and addressing any issues promptly will help prolong the lifespan and keep your home looking its best.
We hope this comprehensive guide has provided you with the knowledge and confidence to undertake your shake siding installation project. Whether you are a seasoned DIY enthusiast or a beginner in home improvement, following these steps and adhering to best practices will help you achieve a successful outcome.
Thank you for choosing shake siding to enhance the visual appeal and durability of your home’s exterior. We hope you enjoy the benefits of your new siding for many years to come!
Frequently Asked Questions about How To Install Shake Siding
Was this page helpful?
At Storables.com, we guarantee accurate and reliable information. Our content, validated by Expert Board Contributors, is crafted following stringent Editorial Policies. We're committed to providing you with well-researched, expert-backed insights for all your informational needs.


0 thoughts on “How To Install Shake Siding”