Articles
How To Install Fence On A Slope
Modified: October 22, 2024
Learn how to install a fence on a slope with our step-by-step articles. Avoid the hassle and get your fence installed properly and securely.
(Many of the links in this article redirect to a specific reviewed product. Your purchase of these products through affiliate links helps to generate commission for Storables.com, at no extra cost. Learn more)
Introduction
Installing a fence on a sloping yard may seem like a daunting task, but with proper planning and preparation, it can be done with ease. Whether you want to add privacy, secure your property, or enhance the aesthetic appeal of your outdoor space, a well-installed fence can serve multiple purposes. Understanding the unique challenges that come with a sloping yard and implementing the right techniques will ensure a successful and visually appealing fence installation.
One of the key factors to consider when installing a fence on a slope is the angle of the slope itself. The steeper the slope, the more adjustments and techniques will be required to ensure that the fence stays level and secure. Additionally, the type of fence you choose will also play a role in how it is installed on a slope. From understanding the slope of your yard to selecting the appropriate fence material, this article will guide you through the steps needed to successfully install a fence on a slope.
Before diving into the installation process, it is essential to plan and prepare accordingly. Begin by assessing the slope of your yard and understanding its angle and direction. This information will help you determine the best approach to installing the fence. It is also crucial to check local regulations and obtain any necessary permits before proceeding with the installation.
Choosing the right fence for a sloping yard is another crucial aspect of the process. There are various types of fences available, such as wooden, vinyl, aluminum, and chain-link fences, each with its own advantages and considerations. Consider your privacy needs, budget, and maintenance preferences when selecting a fence material.
Once you have selected the appropriate fence material, it is time to mark the fence line. Properly marking the line will ensure accuracy during the installation process. Gather the necessary tools and materials needed, including measuring tape, stakes, string, and a level.
With the planning and preparations in place, it is time to set the corner posts. The stability and levelness of the corner posts are crucial for the fence’s overall strength and durability. Digging the post holes and using a level to ensure they are plumb are essential steps in this process.
Key Takeaways:
- Proper planning, understanding the slope, and selecting the right materials are crucial for successfully installing a fence on a slope. Attention to detail and regular maintenance ensure a functional and visually appealing result.
- Adjusting fence panels to follow the slope, securing the fence with longer posts and concrete, and completing finishing touches are essential for a stable and aesthetically pleasing fence installation on a slope.
Read more: How To Install Vinyl Fence On A Slope
Understanding the Slope
Before embarking on the installation of a fence on a slope, it is important to have a clear understanding of the slope and how it will affect the installation process. The slope refers to the incline or decline of the land, which can significantly impact the stability and alignment of the fence.
The first step in understanding the slope is to determine its angle and direction. Use a level, measuring tape, and stakes to accurately measure and mark the slope. You can do this by placing stakes at different intervals along the slope and using a measuring tape to measure the height difference between each stake. This will provide you with a clear picture of the slope’s angle and direction.
It is important to note that a slope can be gentle or steep, and this will dictate the technique and level of adjustment required during the fence installation. A gentle slope will have a gradual incline, while a steep slope will have a more pronounced incline. The degree of the slope will determine how much the fence will need to be adjusted to maintain its level appearance.
Another factor to consider when understanding the slope is the possibility of erosion. Sloping yards tend to be more susceptible to erosion due to water runoff. It is important to assess the drainage in the area and take necessary measures, such as incorporating proper grading and installing drainage systems, to prevent erosion from affecting the stability of the fence.
Additionally, it is essential to consider any underground utilities or obstacles that may be present on the slope. Before digging any post holes, it is crucial to contact your local utility companies to ensure that it is safe to dig in the designated area. This will help avoid any damage to underground utilities and ensure a safe and smooth installation process.
Understanding the slope of your yard will enable you to plan and prepare accordingly for the fence installation. It will also help you determine the appropriate techniques and adjustments needed to ensure the fence remains level and securely anchored into the ground. By taking the time to assess and understand the slope, you can effectively navigate any challenges that may arise during the installation process.
Planning and Preparation
Proper planning and preparation are essential when installing a fence on a slope. Taking the time to carefully plan and gather the necessary materials will ensure a smoother and more successful installation process.
The first step in the planning phase is to assess the slope of your yard. Measure the angle and direction of the slope using a level, measuring tape, and stakes. This will provide you with a clear understanding of the slope and help determine the adjustments needed during the installation.
Next, check with your local municipality to understand any zoning regulations or permit requirements for installing a fence. Some areas may have specific rules and restrictions regarding fence height, materials, and setback distances. By familiarizing yourself with these regulations, you can ensure that your fence installation is compliant with local laws.
Once you have a clear understanding of the slope and any local regulations, it’s time to decide on the type of fence that best suits your needs. Consider the purpose of the fence, such as privacy, security, or aesthetics, and choose a material that aligns with those goals. Some common fence materials include wood, vinyl, aluminum, and chain-link. Each material has its own advantages and considerations, so research and select the one that best fits your preferences and budget.
After selecting the fence material, it’s important to determine the fence line. Use stakes and string to mark the desired boundary of the fence. This step will help you visualize the final placement of the fence and ensure accuracy during the installation process.
Gathering the necessary tools and materials is the next crucial step in the planning and preparation phase. Some common tools and materials you may need include a measuring tape, level, stakes, string, post hole digger, concrete mix, gravel, screws or nails, and fence panels or boards. By having all the necessary items ready before starting the installation, you can streamline the process and avoid unnecessary delays.
Ensure that all materials are of high quality and suitable for the slope of your yard. For example, if you have a steep slope, you may need longer posts to accommodate the depth needed for stability.
Lastly, it is important to establish a timeline for the fence installation. Consider factors such as weather conditions and availability of assistance. Depending on the size of the project, it may take several days to complete the installation, so plan accordingly to allow for ample time.
By thoroughly planning and preparing for the fence installation, you can set yourself up for success and minimize any potential challenges that may arise. Taking the time to assess the slope, understand local regulations, select the right fence material, and gather the necessary tools and materials will ensure a smoother and more efficient installation process.
Choosing the Right Fence
When installing a fence on a slope, selecting the right fence material is crucial. The choice of fence material will not only impact the appearance of your property but also determine its functionality, durability, and maintenance requirements. Here are some factors to consider when choosing the right fence for your sloping yard.
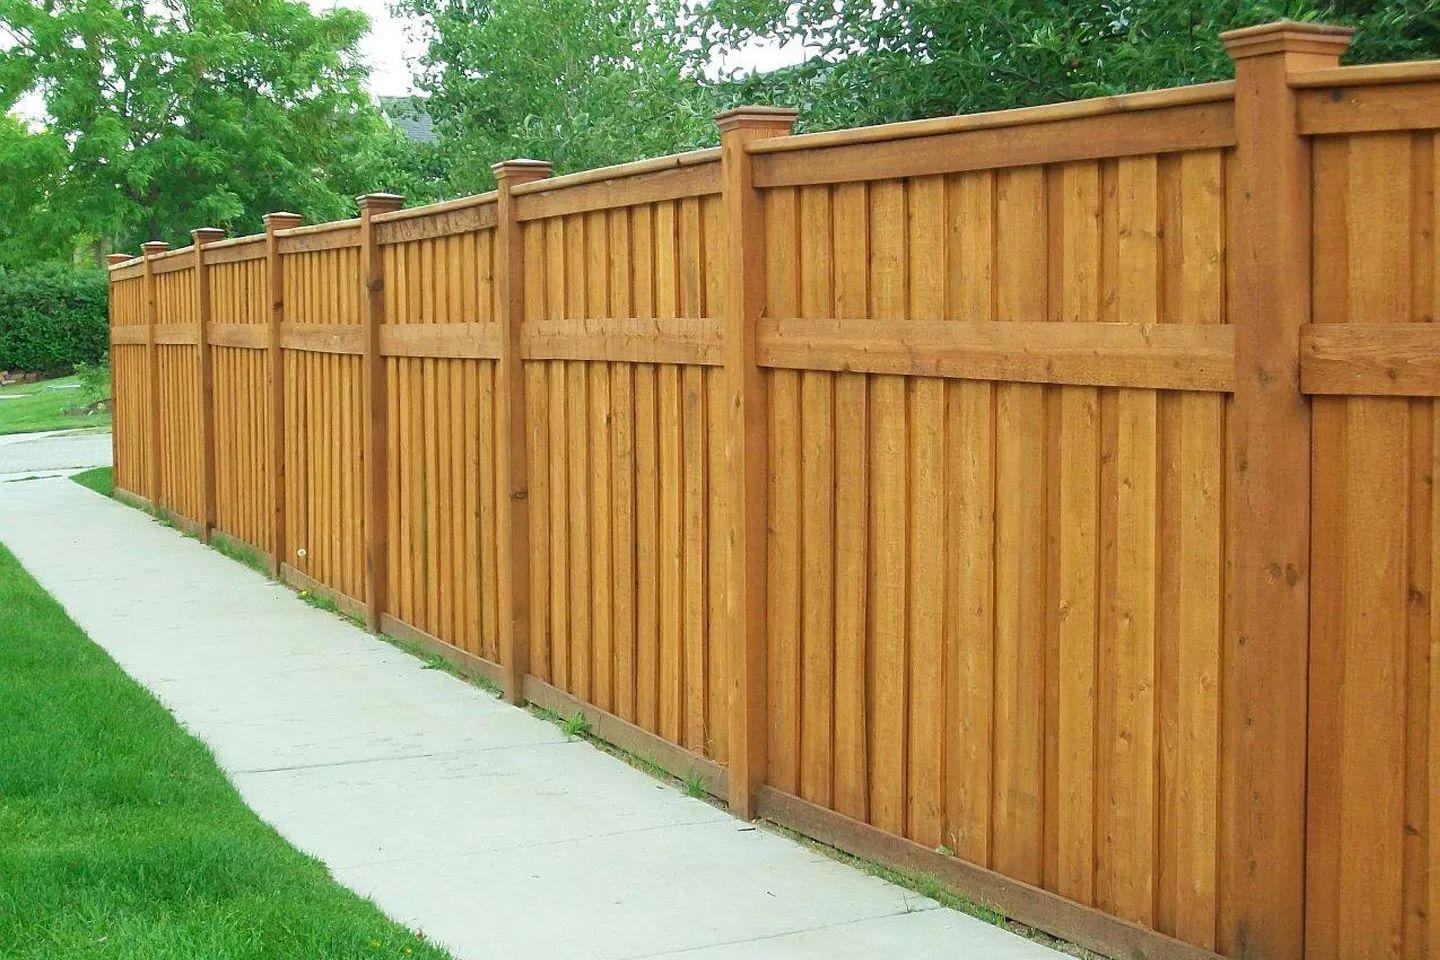
1. Privacy: Determine your privacy needs. If privacy is a top priority, a solid fence material such as wood or vinyl would be a suitable choice. These types of fences provide a solid barrier, blocking the view from the outside and creating a private space within your property.
2. Aesthetic Appeal: Consider the overall aesthetic you want to achieve. If you desire a rustic look, a wood fence can provide a natural and charming appeal. On the other hand, if you prefer a modern and sleek appearance, aluminum or vinyl fences offer a clean and contemporary look.
3. Maintenance: Evaluate the level of maintenance you are willing to commit to. Wood fences may require more maintenance, including staining, painting, and regular sealing to protect against weather elements. Vinyl and aluminum fences, on the other hand, are relatively low-maintenance options, requiring occasional cleaning to keep them looking pristine.
4. Budget: Set a budget for your fence installation project. Different fence materials come with varying price ranges. While wood fences may be more affordable initially, keep in mind the long-term maintenance costs. Vinyl and aluminum fences may have a higher upfront cost but can save you money in maintenance expenses over time.
5. Durability: Evaluate the durability of the fence material. Consider factors such as resistance to rot, pests, and weather conditions. Wood fences can be susceptible to rot and insect damage, while vinyl and aluminum fences are more resistant to these issues.
6. Local Regulations: Check your local regulations to ensure that the chosen fence material meets any specific requirements. Some areas may have restrictions on fence height, materials, or appearance, so it’s important to choose a material that complies with the local guidelines.
7. Compatibility with Slope: Consider how well the chosen fence material can accommodate the slope of your yard. Some fence materials are more flexible and can be adjusted to follow the contour of the slope, making the installation process easier.
By carefully considering these factors, you can choose the right fence material that aligns with your needs, preferences, and budget. Remember to balance aesthetics, functionality, durability, and maintenance requirements when making your decision. Taking the time to select the appropriate fence material will result in a visually appealing and functional fence installation on your sloping yard.
Marking the Fence Line
Marking the fence line is a crucial step when installing a fence on a slope. Properly marking the line will ensure accuracy and alignment during the installation process. Here are the steps to effectively mark the fence line on your sloping yard.
1. Determine the Boundary: Start by identifying the desired boundary for your fence. Consider factors such as property lines, landscaping features, and any existing structures. This will help you establish the area where the fence will be installed.
2. Use Stakes and String: Once you have determined the boundary, use stakes and string to create a visual guide for the fence line. Place stakes at regular intervals along the boundary, ensuring they are firmly planted into the ground.
3. Attach the String: Attach the string to the first stake and stretch it along the boundary, pulling it taut. Move along the line, attaching the string to each stake until you reach the end of the boundary. This will create a straight and level line to follow during the installation.
4. Measure and Adjust: Use a measuring tape to ensure that the string is at the desired height for your fence. Adjust the string’s height as necessary, considering factors such as privacy requirements or esthetic preferences. It is important to maintain a consistent string height throughout the fence line.
5. Check for Levelness: Use a level to ensure that the string is level along the entire fence line. This is especially important when installing a fence on a slope as it will help ensure that the fence panels are properly aligned and will create a visually appealing result.
6. Adjust for Slope: Take into account the slope of your yard when marking the fence line. If the slope is gentle, the string may be sufficient to follow the contour of the land. However, if the slope is steep, you may need to make adjustments along the line to accommodate the changing elevation.
7. Double-Check the Measurements: Before proceeding with the installation, double-check the measurements and alignment of the fence line. Ensure that it matches your intended design and that it follows the proper boundary. This will help avoid any errors or misconceptions during the installation process.
By taking the time to accurately mark the fence line, you will create a solid foundation for the installation process. The marked line will serve as a guide for positioning the posts, aligning the fence panels, and ensuring a straight and level fence. Remember to make adjustments as needed to account for the slope of your yard, maintaining a consistent height and levelness along the entire fence line.
Read more: How To Install Chain Link Fence On A Slope
Gathering the Necessary Tools and Materials
Gathering the necessary tools and materials is a critical step in ensuring a smooth and efficient fence installation process. Having all the required items ready before starting the project will save you time and minimize any potential disruptions. Here is a list of tools and materials you will need to gather:
1. Measuring Tape: A measuring tape is essential for accurately measuring the dimensions of your yard and determining the placement of the fence posts.
2. Level: A level is crucial for ensuring that the fence posts and panels are installed straight and level. This will promote stability and create a visually appealing fence.
3. Stakes and String: Stakes and string are used to mark the fence line and establish a visual guide for the installation process. They help ensure that the fence is installed in the correct position and alignment.
4. Post Hole Digger: A post hole digger is necessary for digging the holes in which the fence posts will be placed. This tool will help create the proper depth and width for secure post installation.
5. Concrete Mix: Concrete mix is needed to anchor the fence posts securely into the ground. It provides stability and prevents the posts from shifting or leaning over time.
6. Gravel: Gravel is placed at the bottom of the post holes to promote proper drainage and prevent water accumulation around the fence posts. This helps prevent rot and extends the lifespan of the fence.
7. Screws or Nails: Screws or nails are used to secure the fence panels or boards onto the posts. The type of fasteners will depend on the chosen fence material and the specific installation instructions.
8. Fence Panels or Boards: The main component of the fence, fence panels or boards, come in various materials and styles. Choose the appropriate panels or boards that align with your design preferences and the function of the fence.
9. Post Caps and Hardware: Post caps are optional but add a finishing touch to the fence posts. They also provide protection against water infiltration and enhance the aesthetic appeal of the fence. Additionally, gather any necessary hardware, such as brackets or hinges, if your fence design requires them.
10. Safety Equipment: Safety should always be a priority when working on any project. Wear appropriate safety equipment, such as gloves, safety glasses, and sturdy footwear, to protect yourself during the installation process.
Before starting the fence installation, double-check that you have all the necessary tools and materials. This will save you from making multiple trips to the hardware store and ensure a seamless and efficient process. By having everything prepared, you can focus on the installation itself and avoid any unnecessary delays or interruptions.
Setting the Corner Posts
Setting the corner posts is a critical step in the fence installation process. The stability and levelness of the corner posts will provide the foundation for the entire fence structure. Follow these steps to properly set the corner posts:
1. Digging the Post Holes: Use a post hole digger to dig the holes for the corner posts. The size and depth of the holes will depend on the type of fence and the soil conditions in your area. Generally, a depth of about one-third the height of the post is recommended for stability.
2. Check for Plumb: Once the holes are dug, place one corner post in each hole and check for plumb using a level. Adjust the position of the post by adding or removing soil until it is perfectly vertical. This step is crucial to ensure that the rest of the fence will be properly aligned.
3. Adding Gravel: Before setting the posts in concrete, pour a layer of gravel at the bottom of each post hole. The gravel will provide proper drainage and help prevent the posts from rotting due to moisture accumulation.
4. Mixing and Pouring Concrete: Prepare the concrete mix according to the manufacturer’s instructions. Pour the concrete into the post holes around the corner posts, making sure to leave a few inches of space from the top. Use a stick or rod to compact the concrete and remove any air bubbles.
5. Checking Alignment: While the concrete is still wet, double-check the alignment of the corner posts and adjust if necessary. Ensure that they are perfectly vertical and level with each other. Use additional support, such as temporary braces or stakes, to hold the posts in place until the concrete sets.
6. Allowing Concrete to Set: Allow the concrete to cure and set according to the manufacturer’s instructions. This usually takes about 24 to 48 hours. Avoid placing any additional weight or pressure on the corner posts during this time to ensure a solid foundation.
7. Inspecting the Corner Posts: Once the concrete has completely set, inspect the corner posts to ensure that they are secure and stable. Wiggle the posts gently to check for any movement or instability. If needed, reinforce the posts with additional concrete or support.
Setting the corner posts correctly is crucial for the stability and strength of the entire fence structure. Taking the time to dig proper post holes, check for plumb, and set the posts in concrete will ensure a solid foundation for the rest of the fence installation. Remember to follow safety precautions when working with concrete, and consult local building codes and regulations for any specific requirements in your area.
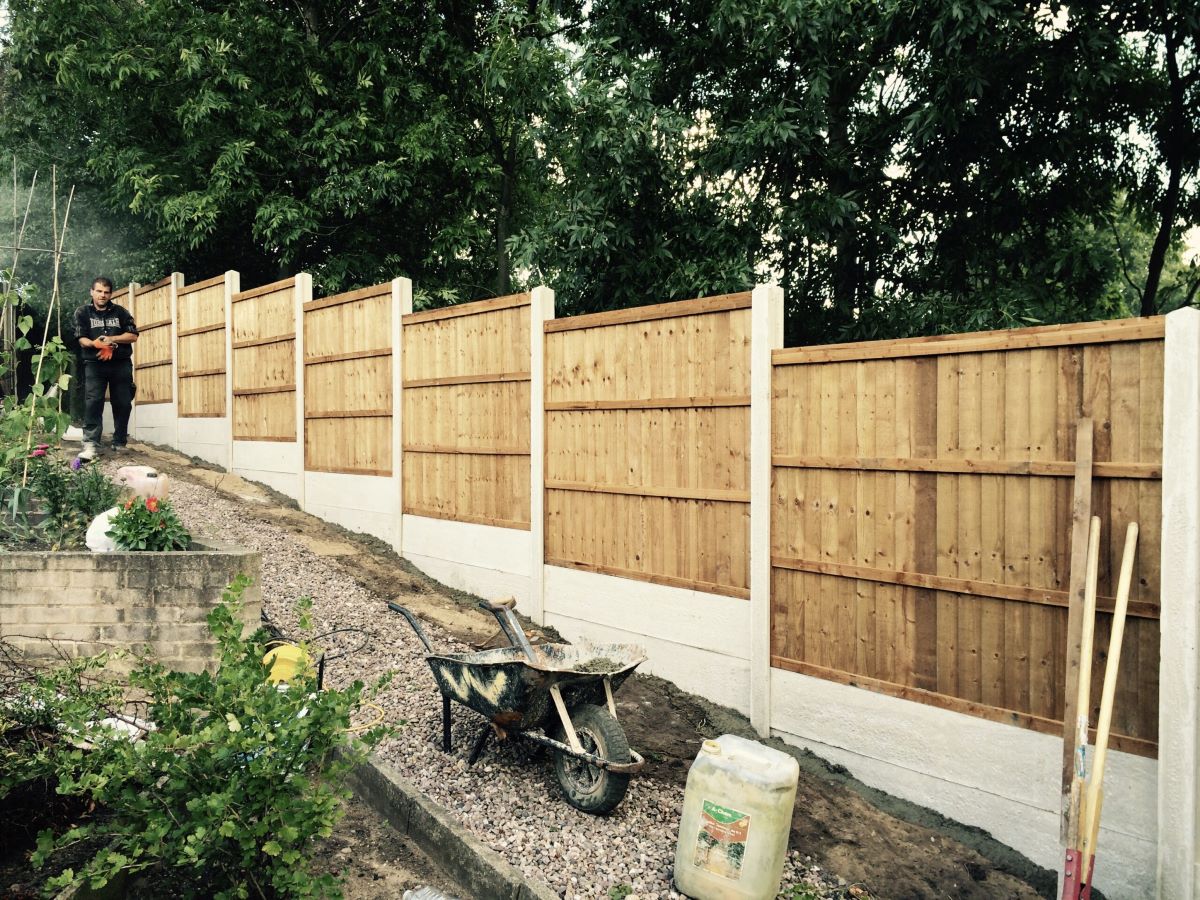
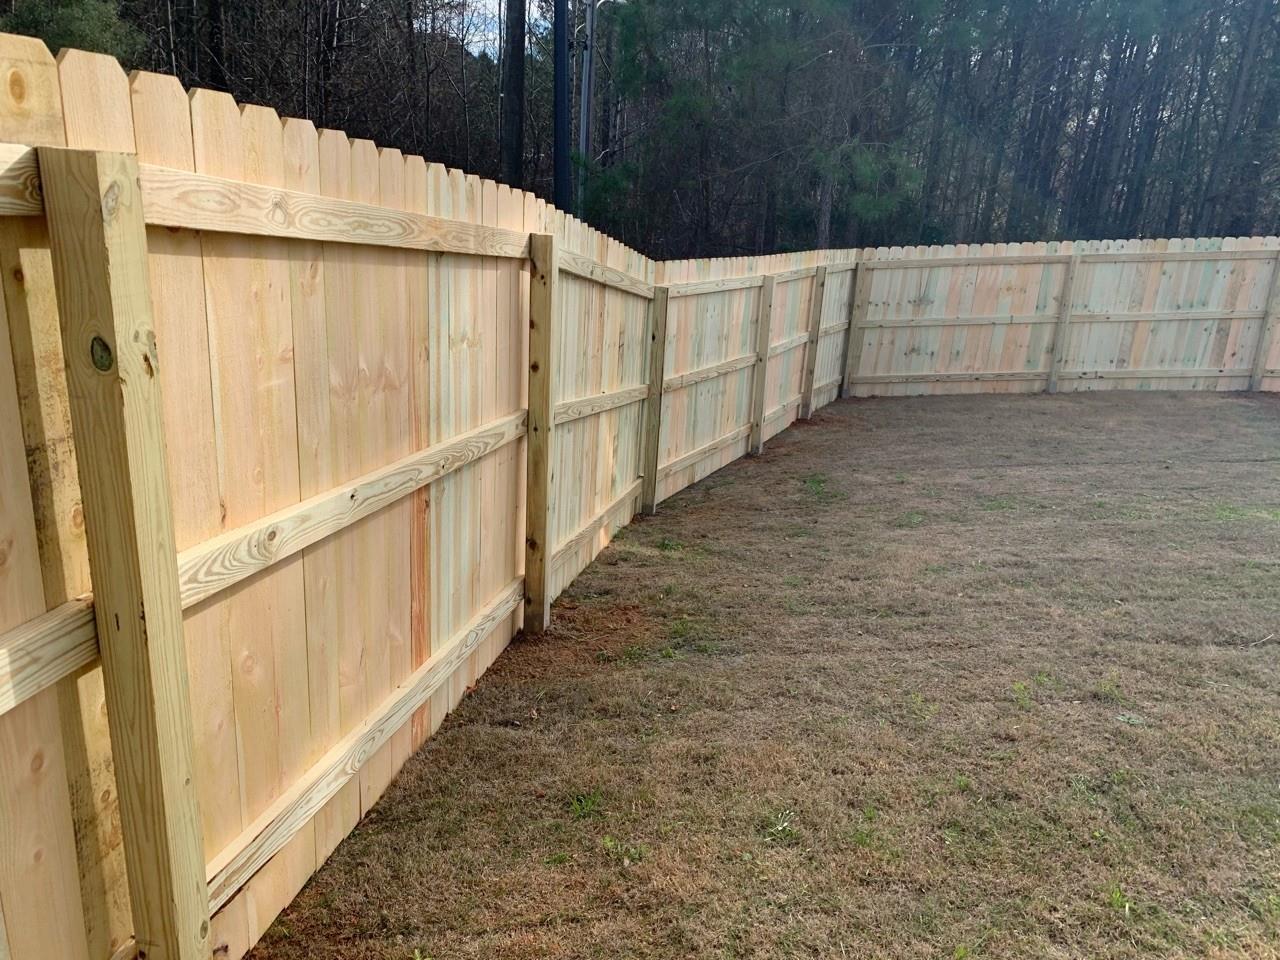
When installing a fence on a slope, use stepped panels or racked panels to accommodate the slope. Stepped panels follow the contour of the ground, while racked panels are installed at an angle to follow the slope.
Installing the Fence Panels
Once the corner posts are set and secure, it’s time to install the fence panels. Properly installing the fence panels will ensure a functional and visually appealing fence. Follow these steps to install the fence panels on your sloping yard:
1. Measure and Mark: Measure the distance between the corner posts to determine the appropriate width for your fence panels. Mark the measurements on the top and bottom rails of the panels using a measuring tape and pencil.
2. Align the First Fence Panel: Start by aligning the first fence panel with the corner post. Ensure that it is level and plumb, using a level to verify the alignment. Have a helper hold the panel in place, or use temporary braces or clamps to secure it while you make adjustments.
3. Attach the Panel to the Post: Use screws, nails, or suitable hardware to attach the fence panel to the corner post. Make sure to follow the manufacturer’s instructions for the specific fence material. Repeat this process for attaching the panel to every corner post and any intermediate posts along the fence line.
4. Level and Adjust: Continue to check the levelness of each fence panel as you install them. Adjust as needed to ensure that each panel is straight and level. Consider the slope of the yard and adjust the panels accordingly to maintain a parallel alignment with the ground.
5. Trim and Modify Panels: If necessary, trim the fence panels to fit the slope of the yard. Use a saw or appropriate cutting tool to make the required modifications. Take accurate measurements and make precise cuts to maintain a neat and professional appearance.
6. Continue Installing Panels: Install the remaining fence panels along the fence line, following the same procedures as mentioned above. Ensure that each panel is securely attached to the posts and properly aligned with the previous panel.
7. Check for Consistency: Regularly step back and assess the overall appearance of the fence as you install each panel. Ensure that there is consistency in the height, levelness, and spacing between panels. Make any necessary adjustments to maintain a uniform and visually pleasing result.
8. Secure with Additional Hardware: If needed, use additional hardware such as brackets or hinges to ensure the stability of the fence panels. This is especially important if you are installing gates or if your fence design requires extra reinforcement.
9. Double-check and Make Final Adjustments: Once all the fence panels are installed, take the time to double-check their alignment, levelness, and overall appearance. Make any final adjustments as needed to ensure a perfect finish.
Installing the fence panels correctly is essential for the overall integrity and aesthetic appeal of the fence. Take your time, follow the manufacturer’s instructions, and pay attention to detail to ensure a high-quality installation. By following these steps, you can confidently install the fence panels on your sloping yard and enjoy the benefits of a beautiful and functional fence.
Adjusting the Panels for the Slope
When installing a fence on a slope, it’s crucial to make adjustments to the fence panels to ensure they follow the contour of the land and maintain a visually appealing appearance. Here are the steps to adjust the fence panels for the slope of your yard:
1. Assess the Slope: Begin by carefully evaluating the slope of your yard. Observe the incline or decline of the land and note any significant changes in elevation along the fence line. Understanding the slope will help you determine how much adjustment is needed for the fence panels.
2. Determine the Angle: Use a level or measuring tool to determine the angle of the slope. This will allow you to calculate the degree of adjustment required for each fence panel. Take accurate measurements to ensure precise adjustments.
3. Start with the First Panel: Begin adjusting the fence panels by focusing on the first panel either from the corner post or the starting point of the fence line. This panel will set the base for the rest of the fence line.
4. Trim the Bottom of the Panel: If the slope is gentle, you may need to trim the bottom of the fence panel to match the contour of the land. Use a saw or appropriate cutting tool to make the necessary adjustments. Take accurate measurements and make precise cuts to maintain a clean and even appearance.
5. Adjust the Panel Angle: For steeper slopes, you may need to adjust the angle of the fence panel itself. This can be done by either tilting the panel slightly to follow the slope or cutting the panel into smaller sections and angling them accordingly. Always ensure that the transition between panels appears seamless and natural.
6. Attach the Adjusted Panel: Once the necessary adjustments are made, securely attach the adjusted fence panel to the posts using appropriate screws, nails, or hardware. Ensure that it is level and aligned with the adjacent panel or corner post.
7. Repeat the Process: Continue adjusting and installing the remaining fence panels along the slope. Make sure each panel follows the contour of the land while maintaining a consistent level and alignment. Take your time and regularly step back to assess the overall appearance of the fence line as you progress.
8. Finishing Touches: Once all the fence panels are adjusted and installed, double-check the alignment, levelness, and overall appearance of the fence. Make any final adjustments or tweaks to ensure a clean and professional finish.
Adjusting the panels for the slope of your yard is essential to create a visually pleasing and structurally stable fence. Remember to take accurate measurements, make precise cuts, and check for levelness and alignment throughout the installation process. By following these steps, you can achieve a seamless and well-adjusted fence that complements the natural slope of your landscape.
Read more: How To Install An Aluminum Fence
Securing the Fence on the Slope
Securing the fence on a slope is crucial to ensure its stability and durability over time. Properly securing the fence will prevent it from leaning or shifting due to the uneven terrain. Here are the steps to secure the fence on the slope of your yard:
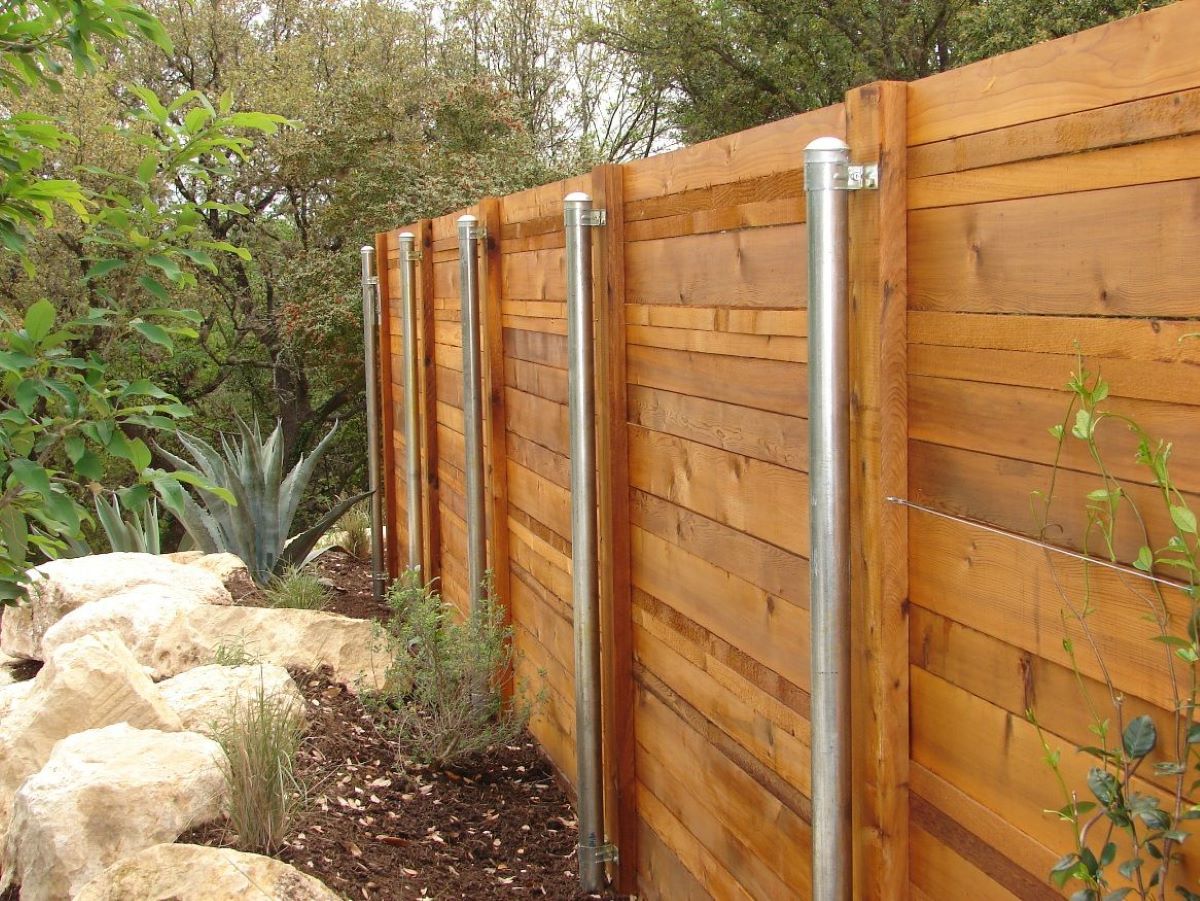
1. Use Longer Posts: When installing a fence on a slope, it’s essential to use longer posts to accommodate the depth necessary for stability. The increased length will provide a stronger foundation and help anchor the fence securely into the ground. Ensure that the posts are sturdy and set at an appropriate depth.
2. Set Posts in Concrete: Dig the post holes and set the fence posts in concrete. The concrete will provide a solid base and anchor the posts firmly in place. Pour the concrete mix into the post holes and allow it to set according to the manufacturer’s instructions. Double-check that the posts are level and plumb while the concrete is still wet.
3. Incorporate Bracing: To further secure the fence on the slope, you may need to incorporate bracing or additional supports. Bracing involves adding perpendicular wooden boards or metal stakes between the fence posts to reinforce stability. These supports will distribute the weight evenly and prevent the fence from leaning or sagging.
4. Install Stabilizing Rails: Stabilizing rails can be added horizontally between the fence posts to provide extra support and prevent the fence panels from bowing or warping on the slope. These rails will help maintain the structural integrity of the fence, especially on steeper slopes.
5. Secure Panels to Posts: Use appropriate screws, nails, or hardware to securely attach the fence panels to the posts. Ensure that the panels are aligned and level with each other. This will prevent any gaps or unevenness in the fence line, enhancing its appearance and stability.
6. Reinforce Gate Posts: Gate posts require special attention when securing the fence on a slope. Use longer and sturdier posts for gate installations. Reinforce the posts with additional braces or supports to withstand the weight and movement of the gate.
7. Check and Adjust Regularly: After the fence is secured on the slope, regularly check its stability and make any necessary adjustments. Be mindful of any signs of leaning, shifting, or sagging. If you notice any issues, promptly address them to maintain the integrity of the fence.
8. Consider Professional Assistance: Installing a fence on a slope can be challenging, particularly for steep slopes or if you have limited experience. If you are unsure or feel overwhelmed, it may be beneficial to seek professional assistance. A professional fence installer can ensure that the fence is securely anchored on the slope, providing you with peace of mind.
Securing the fence on a slope is essential to maintain its longevity and appearance. By following these steps and ensuring the fence is properly set, braced, and stabilized, you can have a secure and aesthetically pleasing fence that withstands the challenges of the slope.
Finishing Touches
Completing the finishing touches is the final step in installing a fence on a slope. These small details enhance the overall appearance, functionality, and longevity of the fence. Here are some important finishing touches to consider:
1. Apply Protective Coatings: If you have chosen a wood fence, applying a protective coating or stain can help prolong its lifespan and enhance its appearance. Make sure to select a coating that is suitable for the specific type of wood and follow the manufacturer’s instructions for application.
2. Add Post Caps: Post caps provide an attractive and decorative touch to the fence. They also protect the tops of the posts from water infiltration, which can lead to rot. Choose post caps that complement the style of your fence and securely attach them to each post.
3. Clean Up the Area: Once the fence is installed, clean up any debris, tools, or leftover materials from the installation. Rake the area around the fence to remove any excess dirt or rocks. This will give your fence a clean and polished look.
4. Adjust Gate Latches and Hinges: If your fence includes gates, ensure that the latches and hinges are properly adjusted and functional. Test the gate’s opening and closing mechanism to ensure smooth operation. Make any necessary adjustments to achieve a secure closure.
5. Consider Landscaping: Enhance the visual appeal of your fence by incorporating landscaping around it. Plant flowers, shrubs, or other greenery along the fence line to soften its appearance and create a more inviting outdoor space.
6. Install Lighting: Consider installing outdoor lighting along your fence to enhance its visibility and add a touch of ambiance to your yard. Solar-powered lights or low-voltage LED lights can be installed along the top of the fence or strategically placed to illuminate walkways or features.
7. Regular Maintenance: Proper maintenance is essential to keep your fence looking its best. Regularly inspect the fence for any damage, loose screws, or signs of wear. Clean it periodically using mild soap and water to remove dirt or grime. Repaint or restain the fence as needed to maintain its color and protection.
8. Seek Professional Assistance if Needed: If you are unsure about any finishing touches or encounter challenges during the installation process, consider seeking professional assistance. They have the expertise and experience to ensure that the final touches are done correctly and effectively.
Remember that the finishing touches are the final step in completing your fence installation on a slope. Paying attention to these details will not only enhance the overall appearance but also contribute to the longevity and functionality of your fence. Take pride in your finished fence and enjoy the benefits it brings to your outdoor space.
Maintenance and Upkeep
Maintenance plays a crucial role in preserving the functionality, appearance, and longevity of your fence. Regular upkeep will help prevent damage, prolong its lifespan, and ensure that your fence remains a beautiful and functional addition to your property. Here are some essential maintenance tasks to consider:
1. Inspect Regularly: Regularly inspect your fence to identify any signs of damage, wear, or structural issues. Look for loose screws, rotting wood, bent or broken panels, or rusted metal components. Address these issues promptly to prevent further damage or deterioration.
2. Clean and Remove Debris: Clean your fence regularly to remove dirt, dust, and other debris that can accumulate over time. Use a mild soap or fence cleaner and a soft brush or cloth. Rinse thoroughly with water to remove any cleaning solution residue. Removing debris will prevent the build-up of mold, mildew, and staining.
3. Trim Vegetation: Trim any nearby vegetation, such as overgrown grass, vines, or tree branches, that may come into contact with your fence. These can cause damage, discoloration, or even structural issues if left unattended. Keeping the area around your fence clear will prevent unnecessary wear and tear.
4. Repair or Replace Damaged Parts: Any damaged or broken parts should be promptly repaired or replaced. This includes loose screws, cracked boards, or rusted metal components. By addressing these issues early on, you can prevent further damage and maintain the structural integrity of your fence.
5. Treat Wood Fences: If you have a wood fence, periodic treatment is necessary to protect it from the elements. Apply a sealant, stain, or paint to seal the wood and provide an added layer of protection against moisture, rot, and UV damage. Follow the manufacturer’s instructions for the appropriate timing and application method.
6. Address Rust on Metal Fences: If your fence has metal components, inspect them for any signs of rust. Remove rust using a wire brush and apply a rust-resistant paint or primer to prevent further corrosion. Regularly check for signs of rust and address it promptly to extend the lifespan of your metal fence.
7. Adjust Gates and Hardware: Regularly check and adjust gate hinges, latches, and other hardware to ensure smooth operation. Lubricate moving parts if necessary to prevent sticking or binding. Properly functioning gates will prolong the life of your fence and make it easier to access your property.
8. Schedule Professional Maintenance: Consider scheduling professional maintenance to keep your fence in top condition. Professional fence companies can provide thorough inspections and maintenance services tailored to your specific fence type and needs.
Remember, maintaining your fence is an ongoing process. Regular inspections, cleaning, and repairs are essential to ensure its longevity and optimal performance. By taking the time to care for your fence, you can enjoy its functionality and aesthetic appeal for many years to come.
Conclusion
Installing a fence on a slope may present some challenges, but with proper planning, preparation, and execution, it can be a rewarding project that enhances the functionality and aesthetic appeal of your outdoor space. By understanding the slope, choosing the right fence material, marking the fence line, gathering the necessary tools and materials, setting the corner posts, installing the fence panels, adjusting them for the slope, securing the fence, and completing the finishing touches, you can achieve a visually pleasing and structurally sound fence on a sloping yard.
Throughout the installation process, it is important to maintain a balance between functionality and aesthetics. Consider the purpose of your fence, whether it’s for privacy, security, or simply enhancing the overall look of your property. Select a fence material that meets your needs, budget, and maintenance preferences. Take into account the slope of your yard and make the necessary adjustments to ensure a level and aligned fence. Secure the fence properly, considering longer posts, concrete, bracing, and additional supports if needed.
Once the fence is installed, proper maintenance and regular upkeep are vital to preserving its integrity and appearance. Inspect your fence regularly for any damage or wear, clean it, trim nearby vegetation, and address any issues promptly. Treat wood fences with sealants or stains, address rust on metal fences, and keep gates and hardware in proper working order. Regular maintenance will extend the lifespan of your fence and keep it looking its best for years to come.
In conclusion, installing a fence on a slope requires careful planning, attention to detail, and ongoing maintenance. With the right techniques and approach, you can achieve a functional, durable, and visually pleasing fence that complements the unique contours of your sloping yard. Enjoy the benefits of privacy, security, and enhanced outdoor aesthetics that a well-installed fence can bring.
Frequently Asked Questions about How To Install Fence On A Slope
Was this page helpful?
At Storables.com, we guarantee accurate and reliable information. Our content, validated by Expert Board Contributors, is crafted following stringent Editorial Policies. We're committed to providing you with well-researched, expert-backed insights for all your informational needs.


0 thoughts on “How To Install Fence On A Slope”