
Articles
How To Install Roof Flashing Against A Wall
Modified: December 7, 2023
Learn how to properly install roof flashing against a wall in this informative article. Find step-by-step instructions and professional tips to ensure a watertight seal for your roof.
(Many of the links in this article redirect to a specific reviewed product. Your purchase of these products through affiliate links helps to generate commission for Storables.com, at no extra cost. Learn more)
Introduction
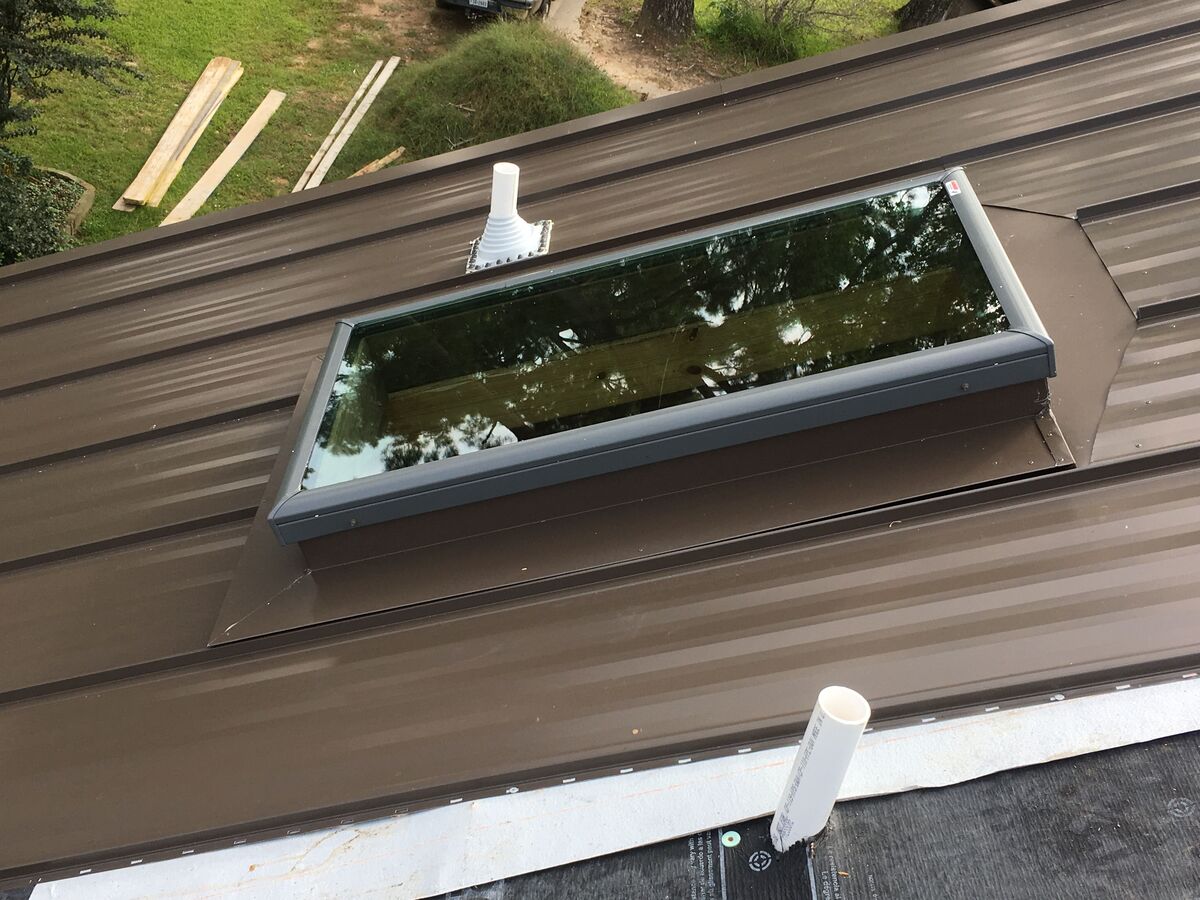
Installing roof flashing against a wall is an essential step in ensuring the durability and functionality of your roofing system. Roof flashing is a thin material, usually made of metal or rubber, that is installed to protect the joints and intersections of a roof from water infiltration. It acts as a barrier, preventing water from penetrating the roof and causing damage to the underlying structure.
When installing roof flashing against a wall, it is crucial to follow the proper techniques to ensure a watertight seal and long-lasting results. This article will guide you through the step-by-step process of installing roof flashing against a wall, including the necessary materials and safety precautions.
Before we begin, it is important to gather all the materials needed for the installation. This includes roof flashing, roofing nails, a hammer, roofing cement or caulking, a measuring tape, a chalk line, a ladder, safety goggles, and gloves. Having these tools at hand will help streamline the installation process and guarantee a successful outcome.
In the following sections, we will delve into each step in detail, providing the necessary instructions and tips to help you install roof flashing against a wall effectively. From measuring and marking the wall to securing the flashing and applying the necessary sealant, we will cover all the essential aspects of this installation process.
Remember, safety should always be a top priority when working on any roofing project. Before starting the installation, make sure to use the ladder correctly, wear safety goggles to protect your eyes from debris, and use gloves to safeguard your hands.
Now that we have covered the basics, let’s jump into the step-by-step process of installing roof flashing against a wall. By following these instructions carefully, you can ensure that your roof remains protected from potential water damage, extending its lifespan and maintaining the structural integrity of your home.
Key Takeaways:
- Proper installation of roof flashing against a wall is crucial for protecting your roofing system from water damage. Follow the step-by-step process, prioritize safety, and use high-quality materials for a durable, watertight seal.
- By measuring, cutting, positioning, nailing, and sealing the flashing correctly, you can ensure a professional finish and long-lasting protection for your roof. Don’t overlook safety precautions and thorough inspection for a successful installation.
Read more: How To Store A Mattress Against A Wall
Materials Needed
To properly install roof flashing against a wall, you will need the following materials and tools:
1. Roof flashing: Roof flashing is a crucial component of the installation process. It is typically made from metal, such as aluminum or galvanized steel, or rubber materials like EPDM. The flashing acts as a barrier, directing water away from vulnerable areas and preventing leaks.
2. Roofing nails: You will need roofing nails to secure the flashing in place. These specialized nails are designed to withstand harsh weather conditions and provide a secure attachment to the roof.
3. Hammer: A hammer is essential for driving the roofing nails into the flashing and ensuring a tight fit. Choose a hammer with a comfortable grip that allows for precise control during installation.
4. Roofing cement or caulking: Roofing cement or caulking is used to create a watertight seal along the edges and joints of the flashing. It helps to prevent water from seeping in and causing damage. Ensure you choose a high-quality roofing cement or caulking that is compatible with the material of the flashing.
5. Measuring tape: Accurate measurements are vital for a successful installation. Use a measuring tape to determine the length of the wall where the flashing will be installed. This will ensure that the flashing is cut to the correct size, providing proper coverage and protection.
6. Chalk line: A chalk line is a useful tool for marking the desired placement of the flashing on the wall. It allows for straight, precise lines, guiding the installation process and ensuring a professional finish.
7. Ladder: When working at heights, it is crucial to have a stable and secure ladder. Choose a ladder that can safely support your weight and has non-slip feet to prevent accidents.
8. Safety goggles: Protecting your eyes is essential when installing roof flashing. Safety goggles will shield your eyes from debris, dust, and any potential accidents during the installation process.
9. Gloves: It is essential to wear gloves to protect your hands while handling roofing materials and tools. Gloves provide a barrier between your skin and any sharp edges or potential injuries.
These materials and tools are key to a successful installation of roof flashing against a wall. Ensure that you have all the necessary items before starting the project, as it will streamline the installation process and help you achieve the best results. Remember to prioritize safety and take all precautionary measures when working with roofing materials and tools.
Step 1: Safety Precautions
Before beginning the installation of roof flashing against a wall, it is crucial to prioritize safety. Working on a roof can be dangerous, so taking the necessary precautions is essential to prevent accidents and injuries. Here are two important safety measures to keep in mind:
1. Use a ladder properly: When accessing the roof, it is important to use a ladder correctly. Ensure that the ladder is placed on a stable and level surface. Always inspect the ladder for any defects or damage before climbing. The ladder should be tall enough to safely reach the roof without overreaching. Maintain three points of contact at all times while climbing and descending the ladder.
2. Wear safety goggles and gloves: Protecting your eyes and hands is crucial during the installation process. Wear safety goggles to shield your eyes from any debris, dust, or flying particles that may be present. Gloves will provide a barrier between your hands and any sharp edges or potential injuries.
By following these safety precautions, you can minimize the risk of accidents or injuries while installing roof flashing against a wall. Remember to always prioritize your safety and use common sense when working at heights. Being cautious and attentive will ensure a smooth and safe installation process.
Step 2: Measure and Mark
The next step in installing roof flashing against a wall is to properly measure and mark the area where the flashing will be installed. This ensures accurate placement and a professional finish. Follow these steps to measure and mark the wall:
1. Measure the length of the wall where the flashing will be installed: Use a measuring tape to determine the length of the wall where the flashing will be attached. Measure from one end to the other, ensuring you get an accurate measurement. Note down the measurement for reference.
2. Mark the desired placement of the flashing with chalk: Once you have measured the length of the wall, it’s time to mark the desired placement of the flashing. Use a chalk line or a chalk pencil to create a straight line along the wall at the appropriate height where the flashing will be installed. This line will act as a guide during the installation process.
Take care to align the chalk line accurately, ensuring it is level and straight. This will help maintain a professional appearance after the installation is complete.
Taking the time to measure and mark the wall properly ensures that the roof flashing will be installed in the correct position, providing the necessary protection against water infiltration. Accurate measurements and clear markings will help streamline the installation process and result in a more visually appealing and functional finished product.
Step 3: Cut Flashing
After measuring and marking the wall for the placement of the flashing, the next step is to cut the flashing to the appropriate length. This ensures a proper fit and proper coverage of the targeted area. Follow these steps to cut the flashing:
1. Measure the required length: Using a measuring tape, measure the distance between the two marked points on the wall. Take precise measurements to ensure accuracy.
2. Mark the cutting points: Once you have measured the desired length, use a pencil or marker to mark the cutting points on the flashing. Make sure the marks are clear and visible, as they will guide your cutting process.
3. Cut the flashing: With the appropriate cutting tool, such as tin snips or a utility knife, carefully cut along the marked lines. Take your time and ensure you follow the lines accurately for a clean and precise cut. If using tin snips, make sure they are designed for cutting metal flashing.
4. Check the fit: Once you have cut the flashing to the appropriate length, hold it up against the wall to check the fit. Ensure that it covers the designated area and reaches the desired height. Adjust if necessary.
Cutting the flashing to the correct length is vital for a proper installation. It ensures that the flashing provides sufficient coverage and protection against water infiltration. Be careful while cutting and follow the marked lines accurately to avoid any unnecessary errors. Taking the time to measure and cut the flashing correctly will contribute to the overall success and functionality of the installation process.
When installing roof flashing against a wall, make sure to use the appropriate flashing material for the type of wall and roof. Properly seal the flashing to prevent water infiltration.
Read more: How To Install Dormer Flashing
Step 4: Position Flashing
With the flashing cut to the appropriate length, it’s time to position it against the wall. This step is crucial to ensure a proper seal and effective protection against water infiltration. Follow these steps to position the flashing correctly:
1. Start from the bottom: Begin by aligning the bottom edge of the flashing with the bottom of the wall where it will be installed. Ensure that it is level and straight.
2. Hold the flashing in place: While maintaining the alignment, hold the flashing firmly against the wall. This will help you assess the fit and make any necessary adjustments before securing it in place.
3. Check the alignment: Take a step back and evaluate the positioning of the flashing. Ensure that it is symmetrical and extends evenly along the length of the wall. Adjust as needed to achieve the desired appearance.
4. Ensure proper overlap: If you are installing overlapping flashing, make sure that the overlapping edge is in the correct position. This will help prevent water from seeping in between the pieces of flashing.
By carefully positioning the flashing against the wall, you are laying the foundation for a secure and effective installation. Taking the time to ensure proper alignment and fit will result in a watertight seal and long-lasting protection for your roof.
Step 5: Nail Flashing
Once the flashing is properly positioned against the wall, it’s time to secure it in place using roofing nails. This step ensures that the flashing remains securely attached, providing long-lasting protection against water infiltration. Follow these steps to nail the flashing:
1. Choose the right nails: Select roofing nails that are appropriate for the material of the flashing and compatible with the roofing system. For metal flashing, choose galvanized roofing nails, while rubber or synthetic flashing may require specialized roofing nails. Consult the manufacturer’s instructions or seek professional advice if unsure.
2. Determine the spacing: Before nailing the flashing, determine the spacing between each nail. Typically, nails should be placed approximately 6 to 8 inches apart along the edges of the flashing. This will ensure a secure grip without causing any damage.
3. Nail along the edges: Starting from the bottom edge of the flashing, carefully drive a nail through the flashing and into the wall. Use a hammer to firmly drive the nail in, making sure it is flush with the surface of the flashing. Repeat this process along the edges and at the determined spacing intervals.
4. Check for a secure fit: Once you have nailed the flashing in place, check the fit to ensure it is securely attached to the wall. Press against the flashing to ensure it is tight and does not move or shift. If needed, add additional nails to reinforce areas that feel loose.
Properly nailing the flashing ensures that it remains securely fastened to the wall, providing effective protection against water infiltration. Take your time and drive the nails in with care, ensuring a secure hold without causing any damage to the flashing or the underlying structure.
Step 6: Apply Roofing Cement/Caulking
Applying roofing cement or caulking is an important step in the installation process of roof flashing against a wall. This additional sealant helps to create a watertight barrier, preventing water from seeping in and causing any potential damage. Follow these steps to apply roofing cement or caulking:
1. Prepare the roof cement or caulking: Ensure you have a high-quality roofing cement or caulking that is compatible with the material of the flashing. Follow the manufacturer’s instructions for any specific preparation or mixing requirements.
2. Starting at one edge: Begin at one edge of the flashing and apply a generous amount of roofing cement or caulking. Use a caulking gun or a trowel to spread it evenly along the edge of the flashing. Extend the application approximately 2 to 3 inches onto the wall.
3. Apply to the adjacent edges: Move along the edges of the flashing, applying roofing cement or caulking in the same manner. Ensure that you cover the entire length of each edge, creating a consistent barrier.
4. Smooth out the sealant: Once the roofing cement or caulking is applied, use a putty knife or a gloved finger to smooth out the sealant. This helps to create an even and visually appealing finish while ensuring proper adhesion.
5. Check for any gaps or loose areas: Once the sealant is applied, inspect the flashing for any gaps or loose areas. Press down on the flashing to ensure a secure fit and check for any areas that may require additional sealant.
Applying roofing cement or caulking to the edges of the flashing is a crucial step in creating a watertight seal and providing additional protection against water infiltration. By carefully following the above steps, you can ensure that the sealant is applied correctly, enhancing the effectiveness and longevity of the roof flashing installation.
Step 7: Inspect and Clean
After completing the installation of the roof flashing against a wall, it is important to thoroughly inspect the flashing and clean up any debris or excess cement. This final step ensures that the flashing is secure and properly sealed. Follow these steps to inspect and clean the flashing:
1. Inspect for any gaps or loose areas: Carefully examine the flashing for any gaps or areas where it may not be properly secured. Press on the flashing to check if it is firmly in place and there are no loose sections. If you notice any gaps or loose areas, use additional roofing nails or apply more roofing cement or caulking to reinforce those spots.
2. Clean up any debris: Remove any debris, such as shavings from the roofing nails or excess cement, that may have accumulated during the installation process. Use a broom or a brush to sweep away any loose debris, ensuring a clean and tidy finish.
3. Remove excess cement: Check for any excess roofing cement or caulking that may have oozed out during the application. Use a putty knife or a scraper to carefully remove the excess cement, ensuring a clean and seamless appearance. Take care not to disturb the sealant or damage the flashing in the process.
4. Dispose of waste properly: Dispose of any waste materials, such as discarded nails or leftover caulking, in a responsible manner. Follow local regulations and guidelines for proper disposal to minimize environmental impact.
By thoroughly inspecting the flashing and cleaning up any debris or excess cement, you can ensure that the installation is completed to a high standard. This final step is crucial for the overall aesthetics and functionality of the flashing, ensuring a secure and watertight seal. Once this step is complete, take a step back and admire the professional finish of the roof flashing installation against the wall.
Conclusion
Installing roof flashing against a wall is a crucial step in protecting your roofing system from water damage. By following the step-by-step process outlined in this article, you can ensure a successful installation and a durable, watertight seal.
Starting with the necessary materials, such as roof flashing, roofing nails, a hammer, and roofing cement or caulking, gather everything you need before beginning the installation. Safety precautions, such as using a ladder properly and wearing safety goggles and gloves, should always be a priority to prevent accidents and injuries.
Measure and mark the wall carefully, ensuring precise placement of the flashing. Cut the flashing to the appropriate length, taking care to follow the marked lines accurately. Position the flashing against the wall, starting from the bottom, and secure it in place using roofing nails.
To create a watertight seal, apply roofing cement or caulking along the edges of the flashing. Smooth out the sealant for an even and visually appealing finish. Lastly, inspect the flashing for any gaps or loose areas, and clean up any debris or excess cement to complete the installation process.
Installing roof flashing against a wall not only enhances the aesthetics of your roofing system but also protects against water intrusion, extending the lifespan of your roof. It is a crucial step in maintaining a strong and durable structure.
Remember to prioritize safety throughout the installation process and use the appropriate tools and materials for the job. If you are unsure about any aspect of the installation, consult a professional roofing contractor for guidance.
By following the guidelines and tips provided in this article, you can confidently install roof flashing against a wall, ensuring the longevity and integrity of your roofing system for years to come.
Frequently Asked Questions about How To Install Roof Flashing Against A Wall
Was this page helpful?
At Storables.com, we guarantee accurate and reliable information. Our content, validated by Expert Board Contributors, is crafted following stringent Editorial Policies. We're committed to providing you with well-researched, expert-backed insights for all your informational needs.


0 thoughts on “How To Install Roof Flashing Against A Wall”