Articles
How To Install Epoxy Flooring In A Garage
Modified: October 20, 2024
Learn how to install epoxy flooring in your garage with our step-by-step articles. Transform your space into a durable and professional-looking area.
(Many of the links in this article redirect to a specific reviewed product. Your purchase of these products through affiliate links helps to generate commission for Storables.com, at no extra cost. Learn more)
Introduction
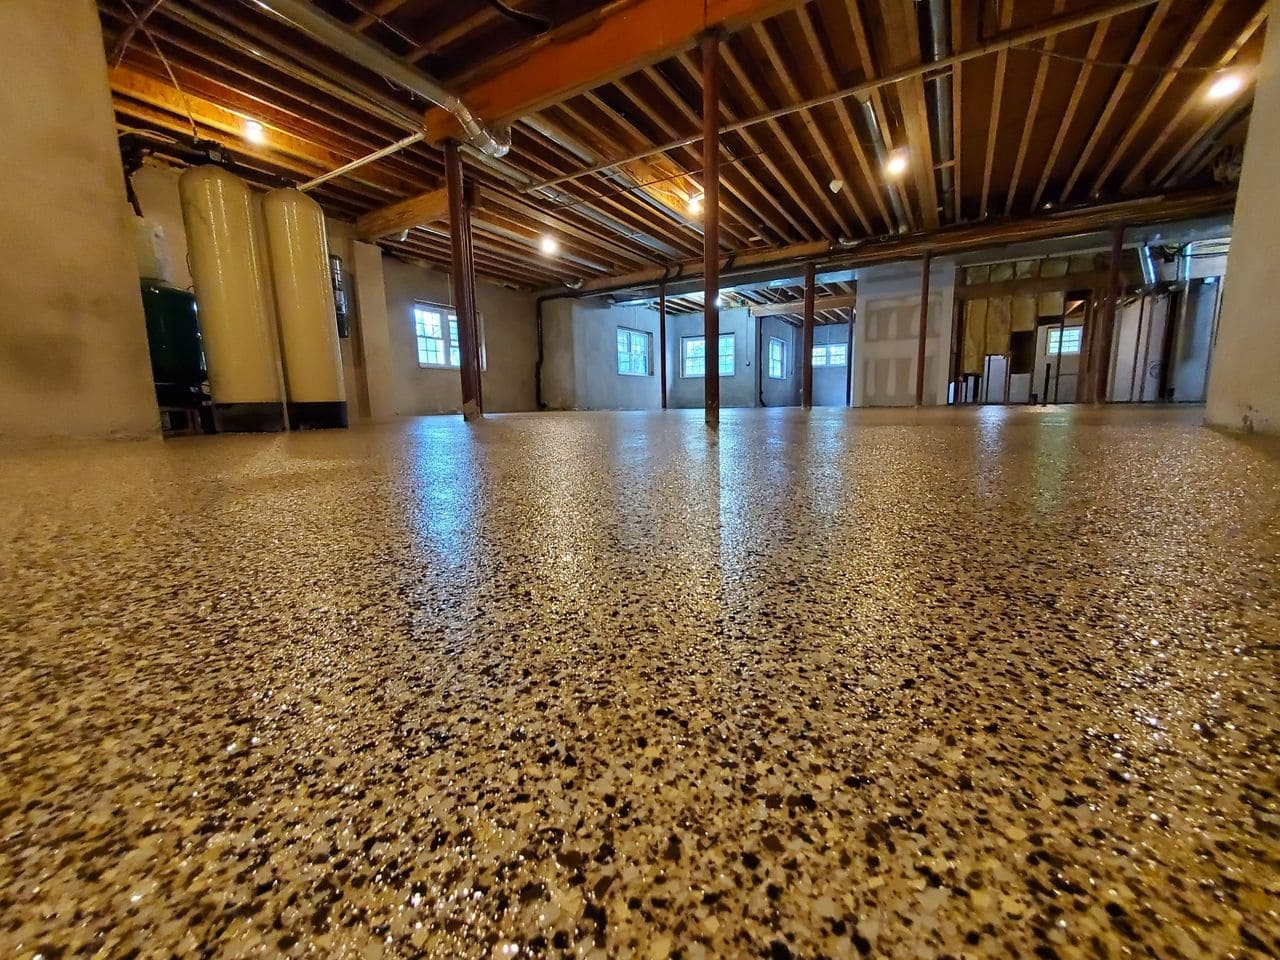
Installing epoxy flooring in a garage is a fantastic way to transform a dull and unremarkable space into a functional and visually appealing area. Whether you use your garage for parking, storage, or as a workshop, epoxy flooring can provide numerous benefits, including durability, easy maintenance, and enhanced aesthetics.
Epoxy flooring is a type of coating that is applied to the concrete floor of a garage. It is made up of a mixture of epoxy resin and a hardening agent, which chemically react to form a strong, durable, and smooth surface. The result is a flooring that can withstand heavy use, resist stains and chemicals, and provide a seamless finish.
In this article, we will guide you through the step-by-step process of installing epoxy flooring in a garage. From preparing the garage to applying the epoxy and adding decorative flakes, we will cover all the necessary steps to help you achieve a professional-looking finish.
Before you begin the installation process, it is essential to gather the necessary materials and tools. You will need epoxy resin, a hardening agent, a concrete primer, decorative flakes (optional), a roller or brush for application, and safety gear such as gloves and goggles. Additionally, ensure that you have a clean and well-ventilated workspace to work in.
With the right preparation and attention to detail, you can transform your garage into a functional and visually stunning space with epoxy flooring. So, let’s dive into the step-by-step process and get started on installing your own epoxy garage floor.
Key Takeaways:
- Transform your garage with epoxy flooring for durability, easy maintenance, and enhanced aesthetics. Follow the step-by-step process for a professional finish and enjoy the long-lasting benefits of a visually stunning garage floor.
- Properly prepare, repair, clean, and apply epoxy to achieve a durable and visually appealing garage floor. Add decorative flakes and a protective topcoat for extra style and longevity. Allow the epoxy to cure fully for maximum strength and durability.
Read more: How To Prep A Garage Floor For Epoxy
Step 1: Preparing the Garage
The first step in installing epoxy flooring in your garage is to properly prepare the space. This involves clearing out any items or obstacles from the garage and giving the floor a thorough cleaning.
Start by removing all vehicles, tools, and equipment from the garage. This will give you a clear workspace and prevent any damage or interference during the installation process. If you have built-in cabinets or shelves, consider covering them to protect them from any potential drips or spills.
Next, sweep or vacuum the entire garage floor to remove any loose debris or dust. Use a stiff-bristle broom or a shop vacuum to ensure that the surface is clean and free from any obstructions. Pay special attention to corners and edges where dirt and debris tend to accumulate.
After sweeping or vacuuming, it is important to thoroughly clean the floor to remove any grease, oil, or stains. You can use a degreaser or a concrete cleaner to effectively remove these substances. Follow the manufacturer’s instructions and use a scrub brush or a pressure washer to scrub the floor and rinse it thoroughly.
Once you have cleaned the floor, allow it to dry completely. This is crucial as any moisture or dampness can affect the adhesion of the epoxy coating. It is recommended to wait at least 24 to 48 hours for the floor to dry thoroughly before proceeding to the next steps.
During the garage preparation process, it is also essential to inspect the floor for any cracks, holes, or imperfections. If you find any, take the time to repair them before proceeding with the epoxy installation. Use a high-quality concrete patching compound and follow the manufacturer’s instructions for application and drying time.
By properly preparing your garage before installing the epoxy flooring, you ensure a clean and smooth surface for optimal adhesion and a professional finish. Taking the time to clear the space, clean the floor, and repair any damage will set the stage for a successful installation process.
Step 2: Repairing the Floor
Before applying epoxy flooring to your garage, it is important to repair any cracks, divots, or imperfections in the concrete floor. This will ensure a smooth and even surface for the epoxy coating to adhere to.
Start by inspecting the floor carefully. Look for any cracks or holes that may need repair. Use a concrete crack filler or patching compound to fill in any small cracks or divots in the floor. Apply the filler or compound according to the manufacturer’s instructions, making sure to completely fill the damaged areas.
If you have larger cracks or holes, you may need to use a concrete patching material. Clean out the crack or hole, removing any loose debris or dirt. Moisten the area with water and apply the patching material, smoothing it out with a trowel or putty knife. Allow the patching material to dry completely before proceeding.
For uneven areas or raised sections of the floor, you may need to use a concrete grinder to level the surface. This will create a smoother and more even base for the epoxy coating. Follow the manufacturer’s instructions for operating the grinder and be sure to wear protective gear, such as goggles and a dust mask.
Once you have repaired any cracks, holes, or uneven areas, it is important to let the repairs cure fully. This may take several hours or even overnight, depending on the product you used. Allow ample time for the repairs to dry and harden before moving on to the next steps.
Repairing the floor ensures that the epoxy coating will be applied to a solid and level surface. It helps to prevent further damage and ensures a professional-looking finish. Take the time to properly repair and prepare your garage floor before moving on to the next steps of the epoxy flooring installation process.
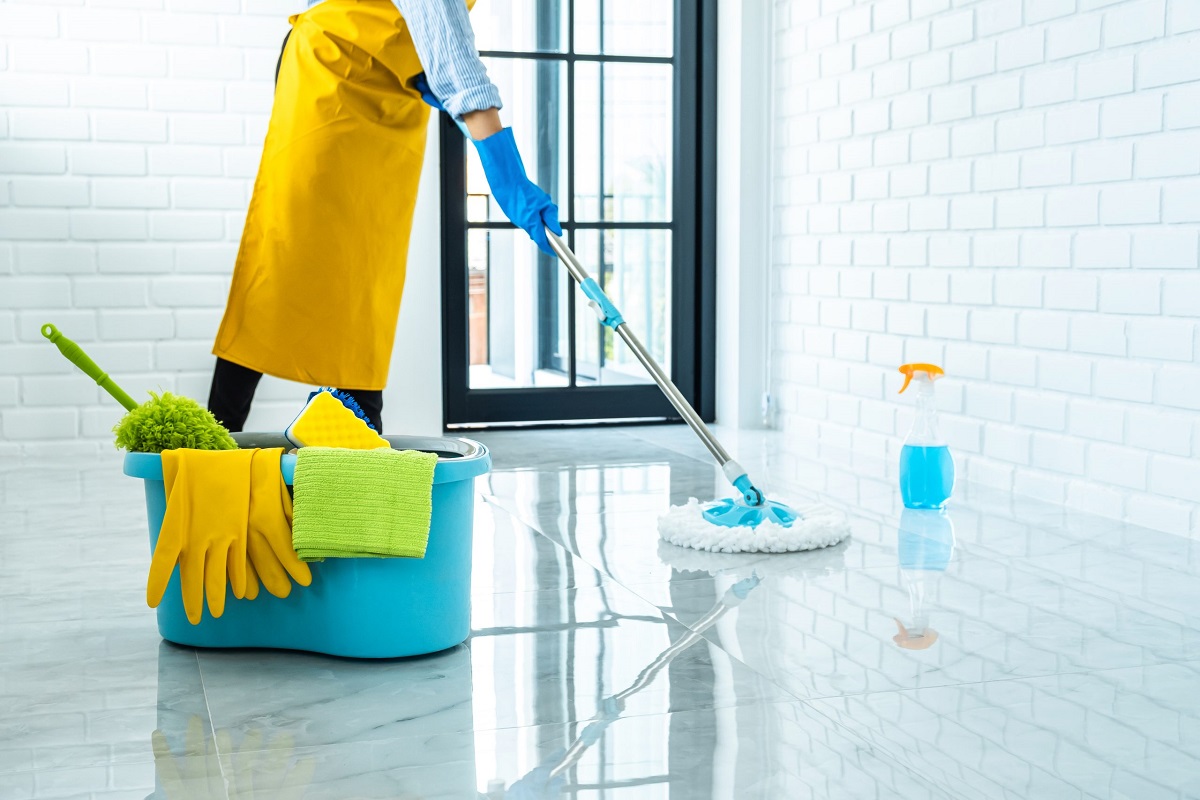
Step 3: Cleaning the Floor
Properly cleaning the garage floor is a crucial step in the process of installing epoxy flooring. It ensures that the surface is free from dirt, dust, oils, and any contaminants that can interfere with the adhesion of the epoxy coating.
Start by sweeping or vacuuming the entire garage floor to remove any loose debris or dirt. Use a broom with stiff bristles or a shop vacuum to effectively clean the surface. Pay close attention to corners, edges, and hard-to-reach areas where dust and debris tend to accumulate.
Once the floor is thoroughly swept or vacuumed, it’s time to tackle any stubborn stains or grease spots. Use a high-quality concrete cleaner or degreaser to treat these areas. Follow the manufacturer’s instructions for dilution and application. Typically, you would mix the cleaner with water in a bucket and apply it to the stained areas using a scrub brush or a mop.
Scrub the stains and grease spots thoroughly to break down the contaminants. For tougher stains, you may need to let the cleaner sit on the surface for a few minutes before scrubbing. After scrubbing, rinse the floor multiple times with clean water to remove any residue from the cleaning solution.
For heavily soiled or greasy areas, you may need to repeat the cleaning process. It is important to ensure that the floor is completely clean before applying the epoxy coating. Any remaining dirt, oil, or contaminants can affect the adhesion and overall appearance of the epoxy.
After cleaning the floor, allow it to dry completely. This may take a few hours or overnight, depending on the humidity and ventilation in your garage. Make sure to open windows or doors to promote air circulation and aid in the drying process.
Taking the time to thoroughly clean the garage floor before applying epoxy flooring will result in a professional finish and ensure optimal adhesion of the epoxy coating. A clean and properly prepared surface sets the stage for a successful installation process and helps to enhance the overall lifespan and performance of the epoxy floor.
Step 4: Applying the Primer
Once the garage floor is properly prepared and cleaned, the next step in installing epoxy flooring is to apply a primer. The primer helps to improve the adhesion of the epoxy coating to the concrete surface and ensures a long-lasting finish.
Before applying the primer, thoroughly read and follow the manufacturer’s instructions. Different epoxy products may have specific primer recommendations or requirements, so it is essential to use the recommended primer for your chosen epoxy coating.
Start by using a roller or a brush to apply the primer to the garage floor. Begin at one corner of the garage and work your way towards the exit, making sure to cover the entire surface. Apply the primer in a thin and even coat, being careful not to leave any puddles or drips.
Pay extra attention to areas that may be more porous, such as cracks or joints, as they may require additional primer to ensure proper adhesion. Work in small sections to ensure thorough coverage and avoid the primer drying too quickly before you can apply the epoxy coating.
As you apply the primer, be sure to wear protective gear such as gloves and goggles. The primer may have strong odors or chemical components, so it is important to work in a well-ventilated area or use fans to aid in ventilation.
After applying the primer, allow it to dry according to the manufacturer’s instructions. This may typically take a few hours, but it is important to allow ample curing time for proper adhesion and performance of the epoxy coating.
By applying a primer before the epoxy coating, you improve the bond between the concrete surface and the epoxy, ensuring a more durable and longer-lasting finish. The primer also helps to seal the surface and prevent any moisture or other contaminants from affecting the final epoxy coating.
Now that you have applied the primer, you are ready to move on to the next exciting step: mixing and applying the epoxy coating to your garage floor.
Read more: How Much Does An Epoxy Garage Floor Cost
Step 5: Mixing the Epoxy
With the primer applied and dried, it’s time to mix the epoxy for the garage floor. Mixing the epoxy correctly is crucial to ensure a smooth and consistent application that will result in a beautiful and durable finish.
Before you begin mixing the epoxy, carefully read and follow the manufacturer’s instructions. Different epoxy brands may have specific mixing ratios and instructions, so it’s important to use the recommended measurements and techniques.
Start by wearing the appropriate protective gear, including gloves and goggles. Epoxy resin and hardener can be strong irritants, so it’s important to protect yourself during the mixing and application process.
Pour the epoxy resin into a clean and sturdy mixing bucket. Then, slowly add the hardener according to the recommended ratio provided by the manufacturer. Proper measurement of the resin and hardener is essential for the epoxy to cure properly and achieve the desired strength and durability.
Use a mixing paddle or a drill with a mixing attachment to combine the resin and hardener thoroughly. Mix at a slow speed to minimize introducing air bubbles into the epoxy mixture. Scrape the sides and bottom of the bucket to ensure all components are fully mixed.
Continue mixing the epoxy for the recommended time specified by the manufacturer. This will typically be around 2 to 3 minutes. Mixing for the specified time ensures that the resin and hardener are fully blended, resulting in a consistent and uniform epoxy mixture.
During this step, it’s important to mix only the amount of epoxy that you can comfortably apply within the recommended pot life. The pot life refers to the time duration during which the epoxy remains workable after mixing. Once the pot life expires, the epoxy will start to harden and become difficult to work with.
Remember to mix small batches at a time and remix as necessary when working on larger areas. By doing so, you can ensure consistency in the epoxy mixture and maintain control over the application process.
Now that you have successfully mixed the epoxy, you are ready to move on to the exciting step of applying it to your prepared garage floor. Proper application of the epoxy will bring your garage floor to life and provide a beautiful, glossy, and durable finish.
When installing epoxy flooring in a garage, make sure to thoroughly clean and degrease the concrete surface before applying the epoxy to ensure proper adhesion and a long-lasting finish.
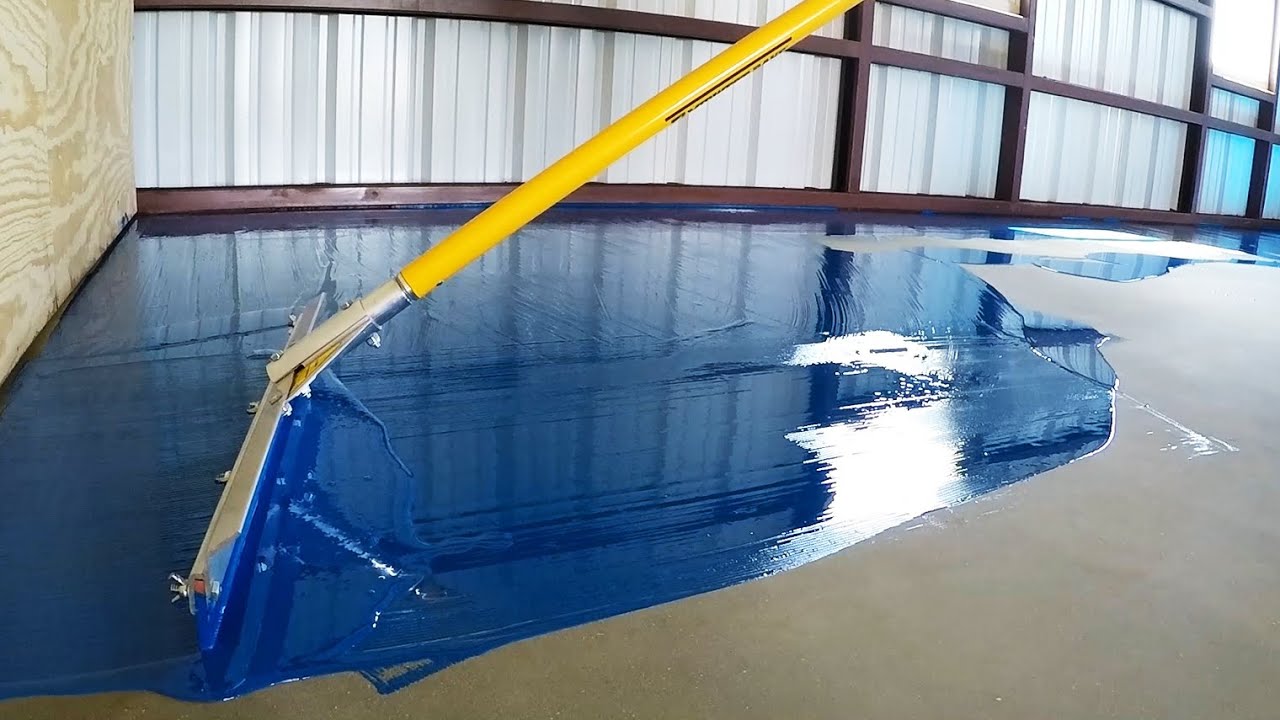
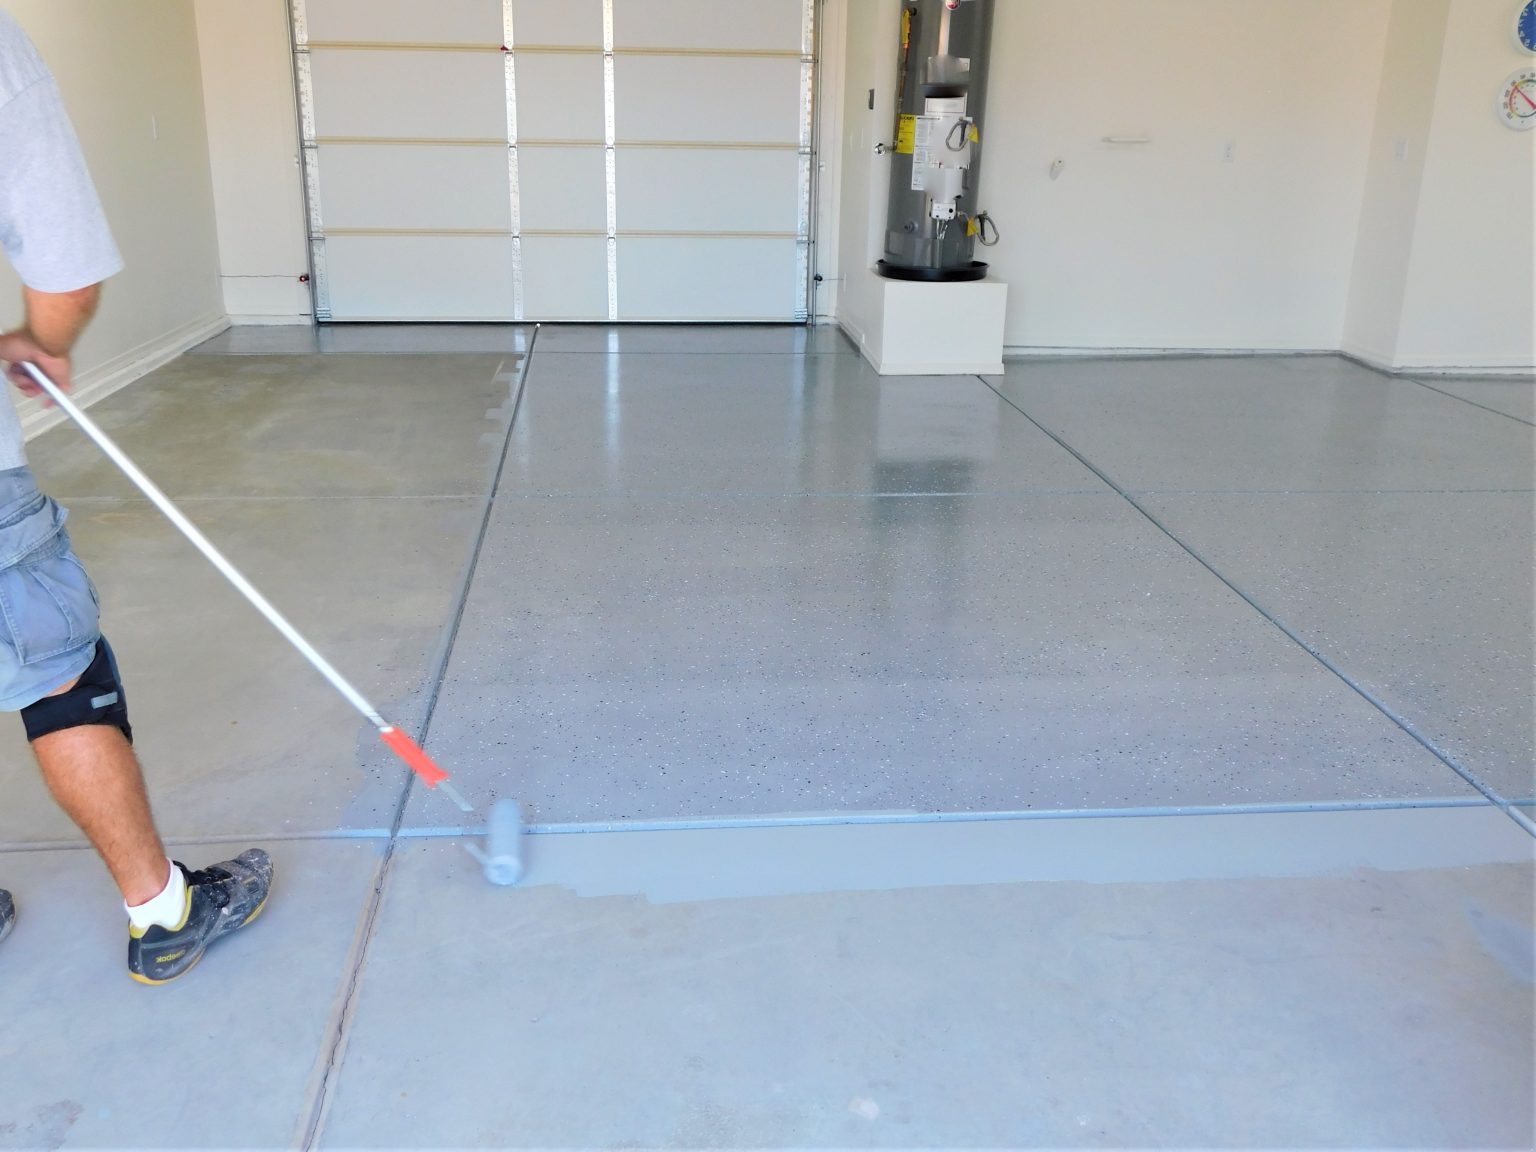
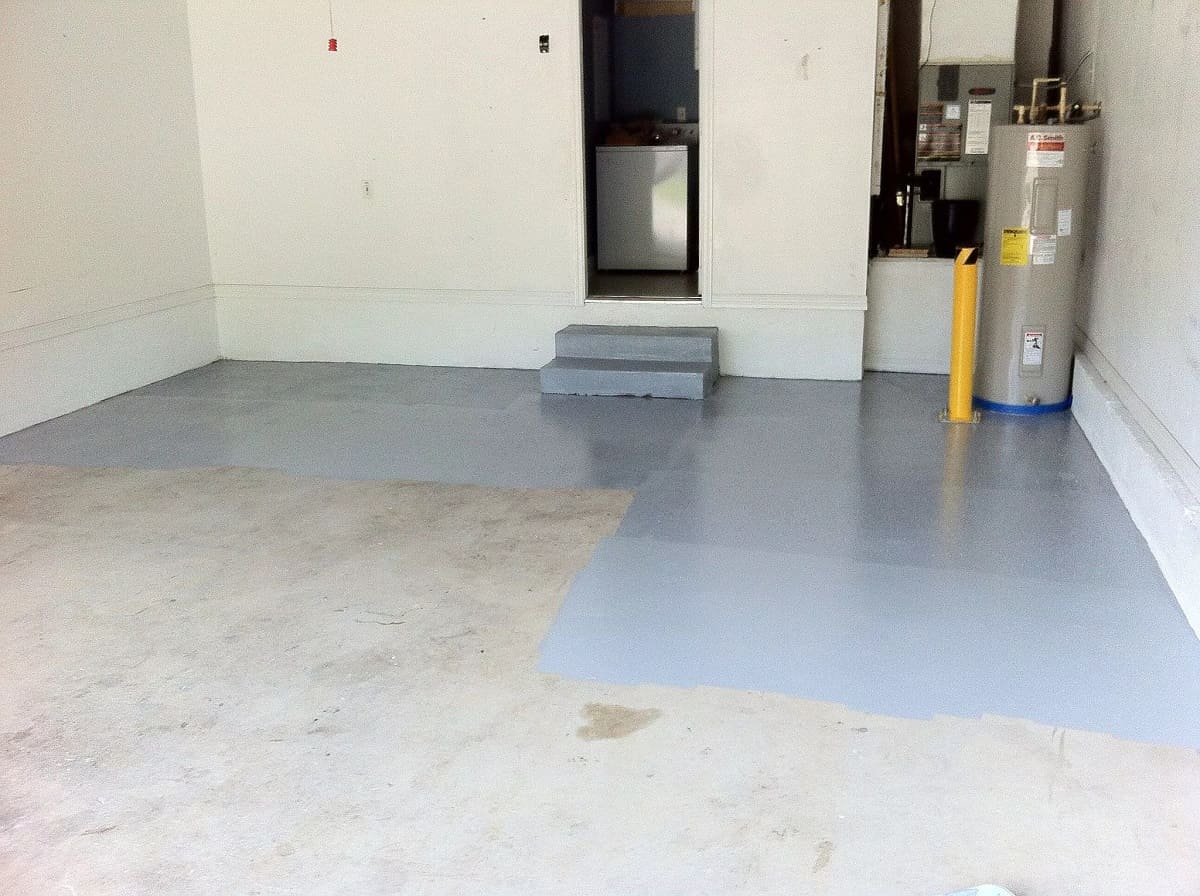
Step 6: Applying the Epoxy
After mixing the epoxy, it’s time to apply it to your garage floor and transform its appearance. Proper application techniques will ensure a smooth, even, and professional-looking finish.
Before you start, make sure the garage floor is clean, dry, and free from any dust or debris. This will help to prevent any imperfections or contaminants from affecting the final epoxy coating.
Using a roller or a brush, begin applying the epoxy to the perimeter of the garage floor. This is known as “cutting in” and helps to ensure that the epoxy coats the edges and corners of the floor. Work in small sections, applying a thin and even coat along the edges.
Once you have cut in the edges, use a larger roller or a squeegee to apply the epoxy to the main surface of the floor. Start in one corner and work your way towards the exit, applying the epoxy in long, overlapping strokes. Make sure to maintain a consistent and smooth application throughout.
As you apply the epoxy, be mindful of working quickly, as it has a limited pot life. You want to ensure that the epoxy is still wet while you apply it, as this will help with adhesion and self-leveling properties. Check the manufacturer’s guidelines for the recommended pot life and plan your application accordingly.
Keep in mind that you may need multiple coats of epoxy to achieve the desired thickness and durability. If applying multiple coats, allow the first coat to dry according to the manufacturer’s instructions before applying the subsequent coat. This usually takes a few hours, but it is important to ensure sufficient curing time.
Once you have applied the epoxy to the entire garage floor, use a roller or a brush to check for any missed spots or uneven areas. Touch up any inconsistencies to ensure a uniform finish. Take care not to overwork the epoxy, as this can introduce air bubbles or streaks.
After the epoxy has been applied, be mindful of any specific cure times as indicated by the manufacturer. Typically, epoxy floors need at least 24 hours to dry before foot traffic can be allowed. Avoid moving vehicles or placing heavy objects on the floor until it has fully cured.
By following the proper techniques and guidelines, you can achieve a smooth, durable, and visually appealing epoxy coating on your garage floor. Proper application is crucial for the longevity and performance of the epoxy, so take the time to apply it with care and precision.
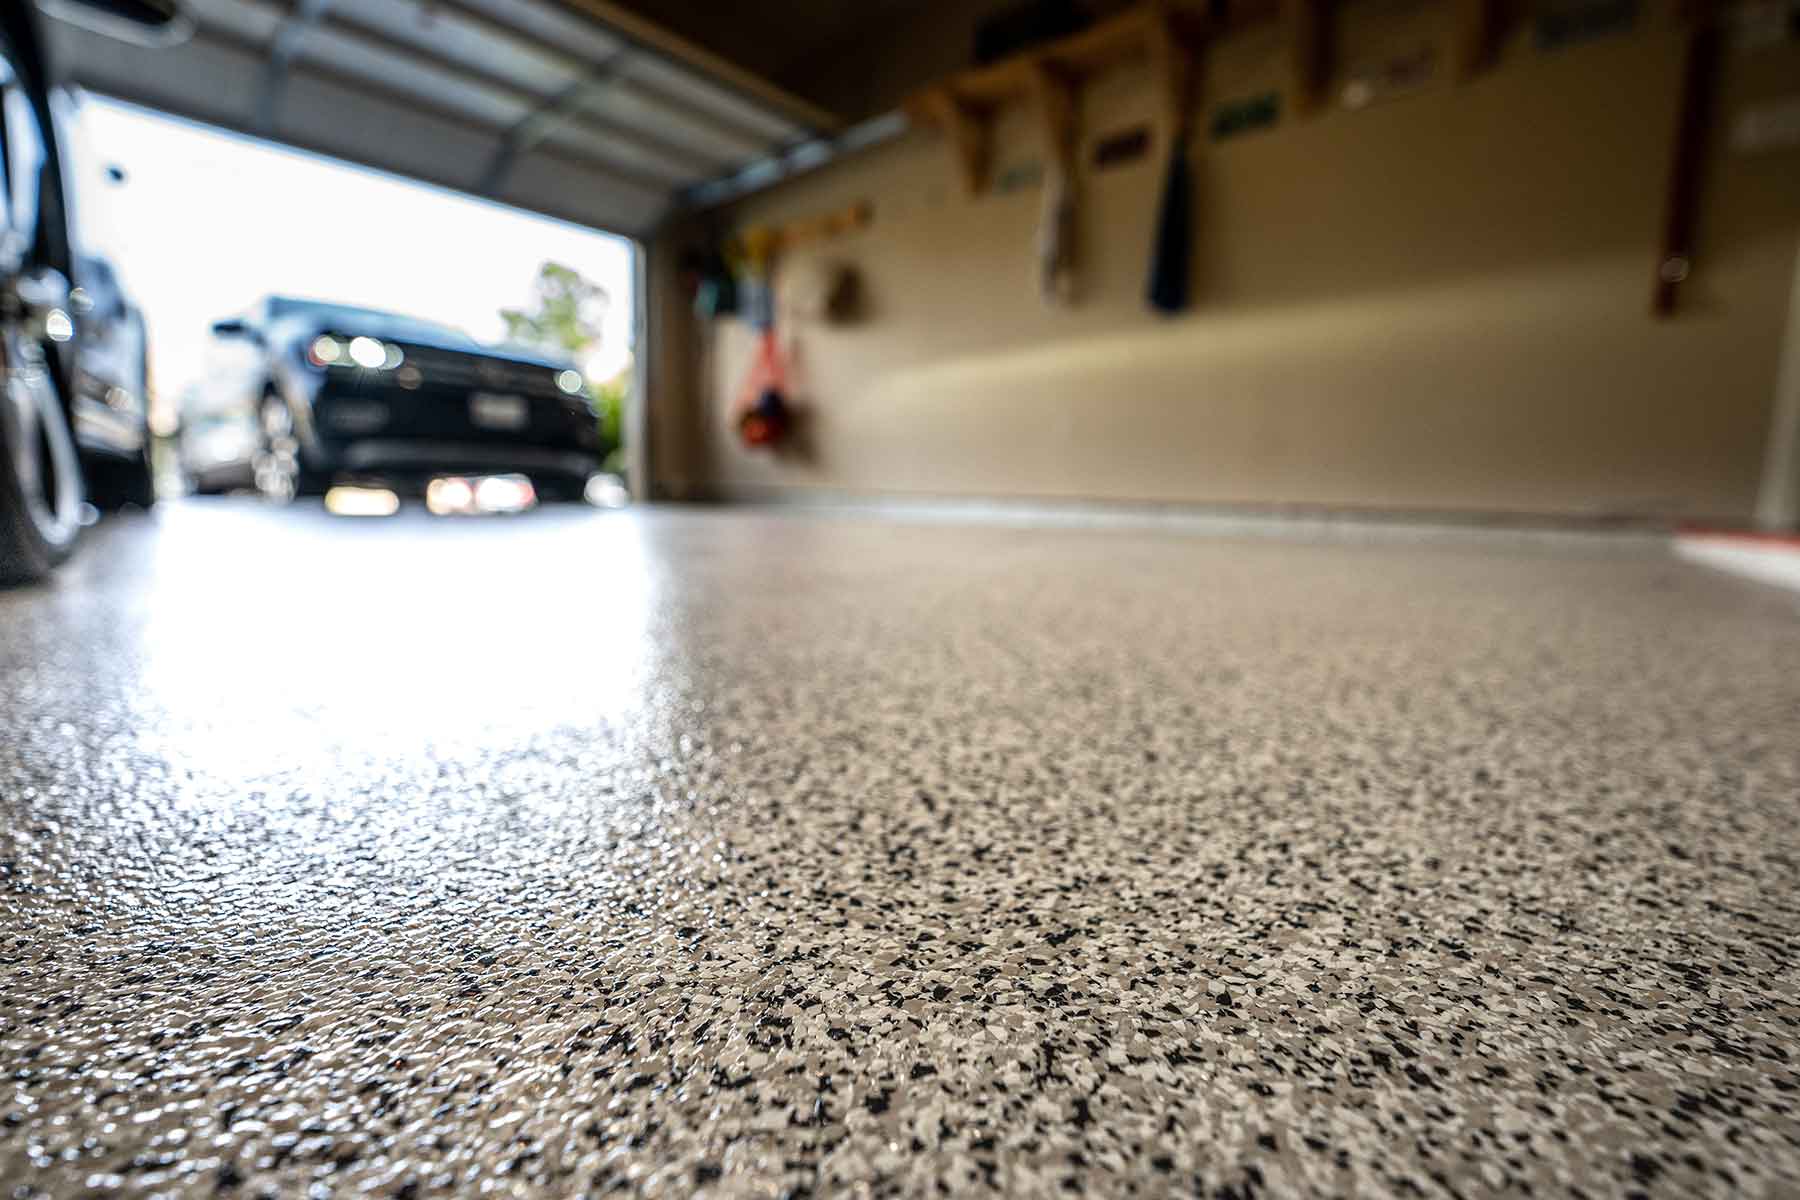
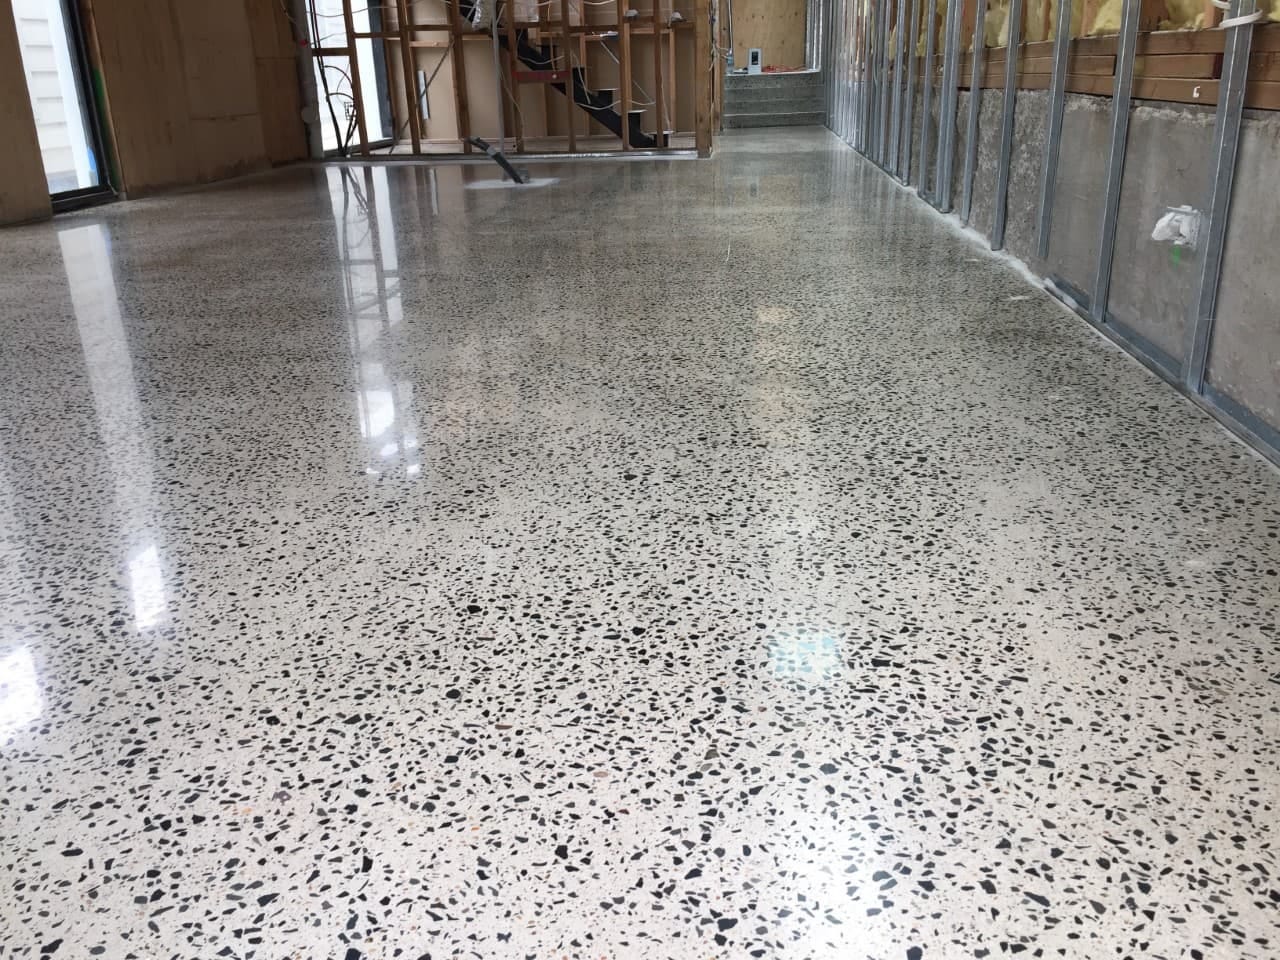
Step 7: Adding Decorative Flakes (optional)
If you want to add an extra touch of style and visual appeal to your epoxy garage floor, you can consider adding decorative flakes. These flakes, also known as vinyl chips or epoxy chips, come in various colors and sizes, allowing you to customize the look of your floor.
Adding decorative flakes is an optional step, but it can make a significant difference in the overall appearance of your garage floor. The flakes not only provide a decorative element but also help to add texture and hide any imperfections in the epoxy coating.
Before you begin, make sure that your epoxy coating is still wet or tacky. This will allow the flakes to adhere properly to the surface. If the epoxy has dried, you won’t be able to achieve a proper bond between the flakes and the coating.
Start by sprinkling the decorative flakes onto the wet epoxy surface. You can either sprinkle them lightly for a more subtle look or apply them more generously for a denser effect. It’s entirely up to your personal preference and the style you want to achieve.
While sprinkling the flakes, it is crucial to do it in a consistent and even manner. You can use your hand or a specialized flake broadcaster to distribute the flakes evenly across the floor. Move in a smooth and sweeping motion to ensure proper coverage.
Once you have applied the flakes, allow the epoxy to dry and cure completely according to the manufacturer’s instructions. This can take several hours or even overnight. During the drying process, it’s important to prevent any foot traffic or other disturbances that could disrupt the flakes’ bond with the epoxy.
After the epoxy has dried, you will need to remove any excess or loose flakes from the surface. This can be done by lightly sanding the floor or using a brush or broom to sweep away the loose flakes. You can also vacuum the floor to ensure a clean and smooth finish.
Once the flakes have been applied and the excess removed, you can proceed to the final step of the epoxy flooring installation process: applying a protective topcoat.
Adding decorative flakes to your epoxy garage floor offers a combination of style and functionality. Not only do they enhance the visual appeal, but they also help to improve the durability and texture of the floor. Consider experimenting with different colors and sizes to create a unique and personalized look for your garage.
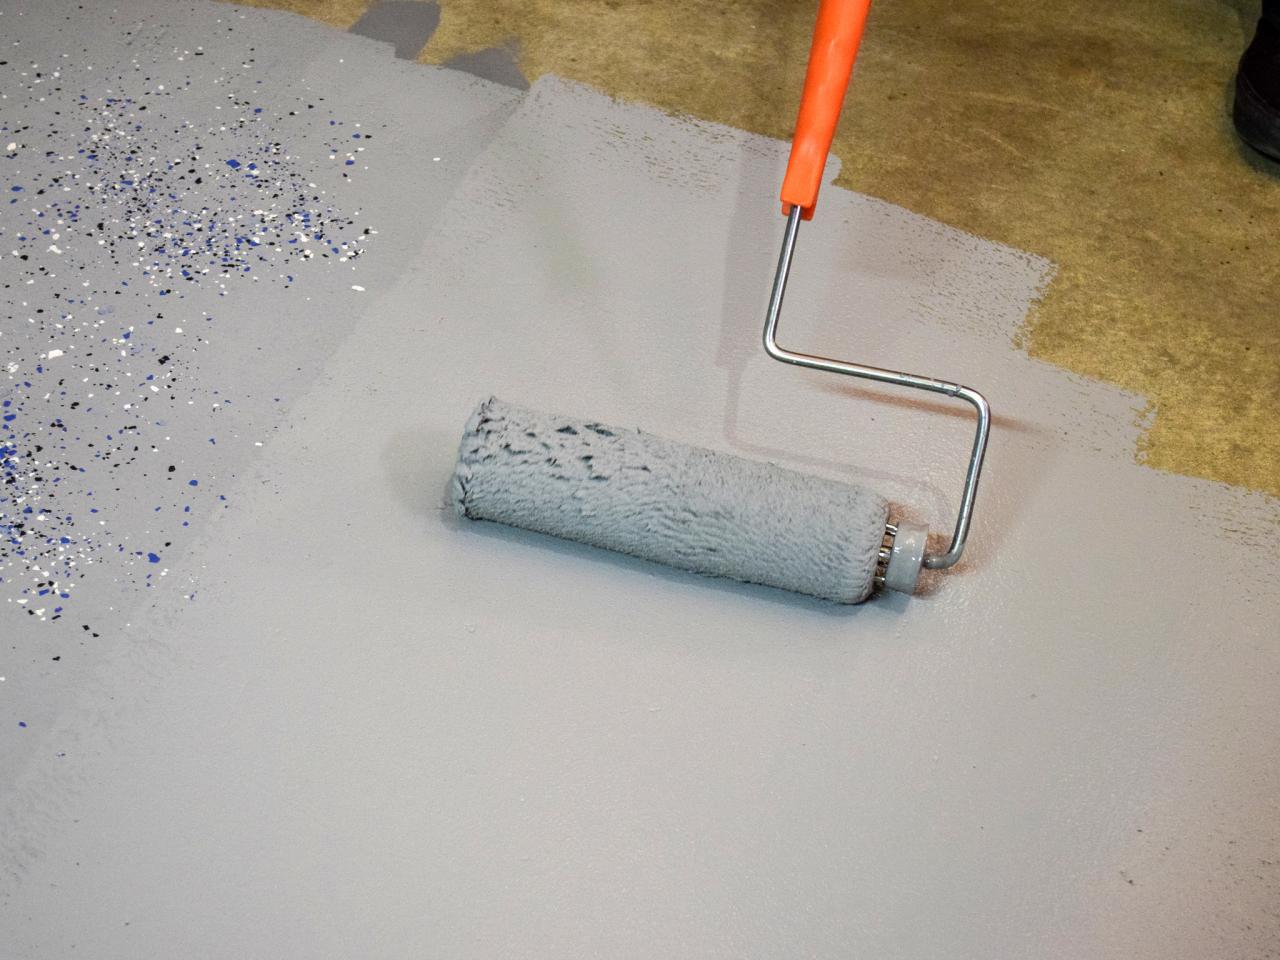
Step 8: Applying a Topcoat
After the epoxy and decorative flakes have dried and cured, the next step in the installation process is to apply a protective topcoat. The topcoat provides an extra layer of durability, UV resistance, and chemical resistance to your garage floor, ensuring its longevity and maintaining its vibrant appearance.
Before you begin applying the topcoat, ensure that the surface is clean and free from any dust or debris. Use a broom or a vacuum to remove any loose particles and prepare a clean working environment.
Start by stirring the topcoat product thoroughly. Most topcoats come in two components, typically a resin and a hardener. Follow the manufacturer’s instructions to mix the two components together to activate the topcoat.
Using a roller or a brush, apply the topcoat to the garage floor. Start from one corner and work your way towards the exit, ensuring an even and consistent application. Be careful not to apply the topcoat too thickly, as this can lead to uneven drying and a less desirable outcome.
As you apply the topcoat, it’s essential to work in small sections to maintain control and ensure that the topcoat does not begin to dry before you can evenly spread it. Use long, overlapping strokes to create a smooth and uniform finish.
While applying the topcoat, be mindful of any specific instructions provided by the manufacturer regarding drying times and curing processes. Depending on the product, the topcoat may require multiple coats for optimal protection and longevity. Follow the recommended waiting time between coats as suggested by the manufacturer.
During the application process, be sure to wear the appropriate protective gear, including gloves and goggles. Some topcoats may have strong odors or contain chemicals that can be irritating, so adequate protection is essential.
Once the topcoat has been applied, allow it to dry and cure fully according to the manufacturer’s instructions. This typically takes at least 24 hours, but it’s best to wait for the recommended curing time to ensure maximum strength and durability.
Applying a topcoat is a critical step in the epoxy flooring installation process. It provides a protective layer that enhances the longevity and performance of your garage floor. With the topcoat in place, your epoxy floor will be better equipped to withstand daily wear and tear, resist chemicals, and maintain its glossy appearance for years to come.
Step 9: Allowing the Epoxy to Cure
After completing the application of the topcoat, the final step in the epoxy flooring installation process is to allow the epoxy to cure. Curing is a crucial process that allows the epoxy to fully harden and reach its maximum durability and strength.
Before you begin using the garage or placing any heavy objects on the floor, it’s important to give the epoxy sufficient time to cure. The curing time can vary depending on the specific epoxy product used and environmental conditions such as temperature and humidity.
Typically, epoxy requires at least 24 hours to cure before light foot traffic can be allowed. However, it is best to follow the manufacturer’s instructions for the recommended curing time. This ensures that the epoxy has ample time to reach its full hardness and durability.
During the curing process, it is essential to avoid moving vehicles, placing heavy objects or furniture on the floor, and exposing it to excessive moisture. These actions can disrupt the curing process and negatively impact the final result.
It’s also important to note that the epoxy may initially have a slightly tacky or soft feel during the first few days of curing. This is normal and expected. As the epoxy continues to cure, it will become harder and more resistant to scratches and impacts.
Properly allowing the epoxy to cure is crucial for achieving the desired end result. Rushing the process or not giving the epoxy enough time to cure can compromise its strength and durability.
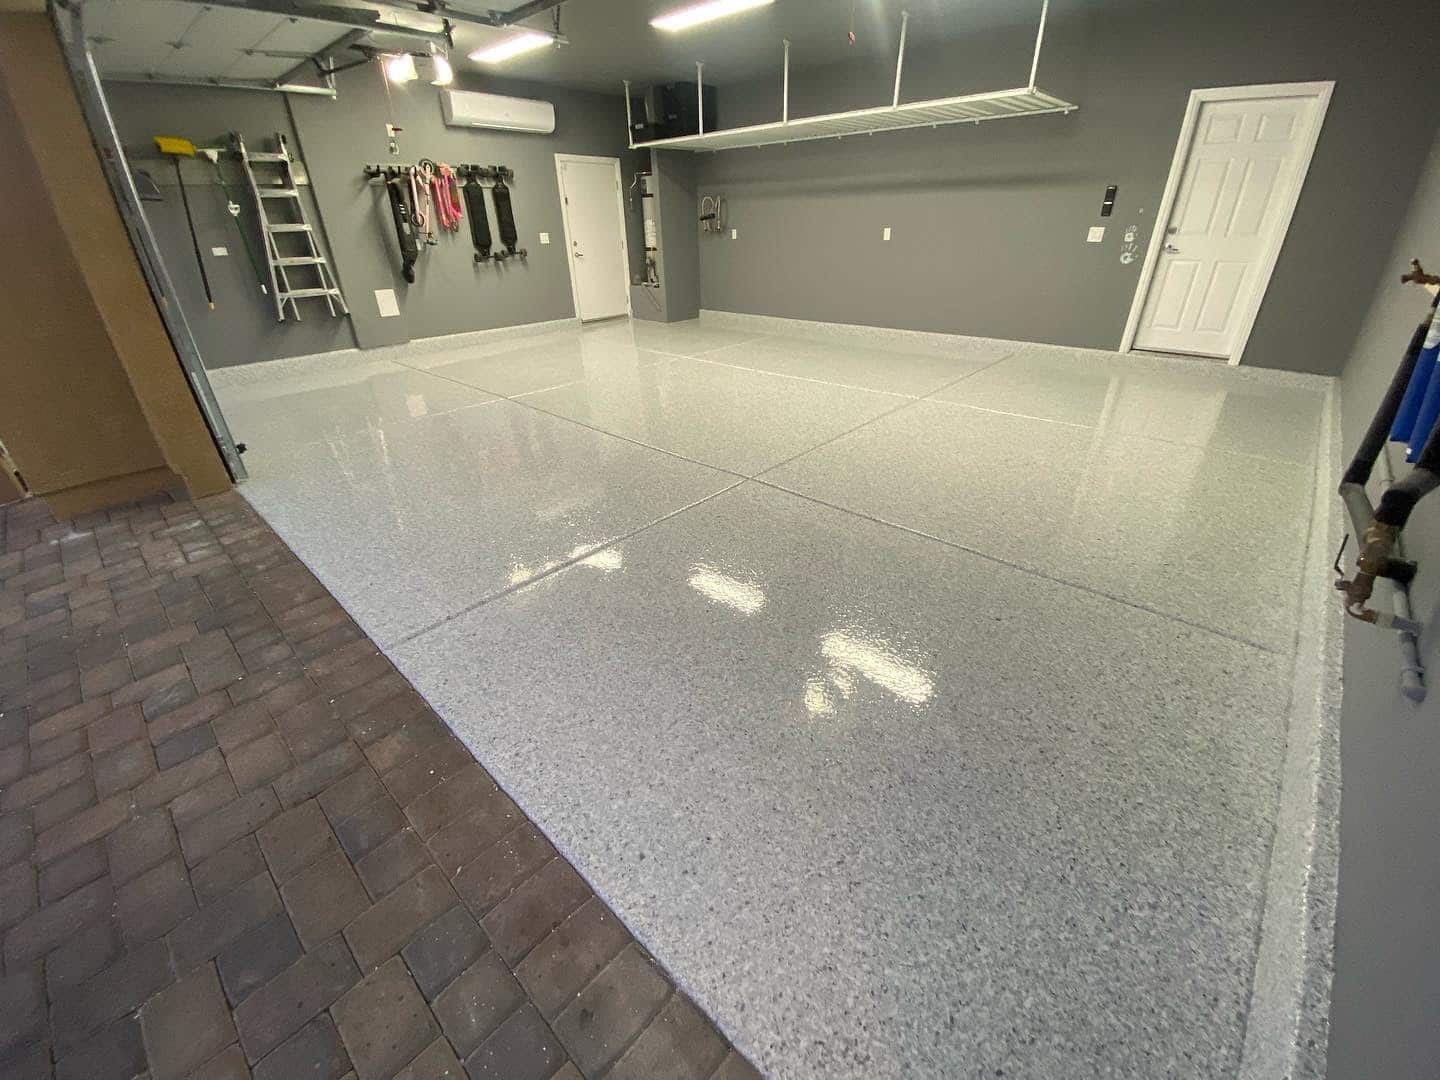
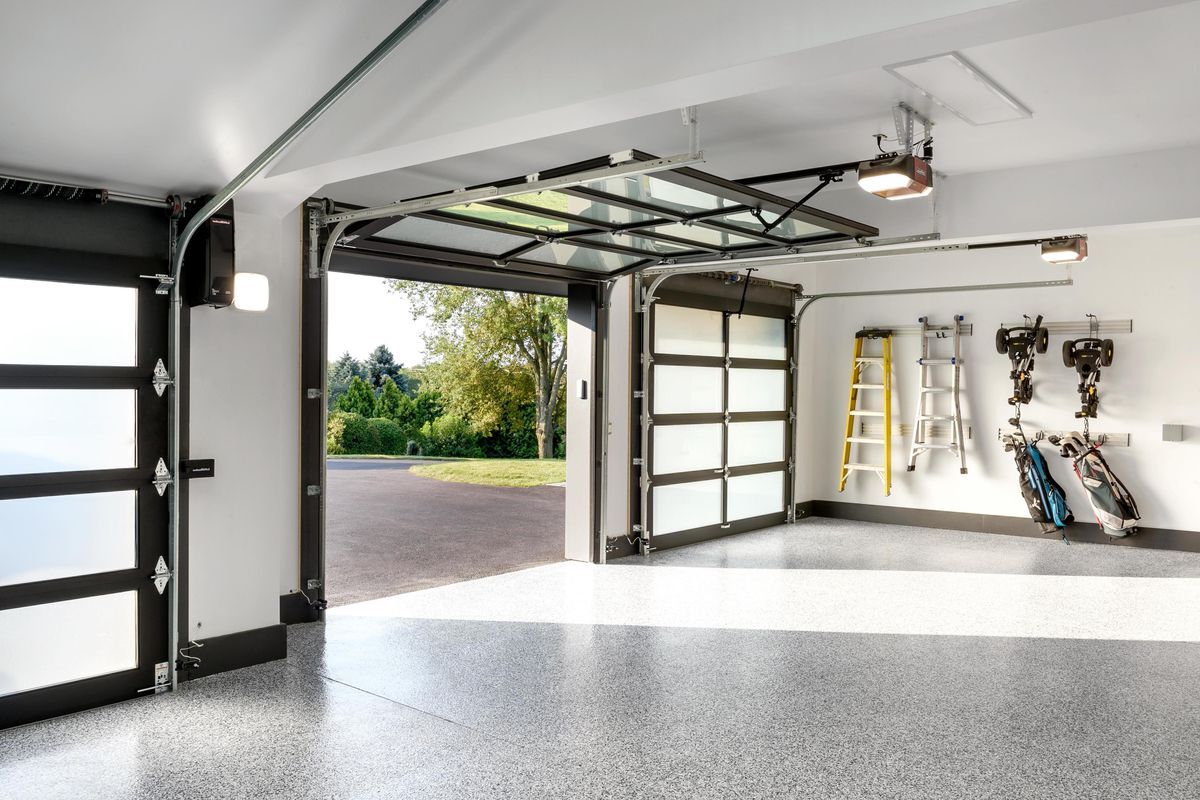
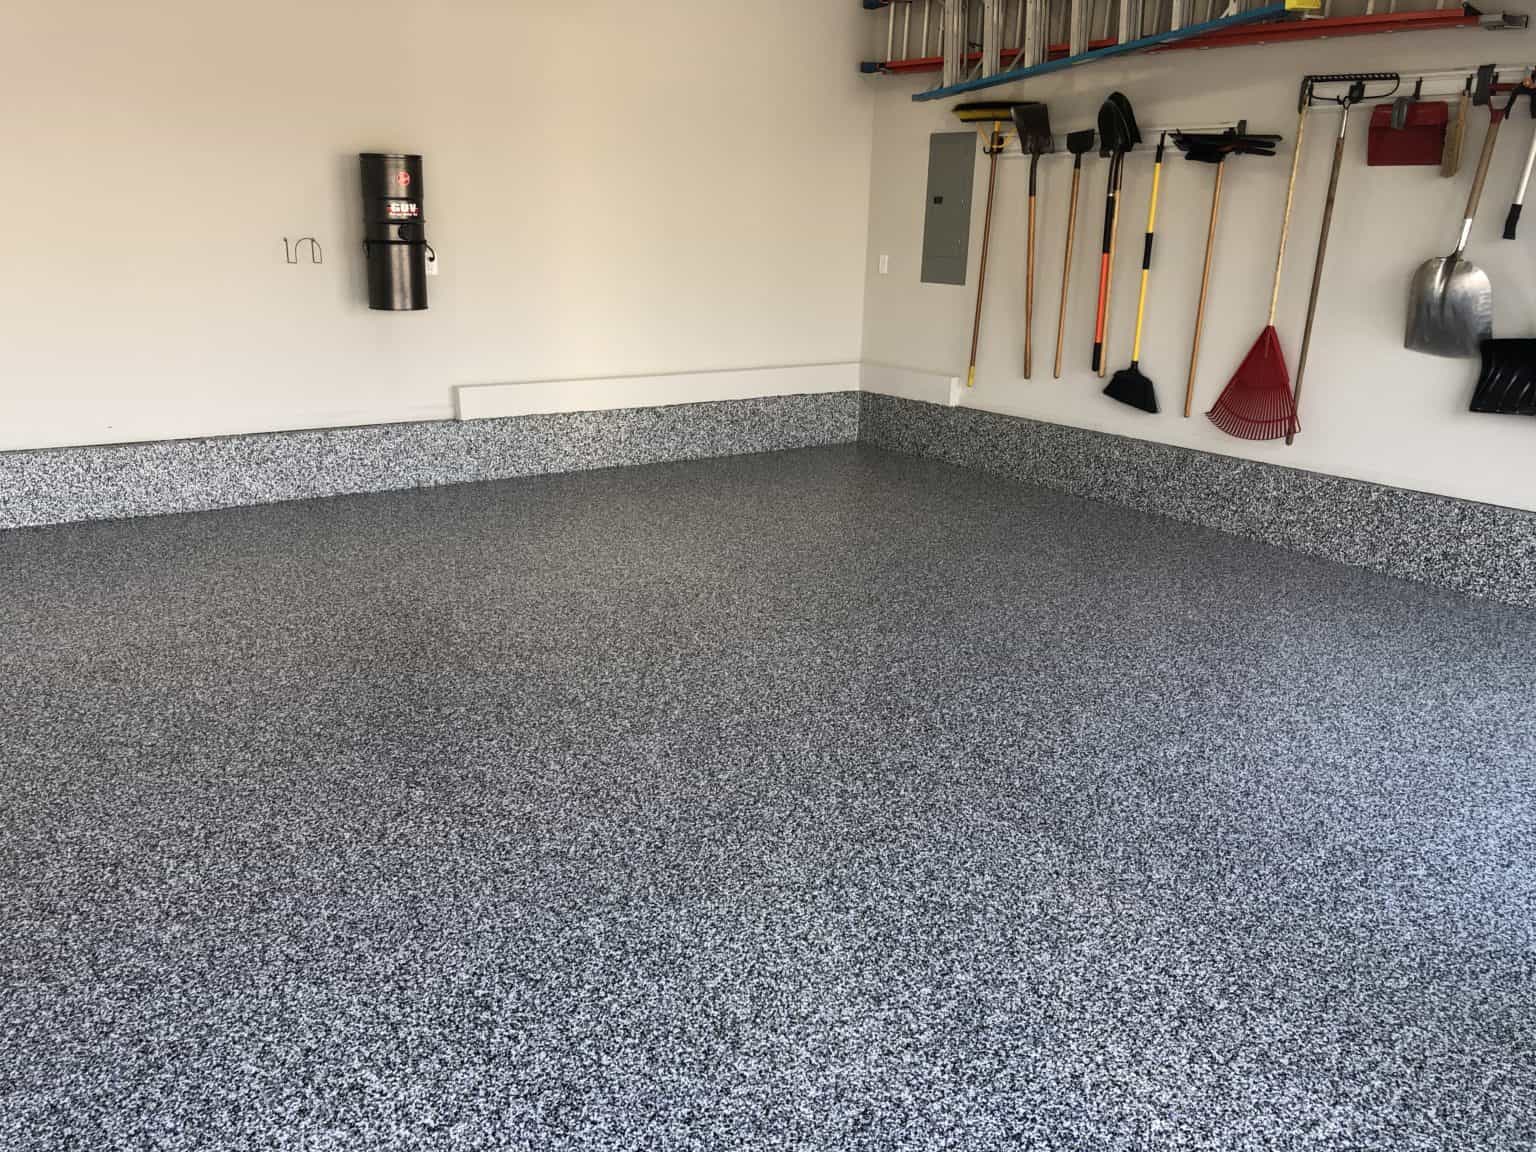
Once the epoxy has fully cured, you can begin to enjoy the many benefits of your new garage floor. Epoxy flooring offers a durable, easy-to-maintain, and visually appealing surface that will enhance the overall functionality and aesthetics of your garage.
By following all the necessary steps, including properly preparing the garage, repairing the floor, cleaning, applying the primer, mixing and applying the epoxy, adding decorative flakes (optional), applying a topcoat, and allowing the epoxy to cure, you can achieve a professional, long-lasting, and visually stunning epoxy flooring in your garage.
Remember to always refer to the manufacturer’s instructions and guidelines for specific details and recommendations regarding your chosen epoxy product. This will ensure that you achieve the best possible results and enjoy the full benefits of your epoxy garage floor for years to come.
Conclusion
Installing epoxy flooring in a garage can significantly transform the space, providing durability, easy maintenance, and an attractive finish. By following the step-by-step process outlined in this article, you can achieve a professional-looking epoxy floor that will enhance the functionality, aesthetics, and value of your garage.
From preparing the garage and repairing the floor to cleaning, applying the primer, mixing and applying the epoxy, adding decorative flakes (optional), applying a topcoat, and allowing the epoxy to cure, each step is crucial in achieving a successful installation.
Proper preparation of the garage, including clearing the space and cleaning the floor, sets the stage for a smooth application process. Repairing any cracks or imperfections ensures a solid foundation for the epoxy coating.
The application process involves mixing the epoxy correctly, applying it evenly, and, if desired, adding decorative flakes to enhance the visual appeal of the floor. Applying a topcoat adds an additional layer of protection and durability to the epoxy surface.
Allowing the epoxy to cure fully is vital to ensure its maximum strength and durability. This includes following the recommended curing times and avoiding heavy traffic or placing objects on the floor during this period.
Epoxy flooring offers numerous benefits, ranging from its ability to withstand heavy use, resist stains and chemicals, and provide a seamless and glossy finish. It is not only visually appealing but also easier to clean compared to traditional concrete floors in a garage.
When installing epoxy flooring, always refer to the manufacturer’s instructions and recommendations specific to the product you are using. Different epoxy brands may have slight variations in application techniques and curing times.
In conclusion, with careful preparation, attention to detail, and following the outlined steps, you can successfully install epoxy flooring in your garage. Enjoy the long-lasting beauty, durability, and functionality of your newly transformed garage space with an epoxy floor that will impress and withstand the test of time.
Frequently Asked Questions about How To Install Epoxy Flooring In A Garage
Was this page helpful?
At Storables.com, we guarantee accurate and reliable information. Our content, validated by Expert Board Contributors, is crafted following stringent Editorial Policies. We're committed to providing you with well-researched, expert-backed insights for all your informational needs.

0 thoughts on “How To Install Epoxy Flooring In A Garage”