Articles
How To Resurface A Garage Floor
Modified: October 24, 2024
Learn how to resurface your garage floor with our informative articles.
(Many of the links in this article redirect to a specific reviewed product. Your purchase of these products through affiliate links helps to generate commission for Storables.com, at no extra cost. Learn more)
Introduction
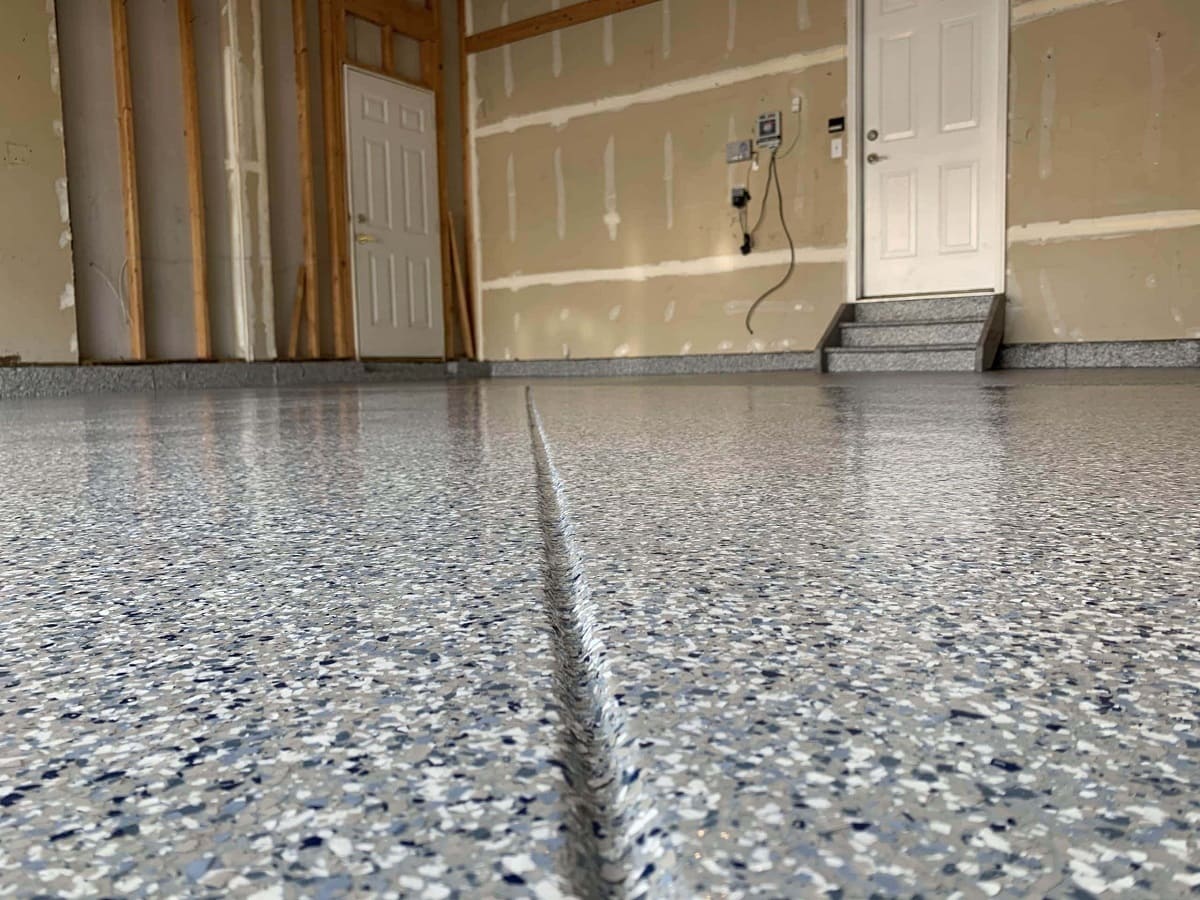
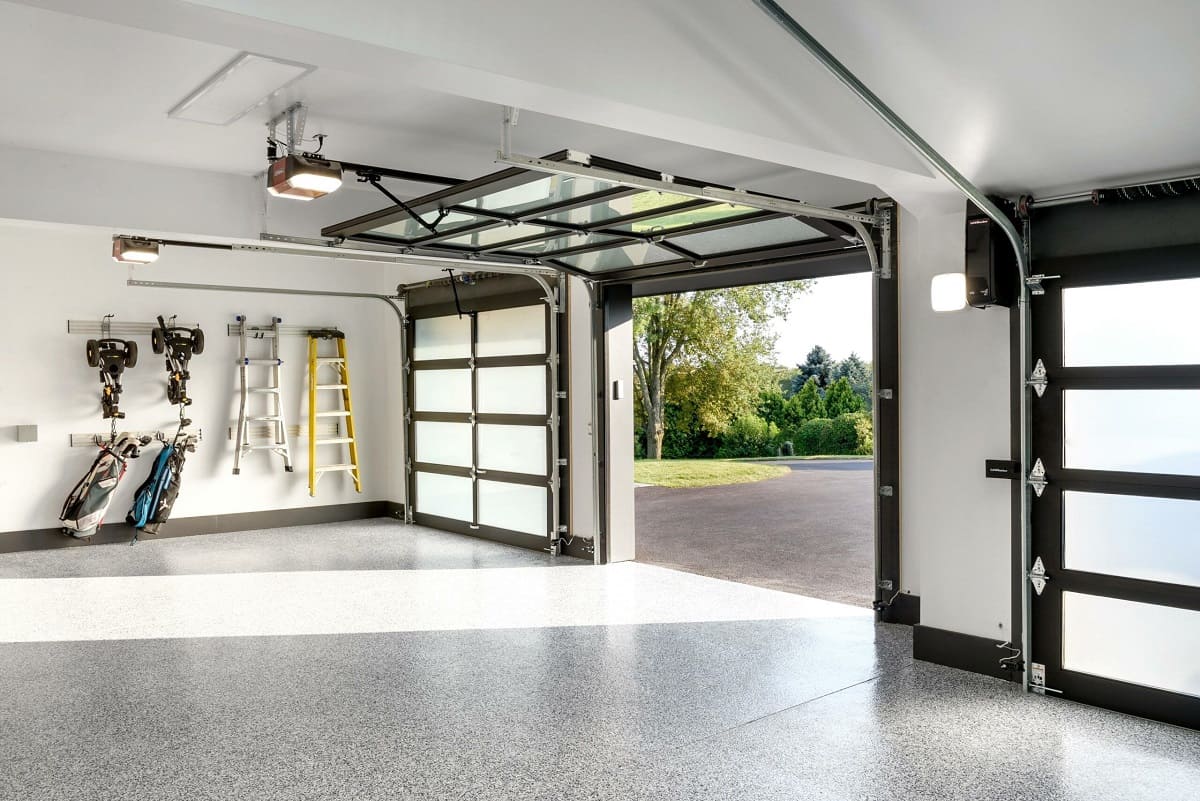
Having a functional and aesthetically pleasing garage floor is essential for any homeowner or DIY enthusiast. Over time, garage floors can become worn, stained, and cracked, detracting from the overall look and usability of the space. However, resurfacing a garage floor can breathe new life into it, transforming it into a durable, smooth, and visually appealing surface.
Resurfacing a garage floor involves repairing any damage and applying a new layer of material to create a fresh, uniform finish. With the right tools, materials, and techniques, you can undertake this project yourself and achieve professional-looking results.
In this article, we will guide you through the process of resurfacing your garage floor, providing step-by-step instructions, tips, and recommendations. Whether you’re looking to improve the functionality and durability of your garage floor or enhance its appearance, this article will equip you with the knowledge and expertise to do so.
Before diving into the details, it’s important to note that resurfacing a garage floor should only be attempted if the existing concrete foundation is in reasonable condition. If your garage floor has significant structural issues, it may require professional assessment and repairs. However, if your floor is relatively sound and simply needs a facelift, resurfacing is a cost-effective and straightforward solution.
Now, let’s gather our tools and materials and get ready to tackle the project of resurfacing your garage floor.
Key Takeaways:
- Transform your garage floor with a professional resurfacing project, enhancing both functionality and aesthetics. Follow step-by-step instructions for a cost-effective DIY solution.
- Ensure long-lasting results by properly preparing, applying, and maintaining your resurfaced garage floor. From crack filling to final touches, create a durable and visually appealing space.
Read more: How To Resurface A Concrete Porch Floor
Tools and Materials Needed
Before you begin resurfacing your garage floor, it’s essential to gather all the necessary tools and materials. Having everything on hand will help streamline the process and ensure you have a successful and hassle-free project.
Here is a list of the tools and materials you will need:
- Concrete etcher or cleaner
- Pressure washer
- Concrete patching compound
- Putty knife or trowel
- Concrete resurfacer
- Mixing paddle
- Broom or brush for application
- Gloves and protective eyewear
- Respirator mask
- Garage floor sealant
- Paint roller and tray
- Paintbrush
The concrete etcher or cleaner is used to prepare the existing garage floor surface by removing any dirt, grease, or previous coatings. This step is crucial to ensure proper adhesion of the resurfacing material. A pressure washer can also be employed to thoroughly clean the floor.
Next, you will need a concrete patching compound to fill in any cracks, holes, or other irregularities in the garage floor. A putty knife or trowel can be used to apply the compound and ensure a smooth surface.
The main material you will use for resurfacing is a concrete resurfacer. This product is designed to bond to the existing concrete and create a new, durable layer. A mixing paddle and appropriate mixing container will be required to prepare the resurfacer mixture according to the manufacturer’s instructions.
To apply the resurfacer, you will need a broom or brush. This will help spread the mixture evenly and ensure proper coverage. Gloves and protective eyewear are essential for your safety during the application process. Additionally, a respirator mask is recommended to protect against any potential dust or fumes.
Once the resurfacing is complete, you may consider applying a garage floor sealant to add an extra layer of protection and enhance the appearance. A paint roller and tray, as well as a paintbrush, will be needed for this step.
Now that you have all the necessary tools and materials ready, it’s time to move on to the preparation stage of resurfacing your garage floor.
Preparation
Proper preparation is crucial for achieving a successful garage floor resurfacing project. This stage involves a series of steps to ensure that your garage floor is ready for the resurfacing process. By adequately preparing the surface, you will promote better adhesion and long-lasting results.
Here are the key steps for preparation:
- Clean the Garage Floor: Start by removing any items, vehicles, or debris from the garage floor. Sweep or vacuum the surface to eliminate loose dirt and dust. Use a concrete etcher or cleaner, following the manufacturer’s instructions, to remove any stains, grease, or previous coatings. If you have access to a pressure washer, it can be used to thoroughly clean the floor.
- Repair Any Damage: Inspect the garage floor for cracks, holes, or other damage. Use a concrete patching compound and a putty knife or trowel to fill in any cracks or holes. Smooth out the patched areas and allow them to dry completely according to the manufacturer’s instructions. This step will ensure a uniform and level surface.
- Test Moisture Levels: Before applying the resurfacer, it’s essential to check the moisture levels of the garage floor. High levels of moisture can hinder adhesion and lead to future problems. Perform a moisture test by placing a plastic sheet onto the floor and securing the edges with tape. Leave it for 24 hours. If condensation forms on the underside of the plastic or the floor appears damp, additional moisture treatment may be necessary.
- Repair Cracks: If you notice any new cracks or expanding cracks during the moisture test, they should be addressed before proceeding. Use a concrete crack repair compound to fill the cracks and allow them to cure as per the product instructions.
- Protect Surrounding Areas: To avoid any accidental spills or damage, cover any adjacent surfaces, walls, or objects with plastic sheeting or drop cloths. This will protect them from the resurfacer and make the cleanup process easier.
Proper preparation is key to a successful resurfacing project. By thoroughly cleaning the garage floor, repairing any damage, testing moisture levels, repairing cracks, and protecting the surrounding areas, you will set a solid foundation for the resurfacing process.
With your preparation complete, you’re now ready to move on to the next step: cleaning the garage floor.
Cleaning the Garage Floor
Once you have completed the preparation stage, it’s time to focus on cleaning the garage floor. Proper cleaning is essential for creating a clean, debris-free surface that promotes optimal adhesion of the resurfacing material.
Follow these steps to effectively clean your garage floor:
- Sweep or Vacuum: Begin by removing any loose dirt, dust, or debris from the garage floor. Use a broom or vacuum to sweep away any larger particles. Pay close attention to corners, edges, and hard-to-reach areas.
- Remove Stains and Grease: Stains and grease can hinder the adhesion of the resurfacing material. Use a concrete etcher or cleaner, following the manufacturer’s instructions, to treat these areas. Apply the cleaner with a brush or sprayer, allow it to sit for the recommended time, and then scrub the stains with a stiff brush. Rinse the floor thoroughly with clean water and allow it to dry.
- Consider Pressure Washing: If you have access to a pressure washer, it can be a valuable tool for deep-cleaning your garage floor. Use a concrete-friendly nozzle and follow the manufacturer’s recommendations to avoid damaging the surface. Start at one end of the floor and work your way across, ensuring that you cover the entire area. This will help remove deep-seated dirt, grime, and any remaining stains.
- Dry the Floor: After cleaning the garage floor, allow it to dry completely before proceeding. Adequate drying time will depend on the ambient temperature and humidity level. It’s essential to ensure that the floor is dry to the touch and free from any moisture or dampness.
By thoroughly cleaning your garage floor, you are preparing it to receive the resurfacing material and promoting optimal adhesion. Removing dirt, stains, and grease will result in a clean and smooth surface, setting the stage for a successful resurfacing project.
Once the floor is dry and ready, you can move on to the next step: filling cracks and holes.
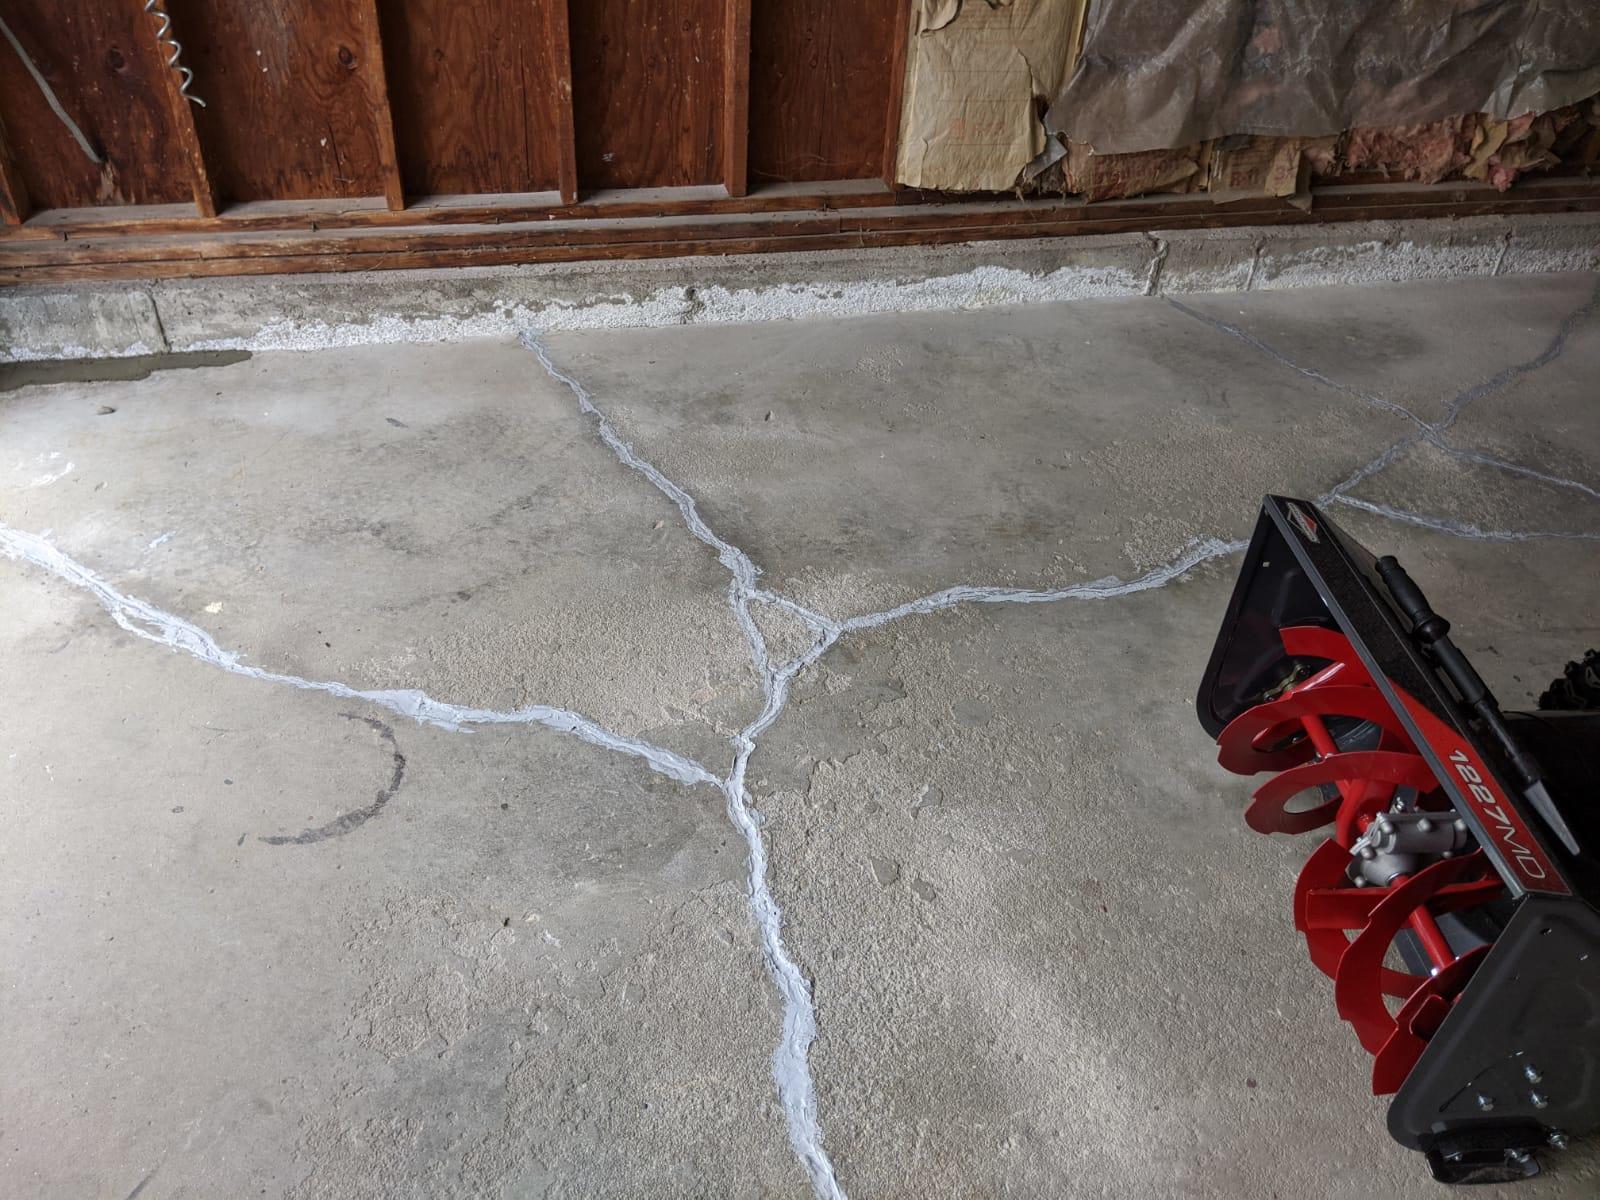
Filling Cracks and Holes
Before applying the resurfacer, it’s crucial to address any cracks and holes in the garage floor. Filling these imperfections will ensure a smooth and even surface, preventing them from reappearing once the resurfacing is complete.
Follow these steps to effectively fill cracks and holes:
- Inspect the Floor: Carefully examine the garage floor for any cracks, divots, or holes. Pay attention to both large and small imperfections, as even minor ones can impact the final appearance and durability of the resurfaced floor.
- Prepare the Surface: Clean the cracks and holes by removing any loose debris, dust, or particles. Use a brush or vacuum to clear out any dirt that may have settled into the cracks. For larger holes, you may need to use a chisel or hammer to create clean edges and remove any loose concrete.
- Apply a Concrete Patching Compound: Select a high-quality concrete patching compound. Follow the manufacturer’s instructions to prepare the compound. Use a putty knife or trowel to apply the compound to the cracks and holes. Ensure that the compound completely fills the imperfections and is leveled with the surrounding surface.
- Smooth the Surface: After applying the patching compound, use the putty knife or trowel to smooth the surface evenly. Feather the edges of the patch to blend it with the surrounding area. This will create a seamless transition between the patched areas and the rest of the floor.
- Allow for Proper Drying: Follow the manufacturer’s instructions regarding the drying time of the patching compound. It’s important to allow sufficient drying time to ensure that the filled cracks and holes are fully cured and ready for the resurfacer.
By addressing cracks and holes before resurfacing, you are ensuring that the appearance and durability of the garage floor will be enhanced. Filling these imperfections properly will result in a smooth and uniform surface, allowing the resurfacer to adhere effectively.
Now that you have filled the cracks and holes, you can proceed to the next step: applying the resurfacer to transform your garage floor.
Before resurfacing your garage floor, make sure to thoroughly clean and etch the surface to ensure proper adhesion of the new coating. This will help to prevent peeling and flaking in the future.
Read more: How To Finish A Garage Floor
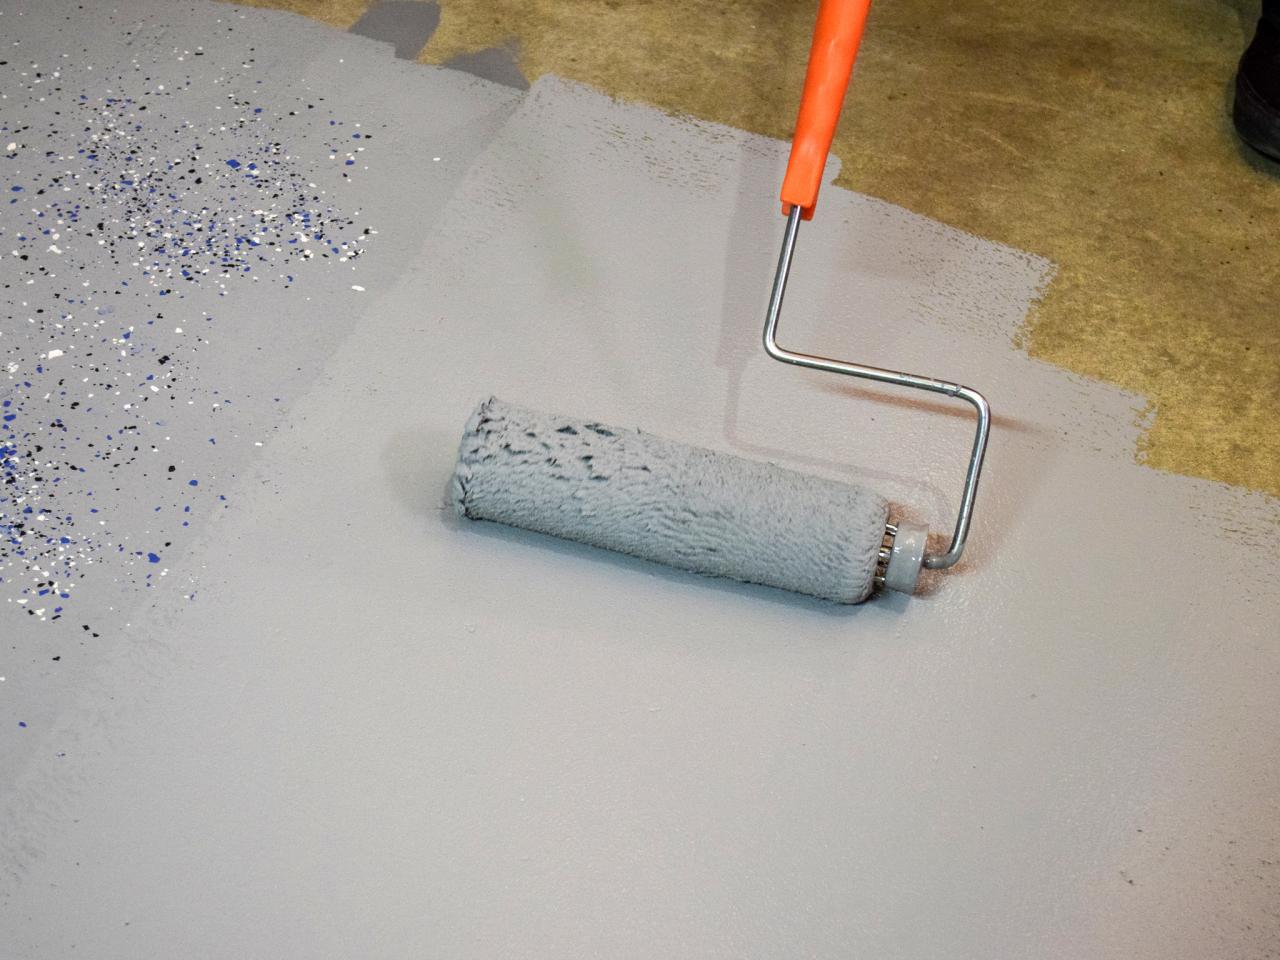
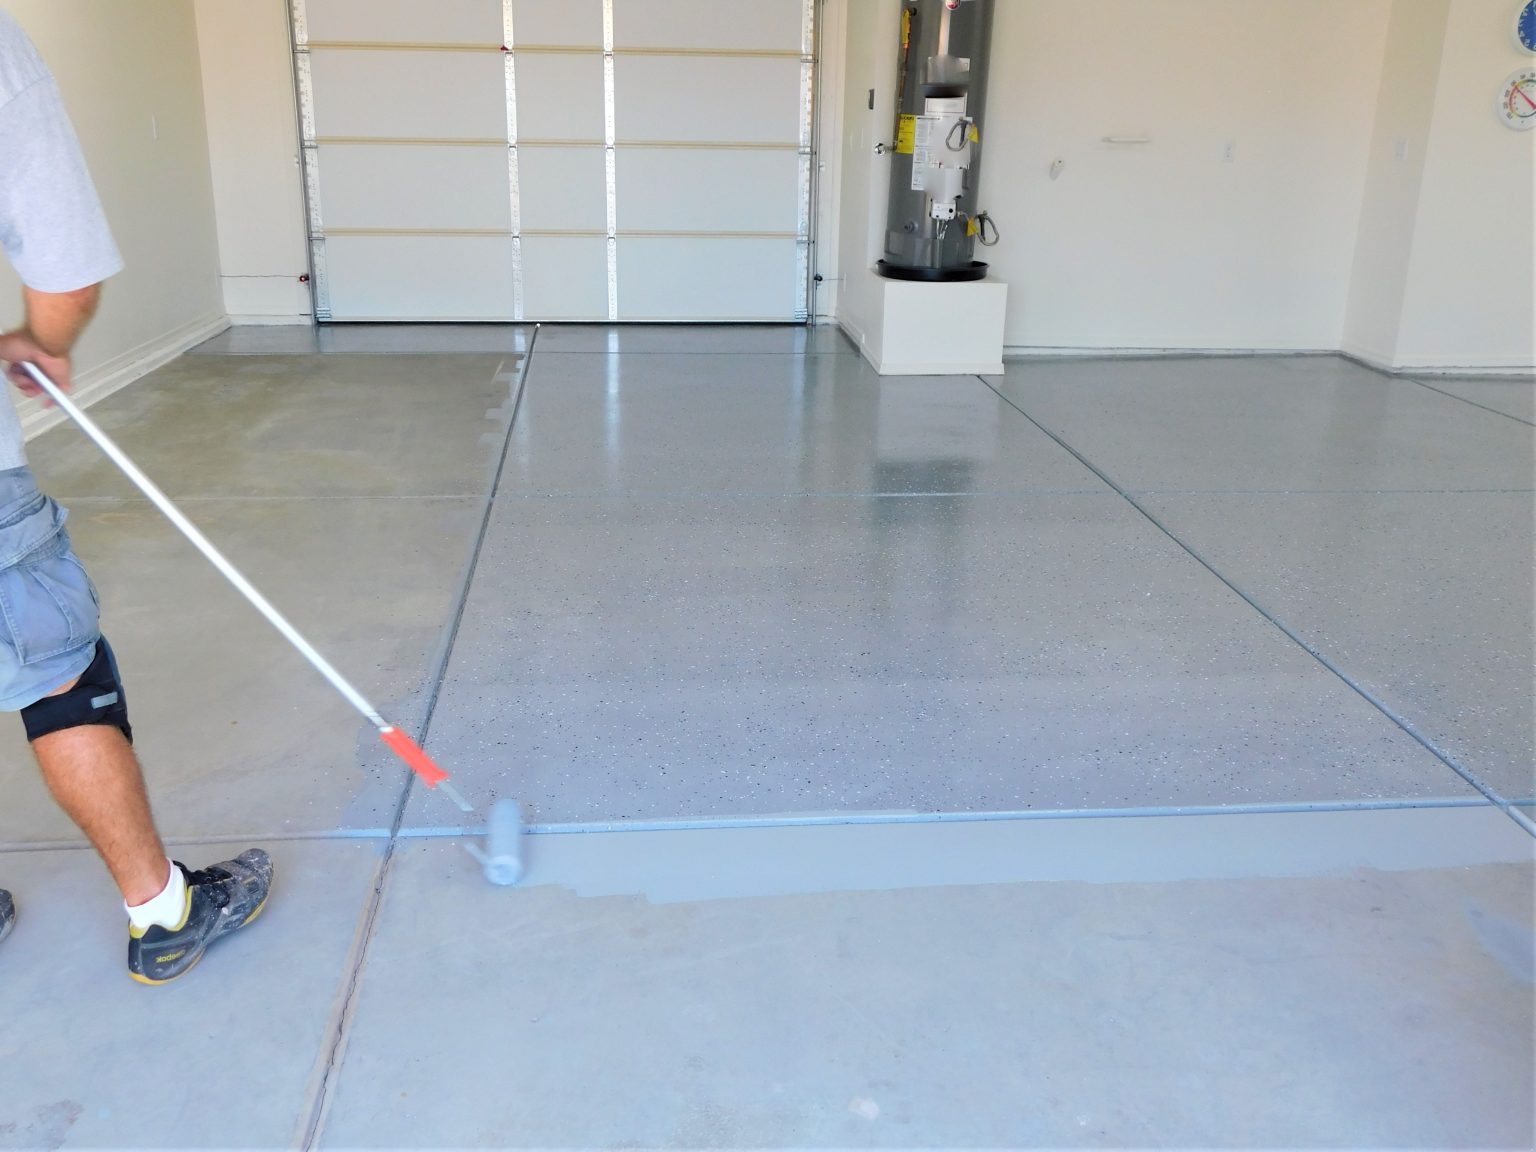
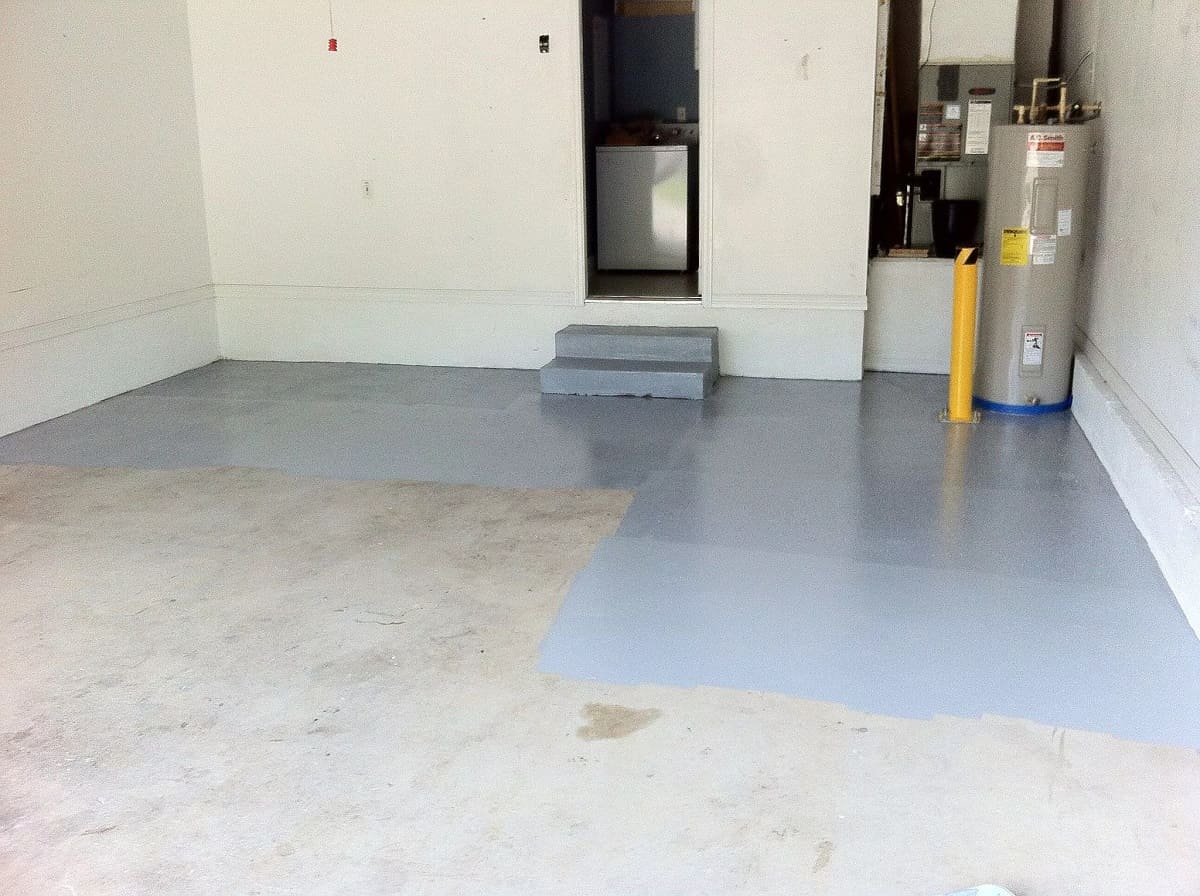
Applying the Resurfacer
Now that you have prepared the garage floor and filled any cracks or holes, it’s time to apply the resurfacer. This is the step where you will actually transform the appearance and functionality of your garage floor, creating a fresh and durable surface.
Follow these steps to effectively apply the resurfacer:
- Prepare the Resurfacer: Read and follow the manufacturer’s instructions on how to mix the resurfacer. Use a bucket or mixing container and a mixing paddle to prepare the resurfacer according to the recommended water-to-powder ratio. Use a consistent and thorough mixing technique to ensure a smooth and uniform mixture.
- Moisten the Garage Floor: Before applying the resurfacer, lightly moisten the garage floor with clean water. This will provide a damp surface and improve the adhesion of the resurfacer. Avoid excessive water that might pool or leave standing water on the floor.
- Begin Application: Start applying the resurfacer to the garage floor using a broom or brush. Begin in a corner and work your way towards the exit, ensuring even coverage across the entire surface. Use long, sweeping motions to spread the resurfacer evenly, filling in any low spots or uneven areas. Maintain a consistent thickness throughout the application.
- Work in Sections: Depending on the size of your garage floor, it may be more manageable to work in smaller sections. This will allow you to focus on a specific area at a time and ensure that the resurfacer is applied evenly and smoothly. Avoid letting any edges dry out before applying the next section.
- Smooth and Level the Surface: Once you have applied the resurfacer to a section of the garage floor, use a trowel or squeegee to smooth and level the surface. This will help eliminate any excess material and create a even and uniform finish. Pay attention to transitions between sections to ensure a seamless appearance.
- Cleanup and Finishing: After completing the entire garage floor, clean any tools or equipment used in the application process. Remove any excess resurfacer that may have splashed onto walls, doors, or other surfaces. Allow the resurfacer to dry according to the manufacturer’s instructions.
By carefully and properly applying the resurfacer, you will achieve a fresh and durable garage floor surface. Take your time, follow the instructions, and pay attention to detail to ensure a professional-looking result.
Now that you have successfully applied the resurfacer, it’s time to move on to the next step: smoothing and leveling the surface for a flawless finish.
Smoothing and Leveling the Surface
After applying the resurfacer to your garage floor, the next step is to smooth and level the surface. This crucial step will ensure that the resurfacer is evenly distributed and create a seamless finish.
Follow these steps to effectively smooth and level the surface:
- Inspect the Surface: Once the resurfacer has been applied, take a close look at the garage floor surface. Look for any areas that appear uneven, have excess material, or need further attention. Identifying these areas early will allow you to address them before the resurfacer fully dries.
- Use a Trowel or Squeegee: Employ a trowel or squeegee to smooth out any uneven or lumpy areas on the garage floor. Hold the tool at a slight angle and apply gentle pressure to level the surface. Work in small sections, using smooth and even strokes. Continuously check the surface for any inconsistencies and make adjustments as necessary.
- Blend Sections: Pay attention to where one section of the resurfacer meets another. Use the trowel or squeegee to blend these areas to create a seamless transition. Feather the edges of each section to ensure a smooth and even appearance, eliminating any visible lines or ridges.
- Check for High or Low Spots: As you smooth and level the surface, keep an eye out for high spots or low spots. High spots can be gently tamped down with a trowel or squeegee, while low spots may require additional resurfacer material to fill in. Take the time to achieve an even and level surface throughout the entire garage floor.
- Maintain a Working Edge: As the resurfacer begins to dry, it’s important to maintain a working edge to blend newly applied material with the drying surface. This will prevent noticeable lines or inconsistencies. Continuously wet the trowel or squeegee to help achieve a smooth texture.
- Allow for Proper Curing: Once you have smoothed and leveled the entire surface, allow the resurfacer to cure and dry according to the manufacturer’s instructions. Avoid stepping or placing any objects on the floor during this time to ensure a successful and durable finish.
By taking the time to effectively smooth and level the resurfacer, you will achieve a flawless and visually appealing garage floor surface. The effort invested in this step will result in a professional-looking outcome that enhances the functionality and aesthetics of your garage.
Now that you have achieved a smooth surface, it’s time to allow the resurfacer to cure and dry thoroughly. We’ll explore this next step: curing and drying.
Curing and Drying
Once you have applied and smoothed the resurfacer on your garage floor, the final step is to allow it to properly cure and dry. Curing is essential for the resurfacer to achieve its maximum strength and durability.
Follow these guidelines to ensure proper curing and drying:
- Refer to the Manufacturer’s Instructions: Each resurfacer product has specific curing and drying times recommended by the manufacturer. It is important to follow these instructions to ensure the best results. Note the minimum and maximum temperatures for optimal curing; temperatures outside this range may affect the curing process.
- Avoid Foot Traffic and Heavy Objects: During the initial curing period, it is crucial to avoid walking or placing heavy objects on the resurfaced garage floor. Doing so can cause indentations or damage the newly applied surface. Refer to the manufacturer’s instructions for the recommended drying period before allowing foot traffic or parking vehicles on the floor.
- Provide Adequate Ventilation: Open windows, doors, or use fans to promote proper air circulation and ventilation in the garage. This helps in the drying process and eliminates any potential odors associated with the curing resurfacer. Ensure that the area is well-ventilated and free from excessive humidity, which can hinder the curing process.
- Monitor the Surface: Regularly inspect the resurfaced garage floor during the curing and drying period. Look for any signs of damage, excessive cracking, or other issues. If you notice any concerns, consult the manufacturer’s instructions or seek professional advice.
- Give It Time: Patience is key during the curing and drying process. Proper curing and drying times can vary depending on factors such as temperature and humidity levels. It is important to allow the recommended curing duration to ensure a strong and long-lasting finish.
By adhering to the manufacturer’s instructions and giving the resurfacer adequate time to cure and dry, you will achieve an optimal and resilient garage floor surface. Taking the necessary precautions during this phase will ensure that you can enjoy a durable and visually appealing resurfaced garage floor for years to come.
Once the resurfacer has fully cured and dried, it’s time for the final touches and recommendations to enhance the longevity and appearance of your newly resurfaced garage floor.
Final Touches and Recommendations
With your garage floor resurfaced and dried, there are a few final touches and recommendations to further enhance the longevity and appearance of your newly transformed space.
Consider the following final touches and recommendations:
- Apply a Garage Floor Sealant: To offer extra protection and extend the lifespan of your resurfaced garage floor, consider applying a garage floor sealant. This will create a barrier against stains, chemicals, and general wear and tear. Follow the manufacturer’s instructions for application and drying times.
- Maintain Regular Cleaning: To keep your garage floor looking its best, establish a routine cleaning schedule. Regularly sweep or use a dust mop to remove debris, dirt, and dust. Periodically give the floor a deep clean using a mild detergent and water. Avoid using harsh chemicals that can damage the surface.
- Protect Against Heavy Loads and Abrasion: While a resurfaced garage floor is designed to withstand heavy loads and everyday use, it is still important to take precautions. Place protective pads or mats under heavy objects or vehicles to prevent scratching or denting the surface. Avoid dragging sharp or heavy items across the floor to minimize the risk of damage.
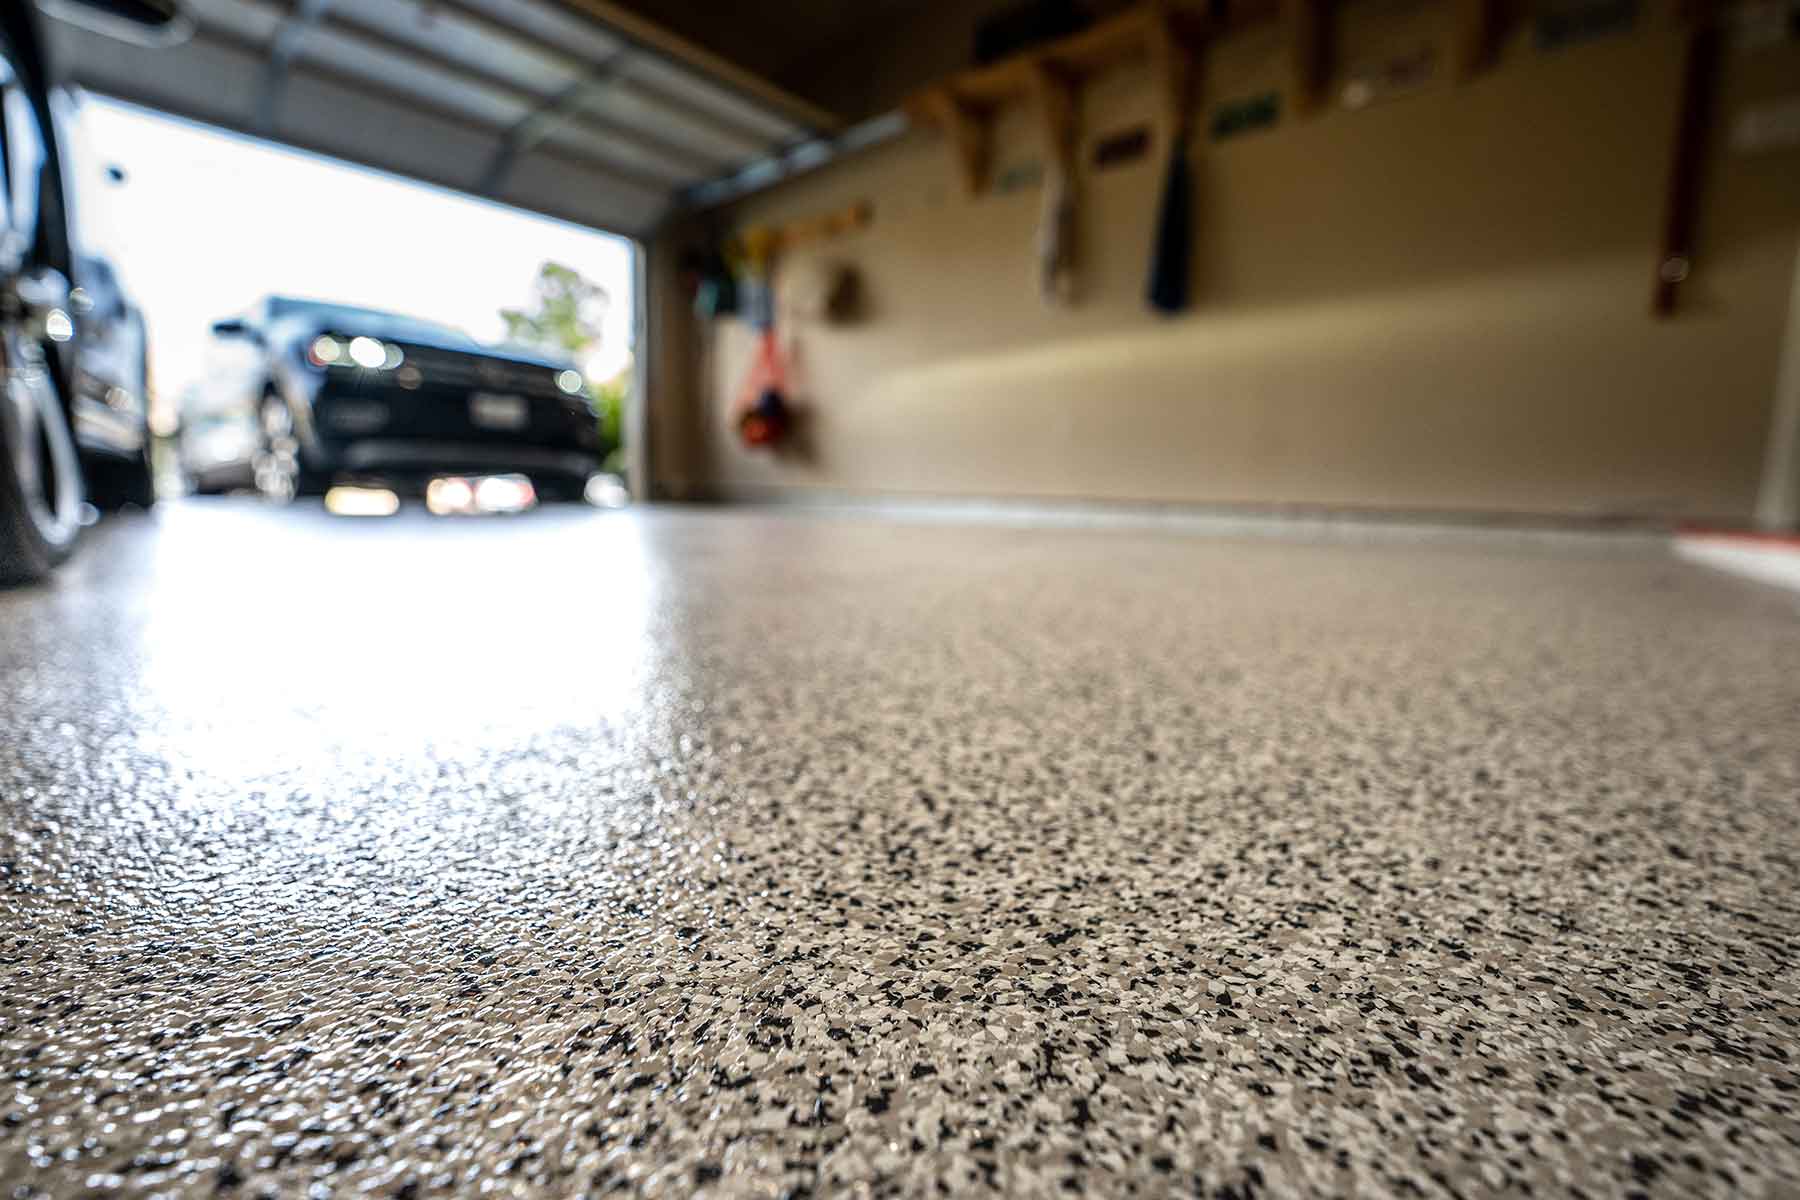
- Consider Adding Color or Patterns: If you want to further customize the appearance of your garage floor, explore options for adding color or patterns. There are various decorative concrete solutions available, such as epoxy coatings or decorative stains, that can provide a unique and visually appealing finish.
- Regularly Inspect for Damage: Periodically inspect your resurfaced garage floor for any signs of damage or wear. Address any cracks, chips, or other issues promptly to prevent further damage. While a properly resurfaced floor is durable, regular maintenance and timely repairs will help extend its lifespan.
- Follow Safe Work Practices: When working in your garage, always prioritize safety. Use proper personal protective equipment (PPE) such as gloves, safety glasses, and a respirator mask when handling chemicals or performing maintenance tasks. Ensure proper ventilation in the garage to minimize exposure to fumes.
By implementing these final touches and recommendations, you can ensure the long-term durability, functionality, and visual appeal of your resurfaced garage floor. Regular maintenance and care will help preserve its quality and protect your investment.
Congratulations on successfully resurfacing your garage floor! With proper care and maintenance, you can enjoy a clean, polished, and functional space for years to come.
Frequently Asked Questions about How To Resurface A Garage Floor
Was this page helpful?
At Storables.com, we guarantee accurate and reliable information. Our content, validated by Expert Board Contributors, is crafted following stringent Editorial Policies. We're committed to providing you with well-researched, expert-backed insights for all your informational needs.


0 thoughts on “How To Resurface A Garage Floor”