Articles
How To Seal Garage Floor
Modified: August 27, 2024
Learn effective methods to seal your garage floor and protect it from damage with our informative articles. Improve the longevity and durability of your garage floor today.
(Many of the links in this article redirect to a specific reviewed product. Your purchase of these products through affiliate links helps to generate commission for Storables.com, at no extra cost. Learn more)
Introduction
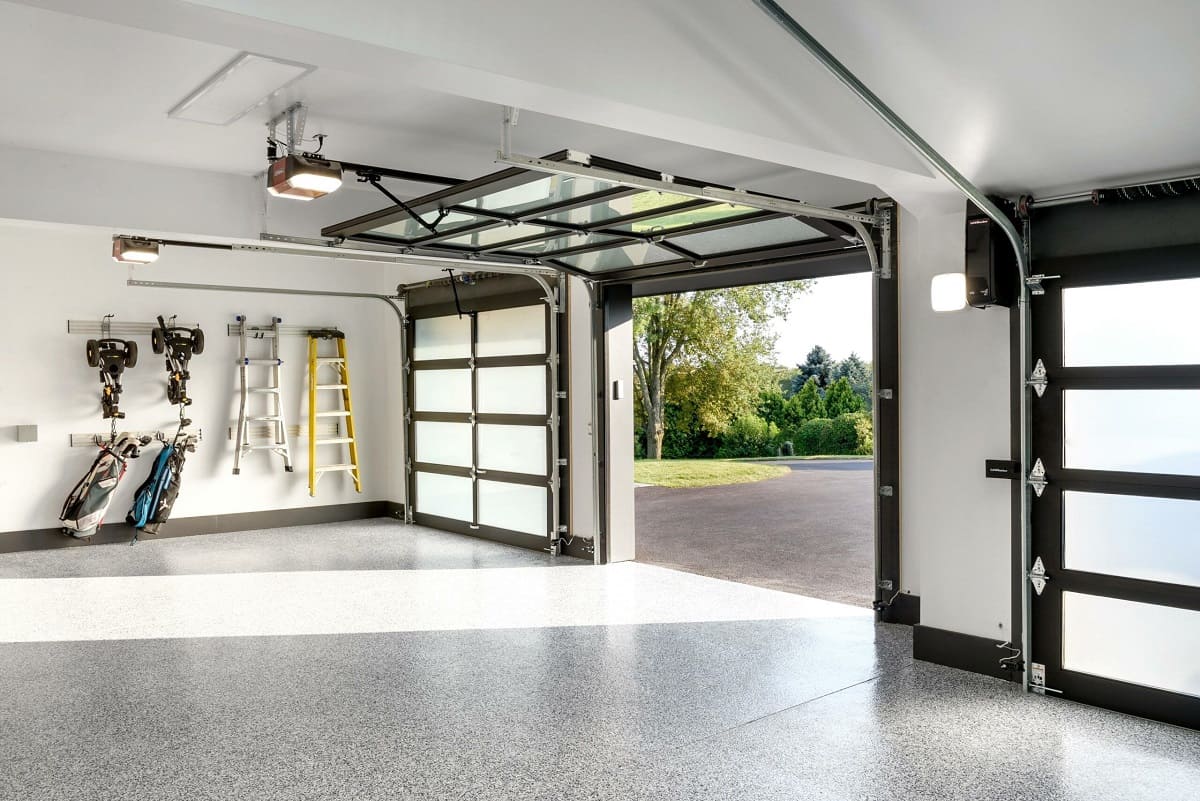
When it comes to protecting your garage floor from stains, spills, and damage, sealing it is a smart and effective solution. A sealed garage floor not only looks great but also provides long-lasting durability, making it easier to clean and maintain. Whether you use your garage as a workshop, storage space, or parking area, sealing the floor is a worthwhile investment.
In this article, we will guide you through the step-by-step process of sealing your garage floor. From preparing the surface to applying the sealer, we will cover all the essential techniques and provide helpful tips along the way. So, let’s get started and give your garage floor the protection it deserves!
Key Takeaways:
- Protect and enhance your garage floor by following a step-by-step process to seal it, ensuring durability, easy maintenance, and a polished appearance. Proper preparation, filling cracks, applying primer, and multiple coats of sealer are key to success.
- Sealing your garage floor is a valuable investment that increases longevity, protects against damage, and simplifies maintenance. Take the time to follow each step carefully, from prep work to drying time, for a beautifully sealed and well-protected space.
Read more: How To Seal A Wood Floor
Materials Needed
Before you begin the process of sealing your garage floor, it’s essential to gather all the necessary materials. Here’s a list of items you’ll need:
- Epoxy or concrete sealer
- Crack filler or epoxy resin
- Primer (if required by the sealer manufacturer)
- Wire brush or floor grinder
- Safety goggles
- Dust mask
- Gloves
- Painter’s tape
- Paint roller, brush, or sprayer
- Paint tray
- Paint stirring sticks
- Bucket and mop for cleaning
- Power washer (optional, but recommended)
It’s important to note that the specific materials you need may vary depending on the type of sealer you choose and the condition of your garage floor. Make sure to carefully read the instructions provided by the sealer manufacturer to determine the required materials and quantities for your project.
Step 1: Prep Work
Before you can start sealing your garage floor, proper preparation is essential. Follow these steps to ensure that your floor is ready for the sealing process:
- Clean the floor: Begin by removing all items from your garage and sweep the floor to remove loose debris. If you have stubborn stains or oil drips, use a degreaser or concrete cleaner to thoroughly clean the surface. Scrub any tough spots with a brush or broom.
- Repair cracks and pits: Inspect your garage floor for any cracks or pits. Fill these imperfections with a crack filler or epoxy resin, following the manufacturer’s instructions. Smooth out the surface and allow it to dry completely before moving on to the next step.
- Remove any existing coatings: If your garage floor has an existing sealer or paint coating, it’s important to remove it before applying a new sealer. Use a floor grinder or a chemical stripper to strip away the old coating. Follow the manufacturer’s instructions for safe and effective removal.
- Etch the surface: Etching the surface of your garage floor helps create a better bond between the sealer and the concrete. Use an etching solution, available at most hardware stores, and follow the manufacturer’s instructions on how to apply it. Rinse the floor thoroughly with water after etching to remove any residue.
- Allow the floor to dry: After completing the prep work, it’s crucial to allow your garage floor to dry completely before moving on to the next step. Follow the manufacturer’s guidelines for drying times, as they may vary depending on the sealer and environmental conditions.
By taking the time to properly prepare your garage floor, you’ll ensure a smooth and successful sealing process. Not only will this help the sealer adhere better to the concrete, but it will also increase the longevity and effectiveness of the sealing treatment.
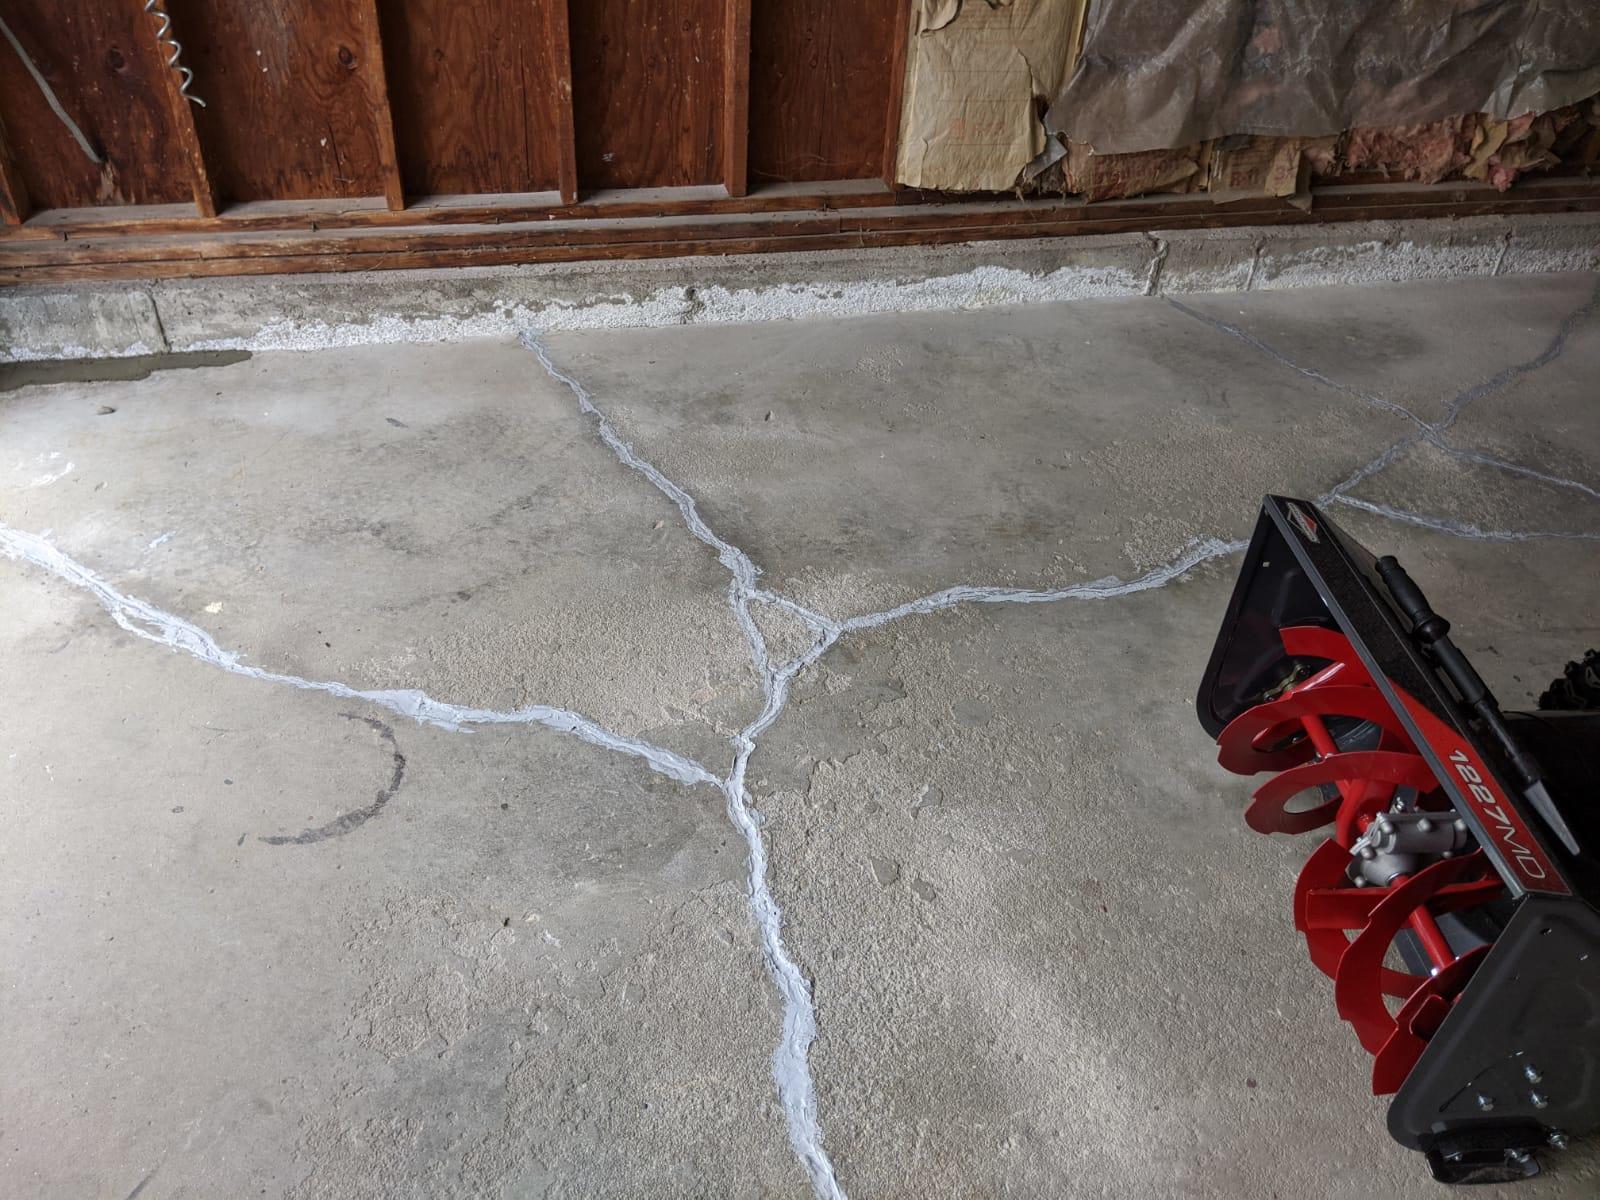
Step 2: Fill Cracks and Pits
One of the key steps in preparing your garage floor for sealing is filling any cracks or pits that may be present. Addressing these imperfections is crucial to achieving a smooth and uniform surface. Follow these steps to effectively fill cracks and pits:
- Inspect the floor: Thoroughly examine your garage floor for cracks, pits, or any other noticeable imperfections. Pay close attention to areas around the edges and corners.
- Clean the cracks: Before filling the cracks, ensure that they are clean and free from any debris. Use a wire brush or a floor grinder to remove any loose materials and create a clean surface for the filler.
- Choose the filler: Select an appropriate crack filler or epoxy resin that is designed for concrete surfaces. Read the product instructions to ensure that it is suitable for your specific needs.
- Apply the filler: Follow the manufacturer’s instructions for applying the filler material. Typically, you will need to mix the filler or resin according to the provided guidelines. Use a putty knife or a trowel to apply the filler, ensuring that it completely fills the cracks and pits.
- Smooth and level: Once the filler is applied, use the putty knife or trowel to smooth out the surface and level it with the surrounding area. This will help create a seamless look and prevent tripping hazards.
- Allow drying time: It’s crucial to give the crack filler or epoxy resin sufficient drying time. Follow the manufacturer’s instructions for the recommended drying duration. Keep in mind that curing times may vary depending on product and environmental conditions.
By properly filling cracks and pits, you will create a more uniform and structurally sound garage floor. This will not only enhance the appearance but also prevent any further damage or deterioration. It’s important to take the time to address these imperfections before moving on to the next step in the sealing process.
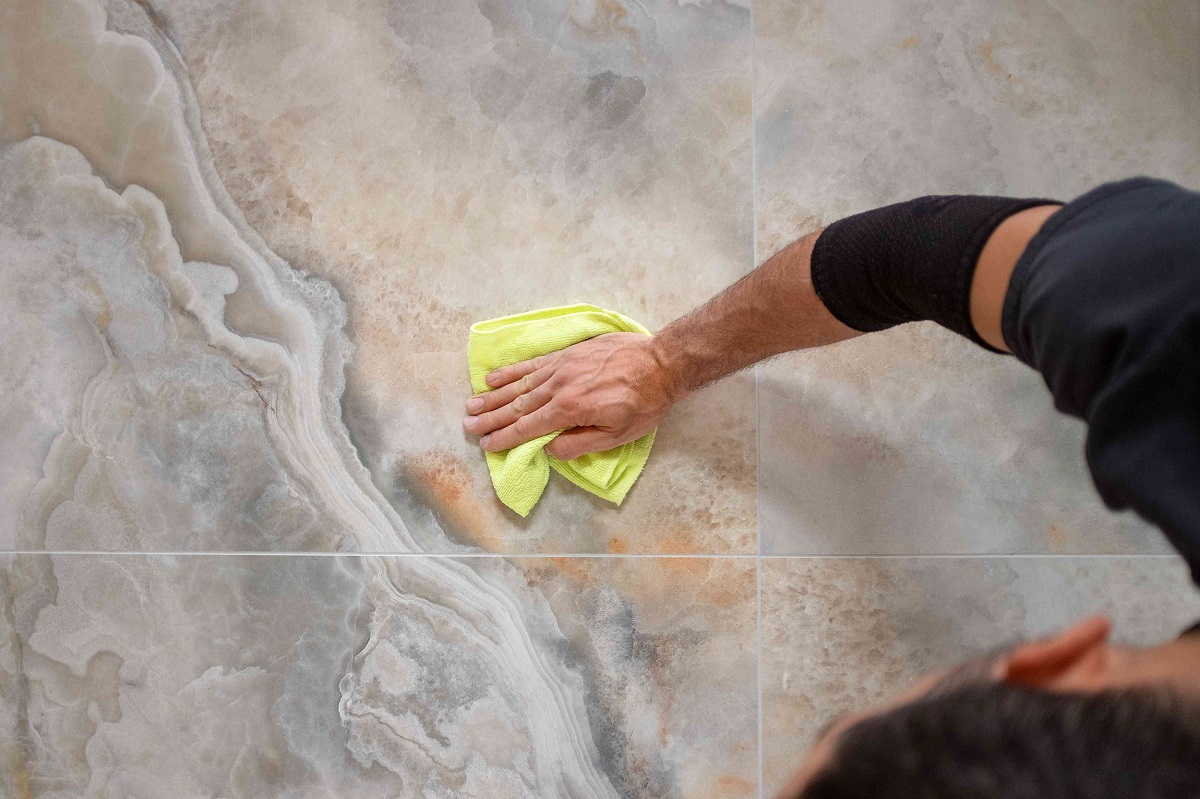
Step 3: Clean the Floor
Before applying a sealer to your garage floor, it’s essential to thoroughly clean the surface. Proper cleaning removes any dirt, dust, or debris that can interfere with the adhesion of the sealer. Follow these steps to ensure a clean surface:
- Sweep the floor: Start by sweeping the entire garage floor to remove loose dirt and debris. Use a broom or a dust mop to collect as much dust as possible.
- Power wash (optional): For deeper cleaning, consider using a power washer. A power washer can effectively remove stubborn stains, oil spots, and other contaminants. Follow the manufacturer’s instructions for safe and appropriate use of the power washer.
- Mix a cleaning solution: Prepare a cleaning solution by diluting a concrete cleaner or degreaser with water. Follow the manufacturer’s instructions for the appropriate dilution ratio.
- Apply the cleaning solution: Use a mop or a scrub brush to apply the cleaning solution to the entire garage floor. Work in small sections, ensuring full coverage of the surface. Pay extra attention to any stained or heavily soiled areas.
- Scrub the floor: Use a scrub brush or a rotary floor scrubber to agitate the cleaning solution on the floor. This will help loosen any stubborn dirt or grime. Pay attention to corners and edges that may require extra scrubbing.
- Rinse the floor: After scrubbing, rinse the floor thoroughly with clean water. Use a hose or a power washer to remove all traces of the cleaning solution. Ensure that no residue is left behind.
- Dry the floor: Allow the garage floor to dry completely before proceeding to the next step. You can use fans or open windows and doors to facilitate the drying process. Avoid applying the sealer to a damp or wet surface.
By cleaning your garage floor thoroughly, you create an optimal surface for the sealer to adhere to. Removing dirt, dust, and contaminants ensures a more successful and long-lasting sealing application. Take the time to clean the floor properly, and you’ll be rewarded with a beautifully sealed garage floor.
Before sealing your garage floor, make sure to thoroughly clean and degrease the surface to ensure proper adhesion of the sealant. Use a concrete cleaner and degreaser to remove any oil, grease, or dirt before applying the sealant.
Read more: How To Seal A Shed Floor
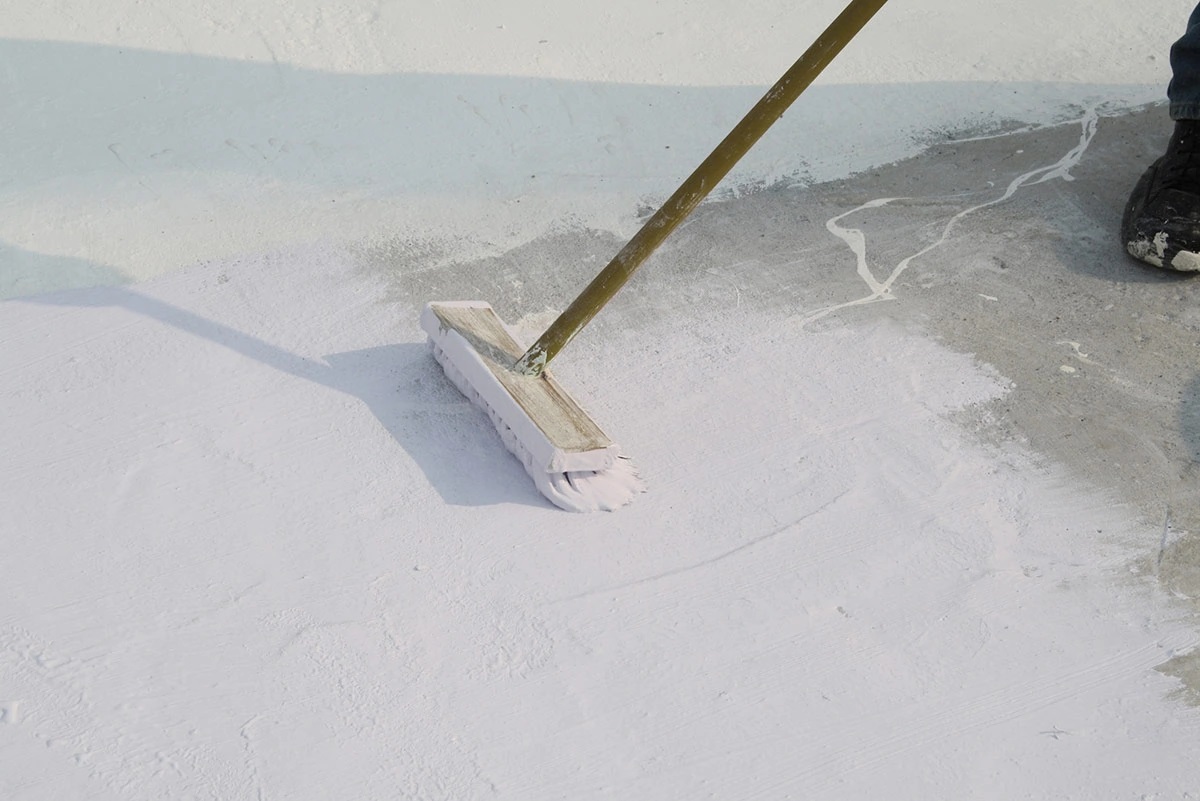
Step 4: Apply Primer
Applying a primer to your garage floor is an important step in the sealing process. Primer helps to improve the adhesion of the sealer to the concrete surface, ensuring a durable and long-lasting finish. Follow these steps to apply the primer:
- Check the sealer manufacturer’s instructions: Before applying the primer, read the instructions provided by the sealer manufacturer. Some sealers may require a specific type of primer or may not require one at all. Ensure that you have the appropriate primer and follow the guidelines accordingly.
- Prepare the primer: If required, mix the primer according to the manufacturer’s instructions. Use a paint stirring stick to thoroughly mix the primer, ensuring that all components are well blended.
- Apply painter’s tape (optional): If you want to protect certain areas, such as walls or baseboards, from getting primer or sealer on them, apply painter’s tape along the edges to create a clean boundary.
- Starting in a corner: Begin applying the primer in a corner of the garage, working your way towards the exit. This will prevent you from painting yourself into a corner and having to step on the freshly applied primer.
- Use a paint roller: Use a high-quality paint roller to apply the primer evenly over the garage floor. Roll the primer in overlapping sections to ensure full coverage. Be mindful of any cracks or crevices, making sure they are adequately coated.
- Allow drying time: Follow the manufacturer’s instructions for the recommended drying time of the primer. Typically, it may take a few hours, but it’s best to allow it to dry overnight to ensure complete curing.
- Inspect for imperfections: Once the primer is dry, inspect the floor for any missed spots or areas that require additional coats. If needed, apply another layer of the primer as per the manufacturer’s recommendations.
Applying a primer creates a strong bond between the sealer and the concrete surface, enhancing the effectiveness and longevity of the sealing process. Follow these steps carefully to achieve optimal results and ensure a smooth and successful sealing application.
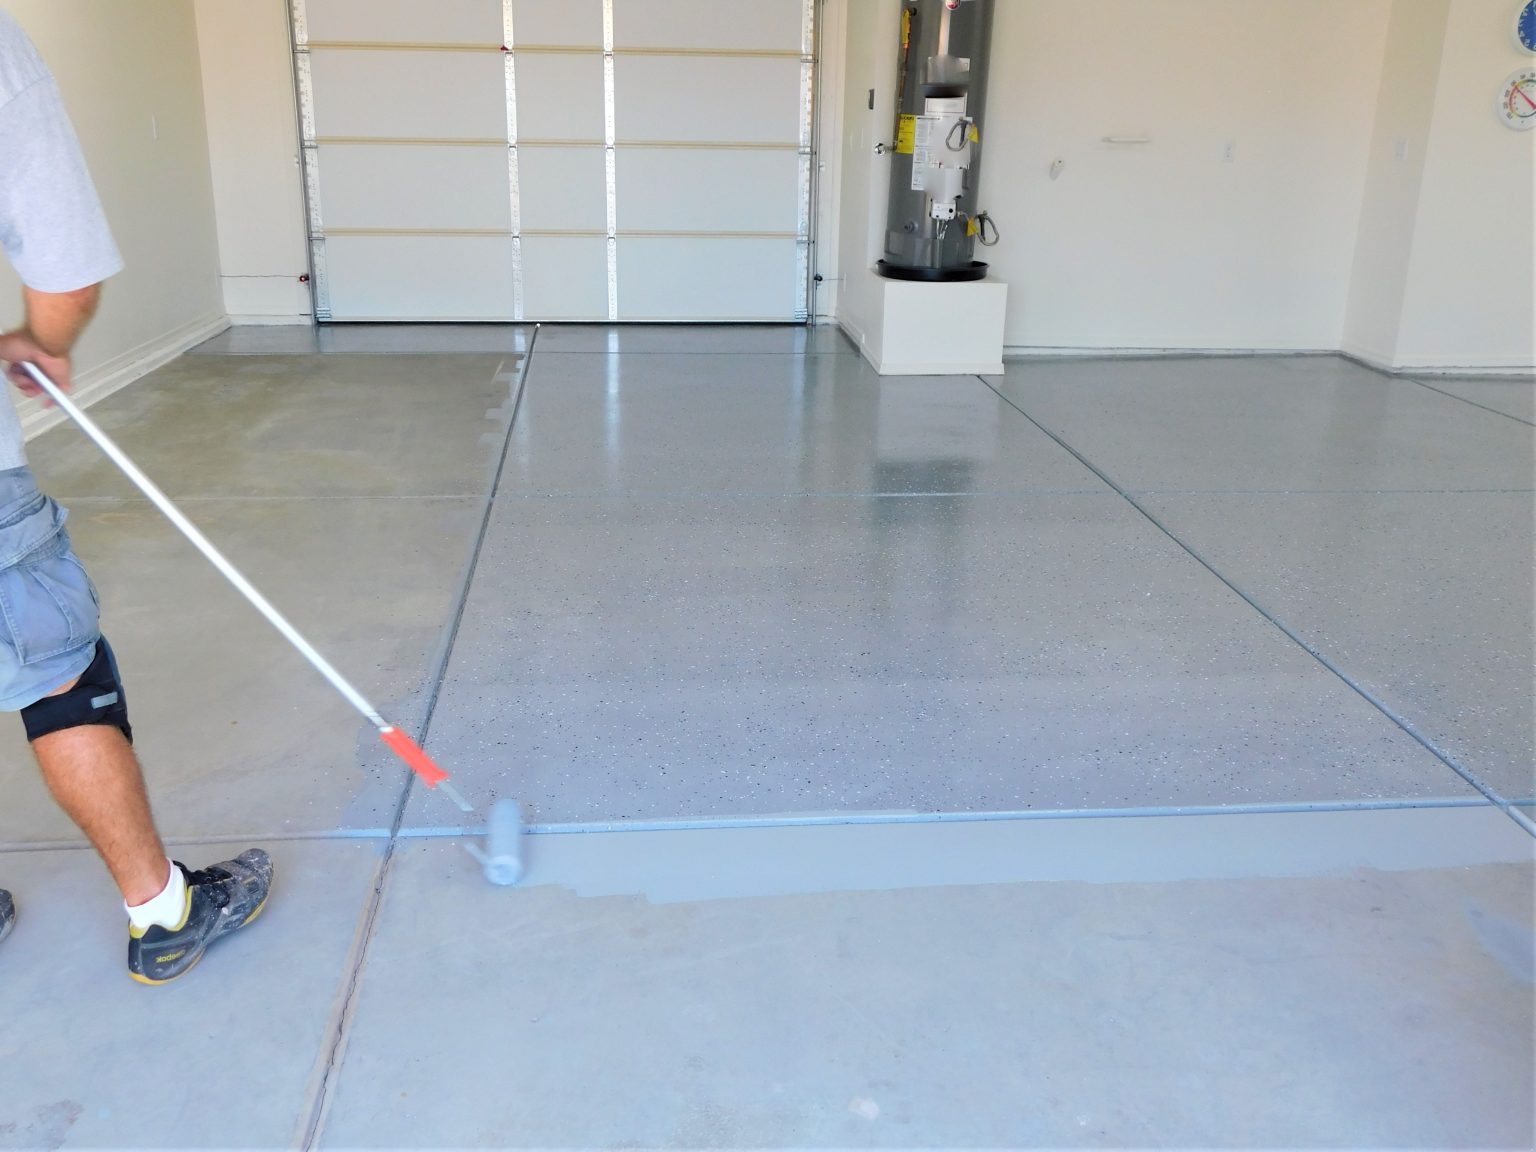
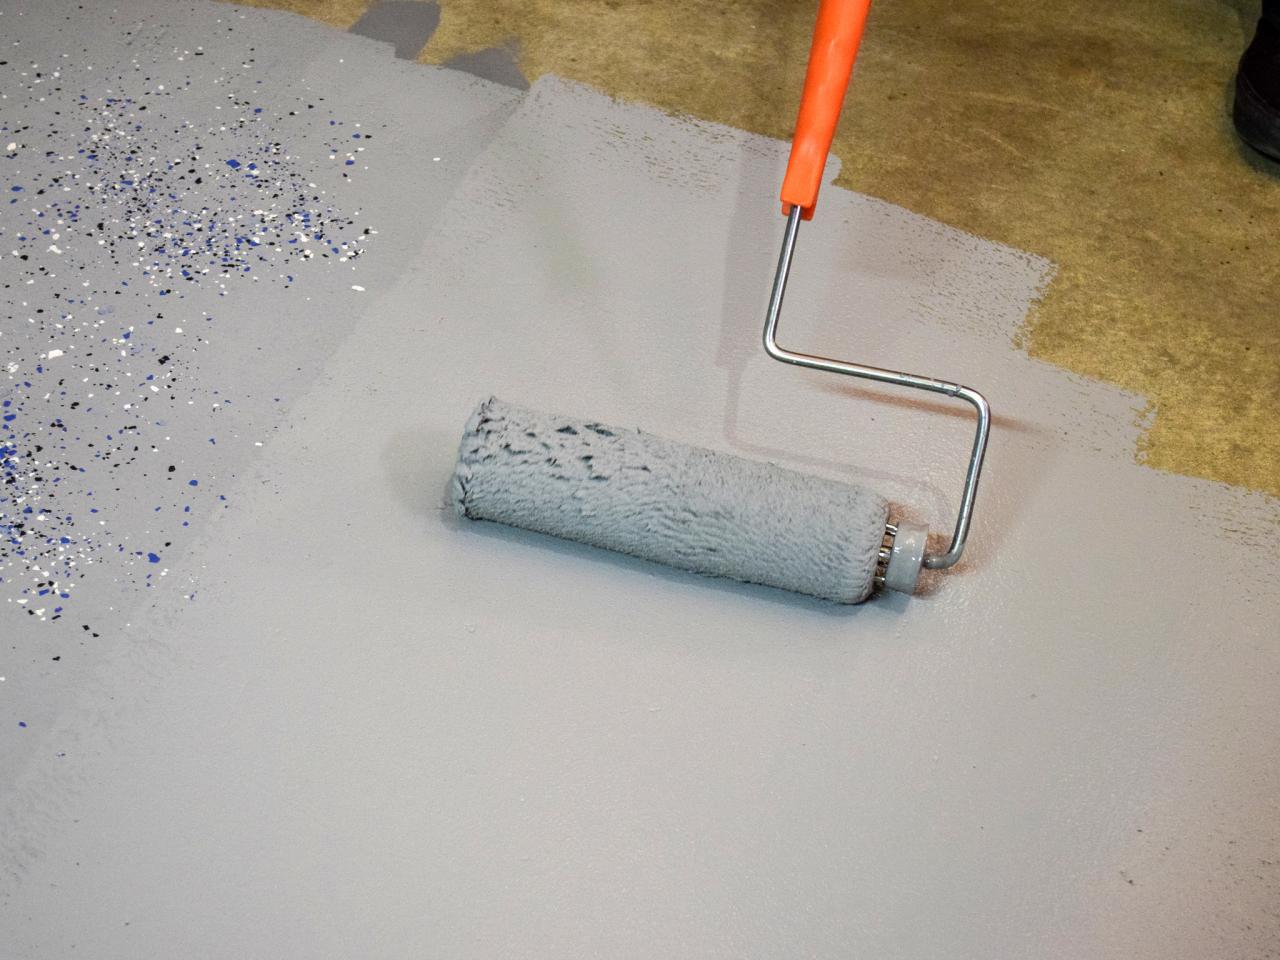
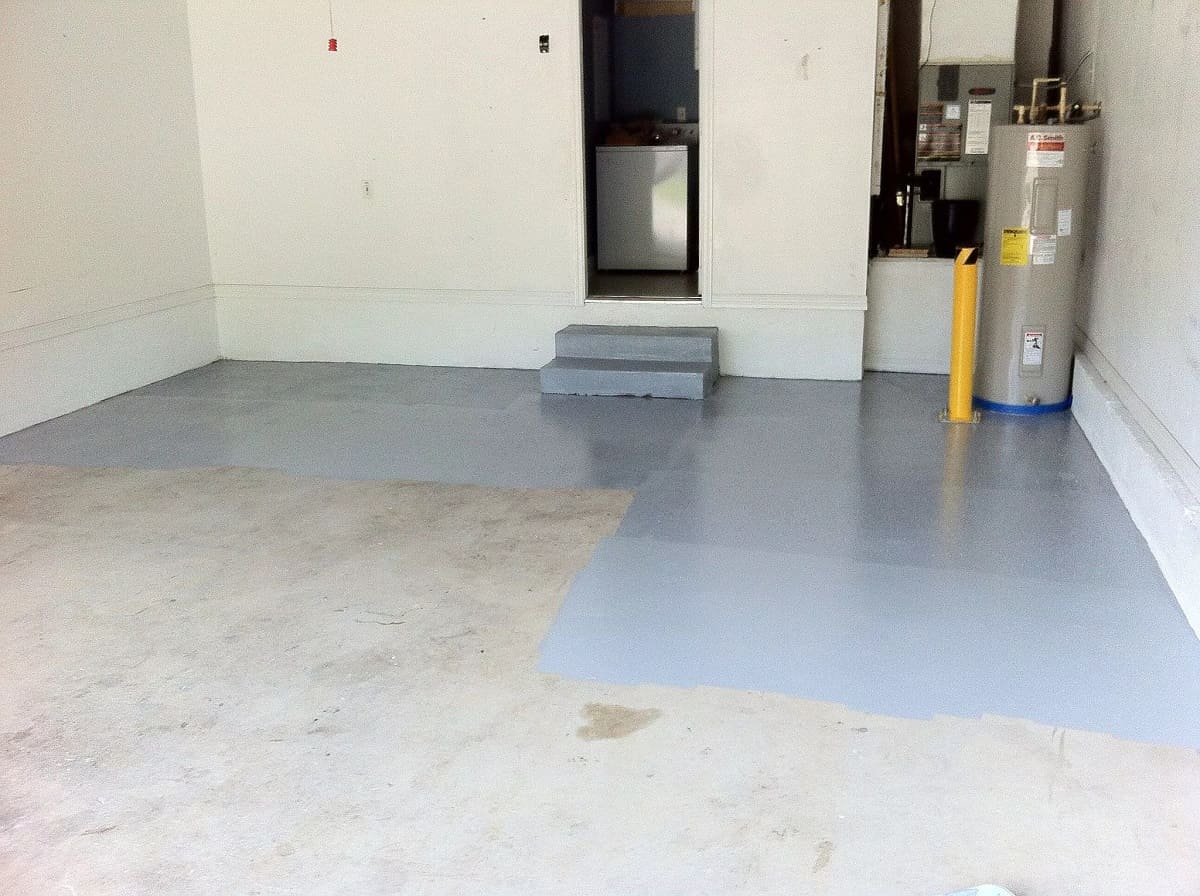
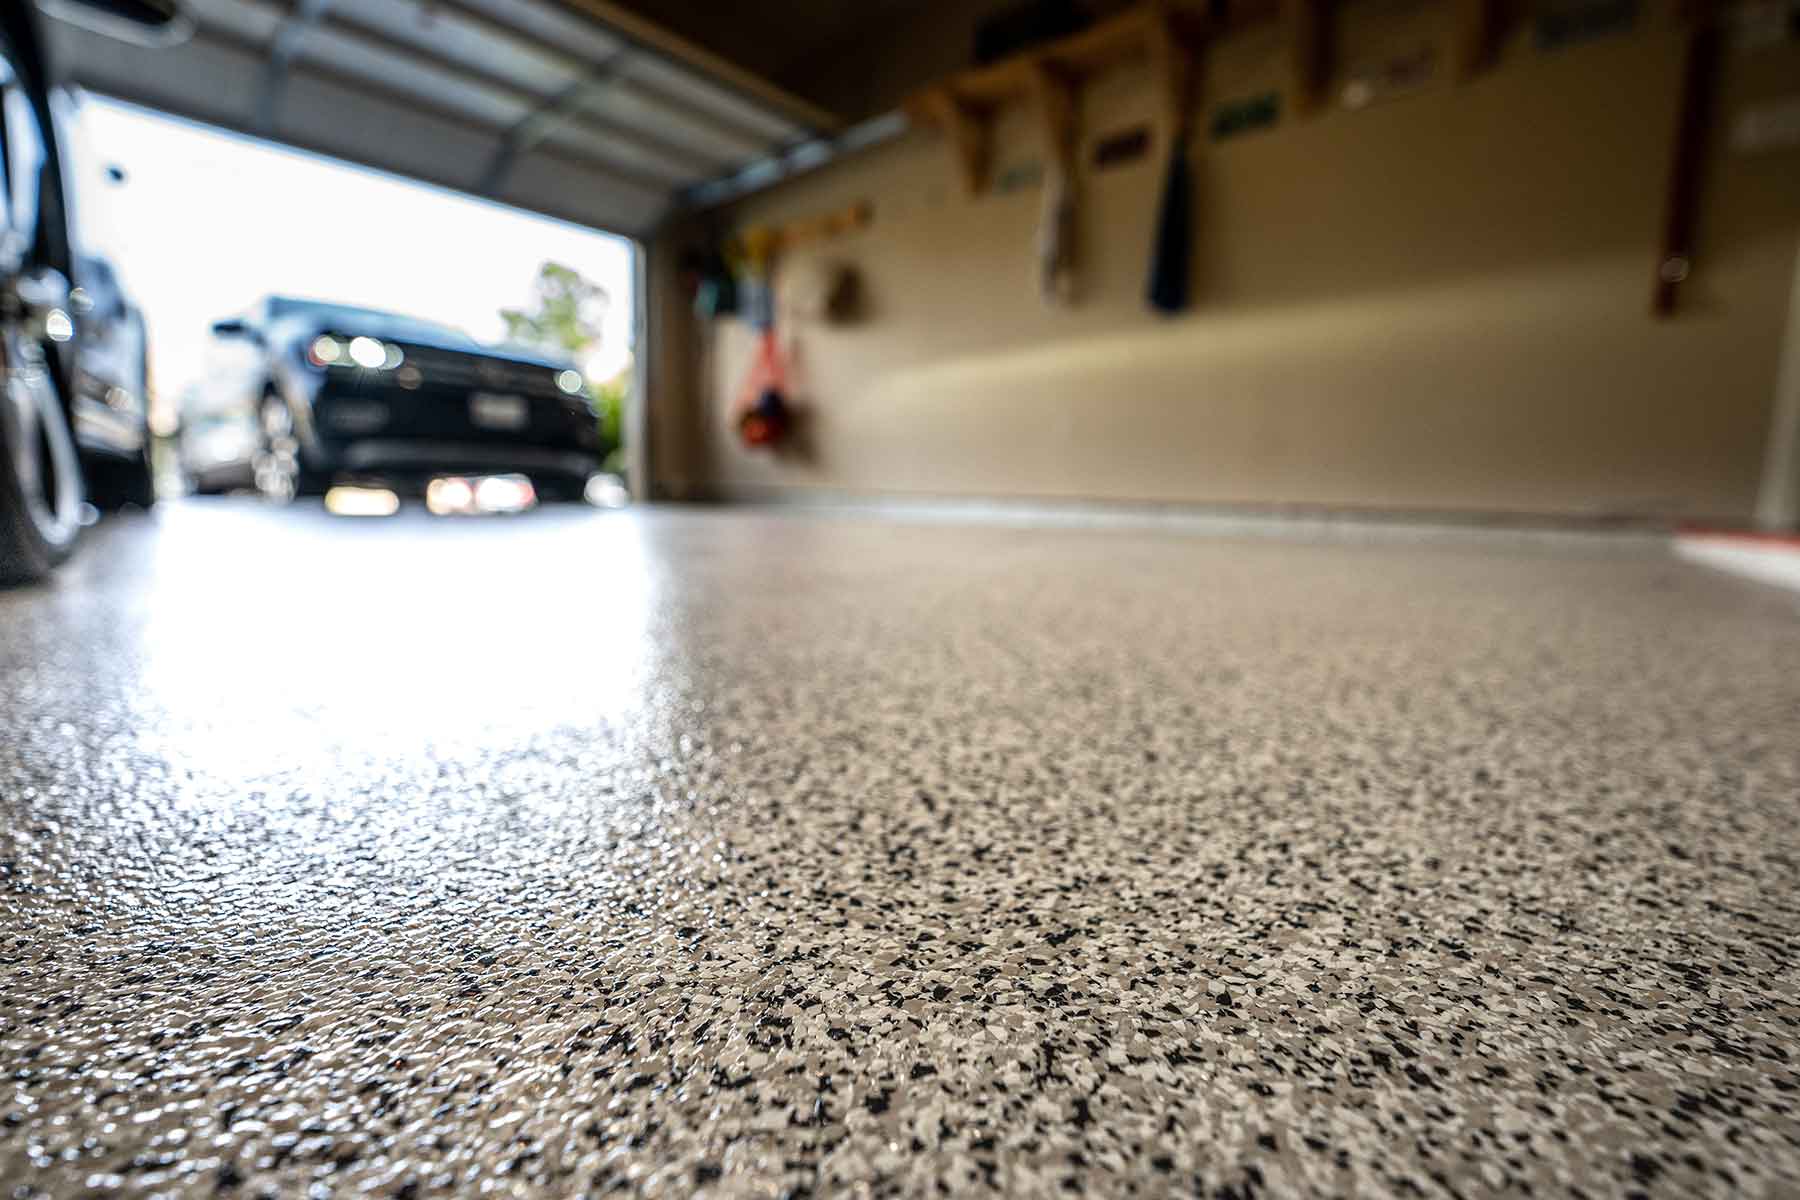
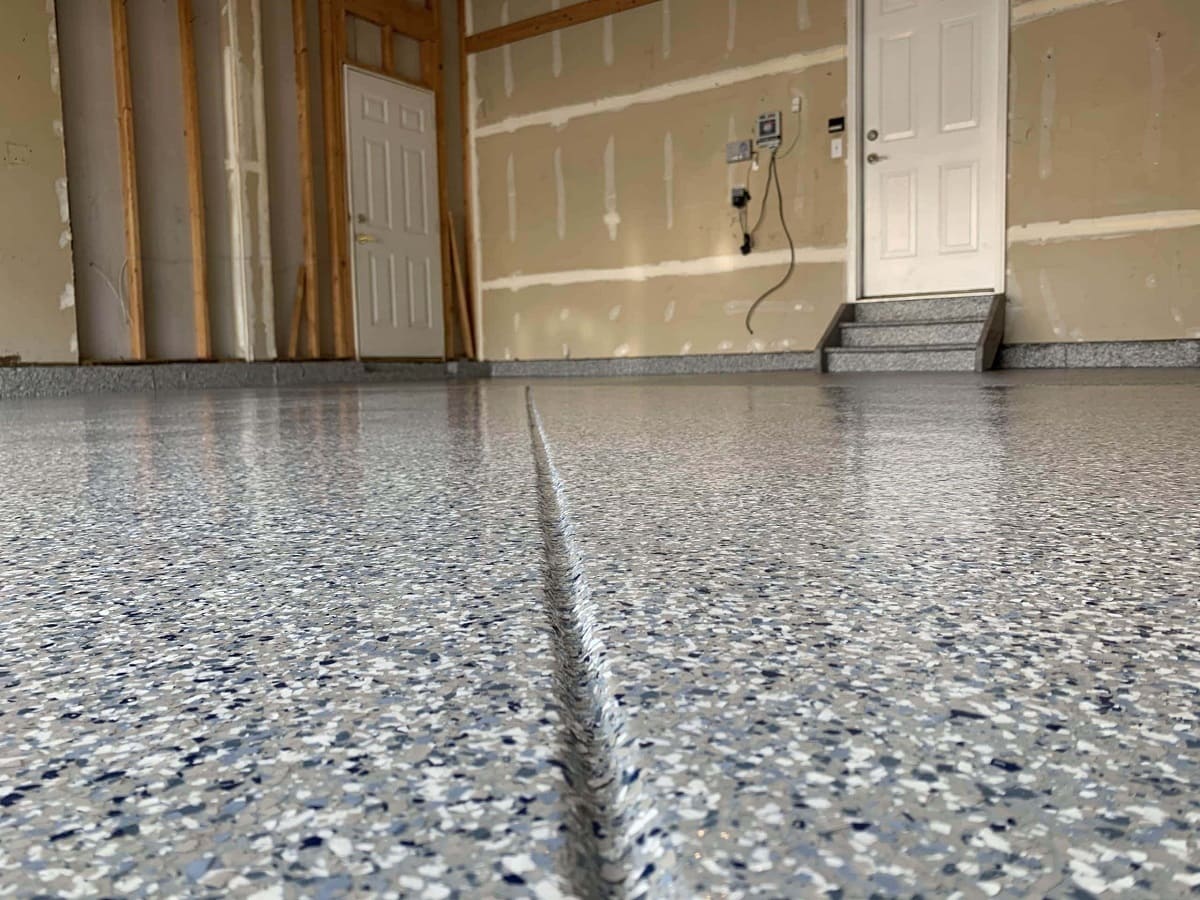
Step 5: Apply Sealer
Now that your garage floor is properly prepped and primed, it’s time to apply the sealer. Sealing your garage floor provides a protective barrier that enhances durability, prevents staining, and gives your floor a fresh and polished look. Follow these steps to apply the sealer:
- Choose the right sealer: Select a high-quality epoxy or concrete sealer that is specifically designed for garage floors. Consider factors such as the type of finish you desire, the level of durability needed, and the manufacturer’s recommendations for your specific surface.
- Mix the sealer (if required): Some sealers may require mixing before application. Follow the manufacturer’s instructions to ensure proper mixing. Use a paint stirring stick to blend the components thoroughly.
- Start at the corner: Begin applying the sealer in a corner of the garage, working your way towards the exit. This ensures a continuous application without stepping on the freshly coated areas.
- Use a paint roller, brush, or sprayer: Apply the sealer using a paint roller, brush, or sprayer, depending on the recommended application method for your chosen sealer. Use long, smooth strokes to ensure even coverage. Be cautious of any cracks or crevices, making sure they are properly sealed.
- Apply multiple coats: In most cases, it is recommended to apply multiple thin coats of sealer rather than a single heavy coat. This allows for better adhesion and avoids trapping air bubbles or creating an uneven finish. Follow the manufacturer’s instructions for the recommended number of coats and drying times between each coat.
- Work in small sections: To maintain a wet edge and achieve a seamless finish, work in manageable sections. Overlapping each section slightly will help ensure complete coverage without leaving gaps or streaks.
- Allow proper drying and curing: Once you have applied the final coat of sealer, allow sufficient drying and curing time before using your garage. Follow the manufacturer’s guidelines, as drying times may vary depending on the sealer type and environmental conditions. It’s best to wait at least 24-48 hours before subjecting the floor to heavy use or parking vehicles on it.
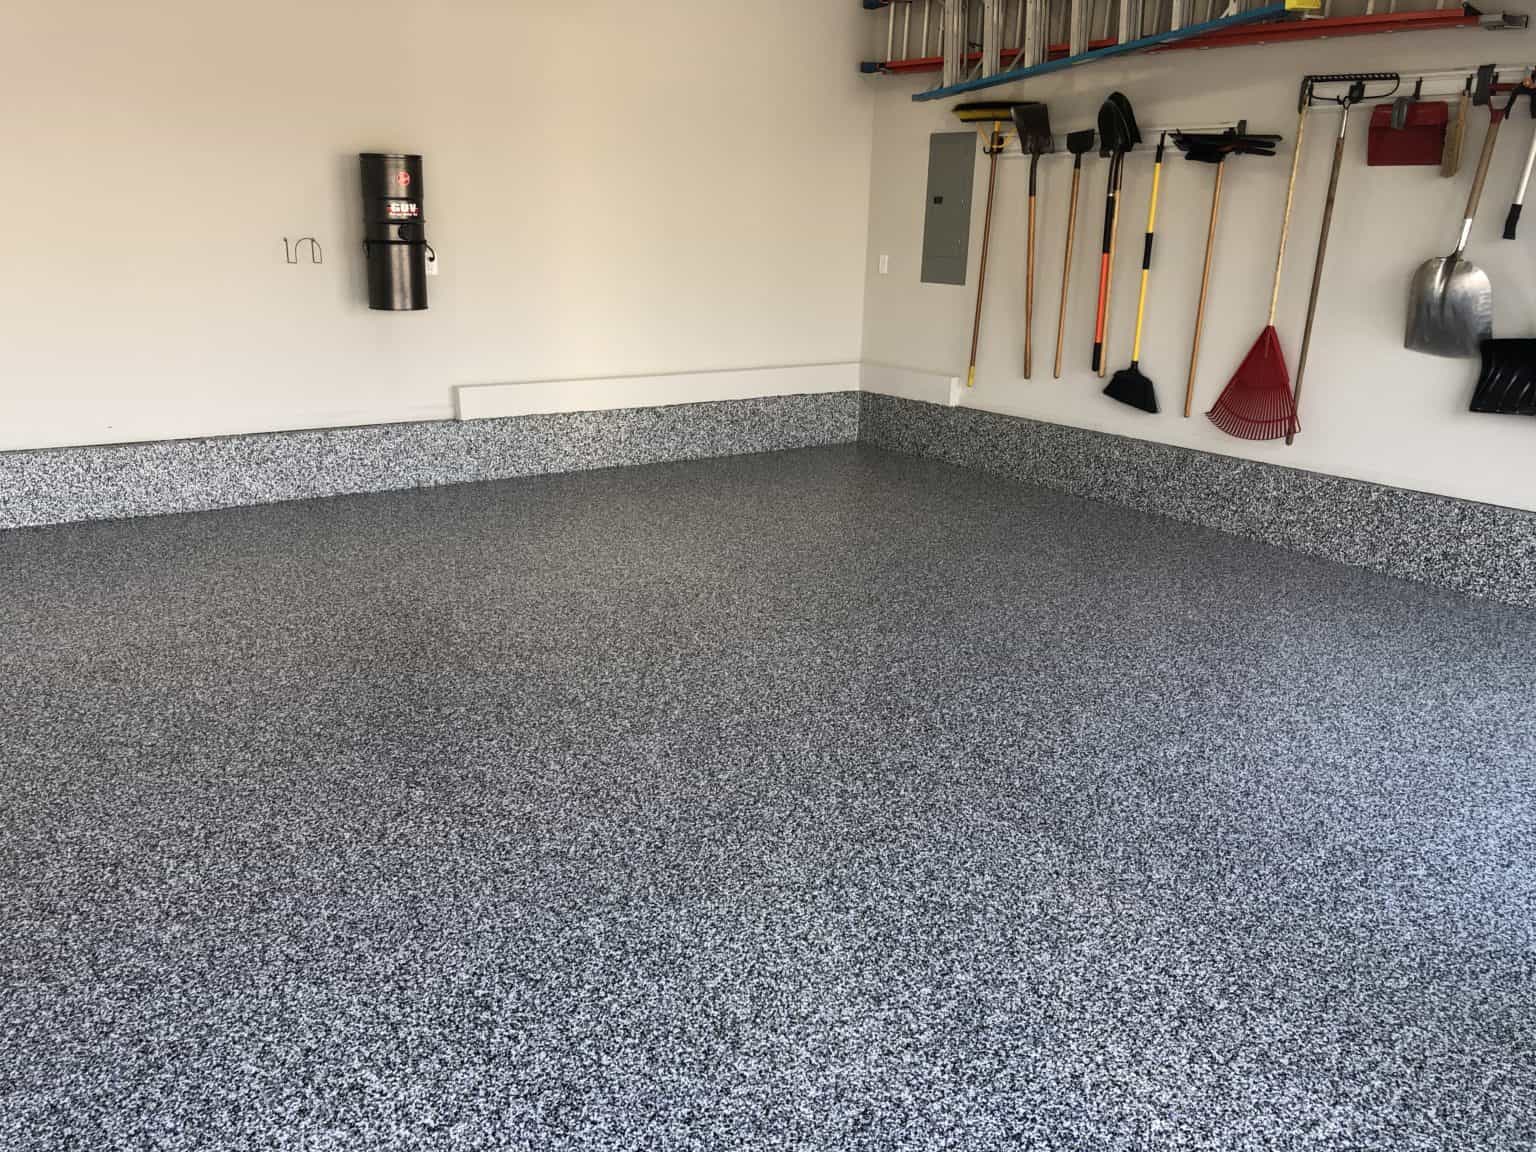
Applying a sealer to your garage floor not only enhances its appearance but also provides protection against stains, chemicals, and everyday wear and tear. Follow these steps carefully to ensure a smooth and successful sealing application, giving your garage floor the ultimate level of protection it deserves.
Step 6: Allow Drying Time
After applying the sealer to your garage floor, it’s crucial to allow sufficient drying time for the sealer to cure properly. This final step ensures the durability and effectiveness of the sealing treatment. Follow these guidelines to allow for proper drying and curing:
- Read the manufacturer’s instructions: Refer to the sealer manufacturer’s instructions for the recommended drying and curing times specific to the product you used. Different sealers have varying drying times, so it’s important to follow their guidelines.
- Avoid foot traffic: To prevent any damage or smudging of the sealer, avoid walking on the freshly sealed floor until it is completely dry. This may take anywhere from 24 to 48 hours, depending on the sealer and environmental conditions.
- Avoid vehicle traffic: If possible, refrain from driving or parking vehicles on the newly sealed garage floor for at least three to seven days. The sealer needs ample time to fully cure and harden to withstand the weight and pressure of vehicles.
- Maintain good ventilation: Keep windows and doors open or use fans to facilitate air circulation and aid in the drying process. This will help expedite the drying time and prevent any moisture or condensation buildup.
- Avoid moisture and spills: During the drying and curing period, make sure to keep the floor dry and free from any spills or excess moisture. Avoid cleaning or subjecting the floor to water until it has fully cured.
- Monitor the curing process: After the initial drying period, continue to observe the floor for any changes or signs of curing. If you notice any issues or uneven drying, consult the sealer manufacturer’s instructions or seek professional assistance.
Proper drying and curing are crucial for the optimal performance and longevity of your sealed garage floor. By allowing sufficient drying time and following the manufacturer’s recommendations, you ensure a durable and well-protected surface that can withstand daily use and provide lasting beauty to your garage.
Conclusion
Sealing your garage floor is a valuable investment that not only enhances the overall appearance of your space but also provides long-lasting durability and protection. By following the step-by-step process outlined in this article, you can successfully seal your garage floor and enjoy the benefits it brings.
From the necessary prep work to filling cracks, cleaning the surface, applying a primer, and finally applying the sealer, each step plays a vital role in ensuring a smooth and successful sealing application. Take your time to complete each step thoroughly and carefully, following the manufacturer’s instructions for the specific materials you’re using.
Remember, proper preparation, such as cleaning the floor and addressing cracks and pits, is crucial for achieving optimal results. Applying a primer beforehand will improve the adhesion of the sealer to the concrete surface, while multiple coats of sealer will provide better protection and a more uniform finish.
Be patient and allow for adequate drying and curing time before subjecting your garage floor to foot or vehicular traffic. This will help ensure that the sealer fully cures and hardens, providing the necessary strength and resilience to withstand daily use and potential spills.
By sealing your garage floor, you are not only protecting it against stains, spills, and damage but also increasing its lifespan and making it easier to clean and maintain. So, take the time to seal your garage floor and enjoy the benefits of a beautiful and well-protected space for years to come.
Frequently Asked Questions about How To Seal Garage Floor
Was this page helpful?
At Storables.com, we guarantee accurate and reliable information. Our content, validated by Expert Board Contributors, is crafted following stringent Editorial Policies. We're committed to providing you with well-researched, expert-backed insights for all your informational needs.

0 thoughts on “How To Seal Garage Floor”