Articles
How To Insulate Garage Floor
Modified: October 24, 2024
Learn how to insulate your garage floor with these informative articles. Improve energy efficiency and create a comfortable space for all your needs.
(Many of the links in this article redirect to a specific reviewed product. Your purchase of these products through affiliate links helps to generate commission for Storables.com, at no extra cost. Learn more)
Introduction
Welcome to our comprehensive guide on how to insulate your garage floor. If you have a garage that is attached to your house, insulating the floor can help to improve the overall energy efficiency and comfort of your home. Whether you use your garage as a workshop, a storage space, or even as an extra living area, insulating the floor can make a significant difference in maintaining comfortable temperatures and reducing heat loss.
Insulating the garage floor can help to prevent cold air from seeping into your home during the winter months, while also reducing heat transfer from the ground in the summer. This can result in lower energy bills, as your heating and cooling systems won’t have to work as hard to maintain a comfortable indoor temperature.
In addition to energy savings, insulating your garage floor can also help to reduce noise transmission from the garage space. If you use your garage as a workshop or have noisy machinery, insulating the floor can help to minimize sound transfer, creating a quieter and more peaceful environment.
Before you begin the process of insulating your garage floor, it’s important to consider the specific characteristics of your garage. Factors such as the type of floor, the existing condition of the floor, and local building codes and regulations can all impact the insulation method you choose. It’s always a good idea to consult with a professional or do thorough research before starting any insulation project to ensure that you follow the correct procedures and meet all requirements.
In this guide, we will walk you through the steps to properly insulate your garage floor. From the preparation stage to the installation of insulation materials and the finishing touches, we will provide you with detailed instructions to help you achieve a well-insulated and comfortable garage space.
Key Takeaways:
- Properly insulating your garage floor can lead to energy savings, reduced heat loss, and a quieter environment. Follow the comprehensive guide to achieve a well-insulated and comfortable garage space.
- By following the steps outlined in the guide, you can effectively prepare, install, and finish your garage floor insulation, resulting in a more comfortable and energy-efficient space.
Read more: How To Insulate A Floor
Step 1: Prepare the Garage Floor
Before you can start insulating your garage floor, it’s crucial to properly prepare the surface. This step ensures that the insulation materials will adhere and provide the best results.
1. Clear the Floor: Remove any items, tools, or debris from the garage floor. This includes sweeping or vacuuming to eliminate dust, dirt, and loose particles. A clean, clear surface will allow for better adhesion of the insulation materials.
2. Repair Any Damage: Inspect the garage floor for cracks, holes, or other damage. Use a concrete patching compound to fill in any cracks or gaps. Smooth out the patched areas with a trowel and allow them to dry completely before proceeding.
3. Level Uneven Areas: If your garage floor has uneven spots or low areas, it’s essential to level them before adding insulation. You can use a self-leveling concrete compound to even out these areas. Follow the manufacturer’s instructions for mixing and applying the compound.
4. Ensure Proper Drainage: Check that the garage floor has proper drainage to prevent the accumulation of water. If needed, make necessary adjustments or install a drainage system to direct water away from the garage.
5. Inspect for Moisture Issues: It’s crucial to address any existing moisture problems before insulating. Moisture can compromise the effectiveness and durability of the insulation materials. Look for signs of water intrusion, such as damp spots or efflorescence on the floor. If you notice any issues, consult with a professional to identify and resolve the source of moisture.
Once you have prepared the garage floor, you are ready to move on to the next step: choosing the insulation material.
Step 2: Choose the Insulation Material
Choosing the right insulation material for your garage floor is crucial for achieving optimal energy efficiency and comfort. There are several options available, each with its own advantages and considerations. Here are some common insulation materials to consider:
- Foam Board Insulation: Foam board insulation, also known as rigid foam insulation, is a popular choice for insulating garage floors. It provides excellent thermal resistance and is easy to cut and install. Foam board insulation comes in different thicknesses, so choose one that suits your specific needs.
- Fiberglass Batt Insulation: Fiberglass batt insulation is another option for insulating garage floors. It consists of long, flexible fibers and is available in rolls or batts. This type of insulation is cost-effective but may require additional measures to prevent moisture buildup.
- Spray Foam Insulation: Spray foam insulation is a versatile option for garage floor insulation. It can be applied as a liquid and expands to fill gaps, cracks, and cavities, creating a seamless and airtight insulation layer. However, professional installation is recommended for spray foam insulation.
- Reflective Insulation: Reflective insulation consists of a reflective foil material that helps to reflect radiant heat. This type of insulation is often used in conjunction with other insulation materials to enhance thermal performance.
When choosing the insulation material, consider factors such as the climate in your area, the desired level of insulation, and your budget. Research the pros and cons of each type and decide which one best suits your needs.
It’s important to follow the manufacturer’s instructions and recommendations for installation. Some insulation materials may require specific adhesives or fasteners for proper attachment to the garage floor. Consider consulting with a professional or insulation specialist to ensure you select and install the right insulation material for your garage floor.
Once you have chosen the insulation material, you can proceed to the next step: measuring and cutting the insulation boards.
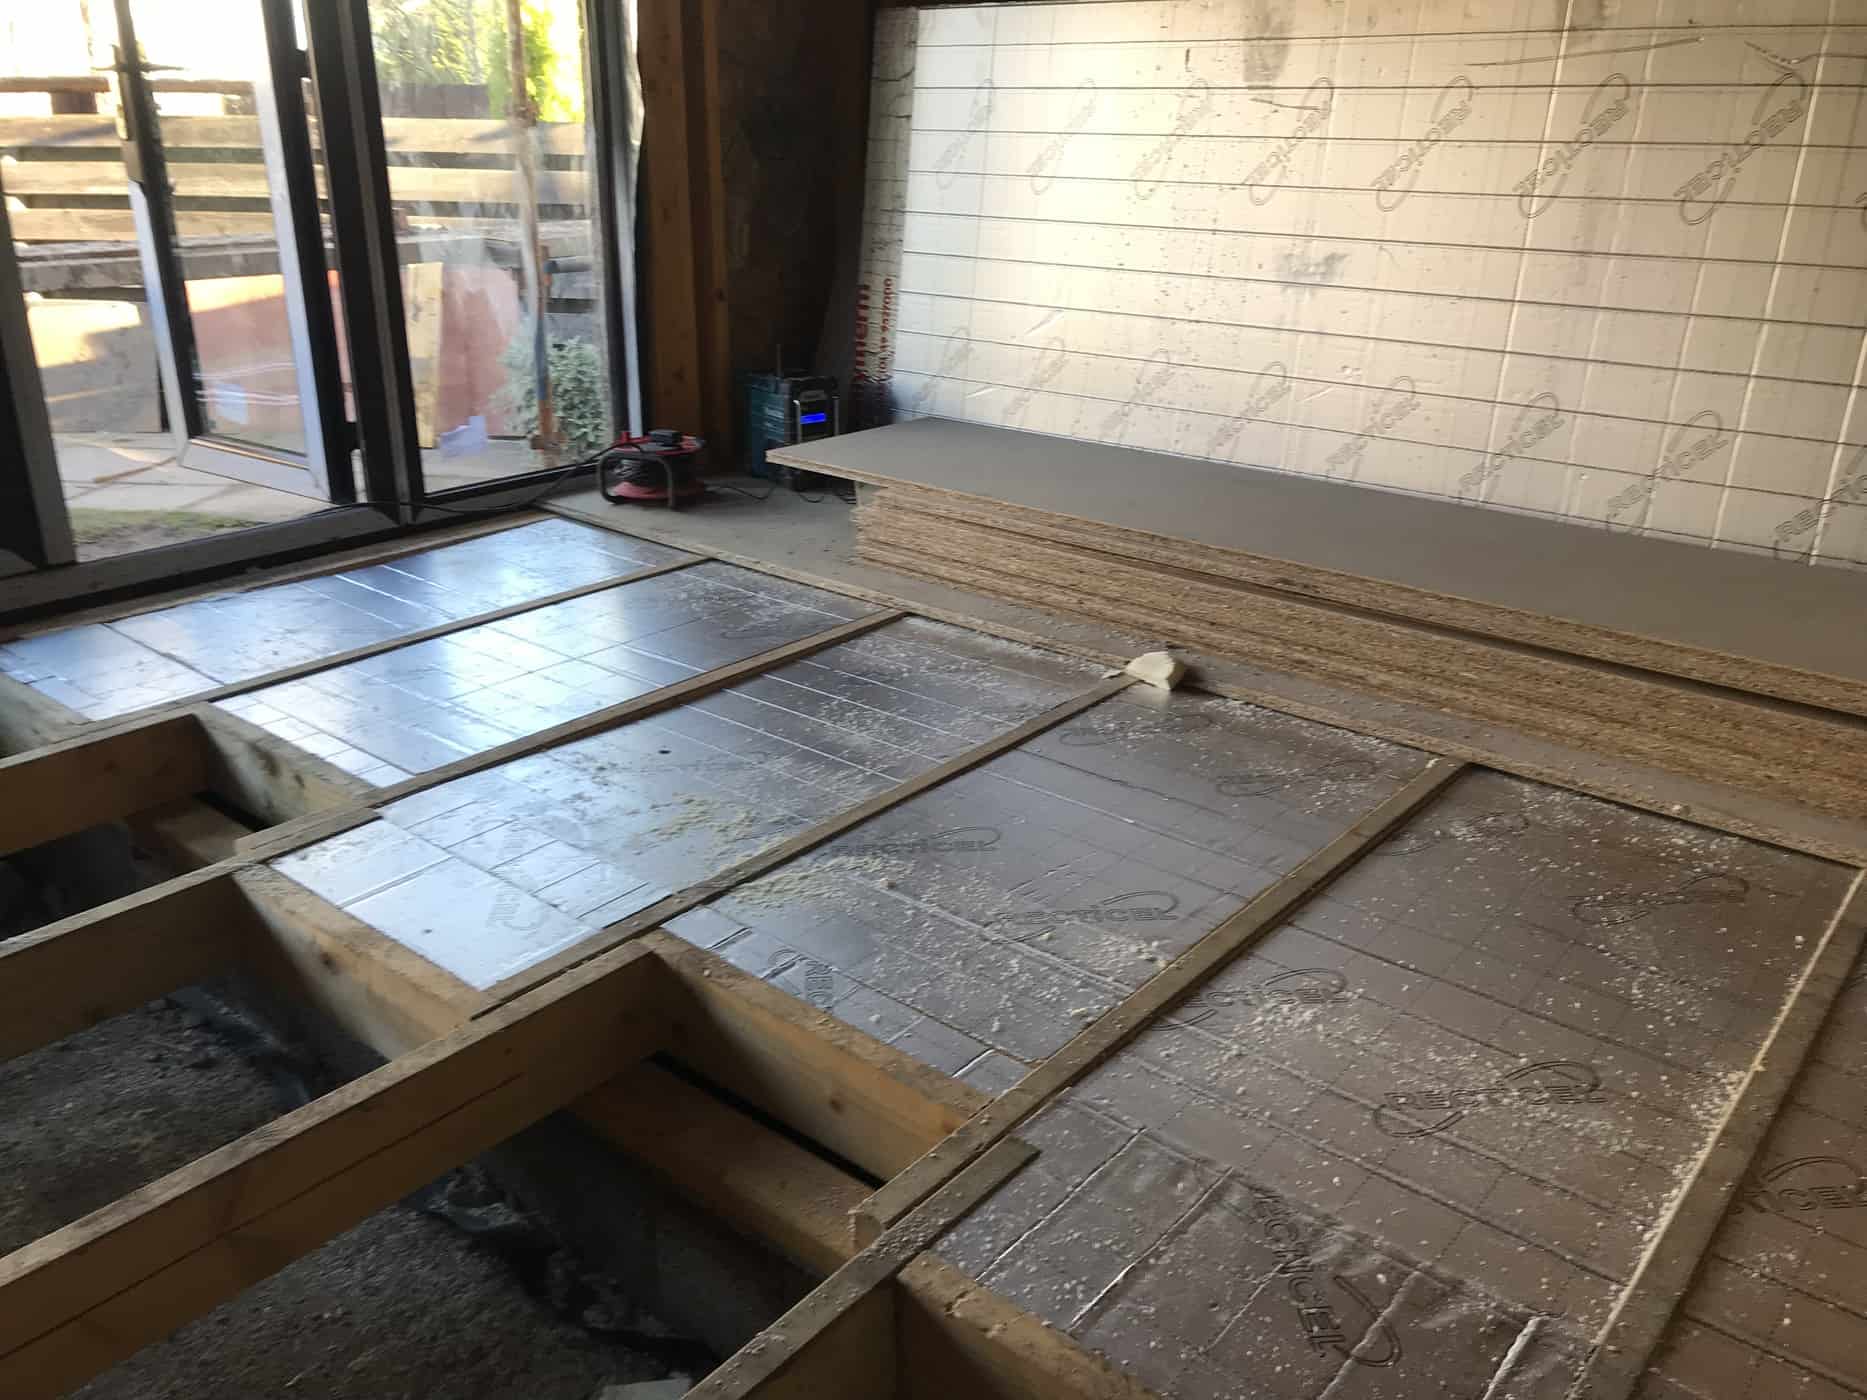
Step 3: Measure and Cut the Insulation Boards
Now that you have chosen the insulation material for your garage floor, it’s time to measure and cut the insulation boards to fit your space.
1. Measure the Floor: Use a measuring tape to measure the dimensions of your garage floor. Take accurate measurements of the width and length, as well as any areas with irregular shapes or obstacles.
2. Mark and Cut the Insulation Boards: Transfer the measurements onto the insulation boards using a pencil or marker. Make sure to mark the boards on the side that will face the ground. Use a straight edge or a carpenter’s square to ensure straight and precise lines.
3. Cut the Insulation Boards: Depending on the type of insulation material you are using, use a utility knife, a handheld saw, or a specialized insulation cutting tool to cut the boards to the correct size. Take caution and follow proper safety guidelines when cutting the insulation boards.
4. Test the Fit: After cutting the insulation boards, test their fit on the garage floor. Place them in their designated positions and ensure they match the dimensions and contours of the floor. Trim any excess material if necessary.
By accurately measuring and cutting the insulation boards, you’ll be able to maximize the coverage and ensure a proper fit on your garage floor. This step is essential to achieve effective insulation and minimize any gaps or exposed areas.
Once you have measured and cut the insulation boards, you can move on to the next step: cleaning and sealing the garage floor.
Step 4: Clean and Seal the Garage Floor
Before proceeding with the installation of the insulation boards, it’s important to thoroughly clean and seal the garage floor. This step helps to ensure proper adhesion of the insulation materials and promotes a long-lasting insulation solution.
Here’s how to clean and seal the garage floor:
- Sweep and Vacuum: Start by removing any loose debris, dust, or dirt from the garage floor. Use a broom and dustpan to sweep the floor, and then use a vacuum cleaner to further eliminate smaller particles.
- Remove Stains and Spills: Use a suitable cleaner and scrub brush to remove any stains or spills on the garage floor. Be sure to follow the manufacturer’s instructions on the cleaning product and avoid using harsh chemicals that could damage the floor.
- Rinse the Floor: Once you have cleaned the floor, rinse it thoroughly with water. This will help to remove any remaining residue and ensure a clean surface for sealing.
- Allow the Floor to Dry: Give the garage floor enough time to dry completely before applying the sealer. This typically takes around 24 hours, but it may vary depending on the temperature and humidity levels in your area.
- Apply a Concrete Sealer: Use a concrete sealer that is compatible with your garage floor. Follow the manufacturer’s instructions on the application process, whether it be using a brush, roller, or sprayer. Apply the sealer evenly, covering the entire floor surface.
- Allow the Sealer to Cure: After applying the sealer, allow it to cure for the recommended amount of time. This typically takes a few days, but it’s important to follow the instructions provided by the manufacturer.
Cleaning and sealing the garage floor helps to ensure a clean and durable surface for the insulation boards. It helps to prevent moisture, improve adhesion, and protect the floor from potential damage.
Once you have cleaned and sealed the garage floor, you are ready to move on to the next step: installing the insulation boards.
Consider using rigid foam insulation boards to insulate your garage floor. These boards are easy to install and provide effective insulation to keep the space warm.
Read more: How To Insulate A Garage Ceiling
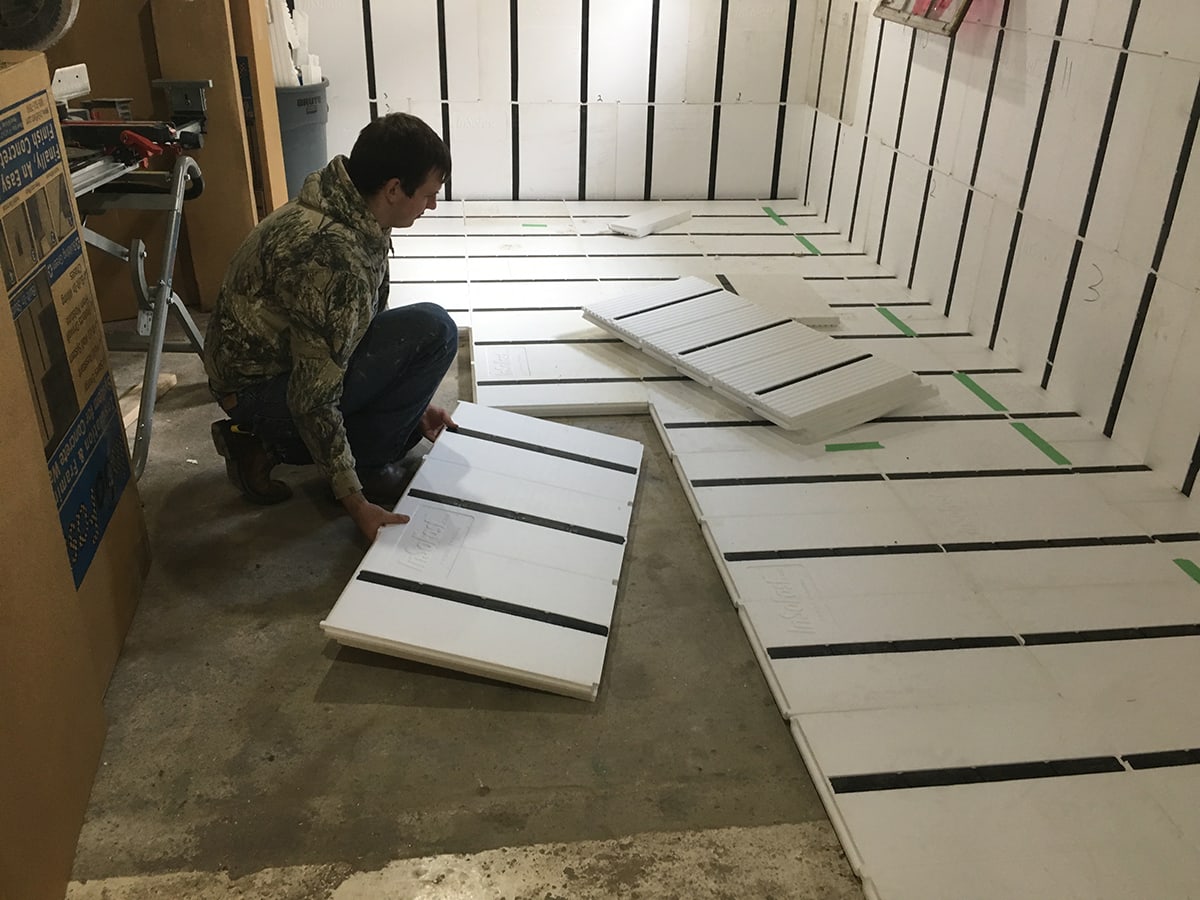
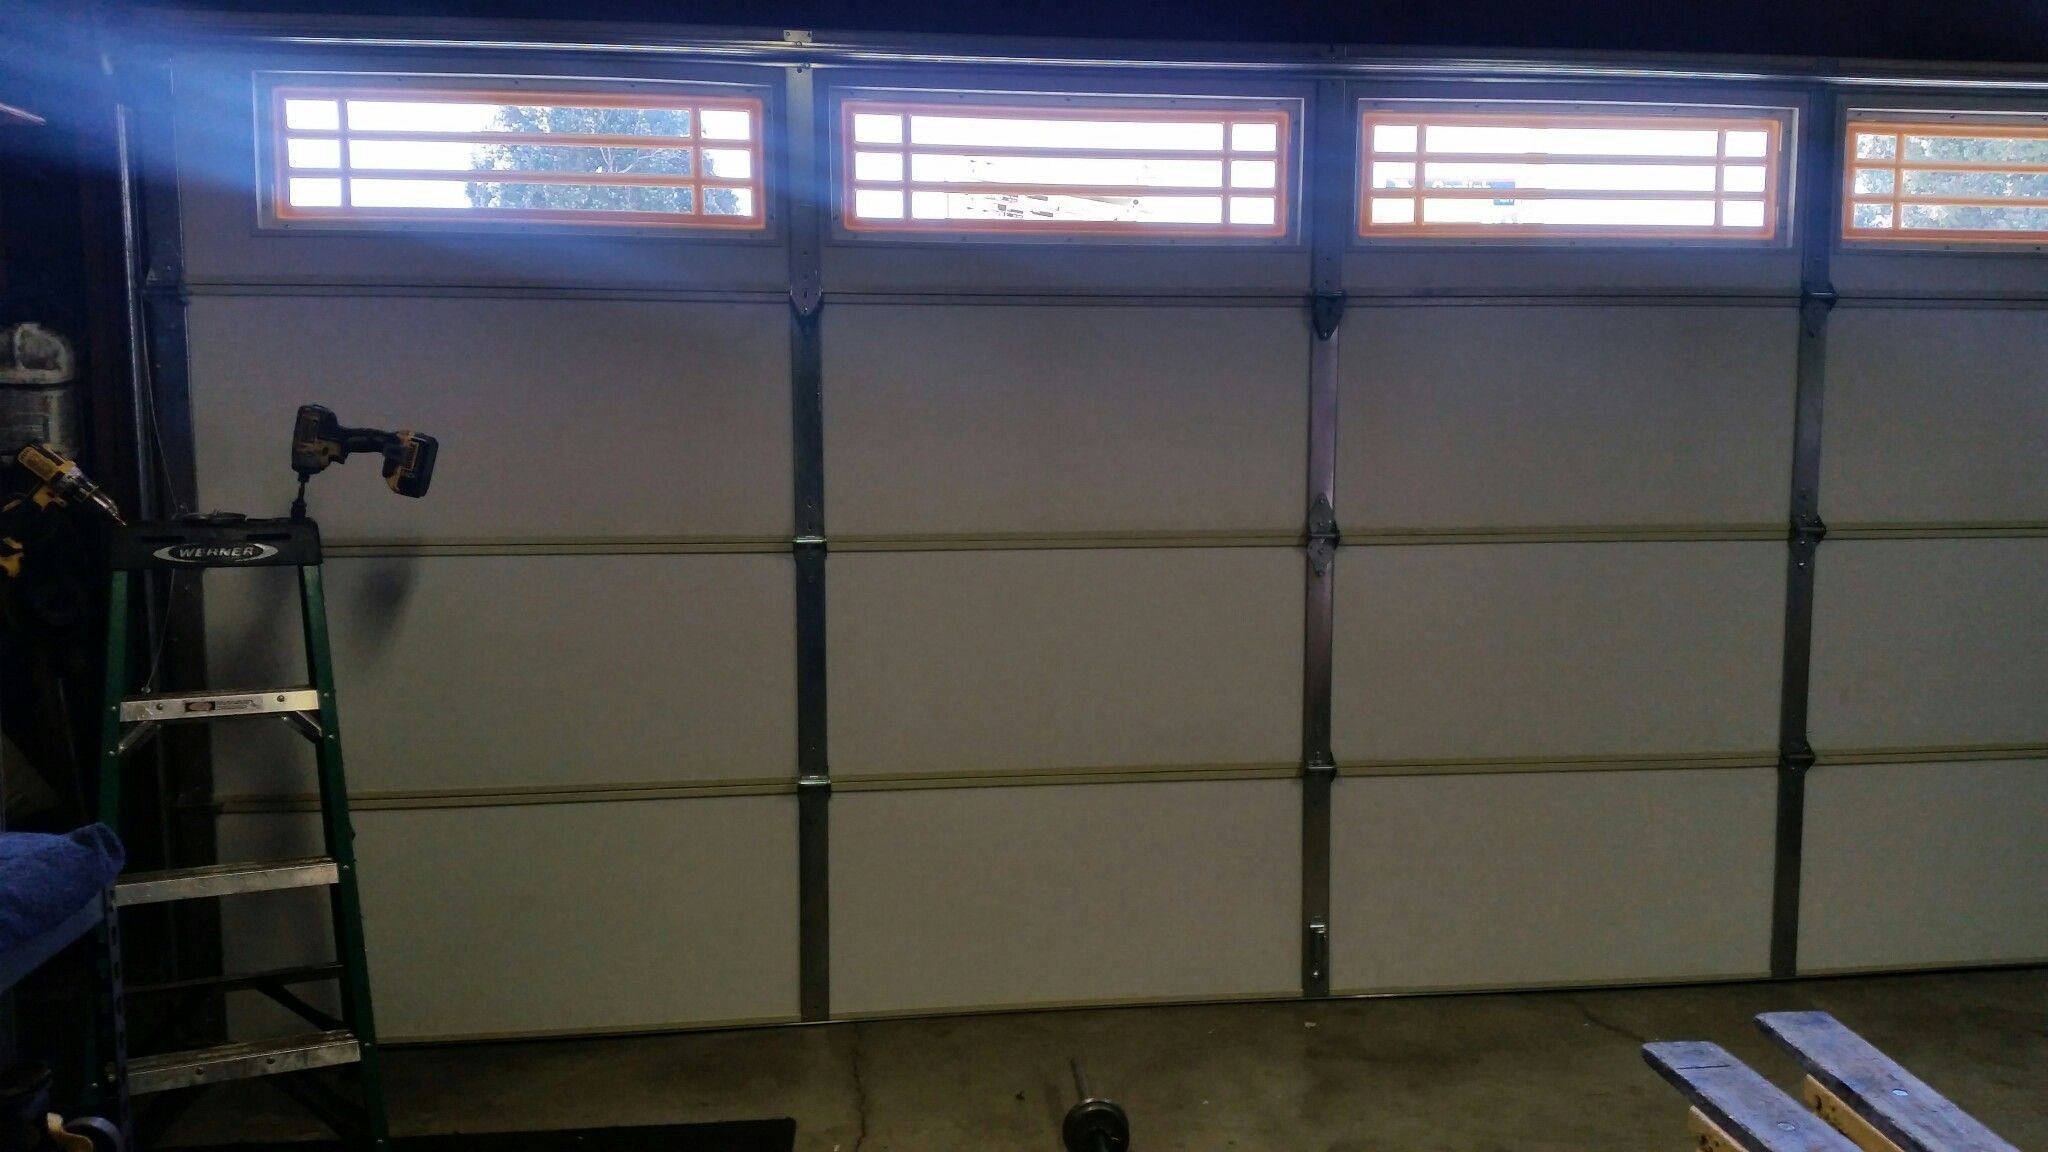
Step 5: Install the Insulation Boards
With your garage floor cleaned and sealed, it’s time to install the insulation boards. Proper installation ensures effective insulation and creates a barrier between the cold ground and your living space.
Follow these steps to install the insulation boards:
- Start at a Corner: Begin the installation in one corner of your garage. This will provide a starting point to align the rest of the insulation boards.
- Apply Adhesive: Apply a suitable adhesive, such as construction adhesive or adhesive recommended by the insulation board manufacturer, on the back of the insulation boards. Follow the adhesive application instructions provided by the manufacturer.
- Press the Boards in Place: Press the adhesive-coated side of the insulation board firmly against the garage floor. Make sure it is aligned with the walls and any other insulation boards already installed.
- Continue Installing: Repeat the process for each insulation board, working your way across the garage floor. Ensure that the boards fit snugly together without any gaps or overlaps.
- Trim for Obstacles: If you encounter obstacles such as pipes or supports, carefully measure and mark the insulation board to fit around them. Use a utility knife or specialized insulation cutting tool to trim the board as needed.
- Double-Check Alignment: Periodically check the alignment and overall placement of the insulation boards as you progress. Adjust if necessary to maintain a uniform and secure installation.
Installing the insulation boards properly provides an essential thermal barrier, preventing heat loss from the floor and ensuring a more comfortable and energy-efficient garage space.
Once you have installed the insulation boards, you can move on to the next step: sealing the edges and joints.
Step 6: Seal the Edges and Joints
After installing the insulation boards, it’s important to seal the edges and joints to create a continuous and airtight barrier. This step helps to prevent any heat or air leakage, ensuring optimal insulation performance.
Follow these steps to seal the edges and joints of the insulation boards:
- Inspect the Edges and Joints: Carefully examine the edges and joints of the insulation boards to identify any gaps or areas that need sealing. Pay close attention to corners, seams, and areas where the boards meet walls or other structures.
- Use Sealant: Apply a suitable sealant, such as a waterproof caulk or foam sealant, along the edges and joints of the insulation boards. Choose a sealant that is compatible with the insulation material you have used.
- Fill the Gaps: Fill any gaps or voids between the insulation boards or between the boards and the walls with the sealant. Ensure that the sealant forms a continuous seal and fills any openings that could allow air infiltration.
- Smooth and Wipe Excess: Use a caulk smoothing tool or a damp cloth to smooth out the sealant and remove any excess. This will create a neat and clean finish.
- Allow the Sealant to Cure: Follow the manufacturer’s instructions on the cure time for the sealant. It typically takes a few hours or overnight for the sealant to fully cure.
Properly sealing the edges and joints of the insulation boards helps to enhance the effectiveness of the insulation, preventing air leakage and maximizing energy efficiency within your garage space.
Once you have sealed the edges and joints, you can proceed to the next step: installing a vapor barrier.
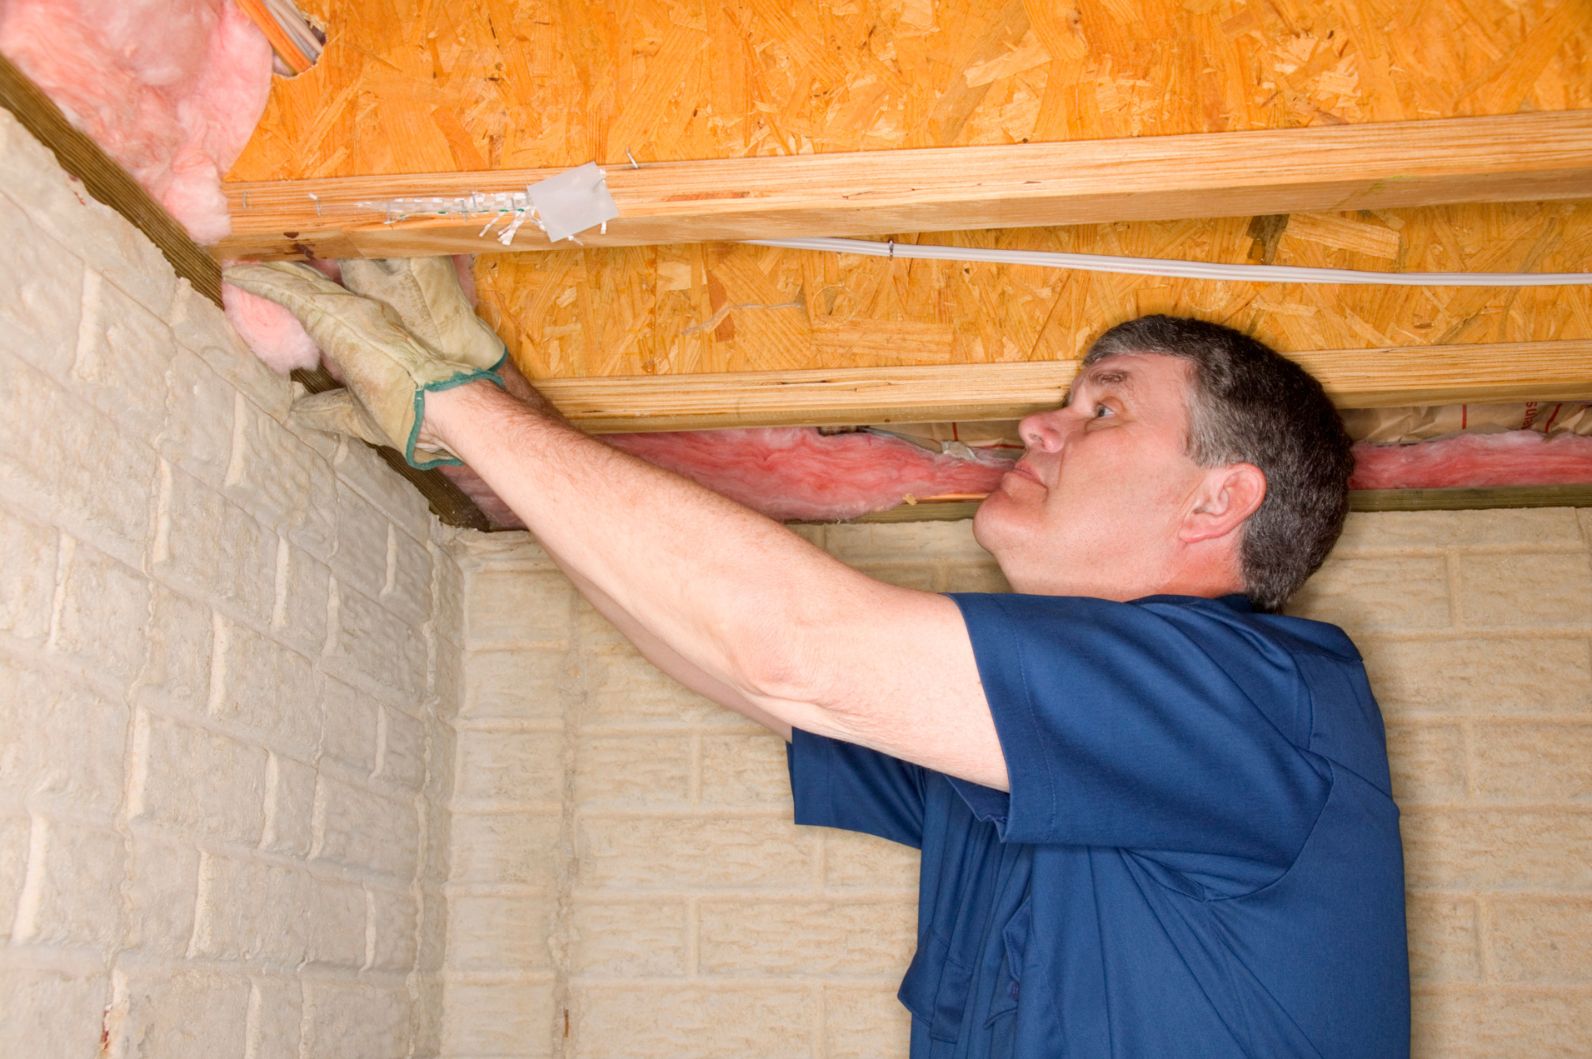
Step 7: Install a Vapor Barrier
Installing a vapor barrier is a crucial step in insulating your garage floor. A vapor barrier helps to prevent moisture from seeping through the floor and can protect the insulation materials from potential damage. It is especially important if you live in an area with high humidity levels.
Follow these steps to install a vapor barrier:
- Clean the Insulation Surface: Ensure that the insulation boards are clean and free from any debris or dust. This will provide a smooth and even surface for the vapor barrier.
- Choose a Vapor Barrier: Select a suitable vapor barrier material such as a plastic sheet or a specialized vapor barrier membrane. Make sure it is resistant to moisture and has low permeability.
- Cut the Barrier: Measure and cut the vapor barrier to fit the dimensions of your garage floor. Leave an extra few inches on each side to overlap with the walls.
- Place the Barrier: Lay the vapor barrier over the insulation boards, ensuring that it covers the entire floor surface. Smooth out any wrinkles or folds to achieve a tight and secure fit.
- Overlap the Edges: When installing multiple pieces of the vapor barrier, overlap the edges by several inches. Use a suitable tape or adhesive recommended by the vapor barrier manufacturer to seal the seams and prevent moisture infiltration.
- Trim the Excess: Trim any excess vapor barrier that extends beyond the edges of the garage floor. A utility knife or a pair of scissors can be used for this purpose.
Installing a vapor barrier helps to protect the insulation and maintain its effectiveness by preventing moisture from entering the garage space. It is an important step in creating a well-insulated and moisture-resistant floor.
Once you have installed the vapor barrier, you can proceed to the final step: finishing the garage floor.
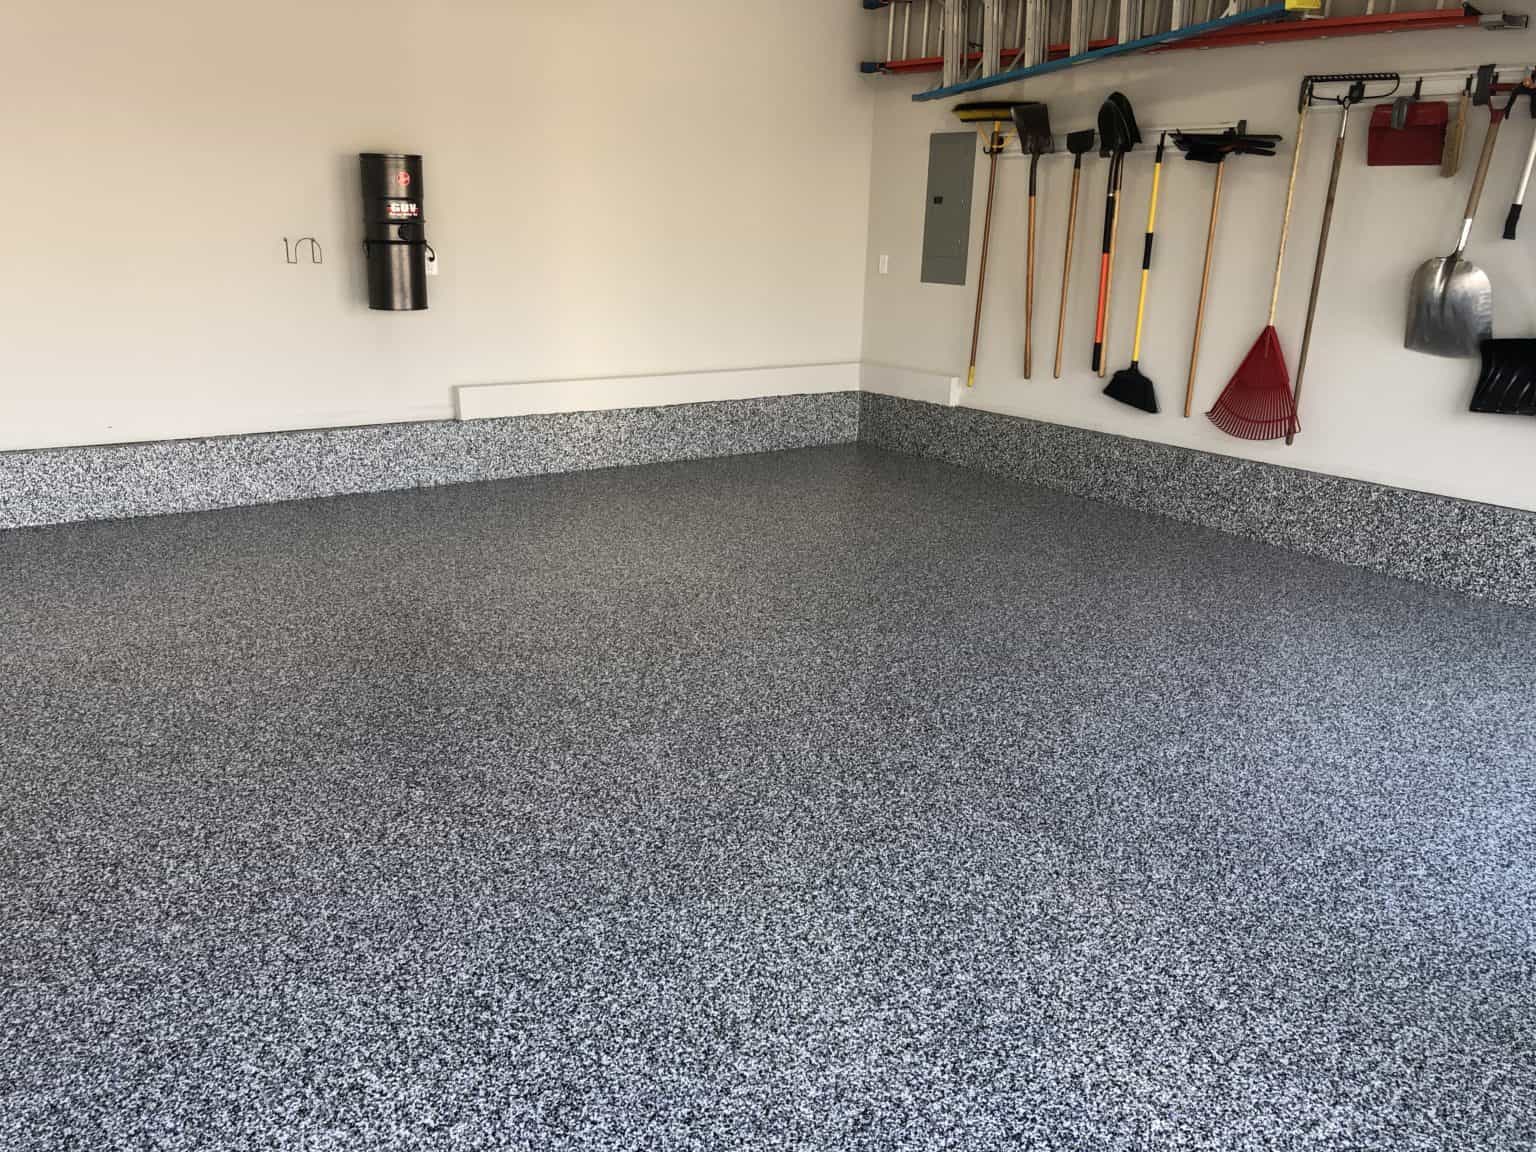
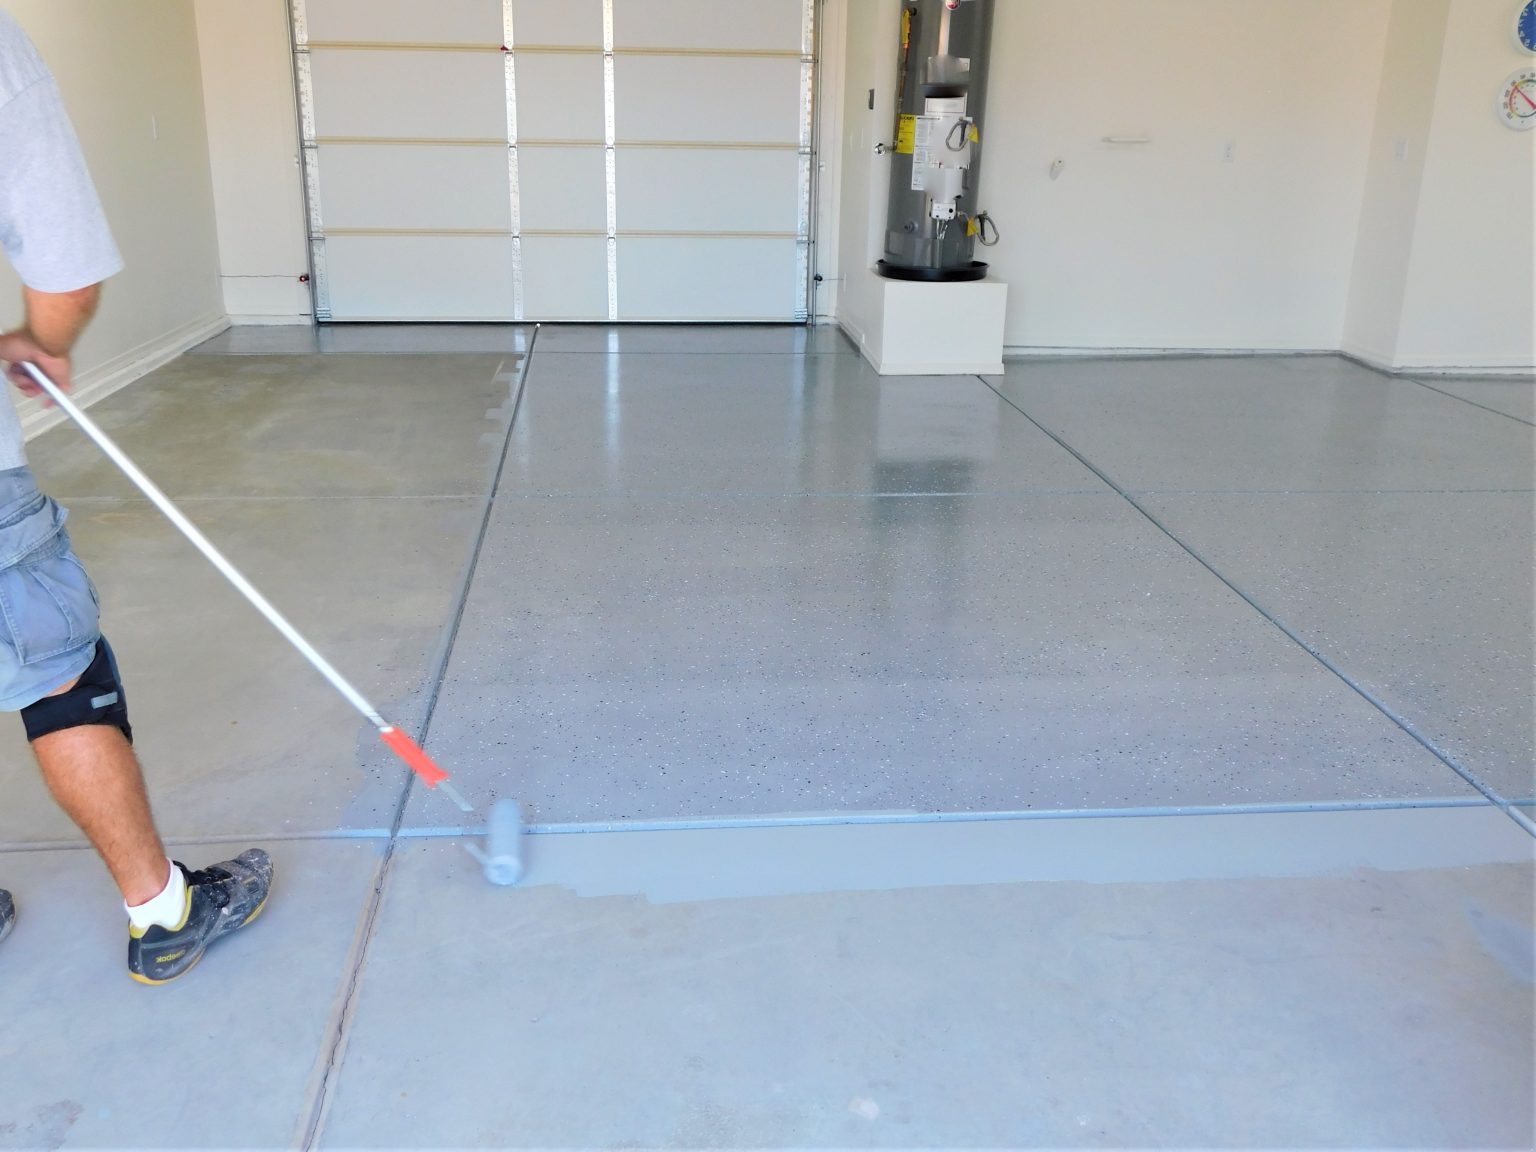
Step 8: Finish the Garage Floor
Finishing the garage floor is the final step in the insulation process. This step not only enhances the appearance of the garage but also provides additional protection and durability to the insulated floor.
Follow these steps to finish the garage floor:
- Choose a Floor Finish: Decide on the type of finish you want for your garage floor. Options include epoxy coatings, polyurethane sealers, or even simple garage floor paint. Consider factors such as durability, ease of maintenance, and aesthetic appeal.
- Prepare the Surface: Before applying the floor finish, ensure that the garage floor is clean and free from any debris or dust. Sweep or vacuum the floor to remove any loose particles. If necessary, use a suitable cleaner to remove any stubborn stains or spills.
- Apply the Finish: Follow the manufacturer’s instructions for the selected floor finish. Use a roller or a brush to apply an even coat over the entire garage floor. Take care to apply the finish in a well-ventilated area and use appropriate safety measures.
- Allow for Drying and Curing: Depending on the type of floor finish, allow sufficient time for drying and curing. This may take anywhere from a few hours to several days. Avoid walking or placing any heavy objects on the floor until it has fully cured.
- Add Protective Measures: To further protect your newly finished garage floor, consider adding protective mats or pads in areas where heavy machinery or vehicles will be parked. This helps to prevent damage or scratches to the floor finish.
- Maintain the Floor: Regularly clean and maintain the finished garage floor according to the manufacturer’s recommendations. This will help to preserve its appearance and extend its lifespan.
Finishing the garage floor not only adds a polished look to the space but also provides additional protection and ease of maintenance. It completes the insulation process and ensures that your garage floor is ready to withstand daily wear and tear.
By following these steps, you have successfully completed the process of insulating and finishing your garage floor. Your efforts will result in a more comfortable, energy-efficient, and aesthetically pleasing garage space.
Congratulations on a job well done!
Read more: How To Insulate A Garage Attic
Conclusion
Insulating your garage floor is a worthwhile investment that brings numerous benefits to your home. By following the steps outlined in this comprehensive guide, you have learned how to properly insulate your garage floor, creating a more comfortable and energy-efficient space.
Throughout the process, you prepared the garage floor, selected the right insulation material, measured and cut the insulation boards, cleaned and sealed the floor, installed the insulation boards, sealed the edges and joints, installed a vapor barrier, and finished the garage floor with a suitable floor finish.
By insulating your garage floor, you have effectively reduced heat loss, improved energy efficiency, and created a more comfortable atmosphere. You will experience cost savings on your energy bills and enjoy a quieter and better-insulated garage space.
Remember to consult local building codes and regulations before starting any insulation project to ensure compliance. If you are unsure or require assistance, it is always recommended to seek professional advice or hire a reputable contractor who specializes in insulation.
Now that you have successfully completed the insulation process, take pride in your accomplishment and enjoy the benefits of a well-insulated garage floor. Whether you use your garage as a workshop, storage space, or even as an extended living area, a properly insulated floor enhances the overall comfort and functionality of the space.
Thank you for reading this guide and taking the initiative to insulate your garage floor. We hope that this comprehensive article has provided you with the knowledge and guidance necessary to tackle this project effectively. Enjoy your newly insulated garage floor!
Frequently Asked Questions about How To Insulate Garage Floor
Was this page helpful?
At Storables.com, we guarantee accurate and reliable information. Our content, validated by Expert Board Contributors, is crafted following stringent Editorial Policies. We're committed to providing you with well-researched, expert-backed insights for all your informational needs.


0 thoughts on “How To Insulate Garage Floor”