Articles
How To Level Garage Floor
Modified: January 6, 2024
Discover effective ways to level your garage floor with our informative articles.
(Many of the links in this article redirect to a specific reviewed product. Your purchase of these products through affiliate links helps to generate commission for Storables.com, at no extra cost. Learn more)
Introduction
Welcome to the ultimate guide on how to level your garage floor! A level garage floor not only improves the aesthetics of your space, but also makes it easier to park your vehicles, store items, and perform various activities. Whether you’re preparing to install new flooring or simply want to eliminate uneven surfaces, this step-by-step tutorial will walk you through the process of leveling your garage floor.
Before we dive into the details, it’s important to note that leveling a garage floor requires some time, effort, and patience. However, with the right tools and materials, you can achieve professional results without breaking the bank. So, roll up your sleeves and let’s get started!
But first, let’s address a common concern: why should you bother leveling your garage floor? Well, an uneven surface can lead to several problems. Not only can it be unsightly, but it can also cause tripping hazards and interfere with the functionality of your space. It can make it difficult to install cabinets, shelving, or other storage solutions. Additionally, an uneven garage floor can negatively impact the longevity of your flooring, as it may cause strain and uneven wear.
Now that we understand the importance of leveling your garage floor, let’s move on to the first step: clearing the garage.
Key Takeaways:
- Transform your garage into a safer, more organized space by following our step-by-step guide to leveling the floor. Enjoy the benefits of a visually appealing and functional environment for parking, storage, and DIY projects.
- Prioritize safety, attention to detail, and commitment to improvement as you embark on the process of leveling your garage floor. Achieve professional results and enjoy the transformed space.
Read more: How To Level A Floor
Step 1: Clearing the Garage
Before you can start leveling your garage floor, you need to clear out any items and debris that may be in the way. This includes removing vehicles, tools, storage bins, and any other objects that are on the floor or taking up space.
Start by designating a clear area outside of the garage where you can temporarily store your belongings. This will allow you to easily access the entire floor and work without any obstructions. Sort through your items and decide what you want to keep, donate, or discard. This is a great opportunity to declutter and create a more organized space.
Once you have cleared the garage, sweep or vacuum the floor to remove any loose dust, dirt, or debris. You want to start with a clean surface to ensure proper adhesion of the leveling materials.
If you have any built-in cabinets, shelves, or workbenches, you may need to temporarily remove them to gain full access to the floor. Make sure to carefully disassemble and store any removed items to avoid damage or loss.
It’s also a good idea to cover any exposed electrical outlets, vents, or other openings to protect them from dust and debris during the leveling process.
With the garage clear and the floor clean, you’re ready to move on to the next step: inspecting the floor.
Step 2: Inspecting the Floor
Before you can begin leveling your garage floor, it’s important to thoroughly inspect the surface to identify any areas that require special attention. This step will help you determine the extent of the leveling work needed and guide your choice of materials.
Grab a flashlight and carefully examine the entire floor, paying close attention to cracks, holes, and any signs of unevenness. Look for areas where the concrete may be significantly lower or higher than the surrounding sections.
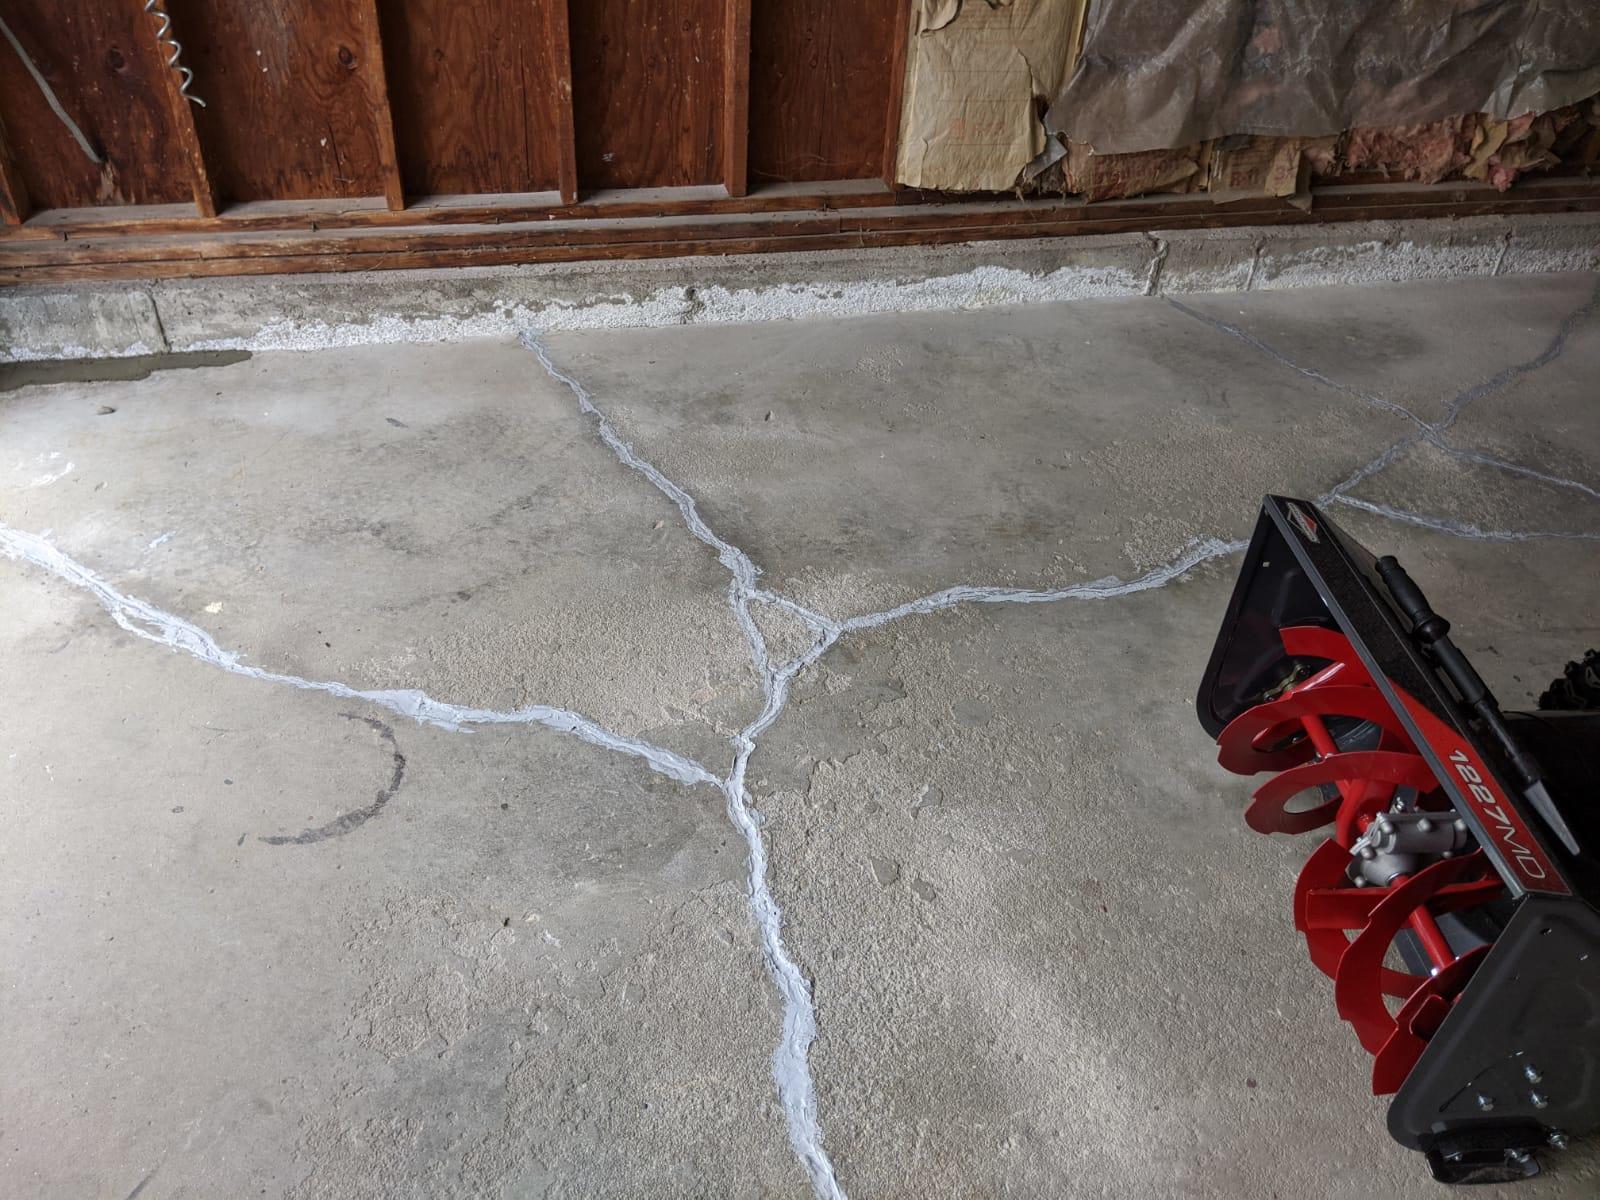
If you notice any cracks, measure their width and length. Small cracks less than ¼ inch wide are generally considered hairline cracks and can be addressed during the filling and leveling process. However, larger cracks may require additional treatment or repairs.
Inspect the edges and corners of the floor to ensure they are straight and even. Uneven edges can make it challenging to achieve a level surface throughout the garage.
Additionally, check for any moisture issues. Look for signs of water damage, such as discoloration or efflorescence (white powder residue). Moisture-related problems should be addressed before leveling the floor to prevent future damage.
Keep in mind that the condition of the floor will influence the choice of leveling materials and techniques. For minor imperfections, a self-leveling compound may be sufficient. However, if the floor has significant issues, such as large cracks or severe unevenness, you may need to consider professional assistance or more extensive repairs.
Once you have inspected the floor and documented any problem areas, you’re ready to move on to the next step: gathering materials and tools.
Step 3: Gathering Materials and Tools
Now that you’ve inspected your garage floor, it’s time to gather the necessary materials and tools for the leveling process. Having everything prepared beforehand will help streamline the project and ensure a smooth workflow.
Here are the essential materials you’ll need:
- Self-leveling compound: This is the key ingredient for leveling your garage floor. Choose a high-quality self-leveling compound that is specifically designed for use on concrete surfaces. The quantity you’ll need depends on the size of your garage and the severity of the unevenness.
- Crack filler: If you have any cracks in your floor, you’ll need a crack filler to repair them before applying the self-leveling compound. Look for a product that is compatible with concrete and suitable for the size of your cracks.
- Concrete bonding agent: A bonding agent will help improve the adhesion between the existing concrete and the self-leveling compound. Follow the manufacturer’s instructions for proper application.
- Cleaner/degreaser: Before applying any leveling materials, you’ll need to thoroughly clean the floor to remove any dirt, oil, or contaminants. Look for a cleaner or degreaser that is specifically formulated for concrete surfaces.
- Concrete grinder or sander: If your floor has high spots or uneven surfaces that need to be ground down, a concrete grinder or sander will come in handy. This tool will help you achieve a smoother, more level surface.
- Trowel or squeegee: You’ll need a trowel or squeegee to spread and smooth the self-leveling compound. Choose a tool that is appropriate for the size and depth of the floor area you’re working on.
- Mixing bucket and mixing paddle: The self-leveling compound will need to be mixed thoroughly before application. Use a sturdy bucket and a mixing paddle attachment for a power drill to ensure a consistent mixture.
- Protective gear: Don’t forget to prioritize your safety by wearing protective gear, including gloves, safety glasses, and a dust mask.
Make sure to read the product labels and follow the manufacturer’s instructions for proper usage and disposal. Additionally, check if there are any specific tools or materials recommended for the particular self-leveling compound you’ve chosen.
With all the necessary materials and tools at your disposal, you’re now prepared to move on to the next step: filling cracks and holes.
Step 4: Filling Cracks and Holes
Before applying the self-leveling compound, it’s important to fill in any cracks and holes in your garage floor. This will ensure a smooth and level surface once the leveling process is complete.
Here’s how to fill cracks and holes in your concrete floor:
- Prepare the cracks: Use a wire brush or a scraper to clean out any debris or loose materials from the cracks. This will help the crack filler adhere better to the concrete.
- Choose the crack filler: Select an appropriate crack filler that matches the width and depth of the cracks. Follow the instructions on the product for proper application.
- Fill the cracks: Squeeze or pour the crack filler into the cracks, ensuring that it completely fills the space. Use a putty knife or a trowel to smooth the surface and level it with the surrounding floor. Remove any excess filler and allow it to dry according to the manufacturer’s instructions.
- Fill the holes: For small holes, you can use the same crack filler to fill them. For larger holes, consider using a patching compound or mortar mix. Prepare the mixture according to the manufacturer’s instructions, and then fill the holes, smoothing the surface with a trowel.
- Allow the filler to cure: Give the crack filler and patching compound enough time to fully cure. This typically takes 24 to 48 hours, but it’s best to follow the specific instructions provided by the manufacturer.
- Inspect the filled areas: Once the filler is cured, inspect the filled cracks and holes to ensure they are level with the surrounding floor. If necessary, sand or grind down any high spots for a smoother transition.
By filling the cracks and holes in your garage floor, you’ll create a more even surface and prevent future damage. With this step out of the way, you’re ready to move on to the next stage: grinding the floor.
Read more: How To Finish A Garage Floor
Step 5: Grinding the Floor
Grinding the floor is an important step in the leveling process as it helps to remove high spots and create a smoother surface. This step ensures that the self-leveling compound can adhere properly and results in a more even and professional finish.
Follow these steps to grind your garage floor:
- Prepare the grinder: Choose a concrete grinder that is suitable for the size of your garage and the type of surface you’re working with. Attach a diamond grinding disc or a grinding wheel with coarse grit.
- Put on protective gear: Before you start grinding, make sure to wear safety goggles, a dust mask, and ear protection. Grinding can produce a significant amount of dust and noise.
- Start grinding: Hold the grinder firmly with both hands and position it at a slight angle to the floor. Begin grinding in small, overlapping circles, working your way across the entire surface. Apply even pressure and keep the grinder moving to avoid uneven results.
- Inspect the surface: Periodically stop and inspect the floor to check your progress. Look for any remaining high spots or uneven areas that need more grinding. Pay close attention to edges and corners, as they can be more challenging to reach.
- Repeat the process: If necessary, make additional passes with the grinder to achieve the desired levelness. Gradually switch to finer grit discs or wheels as you progress to achieve a smoother surface.
- Clean up the dust: Once you’re done grinding, clean up the dust using a broom and a shop vacuum. It’s important to remove all dust and debris to ensure proper adhesion of the self-leveling compound.
Keep in mind that grinding can be a messy process, so it’s a good idea to cover any nearby items or surfaces to protect them from dust. Additionally, ensure proper ventilation in the garage to minimize the accumulation of dust particles.
With the floor ground down to a more even level, you’re ready to move on to the exciting part: applying the self-leveling compound!
Before leveling your garage floor, make sure to thoroughly clean the surface to remove any dirt, oil, or debris. This will ensure a smooth and even application of the leveling compound.
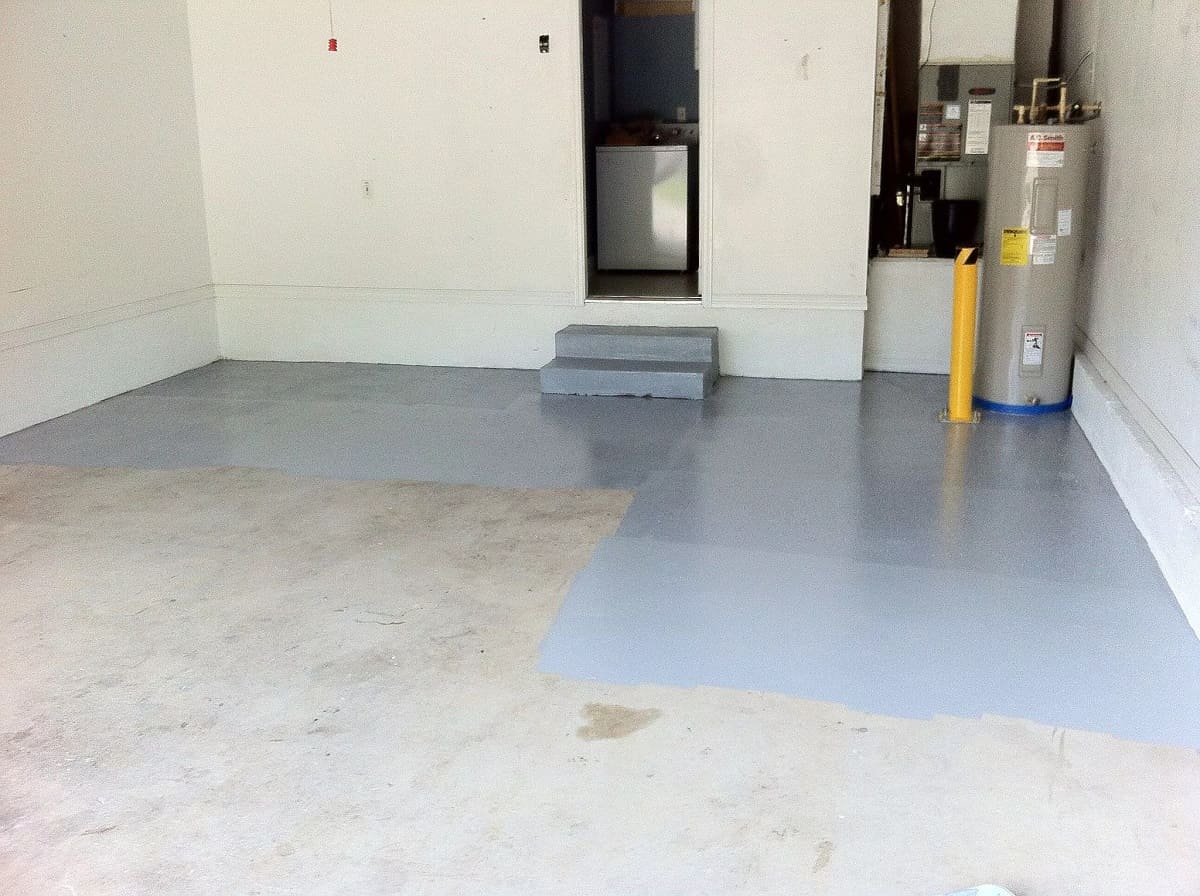
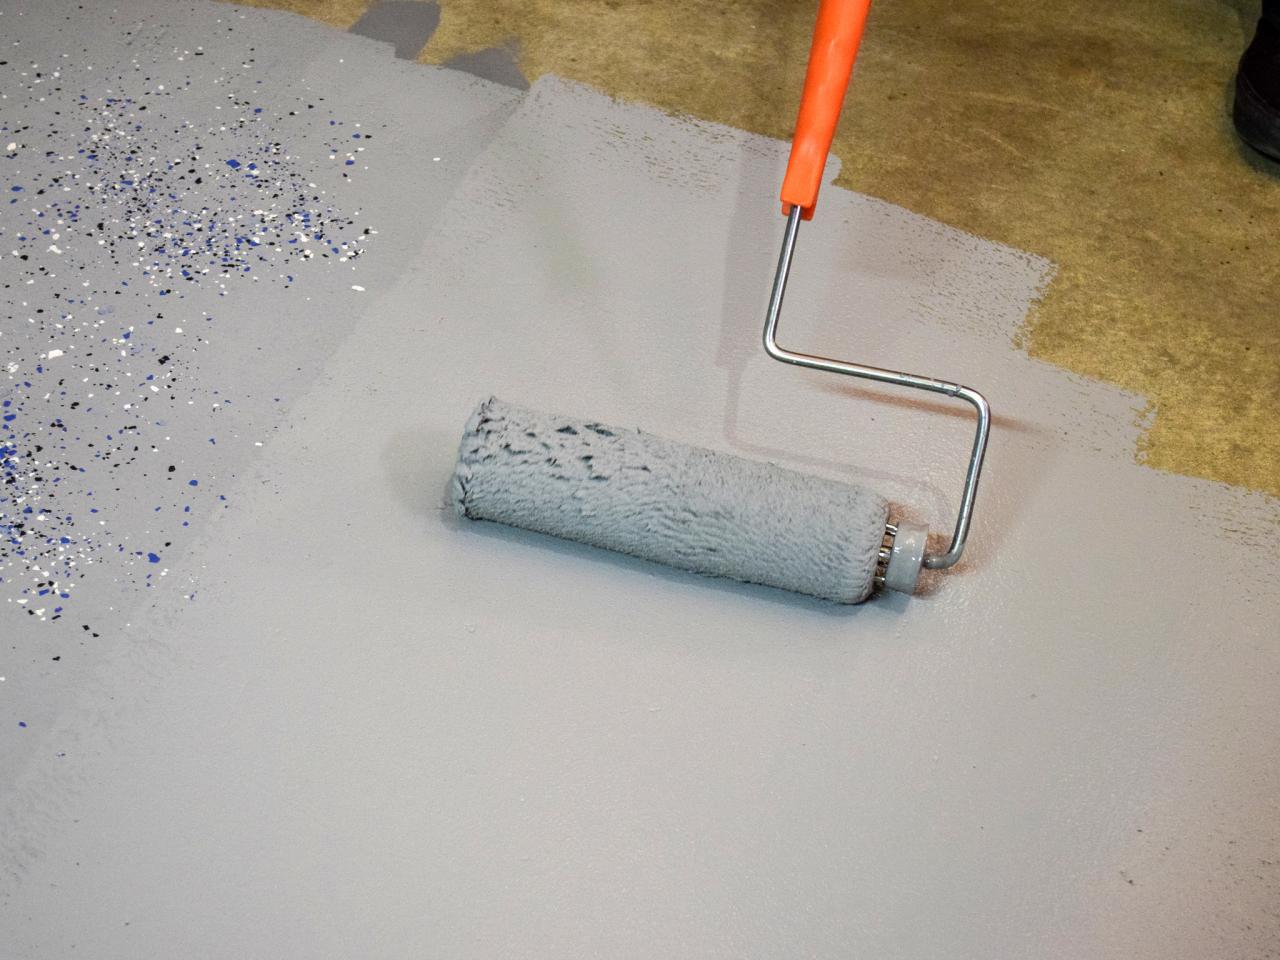
Step 6: Applying Self-Leveling Compound
Now that you’ve prepared the floor by filling cracks, holes, and grinding away high spots, it’s time to apply the self-leveling compound. This compound will help create a smooth and level surface across your garage floor.
Follow these steps to apply the self-leveling compound:
- Preparation: Start by thoroughly cleaning the floor to remove any dust, dirt, or debris. Use a cleaner or degreaser specifically formulated for concrete surfaces and follow the manufacturer’s instructions.
- Mixing the compound: Read the instructions on the self-leveling compound packaging for the proper mixing ratio and technique. Use a clean mixing bucket and a mixing paddle attached to a power drill. Gradually add water to the compound while mixing until you achieve a smooth and pourable consistency.
- Priming the floor: Apply a thin layer of concrete bonding agent on the entire floor using a brush or roller. This will help improve the adhesion of the self-leveling compound to the existing concrete.
- Pouring the compound: Starting from a corner, slowly pour the self-leveling compound onto the floor. Use a trowel or squeegee to spread the compound evenly, working your way across the entire floor. Ensure that the compound fills in low areas and covers any imperfections.
- Smoothing the surface: Once the compound is evenly spread, use a smoothing tool, such as a smoothing trowel or a long-handled squeegee, to level and smooth out the surface further. Work in long, sweeping motions to create a consistent and even finish. Pay attention to the edges and corners to ensure they are properly filled and smooth.
- Drying and curing: Allow the self-leveling compound to dry and cure according to the manufacturer’s instructions. This typically takes 24 to 48 hours, but may vary depending on factors such as temperature and humidity. Avoid walking on or disturbing the surface during the drying period to prevent any imperfections.
Remember to work efficiently and steadily to ensure the self-leveling compound does not set before you can finish spreading and smoothing it. Maintain a consistent thickness across the entire floor to achieve a level surface.
Once the compound has fully cured, visually inspect the floor for any areas that may need additional touch-ups or sanding. With the self-leveling compound applied, you’re one step closer to a perfectly leveled garage floor.
Step 7: Smoothing and Finishing the Surface
After applying the self-leveling compound, it’s important to smooth and finish the surface to achieve a professional and seamless result. This step will help eliminate any imperfections and create a smooth, level, and visually appealing garage floor.
Follow these steps to smooth and finish the surface of your newly applied self-leveling compound:
- Inspect the surface: Before you begin smoothing and finishing, carefully inspect the entire floor for any noticeable bumps, uneven areas, or imperfections. Mark these areas for additional attention during the smoothing process.
- Sanding high spots: If you notice any high spots or ridges on the surface, use a hand-held sander or a sanding block to gently sand them down. Start with a coarse-grit sandpaper and gradually switch to finer grits for a smoother finish.
- Filling low spots: If you come across any low spots or gaps that were not adequately filled by the self-leveling compound, use a leveling compound or a suitable filler to fill them in. Follow the manufacturer’s instructions for proper application and drying times.
- Smoothing the surface: Use a floor scraper, a leveling trowel, or a wide putty knife to smooth the surface of the self-leveling compound. Work in broad, sweeping motions to level out any ridges or uneven areas. Pay special attention to the edges and corners to ensure a seamless transition from the newly leveled area to the existing floor.
- Finishing touches: Once the surface is relatively smooth, consider using a floor sander or a buffer with a fine-grit sandpaper to further refine the finish and achieve a uniform texture. This will help create a polished and professional look.
- Clean the surface: After you’ve finished smoothing and sanding, thoroughly clean the surface to remove any dust, debris, or sanding residue. Sweep or vacuum the floor and wipe it down with a damp cloth or mop to ensure a clean and debris-free surface.
Remember to take your time and be meticulous during the smoothing and finishing process. By addressing any imperfections and achieving a smooth surface, you’ll ensure a visually appealing and functional garage floor.
With the surface smoothed and finished, you’re ready to move on to the next step: allowing the self-leveling compound to fully cure.
Step 8: Allowing the Compound to Cure
Once you have smoothed and finished the surface of the self-leveling compound, it’s crucial to allow it to fully cure before moving on to the next steps. Curing is a critical part of the process as it ensures the compound sets and hardens properly, providing a durable and long-lasting garage floor.
Follow these guidelines to properly allow the self-leveling compound to cure:
- Read the manufacturer’s instructions: Different self-leveling compounds have varying curing times, so it’s important to refer to the specific instructions provided on the product packaging. This will give you an idea of how long the compound needs to cure for optimal results.
- Provide proper ventilation: To aid in the curing process, ensure proper ventilation in your garage. Increase airflow by opening windows or using fans. Good ventilation helps to remove moisture, expedites drying, and prevents any trapped odors from lingering.
- Maintain the right temperature: The curing process can be affected by temperature. Aim to maintain a consistent temperature in your garage within the recommended range specified by the manufacturer. Extreme heat or cold can impact the curing time and the quality of the final result.
- Avoid foot traffic: During the curing period, avoid walking on the newly leveled floor as much as possible. Foot traffic can disrupt the drying process and leave unwanted marks or imprints on the surface.
- Protect the surface: Take precautions to protect the freshly leveled surface during the curing period. Place warning signs or barricades to prevent others from accidentally stepping onto the floor. Avoid placing heavy objects or dragging equipment across the surface, as this could cause damage or unevenness.
- Monitor the curing time: Keep track of how long the compound has been curing to ensure you give it enough time to fully set. Set reminders or alarms to stay on track with the recommended curing period.
- Perform a final inspection: Once the compound has fully cured, visually inspect the floor to ensure that it has dried evenly and any imperfections have been addressed. Make any necessary touch-ups or final adjustments before proceeding to the next steps.
By allowing the self-leveling compound to cure properly, you’re ensuring the longevity and durability of your leveled garage floor. Once the compound has completely cured, you’re ready to move on to the final step: adding a protective coating (optional).
Read more: How To Level Floor For Tile
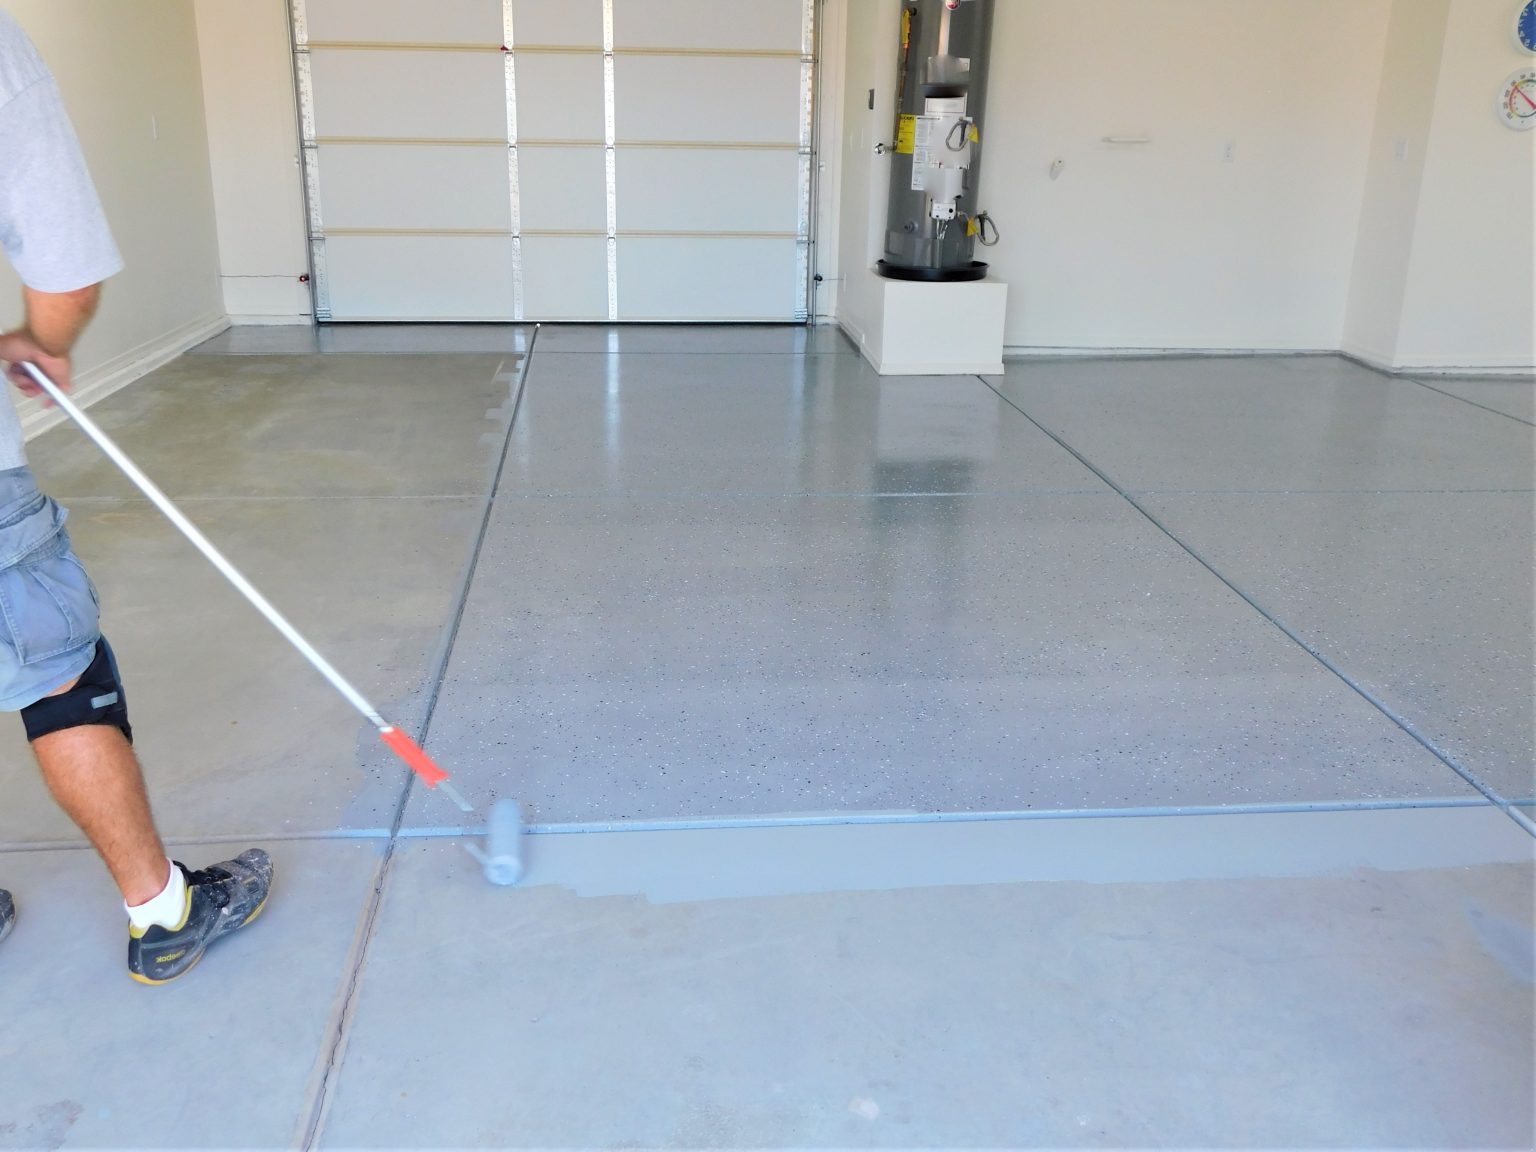
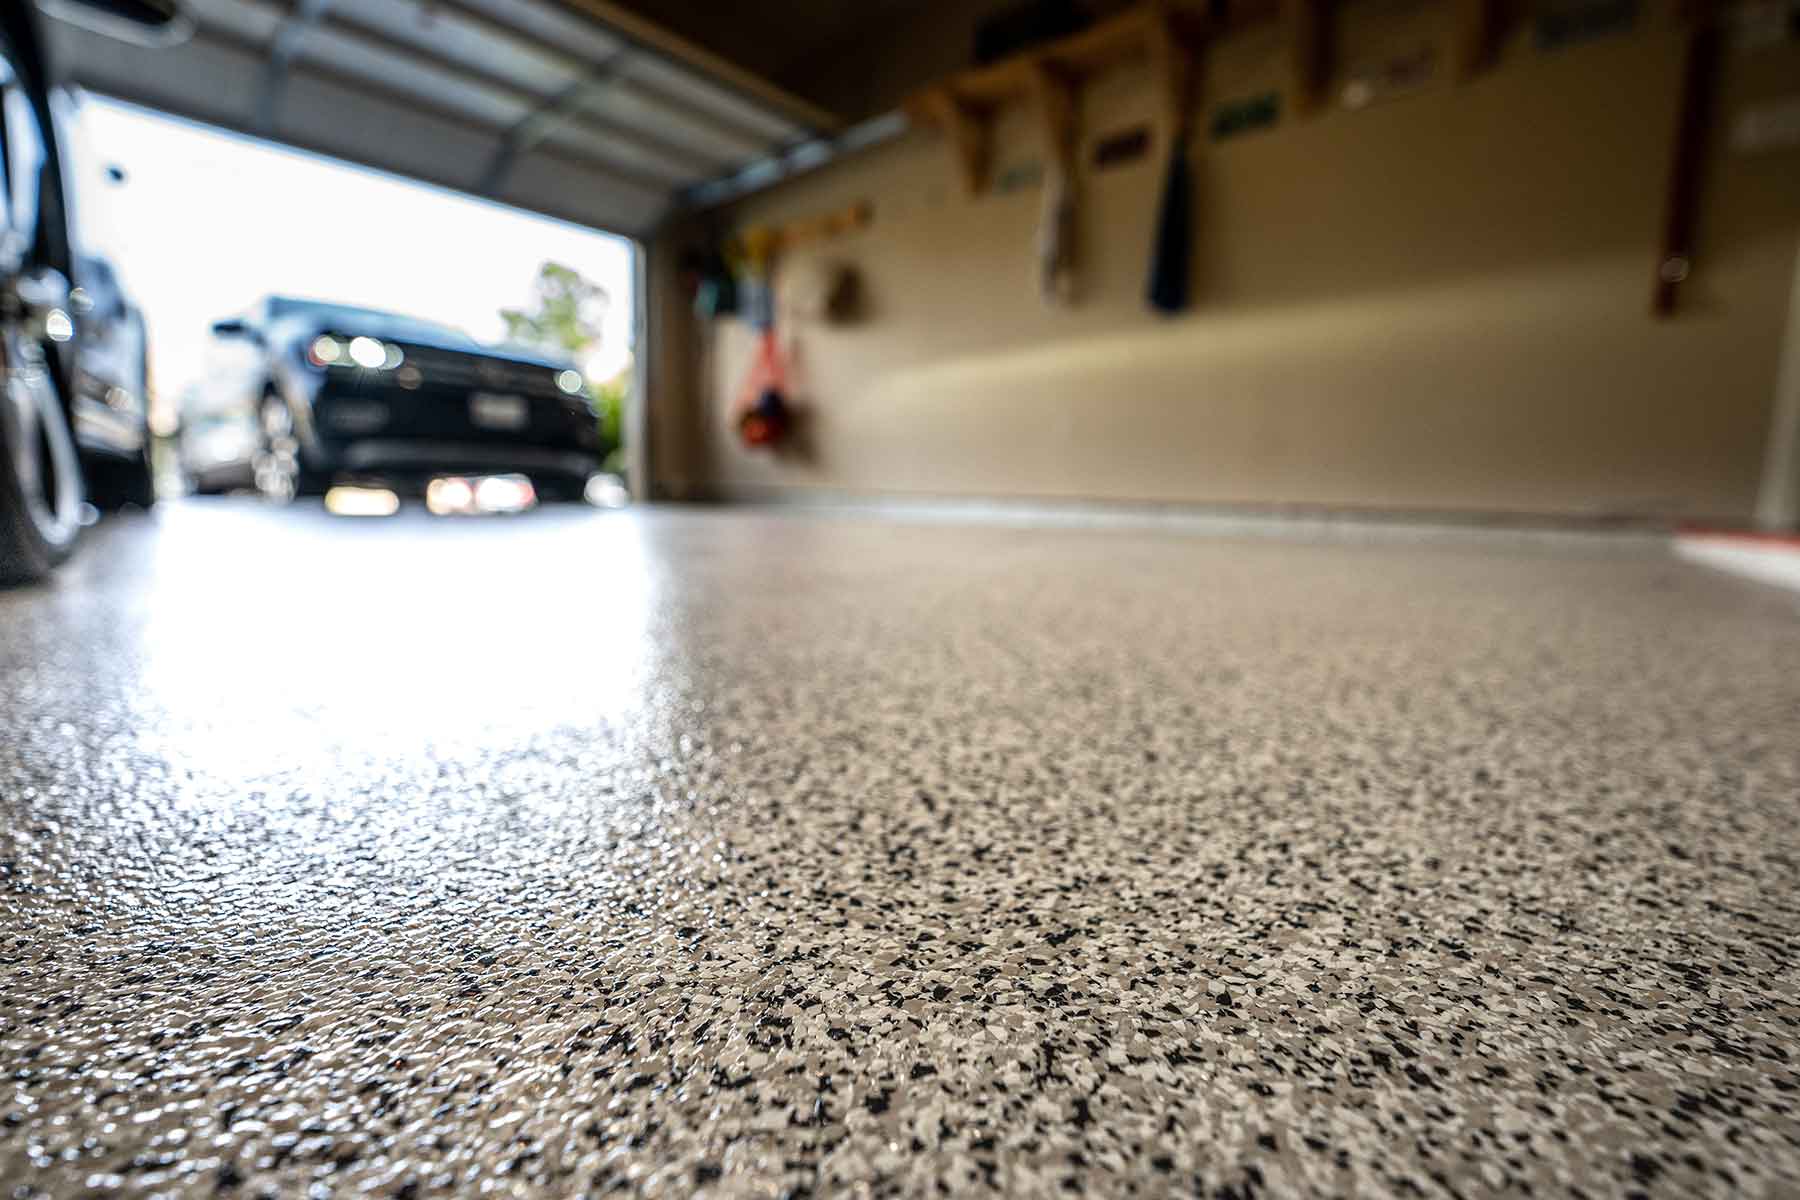
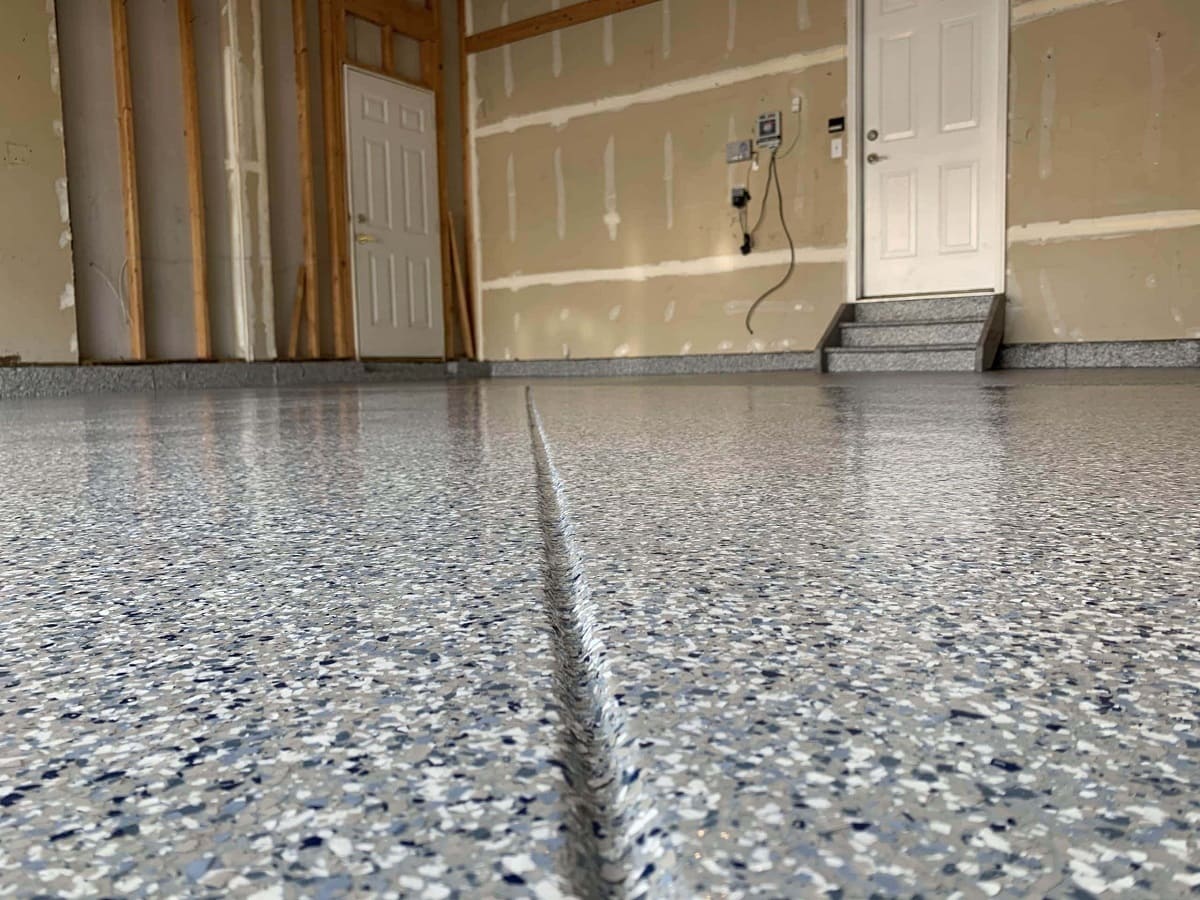
Step 9: Adding a Protective Coating (Optional)
Adding a protective coating to your leveled garage floor is an optional but highly recommended step. A protective coating not only enhances the appearance of the floor but also adds additional durability and resistance to wear and tear. It acts as a barrier to protect the surface from chemicals, stains, and daily use.
Here’s how to add a protective coating to your garage floor:
- Choose the right coating: There are various types of coatings available for garage floors, including epoxy, polyurethane, and acrylic sealers. Research the options and select a coating that suits your specific needs and preferences. Consider factors such as durability, ease of application, and the desired finish.
- Prepare the surface: Before applying the coating, make sure the surface is clean and free of any dust, debris, or contaminants. Sweep or vacuum the floor thoroughly, and use a mild cleaner or degreaser to remove any stains or stubborn marks. Allow the surface to dry completely.
- Follow the manufacturer’s instructions: Read and carefully follow the instructions provided by the manufacturer of the chosen coating. They will provide specific guidance regarding mixing ratios, application techniques, and drying times.
- Apply the coating: Begin by cutting in around the edges of the floor using a brush or roller. Work in small sections, applying the coating evenly using long, overlapping strokes. Make sure to follow the recommended thickness and coverage guidelines. Use a paint roller or a squeegee to ensure an even and smooth application.
- Allow proper drying time: Once the coating is applied, it’s crucial to allow it to dry and cure according to the manufacturer’s instructions. This can take several hours to days, depending on the type of coating and environmental conditions. Ensure the area is well-ventilated during the drying process.
- Add additional coats (if required): Some coatings may require multiple coats for optimal protection and appearance. Follow the recommended waiting period in between coats and apply subsequent coats following the same application process.
- Maintain the coating: After the coating has fully cured, it’s important to maintain its quality and longevity. Regularly clean the surface with a mild detergent and warm water, avoiding harsh chemicals or abrasive cleaners that could damage the coating. Consider periodic reapplication or touch-ups as needed.
Adding a protective coating to your leveled garage floor is an investment that can significantly enhance its appearance and durability. It provides an extra layer of protection against stains, chemicals, and daily usage, keeping your garage floor looking great for years to come.
With the optional protective coating applied, you have successfully completed the process of leveling and enhancing your garage floor. Enjoy your newly leveled, functional, and visually appealing space!
Conclusion
Congratulations! You have now completed the process of leveling your garage floor and transformed it into a more functional and visually appealing space. By following the steps outlined in this guide, you have successfully addressed unevenness, cracks, and imperfections, resulting in a smooth and level surface.
Leveling your garage floor not only improves the aesthetics of the space but also provides several practical benefits. It creates a safer environment by eliminating tripping hazards, allows for easier movement and organization of items, and provides a solid foundation for various activities such as parking vehicles, storage, or DIY projects.
Throughout this journey, you have learned to clear the garage, inspect the floor, gather the necessary materials and tools, fill cracks and holes, grind the floor, apply the self-leveling compound, smooth and finish the surface, allow for proper curing, and optionally add a protective coating. Each step was crucial in achieving a level and durable garage floor.
Remember, as you embark on this process, always prioritize safety by wearing protective gear and following the manufacturer’s instructions for the materials and tools you use. Additionally, take the time to properly prepare and clean the floor to ensure optimal adhesion and a smooth finish.
Through your efforts, you have transformed your garage into a space that is not only functional but also showcases your attention to detail and commitment to improvement. So, take a step back, admire your work, and enjoy the benefits of your leveled garage floor.
Thank you for joining us on this journey, and we hope this comprehensive guide has been helpful in achieving your goal of leveling your garage floor. Now, go ahead and make the most of your newly leveled space!
Frequently Asked Questions about How To Level Garage Floor
Was this page helpful?
At Storables.com, we guarantee accurate and reliable information. Our content, validated by Expert Board Contributors, is crafted following stringent Editorial Policies. We're committed to providing you with well-researched, expert-backed insights for all your informational needs.

0 thoughts on “How To Level Garage Floor”