Articles
How To Finish A Garage Floor
Modified: September 1, 2024
Learn how to finish your garage floor with these informative articles. Discover tips, techniques, and step-by-step guides for a professional-looking result.
(Many of the links in this article redirect to a specific reviewed product. Your purchase of these products through affiliate links helps to generate commission for Storables.com, at no extra cost. Learn more)
Introduction
Finishing your garage floor not only enhances the aesthetic appeal of the space but also provides numerous practical benefits. A properly finished garage floor is more durable, easier to clean, and can even resist stains and chemicals. Whether you’re planning to use your garage as a workshop, storage space, or simply to park your vehicles, applying a garage floor finish is a worthwhile investment.
In this article, we will guide you through the process of finishing your garage floor step by step. We will discuss the tools and materials you’ll need, as well as provide detailed instructions for each stage of the process. By following these guidelines, you will be able to achieve a professional-looking garage floor finish that will stand the test of time.
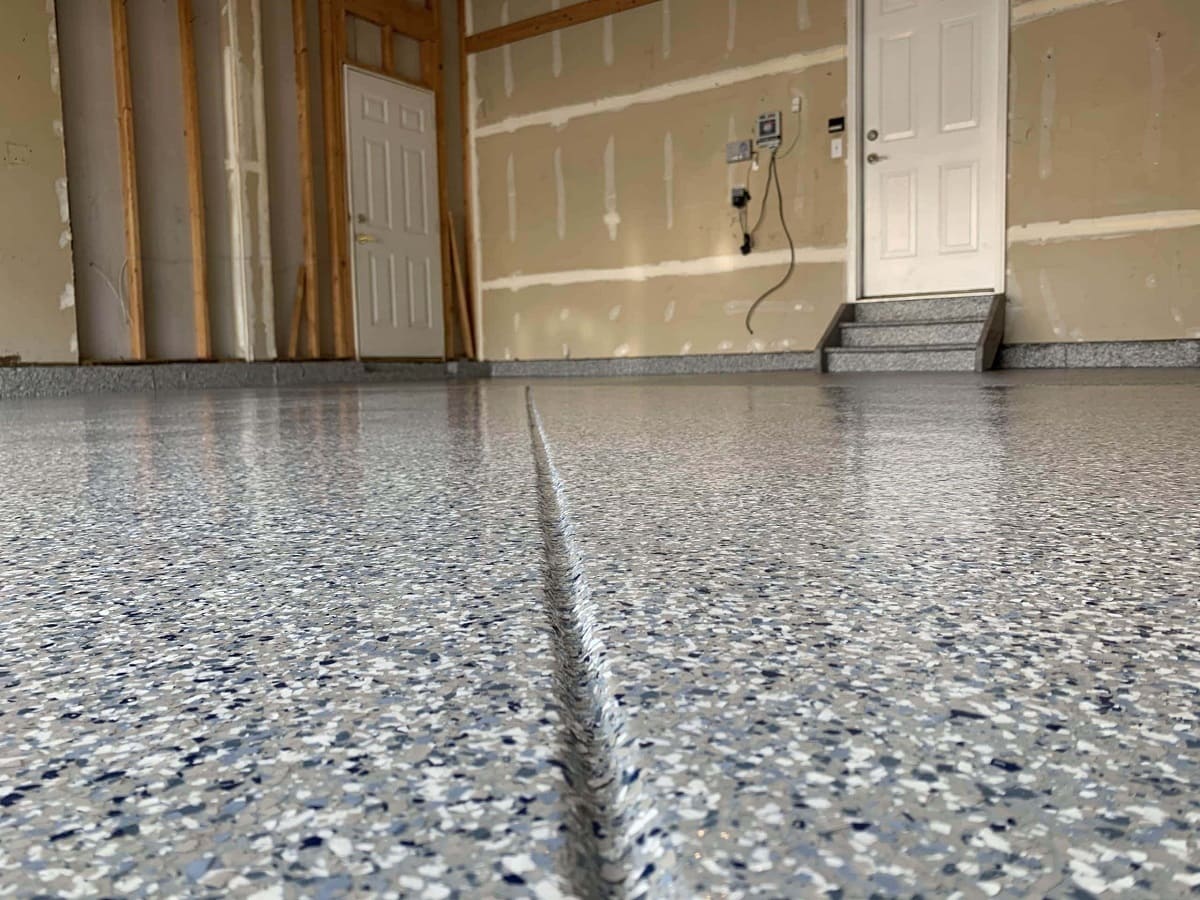
Before we jump into the specifics, it’s important to note that different types of garage floor finishes are available on the market. The most popular and durable choice is epoxy coating, which creates a smooth, glossy surface. This article will focus primarily on the application of epoxy coating as it offers excellent durability, chemical resistance, and customization options.
Now let’s gather the tools and materials required for this project.
Key Takeaways:
- Transform your garage into a durable, attractive space by following the step-by-step guide to finishing your garage floor. Enjoy the benefits of enhanced aesthetics, easier maintenance, and resistance to stains and chemicals.
- Achieve a professional-looking garage floor finish with epoxy coating, proper surface preparation, and optional decorative elements. Create a personalized, visually appealing space that is both durable and easy to maintain.
Read more: How To Finish Garage Ceiling
Tools and Materials Required
Before you begin the garage floor finishing process, gather the following tools and materials:
- Protective gear: Safety goggles, gloves, and a respirator mask to protect yourself from any fumes or chemicals.
- Concrete cleaner: A high-quality concrete cleaner to remove any dirt, oil, or grease from the surface of the floor.
- Pressure washer: A pressure washer will be needed to thoroughly clean the garage floor and remove any stubborn stains or debris.
- Concrete patching compound: This is used to repair any cracks, holes, or imperfections on the surface of the floor.
- Concrete grinder: If your garage floor has deep stains or uneven areas, a concrete grinder can help restore a smooth surface.
- Primer: Epoxy primer is essential for ensuring proper adhesion of the epoxy coating to the concrete surface.
- Epoxy coating: This is the main material that will provide a durable and attractive finish to your garage floor. Choose a high-quality epoxy coating that suits your desired color and finish.
- Epoxy roller and brushes: These tools are necessary for applying the epoxy coating evenly and smoothly.
- Flake or color chips (optional): If you want to add texture or decorative elements to your garage floor, consider using flakes or color chips that can be sprinkled onto the wet epoxy coating.
- Clear epoxy topcoat (optional): To enhance the durability and longevity of the epoxy coating, you may also choose to apply a clear epoxy topcoat.
- Paint brushes: A set of paint brushes will come in handy for touch-ups and precise application in corners and edges.
- Broom and dustpan: These basic cleaning tools will help remove any loose debris before starting the process.
- Tape and plastic sheeting: Use them to protect walls, baseboards, and other areas of your garage that you don’t want to get epoxy on.
- Hot tire-resistant mats or pads: Once the garage floor is finished, it’s a good idea to use mats or pads to protect it from hot tire marks.
Make sure you have all of these tools and materials ready before you begin the garage floor finishing project. This way, you can work efficiently and avoid interruptions during the process.
Now, let’s move on to the first step – preparing the garage floor.
Preparing the Garage Floor
Proper preparation of the garage floor is crucial for a successful and long-lasting finish. Follow these steps to ensure that your garage floor is ready for the application of the epoxy coating:
- Clean the floor: Start by removing any objects, tools, or debris from the garage floor. Sweep the entire area to get rid of loose dirt and dust. Use a broom and dustpan to collect the debris and dispose of it properly.
- Remove stains and oil spots: Inspect the floor for any stains or oil spots. Use a suitable concrete cleaner to treat these areas. If the stains are particularly stubborn, you may need to use a specialized stain remover or degreaser.
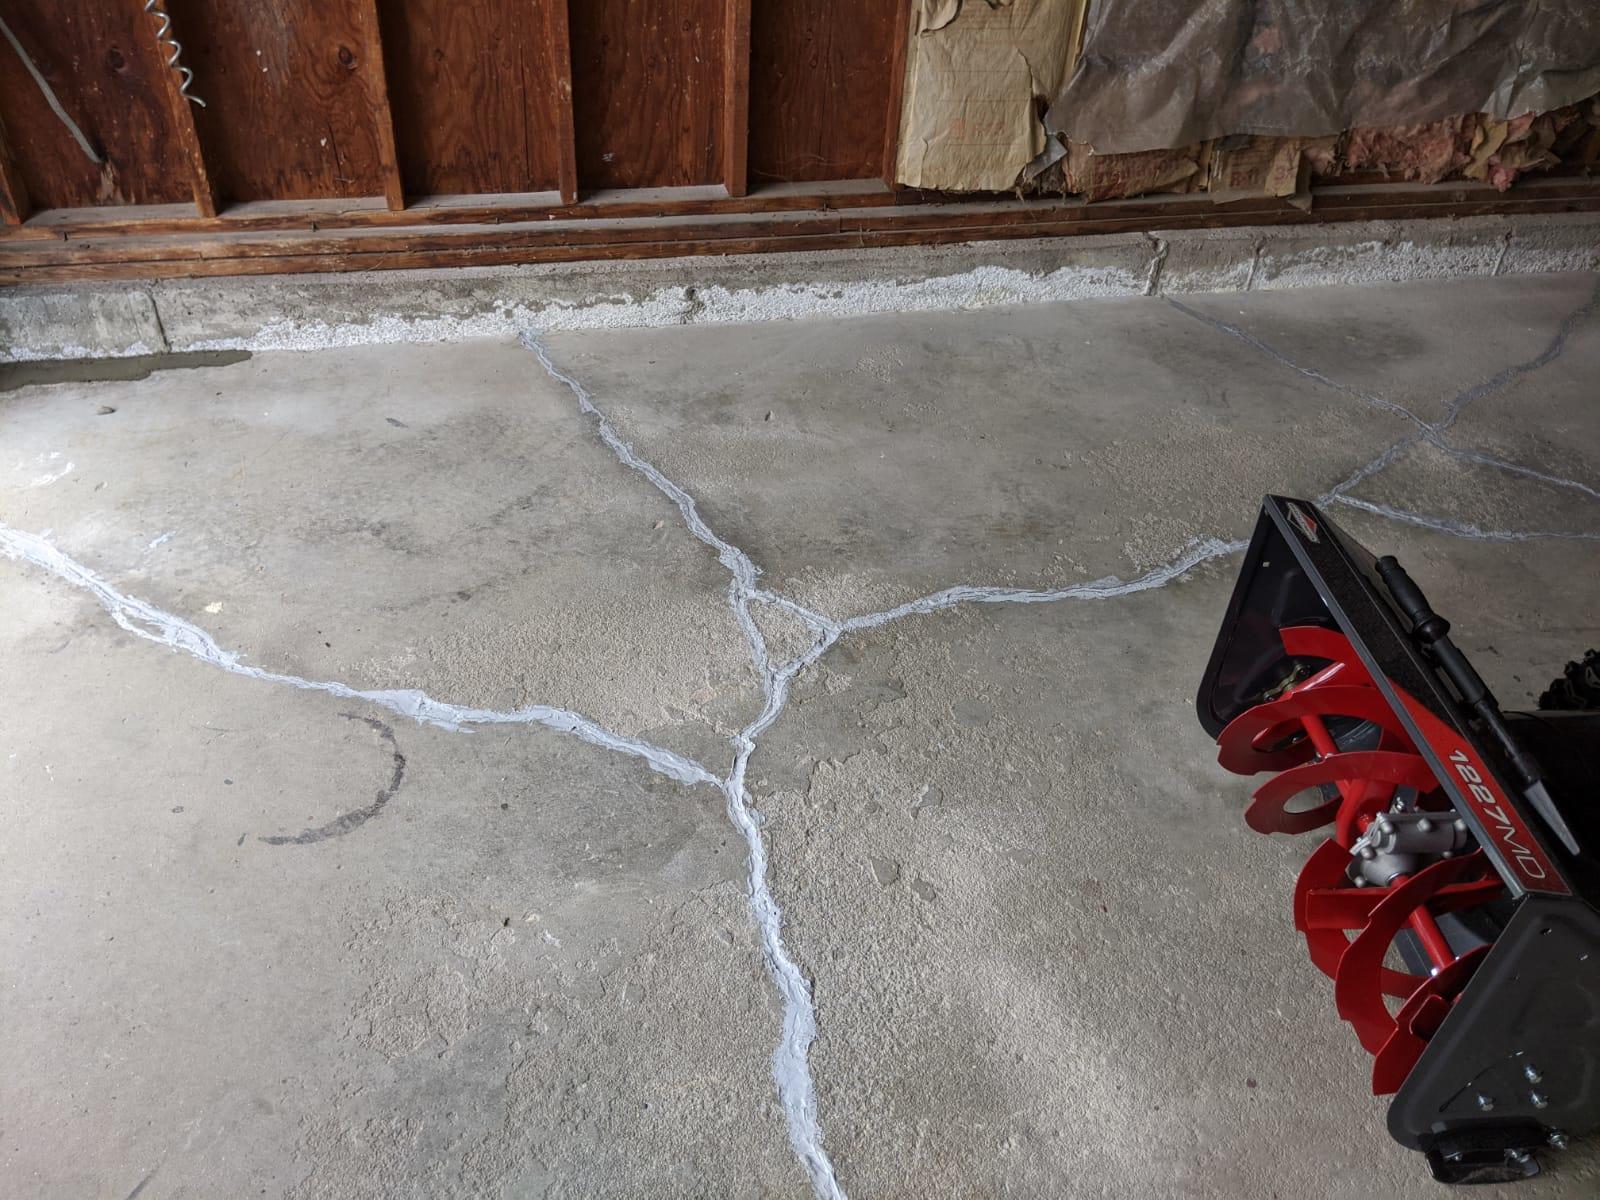
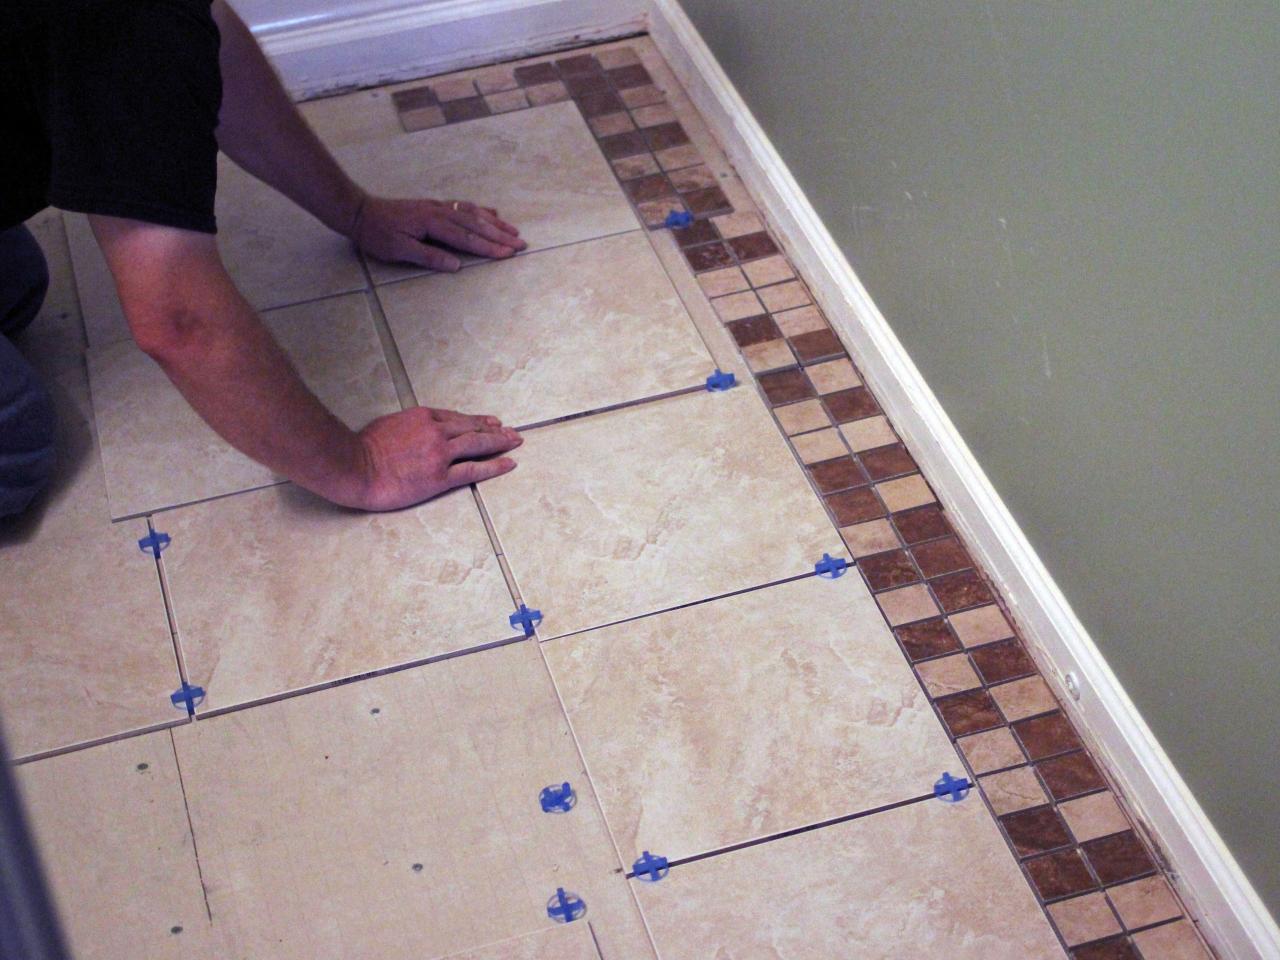
- Repair cracks and imperfections: Inspect the surface of the garage floor for cracks, holes, or uneven areas. Use a concrete patching compound to fill in any cracks and level out the surface. Follow the manufacturer’s instructions for mixing and applying the patching compound.
- Grind or etch the surface (if necessary): If your garage floor has a smooth or sealed surface, you will need to roughen it up to allow the epoxy coating to adhere properly. You can use a concrete grinder or etching solution to achieve this. Follow the manufacturer’s instructions for the recommended method.
- Check for moisture: Moisture can affect the adhesion and durability of the epoxy coating. Perform a moisture test by taping a plastic sheet to the floor and leaving it for 24 hours. If condensation appears on the underside of the plastic sheet, you may need to take additional steps to address the moisture issue before proceeding with the coating application.
Once you have completed these steps, you will have a clean and properly prepared garage floor ready for the next stage of the finishing process. In the next section, we will discuss how to repair any remaining cracks or imperfections on the surface.
Repairing Cracks and Imperfections
Before applying the epoxy coating, it’s essential to repair any remaining cracks, holes, or imperfections on the garage floor surface. Follow these steps to ensure a smooth and even surface:
- Clean the area: Use a broom or vacuum cleaner to remove any dust or debris from the cracks and surrounding area.
- Prep the crack: Use a chisel and hammer to widen the crack to create a V-shaped groove. This will allow the patching material to adhere better and create a stronger bond.
- Remove loose material: Clean out any loose material from the crack using a wire brush or vacuum cleaner. Make sure the crack is free from debris, dust, and loose concrete.
- Apply a bonding agent: Use a concrete bonding agent or primer to ensure proper adhesion of the patching material. Follow the manufacturer’s instructions for the application process.
- Fill the crack: Use a high-quality concrete patching compound to fill the crack completely. Use a putty knife or trowel to spread the patching material evenly and smooth out the surface.
- Level the surface: After filling the crack, use a straight edge or trowel to level the patched area with the surrounding floor. Make sure it is flush and smooth to prevent any noticeable transitions once the epoxy coating is applied.
- Allow it to cure: Follow the manufacturer’s instructions for the recommended curing time of the patching compound. Typically, it takes around 24 hours for the patch to fully cure.
Repeat these steps for each crack or imperfection on the garage floor. Properly repairing these areas is important to ensure a seamless and durable finish. Once all the repairs are complete and the patching compound is fully cured, you can move on to the next step – cleaning the surface.
Cleaning the Surface
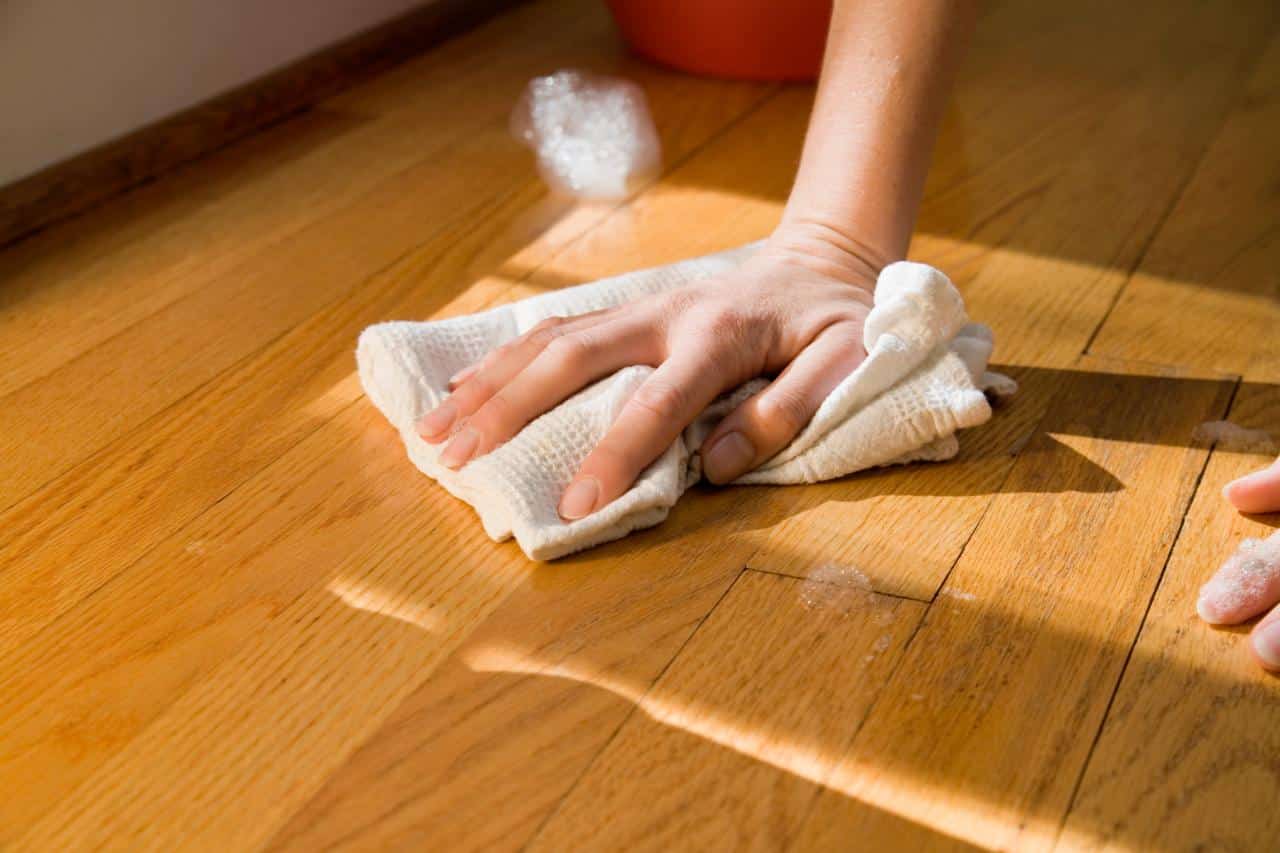
Before applying any coatings or treatments, it is crucial to thoroughly clean the garage floor surface. This ensures the removal of any remaining dirt, dust, or contaminants that could hinder the adhesion and effectiveness of the epoxy coating. Follow these steps to clean the surface effectively:
- Sweep or vacuum: Start by sweeping or vacuuming the entire garage floor to remove loose dirt and dust. Pay attention to corners, edges, and any hard-to-reach areas.
- Remove stains: Treat any noticeable stains or spots on the floor using a suitable concrete cleaner or degreaser. Follow the manufacturer’s instructions for the recommended application method and wait for the designated amount of time to allow the cleaner to work effectively.
- Scrub the floor: Use a stiff bristle brush or broom to scrub the entire surface of the garage floor. This helps to dislodge any stubborn dirt, grime, or remaining stains. Apply pressure and use circular motions to ensure thorough cleaning.
- Pressure wash: If available, use a pressure washer to rinse the floor and remove all the loosened dirt, cleaning solution residues, and debris. Start from one end of the garage and work your way towards the exit to avoid tracking dirty water over clean areas.
- Dry the floor: Allow the garage floor to dry completely before proceeding. Use a squeegee or a mop to remove any excess water and aid in the drying process.
Ensure that the floor is completely dry before moving on to the next step to achieve optimal adhesion and performance of the epoxy coating. Once the surface is clean and dry, it’s time to apply the primer.
Read more: How To Finish Garage Stairs
Applying Primer
Before applying the epoxy coating, it is crucial to apply a primer to the garage floor. The primer serves as a bonding agent, ensuring proper adhesion of the epoxy to the concrete surface. Follow these steps to apply the primer:
- Prepare the area: Ensure that the garage floor is clean, dry, and free from any debris or dust. If necessary, use a broom or vacuum to remove any remaining particles.
- Mix the primer: Open the container of epoxy primer and stir it thoroughly to ensure a consistent texture. If the primer requires mixing with a catalyst or activator, follow the manufacturer’s instructions for the correct ratio and mixing process.
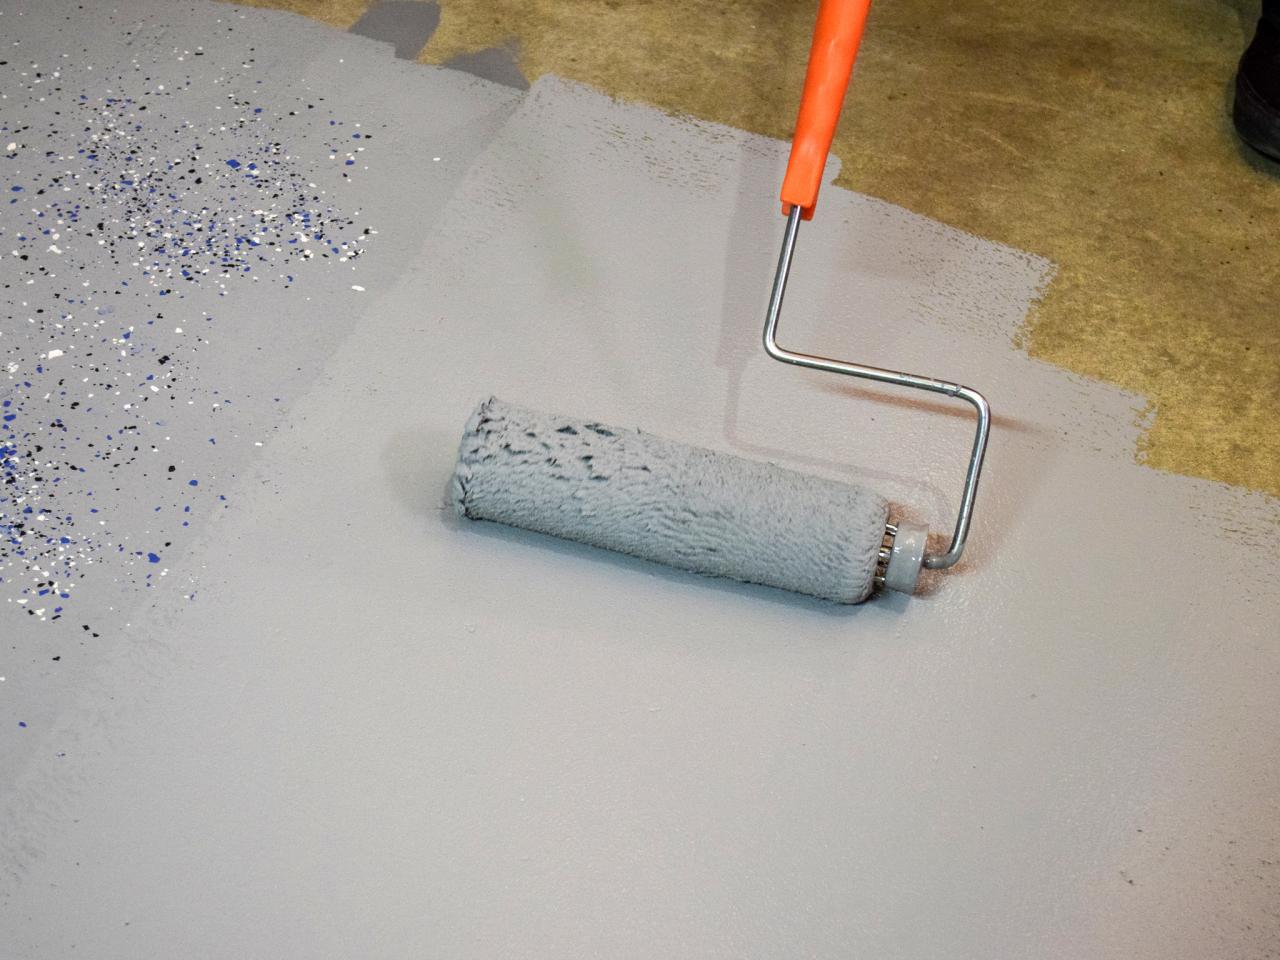
- Apply the primer: Start by cutting in the edges of the garage floor with a paintbrush or roller brush. Then, use a paint roller with a long handle to apply the primer to the rest of the floor in smooth, even strokes. Work in small sections to ensure complete coverage.
- Allow the primer to dry: Follow the manufacturer’s instructions for the recommended drying time of the primer. Typically, it takes several hours for the primer to dry completely. Avoid walking on the surface while it is drying to prevent any unwanted marks or damage.
- Inspect for coverage: Once the primer is dry, inspect the surface to ensure full coverage. Look for any thin or missed spots and apply an additional coat if necessary. It is essential to have a uniform layer of primer to promote proper adhesion of the epoxy coating.
Applying a primer is a crucial step in the garage floor finishing process. It helps create a strong bond between the epoxy coating and the concrete surface, ensuring long-lasting durability. Once the primer is dry and the coverage is satisfactory, you are ready to move on to the next step – applying the epoxy coating.
Before starting to finish your garage floor, make sure to thoroughly clean and degrease the surface to ensure proper adhesion of the finishing materials. This will help to achieve a smooth and durable finish.
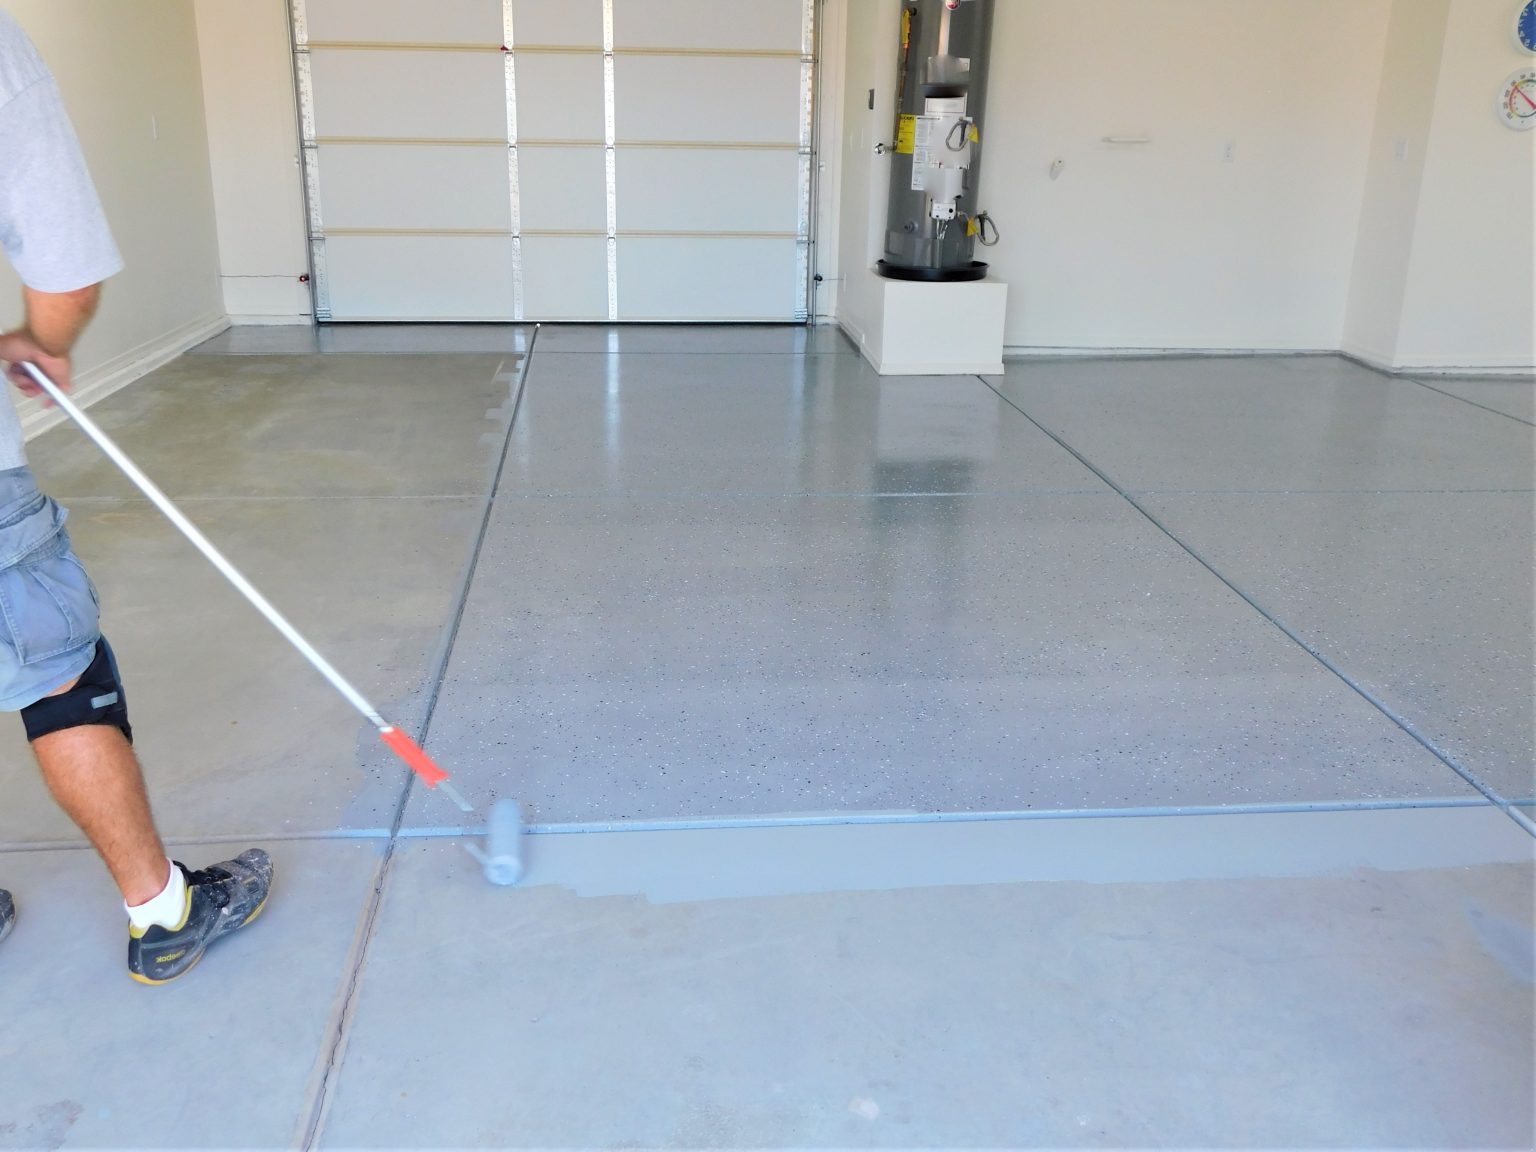
Applying Epoxy Coating
Now comes the exciting part – applying the epoxy coating to your garage floor. Follow these steps to achieve a smooth and professional-looking finish:
- Mix the epoxy: Carefully read and follow the manufacturer’s instructions for mixing the epoxy coating. In most cases, the epoxy will come in two parts – resin and hardener – that need to be mixed together. Use a mixing paddle and a drill to thoroughly blend the components together until they reach a uniform consistency.
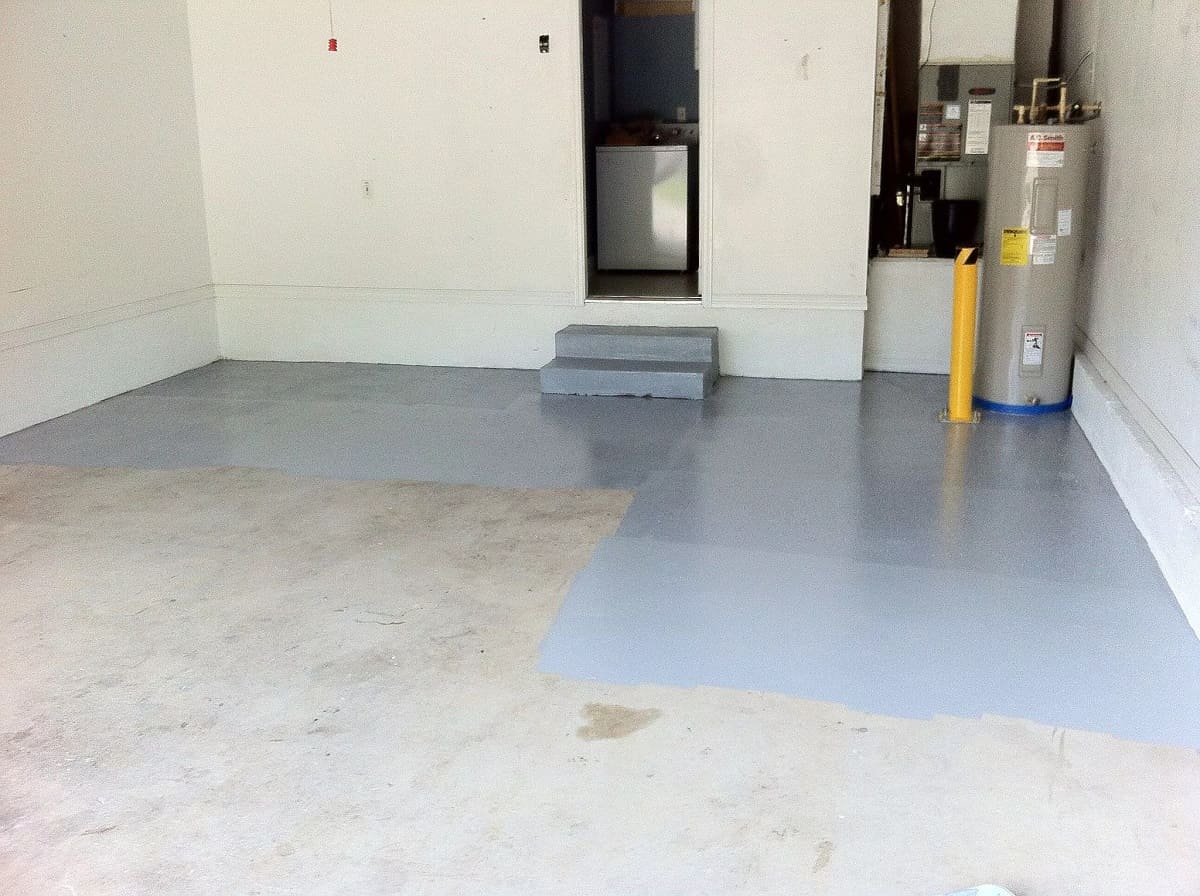
- Start at the back of the garage: Begin applying the epoxy coating at the back of the garage, working your way towards the exit. This way, you won’t get trapped in a corner of the garage.
- Cut in the edges: Use a brush or roller to cut in the edges of the garage floor, including corners, baseboards, and areas near walls. Apply a thin and even layer of epoxy coating to these areas.
- Roll out the coating: Using a paint roller with a long handle, start rolling out the epoxy coating onto the floor. Work in small sections, overlapping each pass to ensure even coverage. Apply light and even pressure to create a smooth surface.
- Work quickly: Epoxy coatings have a limited working time, so it’s crucial to work efficiently. Avoid going over previously coated areas once the epoxy starts to set, as it may result in unevenness or visible brush strokes.
- Eliminate bubbles: If you notice any bubbles forming on the surface of the coating, gently run a heat gun or propane torch over them to pop and eliminate them. Be careful not to overheat the epoxy, as this can cause discoloration or damage.
- Allow for proper curing: Follow the manufacturer’s instructions for the recommended curing time of the epoxy coating. Typically, it takes 24 to 48 hours for the epoxy to fully cure. During this time, avoid walking or driving on the surface to prevent any damage.
Remember to work methodically and consistently to ensure an even and seamless finish. If desired, you can apply a second coat of epoxy to achieve a thicker and more durable surface. Consult the manufacturer’s guidelines for the recommended wait time between coats.
Once the epoxy coating is fully cured, you can proceed to the next step – adding flake or color chips for a decorative touch, if desired.
Spreading the Epoxy
Now that you have applied the epoxy coating to your garage floor, it’s time to spread it out evenly to ensure a smooth and professional finish. Follow these steps to properly spread the epoxy:
- Prepare the epoxy: If you are adding flakes or color chips to the epoxy, make sure they are ready to be sprinkled onto the wet surface. Mix the epoxy according to the manufacturer’s instructions, ensuring a thorough blend of the resin and hardener.
- Start in a corner: Begin spreading the epoxy from a corner of the garage, working your way out towards the exit. This allows you to avoid stepping on the freshly coated areas.
- Pour the epoxy: Pour a small amount of mixed epoxy directly onto the floor in a ribbon-like pattern. Aim to spread it out evenly, covering a manageable area at a time.
- Spread with a squeegee: Use a long-handled squeegee to spread the epoxy across the floor in a back-and-forth motion. Apply even pressure to ensure an even and smooth distribution of the epoxy coating. Work in small sections to maintain control and prevent the epoxy from drying too quickly.
- Blend the strokes: After spreading each section, make overlapping strokes with the squeegee to blend the edges and create a seamless transition between coated areas. This helps to eliminate any visible lines or inconsistencies.
- Keep a wet edge: As you continue spreading the epoxy, make sure to maintain a wet edge. This means that each new section of epoxy is applied while the previous one is still wet. This ensures proper blending and avoids the formation of noticeable lines or boundaries between sections.
- Continue the process: Repeat the pouring, spreading, and blending process until the entire garage floor is coated with epoxy. If you are adding flakes or color chips, sprinkle them onto the wet epoxy according to your desired coverage and design.
Remember to work efficiently but carefully, as the epoxy has a limited working time. Take breaks if needed, but try to complete the spreading process as quickly as possible to maintain a consistent finish. Once the epoxy has been spread, allow it to cure according to the manufacturer’s instructions before moving on to the next step – allowing the coating to cure.
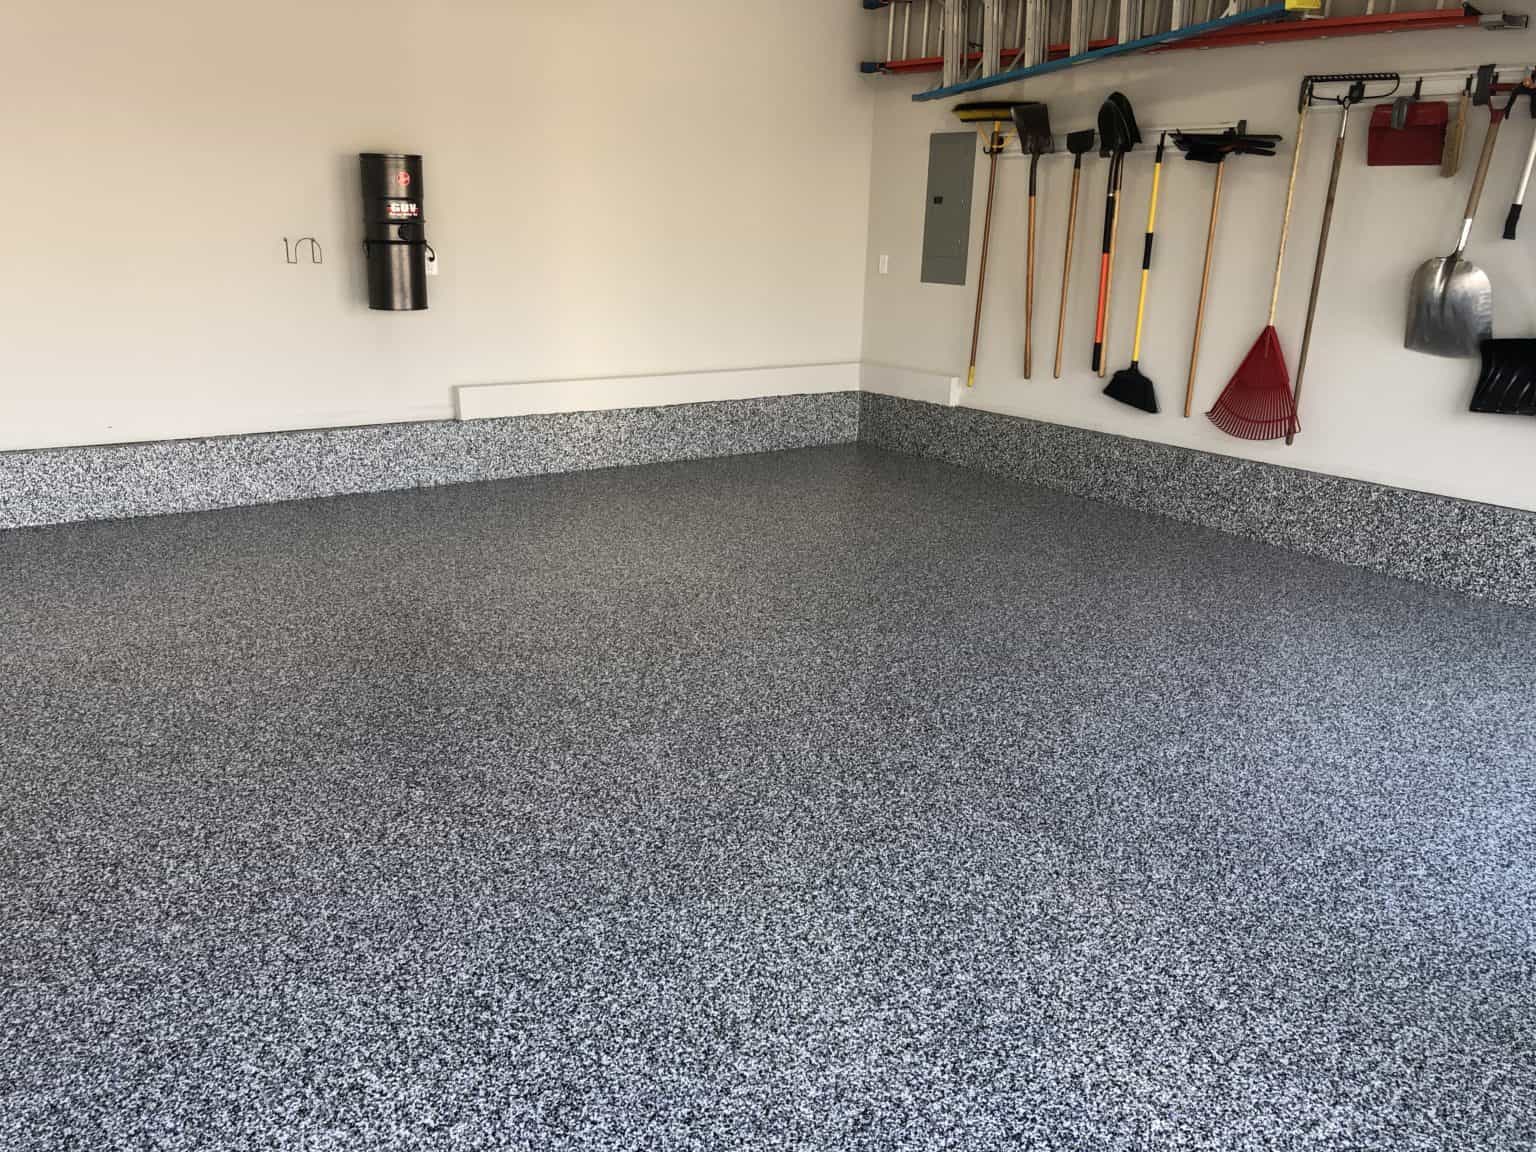
Adding Flake or Color Chips (Optional)
If you want to add a decorative touch to your garage floor, you can incorporate flakes or color chips into the epoxy coating. This step is entirely optional but can enhance the overall appearance of your floor. Follow these steps to add flakes or color chips:
- Prepare the epoxy: Mix the epoxy coating according to the manufacturer’s instructions. Ensure that it is thoroughly blended before proceeding.
- Spread the base coat: Apply a base coat of epoxy to the floor using a roller or brush. Make sure to spread it evenly to create a smooth surface for the flakes or chips to adhere to.
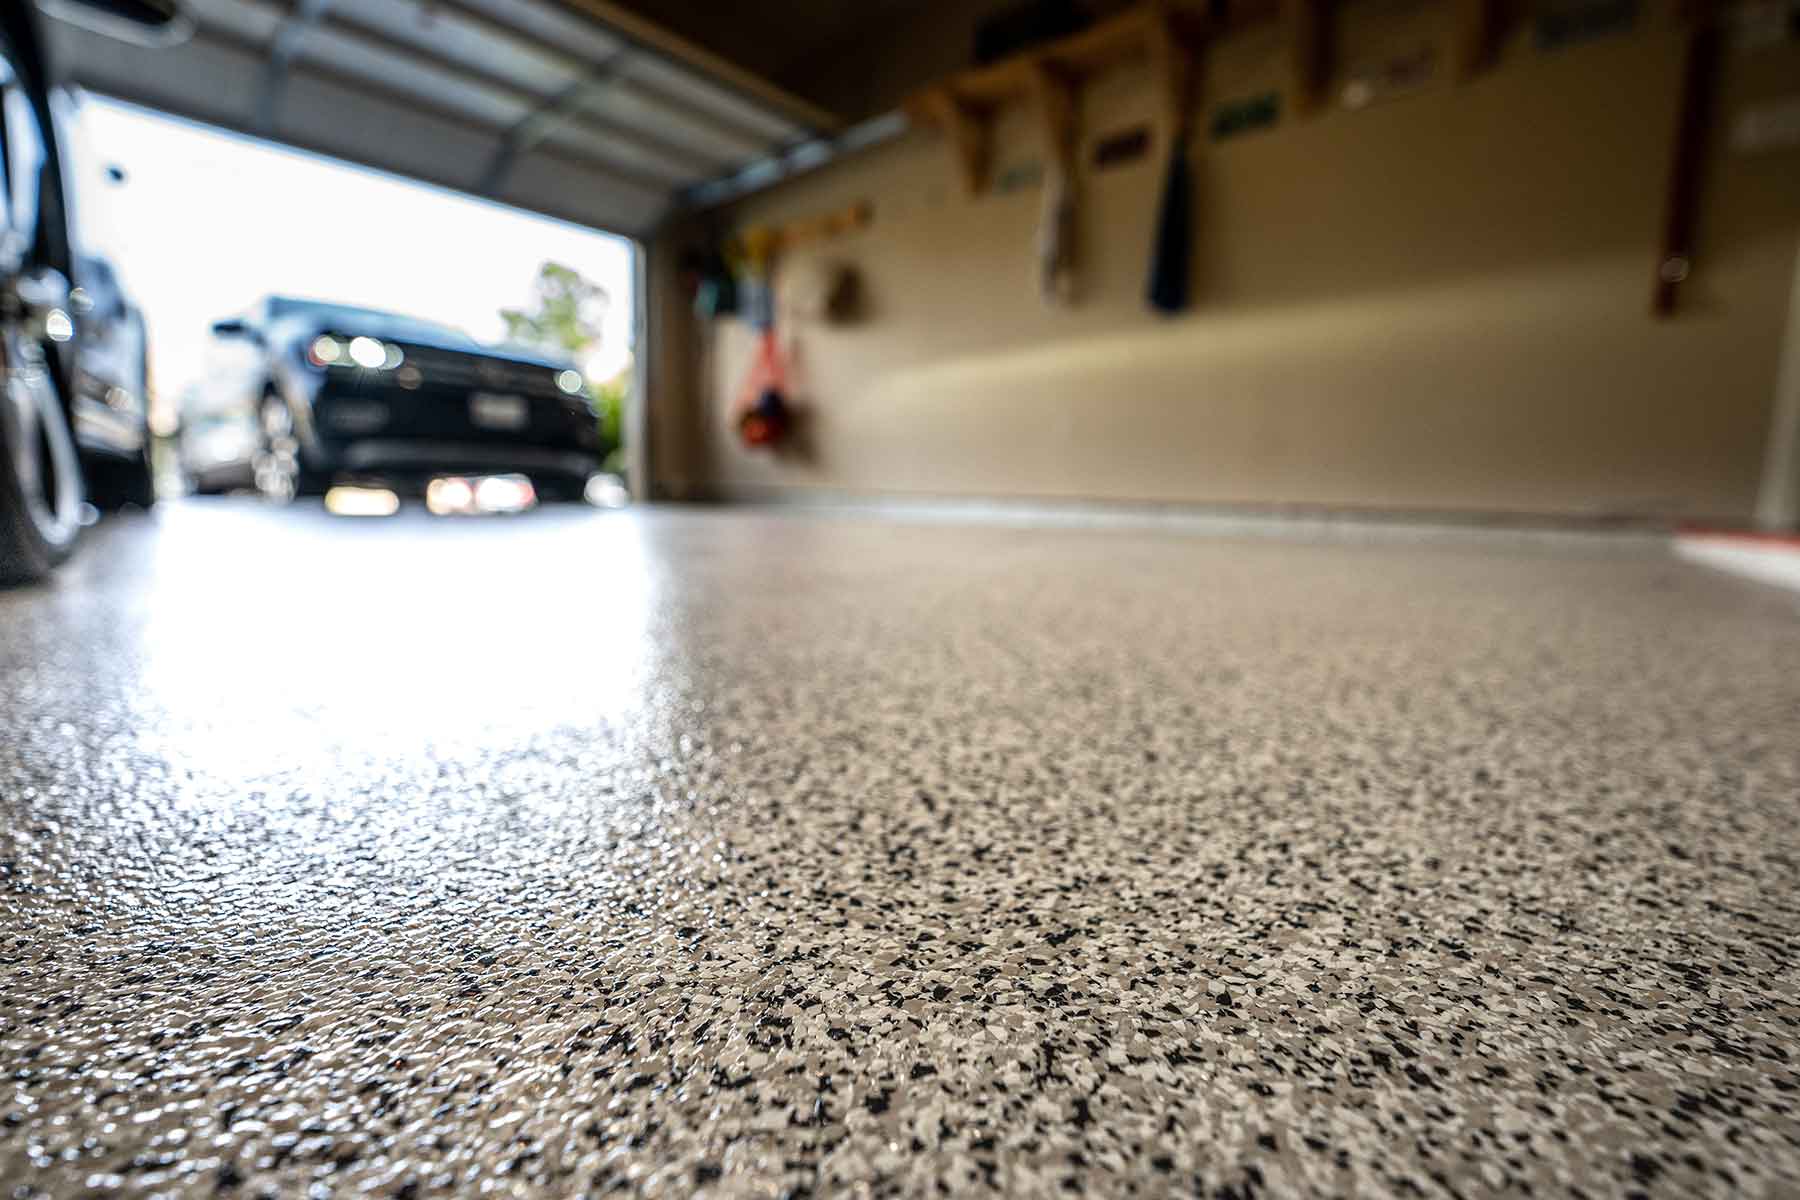
- Start in a corner: Begin at a corner of the garage and sprinkle the flakes or chips onto the wet epoxy coating. Start with a small amount and gradually increase the coverage as desired.
- Use a broadcast technique: Use a broadcast technique by gently tossing the flakes or chips into the air, allowing them to disperse and land randomly on the epoxy surface. Avoid clumping the flakes or chips together and strive for an evenly scattered appearance.
- Press the flakes into the epoxy: After sprinkling the flakes or chips, use a roller or brush to gently press them down into the epoxy. This ensures they are embedded properly and have good adhesion.
- Allow the base coat to cure: Give the base coat with the flakes or chips enough time to cure according to the manufacturer’s instructions. This typically takes around 24 to 48 hours.
- Remove excess flakes: Once the base coat has cured, use a broom or vacuum cleaner to remove any loose or excess flakes that did not adhere to the epoxy surface.
- Apply the topcoat: For added durability and protection, consider applying a clear epoxy topcoat over the flakes or chips. The topcoat will seal in the design and provide a glossy finish.
- Cure the topcoat: Allow the topcoat to cure according to the manufacturer’s instructions. This will typically take an additional 24 to 48 hours.
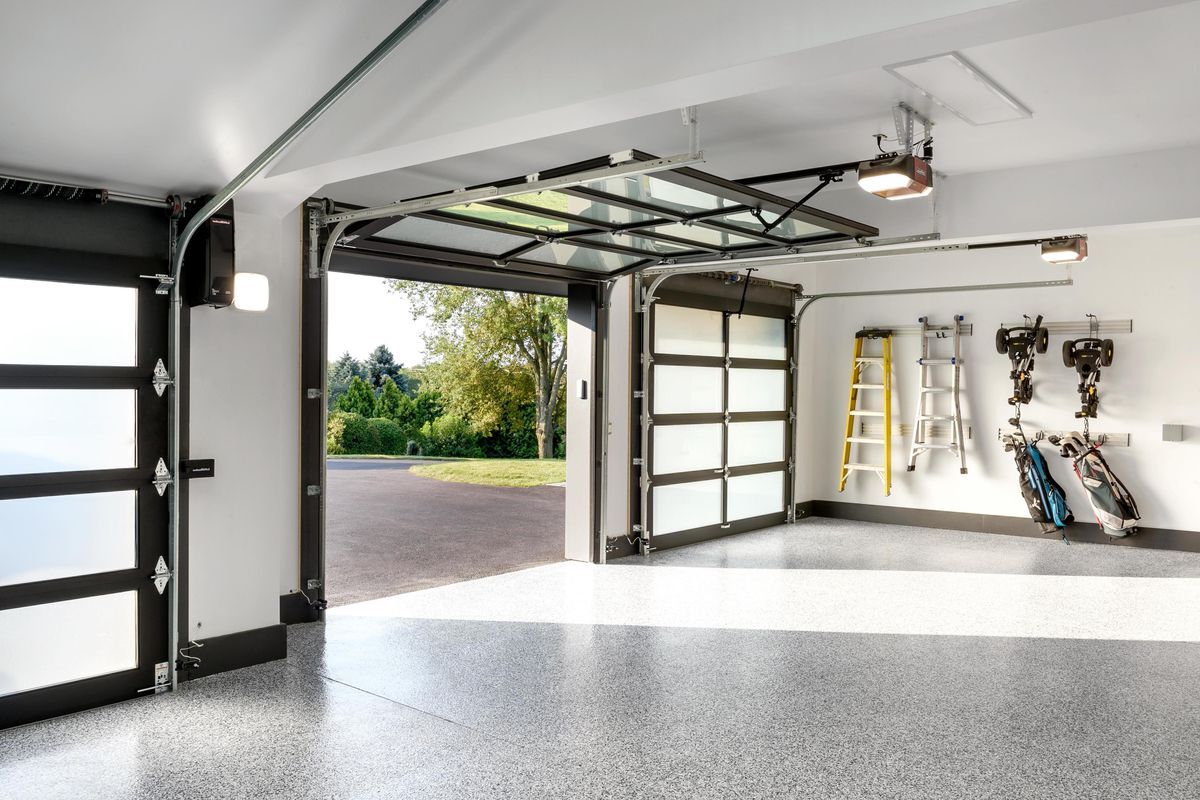
Adding flakes or color chips to your garage floor is a creative way to personalize the space and create a visually appealing surface. Once the final coat has fully cured, you can enjoy your beautifully decorated garage floor.
Read more: How To Finish Concrete Basement Floor
Allowing the Coating to Cure
After applying the epoxy coating to your garage floor, it is crucial to allow ample time for the coating to cure. Curing is the process by which the epoxy chemically reacts and hardens, resulting in a durable and long-lasting finish. Follow these steps to ensure proper curing of the epoxy coating:
- Read the manufacturer’s instructions: Different epoxy coatings may have different curing times and guidelines. Refer to the manufacturer’s instructions for specific curing information.
- Create a controlled environment: Curing is best achieved in a controlled environment with optimal temperature and humidity conditions. Ensure that the garage is well-ventilated and that the temperature remains within the recommended range specified by the manufacturer.
- Avoid foot traffic and heavy objects: During the curing process, avoid walking on the coated surface and do not place heavy objects or vehicles on it. This can cause indentations or damage to the epoxy coating.
- Maintain cleanliness: Keep the area around the coated floor as clean as possible during the curing process. This will help prevent dust, debris, and other particles from settling on the surface and potentially causing imperfections.
- Monitor curing time: Keep track of the recommended curing time provided by the manufacturer. Typically, it takes around 24 to 48 hours for the epoxy coating to fully cure. However, curing times can vary depending on factors such as temperature and humidity.
- Avoid moisture exposure: To prevent any moisture-related issues, refrain from using water or cleaning products on the coated floor until the curing process is complete.
- Exercise patience: It may be tempting to start using the garage soon after applying the epoxy coating, but patience is key to achieving optimal results. Allow the coating to cure fully to ensure a strong, resilient finish.
Once the epoxy coating has undergone the recommended curing time, it should be hardened and ready for normal use. Remember that the curing process may continue over a longer period, so it is advisable to avoid placing heavy objects or vehicles on the coated floor for at least a few days after the initial curing time.
By allowing the epoxy coating to cure properly, you are ensuring the longevity and performance of your garage floor finish. Once the coating has fully cured, you can proceed to the optional step of applying a topcoat for added protection and shine.
Applying a Topcoat (Optional)
Applying a topcoat to your garage floor is an optional step but can provide added protection, durability, and a glossy finish to the epoxy coating. A topcoat acts as a protective layer that safeguards the epoxy and enhances its overall appearance. Follow these steps to apply a topcoat:
- Select a clear epoxy topcoat: Choose a high-quality clear epoxy topcoat specifically designed for use over epoxy coatings. Make sure it is compatible with the epoxy coating you have applied.
- Prepare the area: Clean the surface of the epoxy-coated floor, removing any dust, dirt, or debris. Ensure it is dry before proceeding with the topcoat application.
- Mix the topcoat: Read and follow the manufacturer’s instructions for mixing the topcoat material. Thoroughly combine the resin and hardener to achieve a uniform consistency.
- Apply the topcoat: Start by cutting in the edges of the floor using a brush or roller. Then, use a roller or brush to apply the topcoat in even, overlapping strokes. Work in small sections to ensure proper coverage and avoid missing any spots.
- Roll out any bubbles: After applying the topcoat, use a foam roller to gently roll out any bubbles that may have formed. This will help create a smooth and even surface.
- Allow for proper curing: Follow the manufacturer’s instructions for the recommended curing time of the topcoat. Typically, it takes around 24 to 48 hours for the topcoat to fully cure.
- Avoid foot traffic and heavy objects: During the curing process, avoid walking on the newly top-coated floor and refrain from placing heavy objects or vehicles on it. This will prevent any damage or marks from forming.
- Enjoy the enhanced finish: Once the topcoat has fully cured, you can enjoy the improved appearance, added protection, and increased durability of your garage floor.
Applying a topcoat can further enhance the aesthetic appeal and performance of your garage floor. It adds an extra layer of protection against daily wear and tear, chemicals, and UV rays, extending the lifespan of the epoxy coating. Take the time to properly apply and cure the topcoat to ensure the best results.
With the topcoat perfectly cured, you can now enjoy a beautifully finished garage floor that is not only visually appealing but also highly durable and resistant to stains and chemicals.
Conclusion
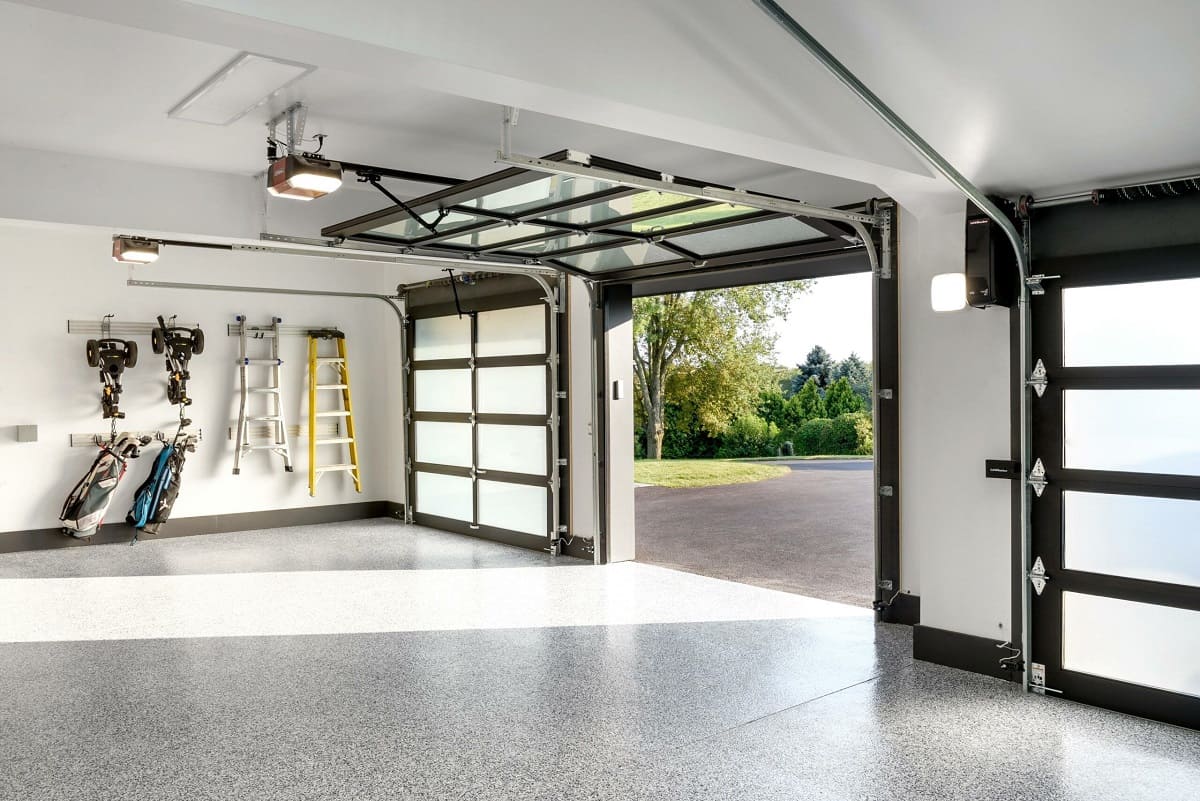
Congratulations, you have successfully completed the process of finishing your garage floor! By following the steps outlined in this article, you have transformed your garage into a clean, attractive, and functional space. Not only does a finished garage floor enhance the overall appearance of the space, but it also provides practical benefits such as increased durability, easier maintenance, and resistance to stains and chemicals.
Throughout the process, you learned about the tools and materials required for the job, the importance of proper preparation, and how to repair cracks and imperfections. You also discovered the significance of cleaning the surface before applying the epoxy coating, followed by the application of primer to ensure good adhesion.
Spreading the epoxy coating and the optional step of adding flakes or color chips allowed you to create a personalized and visually appealing garage floor. Finally, if you chose to apply a topcoat, you have added an extra layer of protection and achieved a shiny, professional finish.
Remember, proper curing of the epoxy coating and allowing sufficient time for all the layers to fully harden is crucial for long-lasting results. Avoid heavy traffic or placing heavy objects on your garage floor until it has completely cured.
Now, you can proudly enjoy your finished garage floor, whether it’s for parking vehicles, utilizing it as a workshop, or creating a clean storage space. Regular cleaning and maintenance will help preserve the beauty and longevity of your garage floor finish.
Thank you for following this step-by-step guide on how to finish a garage floor. We hope it has provided you with valuable insights and practical knowledge to achieve a professional-looking finish. Enjoy your newly transformed garage space!
Frequently Asked Questions about How To Finish A Garage Floor
Was this page helpful?
At Storables.com, we guarantee accurate and reliable information. Our content, validated by Expert Board Contributors, is crafted following stringent Editorial Policies. We're committed to providing you with well-researched, expert-backed insights for all your informational needs.


0 thoughts on “How To Finish A Garage Floor”