Articles
How To Prep A Garage Floor For Epoxy
Modified: August 17, 2024
Learn how to properly prepare your garage floor for epoxy application with our informative articles. Get expert tips and advice to ensure a successful epoxy flooring project.
(Many of the links in this article redirect to a specific reviewed product. Your purchase of these products through affiliate links helps to generate commission for Storables.com, at no extra cost. Learn more)
Introduction
When it comes to transforming your garage into a functional and stylish space, applying an epoxy coating to the floor can make a world of difference. Not only does it provide a durable and attractive surface, but it also helps to protect the concrete against stains, cracks, and wear and tear. However, before you start applying epoxy to your garage floor, it’s crucial to properly prep the surface to ensure a long-lasting and flawless finish.
In this article, we will guide you through the step-by-step process of prepping your garage floor for epoxy. By following these guidelines, you can achieve professional results and create the perfect foundation for your epoxy coating.
Before you begin prepping, it’s important to gather the necessary tools and materials for the job. You will need a stiff-bristle brush or broom, a pressure washer or hose with high-pressure nozzle, a concrete etching solution, a concrete patching compound, a sander or grinder, a shop vacuum, and, of course, the epoxy coating system of your choice.
Now, let’s dive into the essential steps to prep your garage floor for epoxy coating.
Key Takeaways:
- Properly prepping your garage floor for epoxy coating is crucial for achieving a durable, attractive, and long-lasting finish. From assessing the condition to applying the epoxy, each step plays a vital role in creating a flawless surface.
- Allowing the epoxy coating to cure fully is essential for maximizing its durability and longevity. Following the manufacturer’s guidelines for curing time and conditions will ensure that your garage floor retains its beauty and protective qualities for years to come.
Read more: How To Install Epoxy Flooring In A Garage
Assess the condition of the garage floor
The first step in prepping your garage floor for epoxy is to assess its condition. Take a close look at the surface and identify any cracks, stains, or areas of damage. This will help you determine the extent of preparation needed and the appropriate repairs that will need to be made before applying the epoxy coating.
If there are large cracks or deep damage, it may be necessary to consult a professional to evaluate the structural integrity of the floor and provide recommendations for repairs. However, minor cracks and surface imperfections can typically be addressed as part of the prepping process.
Additionally, check for any oil or grease stains on the surface. These can prevent the epoxy from adhering properly, so it’s essential to remove them before proceeding. You can use a degreasing cleaner or a mixture of water and detergent to scrub away the stains. Rinse the area thoroughly and allow it to dry completely before moving on to the next step.
By assessing the condition of your garage floor, you can identify any issues that need to be addressed and ensure a smooth and successful epoxy coating application. Take the time to thoroughly inspect the surface to achieve the best possible results.
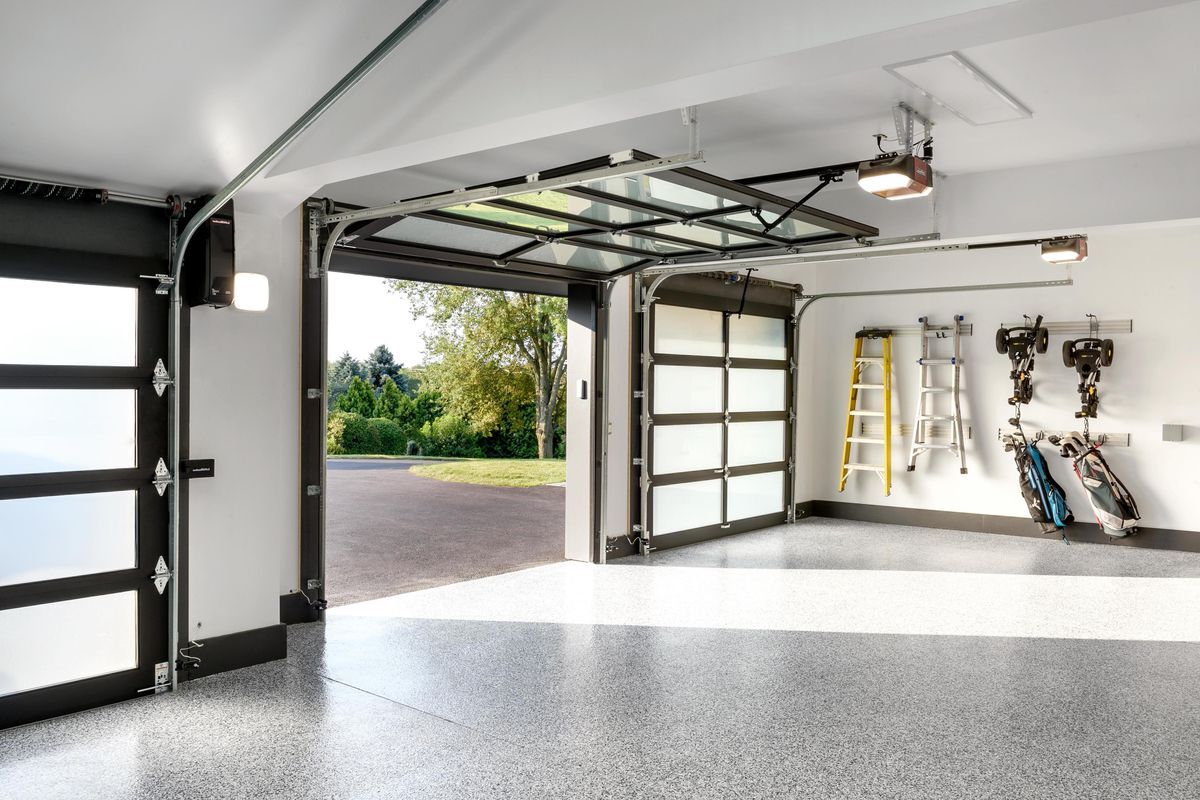
Clear out the garage
Before you can begin prepping your garage floor for epoxy, it’s essential to clear out the space. Remove all vehicles, tools, equipment, and any other items that may be obstructing the floor. This will allow you to have unhindered access to the entire surface and ensure that no debris or items interfere with the prepping process.
Clearing out the garage also provides an opportunity to declutter and organize the space. Take this time to evaluate and sort through your belongings, getting rid of any items that are no longer needed or taking up unnecessary space. This will not only create a more organized garage but also make the prepping process easier and more efficient.
If you have shelves or storage units attached to the walls, consider removing them or moving them away from the floor. This will allow you to work on the entire surface without any obstructions. If you don’t have space in other areas of your property to store items temporarily, you may want to consider renting a storage unit for the duration of the epoxy coating project.
Once the garage is clear, sweep or use a stiff-bristle brush to remove any loose dirt, dust, or debris from the floor. This will provide a clean base for the subsequent steps of the prepping process.
Remember, clearing out the garage is a crucial step to ensure that the prepping and epoxy application go smoothly. It allows for easy access to the entire floor, prevents any interference or damage to your belongings, and sets the stage for a successful garage floor transformation.
Repair any cracks or damage
Once you have assessed the condition of your garage floor and cleared out the space, it’s time to address any cracks or damage that you identified earlier. Repairing these issues is crucial to create a smooth and even surface for the epoxy coating.
If you notice any small cracks, you can typically repair them yourself using a concrete patching compound. Start by cleaning the crack with a wire brush to remove any loose debris and dust. Then, follow the manufacturer’s instructions to mix the patching compound and apply it to the crack, ensuring that it fills the void completely. Smooth out the surface with a trowel or putty knife, and allow it to dry and cure according to the instructions.
For larger cracks or areas of significant damage, it is recommended to consult a professional for evaluation and repair. They will have the expertise and tools necessary to address more extensive issues and ensure that the repairs are done correctly.
Once the repairs have been made, it’s important to allow ample time for the patches to cure completely. This will help prevent any future cracks or damage from occurring and ensure the longevity of the epoxy coating.
By taking the time to repair any cracks or damage on your garage floor, you are setting the foundation for a successful epoxy coating application. This step is essential to ensure a smooth and level surface, providing a flawless finish and enhancing the overall durability of the coating.
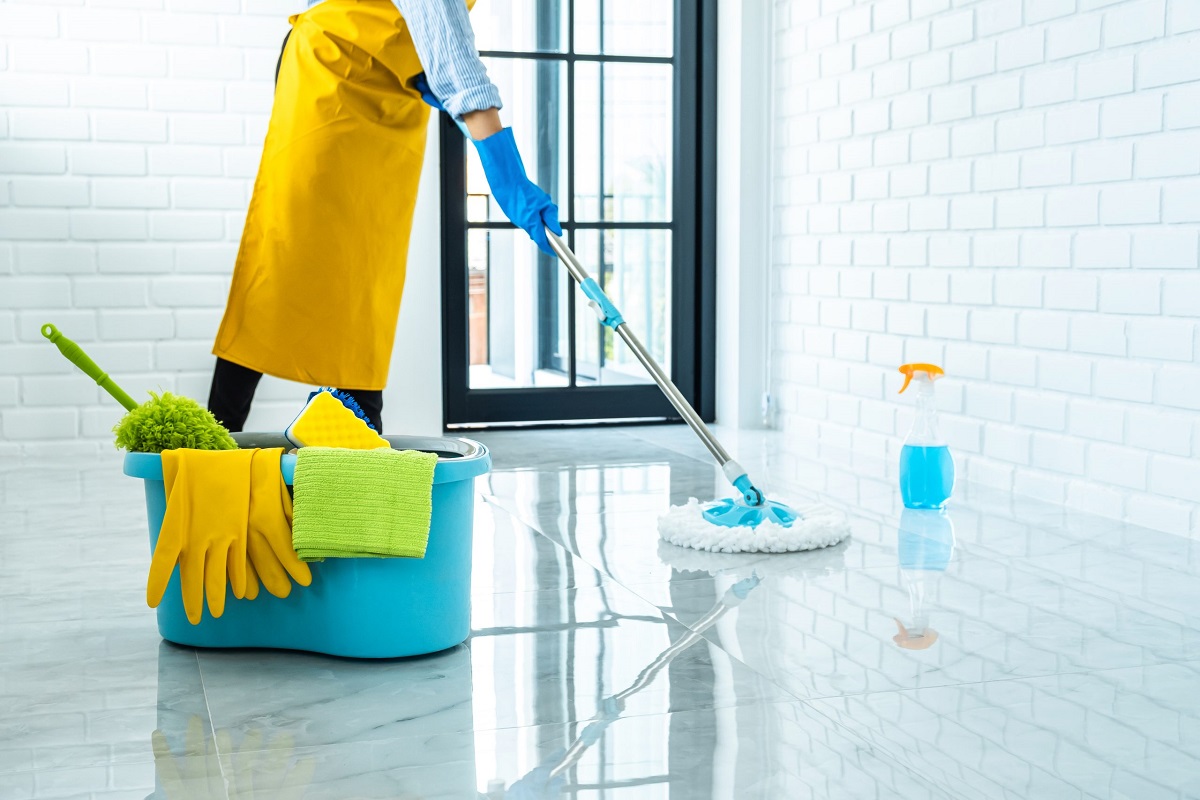
Clean the garage floor
After assessing the condition of your garage floor and repairing any cracks or damage, it’s time to thoroughly clean the surface. Proper cleaning is essential to remove dirt, grease, oils, and any other contaminants that can hinder the adhesion of the epoxy coating.
Start by sweeping or using a stiff-bristle brush to remove loose debris and dust from the floor. This will help prevent these particles from mixing with any cleaning solutions and potentially scratching the surface during the cleaning process.
Next, you’ll want to use a degreasing cleaner or a mixture of water and detergent to tackle any oil or grease stains. Apply the cleaner to the stained areas and scrub them with a stiff-bristle brush. Make sure to work the cleaner into the surface to lift off the oils and grease effectively. Rinse the area thoroughly with clean water to remove any residue.
If you notice any stubborn stains, you can use a more concentrated cleaner or a specialized concrete cleaner. Follow the instructions provided with the cleaner and use a scrub brush or scrub pad to target and remove the stains. Rinse the floor again to ensure all cleaning residue is removed.
Once the stained areas are cleaned, it’s time to clean the entire floor. You can use a pressure washer or a hose with a high-pressure nozzle to thoroughly rinse the garage floor. Start from one corner and work your way out, ensuring that you cover the entire surface. This will help remove any remaining dirt, debris, and cleaning solution, leaving you with a clean and ready-to-prep floor.
Allow the floor to dry completely before moving on to the next step. This may take several hours, depending on the ambient humidity and airflow. Use fans or open any doors or windows to facilitate faster drying.
Cleaning the garage floor is a crucial step in the prepping process for epoxy coating. By removing dirt, grease, and other contaminants, you are creating an optimal surface for the epoxy to adhere to, ensuring a long-lasting and flawless finish.
Read more: How Much Does An Epoxy Garage Floor Cost
Etch the garage floor
After cleaning the garage floor, the next step in prepping for epoxy coating is to etch the surface. Etching is important as it helps open up the pores of the concrete, allowing the epoxy to penetrate and bond effectively.
Etching is typically done using a concrete etching solution, which is an acidic compound designed to remove the top layer of the concrete and create a rough texture. This helps improve adhesion and ensures that the epoxy coating will bond securely to the floor.
Before beginning the etching process, make sure to protect yourself by wearing rubber gloves, safety goggles, and appropriate clothing. Follow the manufacturer’s instructions for diluting the etching solution and apply it to the garage floor using a sprayer or a watering can. It’s important to apply the solution evenly and cover the entire surface.
Once you have applied the etching solution, use a stiff brush or broom to scrub the floor thoroughly. This will help work the solution into the concrete, ensuring an effective etching process. Make sure to pay extra attention to any areas that may have been missed or are prone to high traffic or staining.
After scrubbing, let the etching solution sit on the surface for the recommended amount of time, usually about 10-20 minutes. This will allow the acid to react with the concrete and open up the pores. Keep in mind that the surface may become fizzing or bubbling during this process, which is normal and indicates the reaction is taking place.
Once the time has elapsed, rinse the floor thoroughly with clean water, removing all traces of the etching solution. Use a hose or pressure washer to ensure thorough rinsing, starting from one corner and working your way out. This step is crucial as any lingering residue can interfere with the adhesion of the epoxy coating.
Allow the floor to dry completely before proceeding to the next step. This may take several hours, depending on factors such as temperature and humidity. It’s essential to have a completely dry surface to ensure optimal bonding of the epoxy coating.
By etching the garage floor, you are creating a rough and porous surface that will promote strong adhesion of the epoxy coating. This step is crucial for achieving a long-lasting and durable garage floor finish.
Rinse and dry the floor
After etching the garage floor, it’s important to thoroughly rinse and dry the surface before moving on to the next steps of the prepping process. This ensures that all traces of the etching solution are removed and creates an optimal environment for the application of the epoxy coating.
To begin, use a hose or pressure washer to rinse the floor with clean water. Start from one corner and work your way out, making sure to cover the entire surface. Pay special attention to any areas where the etching solution may have pooled or accumulated.
Ensure that you rinse the floor thoroughly, as any lingering residue from the etching solution can interfere with the bonding of the epoxy coating. Take your time to remove all traces of the solution and consistently assess the water running off the floor. If it remains cloudy or milky, continue rinsing until the water runs clear.
Once the floor is rinsed, it’s crucial to give it ample time to dry completely. The drying time will depend on several factors, including the ambient temperature, humidity levels, and airflow in the area. It is recommended to allow the floor to air dry for at least 24 hours to ensure optimal drying.
During the drying process, make sure to keep the area well-ventilated by opening windows or doors, using fans, or employing a dehumidifier. This will help facilitate faster drying and ensure a moisture-free surface for the subsequent steps.
It’s important to have a completely dry floor before applying the epoxy coating, as any moisture trapped in the concrete can cause the coating to bubble or peel. Take the time to ensure proper drying to achieve the best possible results for your garage floor.
By thoroughly rinsing and drying the garage floor, you are creating an ideal surface for the epoxy coating. This step ensures the removal of any residual etching solution and helps promote optimal adhesion and longevity of the epoxy coating.
Before applying epoxy to a garage floor, it’s crucial to thoroughly clean and degrease the surface. Use a concrete cleaner and degreaser to remove any oil, grease, or dirt, and then etch the surface with a concrete etching solution to ensure proper adhesion of the epoxy.
Fill in any divots or low spots
After rinsing and drying the garage floor, it’s time to assess the surface for any divots or low spots that may be present. These imperfections can affect the overall appearance and smoothness of the epoxy coating, so it’s important to address them before proceeding.
If you come across any divots or low spots on the floor, you will need to fill them in to create a level surface. Start by preparing a concrete patching compound according to the manufacturer’s instructions. This compound is designed to fill in small voids and irregularities in the concrete.
Using a trowel or putty knife, apply the patching compound to the divots or low spots, making sure to fill them completely. Smooth out the surface of the compound, ensuring that it is level with the surrounding floor. Allow the compound to dry and cure as per the manufacturer’s instructions.
If you have larger areas of unevenness or significant low spots, you may need to consider more extensive repairs. Consult a professional or a concrete contractor who can evaluate the area and provide recommendations on the best course of action.
Once the patching compound has dried, inspect the filled areas to ensure that they are level and smooth. Use sandpaper or a sander to gently smooth out any rough edges or excess compound that may be protruding. This will help create a seamless transition between the filled areas and the rest of the floor.
By filling in any divots or low spots, you are ensuring that the epoxy coating will adhere uniformly and provide a smooth and even finish. Addressing these imperfections is a crucial step in the prepping process and will help you achieve professional-looking results on your garage floor.
Sand the floor
After filling in any divots or low spots on the garage floor, the next step in prepping for epoxy coating is to sand the surface. Sanding helps to smooth out any remaining imperfections, rough areas, or unevenness, creating an even and uniform base for the epoxy.
Start by using a floor sander or grinder equipped with a diamond-grit sanding disc. This will allow you to effectively remove any high spots, rough patches, or protruding edges on the floor. Move the sander in a back-and-forth motion, covering the entire surface evenly. Pay special attention to areas where the patching compound was applied to ensure a seamless integration with the rest of the floor.
While sanding, keep the sander moving at a consistent pace to avoid creating uneven areas or gouging the floor. Take breaks periodically to check the progress and make adjustments as needed. It’s important to note that some dust and debris will be generated during the sanding process, so make sure to wear a dust mask, safety goggles, and protective clothing.
Continue sanding until the entire floor feels smooth and even to the touch. Run your hand gently across the surface to detect any rough spots or inconsistencies. If you come across any remaining imperfections, use hand sandpaper or a sanding block to target those specific areas and create an even finish.
After sanding, it’s crucial to thoroughly clean the floor to remove all dust and debris generated during the sanding process. Use a shop vacuum or a broom to sweep up the loose particles, and then follow up with a thorough wet mopping to ensure a clean and dust-free surface.
Sanding the garage floor is an essential step in the prepping process, as it helps create a smooth and even surface for the epoxy coating to adhere to. By taking the time to sand the floor properly, you will achieve a professional-looking finish that enhances the overall appearance and durability of your garage floor.
Remove all dust and debris
After sanding the garage floor, it’s crucial to remove all dust and debris from the surface before applying the epoxy coating. Any remaining particles can interfere with the adhesion of the coating and compromise the overall finish of the floor.
Start by using a shop vacuum to thoroughly vacuum the entire floor. Pay close attention to corners, edges, and any hard-to-reach areas where dust may have settled. Move the vacuum slowly and methodically to ensure that all particles are effectively captured.
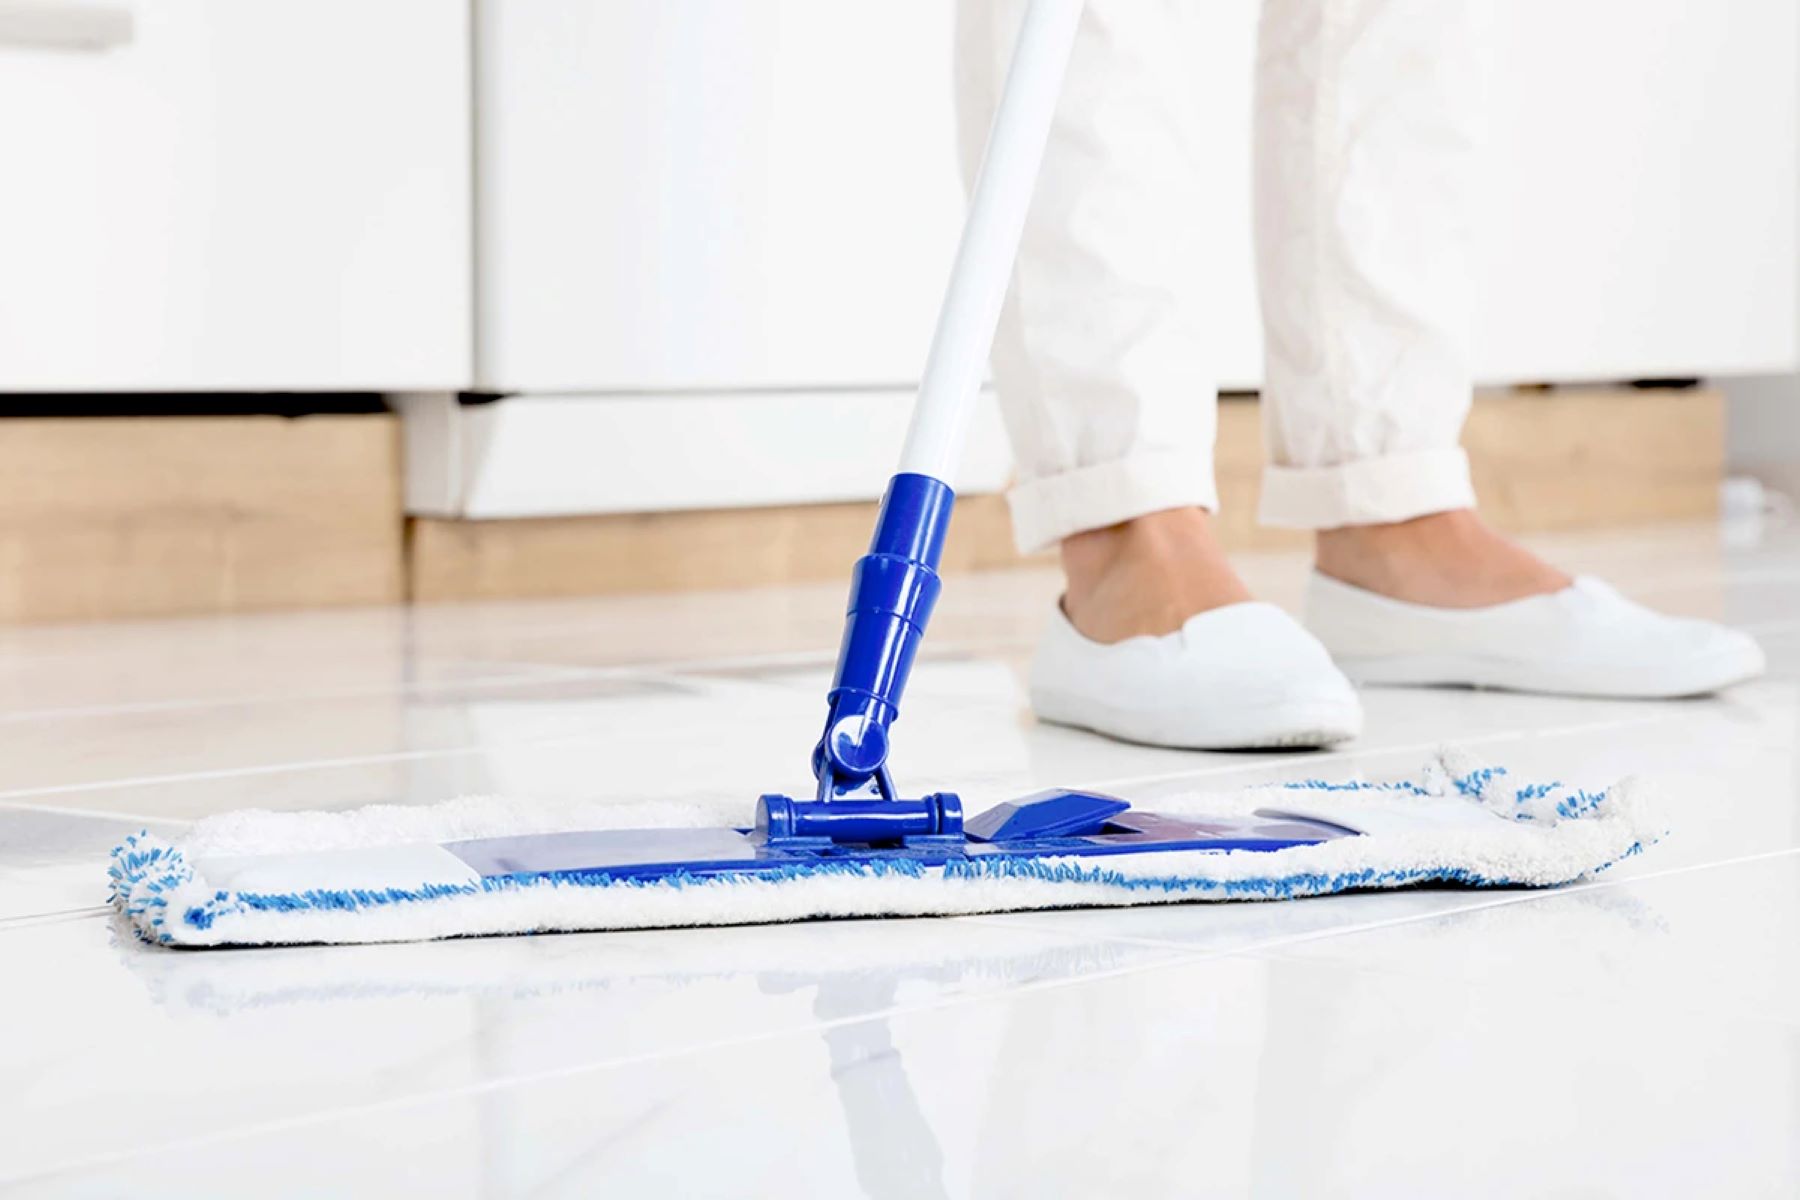
Next, use a damp mop or a microfiber cloth to wipe down the entire floor. This will help pick up any remaining dust or debris that may have been missed by the vacuum. Make sure the mop or cloth is only slightly damp, as excessive moisture can hinder the epoxy coating process.
In areas where the floor may be heavily textured or have deep crevices, you may need to use a brush or a small broom to dislodge any stubborn dust or debris. Sweep the brush or broom gently across the surface, aiming to remove as much loose material as possible.
As you clean, periodically check the surface to ensure that all dust and debris have been removed. Run your hand or a clean cloth lightly over the floor to detect any remaining particles. If you notice any areas that still have dust or debris, go over them again with the vacuum, mop, or brush until they are thoroughly clean.
Once you are confident that the floor is free of dust and debris, give it ample time to dry before proceeding with the next steps of the prepping process. This will allow the epoxy coating to adhere properly and ensure a flawless finish.
Removing all dust and debris from the garage floor is a critical step in the prepping process for epoxy coating. By taking the time to thoroughly clean the surface, you are setting the stage for a successful application of the coating, ensuring optimal adhesion and longevity.
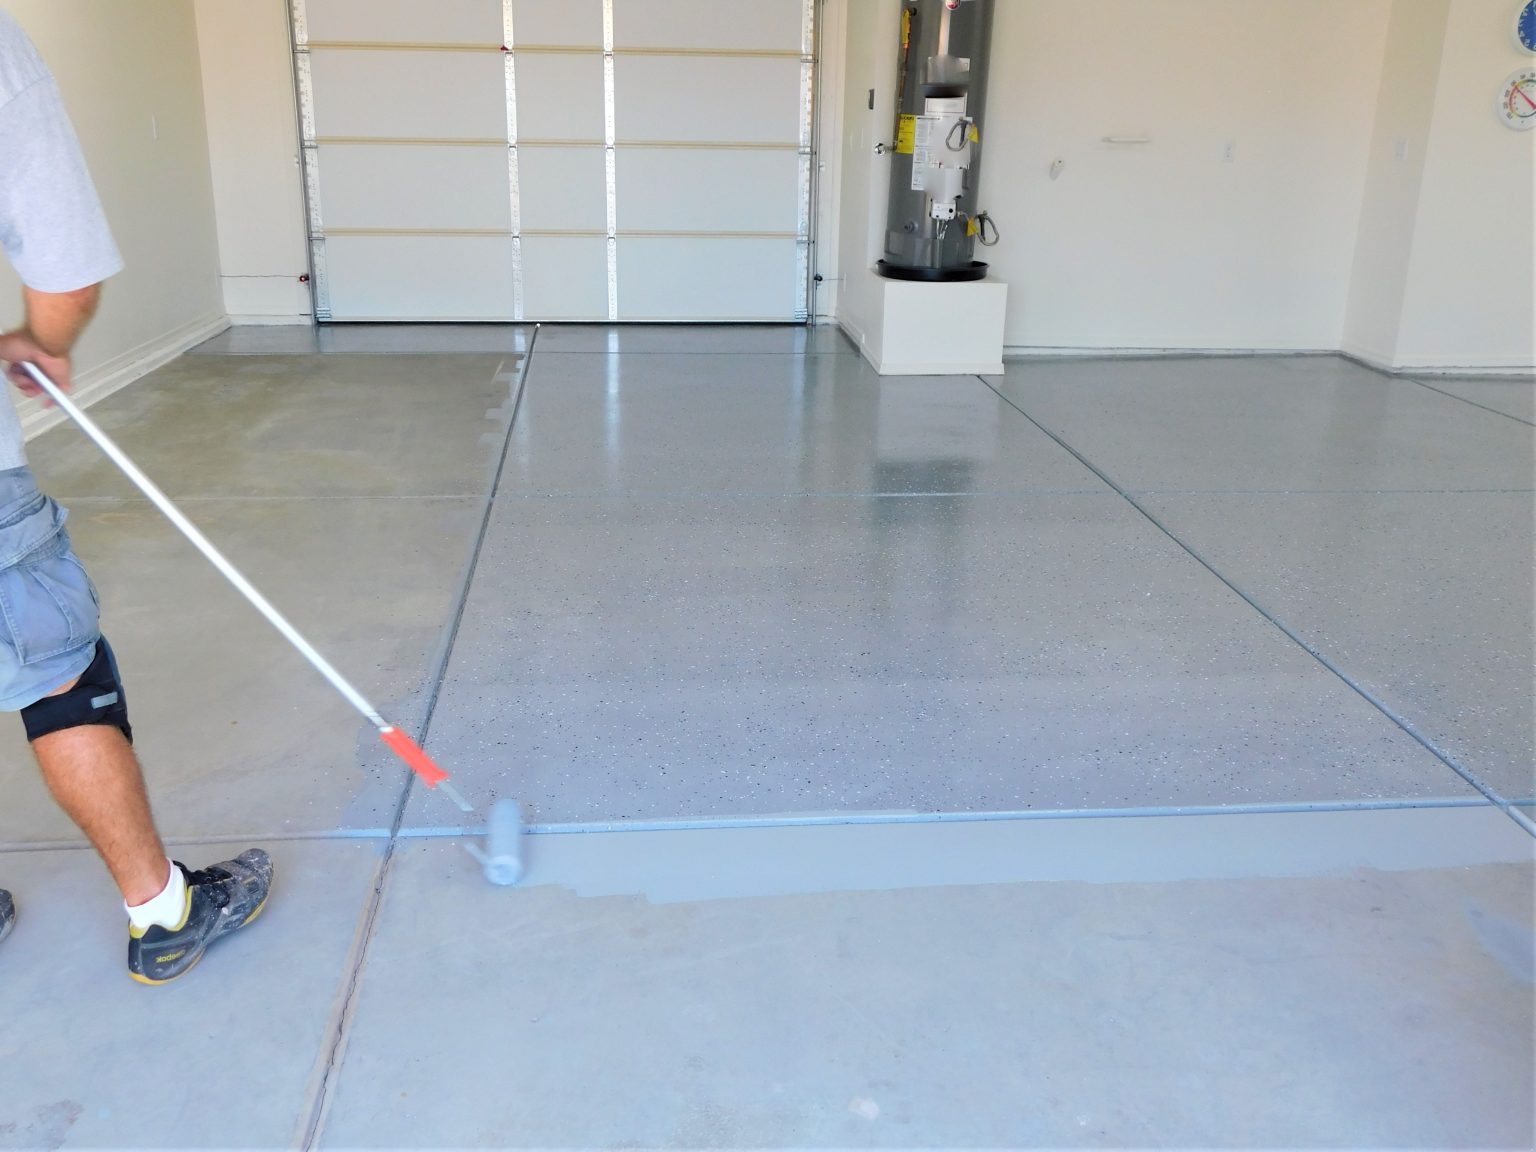
Apply epoxy primer
After properly prepping and cleaning the garage floor, it’s time to apply the epoxy primer. The epoxy primer serves as a bonding agent between the concrete floor and the epoxy coating, enhancing adhesion and ensuring a durable and long-lasting finish.
Before applying the primer, make sure to read and follow the manufacturer’s instructions carefully. This will ensure that you achieve the best results and that the primer is applied correctly.
Start by mixing the epoxy primer according to the instructions provided. Use a clean bucket and a mixing paddle to ensure proper blending of the components. It’s important to measure and mix the primer accurately to achieve the desired consistency and performance.
Once the primer is properly mixed, pour it onto the floor in sections. Use a roller with a long handle or a brush to spread the primer evenly, working it into the surface. Make sure to cover the entire floor, paying extra attention to edges and corners.
When applying the epoxy primer, work in small sections to ensure that the primer doesn’t dry out or become tacky before you move on to the next section. Use long, even strokes to create a smooth and consistent application. If you are using a roller, it’s recommended to use a nap length that is suitable for epoxy coatings to ensure proper coverage.
Allow the epoxy primer to dry according to the manufacturer’s instructions. This typically takes several hours, but it’s essential to follow the specified drying time to ensure proper bonding and to avoid any issues with the subsequent layers of epoxy coating.
Remember to clean your tools and equipment immediately after applying the primer. Epoxy primer is difficult to remove once it has dried, so it’s important to clean up while it is still wet.
Applying the epoxy primer is a crucial step in preparing the garage floor for the epoxy coating. It helps to create a strong bond between the concrete and the coating, improving adhesion and overall durability. Follow the manufacturer’s instructions carefully to ensure a successful application.
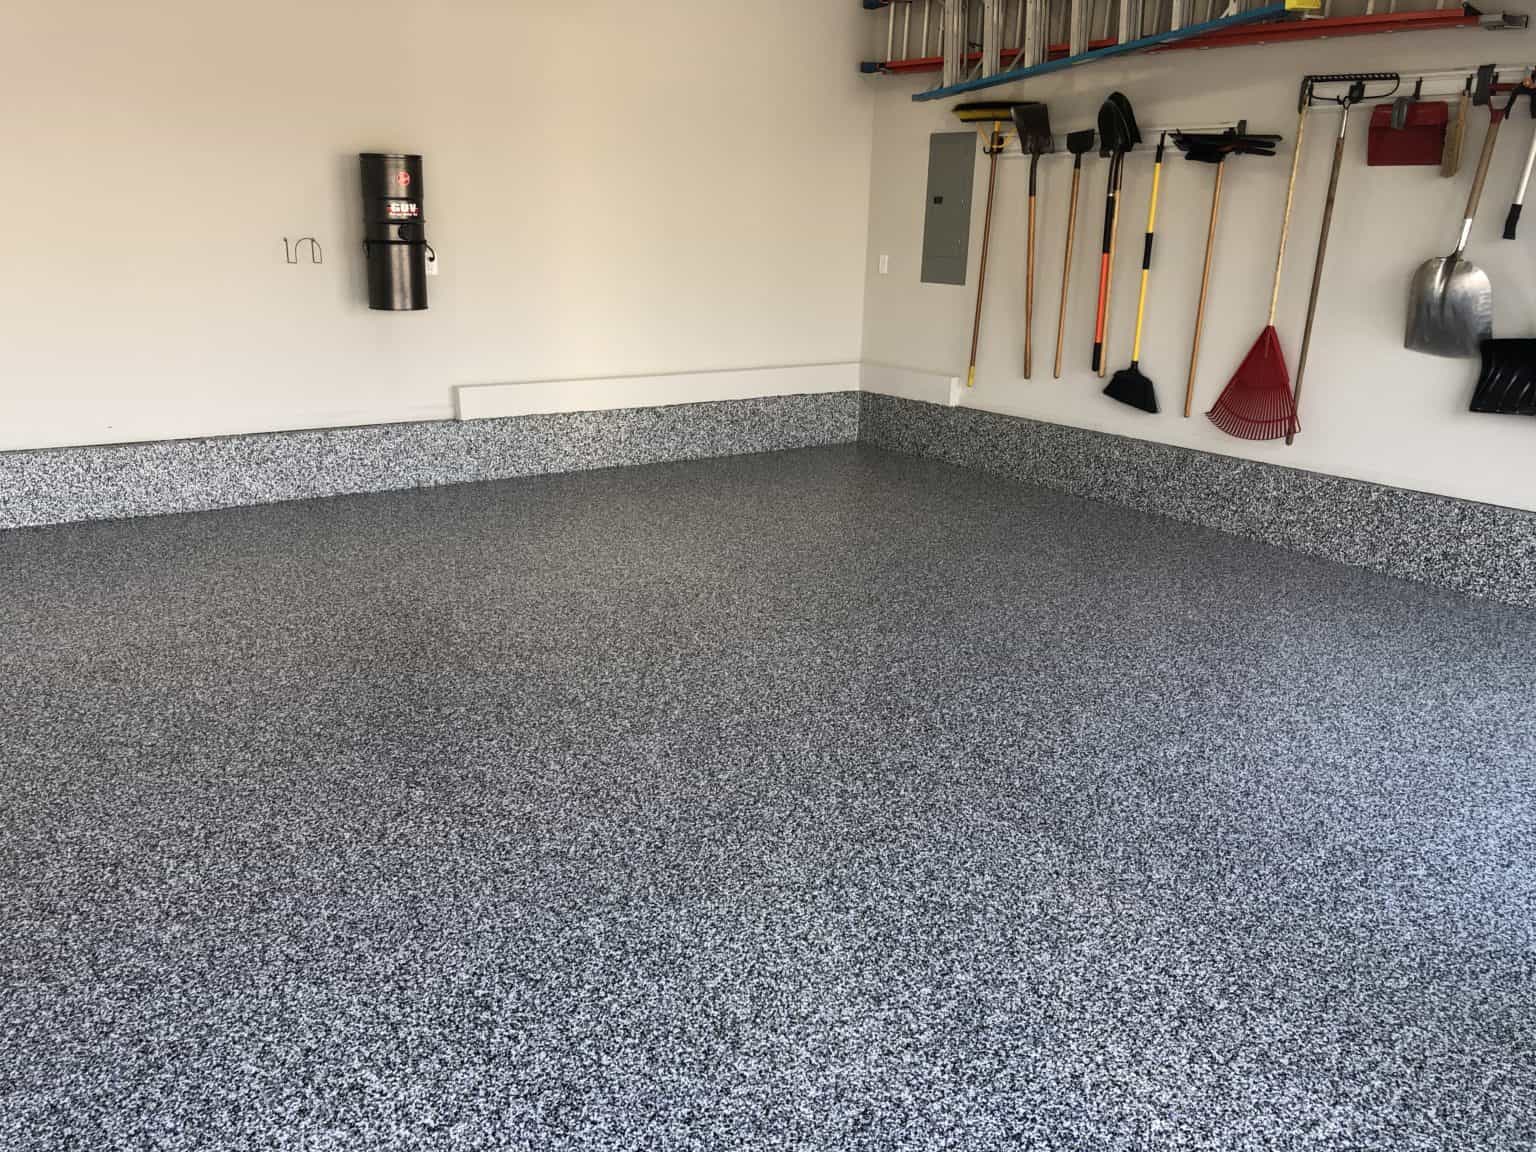
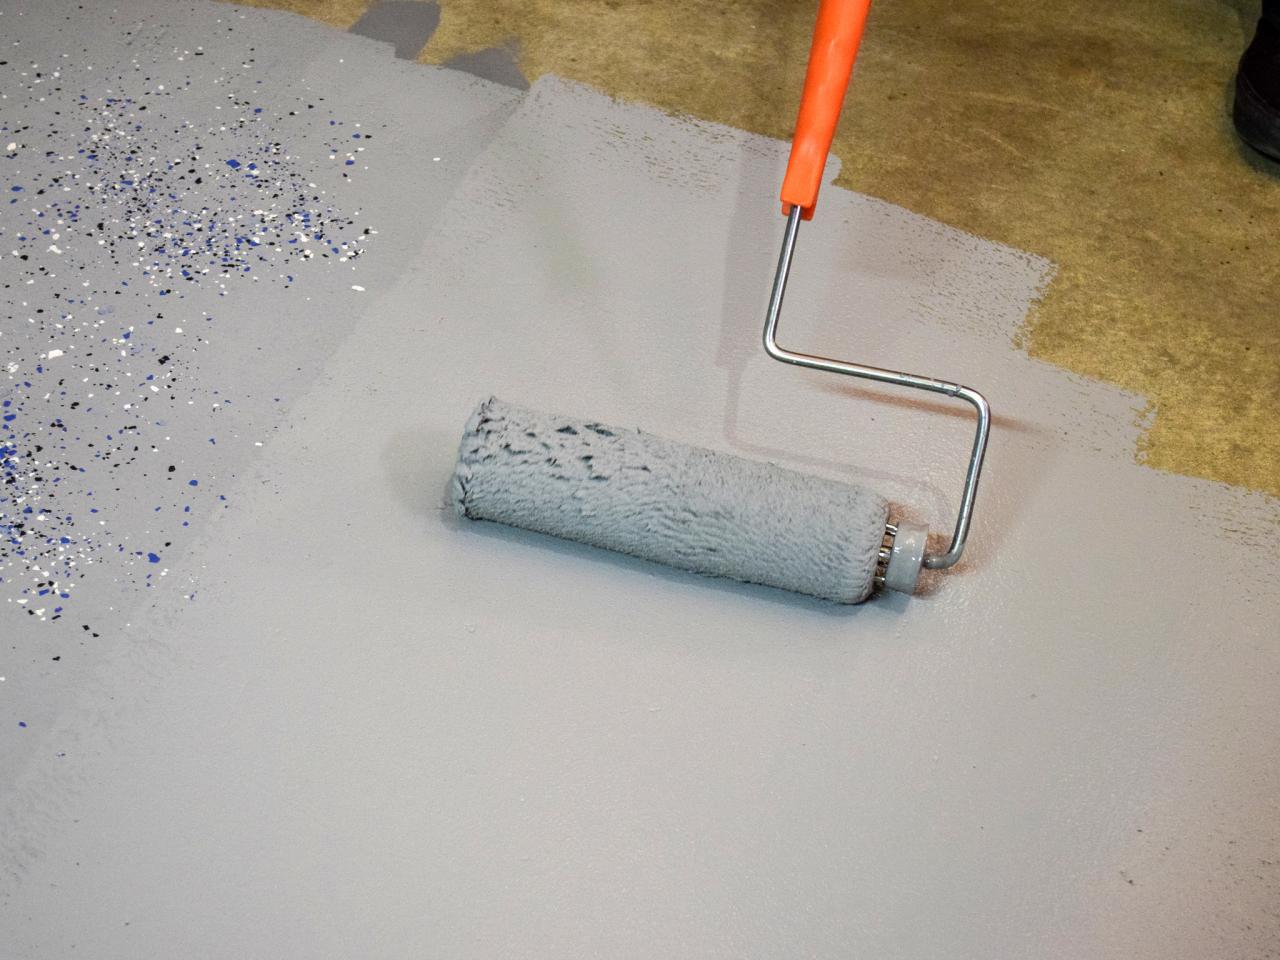
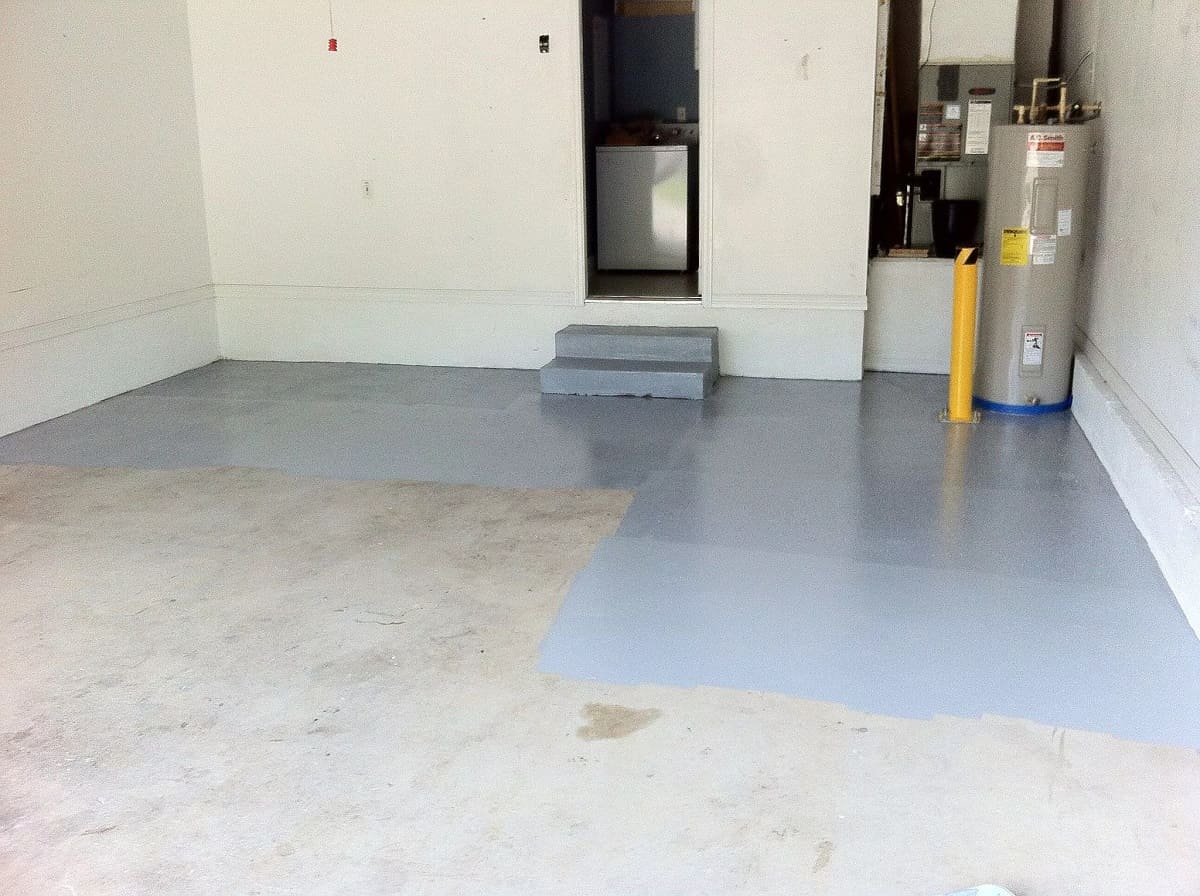
Apply epoxy coating
After the epoxy primer has dried, it’s time to apply the epoxy coating to your garage floor. The epoxy coating provides a beautiful, durable, and long-lasting finish that will transform the appearance and functionality of your space.
Before starting, make sure you have gathered all the necessary materials and tools for applying the epoxy coating. This typically includes the epoxy mixture, a clean bucket for mixing, a mixing paddle, a roller with a nap length suitable for epoxy, brushes for cutting in edges, and protective gear such as gloves and goggles.
Start by thoroughly mixing the epoxy coating according to the manufacturer’s instructions. It’s important to mix the two components thoroughly for the proper chemical reaction to occur. Use a clean bucket and a mixing paddle to ensure the components are blended evenly.
Once your epoxy coating mixture is ready, pour it onto the floor in manageable sections. Use a roller to spread the coating evenly, starting from one corner and working your way out. Use long, smooth strokes to create a uniform application. Make sure to apply a sufficient thickness for optimal durability, but avoid overapplication, as it could lead to sagging or pooling.
After covering the main floor area, use brushes to cut in along the edges, corners, and any areas that the roller couldn’t reach. This will help ensure complete coverage and a seamless transition between the coated and uncoated areas.
While applying the epoxy coating, periodically check for any bubbles that may form. If you notice any bubbles, lightly pass a heat gun or a propane torch over them to gently pop and eliminate them. Be cautious not to overheat the epoxy, as excessive heat can cause damage or discoloration.
Once the epoxy coating is applied, it’s important to let it cure according to the manufacturer’s recommendations. This typically involves allowing the coating to dry for a specified amount of time, usually 24-48 hours, before subjecting it to any foot traffic or placing items on the floor. Always follow the manufacturer’s specific curing instructions for the best results.
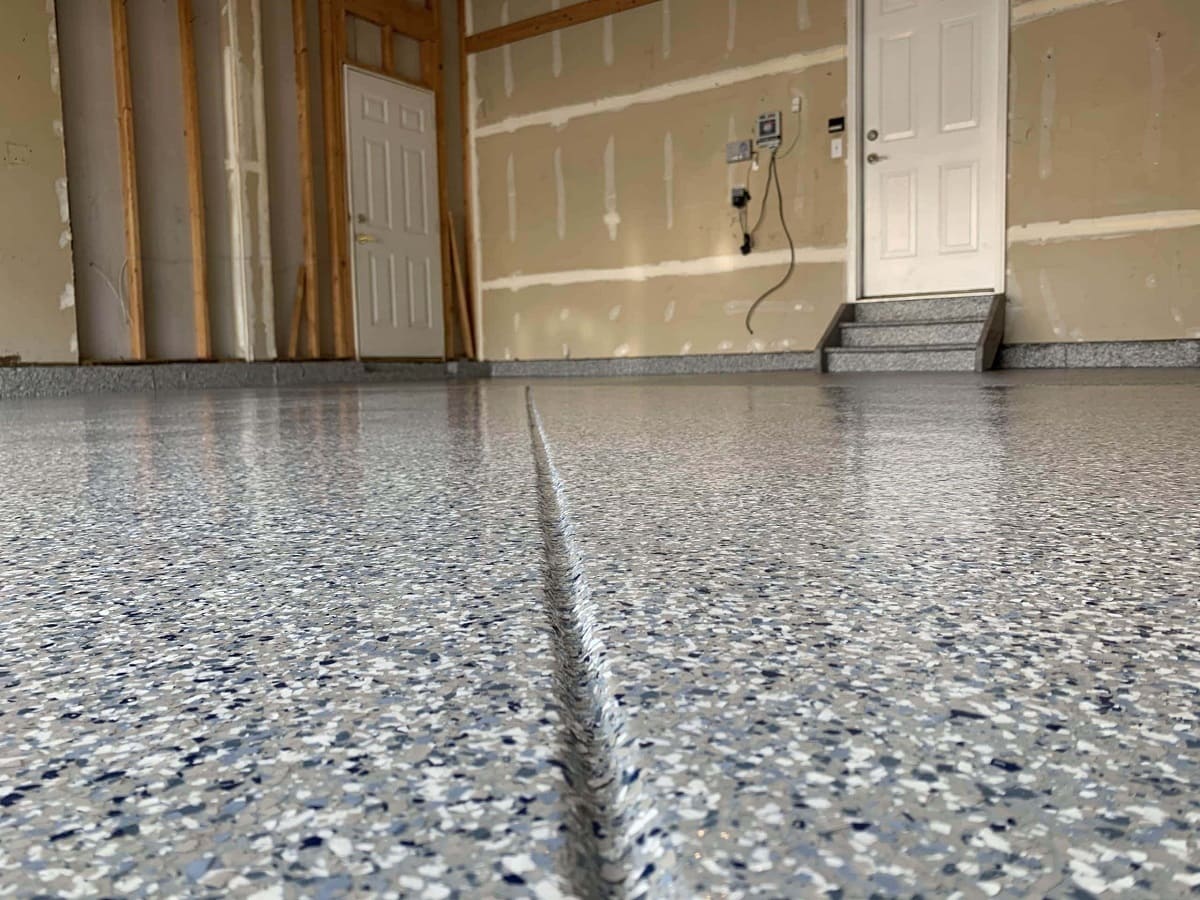
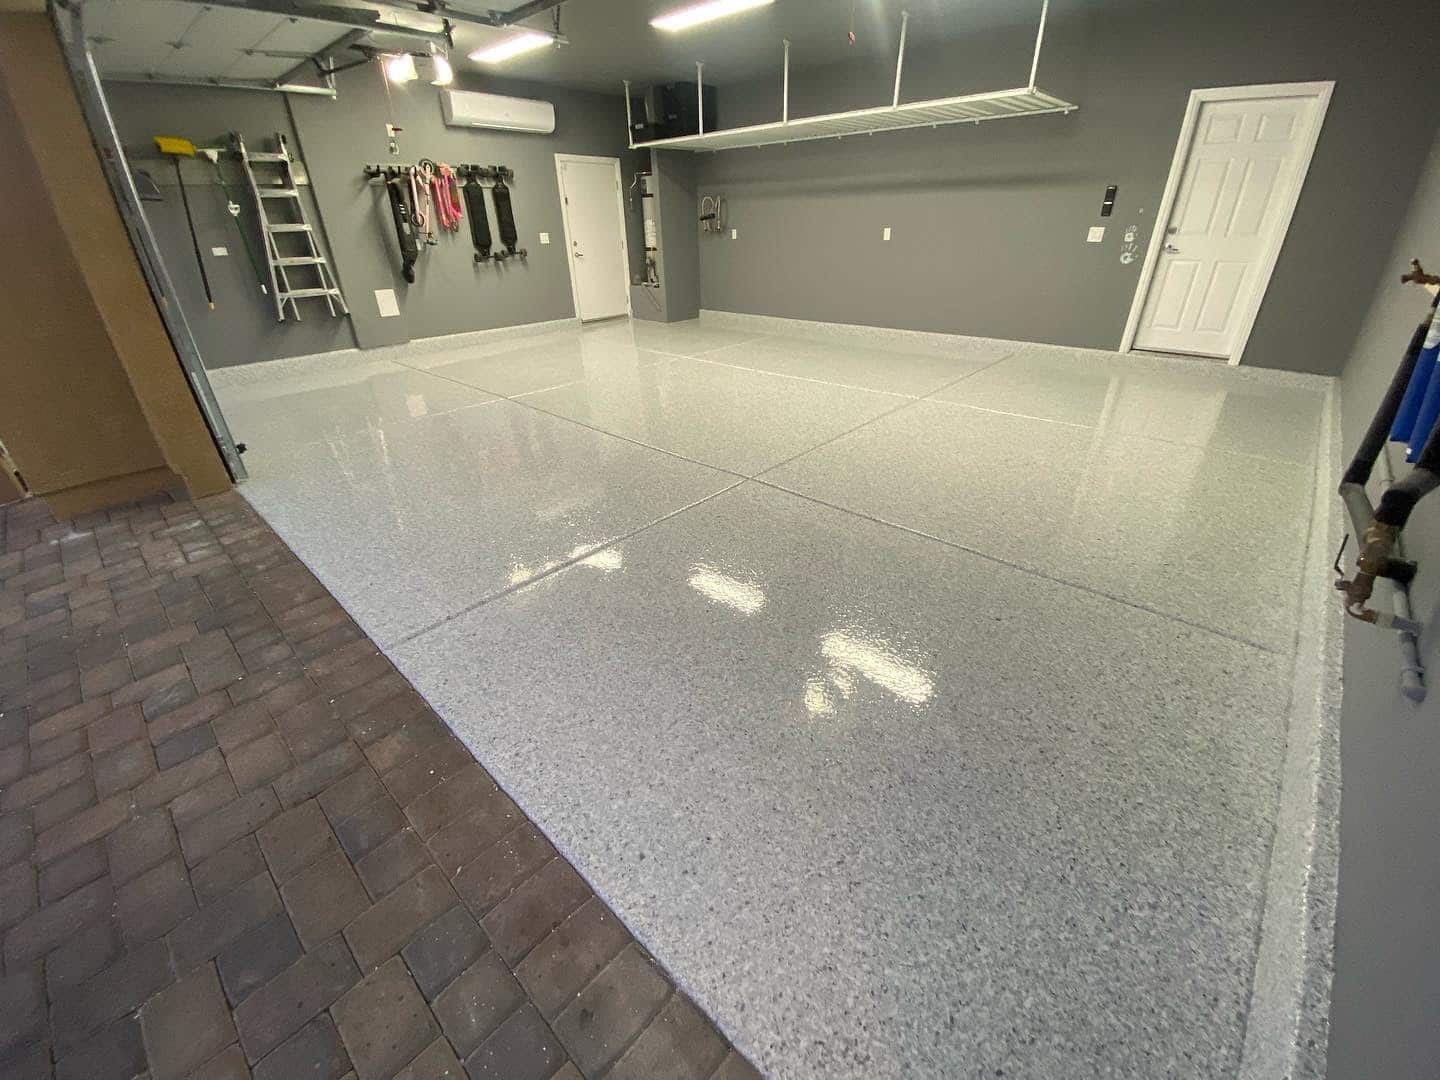
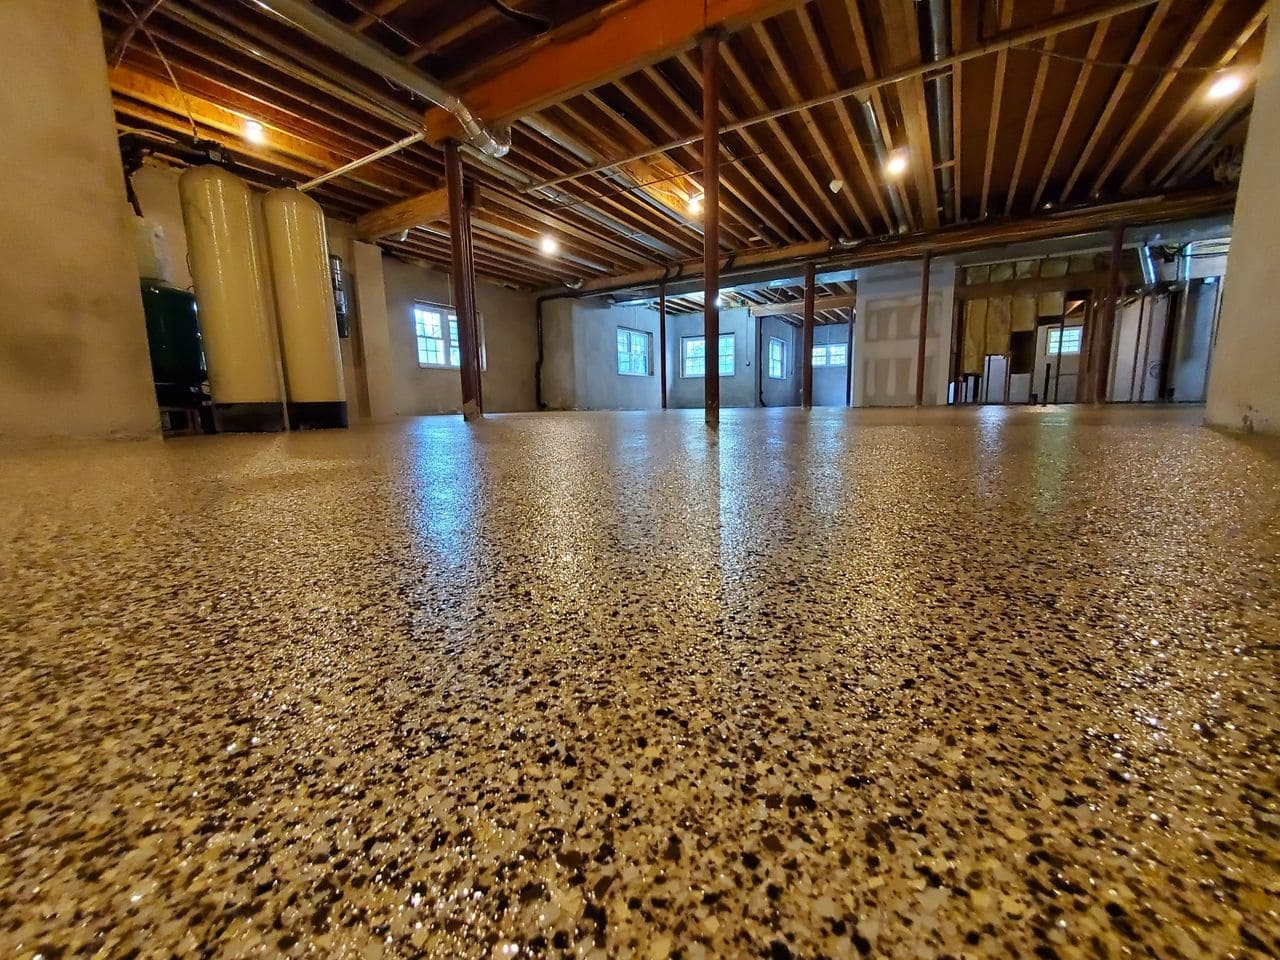
After the epoxy coating has fully cured, your garage floor will have a beautiful and durable finish that is resistant to stains, chemicals, and wear. It will enhance the overall aesthetics of your garage and provide a surface that is easy to clean and maintain.
Applying the epoxy coating requires attention to detail and following the manufacturer’s instructions for the best results. Take your time during the application process and ensure proper curing to achieve a flawless and long-lasting epoxy-coated garage floor.
Allow the epoxy to cure
After applying the epoxy coating to your garage floor, it’s crucial to allow it sufficient time to cure. Curing is the process by which the epoxy hardens and reaches its full strength, durability, and chemical resistance. By allowing the epoxy to cure properly, you ensure that your garage floor will provide long-lasting protection and maintain its beautiful appearance.
The curing time for epoxy coatings can vary depending on factors such as temperature, humidity, and the specific product used. It’s essential to follow the manufacturer’s instructions for the recommended curing time and conditions. Typically, epoxy coatings require at least 24-48 hours to cure fully.
During the curing process, it’s crucial to avoid any foot traffic or placing heavy objects on the epoxy-coated floor. This can disrupt the curing process and lead to uneven drying or damage the fresh coating. Make sure to communicate and enforce these restrictions with anyone in your household or who may have access to the garage during this time.
Maintaining proper environmental conditions is also important for the epoxy to cure effectively. Ensure that the temperature remains within the recommended range specified by the manufacturer. Extremes of hot or cold temperatures can slow down or hinder the curing process. Additionally, maintaining suitable airflow and ventilation in the area can help facilitate faster curing.
After the initial curing period, it’s advisable to wait a few more days before subjecting the epoxy-coated floor to heavy use or placing heavy objects on it. While the epoxy may have reached sufficient hardness to walk on, it will continue to develop additional strength over time. Following the manufacturer’s guidelines for full cure time will help ensure optimal performance.
During the curing process, minor imperfections or blemishes may become more apparent. These can include small bubbles, brush marks, or roller marks. Don’t be alarmed if you notice these imperfections during the curing phase. Many epoxy coatings are self-leveling, which means some of these imperfections may dissipate as the epoxy cures. However, if any major flaws or issues persist, consult the manufacturer for further guidance.
By allowing the epoxy to cure fully, you are maximizing its durability and longevity. This curing process is a critical step in ensuring that your epoxy-coated garage floor retains its beauty and protective qualities for years to come.
Read more: How To Epoxy A Floor
Conclusion
Prepping a garage floor for epoxy coating is a necessary and essential process to achieve a durable, attractive, and long-lasting finish. By following the steps outlined in this guide, you can ensure that your epoxy coating adheres properly and provides optimal protection for your garage floor.
Assessing the condition of the garage floor, clearing out the space, and repairing any cracks or damage are the initial steps to create a solid foundation. Cleaning the floor thoroughly, etching the surface, and rinsing and drying the floor are essential to remove dirt, grease, and contaminants that could hinder adhesion.
Filling in any divots or low spots and sanding the floor help to create an even surface for the epoxy coating application. Removing all dust and debris is crucial to ensure a clean and smooth canvas for the epoxy.
Applying the epoxy primer provides a strong bond between the concrete floor and the subsequent epoxy coating layers. Finally, applying the epoxy coating itself transforms the appearance of your garage floor, providing a durable, chemical-resistant, and easy-to-maintain surface.
Remember to allow the epoxy coating sufficient time to cure, following the manufacturer’s guidelines, to achieve optimal hardness and durability. This will ensure that your garage floor can withstand the demands of everyday use and provide long-lasting protection.
By following these steps and investing the time and effort into properly prepping your garage floor, you will transform your space into a functional and visually appealing area. Whether it’s for parking your vehicles, as a workshop, or as an extension of your living space, a properly prepped and epoxy-coated garage floor will add value, beauty, and functionality to your home.
Frequently Asked Questions about How To Prep A Garage Floor For Epoxy
Was this page helpful?
At Storables.com, we guarantee accurate and reliable information. Our content, validated by Expert Board Contributors, is crafted following stringent Editorial Policies. We're committed to providing you with well-researched, expert-backed insights for all your informational needs.
0 thoughts on “How To Prep A Garage Floor For Epoxy”