Articles
How To Remove Hampton Bay Ceiling Fan
Modified: October 18, 2024
Learn how to effectively remove a Hampton Bay ceiling fan with our informative articles. Discover step-by-step instructions and helpful tips to simplify the process.
(Many of the links in this article redirect to a specific reviewed product. Your purchase of these products through affiliate links helps to generate commission for Storables.com, at no extra cost. Learn more)
Introduction
Welcome to our comprehensive guide on how to remove a Hampton Bay ceiling fan. Hampton Bay ceiling fans are known for their stylish designs and efficient functionality, but there may come a time when you need to remove one. Whether you’re replacing it with a new fan or making repairs, this article will provide you with step-by-step instructions on how to safely and effectively remove your Hampton Bay ceiling fan.
Before we begin, it’s important to note that you should always prioritize safety when working with electricity. Make sure to turn off the power to the fan at the circuit breaker before starting any work. Additionally, if you are unsure about any part of the removal process, it is recommended to consult a licensed electrician to ensure a safe and proper removal.
In this guide, we will walk you through the process of removing a Hampton Bay ceiling fan, from detaching the blades to disconnecting the electrical connections. We’ll also provide tips on how to patch and repair your ceiling if necessary after removing the fan.
To successfully remove your Hampton Bay ceiling fan, you’ll need a few tools and materials. These may include a ladder, screwdrivers (both Phillips and flathead), wire strippers, electrical tape, and a voltage tester. It’s essential to have these items on hand to ensure a smooth removal process.
So, if you’re ready to learn how to remove your Hampton Bay ceiling fan safely and efficiently, let’s dive into the step-by-step instructions. Remember to follow each step carefully and take your time to avoid any accidents or damage to your fan or ceiling.
Let’s get started with step one: turning off the power to the fan.
Key Takeaways:
- Safely remove a Hampton Bay ceiling fan by following step-by-step instructions, prioritizing safety, and using the necessary tools and materials. Always turn off the power and consult a professional if unsure.
- After removing the fan, consider patching and repairing the ceiling for a seamless finish. Prioritize safety, take your time, and enjoy the process of upgrading your space.
Read more: How To Install Hampton Bay Ceiling Fan
Safety Precautions
Before you begin the process of removing your Hampton Bay ceiling fan, it’s crucial to prioritize safety. Working with electricity can be dangerous, so it’s essential to take the following precautions:
- Turn off the power: Before starting any work, locate the circuit breaker that controls the fan and turn off the power. This will prevent any accidental electric shocks or injuries.
- Use a voltage tester: Even after turning off the power, it’s advisable to use a voltage tester to ensure that no electricity is flowing to the fan. This will give you peace of mind and make the removal process safer.
- Have a stable ladder: Make sure you have a stable ladder or platform to support your weight while working on the fan. This will prevent falls and injuries.
- Wear protective gear: Use safety goggles to protect your eyes from any debris or dust that may fall during the removal process. Additionally, wearing gloves will provide added protection for your hands.
- Work with a partner: Having a second person present can be valuable for added safety. They can steady the ladder, hand you tools, or offer assistance if needed.
- Be gentle with the fan: Throughout the removal process, handle the fan and its components with care to avoid any damage or accidents.
- Keep children and pets away: Make sure to keep children and pets at a safe distance from the work area to prevent any accidents or injuries.
- Consult a professional if unsure: If you are unsure about any part of the removal process or feel uncomfortable working with electricity, it’s best to hire a licensed electrician. They have the knowledge and experience to ensure a safe and proper removal.
By following these safety precautions, you are taking the necessary steps to protect yourself and others during the removal process. Safety should always be your top priority when working with electrical appliances.
Now that you’re aware of the safety precautions, let’s move on to the tools and materials you’ll need for removing your Hampton Bay ceiling fan.
Tools and Materials Needed
Before you begin the process of removing your Hampton Bay ceiling fan, it’s important to gather the necessary tools and materials. Having these items on hand will make the removal process easier and more efficient. Here’s a list of what you’ll need:
- Ladder: You’ll need a sturdy ladder to reach the ceiling fan and work at a safe height.
- Screwdrivers: Both Phillips and flathead screwdrivers will be necessary for removing the screws that hold the fan together.
- Wire strippers: Wire strippers will be useful for disconnecting the electrical connections.
- Electrical tape: Electrical tape is needed to secure and insulate the electrical connections.
- Voltage tester: A voltage tester is essential for checking if there is still electricity flowing to the fan before starting the removal process.
- Towel or blanket: Use a towel or a blanket to protect the floor or any furniture beneath the fan to prevent any damage from falling debris.
- Bucket or storage container: It’s a good idea to have a bucket or a storage container handy to collect the screws and small parts as you remove them, ensuring they don’t get lost.
Having these tools and materials readily available will make the removal process smoother and more efficient, reducing the likelihood of any delays or complications.
Now that you have all the necessary tools and materials, let’s move on to the step-by-step process of removing your Hampton Bay ceiling fan.
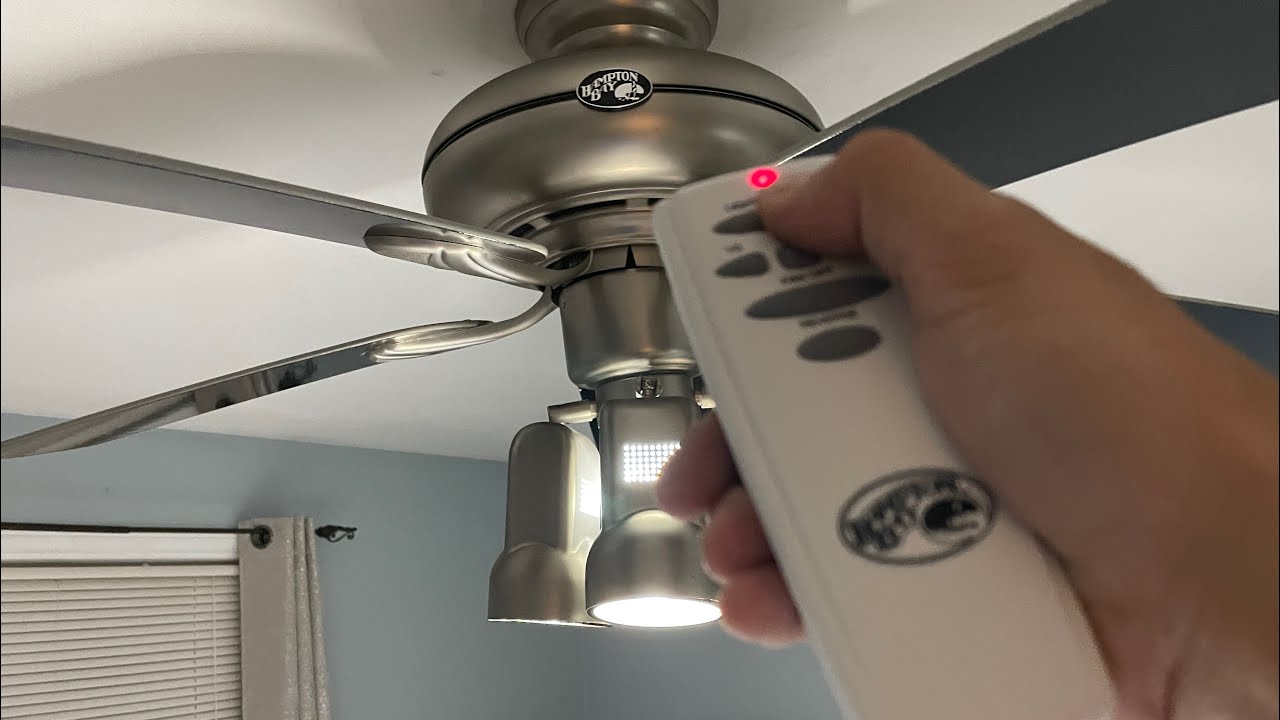
Step 1: Turn Off the Power
Before you start removing your Hampton Bay ceiling fan, it’s crucial to ensure that the power to the fan is completely turned off. This step is essential to prevent any electrical accidents or injuries while working on the fan. Here’s how to turn off the power:
- Locate the circuit breaker that controls the fan. Usually, the fan will have its own dedicated circuit. If you’re unsure which circuit controls the fan, you may need to turn off the main circuit breaker to be safe.
- Flip the switch to the “Off” position or remove the fuse that corresponds to the fan’s circuit.
- Once you’ve turned off the power, use a voltage tester to double-check that there is no electricity flowing to the fan. This will provide an extra level of safety before proceeding with the removal process.
It’s important to note that even though you’ve turned off the power, there may still be residual electricity in the fan. So, it’s advisable to avoid touching any exposed wires or metal parts to prevent electric shocks.
By turning off the power and confirming that it is off, you’ve taken the necessary steps to ensure a safe working environment. Now, let’s move on to step 2: removing the fan blades.
Step 2: Remove the Fan Blades
Once you’ve turned off the power and confirmed that there is no electricity flowing to the fan, you can proceed with removing the fan blades. Here’s a step-by-step guide on how to remove the fan blades from your Hampton Bay ceiling fan:
- Locate the screws that secure the fan blades to the motor housing. The number of screws will vary depending on the fan model.
- Using a screwdriver that fits the screw heads, unscrew the screws counterclockwise to loosen and remove them. Keep the screws in a safe place as you’ll need them later to reassemble the fan.
- Gently lift each fan blade from the motor housing and set them aside. Be careful not to damage the blade or the motor housing during this process.
- Continue removing all the fan blades until they are all detached from the motor.
It’s worth mentioning that some Hampton Bay ceiling fans may have a canopy cover or a decorative plate that covers the screws securing the fan blades. In such cases, you’ll need to remove the canopy cover or plate first before accessing and removing the screws.
Removing the fan blades is an important step in dismantling the Hampton Bay ceiling fan. Once you’ve successfully removed the blades, you can move on to the next step: detaching the light fixture (if applicable).
Read more: Who Sells Hampton Bay Ceiling Fans
Step 3: Detach the Light Fixture (if applicable)
If your Hampton Bay ceiling fan has a light fixture attached, you’ll need to detach it before continuing with the removal process. Here’s a step-by-step guide on how to safely detach the light fixture:
- Locate the screws or screws securing the light fixture to the fan housing. These may be located on the bottom or sides of the fixture.
- Using a screwdriver that fits the screw heads, turn the screws counterclockwise to loosen and remove them. Be sure to keep the screws in a safe place as you’ll need them when reassembling the fan.
- Gently lower the light fixture away from the fan housing, taking care not to damage the wiring or any other components.
- If the light fixture is connected to any electrical wires, carefully disconnect the wires by twisting off the wire nuts or removing any connectors.
- Once the wires are disconnected, set the light fixture aside in a safe place.
If your Hampton Bay ceiling fan does not have a light fixture attached, you can skip this step and move on to the next step.
Removing the light fixture allows for easier access to the fan housing and makes the overall removal process smoother. With the light fixture detached, you’re ready to move on to step 4: removing the canopy cover.
Before removing a Hampton Bay ceiling fan, make sure to turn off the power at the circuit breaker. Use a ladder to access the fan, and carefully remove the blades, light kit, and canopy. Disconnect the wires and remove the mounting bracket to uninstall the fan.
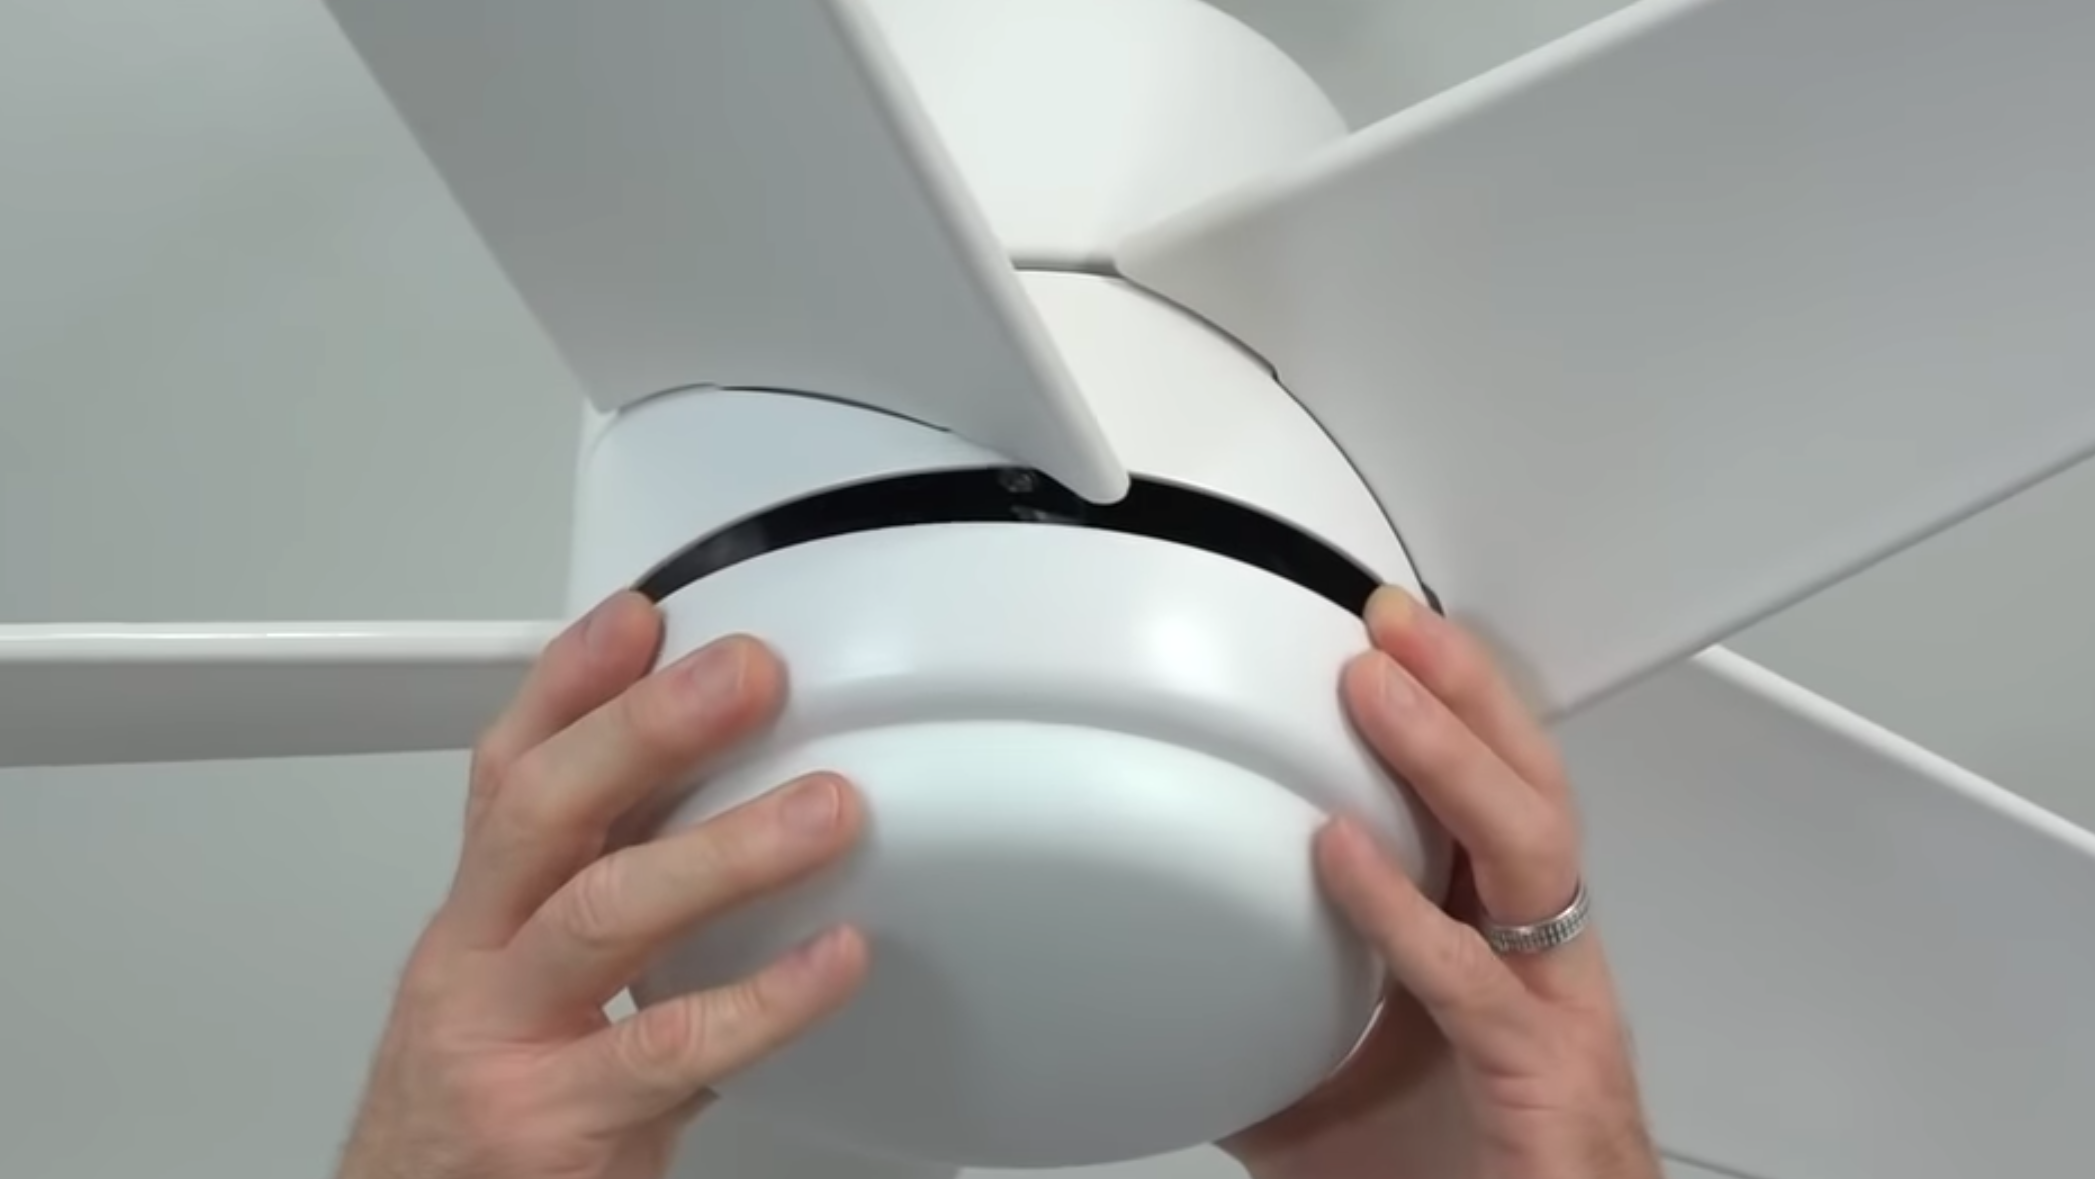
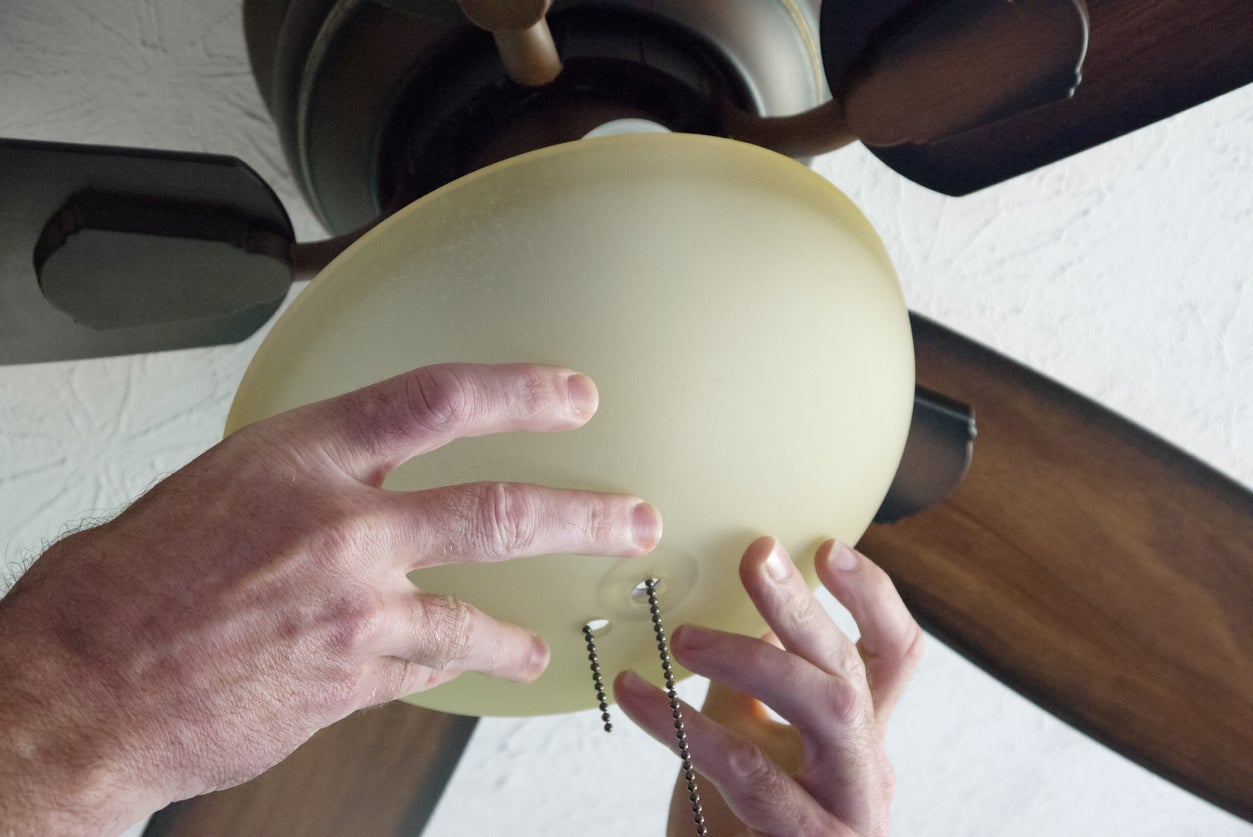
Step 4: Remove the Canopy Cover
In this step, you’ll be removing the canopy cover of your Hampton Bay ceiling fan. The canopy cover is the decorative covering that hides the electrical components and attaches the fan to the ceiling. Follow these steps:
- Locate the screws or mounting hardware that secure the canopy cover to the ceiling.
- Using a screwdriver or the appropriate tool, loosen and remove these screws counterclockwise.
- As you remove the screws, hold onto the canopy cover to prevent it from falling.
- Gently lower the canopy cover away from the ceiling, exposing the electrical components inside.
It’s important to note that some Hampton Bay ceiling fans may have a unique method of attaching the canopy cover. In such cases, refer to the manufacturer’s instructions for specific guidance on removing the canopy cover.
Once the canopy cover is removed, you’ll have better access to the fan’s mounting bracket and the electrical connections. In the next step, we’ll guide you through the process of uninstalling the mounting bracket.
Step 5: Uninstall the Mounting Bracket
Now that the canopy cover is removed, you can proceed to uninstalling the mounting bracket of your Hampton Bay ceiling fan. The mounting bracket is what secures the fan to the ceiling. Follow these steps:
- Locate the screws or bolts that attach the fan’s mounting bracket to the ceiling.
- Using the appropriate screwdriver or wrench, loosen and remove these screws or bolts counterclockwise.
- Hold onto the mounting bracket to prevent it from falling while you remove the screws or bolts completely.
- Once the screws or bolts are removed, carefully lower and set aside the mounting bracket.
It’s important to ensure that the mounting bracket is securely detached from the ceiling before proceeding to the next step. This will prevent any accidents or damage when disconnecting the electrical connections.
With the mounting bracket removed, you’re now ready to disconnect the electrical connections in the next step.
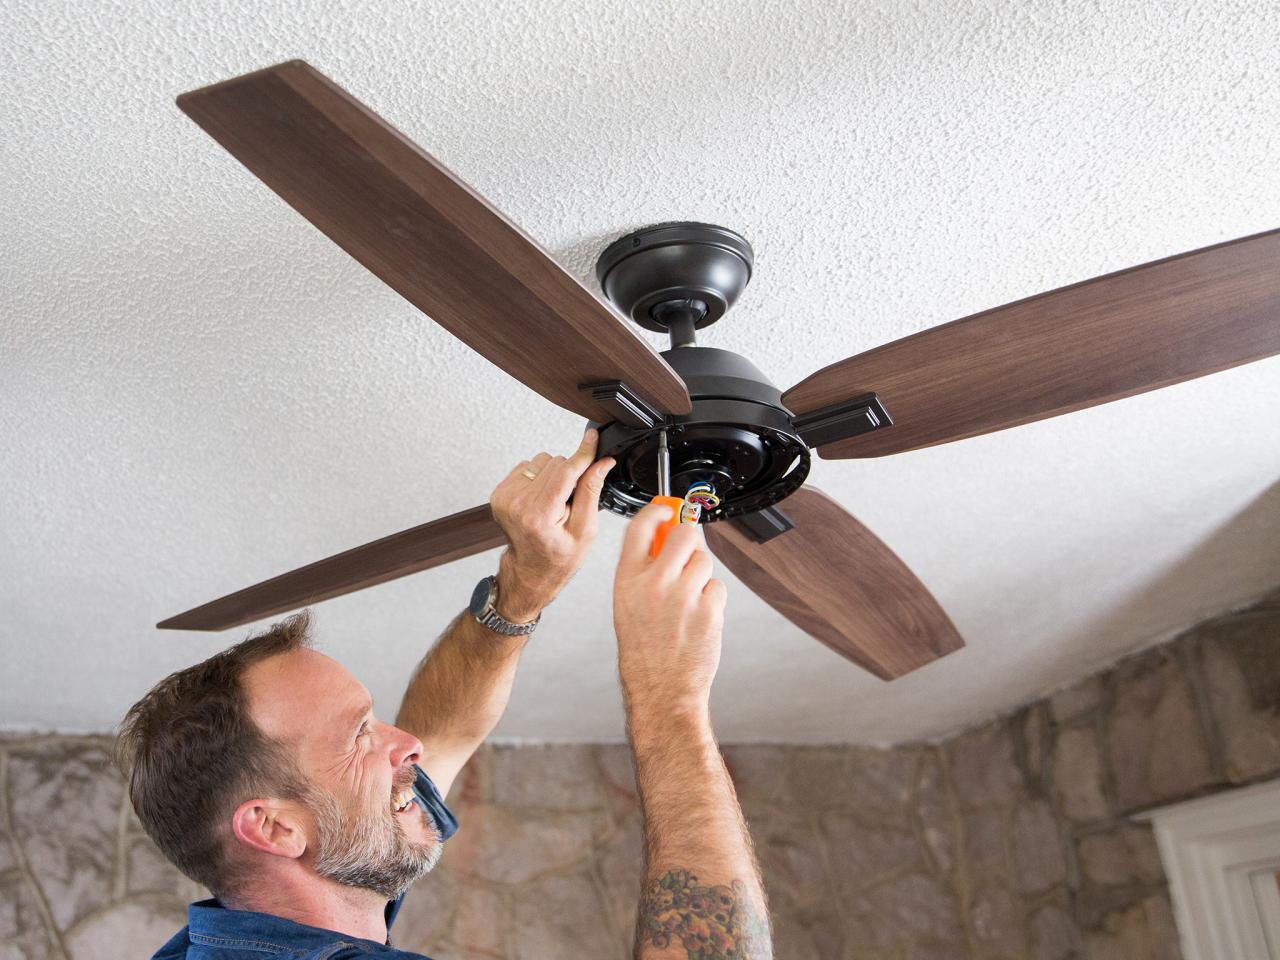
Step 6: Disconnect the Electrical Connections
In this step, you’ll be disconnecting the electrical connections of your Hampton Bay ceiling fan before removing it completely. Follow these steps carefully:
- Locate the wire nuts that connect the fan’s electrical wires to the house wiring.
- Using wire strippers or pliers, grasp the wire nut and twist it counterclockwise to loosen and remove it.
- Once the wire nut is removed, gently separate the fan’s electrical wires from the house wiring.
- It’s important to note the specific connections between the fan’s wires and the house wiring. Consider taking a picture or making a note to aid in reinstallation later.
- After disconnecting the electrical wires, use electrical tape to individually cover and insulate each exposed wire end.
- Secure the electrical tape around the wire ends, ensuring there are no exposed conductors.
Take caution and ensure that the fan’s electrical wires are securely isolated and cannot make contact with each other or any other electrical components. This step is crucial for safety reasons.
With the electrical connections safely disconnected, you’re now ready to remove the Hampton Bay ceiling fan from the mounting bracket in the next step.
Read also: 15 Amazing Hampton Bay Ceiling Fan for 2025
Step 7: Remove the Ceiling Fan from the Mounting Bracket
Now that the electrical connections are safely disconnected, you can proceed to remove the Hampton Bay ceiling fan from the mounting bracket. Follow these steps:
- Hold onto the fan securely to prevent it from falling during the removal process.
- Slowly lift the fan away from the mounting bracket, taking care not to damage any surrounding objects.
- Check for any additional screws or fasteners connecting the fan to the mounting bracket or ceiling. If present, remove them as needed.
- Once all fasteners are removed, carefully lower the fan to the ground or onto a soft surface.
Removing the ceiling fan from the mounting bracket requires caution to avoid any accidents or damage. Depending on the weight and size of the fan, it may be helpful to have a second person assist you with this step.
With the fan removed from the mounting bracket, you can proceed to the final step, which involves patching and repairing the ceiling if necessary.
Step 8: Patching and Repairing the Ceiling (if necessary)
After removing the Hampton Bay ceiling fan, you may find that there are holes or damage on the ceiling where the mounting bracket was attached. In this step, we’ll guide you on how to patch and repair the ceiling if necessary:
- Start by cleaning the area around the mounting bracket to remove any dust or debris.
- If there are any small screw holes, you can use a lightweight spackling compound or putty to fill them. Apply the spackling compound using a putty knife, smoothing it out evenly.
- For larger holes, you may need to use a patching kit or drywall compound. Follow the instructions provided with the kit to create a patch that fits the size of the hole.
- Apply the patching material over the hole, using a putty knife to smooth it out and blend it with the surrounding ceiling surface.
- Allow the patching compound or spackling to dry completely according to the manufacturer’s instructions.
- Once dry, sand the patched areas lightly to achieve a smooth finish.
- If necessary, apply a primer to the patched areas before painting to ensure a uniform color and texture.
- Finally, paint the patched areas to match the rest of the ceiling. Use a paintbrush or roller, and apply multiple coats if needed.
By patching and repairing the ceiling, you restore its appearance and integrity. This step is optional but recommended if there are noticeable holes or damage after removing the fan.
With the ceiling repaired, you have successfully completed the process of removing a Hampton Bay ceiling fan. You can now proceed with installing a new fan or making any necessary repairs or modifications.
Congratulations on a job well done!
Conclusion
Congratulations! You have successfully learned how to remove a Hampton Bay ceiling fan. By following the step-by-step instructions in this comprehensive guide, you have safely and effectively completed the removal process.
We started by emphasizing the importance of safety precautions when working with electricity. Always remember to turn off the power, use a voltage tester, and wear protective gear. If you’re unsure, it’s best to consult a licensed electrician.
We then discussed the tools and materials you’ll need for the removal process. Gathering these items beforehand will make the job easier and more efficient.
The step-by-step instructions guided you through detaching the fan blades, removing the light fixture (if applicable), taking off the canopy cover, uninstalling the mounting bracket, disconnecting the electrical connections, and finally, removing the fan from the mounting bracket.
If necessary, we also provided guidance on patching and repairing the ceiling after removing the fan, ensuring a smooth finish and maintaining the aesthetic appeal of your room.
Removing a Hampton Bay ceiling fan can open up new possibilities for replacing it with a new fan or making repairs. Just remember to carefully follow the instructions and take your time to avoid any accidents or damage to the fan or ceiling.
Thank you for using our guide to learn how to remove a Hampton Bay ceiling fan. We hope you found it informative and helpful. If you have any further questions, don’t hesitate to reach out to a professional or consult the manufacturer’s instructions. Happy fan removal!
Now that you've mastered removing your Hampton Bay ceiling fan, why not tackle the next challenge? If you're keen on replacing that empty space with a new fan, our guide on how to install a ceiling fan where a light was offers practical steps to ensure a smooth setup. For those curious about regular upkeep, our comprehensive home maintenance advice will keep your dwelling in top shape year-round. Both pieces are packed with easy-to-follow advice aimed at enhancing your home's comfort and functionality.
Frequently Asked Questions about How To Remove Hampton Bay Ceiling Fan
Was this page helpful?
At Storables.com, we guarantee accurate and reliable information. Our content, validated by Expert Board Contributors, is crafted following stringent Editorial Policies. We're committed to providing you with well-researched, expert-backed insights for all your informational needs.


0 thoughts on “How To Remove Hampton Bay Ceiling Fan”