
Articles
How To Install Z-Flashing On T1-11 Siding
Modified: October 28, 2024
Learn how to properly install Z-flashing on T1-11 siding with our informative articles. Ensure a durable and watertight seal for your siding project.
(Many of the links in this article redirect to a specific reviewed product. Your purchase of these products through affiliate links helps to generate commission for Storables.com, at no extra cost. Learn more)
Introduction
Welcome to our comprehensive guide on how to install Z-flashing on T1-11 siding. If you’re a homeowner or a DIY enthusiast looking to protect your house from moisture damage and ensure the durability of your siding, then this article is for you.
T1-11 siding is a popular choice for many homeowners due to its affordability and versatility. However, without proper installation and protection, it can be susceptible to water infiltration, leading to rot, mold, and structural damage. This is where Z-flashing comes in.
Z-flashing is a crucial component of a well-installed T1-11 siding system. It acts as a barrier, preventing water from seeping into the gaps and joints of the siding, particularly along the horizontal and vertical edges. By properly installing Z-flashing, you can significantly extend the lifespan of your T1-11 siding and ensure a sturdy and moisture-resistant exterior for your home.
In this step-by-step guide, we will take you through the entire process of installing Z-flashing on T1-11 siding. Before we dive in, let’s go over the tools and materials you will need for this project.
Key Takeaways:
- Proper installation of Z-flashing on T1-11 siding is essential for protecting your home from moisture damage, preventing issues like rot and mold, and ensuring the durability of your siding for years to come.
- By following the step-by-step guide and using the right tools and materials, you can successfully install Z-flashing, adding a crucial layer of protection to your home and enhancing the longevity of your T1-11 siding.
Read more: What Is T1-11 Siding
What is Z-Flashing?
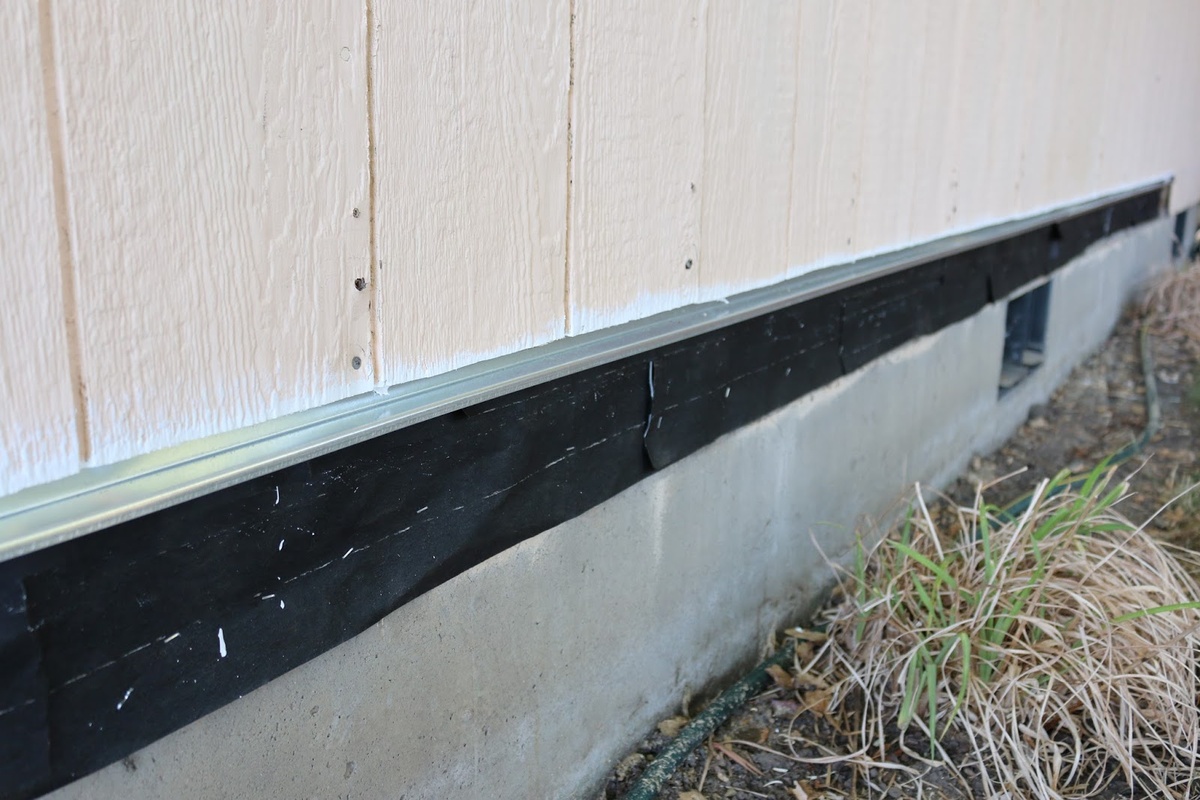
Z-flashing is a thin, metal flashing that is specifically designed to provide a waterproof barrier between the joints and edges of siding materials. It is called Z-flashing because of its distinct “Z” shape, which allows it to redirect water away from vulnerable areas and prevent water intrusion.
The primary purpose of Z-flashing is to protect the underlying structure of your home from moisture damage. Water can easily seep into gaps between siding panels, where it can lead to rot, mold growth, and even structural issues. By installing Z-flashing, you create a barrier that directs water away from these vulnerable areas, ensuring the longevity and integrity of your siding.
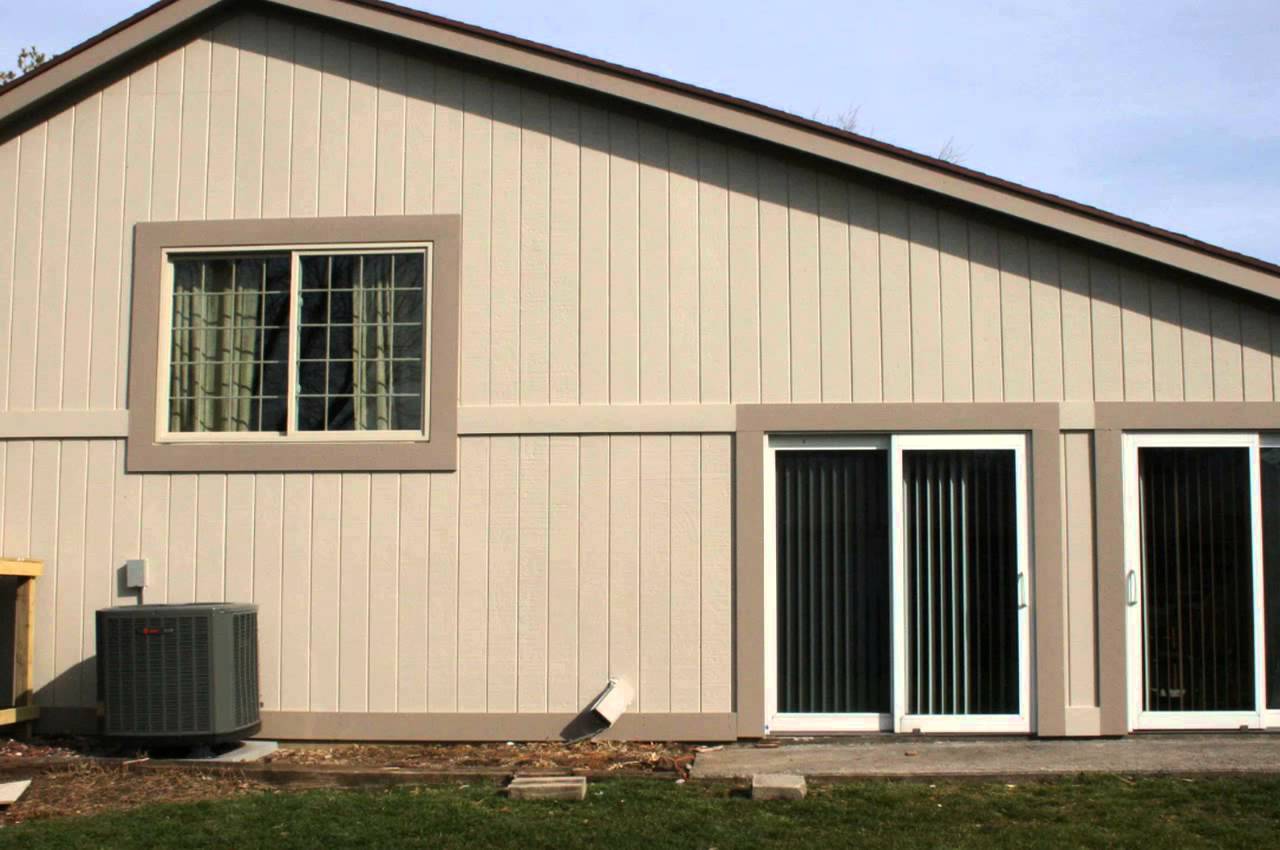
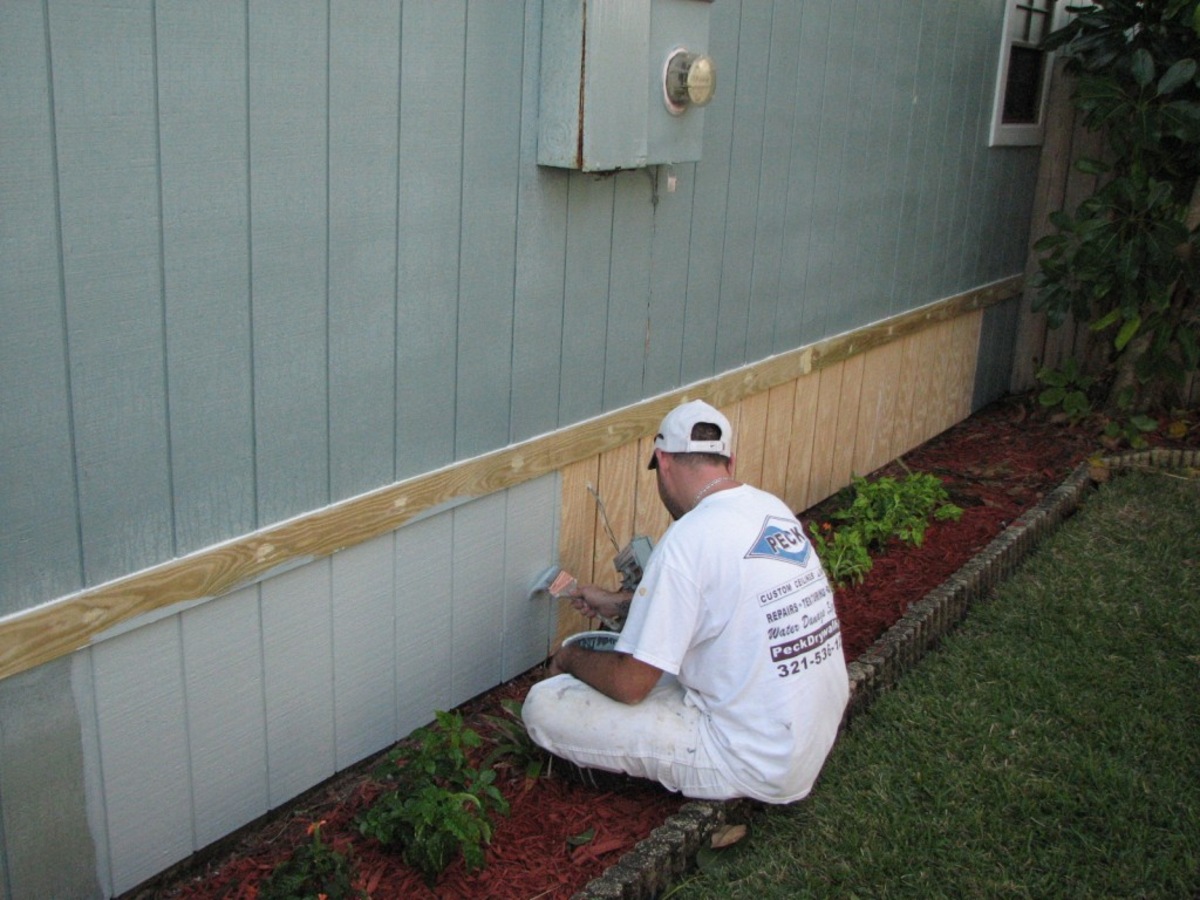
Z-flashing is commonly used in conjunction with T1-11 siding, a type of wood composite siding. T1-11 siding consists of large plywood or engineered wood panels with vertical grooves that mimic traditional wooden planks. While T1-11 siding is durable and cost-effective, it is prone to water infiltration if not properly protected.
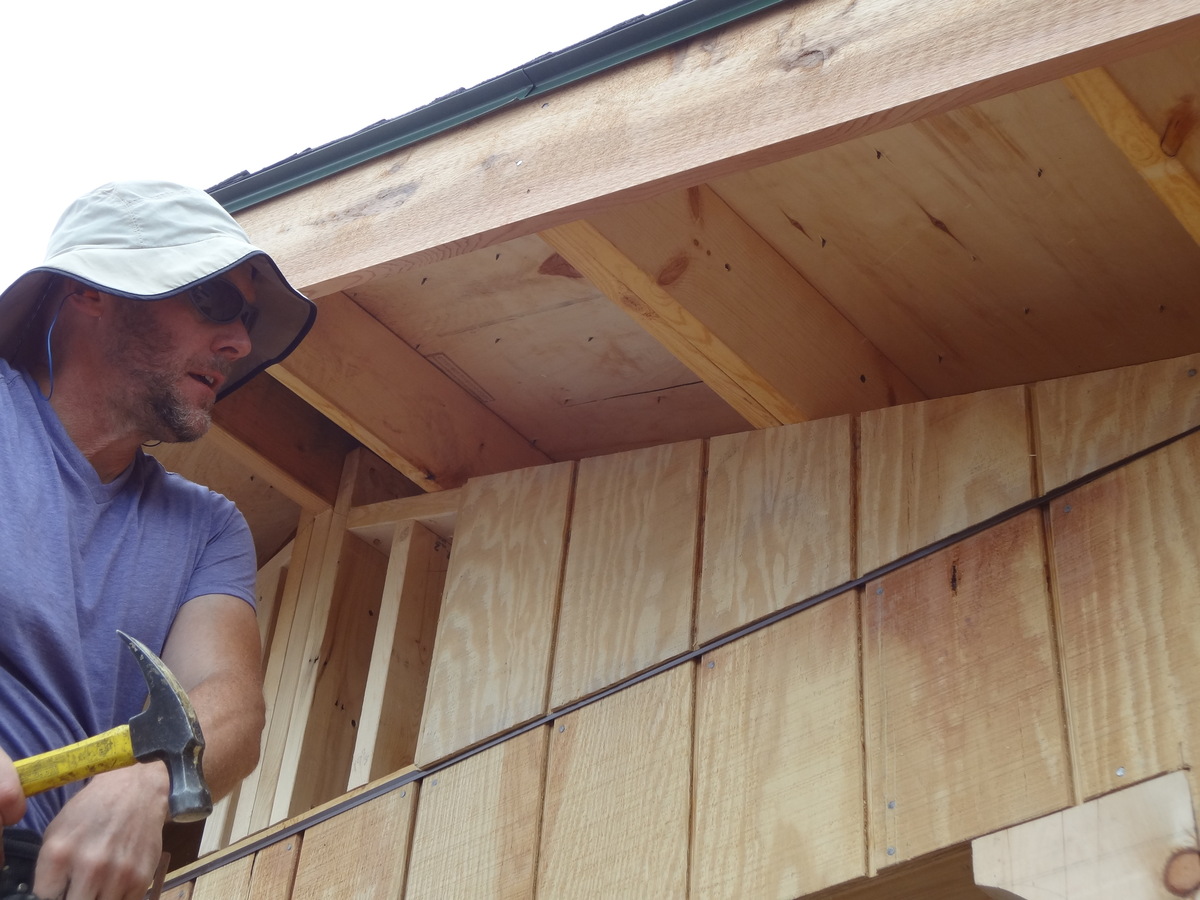
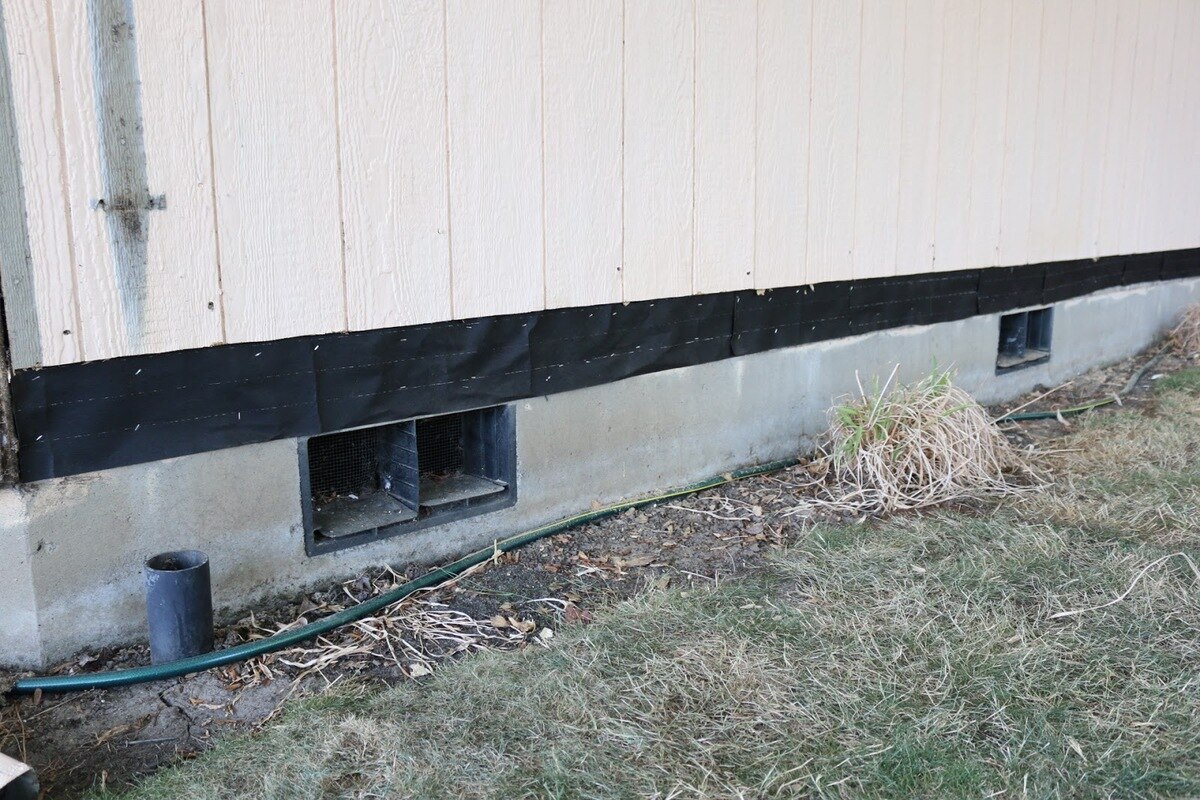
When installing T1-11 siding, Z-flashing is typically applied along the vertical and horizontal edges of the panels. It acts as a protective shield, creating a watertight seal between the panels and preventing water from seeping into the joints.
Additionally, Z-flashing is also used in other siding applications, such as fiber cement, vinyl, and metal sidings. The installation process may vary slightly depending on the type of siding material, but the fundamental purpose remains the same: to provide a waterproof barrier and protect the integrity of the siding.
Now that we understand what Z-flashing is and its importance in siding installations, let’s move on to the tools and materials you will need to install Z-flashing on T1-11 siding.
Tools and Materials Needed
Before you begin installing Z-flashing on T1-11 siding, it’s essential to gather all the necessary tools and materials. Here’s a list of what you’ll need:
Tools:
- Measuring tape
- Pencil or marking tool
- Straight edge or level
- Tin snips or metal cutting shears
- Circular saw or miter saw (optional)
- Hammer
- Drill
- Drill bits
- Screwdriver
- Caulking gun
- Utility knife
Materials:
- Z-flashing – ensure it’s the appropriate length for your siding installation
- Screws or nails – corrosion-resistant and suitable for exterior use
- Silicone caulk or exterior-grade adhesive
- Primer and paint (optional) – for finishing and protecting the Z-flashing
Having these tools and materials readily available will ensure a streamlined and efficient installation process. It’s essential to choose high-quality materials that are designed for exterior use, as they will offer better protection against moisture and weathering.
Once you’ve gathered all the necessary tools and materials, you’re ready to start the process of installing Z-flashing on your T1-11 siding. In the next steps, we’ll guide you through each phase of the installation process, ensuring proper protection for your siding and home.
Read more: How Much Is T1-11 Siding
Step 1: Preparing the T1-11 Siding
Before you can install Z-flashing on your T1-11 siding, it’s important to properly prepare the siding for the installation. Follow these steps to ensure a clean and sturdy surface:
- Inspect the T1-11 siding for any signs of damage, such as rot or decay. Replace any damaged panels before proceeding with the installation.
- Clean the surface of the siding. Use a soft brush or cloth to remove any dirt, debris, or loose paint. If there are stubborn stains or mildew, you can use a mild detergent solution and rinse it off with water. Allow the surface to dry completely before continuing.
- If the T1-11 siding is unfinished or has exposed edges, it’s recommended to prime and paint the panels before installing the Z-flashing. This will provide an additional layer of protection against moisture and ensure the longevity of the siding. Follow the manufacturer’s instructions for priming and painting, and allow the paint to dry thoroughly.
- Measure and mark the locations where the Z-flashing will be installed. Start by identifying the horizontal and vertical joints of the siding panels. Measure and mark the desired height and width for the Z-flashing, ensuring that it extends beyond the edges of the siding by at least 1 inch.
By properly preparing the T1-11 siding, you create a clean and stable foundation for the installation of the Z-flashing. This will ensure a secure and watertight seal, protecting your siding and home from moisture damage.
Once the T1-11 siding is prepped and ready, you can proceed to the next step: measuring and cutting the Z-flashing.
Step 2: Measuring and Cutting Z-Flashing
With the T1-11 siding prepared, it’s time to measure and cut the Z-flashing to the appropriate size. Follow these steps:
- Start by measuring the length of the vertical and horizontal edges where the Z-flashing will be installed. Use a measuring tape and ensure that your measurements are accurate.
- Add an additional inch to each measurement to provide an overlap with the adjacent Z-flashing sections.
- Transfer the measurements onto the Z-flashing using a pencil or marking tool.
- Using tin snips or metal cutting shears, carefully cut along the marked lines to create the individual sections of Z-flashing. Take your time and ensure clean and accurate cuts.
- If you have any angled edges or corners on your T1-11 siding, use a circular saw or miter saw (set at the appropriate angle) to cut the Z-flashing accordingly.
It’s important to cut the Z-flashing accurately to ensure a proper fit and a secure seal. Precise measurements and clean cuts will make the installation process much smoother.
Once you have correctly measured and cut the Z-flashing sections, you can move on to the next step: installing the Z-flashing on the vertical edges of the T1-11 siding.
Step 3: Installing Z-Flashing on Vertical Edges
Now that you have measured and cut the Z-flashing to the appropriate size, it’s time to install it on the vertical edges of the T1-11 siding. Follow these steps:
- Start at one end of the vertical edge and position the Z-flashing against the siding, ensuring that it extends beyond the top and bottom edges by at least 1 inch.
- Using a hammer or drill, secure the Z-flashing in place by driving screws or nails through the top edge into the siding. Place the fasteners approximately 12 to 16 inches apart, ensuring a secure attachment.
- Repeat the process for the remaining sections of Z-flashing, overlapping each section by at least 1 inch. This overlap will create a watertight barrier.
- Make sure the Z-flashing is straight and aligned with the vertical edge of the T1-11 siding. Use a level or straight edge to ensure accuracy.
Installing the Z-flashing on the vertical edges is crucial in preventing water from seeping into the joints of the T1-11 siding. The overlapping sections create a barrier that redirects water away from the vulnerable areas, ensuring the long-term integrity of the siding.
Once the Z-flashing is securely installed on the vertical edges, you can proceed to the next step: installing the Z-flashing on the horizontal edges of the T1-11 siding.
When installing Z-flashing on T1-11 siding, make sure to properly seal the top edge of the flashing to prevent water from seeping behind the siding. Use a high-quality exterior caulk for a long-lasting seal.
Step 4: Installing Z-Flashing on Horizontal Edges
Once the Z-flashing is securely installed on the vertical edges, it’s time to move on to installing it on the horizontal edges of the T1-11 siding. Follow these steps:
- Start at one end of the horizontal edge and position the Z-flashing against the siding, ensuring that it extends beyond the edge by at least 1 inch.
- Using a hammer or drill, secure the Z-flashing in place by driving screws or nails through the top edge into the siding. Again, place the fasteners approximately 12 to 16 inches apart for a secure attachment.
- Repeat the process for the remaining sections of Z-flashing, overlapping each section by at least 1 inch.
- Ensure that the Z-flashing is straight and aligned with the horizontal edge of the T1-11 siding. Use a level or straight edge to ensure accuracy.
Installing the Z-flashing on the horizontal edges is just as important as the vertical edges. It creates a watertight seal that prevents water from infiltrating the joints of the T1-11 siding, protecting your home from moisture damage.
Now that the Z-flashing is securely installed on both the vertical and horizontal edges, you can move on to the next step: securing the Z-flashing in place.
Read more: How To Install T1-11 Siding Around Windows
Step 5: Securing the Z-Flashing
Once the Z-flashing is installed on both the vertical and horizontal edges of the T1-11 siding, it’s important to secure it in place to ensure a tight and reliable seal. Follow these steps:
- After installing each section of Z-flashing, check for any gaps or areas where the flashing may not be tightly pressed against the siding. If you notice any gaps, use a hammer or a screwdriver to gently tap the flashing into place.
- Ensure that there are no loose sections of the Z-flashing. If you find any areas that are not securely attached, use additional screws or nails to fasten them down.
- Inspect the overall alignment and straightness of the Z-flashing. Make any necessary adjustments to ensure that the flashing is properly lined up and parallel to the edges of the T1-11 siding.
Securing the Z-flashing is crucial in maintaining its effectiveness and ensuring a reliable barrier against moisture. By double-checking the installation and making any necessary adjustments, you can be confident in the protection it provides to your T1-11 siding and your home.
Once you have completed securing the Z-flashing, you can move on to the final step: caulking and sealing the installation.
Step 6: Caulking and Sealing
After securing the Z-flashing in place, it’s important to properly caulk and seal the installation to ensure a complete and watertight barrier. Follow these steps:
- Begin by inspecting the entire Z-flashing installation for any gaps, cracks, or areas where water could potentially penetrate. Focus particularly on the joints where the sections of Z-flashing overlap.
- Using a caulking gun, apply a generous amount of silicone caulk into these gaps and joints. Ensure that the caulk completely fills the space and creates a continuous seal along the Z-flashing.
- Smooth out the caulk with a damp finger or a caulk smoothing tool to ensure a neat and seamless finish. This will help improve the appearance of the installation and provide a better seal.
- If desired, you can also apply a bead of caulk along the top edge of the Z-flashing, where it meets the T1-11 siding, for added protection against water infiltration.
- Allow the caulk to dry and cure according to the manufacturer’s instructions. This will ensure that it forms a strong and durable seal.
- Once the caulk is dry, you can consider applying a coat of paint or primer to the Z-flashing. This will help protect the metal from corrosion and enhance its longevity.
By caulking and sealing the Z-flashing installation, you create an additional layer of protection against water intrusion. This final step helps to ensure the overall effectiveness and longevity of your T1-11 siding.
With the caulking and sealing complete, you have successfully installed Z-flashing on your T1-11 siding. This protective measure will greatly reduce the risk of moisture-related issues and maintain the integrity of your siding for years to come.
Now that you’ve completed the installation process, take a step back and admire your handiwork. Not only have you added an important layer of protection to your home, but you’ve also learned valuable skills that can be applied to future projects.
Congratulations on a job well done!
Conclusion
Installing Z-flashing on T1-11 siding is a crucial step in protecting your home from moisture damage and ensuring the longevity of your siding. By following the steps outlined in this comprehensive guide, you have learned how to properly measure, cut, and install Z-flashing on both the vertical and horizontal edges of your T1-11 siding.
Z-flashing acts as a barrier, redirecting water away from vulnerable areas and preventing water infiltration into the joints and gaps of the siding. This helps to prevent issues such as rot, mold, and structural damage, ensuring the durability and appearance of your siding for years to come.
Remember to gather all the necessary tools and materials before you start the installation process, and take the time to properly clean and prepare the T1-11 siding. Accurate measurements and clean cuts are key to ensuring a secure and effective Z-flashing installation.
Once the Z-flashing is installed, be sure to secure it in place and caulking and seal all gaps and joints. This final step provides additional protection against water intrusion and enhances the overall effectiveness of the Z-flashing system.
By completing the installation of Z-flashing on your T1-11 siding, you have taken a proactive step in safeguarding your home from moisture damage. The knowledge and skills you have gained from this guide can be applied to future projects and help you maintain the integrity of your siding for years to come.
Remember, if you are unsure about any step or if you encounter any challenges during the installation process, it is advisable to consult with a professional in order to ensure a successful and effective installation of the Z-flashing.
Now you can enjoy peace of mind knowing that your T1-11 siding is well-protected and will continue to enhance the beauty and value of your home for many years to come.
Now that you've mastered installing Z-flashing on T1-11 siding, why not deepen your understanding of the material you've been working with? Our detailed guide on What Is T1-11 Siding covers everything from its unique properties to maintenance tips. Perfect for anyone looking to make informed decisions about home siding options, this article ensures you're well-equipped to handle any siding project confidently.
Frequently Asked Questions about How To Install Z-Flashing On T1-11 Siding
Was this page helpful?
At Storables.com, we guarantee accurate and reliable information. Our content, validated by Expert Board Contributors, is crafted following stringent Editorial Policies. We're committed to providing you with well-researched, expert-backed insights for all your informational needs.


0 thoughts on “How To Install Z-Flashing On T1-11 Siding”