Articles
How To Insulate A Vaulted Ceiling
Modified: October 22, 2024
Learn how to properly insulate a vaulted ceiling with our informative articles. Find step-by-step guides and expert tips to ensure maximum comfort and energy efficiency.
(Many of the links in this article redirect to a specific reviewed product. Your purchase of these products through affiliate links helps to generate commission for Storables.com, at no extra cost. Learn more)
Introduction
Vaulted ceilings are architecturally stunning, adding elegance and grandeur to any space. Their soaring height and unique shape create a sense of openness and spaciousness. However, without proper insulation, these beautiful ceilings can also lead to energy inefficiency, discomfort, and increased utility bills.
In this article, we will explore the importance of insulating vaulted ceilings and provide a step-by-step guide on how to effectively insulate them. By understanding the benefits of insulation and the various types available, you will be equipped with the knowledge to make informed decisions for your home improvement project.
Insulating your vaulted ceiling is essential for several reasons. Firstly, it helps regulate the temperature inside your home, keeping it comfortable year-round. Without insulation, heat can escape through the ceiling during colder months and infiltrate during hotter seasons, creating an uncomfortable living environment and increasing the workload of your HVAC system.
Secondly, insulation helps with energy efficiency and cost savings. A properly insulated vaulted ceiling prevents heat transfer, which reduces the need for excessive heating or cooling. This leads to lower energy consumption and ultimately lower utility bills.
Additionally, insulation improves soundproofing in your home. Vaulted ceilings can create acoustic challenges because sound waves can bounce off the high surfaces, resulting in echoes and a lack of privacy. Insulation helps absorb and dampen sound, creating a quieter and more peaceful living environment.
Now that we understand the importance of insulating vaulted ceilings, let’s explore the different types of insulation available and how to install them effectively. Understanding the tools and materials required and the step-by-step process will help you tackle this project with confidence and achieve optimal results.
Key Takeaways:
- Insulating vaulted ceilings is crucial for energy efficiency, comfort, and soundproofing. Choose the right insulation type, prepare the area, and follow safety guidelines for a successful and sustainable home improvement project.
- Consider the benefits, types, and installation process of vaulted ceiling insulation. Prioritize safety, evaluate R-values, and address air leaks to create a well-insulated and eco-friendly living space.
Read more: What Is A Vaulted Ceiling
Understanding Vaulted Ceilings
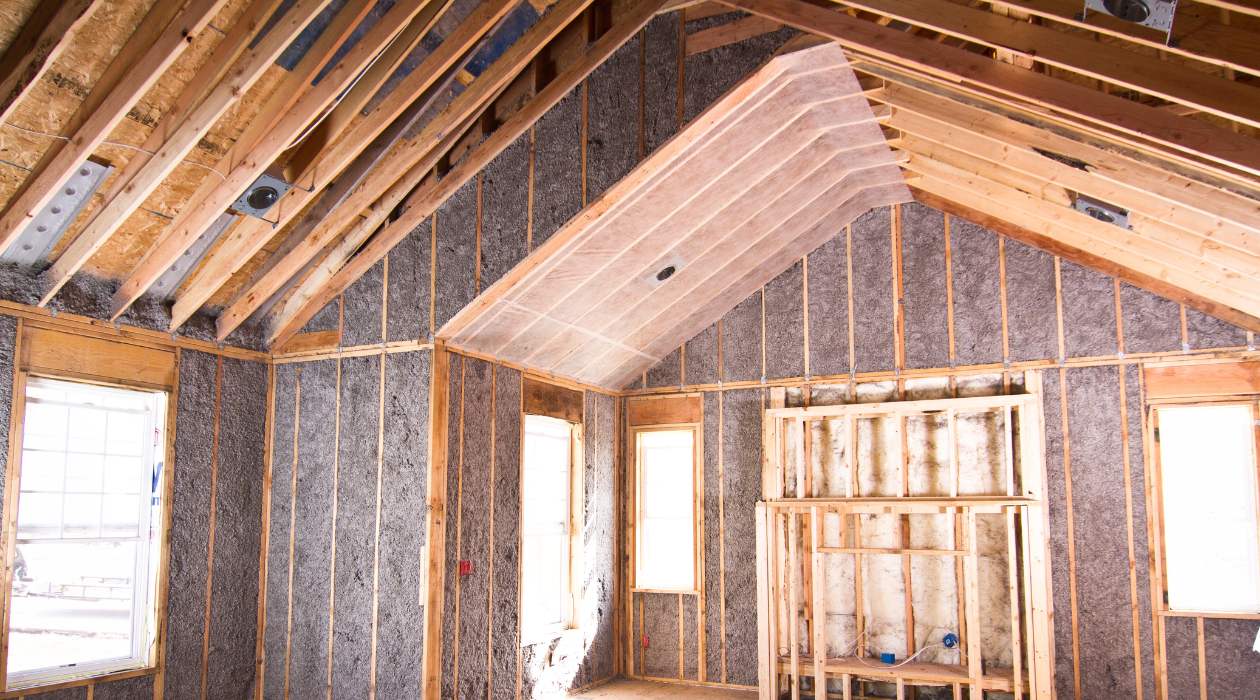
Vaulted ceilings, also known as cathedral ceilings or high ceilings, are characterized by their high and sloping design. They add a touch of elegance and spaciousness to any room, creating a visually appealing focal point. Understanding the structure and unique features of vaulted ceilings is vital when it comes to insulating them effectively.
One of the key aspects of vaulted ceilings is their height. Unlike traditional flat ceilings that have a consistent height, vaulted ceilings have a varying height that slopes upwards towards the center. This design element creates an open and airy feel within a space, making it ideal for large rooms or areas where you want to enhance the sense of volume.
Another important consideration is the type of construction used for the vaulted ceiling. There are two main types: trussed and non-trussed. Trussed ceilings have structural beams that are spaced evenly across the ceiling, providing support and stability. Non-trussed ceilings, on the other hand, do not have visible beams as they rely on other structural elements for support.
When it comes to insulating vaulted ceilings, the design and construction of the ceiling impact the insulation process. For trussed ceilings, insulation is typically placed between the ceiling joists, providing a thermal barrier. Non-trussed ceilings may require a different approach, such as using rigid foam insulation attached directly to the ceiling surface.
It’s also important to consider the access to the vaulted ceiling. Since the ceiling is higher and sloping, it can be challenging to reach and work on. Access points, such as attic spaces, may need to be utilized to ensure proper insulation installation.
Understanding the design, construction, and access points of your vaulted ceiling will help you determine the most suitable insulation method and ensure a seamless insulation installation process. By taking these factors into account, you can maximize the energy efficiency, comfort, and aesthetic appeal of your space.
Benefits of Insulating Vaulted Ceilings
Insulating your vaulted ceilings offers a myriad of benefits that go beyond just energy efficiency. Let’s explore some of the key advantages of insulating your vaulted ceilings:
- Enhanced Energy Efficiency: Insulation acts as a thermal barrier, preventing heat transfer between your living space and the outdoors. By properly insulating your vaulted ceilings, you can significantly reduce heat loss during colder months and heat gain during warmer months. This results in reduced reliance on heating and cooling systems, leading to energy conservation and lower utility bills.
- Improved Comfort: Vaulted ceilings can create temperature disparities within your home. Insulation helps regulate and maintain a consistent temperature throughout the room, making it more comfortable for occupants. Whether it’s a scorching summer day or a chilly winter night, properly insulating your vaulted ceilings ensures a comfortable and cozy living environment.
- Noise Reduction: Vaulted ceilings are known for their acoustic challenges, as sound waves can bounce off the high surfaces, leading to echoes and noise disturbances. Insulation helps absorb and dampen sound, reducing the impact of noise within the space. Whether it’s the pitter-patter of rain or the rumble of traffic outside, insulating your vaulted ceilings can provide a quieter and more peaceful living environment.
- Improved Indoor Air Quality: Insulation not only helps regulate temperature but also acts as a barrier against outdoor pollutants and allergens. By sealing gaps and preventing air infiltration, insulation minimizes the entry of dust, pollen, and other allergens into your living space. This promotes improved indoor air quality, especially for individuals with respiratory conditions or allergies.
- Long-Term Savings: Investing in insulation for your vaulted ceilings may require an upfront cost, but it provides long-term savings. The reduced energy consumption resulting from insulation leads to lower utility bills year after year. Additionally, improved energy efficiency can increase the resale value of your home, making insulation a wise investment.
- Sustainability: Insulating your vaulted ceilings aligns with sustainable living practices. By reducing energy consumption and minimizing carbon emissions, you contribute to environmental conservation. Insulation not only benefits your home and wallet but also promotes a greener and more sustainable future.
With these numerous benefits, insulating your vaulted ceilings is a wise decision that can improve your home’s comfort, energy efficiency, and overall quality of living. By creating a properly insulated envelope, you can enjoy a more comfortable and sustainable home for years to come.
Types of Insulation for Vaulted Ceilings
When it comes to insulating your vaulted ceilings, there are several options to choose from. Each type of insulation offers different benefits and considerations. Here are some common types of insulation for vaulted ceilings:
- Fiberglass Insulation: Fiberglass insulation is one of the most common and widely used types of insulation. It consists of fine glass fibers and is available in batts or rolls. Fiberglass insulation is cost-effective, easy to install, and offers good thermal performance. It is suitable for both trussed and non-trussed vaulted ceilings. However, it’s important to wear protective gear during installation, as the fibers can irritate the skin and respiratory system.
- Spray Foam Insulation: Spray foam insulation is a versatile option for vaulted ceilings. It is applied as a liquid that expands and hardens into a foam, creating an airtight seal. Spray foam insulation provides excellent thermal performance and effectively fills irregular and hard-to-reach spaces. It also offers soundproofing benefits. However, professional installation is recommended due to the precise application process and the need to handle chemicals with care.
- Cellulose Insulation: Cellulose insulation is made from recycled paper treated with fire retardants. It is an eco-friendly option that offers good thermal performance and soundproofing benefits. Cellulose insulation is densely packed and can be blown into cavities or installed as loose fill. It is suitable for both trussed and non-trussed vaulted ceilings. However, it requires professional installation due to the specialized equipment needed.
- Rigid Foam Insulation: Rigid foam insulation, such as expanded polystyrene (EPS) or extruded polystyrene (XPS), is a popular choice for insulating vaulted ceilings. It comes in rigid panels that provide excellent thermal resistance. Rigid foam insulation is lightweight, moisture-resistant, and easy to handle. It can be attached directly to the ceiling surface for non-trussed vaulted ceilings. However, sealing gaps between panels is crucial to prevent air leakage.
- Natural Fiber Insulation: Natural fiber insulation, such as wool or cotton, is an eco-friendly alternative to traditional insulation materials. It offers good thermal performance, sound absorption, and moisture regulation. Natural fiber insulation is suitable for both trussed and non-trussed vaulted ceilings. It is easy to handle and install, but it may require thicker layers to achieve the same thermal resistance as other materials.
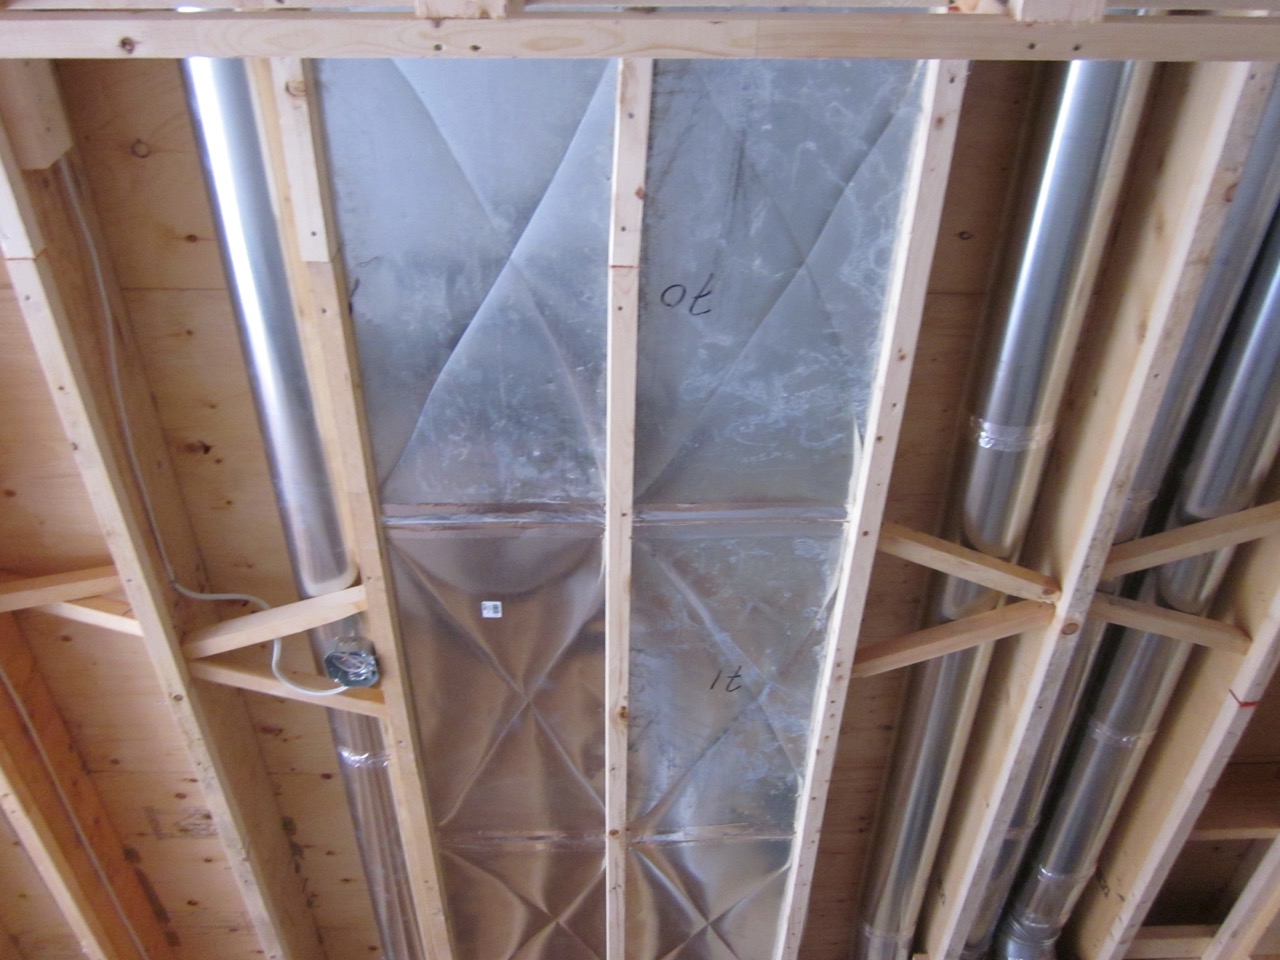
- Reflective Insulation: Reflective insulation consists of a reflective material, such as aluminum foil, backed by a layer of insulation. It works by reflecting radiant heat away from the ceiling, keeping the space cooler in hot climates. Reflective insulation is typically used in conjunction with other insulation materials for optimal performance. It is suitable for both trussed and non-trussed vaulted ceilings and is particularly effective in areas with hot summers.
Before deciding on the type of insulation for your vaulted ceilings, consider factors such as climate, budget, accessibility, and personal preferences. Consulting with a professional insulation contractor can help you determine the most suitable option based on your specific needs and requirements.
Tools and Materials Needed
Before you begin the process of insulating your vaulted ceilings, it’s essential to gather the necessary tools and materials. Having everything on hand will help ensure a smooth and efficient installation. Here are the tools and materials you’ll need:
Read more: How Much To Vault A Ceiling
Tools:
- Measuring tape
- Utility knife
- Straightedge or ruler
- Pencil or marker
- Staple gun or insulation fasteners
- Ladder or scaffolding, depending on the height of the ceiling
- Protective gear (safety goggles, gloves, mask) for handling insulation
Materials:
- Insulation material of your choice (fiberglass batts, spray foam, cellulose, rigid foam, natural fiber, etc.)
- Vapor barrier (if required by local building codes)
- Fasteners (staples, nails, or screws)
- Caulk or expanding foam sealant (for sealing gaps)
- Tape (duct tape or foil tape, depending on the type of insulation)
- Access panels or hatches (if needed to reach the ceiling)
It’s important to choose the appropriate insulation material based on your specific needs, budget, and the design of your vaulted ceiling. Research and consult with professionals to determine which insulation type is best suited for your project.
Additionally, check your local building codes and regulations to ensure compliance with any specific requirements for insulation and vapor barrier installation. Following these guidelines will help ensure a safe and effective insulation process.
Once you have all the necessary tools and materials, you’ll be ready to move on to the next steps of preparing the area and installing the insulation in your vaulted ceiling. Proper preparation and execution are key to achieving optimal insulation effectiveness and energy efficiency.
Preparing the Area
Before you start the insulation process for your vaulted ceiling, it’s crucial to properly prepare the area to ensure a smooth and successful installation. Here are the steps to follow when preparing the area:
1. Clear the Space:
Clear the room or area below the vaulted ceiling of any furniture, decorations, or obstructions. This will provide you with ample space to work and maneuver during the insulation process.
Read more: How To Decorate A Vaulted Ceiling Wall
2. Inspect the Ceiling:
Thoroughly inspect the ceiling for any signs of damage, leaks, or structural issues. Repair any cracks or holes before proceeding with insulation. It’s important to have a solid and stable surface for the insulation to adhere to.
3. Measure and Calculate:
Measure the dimensions of your vaulted ceiling to determine the amount of insulation material needed. Take accurate measurements of both the length and width of the ceiling at various points, as vaulted ceilings can have irregular shapes. Calculate the total square footage to ensure you purchase the correct amount of insulation.
4. Install Vapor Barrier (if required):
Check your local building codes to determine if a vapor barrier is required for your vaulted ceiling insulation. A vapor barrier helps prevent moisture buildup and condensation within the insulation. If necessary, install the vapor barrier according to the specifications provided by the manufacturer.
5. Create Access Points:
If your vaulted ceiling does not have existing access points, you may need to create them to reach and install the insulation. Consider installing access panels or hatches in inconspicuous locations, such as closets or unused areas, for easy future access.
Read more: How To Paint Vaulted Ceiling
6. Safety Precautions:
Prioritize safety during the preparation phase by wearing appropriate protective gear, such as safety goggles, gloves, and a mask, especially when working with insulation materials. This will protect you from skin irritation and minimize the inhalation of insulation fibers.
By taking the time to thoroughly prepare the area and understand the specific requirements of your vaulted ceiling, you set the foundation for a successful insulation installation. Adequate preparation ensures that the insulation will be applied properly and adhere effectively to the ceiling, maximizing energy efficiency and comfort in your space.
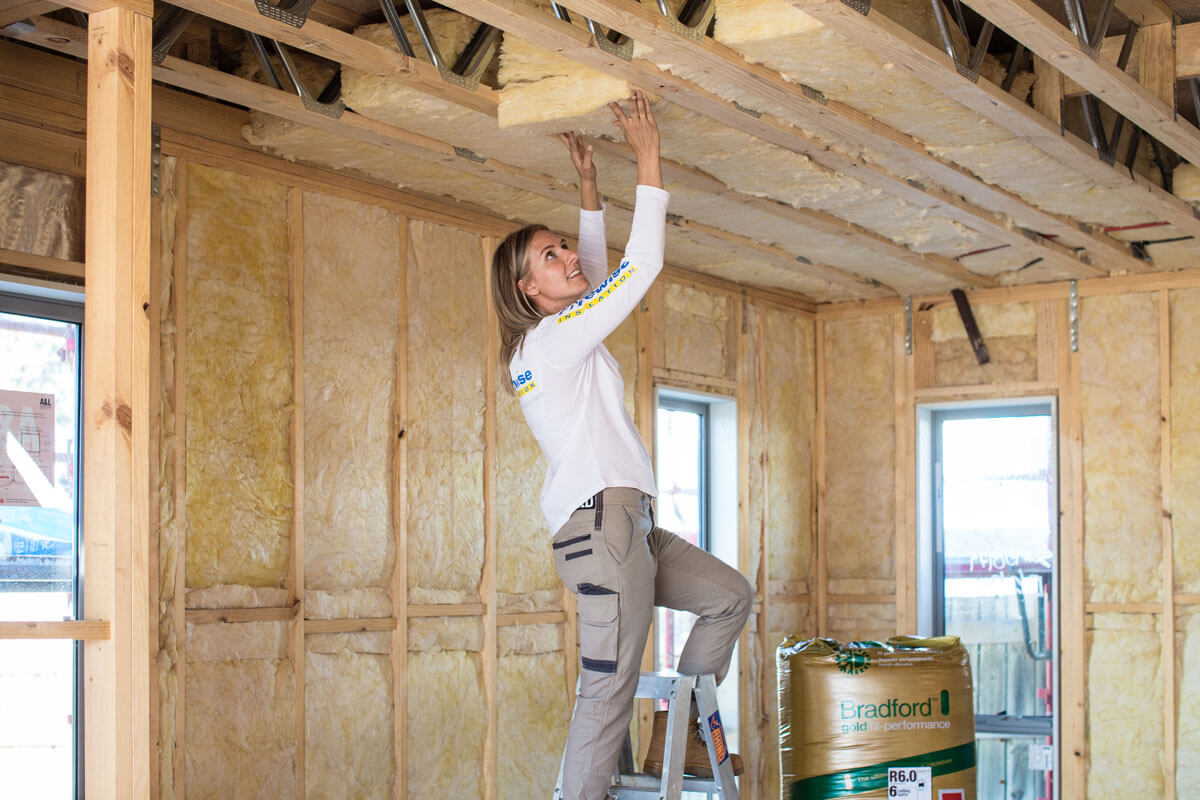
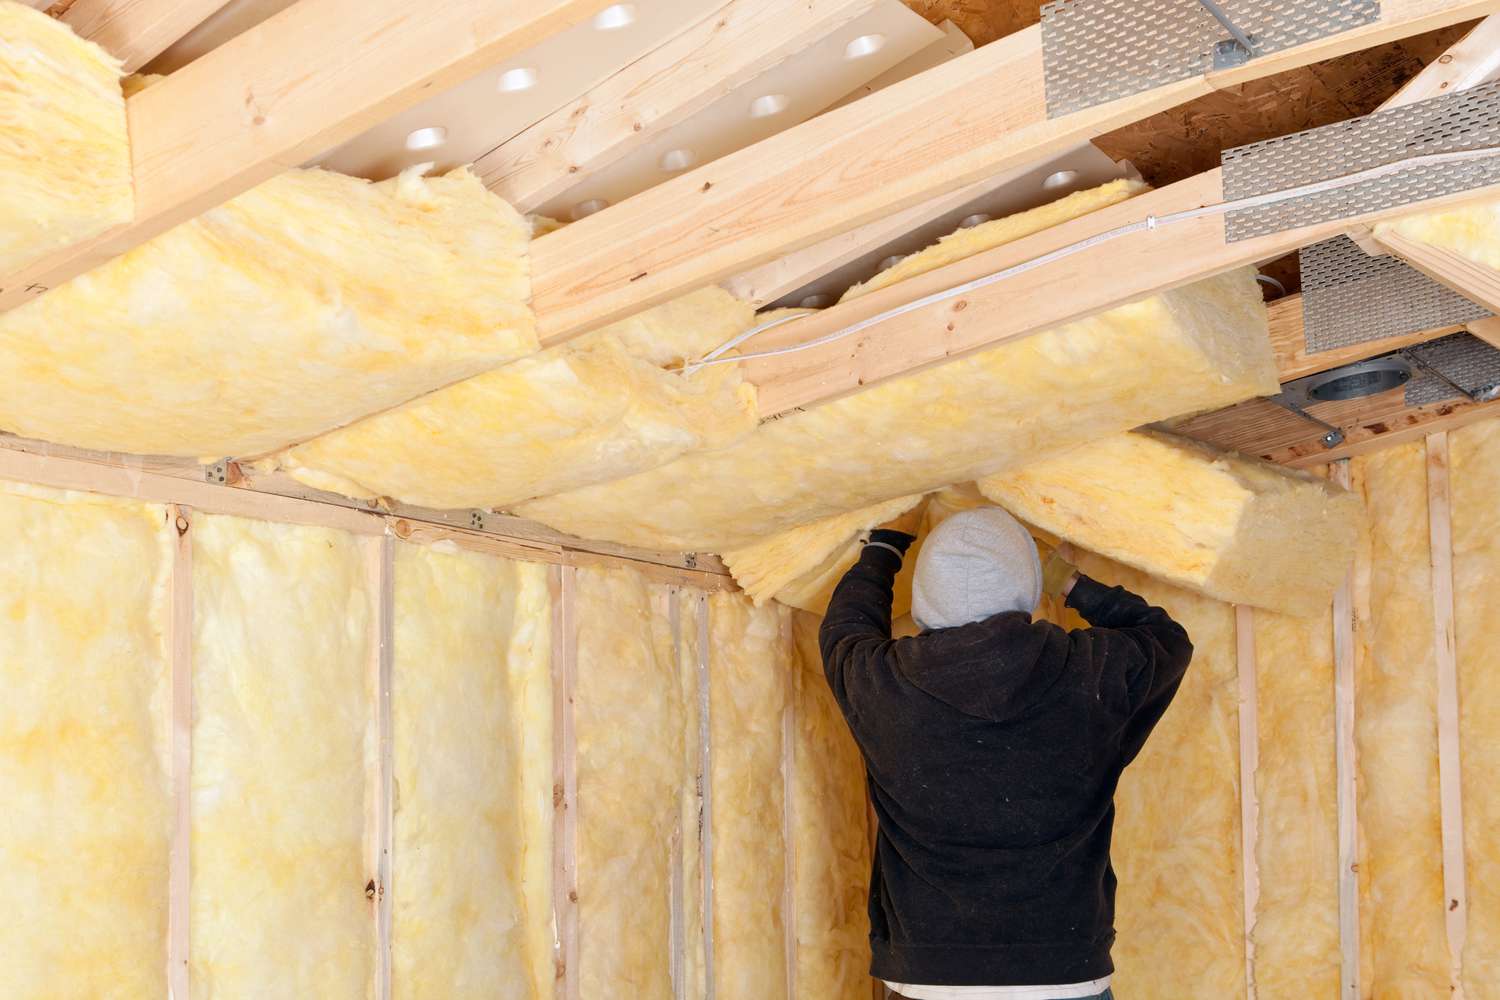
Installing Insulation in a Vaulted Ceiling
Installing insulation in a vaulted ceiling is a multi-step process that requires careful attention to detail. Here is a step-by-step guide on how to effectively install insulation in your vaulted ceiling:
1. Start at the Top:
Begin the insulation installation at the highest point of the vaulted ceiling. This allows you to work your way down, ensuring that insulation is properly secured and placed throughout the entire ceiling area.
2. Place Batts or Rolls:
If using fiberglass insulation batts or rolls, position them between the ceiling joists or trusses. Use a utility knife to carefully trim the insulation to fit the space, making sure it is snug and covers the entire area. Avoid compressing the insulation, as this can reduce its effectiveness.
Read more: How To Build A Vaulted Ceiling
3. Use Fasteners:
If necessary, secure the insulation in place using staplers or insulation fasteners. This will prevent the insulation from sagging or shifting over time. Fasteners should be spaced out evenly along the edges and at regular intervals throughout the insulation material.
4. Seal Gaps:
Inspect the installed insulation for any gaps or areas where air can escape. Use caulk or expanding foam sealant to seal any openings around pipes, vents, or electrical openings. This will help improve the air tightness of the insulation and enhance its overall performance.
5. Follow Manufacturer Guidelines:
Always refer to the manufacturer’s instructions and guidelines specific to the type of insulation you are using. These guidelines will provide valuable information on correct installation techniques, recommended thickness, and any additional steps or considerations to ensure optimal performance.
6. Mind Access Panels:
If you have installed access panels or hatches for future accessibility, take care to properly insulate around them. Cut the insulation material to fit around the access points, ensuring a seamless and continuous insulation layer.
Read more: How To Light A Vaulted Ceiling
7. Check for Even Coverage:
After completing the insulation installation, inspect the entire vaulted ceiling to ensure even coverage and no gaps. If necessary, add additional insulation or adjust existing insulation to create a consistent layer.
Remember to prioritize safety during the insulation process by wearing appropriate protective gear and following best practices. If you are unsure about any aspect of the installation, it is always recommended to consult with a professional insulation contractor.
By following these steps and installing insulation correctly in your vaulted ceiling, you can improve energy efficiency, thermal comfort, and sound insulation in your living space.
Additional Tips and Considerations
When insulating a vaulted ceiling, there are some additional tips and considerations to keep in mind. These will help ensure a successful insulation project and maximize the benefits of your newly insulated space. Here are some key tips to consider:
1. Check Building Codes:
Familiarize yourself with local building codes and regulations regarding insulation requirements for vaulted ceilings. This will ensure compliance and help you understand any specific guidelines or recommendations for your area.
2. Evaluate Insulation R-Value:
The R-value of insulation measures its thermal resistance. Consider the climate you live in and aim for an insulation R-value that will provide adequate temperature control and energy efficiency. Consulting with an insulation professional can help determine the appropriate R-value for your vaulted ceiling.
Read more: How To Hang Curtains With Vaulted Ceilings
3. Address Air Leaks:
Air leaks can undermine the effectiveness of insulation. Inspect your vaulted ceiling for any gaps, cracks, or areas where air can escape. Sealing these leaks with caulk or expanding foam will help create an airtight envelope and improve insulation performance.
4. Consider Soundproofing:
If soundproofing is a priority, consider using insulation materials with good sound-dampening properties, such as spray foam or cellulose insulation. These materials can help reduce noise transmission and create a quieter living environment.
5. Seek Professional Assistance:
If you’re unsure about the insulation process or have a complex vaulted ceiling structure, it’s always advisable to seek professional assistance. Insulation contractors have the expertise and knowledge to evaluate your specific needs and ensure proper insulation installation.
6. Safety First:
Prioritize safety throughout the insulation project. Wear appropriate protective gear, such as gloves, safety goggles, and a dust mask, to minimize exposure to insulation fibers or chemicals. Follow safety guidelines and instructions provided by insulation manufacturers.
7. Maintain Ventilation:
Ensure proper ventilation in your home to prevent moisture buildup. Adequate airflow helps prevent condensation, which can lead to mold or mildew growth. Consult with professionals to ensure proper ventilation in your attic or vaulted ceiling area.
By considering these additional tips and factors, you can enhance the success of your vaulted ceiling insulation project and create a more energy-efficient, comfortable, and enjoyable living space.
Conclusion
Insulating a vaulted ceiling is a worthwhile investment that offers numerous benefits. From improving energy efficiency and comfort to reducing noise and enhancing indoor air quality, insulation plays a crucial role in creating a well-insulated and comfortable living environment.
By understanding the structure and unique features of vaulted ceilings, you can choose the most suitable insulation type for your specific needs. Fiberglass, spray foam, cellulose, rigid foam, natural fiber, and reflective insulation are all viable options that offer different benefits and considerations.
Before starting the insulation process, it’s crucial to properly prepare the area and gather the necessary tools and materials. Clearing the space, inspecting the ceiling, measuring and calculating, installing a vapor barrier (if required), and creating access points are essential steps to ensure a smooth and successful installation.
During the insulation process, it’s important to follow manufacturer guidelines, secure insulation materials in place, seal gaps, and ensure even coverage. Taking safety precautions, such as wearing protective gear and seeking professional assistance if needed, is vital to a successful and safe insulation project.
Lastly, keeping in mind additional tips and considerations, such as checking building codes, evaluating insulation R-value, addressing air leaks, considering soundproofing, seeking professional assistance, and maintaining ventilation, will help you achieve optimal insulation results.
In conclusion, insulating your vaulted ceilings is a wise decision that improves energy efficiency, thermal comfort, and overall quality of living. Whether you choose fiberglass, spray foam, cellulose, or another insulation material, the benefits of proper insulation are significant and long-lasting.
Investing in insulation for your vaulted ceilings not only enhances your home’s energy efficiency but also contributes to a more sustainable and eco-friendly living environment. By creating a well-insulated space, you can enjoy year-round comfort and lower energy costs while reducing your carbon footprint.
So, seize the opportunity to insulate your vaulted ceilings and elevate the comfort, energy efficiency, and overall quality of your living space. Your home and wallet will thank you for it.
Frequently Asked Questions about How To Insulate A Vaulted Ceiling
Was this page helpful?
At Storables.com, we guarantee accurate and reliable information. Our content, validated by Expert Board Contributors, is crafted following stringent Editorial Policies. We're committed to providing you with well-researched, expert-backed insights for all your informational needs.


0 thoughts on “How To Insulate A Vaulted Ceiling”