Articles
How To Level Dishwasher
Modified: October 20, 2024
Discover helpful articles on how to level your dishwasher and ensure it functions optimally. Get expert tips and step-by-step instructions for a smoother dishwashing experience.
(Many of the links in this article redirect to a specific reviewed product. Your purchase of these products through affiliate links helps to generate commission for Storables.com, at no extra cost. Learn more)
Introduction
Welcome to this comprehensive guide on how to level a dishwasher. If you have recently installed a new dishwasher or noticed that your current one is not properly balanced, then this article is for you. Leveling your dishwasher is an essential step to ensure its optimal performance and functionality.
Why is leveling important, you might ask? Well, when a dishwasher is not level, it can lead to a range of issues. These include leakages, poor drainage, noisy operation, and even damage to your kitchen countertops. By taking the time to properly level your dishwasher, you can avoid these problems and enjoy a hassle-free dishwashing experience.
In this guide, we will walk you through the step-by-step process of leveling your dishwasher. Don’t worry if you’re not a DIY expert – you don’t need to be! We will explain each step in detail and provide valuable tips along the way.
Before we dive into the process, let’s quickly go over the tools and materials you will need:
- A level (preferably a torpedo level or a bubble level)
- Pliers or an adjustable wrench
- A screwdriver
- Shims (cardboard or wooden shims work well)
Now that we’ve covered the basics, let’s get started on leveling your dishwasher!
Key Takeaways:
- Properly leveling your dishwasher is crucial for efficient water drainage, reduced noise, and prevention of damage to your appliance and kitchen. Take the time to follow the step-by-step guide and use the necessary tools for a hassle-free dishwashing experience.
- Remember to prepare your dishwasher by disconnecting power and water, emptying it, and ensuring a clean and level floor. Double-check the levelness using the level, and make any additional adjustments if needed. By following these steps, you can achieve a perfectly leveled dishwasher that operates efficiently and enhances the overall functionality of your kitchen.
Read more: How To Level A Laser Level Tripod
Understanding the Importance of Leveling a Dishwasher
When it comes to the proper operation of a dishwasher, leveling is crucial. A level dishwasher ensures that water is evenly distributed inside the unit, allowing for efficient cleaning and rinsing. It also prevents leakage, reduces noise, and prevents potential damage to both the dishwasher and surrounding cabinetry.
One of the main reasons why leveling is important is to ensure that the water inside the dishwasher drains properly. If the dishwasher is not level, it can cause water to pool in certain areas, leading to poor drainage and the formation of unpleasant odors. Additionally, an unlevel dishwasher may not provide adequate support for the door to seal properly, resulting in leaks and water damage to your kitchen floor.
Another important aspect of leveling is to minimize noise during operation. When a dishwasher is not properly level, it can create vibrations and rattling noises that can be quite annoying. By taking the time to level your dishwasher, you can reduce these noises and enjoy a quieter kitchen environment.
In addition to functionality and noise reduction, leveling a dishwasher is also crucial for the longevity of the appliance. When a dishwasher is unlevel, it can place uneven pressure on the components, resulting in premature wear and tear. This can lead to costly repairs or the need for a replacement sooner than expected.
Lastly, leveling a dishwasher is essential for maintaining the aesthetic appeal of your kitchen. An unlevel dishwasher can cause cabinets and countertops to shift or become uneven, which can detract from the overall look of your kitchen. By ensuring that your dishwasher is level, you can maintain a sleek and seamless appearance in your kitchen space.
Overall, leveling a dishwasher is not just a simple task; it is a vital step in ensuring optimal performance, preventing damage, and prolonging the lifespan of the appliance. Now that we understand the importance of leveling, let’s move on to the step-by-step process of how to level a dishwasher.
Tools and Materials Needed
Before you begin leveling your dishwasher, it’s important to gather all the necessary tools and materials. Having everything ready will save you time and ensure a smooth and efficient process.
Here are the tools and materials you will need:
1. A Level
A level is an essential tool for accurately determining whether your dishwasher is level or not. You can use either a torpedo level or a bubble level for this task. Make sure it’s a reliable and accurate level to obtain precise measurements.
2. Pliers or an Adjustable Wrench
You may need to use pliers or an adjustable wrench to adjust the dishwasher’s leveling feet. These tools will allow you to easily loosen or tighten the nuts that secure the leveling feet in place.
Read more: How To Work A Water Level Or Laser Level
3. Screwdriver
A screwdriver will be needed to adjust any screws that hold the dishwasher in place. Depending on the model of your dishwasher, you may need a Phillips or flathead screwdriver.
4. Shims
Shims are thin pieces of material, such as cardboard or wood, used to fill gaps and provide support under the dishwasher. They are especially useful if your floor is uneven or if the dishwasher needs additional support in certain areas.
Make sure you have all these tools and materials readily available before starting the leveling process. This will ensure a smoother and more convenient experience. Now that you have everything you need, let’s move on to the step-by-step guide on how to level a dishwasher.
Step-by-Step Guide to Leveling a Dishwasher
Now that you have gathered all the necessary tools and materials, it’s time to start leveling your dishwasher. Follow these step-by-step instructions to ensure a properly balanced and functional appliance.
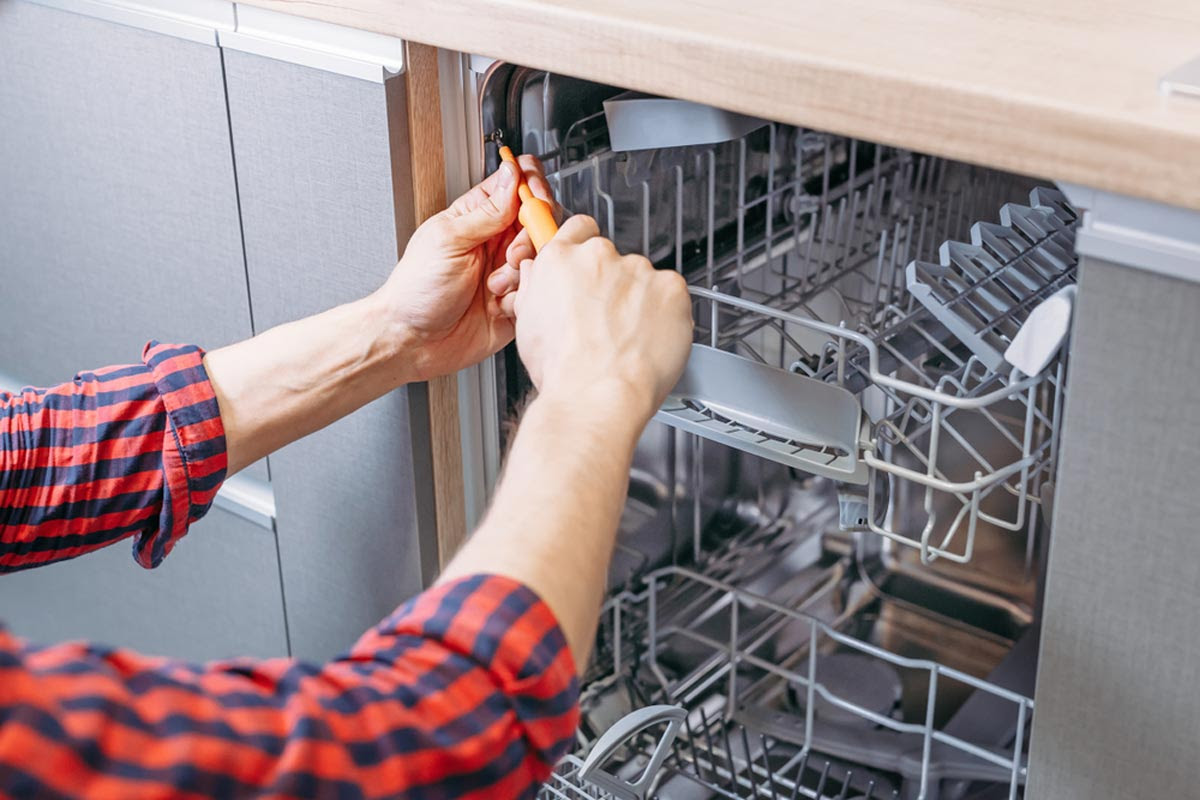
1. Preparing the Dishwasher
Before you begin the leveling process, make sure your dishwasher is empty and disconnected from any power sources. This will ensure your safety and prevent any potential damage to the appliance during the leveling process.
Read more: How To Use A Self Leveling Laser Level
2. Adjusting the Front Leveling Feet
Start by locating the front leveling feet, which are usually located on the front bottom corners of the dishwasher. Use a wrench or pliers to loosen the nuts securing the feet, allowing you to adjust them up or down.
Consult your dishwasher’s user manual for specific instructions on how to adjust the leveling feet, as different models may vary in design. Use the level to check the dishwasher’s levelness from side to side. Adjust the front leveling feet until the bubble in the level is centered.
3. Adjusting the Rear Leveling Feet
Next, locate the rear leveling feet, which are typically located at the back of the dishwasher near the corners. Again, use a wrench or pliers to loosen the nuts securing the feet and adjust them up or down.
Check the levelness of the dishwasher from front to back using the level. Adjust the rear leveling feet until the bubble in the level is centered.
4. Checking the Levelness
After adjusting both the front and rear leveling feet, double-check the levelness of the dishwasher using the level. Place the level in different directions, both horizontally and vertically, to ensure the bubble is centered in all positions.
Make any necessary adjustments to the leveling feet until the dishwasher is perfectly level in all directions.
5. Securing the Dishwasher in Place
Once you have achieved the desired levelness, it’s time to secure the dishwasher in place. Tighten the nuts on each of the leveling feet to ensure they are firmly held in position.
If the dishwasher wobbles or moves, you can use shims to provide additional stability and support. Simply slide the shims under the front or rear of the dishwasher until it is stable and does not move.
Congratulations! You have successfully leveled your dishwasher. Now it’s time to reconnect it and enjoy its optimized performance.
Keep in mind that different dishwasher models may have slightly different leveling procedures, so always refer to your user manual for specific instructions. Additionally, if you’re unsure about any step or encounter any difficulties, it’s best to consult a professional for assistance.
Now that you know how to level a dishwasher, you can ensure its proper operation, avoid potential issues, and enjoy a smooth dishwashing experience.
Read more: How To Use Level Pro 3 Laser Level
Preparing the Dishwasher
Before you start leveling your dishwasher, it’s essential to properly prepare the appliance. Follow these steps to ensure a safe and efficient leveling process:
1.1 Disconnect Power and Water
First, disconnect your dishwasher from any power sources. Turn off the electricity at the circuit breaker or unplug the power cord from the outlet. This step is crucial to prevent any electrical accidents or damage to the appliance.
Additionally, if your dishwasher is connected to a water supply, shut off the water valve to the appliance. This will prevent any water leaks while you work on leveling the unit.
1.2 Empty the Dishwasher
Next, remove all items and dishes from inside the dishwasher. You want to have an empty dishwasher to avoid any accidents or obstacles while handling the appliance during the leveling process.
Take the opportunity to clean the dishwasher interior, including the racks, filters, and spray arms, to ensure optimal performance once the leveling is complete.
1.3 Be Mindful of the Floor
Take a close look at the flooring beneath the dishwasher. Ensure that it is clean and free of any debris or objects that could interfere with the leveling process.
If the floor is uneven or has bumps, it may affect the stability of the dishwasher. In such cases, you may need to use shims to fill in any gaps or provide additional support to achieve a level surface for the appliance.
Read more: How To Level Fence
1.4 Gather Necessary Tools
Before starting the leveling process, gather all the tools and materials required, as mentioned earlier. Having them readily available will save you time and ensure a smoother workflow.
Make sure you have a level (torpedo level or bubble level), pliers or an adjustable wrench, a screwdriver, and shims (cardboard or wooden shims) if needed.
By properly preparing your dishwasher, you create a safe and organized environment for the leveling process. Now that your dishwasher is ready, you can move on to the next step of adjusting the leveling feet.
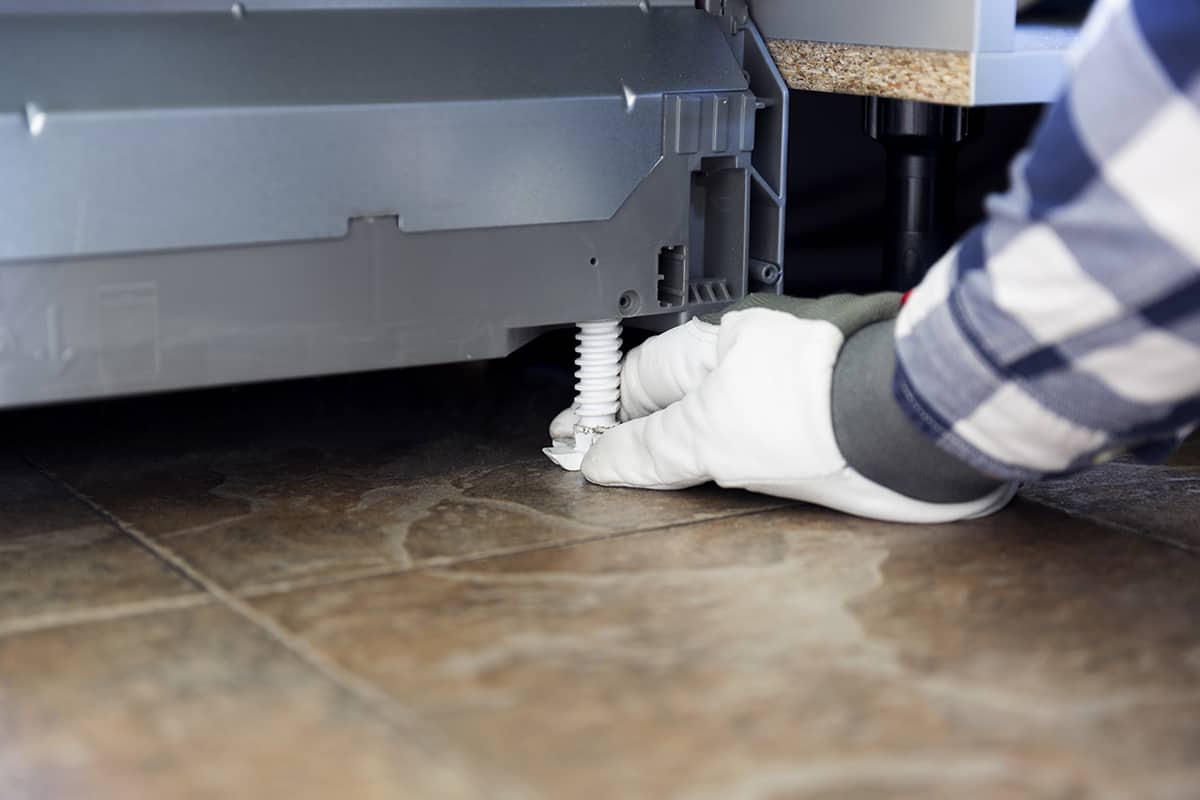
Adjusting the Front Leveling Feet
Once you have prepared your dishwasher, it’s time to start adjusting the leveling feet. The front leveling feet of the dishwasher are located at the bottom corners of the front panel. Follow these steps to properly adjust the front leveling feet:
2.1 Locate the Front Leveling Feet
Take a close look at the front bottom corners of your dishwasher. You should see two adjustable feet, one on each side. These are the front leveling feet that you will be adjusting to achieve a level dishwasher.
2.2 Loosen the Mounting Nuts
Using pliers or an adjustable wrench, loosen the mounting nuts on both of the front leveling feet. This will allow you to adjust the feet up or down to achieve the desired levelness.
Read more: How To Level Washer
2.3 Use a Level to Check Levelness
Place a level on top of the dishwasher door or interior tub, ensuring it’s parallel to the front edge of the dishwasher.
Gently adjust the front leveling feet, either by raising or lowering them, until the bubble in the level is perfectly centered. This indicates that the dishwasher is level from side to side.
2.4 Tighten the Mounting Nuts
Once you have achieved a level position, use your pliers or adjustable wrench to tighten the mounting nuts on both front leveling feet. This will secure the feet in their adjusted positions and prevent them from shifting.
2.5 Check Levelness Again
Double-check the levelness of the dishwasher using the level. Make sure the bubble in the level is still centered. If necessary, make any minor adjustments to the front leveling feet to achieve a perfectly level position.
Remember, it’s essential to adjust both front leveling feet equally to maintain balance. Adjusting one foot more than the other can result in an unlevel dishwasher.
Once you have successfully adjusted the front leveling feet and achieved a level position, you can proceed to the next step of adjusting the rear leveling feet.
Adjusting the Rear Leveling Feet
After adjusting the front leveling feet, it’s time to focus on the rear leveling feet of your dishwasher. These feet are usually located at the back corners of the appliance. Follow these steps to properly adjust the rear leveling feet:
Read more: How To Level A Floor
3.1 Locate the Rear Leveling Feet
Look at the back corners of your dishwasher to find the rear leveling feet. These are adjustable feet that will allow you to level the dishwasher from front to back.
3.2 Loosen the Mounting Nuts
Using pliers or an adjustable wrench, loosen the mounting nuts on both rear leveling feet. This will enable you to adjust the feet up or down to achieve a level position.
3.3 Use a Level to Check Levelness
Place a level inside the dishwasher, ensuring it’s parallel to the sides and front of the appliance.
Adjust the rear leveling feet until the bubble in the level is centered. This indicates that the dishwasher is level from front to back.
3.4 Tighten the Mounting Nuts
Once you have achieved a level position, tighten the mounting nuts on both rear leveling feet to secure them in place. This will prevent any shifting or movement of the feet.
Read more: How To Level Ceiling Joist With Laser Level
3.5 Verify Levelness
Double-check the levelness of the dishwasher using the level. Place the level in different positions inside the dishwasher to ensure the bubble is centered in all directions.
If necessary, make any slight adjustments to the rear leveling feet to achieve a perfectly level position from front to back.
Remember, just like with the front leveling feet, it’s crucial to adjust the rear leveling feet equally. This will ensure that the dishwasher remains stable and balanced.
Once you have successfully adjusted the rear leveling feet and achieved a level position, you can proceed to the next step of checking the overall levelness of the dishwasher.
Checking the Levelness
Now that you have adjusted both the front and rear leveling feet, it’s time to check the overall levelness of your dishwasher. This step is crucial to ensure that the appliance is perfectly balanced. Here’s how to check the levelness:
4.1 Place the Level Inside the Dishwasher
Take your level and place it horizontally in different directions inside the dishwasher. The level should be resting on the bottom of the dishwasher or on the racks, depending on the model.
Rotate the level to check both the side-to-side and front-to-back levelness. Ensure that the bubble in the level is centered in all positions.
4.2 Make Additional Adjustments if Needed
If you notice any slight discrepancies in the levelness, make small adjustments to the leveling feet to correct them. Use your pliers or adjustable wrench to loosen the mounting nuts and then raise or lower the feet accordingly.
Recheck the levelness after adjustments, ensuring that the bubble in the level is centered in all directions.
Read more: How To Establish Level Without Laser Level
4.3 Achieve Perfect Levelness
Continue making minor adjustments to the leveling feet until you achieve a perfect levelness in all directions. This will ensure that the dishwasher is properly balanced, which is essential for optimal performance.
4.4 Ensure Stable Position
Once you have achieved the desired levelness, make sure the dishwasher is stable in its position. Gently push or shake the dishwasher to see if there is any movement. If it wobbles or shifts, readjust the leveling feet or use shims to provide additional stability.
By following these steps and checking the overall levelness of your dishwasher, you can ensure that it is properly balanced and ready for use.
Now that you have achieved the correct levelness, it’s time to move on to the final step of securing the dishwasher in its place.
Securing the Dishwasher in Place
Once you have successfully leveled your dishwasher, the final step is to secure it in place to prevent any movement or instability. Here’s how you can secure your dishwasher:
5.1 Tighten the Mounting Brackets
Check the sides or top of your dishwasher for mounting brackets. These brackets are typically attached to the dishwasher and can be secured to the adjacent cabinets or countertop.
Using a screwdriver, tighten the screws on the mounting brackets to firmly secure the dishwasher in place. Make sure the brackets are tight enough to prevent any movement but not so tight that they cause damage to the appliance.
5.2 Verify Stability
Give the dishwasher a gentle push or shake to test its stability. It should remain securely in place without any movement or shifting. If you notice any wobbling or instability, recheck the levelness and readjust the leveling feet if necessary.
5.3 Use Shims if Needed
If your dishwasher is still not completely stable, you can use shims for additional support. Place small cardboard or wooden shims under the feet or sides of the dishwasher to level it out and provide stability.
Make sure the shims are properly positioned and do not interfere with the functioning of the dishwasher or cause any unevenness.
5.4 Reconnect Power and Water
Once the dishwasher is secure and stable, you can reconnect the power and water supply.
Plug the power cord back into the electrical outlet or turn on the circuit breaker to restore power to the dishwasher. If you had turned off the water valve during the leveling process, open it back up to allow water to flow into the appliance.
With the dishwasher now properly secured and leveled, you can confidently use it without any concerns about stability or performance.
Remember, always refer to your dishwasher’s user manual for specific instructions and guidelines on leveling and securing the appliance. If you encounter any difficulties, it’s best to consult a professional for assistance.
By following these steps and taking the time to level and secure your dishwasher, you can ensure optimal performance, prevent potential damage, and enjoy a seamless dishwashing experience.
Additional Tips and Considerations
While leveling a dishwasher may seem like a straightforward process, here are some additional tips and considerations to keep in mind:
1. Refer to the User Manual
Every dishwasher model is unique, so it’s essential to consult the user manual provided by the manufacturer. The manual may have specific instructions and guidelines for leveling and securing your particular dishwasher.
2. Take Your Time
Leveling a dishwasher requires patience and precision. Take your time during each step to ensure that the adjustments are accurate and the dishwasher is properly balanced. Rushing through the process may result in an unlevel dishwasher and potential issues in the future.
3. Use a Helper
Having an extra pair of hands can be beneficial when leveling a dishwasher. While one person adjusts the leveling feet, the other person can hold the level and provide feedback on the levelness of the appliance. This teamwork can result in a more accurate leveling process.
4. Check for Leaks
After leveling and securing the dishwasher, run a test cycle to check for any water leakage. Keep an eye on the connections, hoses, and drain to ensure that everything is properly sealed and functioning without any leaks.
Read more: How To Wash Hats In The Dishwasher
5. Regularly Check the Levelness
Over time, the leveling of your dishwasher may shift slightly due to vibrations or movement. It’s a good practice to periodically check the levelness of the appliance and make any necessary adjustments to maintain its balance and performance.
6. Seek Professional Help if Needed
If you encounter any difficulties or are unsure about any step in the leveling process, don’t hesitate to seek professional assistance. Dishwashers are valuable appliances, and it’s better to get expert help if you’re unsure rather than risk damaging the dishwasher or compromising its functionality.
By following these tips and considerations, you can ensure a successful and effective leveling process for your dishwasher. Remember, a properly leveled dishwasher contributes to its longevity, optimal performance, and a stress-free dishwashing experience.
Now that you have all the information you need, go ahead and level your dishwasher with confidence!
Conclusion
Leveling a dishwasher is a vital step to ensure its proper functioning and avoid potential issues like leaks, poor drainage, and noisy operation. By following the step-by-step guide and using the necessary tools, you can easily level your dishwasher and enjoy a seamless dishwashing experience.
Understanding the importance of leveling your dishwasher is key. It ensures adequate water drainage, reduces noise, promotes longevity, and maintains the aesthetic appeal of your kitchen. Taking the time to properly level your dishwasher will prevent damage to your appliance and surrounding cabinetry, ultimately saving you time and money.
Remember to prepare your dishwasher by disconnecting power and water, emptying it, and ensuring a clean and level floor. Gather all the necessary tools, such as a level, pliers or an adjustable wrench, a screwdriver, and shims if needed.
Adjust the front leveling feet first, ensuring the bubble in the level is centered. Then, move on to the rear leveling feet and make the necessary adjustments to achieve levelness from front to back. Double-check the levelness using the level, and make any additional adjustments if needed.
Once your dishwasher is level, secure it in place by tightening the mounting brackets and verifying stability. Reconnect the power and water supply, and test for any leaks or movement.
Additional tips and considerations, such as referring to the user manual, taking your time, and periodically checking the levelness, will ensure the longevity and optimal performance of your dishwasher.
Remember, if you encounter any difficulties or are unsure about the leveling process, it’s always best to seek professional assistance. They can provide expert guidance and ensure the proper leveling of your dishwasher.
By following these steps, you can achieve a perfectly leveled dishwasher that operates efficiently, reduces noise, and enhances the overall functionality of your kitchen. So, go ahead and level your dishwasher with confidence, knowing that you’ve taken the necessary steps to maintain your appliance’s performance and longevity.
Frequently Asked Questions about How To Level Dishwasher
Was this page helpful?
At Storables.com, we guarantee accurate and reliable information. Our content, validated by Expert Board Contributors, is crafted following stringent Editorial Policies. We're committed to providing you with well-researched, expert-backed insights for all your informational needs.
0 thoughts on “How To Level Dishwasher”