Articles
How To Make A Quilt From Old T-Shirts
Modified: February 24, 2024
Learn how to repurpose old t-shirts and create a unique quilt with this step-by-step guide. Get expert tips and tricks in this informative article.
(Many of the links in this article redirect to a specific reviewed product. Your purchase of these products through affiliate links helps to generate commission for Storables.com, at no extra cost. Learn more)
Introduction
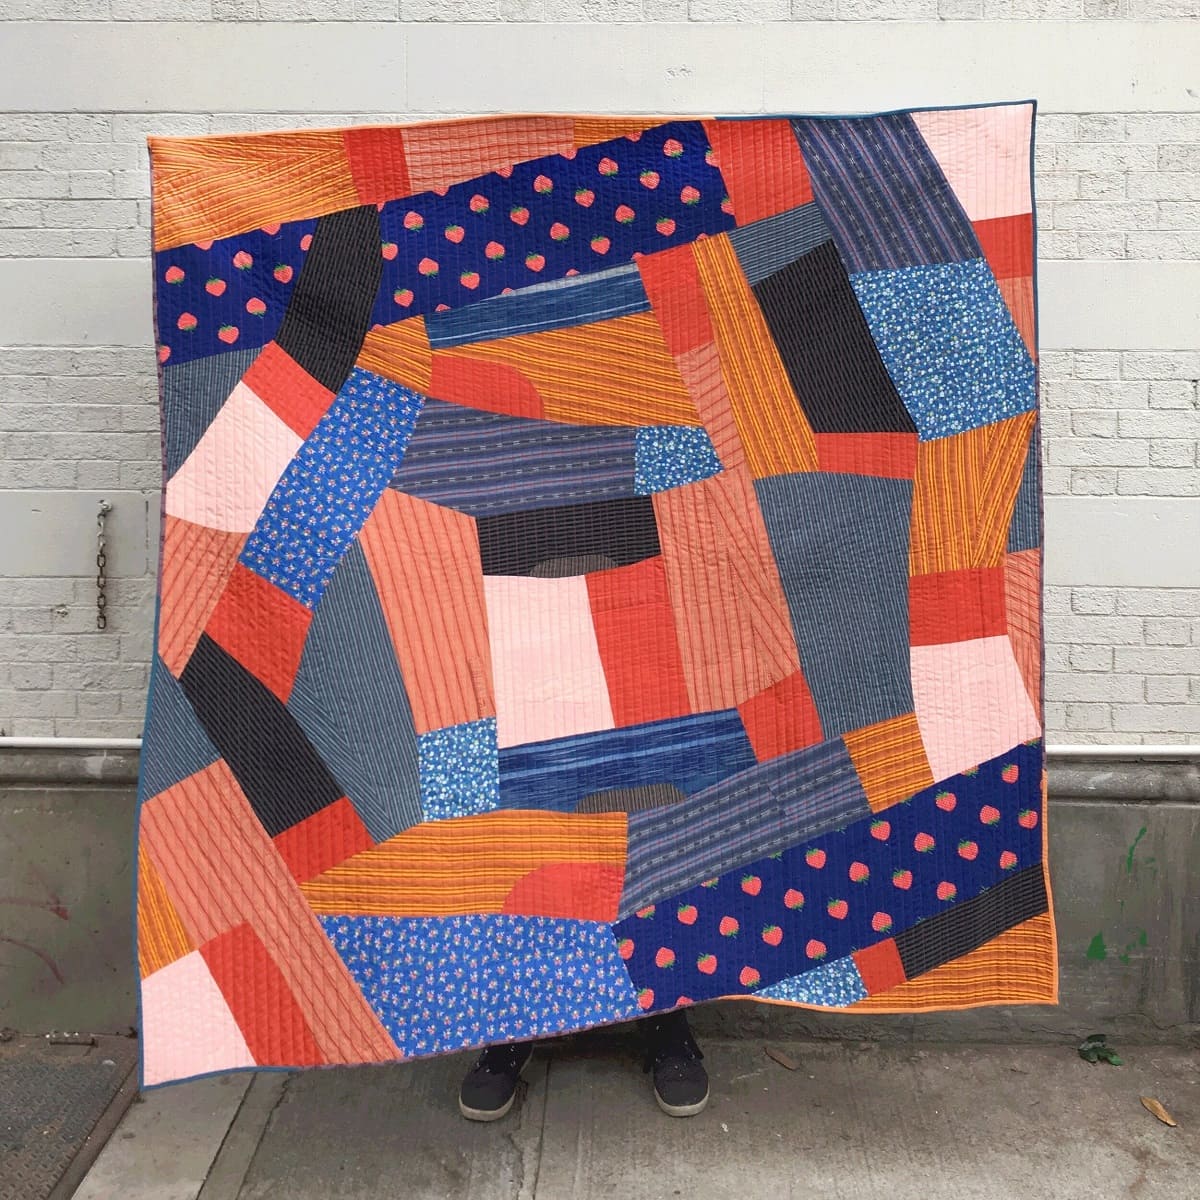
Quilting is a timeless craft that allows you to turn old t-shirts into a cozy and sentimental quilt. Whether you want to preserve memories of special events or simply repurpose old garments, making a quilt from old t-shirts is a creative and sustainable project.
In this article, we will guide you through the step-by-step process of making a quilt from old t-shirts. From choosing and preparing the t-shirts to quilting the layers together, we will provide you with all the information you need to successfully complete your quilt.
Not only is making a quilt from old t-shirts a wonderful way to upcycle and reduce waste, but it also allows you to showcase your personal style and create a truly unique keepsake. Whether you are a quilting enthusiast or a beginner looking for a new project, this article is for you.
So gather your collection of beloved t-shirts, dust off your sewing machine, and let’s dive into the world of t-shirt quilting!
Key Takeaways:
- Transform old t-shirts into a cozy, sentimental quilt by following a step-by-step process. Showcase memories, exercise creativity, and create a unique keepsake while reducing waste and upcycling beloved garments.
- From choosing and preparing t-shirts to quilting the layers together, this article guides you through the entire process of making a t-shirt quilt. Exercise patience, dedication, and sewing skills to create a cherished, one-of-a-kind masterpiece.
Read more: How To Make A Memory Quilt From T-Shirts
Materials Needed
Before you begin making your t-shirt quilt, it’s important to gather all the materials you will need. Here is a list of essential items:
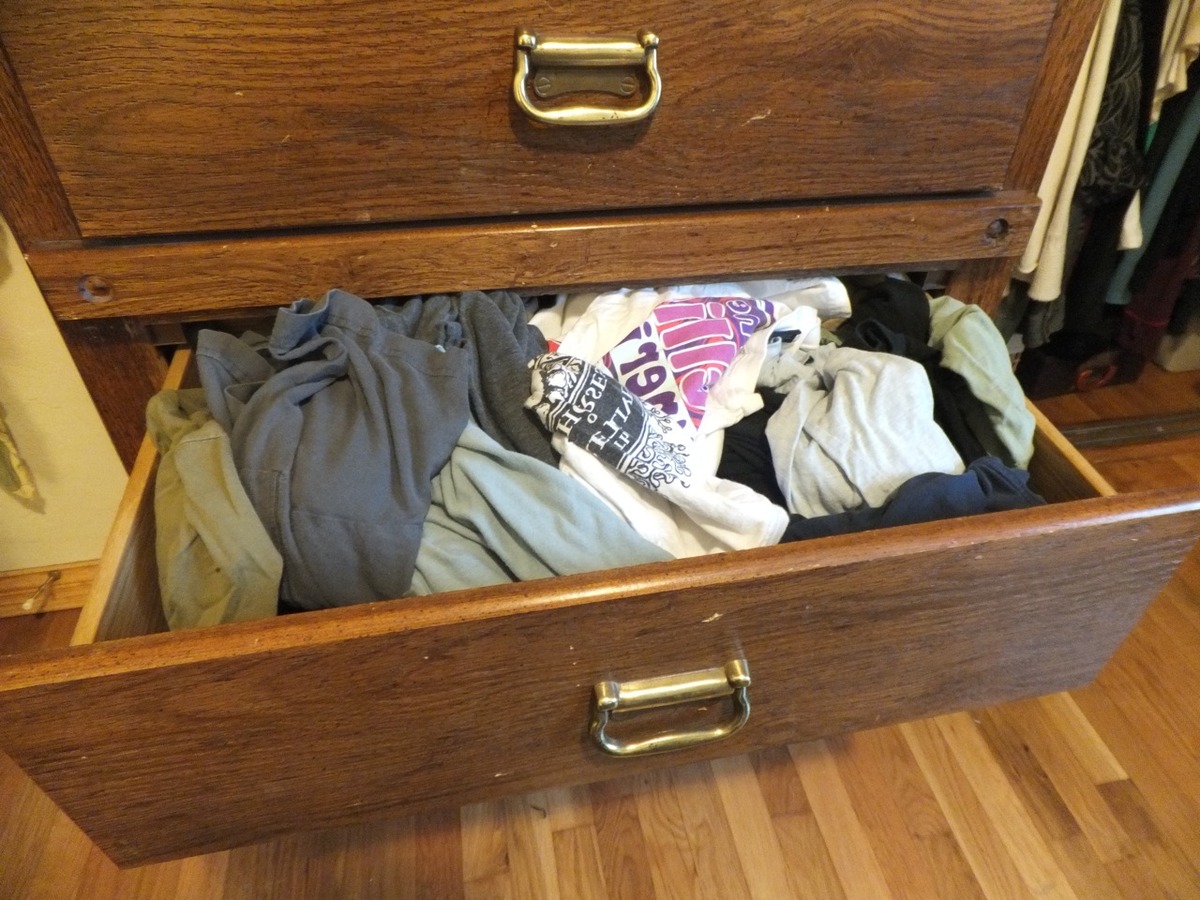
- Old T-Shirts: Select a variety of t-shirts with meaningful designs or sentimental value. Make sure they are clean and in good condition.
- Fabric for Sashing: Choose a coordinating fabric to use as sashing strips between the t-shirt squares.
- Backing Fabric: Get a large piece of fabric to serve as the backing for your quilt. Make sure it’s larger than the size of your quilt top.
- Batting: Select batting that is suitable for the size and weight of your quilt. Polyester or cotton batting are popular choices.
- Thread: Use a high-quality thread that matches or complements the colors of your t-shirts and fabric.
- Quilting Ruler: A clear acrylic quilting ruler is essential for measuring and cutting your fabric accurately.
- Rotary Cutter and Cutting Mat: These tools will make cutting your t-shirts and fabric squares much easier.
- Sewing Machine: A reliable sewing machine with a quilting foot is necessary for sewing the t-shirt squares together.
- Pins or Clips: Use either pins or sewing clips to hold your fabric together while sewing.
- Iron and Ironing Board: These will come in handy for pressing your t-shirts and fabric squares.
- Quilting Needles: Choose needles that are suitable for hand quilting or machine quilting, depending on your preference.
- Quilting Ruler and Marking Tools: These are optional but can be helpful for creating quilting designs.
Make sure you have all the necessary materials before you begin your t-shirt quilt project. Having everything ready will make the process smoother and more enjoyable.
Step 1: Choosing and Preparing the T-Shirts
The first step in creating your t-shirt quilt is choosing the t-shirts you want to use and preparing them for the quilting process. Follow these steps:
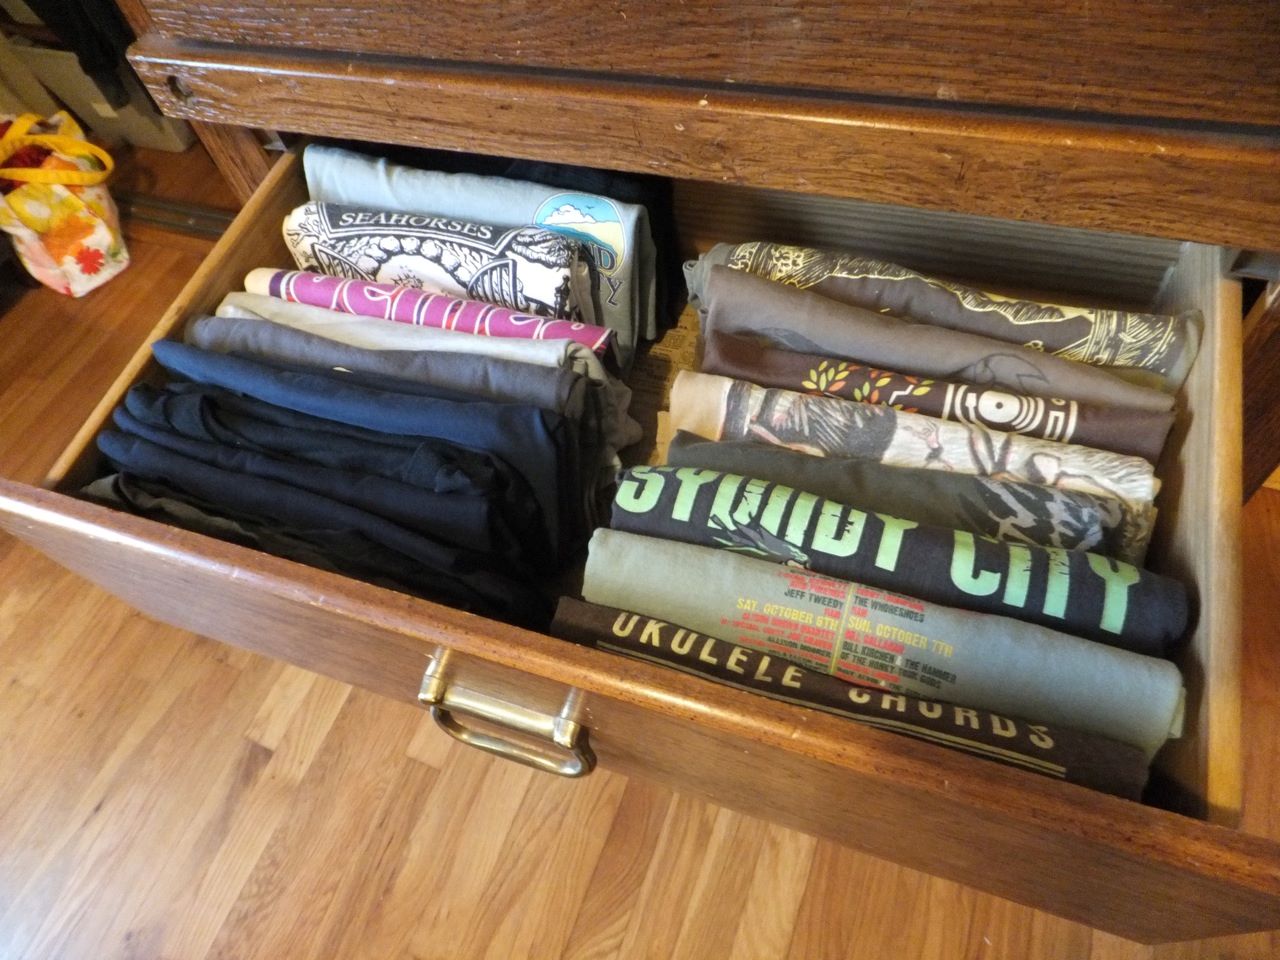
- Choose your t-shirts: Select t-shirts that hold sentimental value or feature designs that you want to showcase in your quilt. Ensure that the t-shirts are clean and in good condition. You can use t-shirts of various sizes and colors to create an interesting and diverse quilt.
- Trim or stabilize the t-shirts: If your t-shirts have large designs or logos that you want to include in your quilt, carefully trim the excess fabric around them, leaving enough seam allowance. Alternatively, if the fabric is thin or stretchy, consider stabilizing it with fusible interfacing to prevent stretching during the quilting process.
- Wash and press the t-shirts: Before you start cutting and sewing, it’s important to wash and press the t-shirts. This will remove any dirt or stains and ensure that the fabric is clean and wrinkle-free.
- Measure and cut the t-shirt squares: Decide on the size of your t-shirt squares based on your desired quilt dimensions. Use a quilting ruler and rotary cutter to measure and cut the t-shirts into square pieces. Aim for uniform square sizes to make the piecing process easier.
Remember, the t-shirts you choose will determine the overall look and feel of your quilt. Take your time in selecting the most meaningful and visually appealing t-shirts for your project.
By following these steps and properly preparing your t-shirts, you’ll be ready to move on to the next step in creating your t-shirt quilt.
Step 2: Designing your Quilt Pattern
Once you have prepared your t-shirts, the next step in creating your t-shirt quilt is designing the layout and pattern. This step is where you get to unleash your creativity and personalize your quilt. Follow these steps:
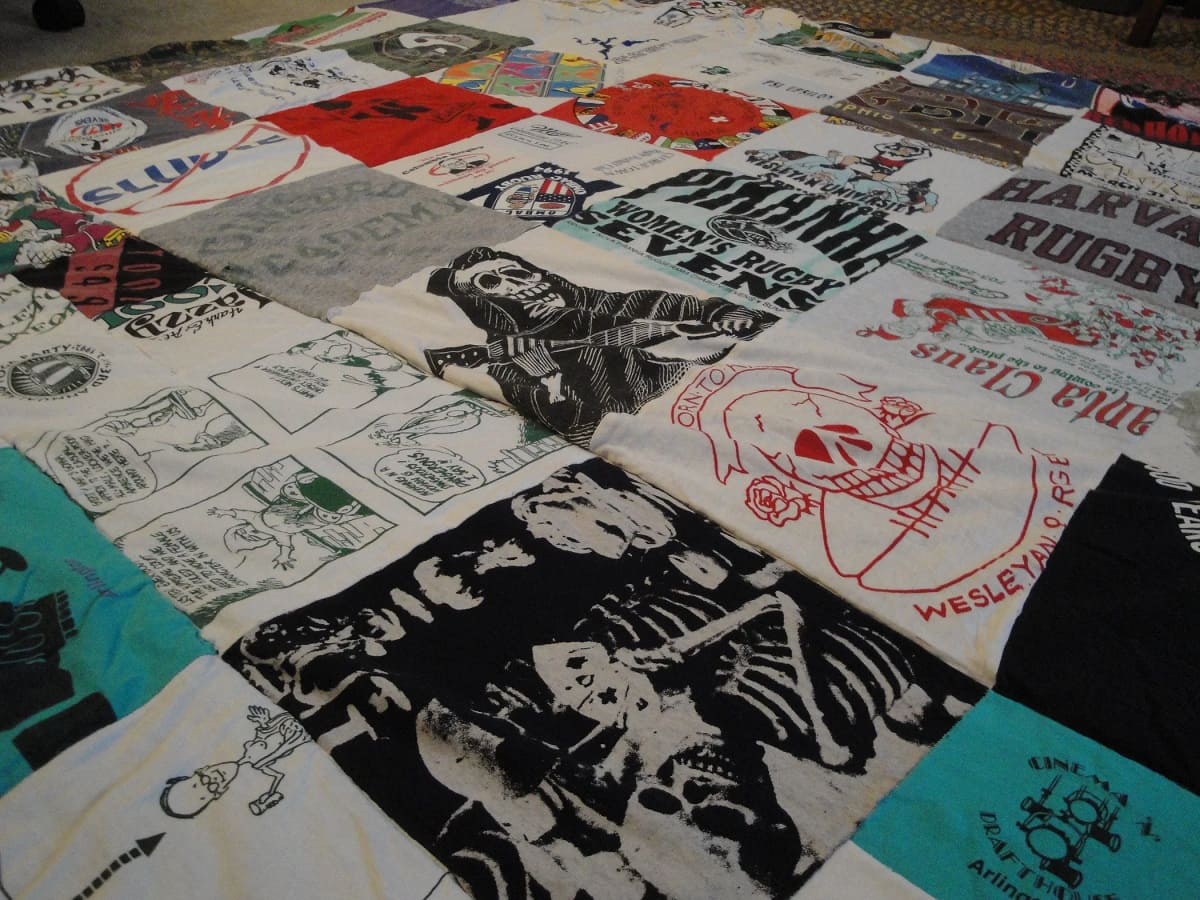
- Lay out your t-shirt squares: Find a large, well-lit surface where you can lay out your t-shirt squares. Arrange them in a way that is visually pleasing to you. You can organize them based on color, theme, or any other pattern you desire.
- Take a photo or make a sketch: Once you’re satisfied with the arrangement, consider taking a photo or making a sketch of the layout. This will serve as a reference during the sewing process.
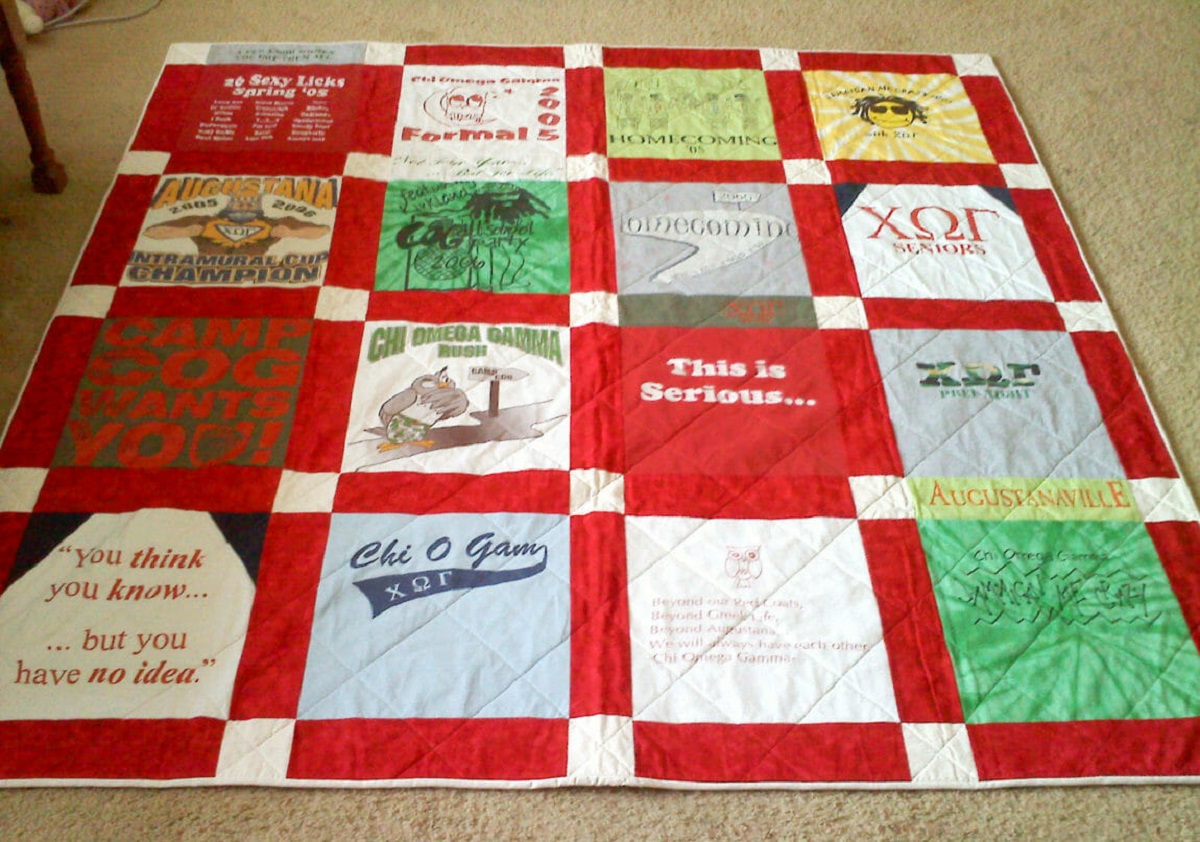
- Add sashing or borders (optional): If you want to incorporate sashing or borders into your quilt design, now is the time to decide on their placement and measurements. Sashing can be strips of fabric that separate each t-shirt square, while borders can frame the entire quilt.
- Consider alternate layouts: Experiment with different layouts, such as a grid pattern, diagonal placement, or even an asymmetrical design. Play around with the t-shirt squares until you find a pattern that resonates with you.
Designing your quilt allows you to create a unique and personalized piece of art. Don’t be afraid to think outside the box and try different arrangements until you achieve the desired look.
By following these steps and taking the time to design your quilt pattern, you’ll be ready to move on to the next step in bringing your t-shirt quilt to life.
Step 3: Cutting the T-Shirts into Squares
Once you have finalized your quilt pattern, it’s time to start cutting your t-shirts into squares. This step is crucial for ensuring that all the pieces fit together seamlessly. Follow these steps:
- Measure and mark your squares: Using a ruler and fabric marker, measure and mark the dimensions for each t-shirt square based on the size you want for your quilt. Make sure to add a ¼ inch seam allowance on all sides.
- Cut the squares: Carefully cut along the marked lines to create your t-shirt squares. Take your time to ensure accurate and clean cuts.
- Organize the squares: As you cut each t-shirt into squares, organize them according to your layout design. This will help you keep track of which squares go where.
It’s important to handle your t-shirts with care during the cutting process to avoid stretching or distorting the fabric. If necessary, you can use stabilizer or interfacing to reinforce any delicate areas.
Remember, precision is key when cutting your t-shirts into squares. Making clean and accurately sized cuts will make the next steps of sewing and piecing your quilt much easier.
By following these steps and taking the time to cut your t-shirts into squares, you’ll be one step closer to transforming them into a beautiful and meaningful quilt.
Read more: How To Make A T-Shirt Quilt
Step 4: Arranging the T-Shirt Squares
With your t-shirt squares cut and ready to go, it’s time to arrange them in the desired order for your quilt. This step allows you to visualize how the final product will look and make any adjustments to the layout. Follow these steps:
- Lay out your t-shirt squares: Find a large, flat surface where you can arrange your t-shirt squares. Start by laying out your squares according to your chosen pattern or design. Take your time and play around with different placements until you are satisfied with the overall arrangement.
- Consider color and design balance: Pay attention to the colors, patterns, and designs on each t-shirt square. Aim for a balanced distribution of colors and avoid placing similar designs side by side. This will create a visually appealing and harmonious quilt.
- Take a photo or make a sketch: Once you are happy with the arrangement, it can be helpful to take a photo or make a sketch of the layout. This will serve as a reference during the sewing process, especially if you need to move the squares around.
- Make any necessary adjustments: Step back and assess your layout. If something doesn’t look quite right, don’t hesitate to make adjustments. Rearranging the t-shirt squares until you achieve the desired look is an essential part of the creative process.
Arranging your t-shirt squares is where the visual magic happens. It’s your opportunity to bring your design to life and create a quilt that tells a story with each square.
By following these steps and taking the time to arrange your t-shirt squares thoughtfully, you’ll be ready to move on to the exciting step of sewing the squares together.
When cutting old t-shirts for a quilt, use a clear ruler and rotary cutter for precise and even cuts. This will ensure that your quilt pieces fit together neatly.
Step 5: Sewing the T-Shirt Squares Together
Now that you have arranged the t-shirt squares in the desired order, it’s time to sew them together to create the quilt top. This step will bring your design to life and transform the individual squares into a cohesive piece. Follow these steps:
- Prepare your sewing machine: Thread your sewing machine with a coordinating thread, and attach a ¼ inch quilting foot for accurate seam allowances.
- Take the first two squares: Take the first two t-shirt squares that will be sewn together. Place the right sides of the fabric together, aligning the edges that will be stitched.
- Sew the squares together: Use a straight stitch to sew along the aligned edges, starting and ending with a backstitch to secure the seams. Continue sewing pairs of squares together until all the squares are sewn into rows.
- Join the rows: Once the rows are complete, carefully match and align the seams of adjacent rows. Pin or clip them together to hold them in place. Sew the rows together, taking care to match the seams accurately.
- Press the seams: After sewing the squares together, press the seams to set them. Press the seams flat and in the desired direction, alternating the direction for each row to reduce bulk.
Keep in mind that accuracy is important when sewing the t-shirt squares together. Take your time and sew with a steady hand to ensure straight seams and consistent seam allowances.
By following these steps and patiently sewing the t-shirt squares together, you’ll be one step closer to completing your t-shirt quilt.
Step 6: Adding Batting and Backing to the Quilt
With the quilt top sewn together, it’s time to add the layers that will give your t-shirt quilt its structure and warmth. The batting and backing will provide insulation and stability to the quilt. Follow these steps to complete this important step:
- Prepare the backing fabric: Lay your backing fabric flat on a large surface, right side down. Smooth out any wrinkles and make sure the fabric is larger than the quilt top.
- Layer the batting: Place the batting on top of the backing fabric, ensuring it covers the entire quilt top. Smooth out any wrinkles or folds in the batting to create an even layer.
- Center the quilt top: Carefully place the quilt top on the layered batting and backing, ensuring it is centered and aligned correctly.
- Baste the layers together: To hold the layers in place, you can either pin or baste them together. Use safety pins or basting stitches to secure the layers, starting from the center and working your way out.
- Trim excess batting and backing: Trim the excess batting and backing fabric, leaving a 1-2 inch border around the edges of the quilt top.
Adding the batting and backing is an important step in creating a comfortable and durable t-shirt quilt. The batting provides the warmth and thickness, while the backing fabric adds stability and protects the quilting stitches.
By following these steps and taking the time to properly layer and secure the batting and backing, you’ll be ready for the next step of quilting the layers together.
Step 7: Quilting the Layers Together
The next step in creating your t-shirt quilt is quilting the layers together. This is where you secure the layers of the quilt and add decorative stitching. Follow these steps to complete this stage:
- Choose your quilting method: Decide whether you want to hand quilt or machine quilt your t-shirt quilt. Hand quilting adds a personal touch with handmade stitches, while machine quilting is faster and more efficient.
- Select your quilting design: Plan out the quilting design you want to use on your t-shirt quilt. You can opt for simple straight lines, free-motion quilting, or even intricate designs depending on your skill level and preference.
- Prepare your sewing machine (if machine quilting): If you’re machine quilting, attach a walking foot or a specified quilting foot to your sewing machine. Ensure that you have the appropriate thread and adjust your tension settings for smooth stitching.
- Start quilting: Begin quilting by stitching along the lines or patterns you have chosen. Whether you’re hand quilting or machine quilting, take your time and be mindful of achieving even stitches and consistent tension.
- Continue quilting: Work your way across the quilt, quilting one section at a time. Take breaks as needed to avoid fatigue and maintain accuracy in your quilting.
Quilting the layers together not only secures the quilt but also adds texture and dimension. The quilting stitches bring your t-shirt quilt to life and make it more durable.
By following these steps and taking the time to quilt your t-shirt quilt with care and precision, you’ll be one step closer to completing your masterpiece.
Read more: How To Make A T-shirt Quilt For Beginners
Step 8: Finishing Touches and Finalizing the Quilt
After quilting the layers together, it’s time to add the finishing touches to your t-shirt quilt. These final steps will give your quilt a polished and professional look. Follow these steps to bring your quilt to completion:
- Trim the edges: Using a rotary cutter and quilting ruler, trim the edges of the quilt to ensure they are straight and even. This will give your quilt a clean and professional finish.
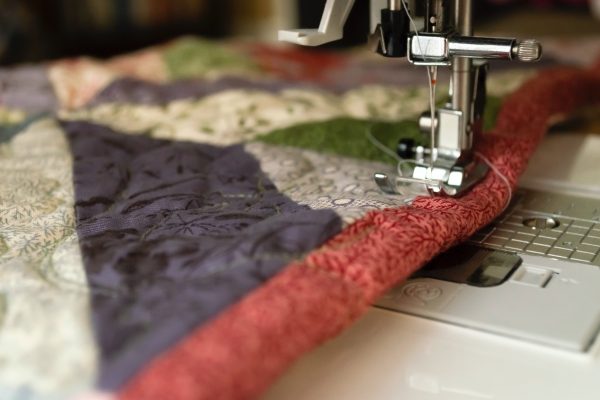
- Add binding: Cut strips of fabric for the binding and attach them to the edges of the quilt. Fold the strips in half lengthwise, press them, and sew them around the raw edges of the quilt to encase them neatly.
- Secure the binding: Fold the binding over to the back of the quilt and hand stitch it using a blind stitch or machine stitch it using a decorative stitch. Make sure the corners are neatly mitered for a polished look.
- Give it a final press: Once the binding is attached, give the entire quilt a final press with an iron to smooth out any wrinkles and make the quilt look crisp and fresh.
- Add labels or personal touches: Consider adding a label to the back of your quilt with your name, the date, and any other details you’d like to include. You can also consider adding additional personal touches like embroidery, applique, or embellishments to make the quilt truly unique.
These final steps in finishing your t-shirt quilt will enhance its overall appearance and ensure its durability. Taking the time to add professional finishing touches will make your quilt look like a work of art.
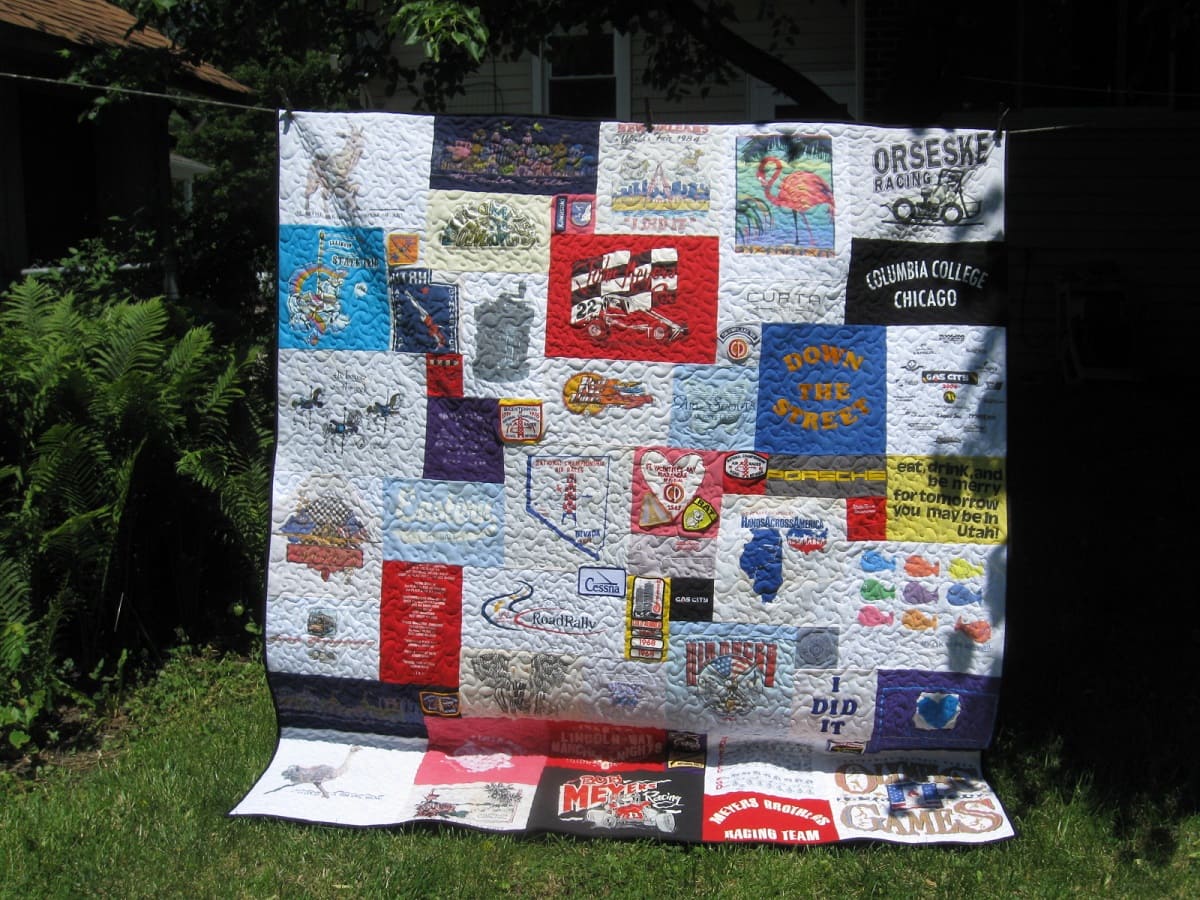
By following these steps and paying attention to the finer details, you’ll be ready to proudly display and enjoy your completed t-shirt quilt.
Conclusion
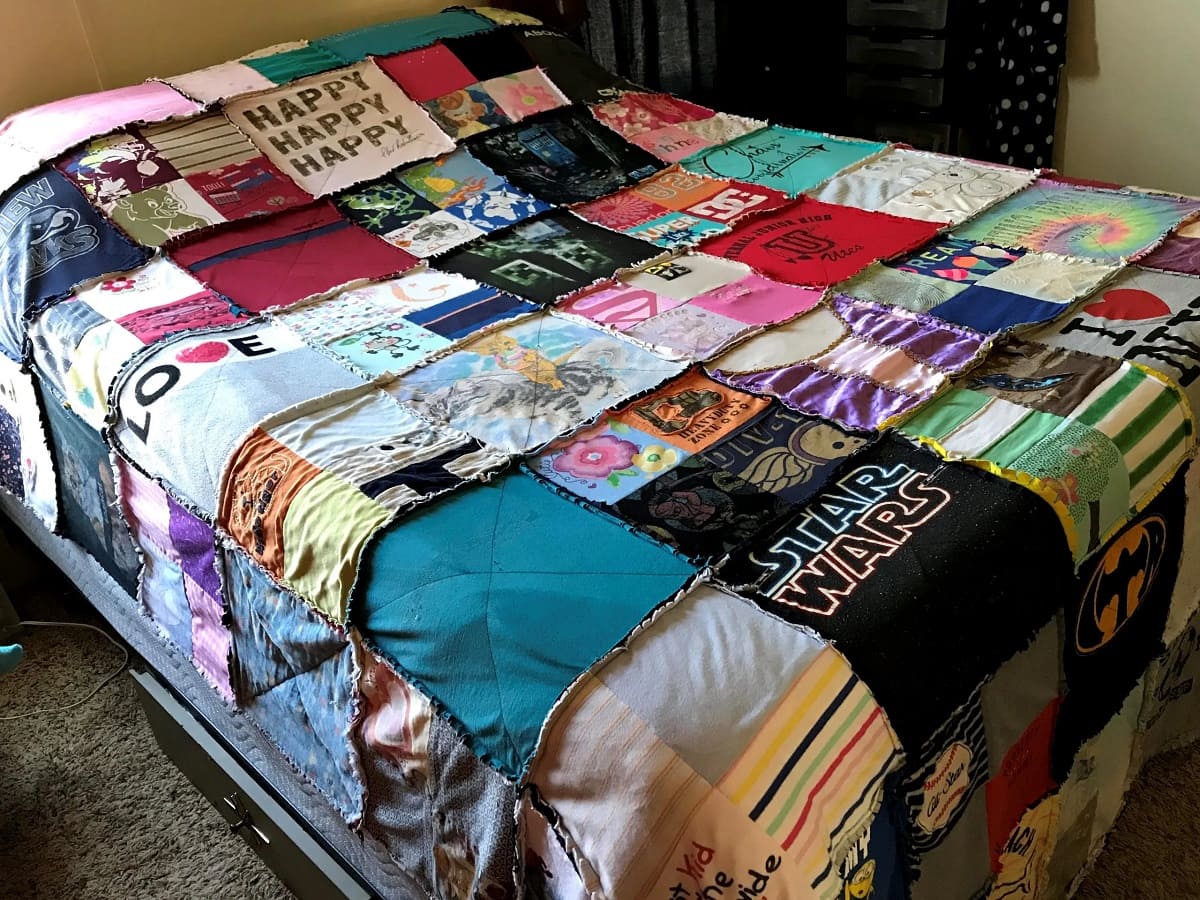
Congratulations! You have successfully transformed your old t-shirts into a beautiful and meaningful quilt. By following the step-by-step process outlined in this article, you have learned how to choose and prepare the t-shirts, design the quilt pattern, cut and arrange the t-shirt squares, sew the squares together, add batting and backing, quilt the layers together, and add the finishing touches.
Creating a t-shirt quilt is not only a fantastic way to repurpose old garments and reduce waste, but it’s also a way to preserve and showcase memories. Each t-shirt square holds a special story, and now those stories are woven together in a cozy and sentimental quilt.
Throughout this process, you have exercised your creativity, patience, and sewing skills. You have brought your personal style and artistic vision into the quilt, making it a unique and cherished item that will be treasured for years to come.
Remember, making a quilt from old t-shirts is a labor of love. Each stitch represents your dedication and passion for both quilting and the memories associated with the t-shirts. Take pride in your accomplishment and share your quilt with others who appreciate the artistry and sentiment behind it.
Now that you have completed your t-shirt quilt, you can snuggle up under its warmth, share your story with friends and family, or perhaps even inspire others to embark on their own t-shirt quilting journey.
So grab a cup of tea, cozy up with your quilt, and admire the masterpiece you have created. Enjoy the comfort, the memories, and the fulfillment that comes with completing a handmade quilt from old t-shirts.
Frequently Asked Questions about How To Make A Quilt From Old T-Shirts
Was this page helpful?
At Storables.com, we guarantee accurate and reliable information. Our content, validated by Expert Board Contributors, is crafted following stringent Editorial Policies. We're committed to providing you with well-researched, expert-backed insights for all your informational needs.
0 thoughts on “How To Make A Quilt From Old T-Shirts”