Articles
How To Make A Quilt From Old Ties
Modified: February 24, 2024
Learn how to make a beautiful quilt using old ties in this informative and easy-to-follow articles. Upcycle your old ties and create a unique piece!
(Many of the links in this article redirect to a specific reviewed product. Your purchase of these products through affiliate links helps to generate commission for Storables.com, at no extra cost. Learn more)
Introduction
Welcome to the world of quilting, where creativity and craftsmanship come together to create beautiful and functional works of art. If you have old ties lying around that are no longer being used, why not repurpose them into a unique and meaningful quilt? Making a quilt from old ties is a wonderful way to preserve memories, honor loved ones, or simply add a touch of personality to your home decor.
In this article, we will guide you through the process of making a quilt from old ties. We will explore each step, from gathering materials to the final touches, to help you create a quilt that is both visually stunning and full of sentimental value.
Before we dive into the details, it’s important to note that quilting can be a time-consuming and intricate process. However, the end result is well worth the effort, as you will have a one-of-a-kind quilt that tells a unique story. So, let’s begin our journey into the world of tie quilting!
Key Takeaways:
- Transform old ties into a unique quilt, preserving memories and showcasing craftsmanship. Enjoy the process and create a one-of-a-kind piece of artistry with sentimental value.
- Care for your tie quilt to ensure its longevity. Follow provided instructions for washing, drying, storage, and regular inspection to preserve its beauty for years to come.
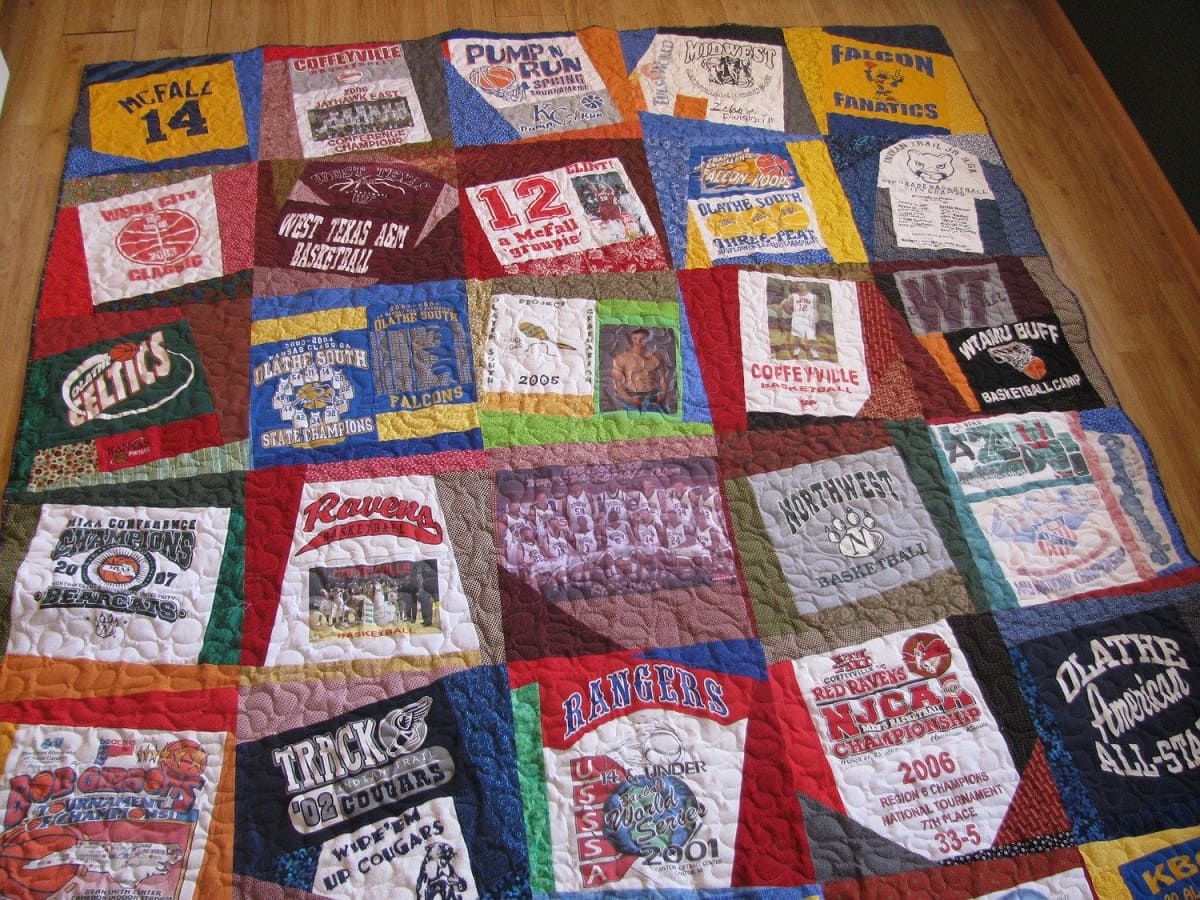
Read more: How To Make Quilt From Old Clothes
Gathering Materials
Before you start your tie quilt project, it’s essential to gather all the necessary materials. Here’s a list of items you’ll need:
- Old Ties: Collect a variety of ties in different colors, patterns, and textures. Look for ties that hold special meaning or ones that you simply find visually appealing.
- Fabric Scissors: Invest in a good pair of fabric scissors that are sharp and precise for cutting the ties.
- Quilting Ruler: A quilting ruler will come in handy for measuring and cutting fabric pieces accurately.
- Sewing Machine: A reliable sewing machine will make the process of sewing the quilt top much faster and more efficient. Ensure that your machine is in good working condition and has the necessary attachments for quilting.
- Thread: Choose thread that matches the colors of your ties or opt for a neutral color that will blend well with your overall design.
- Needles: Have a selection of needles on hand for both hand-sewing and machine use.
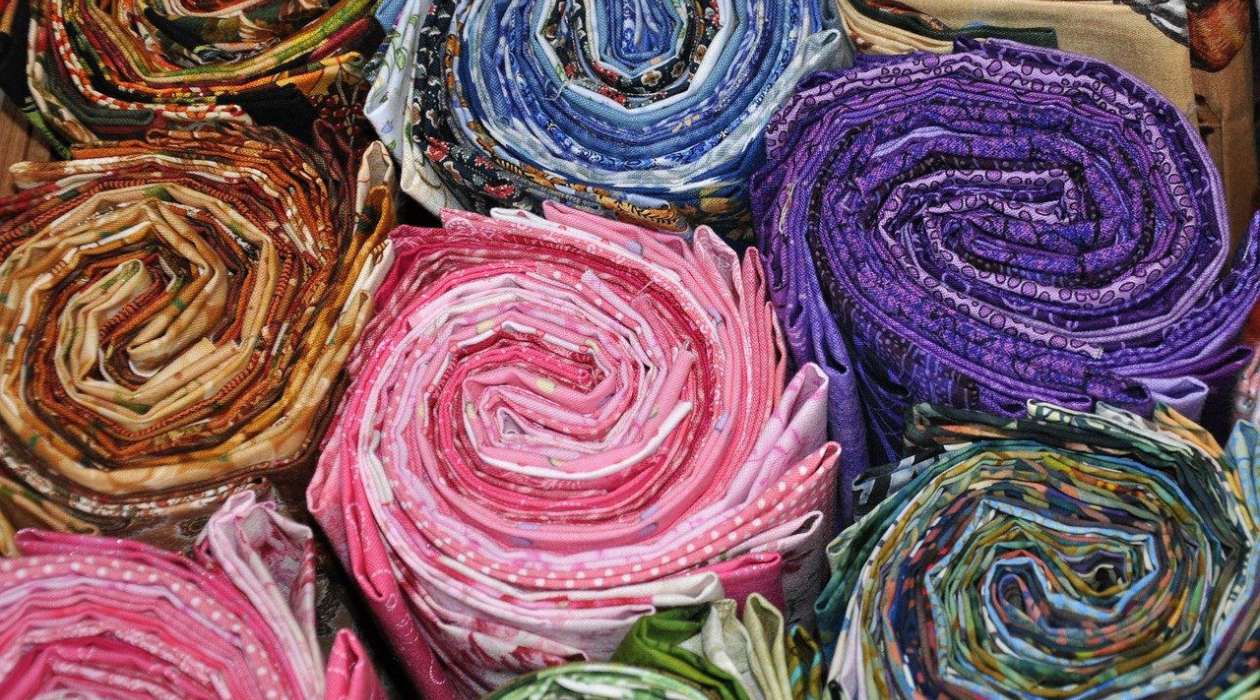
- Backing Fabric: Select a durable and complementary fabric for the backing of your quilt. Make sure it is large enough to cover the size of your desired quilt.
- Batting: This is the layer of material that provides warmth and thickness to your quilt. Choose a batting that suits your desired level of insulation.
- Pins or Clips: These will help you secure the layers of your quilt together during the quilting process.
- Binding Fabric: The binding is the fabric strip that finishes off the edges of your quilt. Choose a fabric that complements your tie colors or opt for a contrasting color to make the design pop.
Once you have gathered all the necessary materials, you can move on to the next step of selecting and preparing the ties for your quilt.
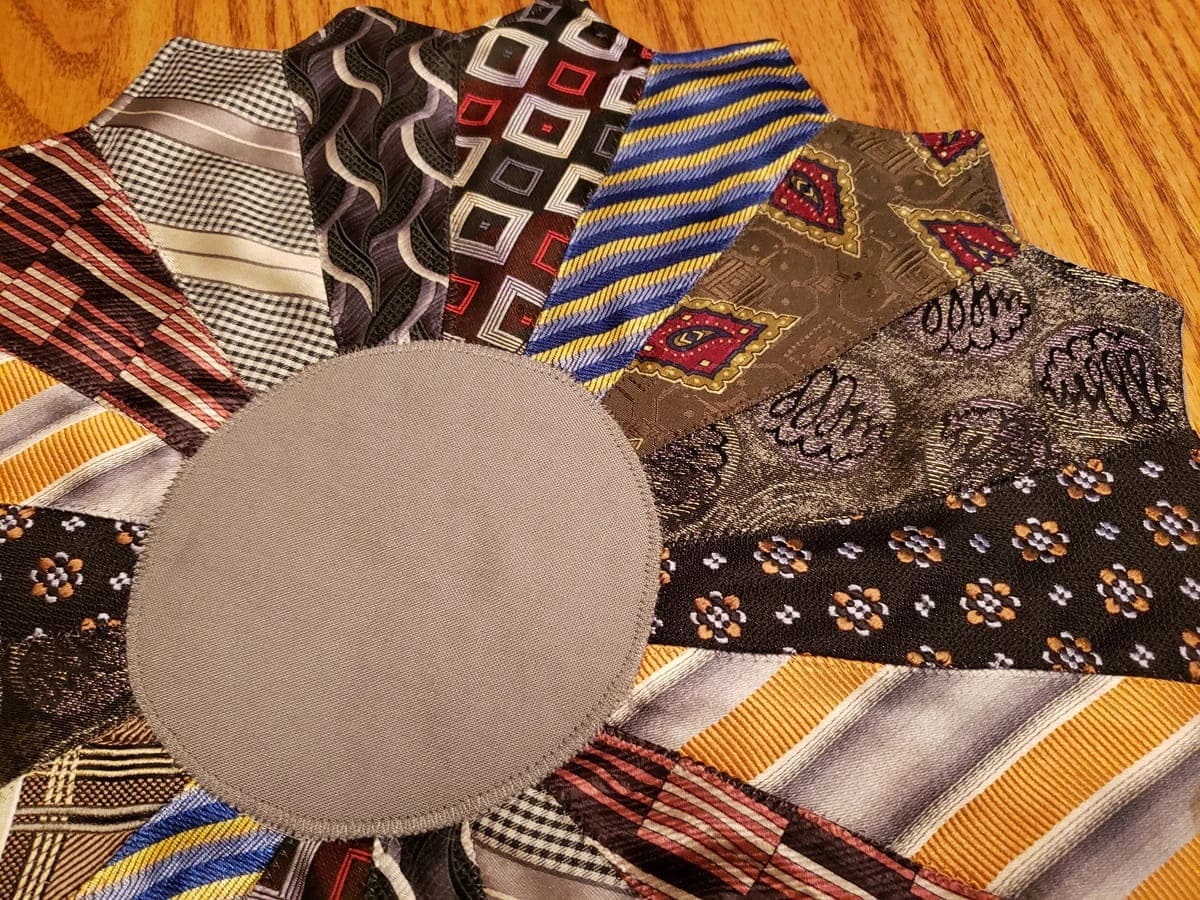
Selecting and Preparing the Ties
When it comes to selecting ties for your quilt, the possibilities are endless. You can choose ties that have personal significance, such as ties worn by family members or ties that hold sentimental value. Alternatively, you can simply select ties based on their colors, patterns, and textures to create a visually appealing design.
Before you start working with the ties, it’s important to prepare them for use in your quilt. Here are the steps to follow:
- Inspect for Damage: Carefully examine each tie for any signs of damage, such as stains, tears, or frayed edges. It’s best to avoid using ties with significant damage, as it can affect the overall appearance and durability of your quilt.
- Remove the Lining: Most ties have a lining on the backside. To remove it, cut the thread that holds the lining in place. This will make it easier to work with the tie material.
- Press and Flatten: After removing the lining, press the ties with a warm iron to remove any wrinkles or creases. Lay them flat on an ironing board and carefully run the iron over the surface. Take care not to scorch the fabric.
- Trim Excess Material: Depending on the size and shape of your ties, you may need to trim off any excess material that extends beyond the desired dimensions. Use sharp fabric scissors to carefully cut the ties to the desired size, keeping in mind the overall design of your quilt.
- Arrange and Sort: Once your ties are prepared, take some time to arrange and sort them based on color, pattern, or any other criteria you prefer. This will give you a clearer idea of how you want to design your quilt.
By taking the time to properly select and prepare your ties, you will ensure that your quilt is not only visually appealing but also durable and long-lasting. With the ties ready, you can now move on to planning the design of your quilt.
Planning the Quilt Design
Planning the design of your tie quilt is an exciting and crucial step in the process. It’s where you get to unleash your creativity and bring your vision to life. Here are some tips to help you plan your quilt design:
- Consider the Tie Colors: Take a close look at the colors of your ties and identify any dominant or complementary shades. You can choose to create a cohesive color scheme or play with contrasting colors for a bold and vibrant look.
- Think About Patterns: Some ties may have unique patterns, such as stripes or paisley prints. Consider how these patterns can be incorporated into your quilt design, either by aligning the patterns or cutting them into smaller pieces for a patchwork effect.
- Experiment with Layouts: Lay out your ties on a clean surface and play around with different arrangements. You can opt for a structured layout, such as a grid or a quilt block pattern, or go for a more randomized look by mixing and matching the tie pieces.
- Consider Size and Shape: Depending on the size and shape of your ties, you may need to make adjustments to create a balanced layout. Consider cutting some ties into smaller pieces or using larger ties as focal points within your design.
- Sketch or Use Quilt Design Software: If you have a clear vision of your quilt design, you can sketch it out on paper to get a visual representation. Alternatively, you can utilize quilt design software or apps to experiment with different layouts and color combinations.
Remember, there are no set rules when it comes to designing your tie quilt. It’s all about personal preference and creating a design that speaks to you. Take your time in this planning stage, as it will greatly impact the final outcome of your quilt. Once you have finalized your design, you can move on to cutting the ties and assembling the quilt top.
Cutting the Ties
Now that you have planned your quilt design, it’s time to cut the ties into the desired shapes and sizes. This step requires precision and attention to detail to ensure that the pieces fit together seamlessly. Here’s how to cut the ties:
- Measure and Mark: Use a quilting ruler to measure and mark the dimensions of each tie piece according to your design plan. Make sure to account for seam allowances.
- Cut Straight Lines: Using sharp fabric scissors, carefully cut along the marked lines to remove any excess material. Take your time and make clean, straight cuts to ensure neat edges.
- Experiment with Angles: Depending on your quilt design, you may want to incorporate angled or diagonal cuts. These cuts can add visual interest and create more dynamic patterns in your quilt.
- Vary the Shape and Size: Don’t be afraid to experiment with different shapes and sizes for each tie piece. You can cut squares, rectangles, triangles, or even more complex shapes to add variety and depth to your quilt design.
- Keep Organized: As you cut the ties, it’s helpful to keep the pieces organized. Use labeled containers or ziplock bags to separate the different sections, making it easier to assemble your quilt top.
Remember to take care while cutting the ties, ensuring your fingers are away from the scissor blades. If you’re unsure about cutting the ties yourself, you can also consider taking them to a fabric cutting service for professional assistance.
Once all the ties have been cut according to your design plan, you’re ready to start sewing the quilt top. This is where the magic happens, as you bring all the tie pieces together to create a cohesive and beautiful quilt.
Read more: How To Make A Tie Quilt With Fleece
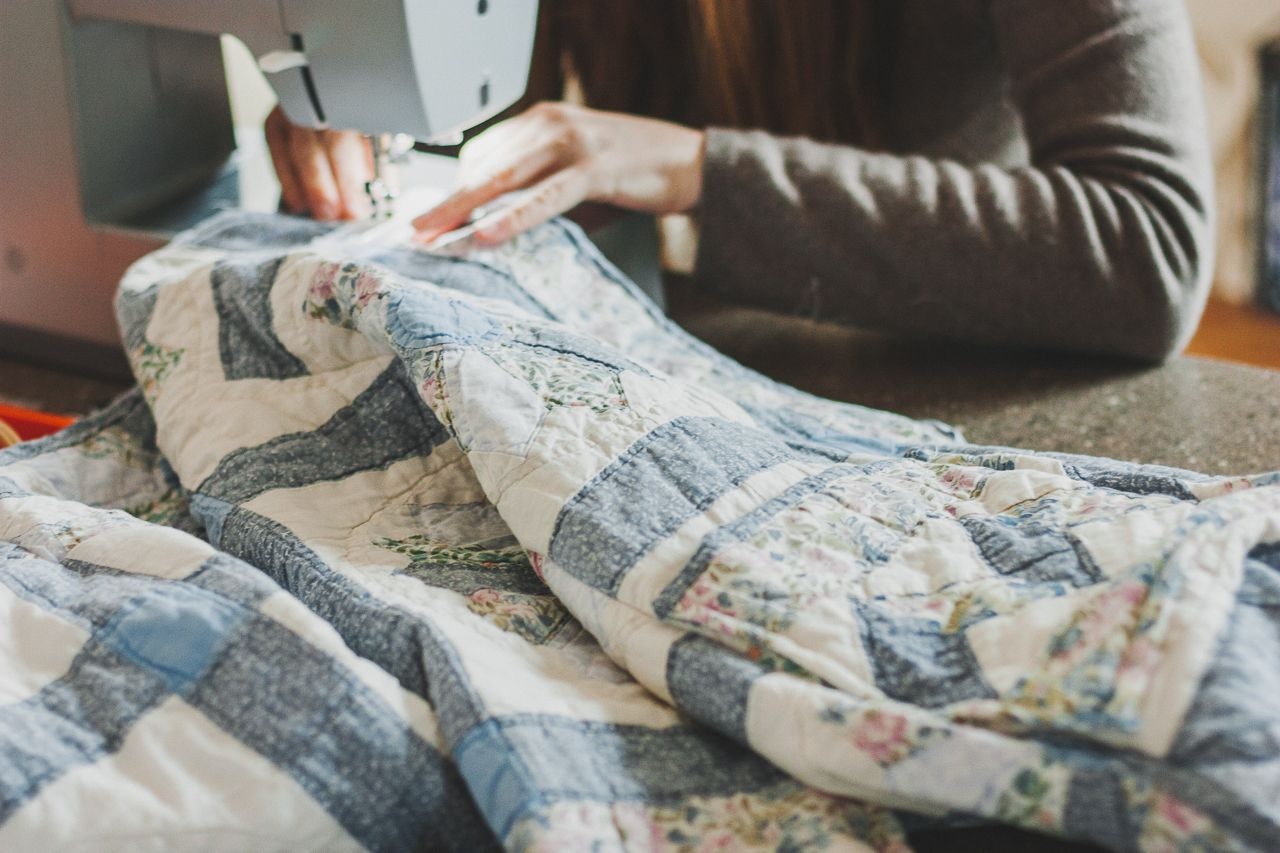
Sewing the Quilt Top
Now that you have your tie pieces cut and organized, it’s time to sew them together to create the quilt top. This step requires careful stitching and precision to ensure that the pieces align perfectly. Here’s a step-by-step guide:
- Layout the Pieces: Arrange the tie pieces according to your design plan. Take your time to make sure they are in the desired arrangement.
- Take the First Two Pieces: Select the first two tie pieces that need to be sewn together. Place them right sides together, with the edges that need to be stitched aligned.
- Sew the Seam: Using a sewing machine or hand-sewing needle and thread, stitch the pieces together along the aligned edge. Use a ¼-inch seam allowance. If using a machine, backstitch at the beginning and end of the seam to secure it.
- Press the Seam: Open the seam and press it flat with an iron. This will help the seam lie flat and make it easier to sew the next piece.
- Continue Sewing: Repeat steps 2 to 4 for the remaining tie pieces, sewing them together one at a time. Take care to align the edges correctly and press each seam flat as you go along.
- Check for Accuracy: As you sew, periodically check that your quilt top is aligned and the pieces are fitting together as intended. Make any necessary adjustments before moving on to the next section.
Continue sewing the tie pieces together until you have completed the entire quilt top. Take your time and enjoy the process, as each stitch brings your quilt closer to completion.
Once the quilt top is complete, it’s time to move on to the next step of adding the batting and backing to create a three-layered quilt sandwich.
When making a quilt from old ties, be sure to carefully cut and press the ties to remove any wrinkles or creases before sewing them together. This will ensure a smooth and professional-looking finished quilt.
Adding Batting and Backing
With the quilt top sewn together, it’s time to add the batting and backing to create a three-layered quilt sandwich. The batting provides insulation and thickness to the quilt, while the backing fabric adds stability and gives a clean finish to the back. Follow these steps to complete this stage:
- Prepare the Batting: Measure and cut the batting to match the size of your quilt top. It should be slightly larger than the quilt top to ensure full coverage.
- Lay out the Backing Fabric: Spread the backing fabric on a flat surface, right side down. Smooth out any wrinkles or creases and ensure it is larger than the quilt top.
- Place the Batting: Carefully lay the cut batting on top of the backing fabric, aligning the edges with the fabric edges. Smooth out any wrinkles or folds to create a flat surface.
- Position the Quilt Top: Place the quilt top on the batting and backing, right side up. Make sure it is centered and aligned with the edges of the batting and backing fabric.
- Baste the Layers Together: To hold the layers in place, you can hand-baste or use safety pins to secure them together. Start in the center and work your way to the edges, spacing the basting or pins a few inches apart.
Once the layers are basted together, you’re ready to move on to the exciting stage of quilting, where you will stitch the layers together to create beautiful patterns and textures.
Next, I will guide you through the process of quilting the layers of your tie quilt.
Quilting the Layers
Quilting is the process of stitching together the three layers of the quilt – the quilt top, batting, and backing fabric. This step not only secures the layers but also adds decorative stitching and texture to the quilt. Here’s how to quilt your tie quilt:
- Select a Quilting Method: Decide on the quilting method that you prefer. You can choose to hand quilt, machine quilt, or a combination of both. Hand quilting creates a traditional, handcrafted look, while machine quilting is faster and more suitable for intricate designs.
- Start in the Center: Begin quilting from the center of the quilt and work your way to the edges. This will help distribute any puckering or gathering evenly throughout the quilt.
- Choose Quilting Patterns: Select the type of quilting pattern you want to use. You can opt for simple straight lines, geometric shapes, meandering stitches, or intricate designs. Consider the overall style of your quilt and let your creativity guide you.
- Mark the Quilt: If hand quilting, mark the quilting lines or designs on the quilt top using a washable fabric marker or quilting stencils. If machine quilting, you can use quilt rulers or free-motion quilting techniques.
- Quilt the Layers: Stitch along the marked lines or patterns, working slowly and steadily. Pay attention to even stitch length and maintaining consistent tension. If using a sewing machine, it’s recommended to use a walking foot to help feed the layers evenly.
- Secure the Ends: As you approach the end of a quilting line or section, backstitch or tie off the threads to secure them. Trim any excess thread.
- Continue Quilting: Repeat the quilting process until the entire quilt is quilted. Take breaks as needed to avoid fatigue and maintain accuracy.
Quilting the layers is a time-consuming process, but it’s also an opportunity to add your personal touch to the quilt. Whether you choose a simple or intricate quilting design, the stitching will enhance the overall aesthetic and durability of your tie quilt.
Once the quilting is complete, it’s time to move on to the final step of binding the quilt edges for a finished look.
Binding the Quilt
The binding is the finishing touch that gives your quilt a polished and professional look. It not only reinforces the edges but also adds a decorative element. Follow these steps to bind the edges of your tie quilt:
- Prepare the Binding Strips: Cut fabric strips for the binding, making sure they are long enough to cover the entire perimeter of the quilt. The width of the strips can vary depending on your preference, but 2.5 inches is commonly used.
- Join the Strips: Take two binding strips and place them together at a right angle with the right sides facing each other. Sew a diagonal line from one corner to the other, creating a seam. Trim the excess fabric, leaving a quarter-inch seam allowance. Repeat this process to join all the binding strips, creating one continuous strip.
- Press and Fold: Fold the binding strip in half lengthwise, wrong sides together, and press it with an iron to create a crisp, folded edge.
- Attach the Binding: Starting in the middle of one side of the quilt, align the raw edges of the folded binding strip with the raw edges of the quilt. Pin or clip the binding in place, leaving a few inches of excess binding at the beginning.
- Sew the Binding: Using a ¼-inch seam allowance, sew the binding to the quilt, removing the pins or clips as you go. Stop stitching approximately ¼ inch away from the corner, backstitch, and then remove the quilt from the machine.
- Miter the Corners: To create neat mitered corners, fold the binding strip up and away from the quilt at a 45-degree angle. Then, fold it back down, aligning it with the next side of the quilt. Continue sewing along the next side, repeating this process for all corners.
- Complete the Binding: When you reach the starting point, trim the excess binding, leaving a few inches of overlap. Open the ends of the binding and fold them back on themselves, wrong sides together. Press the fold, then sew the ends together. Trim any excess fabric.
- Secure the Binding: Fold the binding over the raw edge of the quilt to the backside, encasing the raw edges. Secure it in place with pins or clips, and hand-stitch or use a blind hem stitch with matching thread to sew the binding to the back of the quilt.
Take your time while sewing the binding, ensuring that it is even and securely attached. The binding not only adds a professional finish to your quilt but also protects the raw edges and adds durability.
With the binding complete, your tie quilt is almost ready to be enjoyed. However, before showcasing your masterpiece, there are a few final touches and care instructions to consider.
Read more: How To Make A Quilt From Old T-Shirts
Final Touches and Care Instructions
As you near the completion of your tie quilt, there are a few final touches to consider to make it truly special. These final touches not only enhance the quilt’s appearance but also add to its overall longevity. Here are some suggestions:
- Label Your Quilt: Add a personalized label to the back of your quilt with information such as the maker’s name, date, and any special message or story behind the quilt. This adds a sentimental touch and helps preserve its history.
- Add Embellishments (optional): Consider embellishing your quilt with additional elements like embroidery, appliqué, or fabric painting. These decorative accents can add depth and interest to your quilt design.
- Give it a Final Press: Once you have completed the quilt, give it a final press with a warm iron. This will help set the stitches and ensure a smooth and polished appearance.
Now that your tie quilt is complete, it’s important to know how to care for it properly. Follow these care instructions to keep your quilt looking beautiful:
- Washing: Check the care instructions for the fabric used in your quilt, as different materials may require specific care. If possible, spot clean any stains or spills, and only machine wash when necessary. Use a gentle cycle, mild detergent, and cold water. Avoid harsh detergents, bleach, or excessive agitation.
- Drying: Air drying is recommended for quilts to prevent shrinking or warping. Lay it flat on a clean, dry surface or hang it on a line. Avoid direct sunlight, as it can cause fading over time.
- Storage: When not in use, store your quilt in a cool, dry place away from direct sunlight and with minimal exposure to humidity. Consider folding it gently, using acid-free tissue paper to prevent creases, or rolling it around a tube to minimize stress on the fabric.
- Regular Inspection: Periodically check your quilt for any signs of damage, such as loose threads or tears. Repair any issues promptly to prevent further damage.
By following these care instructions, you can ensure that your tie quilt remains in good condition for years to come, preserving the memories and craftsmanship that went into its creation.
Congratulations! You have now completed your tie quilt and learned valuable skills along the way. This beautiful piece of artistry is not only a reflection of your creativity but also a cherished heirloom that can be passed down through generations.
Enjoy the warmth, comfort, and beauty of your tie quilt, and may it bring joy and inspire admiration for many years to come!
Conclusion
Congratulations on successfully creating your very own quilt from old ties! Through careful selection, preparation, and creativity, you have transformed sentimental or unused ties into a unique and meaningful piece of art. Your quilt tells a story, preserving memories and showcasing your craftsmanship.
Throughout this journey, you learned how to gather materials, select and prepare the ties, plan the quilt design, cut the ties, sew the quilt top, add batting and backing, quilt the layers, bind the quilt, and add final touches. Each step required your attention to detail, creativity, and passion for creating something truly special.
Quilting is an art form that allows for self-expression and provides a functional yet beautiful outcome. Your tie quilt embodies this artistry, serving as a cozy and decorative addition to your home or a heartfelt gift for a loved one.
Remember to care for your quilt by following the provided instructions, ensuring that it remains in good condition for many years. Regular inspection, careful washing, proper storage, and prompt repairs are essential to preserve the beauty and longevity of your quilt.
We hope this guide has equipped you with the knowledge and inspiration to continue exploring the world of quilting. There are endless possibilities for future quilting projects, from traditional patchwork designs to modern improvisational creations. Let your creativity soar as you embark on new quilting adventures!
Thank you for joining us on this journey of making a quilt from old ties. We would love to see your finished quilt and hear the stories it holds. Share your creations and experiences with the quilting community, inspire others, and continue to embrace the joy of quilting!
Frequently Asked Questions about How To Make A Quilt From Old Ties
Was this page helpful?
At Storables.com, we guarantee accurate and reliable information. Our content, validated by Expert Board Contributors, is crafted following stringent Editorial Policies. We're committed to providing you with well-researched, expert-backed insights for all your informational needs.


0 thoughts on “How To Make A Quilt From Old Ties”