Articles
How To Make A Jacket From A Quilt
Modified: January 5, 2024
Learn how to repurpose your quilt into a stylish jacket with our informative articles. Discover step-by-step instructions and tips to create your own unique fashion statement.
(Many of the links in this article redirect to a specific reviewed product. Your purchase of these products through affiliate links helps to generate commission for Storables.com, at no extra cost. Learn more)
Introduction
Welcome to the world of DIY fashion! If you have a quilt that holds sentimental value but is no longer being put to use, why not repurpose it into something trendy and stylish? In this article, we will guide you through the steps to transform your beloved quilt into a unique and fashionable jacket.
Creating a jacket from a quilt not only gives new life to an old item, but it also allows you to showcase your creativity and personal style. By repurposing a quilt, you not only avoid contributing to textile waste but also get to wear a one-of-a-kind piece that tells a story.
Before we dive into the process, let’s gather all the materials you’ll need for this project.
Key Takeaways:
- Transforming a quilt into a jacket is a creative and sustainable way to repurpose cherished textiles, showcasing personal style and craftsmanship while reducing textile waste.
- By carefully cutting, sewing, and adding unique touches, you can create a one-of-a-kind quilt jacket that tells a story and becomes a fashionable statement piece in your wardrobe.
Read more: How To Make A Quilt Pattern From A Picture
Materials Needed
Before you can start making your quilt jacket, make sure you have the following materials on hand:
- A quilt – Choose a quilt that you’re willing to repurpose into a jacket. It can be a vintage quilt, a family heirloom, or even a quilt you made yourself.
- Lining fabric – Select a fabric that complements the colors and pattern of your quilt. This will be used to line the inside of the jacket.
- Scissors – A good pair of fabric scissors will come in handy for cutting the quilt and lining fabric.
- Thread – Choose a thread color that matches the colors of your quilt or opt for a neutral color that will blend in.
- Sewing machine – While it’s possible to hand sew the jacket, using a sewing machine will make the process faster and more efficient.
- Buttons or zippers – Decide whether you want to secure your jacket with buttons or zippers and make sure to have them ready.
- Measuring tape – You’ll need a measuring tape to take accurate measurements of your quilt and yourself.
- Pins – Pins will be useful for holding pieces together and keeping them in place while sewing.
- Iron – An iron will be necessary for pressing and flattening the fabric during the sewing process.
- Optional: Interfacing – If your quilt fabric is soft and you want to add more structure to your jacket, consider using interfacing.
With these materials ready, you’re all set to transform your quilt into a fabulous jacket!
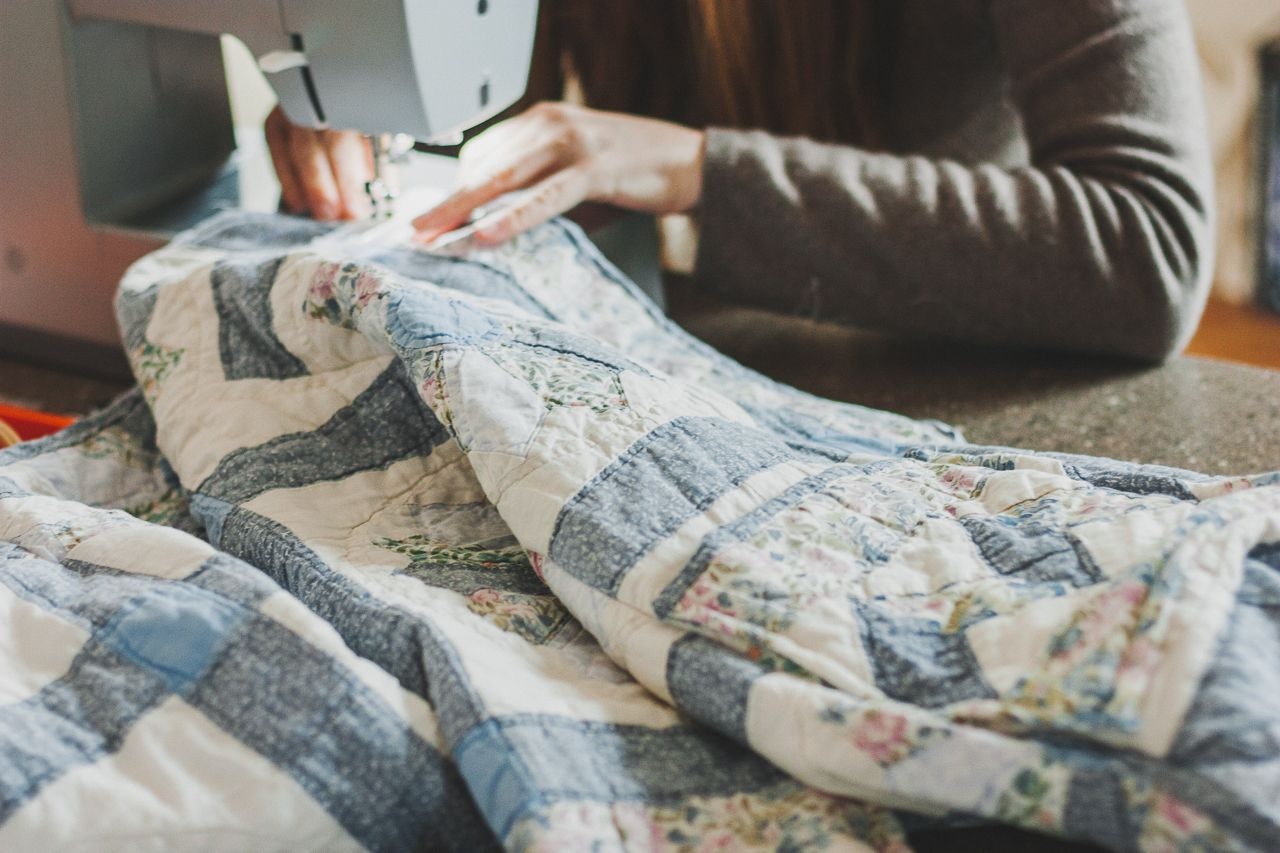
Step 1: Cutting the Fabric
The first step in creating your quilt jacket is to carefully cut the fabric. Start by laying out your quilt on a flat surface, ensuring that it is smooth and wrinkle-free.
Using your measuring tape, measure and mark the desired length and width of your jacket. Keep in mind that the size may vary depending on the size of the quilt and your personal preference. Make sure to leave some extra fabric for seam allowances.
Next, use your fabric scissors to cut along the marked lines. Take your time to ensure clean and even cuts. If your quilt has a distinct pattern or design, consider how you want to incorporate it into your jacket. You may need to adjust the cuts accordingly.
Once you have cut the main body of the jacket, set it aside and assess the remaining fabric. Look for sections that can be repurposed to create pockets, trims, or other design elements. The quilt’s borders or smaller quilted sections can be ideal for this purpose.
Again, measure and mark the desired shapes and sizes for these additional pieces. Carefully cut them out and set them aside with the main body of the jacket.
Remember to double-check your measurements and cuts before proceeding to the next step. Accuracy is crucial to ensure a well-fitting and visually appealing jacket.
Now that you have cut the fabric pieces for your quilt jacket, it’s time to move on to the next step: sewing the panels together.
Step 2: Sewing the Panels Together
Now that you have the fabric pieces cut to size, it’s time to start sewing them together to create the body of your quilt jacket.
Begin by pinning the panels together, aligning the edges with the right sides facing each other. Make sure to match the seams and corners as accurately as possible.
Using a sewing machine and a matching thread, sew along the pinned edges with a straight stitch. Be sure to leave a seam allowance of around 1/2 inch (1.27 cm) or as per your preference. Backstitch at the beginning and end of each seam to secure the stitches.
Repeat this process until all the panels are sewn together, forming the front and back of the jacket. Take your time and check for any bunched or uneven sections as you sew. If necessary, remove the pins and adjust the fabric before sewing it again.
Once the main body panels are securely sewn together, press the seams open using an iron. This step helps to flatten the fabric and gives a neater finish to the jacket.
After pressing the seams, you may want to try on the quilt jacket to check the fit. Adjustments can be made at this stage, such as taking in or letting out the seams to achieve your desired fit.
With the main body of the quilt jacket sewn and fitting well, it’s time to move on to the next step: creating the sleeves.
Step 3: Creating the Sleeves
Now that the main body of the quilt jacket is complete, it’s time to create the sleeves. The sleeves will determine the overall fit and comfort of your jacket, so it’s important to take precise measurements and sew them carefully.
Start by measuring the circumference of your arm where the sleeve will sit. Add a bit of ease to ensure a comfortable fit, then measure the desired length of the sleeves. It’s a good idea to try on the jacket and mark the desired sleeve length on your arm before measuring.
Using these measurements, cut two rectangular fabric pieces for the sleeves. The width of each piece should be equal to the arm circumference measurement, and the length should match the desired sleeve length.
With the sleeve pieces cut, fold them in half lengthwise with the right sides facing each other. Pin the raw edges together, aligning them carefully.
Using your sewing machine, sew along the pinned edge to create a tube for each sleeve. Use a straight stitch and a seam allowance of about 1/2 inch (1.27 cm).
Next, press the seam open with an iron to flatten the fabric and give a clean finish to the sleeves.
Now it’s time to attach the sleeves to the body of the jacket. With the jacket turned inside out, align the raw edges of the sleeve with the armhole of the jacket. Pin them in place, making sure to match the seams.
Using your sewing machine, sew along the pinned edge to attach the sleeves to the body of the jacket. Backstitch at the beginning and end of the seam to secure it.
Repeat these steps for the other sleeve, ensuring symmetry and balance in the placement of the sleeves.
With the sleeves attached, flip the jacket right side out and try it on to check the fit and comfort. Make any necessary adjustments at this stage, such as taking in the seams or shortening the sleeves.
Now that the sleeves are in place, it’s time to move on to the next step: adding the collar.
When making a jacket from a quilt, choose a quilt with a sturdy fabric and consider adding a lining for extra warmth and durability. Be mindful of the quilt’s pattern when cutting and sewing to create a visually appealing jacket.
Read more: How To Make Quilt From Old Clothes
Step 4: Adding the Collar
The collar adds structure and style to your quilt jacket, enhancing its overall look. Adding a collar can be a bit more intricate, but with careful steps, you can achieve a professional finish.
Begin by measuring the circumference of the neckline of your jacket. Add a bit of ease for comfort, then multiply this measurement by the desired collar width. This will give you the length of the fabric strip needed for the collar.
Cut a fabric strip according to the measurements you just calculated. The width of the strip should be twice the desired collar width, as you will be folding it in half.
With the fabric strip ready, fold it in half lengthwise with the right sides facing each other. Pin the raw edges together, aligning them carefully.
Using your sewing machine, sew along the pinned edge, leaving the short ends open. Use a straight stitch and a seam allowance of about 1/2 inch (1.27 cm).
Next, trim the seam allowance and clip the corners to reduce bulk when the collar is turned right side out.
Turn the fabric strip right side out, gently pushing out the corners to ensure a clean finish. Press the collar strip with an iron to flatten the fabric and give it a crisp appearance.
Now it’s time to attach the collar to the jacket. With the jacket turned right side out, place the collar strip along the neckline, aligning the raw edges. Pin the collar in place, ensuring that it is evenly distributed and matches the shape of the neckline.
Using your sewing machine, sew the collar to the neckline, making sure to catch all layers of fabric. Use a straight stitch and a seam allowance of about 1/2 inch (1.27 cm). Take your time and sew slowly to ensure a neat and even stitch.
Once the collar is attached, press it with an iron to give it a polished look. This step helps in setting the stitches and gives a professional finish to the quilt jacket.
With the collar in place, admire your progress and get ready to move on to the next step: adding buttons or zippers to secure the jacket.
Step 5: Adding Buttons or Zippers
Adding buttons or zippers to your quilt jacket not only adds functionality but also serves as a stylish accent. Choose the option that best suits your personal preference and the overall aesthetic of your jacket.
If you prefer buttons, start by determining the placement and number of buttons you want on your jacket. You can mark the positions with pins or tailor’s chalk.
Next, for each button placement, create a small fabric loop that will attach to the jacket. Cut a strip of fabric and fold it in half lengthwise. Sew along the open edge, then turn it right side out. These loops will provide a secure attachment point for the buttons.
Place the loops on the jacket, aligning them with the marked button positions. Sew them in place securely with a few backstitches.
Now, sew the buttons onto the opposite side of the jacket, aligning them with the loops. Ensure that they are positioned correctly to match with the loops and create a snug closure when fastened.
If you prefer zippers, carefully measure the length of the jacket opening where the zipper will be placed. Choose a zipper that corresponds to the measurement and aligns with the style and color scheme of your quilt jacket.
Pinning the zipper in place is crucial for accurate placement. Securely pin the zipper along the opening, making sure that it is centered and aligned with the edges. Use additional pins as needed to keep the fabric in place.
Using a zipper foot on your sewing machine, stitch along both edges of the zipper tape as close to the teeth as possible. Go slowly and adjust the fabric as needed to ensure a straight and even stitch.
Test the zipper functionality by opening and closing it a few times to ensure it operates smoothly. Trim any excess zipper tape beyond the jacket edges.
With the buttons or zipper now added, your quilt jacket is almost complete. It’s time for the final step: adding the finishing touches.
Step 6: Finishing Touches
Congratulations! You are nearing the final step of transforming your quilt into a stylish jacket. In this step, you’ll add the finishing touches to make your creation truly unique.
One option to consider is adding pockets to your quilt jacket. Pockets not only serve a practical purpose but also add an extra element of design and functionality. You can choose to create patch pockets or inseam pockets, depending on your preference. Measure and cut the fabric pieces for the pockets, ensuring they align with the jacket’s design and proportions. Pin the pockets in place and sew them securely onto the jacket.
Another option is to embellish your jacket with decorative elements such as embroidery, applique, or fabric patches. These additions can bring an extra touch of personalization and creativity to your quilt jacket. Consider using contrasting colors or unique designs that complement the quilt’s pattern.
Lastly, give your jacket a final press with the iron. This step will help to smooth out any wrinkles or creases and give your jacket a polished look. Pay attention to the collar, sleeves, and any other areas that need to be flattened.
With the finishing touches complete, try on your quilt jacket and admire your craftsmanship. Take a moment to appreciate the transformation of your quilt into a functional and fashion-forward garment.
Remember, making a jacket from a quilt is a labor of love and creativity. Embrace the imperfections and uniqueness that come with repurposing a quilt, and revel in the fact that you now have a one-of-a-kind piece that tells a story.
Now that you have completed all the steps, it’s time to showcase your quilt jacket and wear it with pride for all to see!
Thank you for joining us on this DIY fashion journey. We hope you enjoyed the process and are thrilled with the outcome of your quilt jacket. Happy sewing!
Conclusion
Transforming a quilt into a jacket is a creative way to repurpose a beloved textile into a fashionable statement piece. By following the steps outlined in this article, you have learned how to make a unique quilt jacket that showcases your personal style and craftsmanship.
Throughout the process, you carefully cut the fabric, sewed the panels together, created sleeves, added a collar, and secured the jacket with buttons or a zipper. The finishing touches, such as adding pockets or embellishments, allowed you to infuse your own creativity and make the jacket truly one of a kind.
Not only does repurposing a quilt into a jacket give a new life to an old item, but it also reduces textile waste and allows you to wear a garment that holds sentimental value. Each quilt jacket tells a story and carries the memories and history of the quilt from which it was made.
By taking the time to carefully select your materials, measure accurately, and sew with precision, you have created a jacket that not only looks stylish but also fits you perfectly. Your quilt jacket showcases your skill and attention to detail, and it’s something you can proudly wear and show off to others.
Remember, the process of making a quilt jacket may require patience and creativity, but the end result is well worth the effort. Whether you choose to display your quilt jacket as a piece of art or wear it as an everyday garment, it’s sure to be a conversation starter and a unique addition to your wardrobe.
Now that you have completed your quilt jacket, keep exploring and finding new ways to repurpose and breathe new life into old textiles. The possibilities are endless, and each project allows you to unleash your creativity and make a positive impact on the environment.
Thank you for joining us on this DIY journey. We hope this article has provided you with the guidance and inspiration you need to make a stunning quilt jacket. Happy sewing and enjoy your new creation!
Frequently Asked Questions about How To Make A Jacket From A Quilt
Was this page helpful?
At Storables.com, we guarantee accurate and reliable information. Our content, validated by Expert Board Contributors, is crafted following stringent Editorial Policies. We're committed to providing you with well-researched, expert-backed insights for all your informational needs.


0 thoughts on “How To Make A Jacket From A Quilt”