Articles
How To Make A Quilt Rack
Modified: January 5, 2024
Learn how to make a quilt rack with our informative articles. Discover step-by-step instructions and helpful tips to create the perfect quilt storage solution.
(Many of the links in this article redirect to a specific reviewed product. Your purchase of these products through affiliate links helps to generate commission for Storables.com, at no extra cost. Learn more)
Introduction
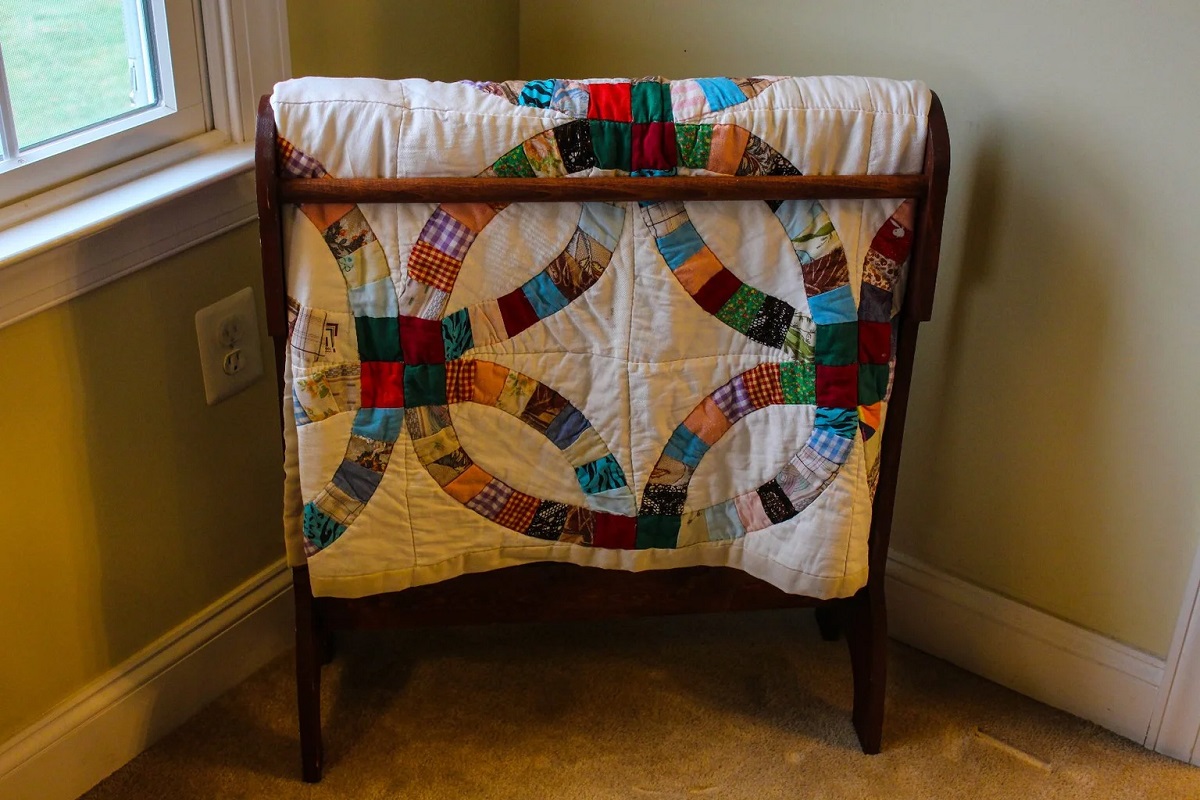
Quilts are not only beautiful works of art, but they also hold sentimental value and tell stories of family history. If you have a collection of quilts that you cherish, then having a quilt rack is a great way to display and store them properly. A quilt rack not only keeps your quilts organized, but it also adds a touch of elegance to your home decor.
In this article, we will guide you through the process of making your own quilt rack. Whether you are a seasoned DIY enthusiast or a beginner, this step-by-step guide will help you create a sturdy and stylish quilt rack that will showcase your beloved quilts with pride.
Before we dive into the details, let’s take a look at the materials you will need for this project.
Key Takeaways:
- Showcase your cherished quilts with pride by creating a sturdy and stylish quilt rack that adds elegance to your home decor. Follow the step-by-step guide for a rewarding DIY project.
- Prioritize safety, attention to detail, and creativity to construct a well-crafted quilt rack that not only organizes your quilts but also becomes a focal point in your home, sharing their artistry and stories.
Read more: How To Fold A Quilt For A Rack
Materials Needed
Before you get started on making your quilt rack, make sure you have the following materials:
- 1×4 inch boards – You will need enough boards to match the dimensions of the quilt rack you desire. Measure the width and height you want the quilt rack to be and purchase enough boards accordingly.
- Sandpaper – Get a variety of sandpaper grits, such as coarse, medium, and fine, to ensure a smooth finish.
- Wood stain or paint – Choose a stain or paint color that complements your home decor and personal preference.
- Brushes or rags – You will need brushes or rags to apply the wood stain or paint.
- Screws or nails – Depending on your preference and the strength you desire, choose either screws or nails to assemble the quilt rack.
- Hanging hardware – To hang the quilt rack on the wall, you will need appropriate hanging hardware, such as D-rings or keyhole hangers.
- Measuring tape – Use a measuring tape to accurately measure the dimensions of the quilt rack.
- Saw – You will need a saw to cut the boards to the desired size.
- Protective eyewear and gloves – Safety should always be a priority when working with tools and materials.
Once you have gathered all the necessary materials, you are ready to start creating your quilt rack. Let’s move on to the step-by-step process.
Step 1: Measure and Cut the Wood
The first step in making your quilt rack is to measure and cut the wood to the desired dimensions. Grab your measuring tape and measure the width and height you want your quilt rack to be. Take note of these measurements as they will guide you in cutting the boards accurately.
Once you have the measurements, use a saw to cut the 1×4 inch boards to the appropriate lengths. Remember to double-check your measurements before making any cuts to ensure accuracy.
When cutting the boards, make sure to use safety precautions such as wearing protective eyewear and gloves. Take your time and make clean, straight cuts to achieve the best results.
Once all the boards are cut, lay them out to ensure they fit together properly. If needed, make any adjustments to the size of the boards before moving on to the next step.
Now that you have measured and cut the wood, it’s time to move on to the next step: sanding and finishing the wood.
Step 2: Sand and Finish the Wood
After cutting the wood for your quilt rack, it’s important to sand the surfaces to create a smooth and polished finish. Sanding not only removes any rough edges or imperfections but also prepares the wood for staining or painting. Here’s how to sand and finish the wood:
- Start with a coarse-grit sandpaper, such as 80 or 100 grit, and sand the edges and surfaces of each board. This will help remove any splinters or rough spots.
- Continue sanding with a medium-grit sandpaper, such as 120 or 150 grit, to further smooth the wood. Sand in the direction of the grain for best results.
- Finish the sanding process with a fine-grit sandpaper, such as 220 grit, to achieve a silky-smooth finish.
- Remove any dust or debris from the wood using a clean cloth or tack cloth.
- Now, it’s time to finish the wood. You can choose to stain or paint the wood, depending on your preference. If you want to enhance the natural beauty of the wood, opt for a wood stain. If you prefer a pop of color or a different finish, go for paint.
- If you choose to stain the wood, use a brush or a clean cloth to apply the stain in the direction of the grain. Allow the stain to penetrate the wood for the recommended amount of time, and then wipe off any excess stain with a cloth.
- If you prefer to paint the wood, use a brush or a roller to apply the paint evenly. You may need to apply multiple coats for full coverage, so let each coat dry according to the paint manufacturer’s instructions before applying the next one.
- Allow the stain or paint to fully dry before moving on to the next step.
Once the wood is sanded and finished, it’s time to assemble the quilt rack. Read on for step 3: assembling the quilt rack.
When making a quilt rack, be sure to measure and cut your wood accurately to ensure a sturdy and balanced finished product. Use a level to ensure the rack is straight when mounting it to the wall.
Step 3: Assemble the Quilt Rack
Now that you have sanded and finished the wood for your quilt rack, it’s time to assemble the pieces. Follow these steps to ensure a sturdy and well-constructed quilt rack:
- Start by laying out the boards in the desired configuration. Align the edges and corners to ensure a proper fit.
- If using screws, pre-drill pilot holes to prevent the wood from splitting. Place the pilot holes slightly smaller than the diameter of the screws.
- Apply wood glue to the edges where the boards will be joined to provide extra strength.
- Using screws or nails, attach the boards together. Start at one end and work your way to the other, securing each joint as you go.
- Double-check that the boards are aligned and perpendicular to one another. Use a square or a level to ensure the quilt rack is straight and properly aligned.
- Wipe off any excess glue with a damp cloth, as it can interfere with staining or painting later on.
- Allow the glue to dry fully according to the manufacturer’s instructions.
Once the quilt rack is assembled and the glue is dry, it’s time to move on to the next step: attaching the hanging hardware.
Read more: How To Make A Quilt
Step 4: Attach the Hanging Hardware
With the quilt rack assembled, the next step is to attach the necessary hanging hardware to ensure secure and easy hanging on the wall. Here’s how to do it:
- Decide where you want to hang the quilt rack on the wall. Take into consideration the height and available space in the room.
- Using a tape measure, mark the desired placement of the hanging hardware on the back of the quilt rack.
- If using D-rings, place them evenly on the backside of the top of the quilt rack. Make sure they are positioned so that they will be hidden when the quilt rack is hung.
- If using keyhole hangers, mark the locations where the screws will go on the back of the quilt rack. Align them so that the keyhole openings are facing downward.
- Once marked, pre-drill pilot holes into the back of the quilt rack at the designated locations.
- Attach the D-rings or keyhole hangers using screws or nails, depending on the type of hardware you are using. Make sure they are securely fastened.
- Before hanging the quilt rack on the wall, check that the hardware is level and properly aligned.
With the hanging hardware attached, your quilt rack is almost complete. All that’s left to do is add some finishing touches.
Move on to step 5 for the final touches.
Step 5: Final Touches
Now that your quilt rack is assembled and the hanging hardware is attached, it’s time to add the final touches to complete the project. These final touches will not only enhance the appearance of your quilt rack but also ensure that your precious quilts are properly displayed. Here’s what you can do:
- If desired, you can apply a clear coat of polyurethane or varnish to protect the wood and give it a glossy finish. Follow the manufacturer’s instructions for application and drying times.
- Consider adding decorative elements to your quilt rack. You can attach ornamental hooks to hang small quilting tools or embroidery hoops. Choose hooks that complement the style of your quilt rack.
- Add a personal touch by attaching a nameplate or a small engraved plaque with your name or a sentimental message.
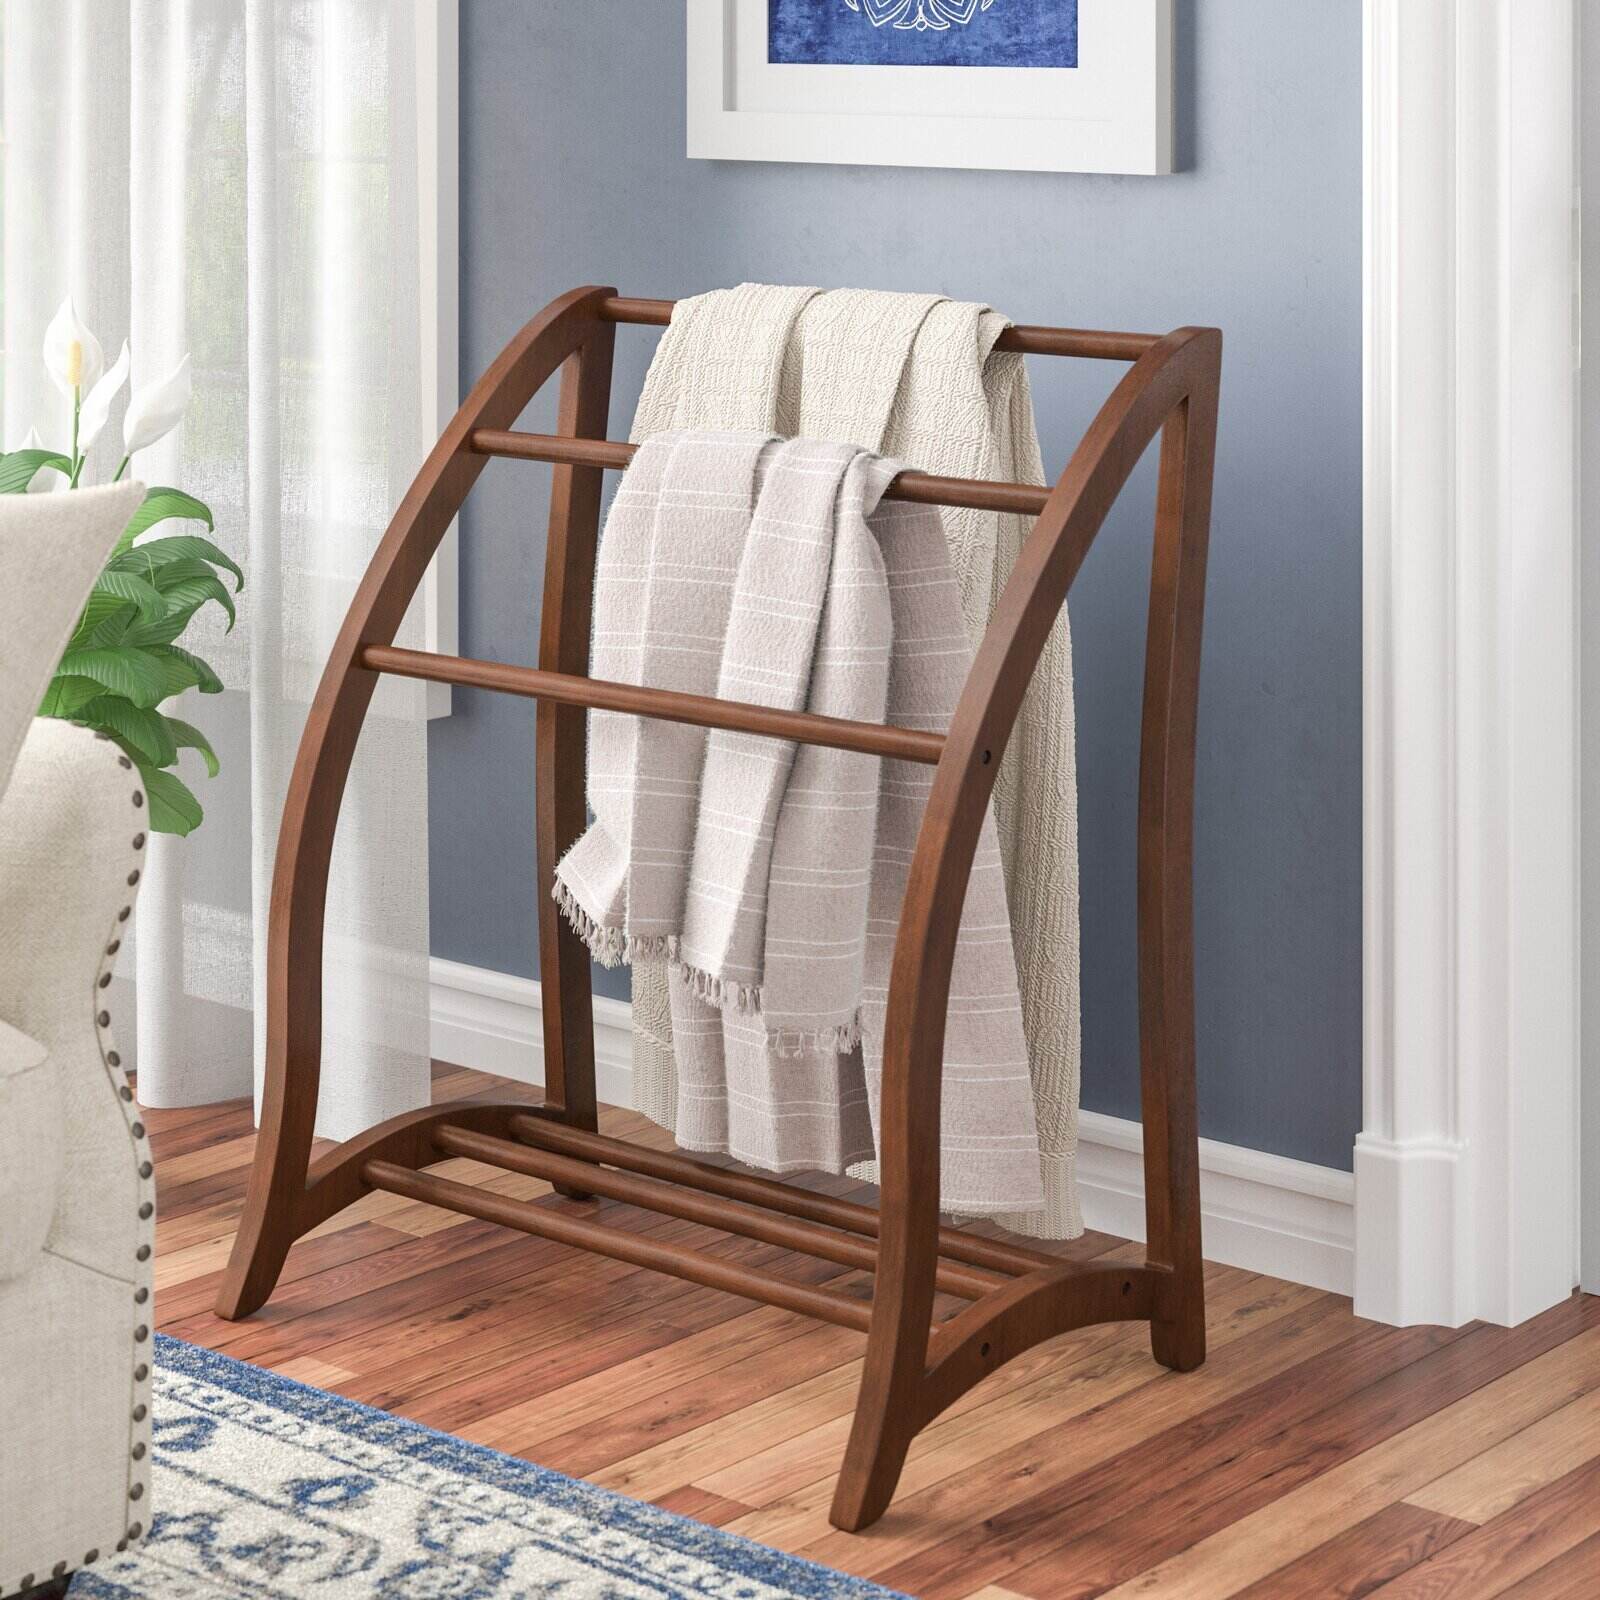
- Arrange your quilts on the quilt rack. Fold them neatly and drape them over the rungs or hang them using quilt clips or clothespins. Experiment with different configurations until you achieve a visually pleasing display.
- Step back and admire your masterpiece. Take a moment to appreciate the beautiful quilts and the craftsmanship of your homemade quilt rack.
With these final touches, your quilt rack is now ready to be showcased in your home. You can display it in the living room, bedroom, or any other space where you want to add a touch of warmth and beauty.
Remember to periodically dust and clean your quilt rack to keep it looking its best. Treat your cherished quilts with care by avoiding exposure to direct sunlight and keeping them dry and away from potential sources of damage.
Congratulations on completing your DIY quilt rack! Not only have you created a functional piece of furniture, but you’ve also created a statement piece that showcases your love for quilting and adds a personal touch to your home decor.
Enjoy the beauty and warmth that your quilt rack brings to your space and the lasting memories that your quilts hold.
Happy quilting!
For more DIY projects and craft ideas, stay tuned to our website for future articles.
Conclusion
Creating your own quilt rack is a rewarding DIY project that allows you to showcase your beautiful quilts while adding a touch of elegance to your home decor. By following the step-by-step guide outlined in this article, you have learned how to measure and cut the wood, sand and finish the surfaces, assemble the quilt rack, attach the hanging hardware, and add the final touches.
Throughout the process, it is important to prioritize safety by wearing protective gear and using tools correctly. Taking your time and paying attention to details will ensure a well-constructed and visually pleasing quilt rack.
With a sturdy and stylish quilt rack in place, you can proudly display your cherished quilts, preserving their beauty and telling the stories they hold. The quilt rack not only provides an organized storage solution but also becomes a focal point in your home, sharing the artistry and craftsmanship of your quilts with family, friends, and guests.
Remember to periodically clean and maintain your quilt rack to keep it looking its best and to care for your quilts by protecting them from direct sunlight and potential sources of damage.
Creating a quilt rack is a special way to showcase your love for quilting and add a personal touch to your space. Whether you’re an experienced DIY enthusiast or just beginning your crafting journey, this project allows you to tap into your creativity and create a functional yet beautiful piece of furniture.
So, gather your materials, unleash your creativity, and start making your own quilt rack. Let your quilts shine and bring warmth and charm to your home.
Happy quilting!
Frequently Asked Questions about How To Make A Quilt Rack
Was this page helpful?
At Storables.com, we guarantee accurate and reliable information. Our content, validated by Expert Board Contributors, is crafted following stringent Editorial Policies. We're committed to providing you with well-researched, expert-backed insights for all your informational needs.


0 thoughts on “How To Make A Quilt Rack”