
Articles
How To Make A Quilt Sandwich
Modified: October 18, 2024
Discover step-by-step instructions and helpful tips on creating the perfect quilt sandwich with our informative articles. Start quilting today!
(Many of the links in this article redirect to a specific reviewed product. Your purchase of these products through affiliate links helps to generate commission for Storables.com, at no extra cost. Learn more)
Introduction
Welcome to the world of quilting! Creating a quilt is a labor of love that requires patience, creativity, and attention to detail. One essential step in the quilt-making process is constructing the quilt sandwich. This important step involves layering the quilt top, batting, and backing fabric together to create a stable and durable foundation for your finished quilt. In this article, we will guide you through the process of making a quilt sandwich, step by step.
Constructing a quilt sandwich is crucial because it ensures that your quilt will have the desired loft, warmth, and longevity. A well-constructed sandwich ensures that the layers of your quilt are securely held together and enables you to create beautiful quilting designs that will enhance the overall visual appeal of your quilt.
Before we dive into the steps of making a quilt sandwich, let’s take a moment to gather the necessary materials. You will need the following:
Key Takeaways:
- Master the art of creating a quilt sandwich by gathering essential materials, preparing the quilt top, layering with precision, basting securely, quilting with creativity, and finishing with finesse. Embrace the joy of quilting!
- Constructing a quilt sandwich is a labor of love that requires patience, attention to detail, and a touch of creativity. Enjoy the journey of transforming fabric into a beautiful and durable finished quilt.
Read more: How To Make A Quilt
Step 1: Gathering the Materials
Before you begin making your quilt sandwich, gather all the materials you will need. This will ensure a smooth and efficient process. Here’s a list of essential materials:
- Quilt Top: This is the pieced or appliqued fabric that forms the top layer of your quilt. Make sure it is trimmed and pressed before proceeding.
- Batting: Choose a batting that suits the type of quilt you want to create. Batting provides warmth, loft, and structure to your quilt. There are various types of batting available, such as cotton, polyester, wool, and blends. Consider the desired thickness, warmth, and drape of your quilt when selecting the batting.
- Backing Fabric: The backing fabric is the bottom layer of your quilt sandwich. Choose a fabric that complements your quilt top and is at least 4 to 6 inches larger than your quilt top on all sides.
- Pins or Quilting Spray Adhesive: You will need pins or quilting spray adhesive to temporarily hold the layers of the quilt sandwich together during the basting process.
- Quilting Thread: Select a strong and durable thread that matches or complements your quilt top and backing fabric. Ensure that you have enough thread to complete the quilting process.
- Quilting Needles: Invest in good quality quilting needles that are suitable for your chosen quilting technique. Needles with a sharp or ballpoint tip, depending on the fabric and batting you’re using, are commonly used for quilting.
- Quilting Gloves: Quilting gloves provide grip and control while maneuvering the quilt sandwich under the sewing machine or for hand quilting. They help reduce hand fatigue and ensure smooth stitching.
- Quilting Ruler and Rotary Cutter: If you plan to do straight-line quilting or intricate designs, a quilting ruler and rotary cutter will be invaluable tools. They help in achieving precise and straight cuts.
- Iron and Ironing Board: Keep your iron and ironing board handy to press the fabrics as needed to create crisp and smooth layers.
- Quilting Machine or Hand Quilting Supplies: Depending on your preference and quilting style, you will need a sewing machine equipped with a quilting foot or hand quilting supplies such as a hoop, thimble, and quilting needles.
By gathering these materials in advance, you’ll have everything you need to create a successful quilt sandwich. Now that you have all the necessary materials, let’s move on to preparing the quilt top in the next step.
Step 2: Preparing the Quilt Top
Now that you have gathered all the materials needed to make your quilt sandwich, it’s time to prepare the quilt top. Follow these steps to ensure that your quilt top is ready for layering:
- Trim and Square the Quilt Top: Examine your quilt top for any uneven edges or excess fabric. Use a quilting ruler and rotary cutter to trim the edges, ensuring that all sides are straight and even. This step will make it easier to align the quilt top with the batting and backing fabric.
- Press the Quilt Top: Use an iron and ironing board to press the quilt top. Pressing will remove any wrinkles or creases, resulting in a smooth and professional-looking quilt top. Pay close attention to the seams and ensure they are pressed open or to one side, depending on your quilting design.
- Check for Loose Threads or Snags: Inspect the quilt top for any loose threads or snags that could get caught or pulled during the quilting process. Use a pair of scissors or a thread snipper to snip off any stray threads.
- Consider Marking the Quilt Top: If you plan to do intricate quilting designs or stitch in the ditch, consider marking the quilt top with temporary fabric markers or water-soluble pens. Marking will provide guidelines for your quilting and help ensure precise stitching.
By taking the time to carefully prepare your quilt top, you will set a solid foundation for the quilt sandwich. Now, let’s move on to the next step: layering the quilt.
Step 3: Layering the Quilt
With your quilt top prepared, it’s time to move on to layering the quilt. This step involves carefully aligning and securing the quilt top, batting, and backing fabric together to create the quilt sandwich. Follow these steps to ensure a smooth layering process:
- Prepare the Batting: Lay your batting flat on a clean and smooth surface. If your batting is wrinkled, you can use an iron on a low heat setting to gently remove any creases. Make sure the batting is slightly larger than your quilt top on all sides.
- Place the Backing Fabric: Lay your backing fabric right side down on top of the batting. Smooth out any wrinkles or folds, ensuring that the backing fabric is centered and evenly aligned with the batting.
- Center the Quilt Top: Place your quilt top right side up on top of the backing fabric and batting. Take your time to carefully center it so that there is an even border of backing fabric visible around the edges of the quilt top.
- Smooth Out the Layers: Starting from the center and working your way towards the edges, smooth out the layers of the quilt sandwich to remove any wrinkles or bubbles. Use your hands or a clean, flat tool like a large ruler to press down and smooth out the layers.
At this point, you have successfully layered your quilt top, batting, and backing fabric to create the quilt sandwich. The layers should be smooth and wrinkle-free, providing a solid foundation for the quilting process. In the next step, we will learn how to baste the layers together to ensure they stay in place during quilting.
When making a quilt sandwich, use safety pins to secure the layers together, starting from the center and working your way out to prevent shifting.
Step 4: Basting the Layers Together
Now that the quilt top, batting, and backing fabric are layered together, it’s time to secure them in place. Basting the layers together will ensure that they stay aligned during the quilting process. There are a few methods you can use to baste the layers together:
- Pinning: Take quilting pins and begin pinning the layers together at regular intervals. Start from the center and work your way towards the edges, ensuring that the layers remain flat and wrinkle-free. Make sure to pin within the seam allowance to avoid sewing over the pins during quilting.
- Quilting Spray Adhesive: Alternatively, you can use a quilting spray adhesive to temporarily bond the layers together. In a well-ventilated area, apply a thin and even layer of adhesive on the batting or backing fabric. Then, carefully place the quilt top on top of the adhesive and smooth out any wrinkles or bubbles. Allow the adhesive to dry according to the manufacturer’s instructions.
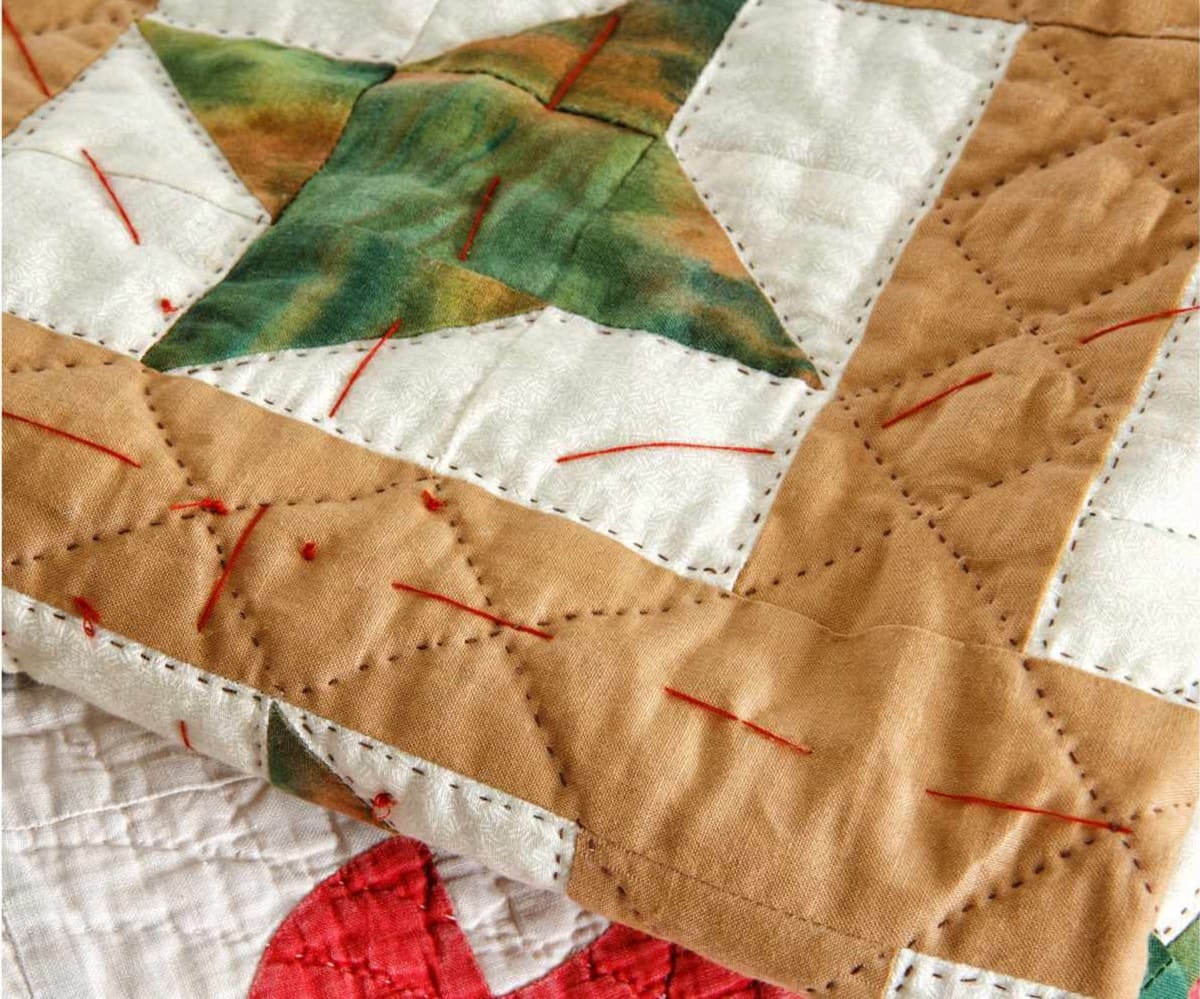
- Quilting Thread Tacks: Another method is to hand-baste the layers using quilting thread. With a quilting needle and thread, create large running stitches or tacks throughout the quilt sandwich to secure the layers in place. These tacks can be easily removed once the quilting is complete.
Choose the basting method that works best for you based on your personal preference and the size of your quilt. Basting will prevent shifting and puckering of the layers during quilting, ensuring a smooth and even finish. Once the layers are securely basted, it’s time to move on to the next step of quilting the sandwich.
Read more: How To Make Bread Sandwich In Microwave Oven
Step 5: Quilting the Sandwich
With the layers of your quilt sandwich securely basted together, it’s time to start quilting! Quilting is the process of stitching through all layers of the quilt sandwich to create decorative or functional designs. Follow these steps to begin quilting your sandwich:
- Select Your Quilting Method: Decide whether you’ll be quilting by hand or using a sewing machine. Hand quilting allows for more intricate and detailed designs, while machine quilting is faster and more suitable for larger quilts.
- Choose Your Quilting Design: Select a quilting design that complements your quilt top and aligns with your overall vision for the quilt. Popular quilting designs include straight lines, free-motion quilting, stippling, and meandering.
- Prepare Your Sewing Machine: If you are machine quilting, ensure that your sewing machine is set up with the appropriate quilting foot and thread. Adjust the tension and stitch length according to your desired outcome.
- Begin Quilting: If you are hand quilting, secure your quilt sandwich in a quilting hoop or use a thimble to maneuver the needle through the layers. Take small, even stitches to create consistent and secure quilting stitches. If you are machine quilting, start quilting from the center of the quilt and work your way outwards.
- Follow Your Quilting Design: Use your chosen quilting design as a guide and follow it as you stitch through the quilt sandwich. Take your time and maintain even tension to ensure neat and uniform stitches.
- Continue Quilting: Quilt section by section, moving the quilt sandwich as needed to reach all areas. Take breaks when needed to rest your hands and assess your progress.
Quilting is an opportunity to add texture, personality, and beauty to your quilt. Take your time, enjoy the process, and experiment with different quilting techniques and patterns. Once you have completed your quilting, move on to the final step of finishing the quilt.
Step 6: Finishing the Quilt
Congratulations! You’ve reached the final step of finishing your quilt. This step involves completing the remaining tasks to turn your quilt sandwich into a beautiful, finished quilt. Here’s what you need to do:
- Trim the Excess: Use a quilting ruler and rotary cutter to trim the excess batting and backing fabric so that they are even with the edges of the quilt top. Make sure all sides are straight and aligned.
- Create the Binding: Cut fabric strips for the binding that are long enough to go around the entire quilt. Fold and press the strips in half lengthwise, wrong sides together, and then sew them to the quilt’s edges, mitering the corners as you go. Fold the binding over to the back of the quilt and hand-stitch it in place.
- Label Your Quilt: Preserve the legacy of your quilt by adding a label. Include your name, the date, and any other information you’d like to commemorate. Use fabric markers or embroidery to create a personalized label, and sew it securely to the back of the quilt.
- Finish with Binding: After the binding is attached, give it a final press with an iron to ensure a neat finish. Check for any loose threads or stray fibers and trim them away.
- Give it a Final Press: Take the time to give your finished quilt a final press with an iron on a low heat setting. This will smooth out any wrinkles and creases and give your quilt a polished and professional look.
- Enjoy Your Quilt: Your quilt is now complete! Admire your hard work and creativity as you enjoy the warmth and beauty of your finished quilt. Share it with loved ones, display it in your home, or give it as a cherished gift.
Finishing a quilt is immensely satisfying, and it’s a testament to your talent and dedication. Take pride in your accomplishment and continue to explore the world of quilting, experimenting with new techniques and designs. Happy quilting!
Conclusion
Congratulations on successfully making a quilt sandwich! By following the steps outlined in this article, you have learned how to gather the necessary materials, prepare the quilt top, layer the quilt, baste the layers together, quilt the sandwich, and finish your quilt with binding.
Creating a quilt sandwich is a crucial step in the quilting process, as it ensures that the layers of your quilt are securely held together and allows you to showcase your quilting designs. By carefully aligning and basting the layers, you set a solid foundation for the quilting process, resulting in a beautiful and durable finished quilt.
Remember to be creative and experiment with different quilting designs and techniques. Whether you choose to hand quilt or use a sewing machine, the quilting process offers ample opportunities to add your personal touch and express your artistic vision.
Quilting is a labor of love that requires patience, skill, and attention to detail. Embrace the journey, enjoy the process, and take pride in every stitch you make. With each quilt you create, you’ll continue to improve your quilting skills and embark on new quilting adventures.
Now that you have completed your quilt sandwich, it’s time to revel in the joy and satisfaction of your finished quilt. Share it with loved ones, display it in your home, or give it as a cherished gift. Your quilt holds not just warmth and beauty, but also the memories and emotions you poured into its creation.
Thank you for joining us in this quilting journey. We hope you found this article helpful and inspiring. Happy quilting!
Frequently Asked Questions about How To Make A Quilt Sandwich
Was this page helpful?
At Storables.com, we guarantee accurate and reliable information. Our content, validated by Expert Board Contributors, is crafted following stringent Editorial Policies. We're committed to providing you with well-researched, expert-backed insights for all your informational needs.



0 thoughts on “How To Make A Quilt Sandwich”