Articles
How To Make Christmas Floating Candles
Modified: October 20, 2024
Learn how to make beautiful Christmas floating candles with our step-by-step articles. Impress your guests with this unique and charming holiday decoration.
(Many of the links in this article redirect to a specific reviewed product. Your purchase of these products through affiliate links helps to generate commission for Storables.com, at no extra cost. Learn more)
Introduction
Christmas is a magical time of year, filled with joy, warmth, and the twinkling of lights. One of the most enchanting elements of Christmas decor is the gentle glow of floating candles. Imagine a serene lake or a decorative bowl filled with flickering candles, casting a soft and romantic ambiance. Creating your own Christmas floating candles is a wonderful way to add a touch of elegance and create a mesmerizing display for your holiday celebrations.
In this article, we will guide you through the process of making your own Christmas floating candles. Whether you are hosting a Christmas party, setting up a centerpiece for your dining table, or simply want to enjoy a peaceful evening by the fireplace, these floating candles will add a magical touch to your holiday decor.
Before we begin, make sure you have all the necessary materials on hand. This project requires a few basic items, which are easy to find and affordable. So, let’s gather our materials and get started on this delightful DIY project!
Key Takeaways:
- Create a magical holiday ambiance by crafting your own Christmas floating candles. Personalize with festive decorations and enjoy the warm, flickering glow for a cozy and enchanting atmosphere.
- Infuse your holiday decor with warmth and elegance by making Christmas floating candles. Follow the step-by-step process, prioritize safety, and bask in the mesmerizing glow of your handcrafted creations.
Read more: How To Make Candles Float On Water
Materials Needed
To make your own Christmas floating candles, you will need the following materials:
- Candle wax – You can choose between paraffin wax, soy wax, or beeswax. Select a wax that suits your preferences and is safe for use in floating candles.
- Candle wicks – Ensure you have enough wicks for each candle you plan to make.
- Candle dye – If you want to add color to your floating candles, opt for candle dye in the colors of your choice.
- Fragrance oil (optional) – If you want to add a pleasant scent to your candles, choose a fragrance oil that complements the Christmas season.
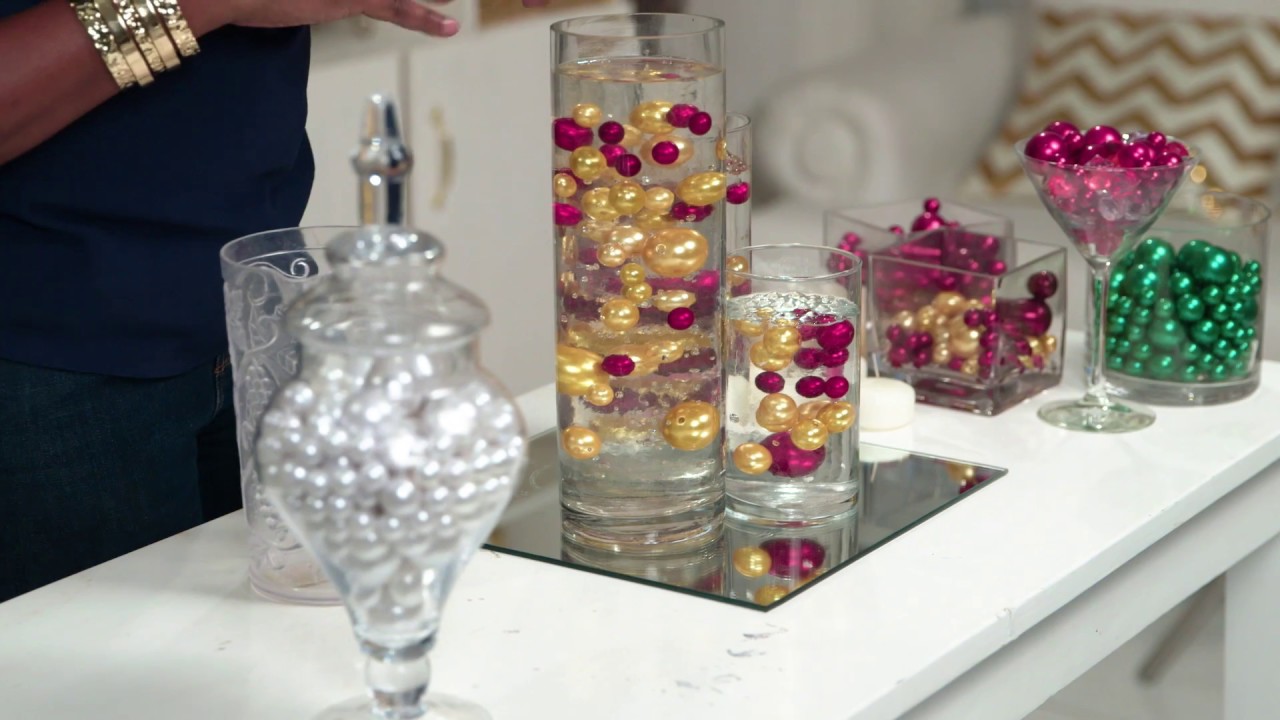
- Containers – Select heat-proof containers, such as small bowls, glass jars, or votive holders, to hold the candles. These containers should be wide enough to accommodate a floating candle without tipping over.
- Decorative elements – Gather various Christmas-themed decorations like pinecones, holly berries, or small ornaments to embellish your floating candles.
- Double boiler or microwave-safe container – You will need this to melt the wax. If using a double boiler, make sure it can withstand the high heat.
- Heat-resistant gloves – These will protect your hands when handling the hot wax and containers.
- Stirring utensil – Use a metal spoon or a wooden stirrer to mix the wax and other ingredients.
- Scissors – These will be necessary for cutting the wicks to the desired length.
- Thermometer – To monitor the temperature of the wax accurately.
- Optional accessories – If desired, you can also gather ribbons, twine, or any other decorative elements to enhance the aesthetic appeal of your floating candles.
Now that you have all the necessary materials, let’s dive into the step-by-step process of making your very own Christmas floating candles!
Step 1: Preparing the Candles
The first step in creating your Christmas floating candles is to prepare the candle mixture. Whether you’re using paraffin wax, soy wax, or beeswax, the process remains the same.
- Begin by melting the wax. If using a double boiler, fill the bottom pan with water and place it on the stovetop over medium heat. Place the wax in the top pan and allow it to melt slowly. If you prefer to use a microwave, place the wax in a microwave-safe container and heat it in short intervals, stirring in between until fully melted. Be cautious not to overheat the wax, as it can become dangerously hot.
- Once the wax has melted, add the desired amount of candle dye to achieve your desired color. Stir the wax gently to evenly distribute the dye. If you prefer unscented candles, you can skip this step.
- If you want to add a pleasant fragrance to your floating candles, add a few drops of fragrance oil to the melted wax. Remember that a little goes a long way, so be conservative with the amount of oil you use. Stir the mixture thoroughly to ensure the fragrance is evenly distributed.
- Allow the wax to cool slightly before pouring it into the containers. For optimal floating ability, the wax should be poured at a temperature between 130°F and 160°F (54°C and 71°C).
- Prepare the candle wicks by cutting them to the desired length, ensuring they are slightly longer than the height of the containers. Attach a metal or plastic tab to the end of each wick to act as an anchor.
- Place the prepared wicks in the center of each container, using a small amount of melted wax or a glue dot to secure them in place.
- Slowly pour the melted wax into each container, being careful not to disturb the wicks. Leave a small amount of space at the top of each container to prevent overflowing when the candle is lit.
- Allow the candles to cool and solidify completely before proceeding to the next step. This will usually take a few hours, depending on the size of the candles and the ambient temperature.
Now that your candles are ready, it’s time to move on to the next step: adding decorations to make them even more festive!
Step 2: Adding Decorations
Now that your candles are ready and solidified, it’s time to add some festive decorations to make them truly special for the Christmas season. Adding a touch of holiday flair will enhance the visual appeal of your floating candles and create a magical ambiance.
- Gather your chosen Christmas-themed decorations, such as pinecones, holly berries, small ornaments, or even dried flowers.
- Prepare the decorations by ensuring they are clean and dry. If using natural elements like pinecones or holly berries, you may need to rinse and dry them beforehand.
- Decide on the desired placement of the decorations on your candles. You can either create a symmetrical arrangement or scatter them randomly for a more natural look.
- Consider using a clear adhesive such as hot glue or a strong adhesive putty to attach the decorations to the surface of the candles. Apply a small amount of the adhesive to the back of each decoration and press firmly onto the candle surface.
- Be mindful of the size and weight of the decorations. Avoid adding too many heavy embellishments that might cause the candle to become unbalanced and tip over in the water.
- Experiment with different combinations of decorations and placement until you achieve the desired look and feel.
Adding decorations to your floating candles is a creative and personal task. Feel free to let your imagination run wild and customize each candle to suit your unique style and taste. Once you have finished adding the decorations, move on to the next step: preparing the containers for the floating candles.
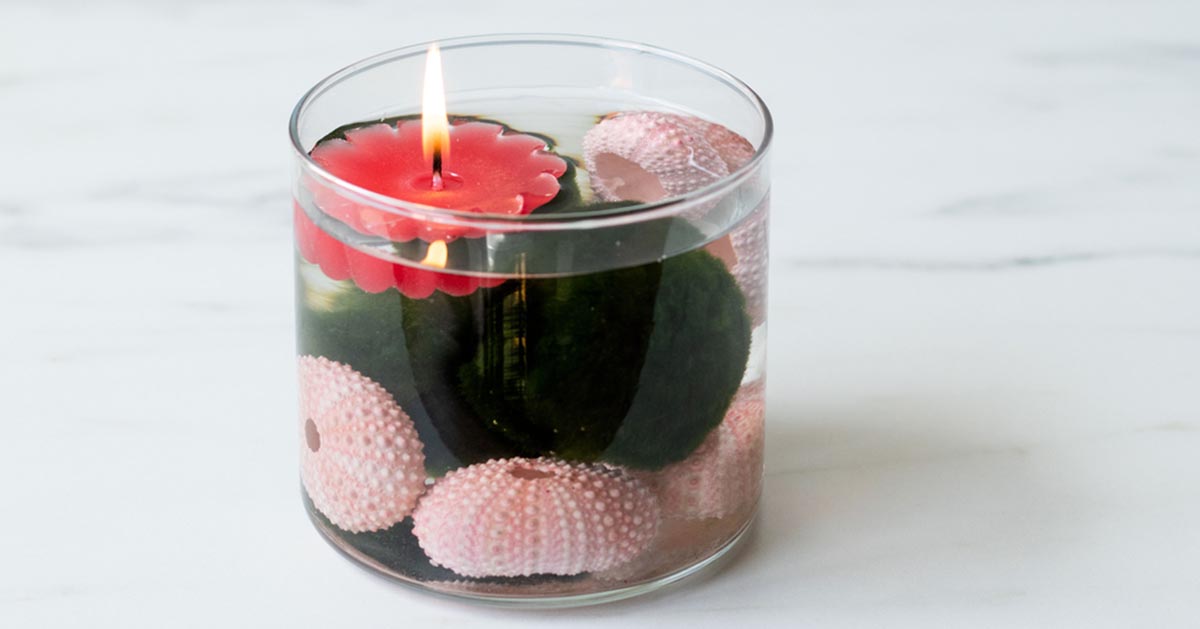
Step 3: Preparing the Containers
Now that your candles are adorned with beautiful decorations, it’s time to prepare the containers that will hold them. The containers serve as the vessels for your floating candles and ensure their stability when placed in water.
- Choose your containers based on your desired aesthetic and the size of your floating candles. Glass jars, small bowls, or votive holders are popular options.
- Clean the containers thoroughly to remove any dust or debris. This will ensure a clear and unobstructed view of the floating candles.
- Fill the containers with water, leaving enough space for the candles to float without tipping over. It’s recommended to fill the containers approximately three-quarters full.
- If desired, you can enhance the visual appeal of the water by adding a few drops of food coloring. This can create a beautiful effect, especially if the color complements the overall theme of your Christmas decor.
- Place the containers on a stable surface, such as a table or a tray. Ensure that the surface is level to prevent the candles from drifting to one side.
- Now that your containers are filled with water, it’s time to move on to the next step: assembling the floating candles.
Preparing the containers is a crucial step in ensuring the stability and visual impact of your floating candles. Take your time to select the perfect containers and arrange them in a way that enhances the overall aesthetic of your Christmas decor.
When making Christmas floating candles, use a high-quality, unscented wax to avoid any interference with the holiday scents. This will ensure a clean burn and a pleasant atmosphere.
Read also: 15 Unbelievable Floating Candles for 2025
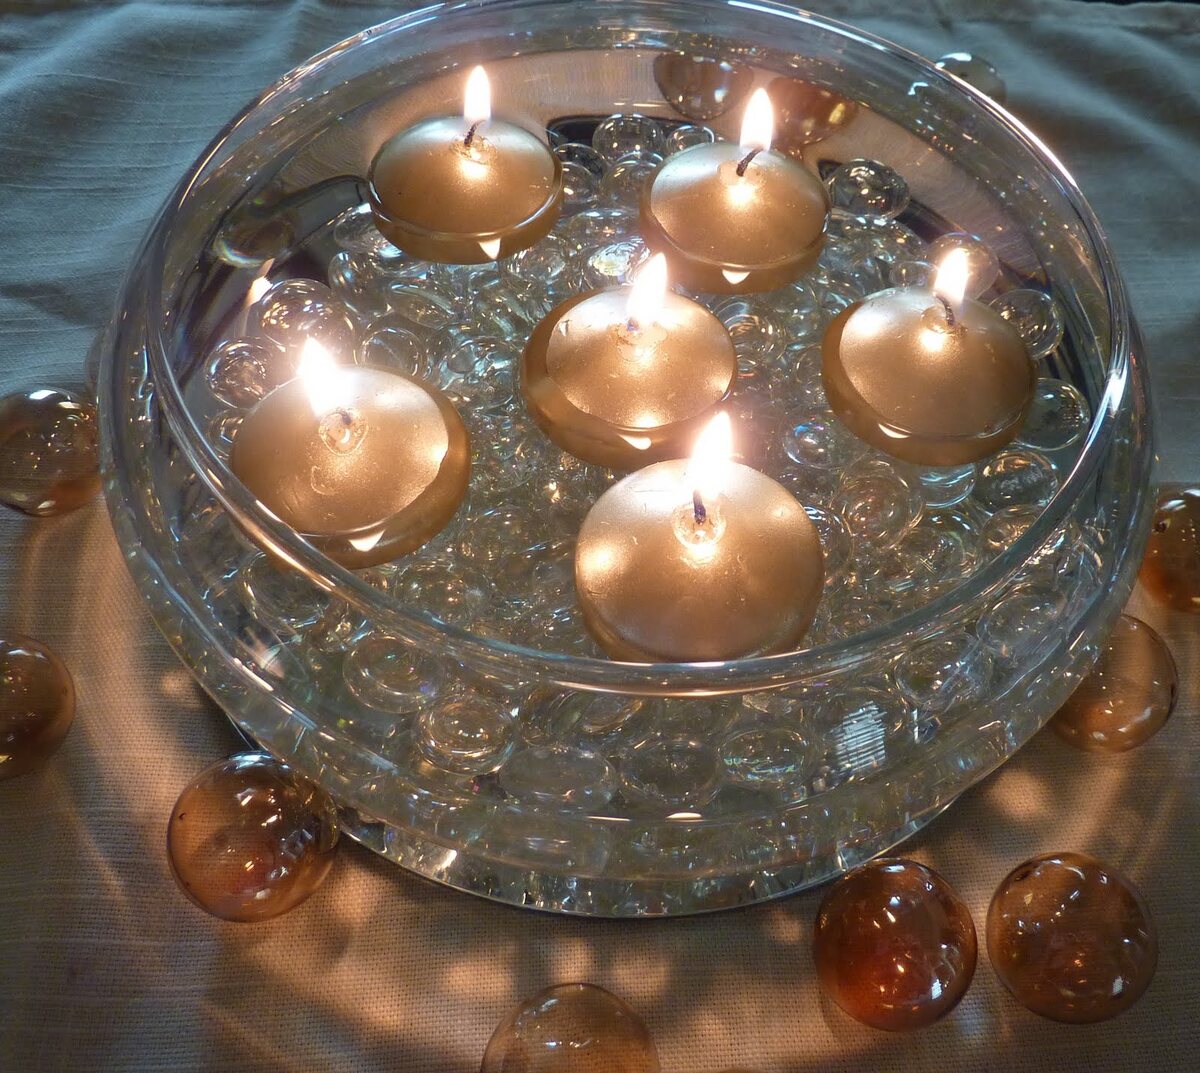
Step 4: Assembling the Floating Candles
With your containers filled with water and ready to go, it’s time to assemble the floating candles. This step involves carefully placing the prepared candles into the water, ensuring they float gracefully and emit a warm, flickering glow.
- Take each prepared candle and gently place it in the center of the water-filled container. The wick should be above the surface of the water, allowing it to be easily lit.
- Double-check that the candles are positioned securely and are not at risk of tipping over. Adjust the placement if necessary, ensuring they are centered and balanced within the container.
- If you are creating a centerpiece with multiple containers, distribute the floating candles evenly amongst them to create a cohesive and visually pleasing display.
- Once all the floating candles are assembled, take a moment to appreciate the enchanting scene that you have created. The flickering light dancing atop the water in each container will add a touch of magic and warmth to any space.
Congratulations! You have successfully assembled your Christmas floating candles. However, before you light them and enjoy their mesmerizing glow, there is one final step to consider: testing the candles.
Note: Do not light the candles until you have completed the testing process to ensure their safety and stability. Safety should always be a top priority when working with open flames and candles.
Step 5: Testing the Candles
Before igniting your floating candles and basking in their tranquil glow, it’s essential to conduct a thorough testing process to ensure their safety and stability.
- Ensure that the containers holding the floating candles are on a stable surface and are not at risk of tipping over. Slightly nudge each container to confirm that the candles remain in place and do not shift or topple.
- Set a lightweight object, such as a small piece of paper or a flower petal, gently on top of each floating candle. Observe the candles for a few minutes to ensure that the objects do not cause the candles to become unstable or extinguish the flames.
- If you plan to have the floating candles on display for an extended period, monitor them closely for any signs of tipping, melting, or other safety concerns. It’s better to identify any potential issues during the testing phase rather than during a festive gathering.
- Consider the location and surroundings where you plan to place the floating candles. Ensure that there are no flammable objects or materials nearby that could pose a fire risk once the candles are lit.
- Take note of any unusual odor or fumes emitted by the candles during the testing phase. If you detect any unpleasant or strong smells, it may indicate an issue with the wax or other materials used. In such cases, it’s advisable to discontinue use for safety reasons.
- If the candles pass all the testing criteria and show no signs of instability or safety concerns, you are ready to move on to the final step: displaying and enjoying your stunning floating candles.
By conducting a thorough testing process, you can ensure that your floating candles are safe, stable, and ready to illuminate your Christmas celebrations with their beautiful, flickering flames.
Step 6: Displaying and Enjoying the Floating Candles
Now that your Christmas floating candles have successfully passed the testing phase, it’s time to display them and bask in their mesmerizing glow. Follow these steps to create the perfect ambiance and fully enjoy the beauty of your handcrafted candles.
- Choose an ideal location for displaying your floating candles. Consider placing them in the center of a dining table, on a mantel, or as a focal point in a living room.
- Clear the area around the candles of any flammable items or materials. Ensure there is a safe distance between the candles and other objects to prevent accidental fires.
- Dim the lights in the room to enhance the romantic ambiance created by the floating candles. The soft, flickering light combined with the gentle movement of water offers a truly magical experience.
- If you desire a more festive touch, you can surround the floating candles with additional Christmas decorations, such as evergreen branches, pinecones, or fairy lights. This will further complement the overall holiday atmosphere.
- Light the wicks of the floating candles using a long-reach lighter or matchstick. Take care to light each wick individually, ensuring the flame catches and burns steadily.
- Step back and admire the enchanting glow of the floating candles as they gracefully illuminate the surrounding space. Take a moment to appreciate the warmth and tranquility they bring to your festive environment.
- Throughout the evening, periodically check on the floating candles to ensure they continue to burn safely and evenly. If necessary, gently adjust their position or relight any extinguished flames.
- Once you have finished enjoying the ambiance of the floating candles, carefully extinguish the flames by blowing them out or using a candle snuffer. Always prioritize safety when handling open flames.
Remember to never leave the floating candles unattended while they are burning. Always follow basic fire safety practices and keep a fire extinguisher nearby, just in case.
By following these steps, you can create a captivating display and fully immerse yourself in the serene beauty of your Christmas floating candles. Enjoy the magical atmosphere they bring and savor the joy of the holiday season.
Conclusion
Making your own Christmas floating candles is a delightful and creative way to add a touch of magic to your holiday decorations. The process of creating these beautiful candles allows you to express your personal style and infuse your home with the warm glow of the season.
Throughout this article, we have guided you through the step-by-step process of making and displaying your Christmas floating candles. From preparing the candles and adding decorative elements to assembling them in containers and conducting safety tests, you have learned the essential techniques to ensure a successful outcome.
By choosing the right materials, adding your own personal touches, and testing for safety, you can create stunning floating candles that will enhance the ambiance of any Christmas gathering or add a peaceful glow to your home.
As you display and enjoy your floating candles, remember to prioritize safety by keeping them away from flammable items and never leaving them unattended. With proper care and attention, your candles will provide an enchanting focal point and fill your surroundings with a cozy and magical atmosphere.
So, gather your materials, let your creativity soar, and embark on the journey of crafting your own Christmas floating candles. Let the flickering flames and gentle glow bring warmth and joy to your holiday season. Happy candle-making and happy holidays!
Frequently Asked Questions about How To Make Christmas Floating Candles
Was this page helpful?
At Storables.com, we guarantee accurate and reliable information. Our content, validated by Expert Board Contributors, is crafted following stringent Editorial Policies. We're committed to providing you with well-researched, expert-backed insights for all your informational needs.


0 thoughts on “How To Make Christmas Floating Candles”