Articles
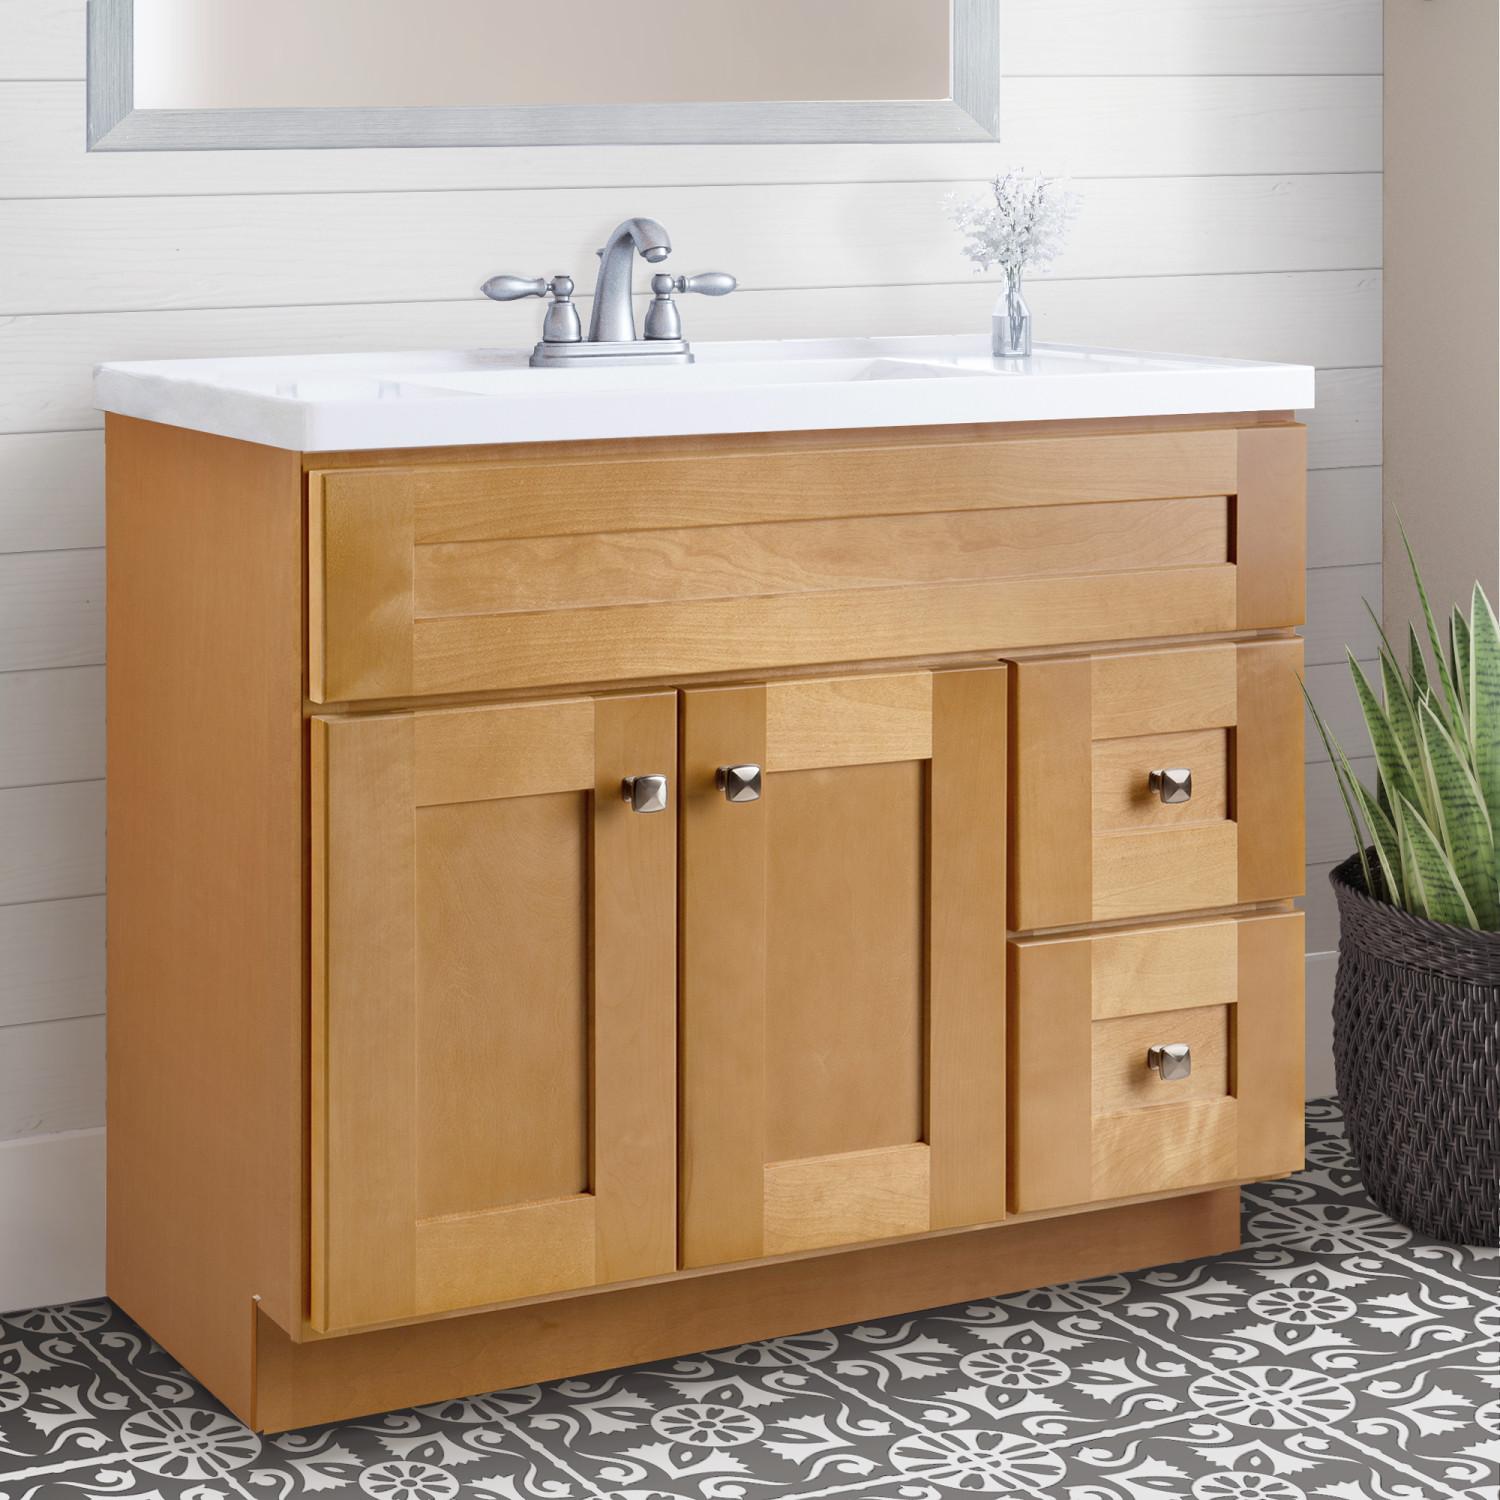
How To Make Floating Vanity
Modified: December 7, 2023
Learn how to make a stylish and functional floating vanity with our detailed articles. Create a modern and space-saving bathroom design.
(Many of the links in this article redirect to a specific reviewed product. Your purchase of these products through affiliate links helps to generate commission for Storables.com, at no extra cost. Learn more)
Introduction
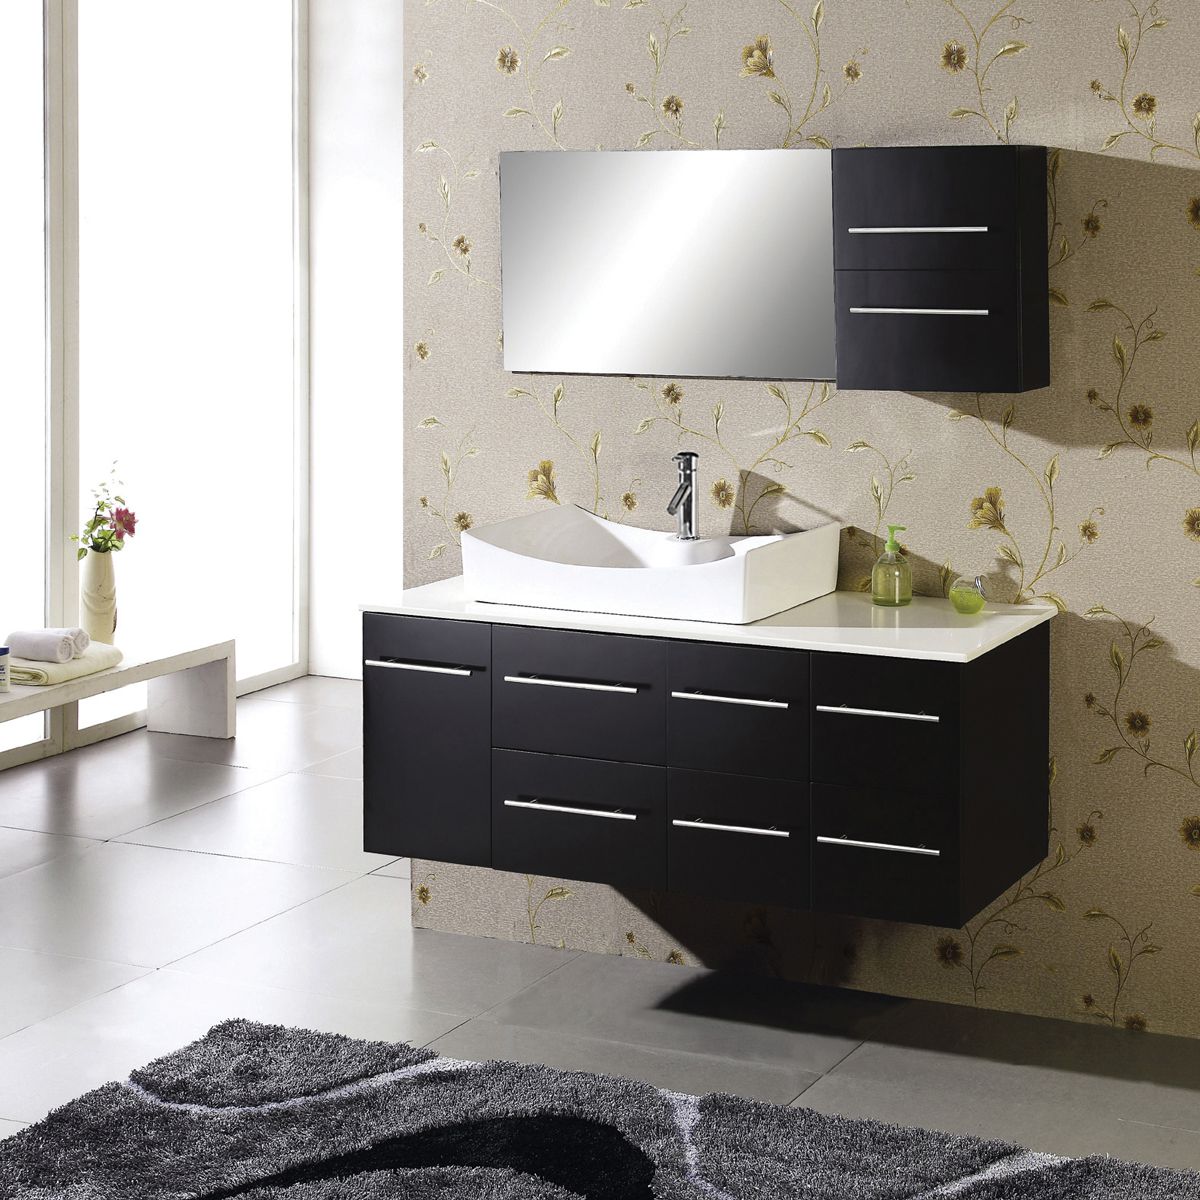
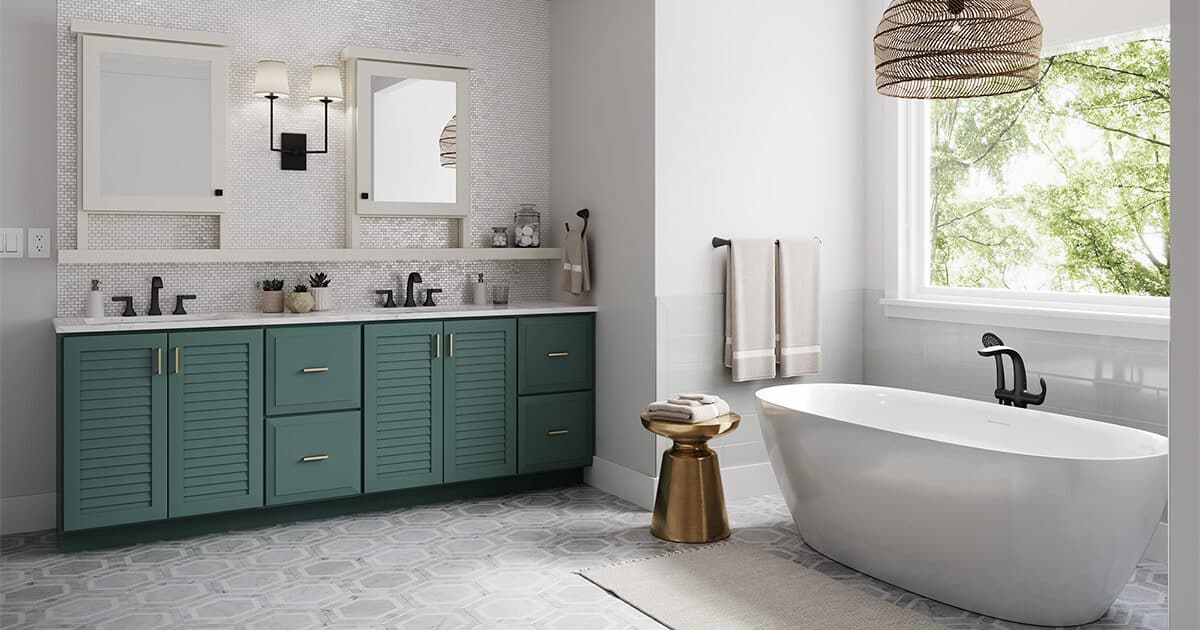
A floating vanity can be a stylish and functional addition to any bathroom. Not only does it provide extra storage space, but it also creates a sleek and modern look. If you’re looking to upgrade your bathroom and add a touch of elegance, learning how to make a floating vanity can be a rewarding project.
In this article, we will guide you through the steps of creating your own floating vanity. We will provide a list of materials needed, as well as a detailed explanation of each step. Whether you’re a seasoned DIY enthusiast or a beginner looking to tackle your first project, this guide will help you achieve professional-looking results.
Before we dive into the process, it’s important to note that building a floating vanity requires some basic carpentry skills and tools. If you’re not confident in your abilities, it’s always a good idea to consult with a professional or enlist the help of an experienced friend.
Read more: What Is A Floating Vanity
Materials Needed
- Wooden boards
- Plywood
- Support brackets
- Screws
- Drill
- Saw
- Sandpaper
- Level
- Paint or stain
- Brushes or rollers
- Measuring tape
Now that we have our materials ready, let’s move on to the steps involved in creating a floating vanity.
Key Takeaways:
- Building a floating vanity requires careful planning, precise measurements, and basic carpentry skills. By following the step-by-step guide, DIY enthusiasts can create a stylish and functional addition to their bathroom.
- From assembling the vanity frame to adding finishing touches, creating a floating vanity involves attention to detail and safety. With the right materials and tools, DIY-ers can achieve professional-looking results and enjoy a rewarding project.
Materials Needed
Making a floating vanity requires a few essential materials. Here is a list of what you’ll need to get started:
- Wooden boards: Look for high-quality boards that are sturdy and durable. The type and size of the boards will depend on the design and dimensions of your vanity.
- Plywood: This will be used to create the vanity top and any additional shelves or drawers. Make sure to choose plywood that is suitable for bathroom use, as it needs to withstand moisture and humidity.
- Support brackets: These are crucial for providing stability and ensuring that your floating vanity stays securely attached to the wall. Opt for heavy-duty support brackets that are designed for floating installations.
- Screws: You’ll need screws to assemble the wooden frame and attach the support brackets. Make sure to choose screws that are long enough to securely fasten the boards together.
- Drill: A drill is essential for creating pilot holes and driving in the screws. Make sure to have a set of drill bits in various sizes to accommodate different screws.
- Saw: Depending on the specifics of your design, you may need a circular saw or a jigsaw to cut the wooden boards and plywood to the desired dimensions.
- Sandpaper: Sandpaper will be used to smooth out any rough edges or surfaces before painting or staining the vanity.
- Level: A level will ensure that your floating vanity is properly aligned and straight. This is especially important if you’re installing multiple shelves or drawers.
- Paint or stain: Choose a paint color or wood stain that complements your bathroom decor. Make sure to select a finish that is waterproof and suitable for use in high-moisture environments like the bathroom.
- Brushes or rollers: These will be needed to apply the paint or stain evenly to the wooden surfaces.
- Measuring tape: Accurate measurements are crucial for a properly fitting and functional vanity. Have a measuring tape on hand to ensure precise dimensions.
Having these materials ready before you start the project will help streamline the process and ensure a smooth construction of your floating vanity.
Step 1: Measure and Plan
Before you start building your floating vanity, it’s crucial to take accurate measurements and create a detailed plan. This will help you determine the size, design, and layout of your vanity, ensuring it fits perfectly in your bathroom.
Start by measuring the space where you plan to install the vanity. Take note of the width, height, and depth available. Consider any obstructions such as pipes or electrical outlets that may affect the placement of your vanity. It’s important to leave enough clearance for these elements.
Next, decide on the design and style of your floating vanity. Will it have a single or double sink? Do you want open shelves or closed cabinets? Consider your storage needs and aesthetic preferences when making these decisions.
Once you have a clear idea of the dimensions and design, create a plan or sketch of your vanity. This can be as simple as a hand-drawn diagram or a more detailed digital rendering. Include the measurements for each component of the vanity, such as the frame, top, shelves, and drawers.
With your plan in hand, you can now create a materials list. Refer to the measurements and design to determine the quantity and dimensions of the wooden boards, plywood, and support brackets you will need. This will ensure that you purchase the correct materials and avoid any delays during construction.
Remember to consider the weight-bearing capacity of your chosen support brackets and ensure they can adequately support the weight of the vanity. It’s always better to choose brackets that can handle a higher weight limit to ensure stability and durability.
Once you have completed the measuring and planning, you’re ready to move on to the next step: cutting and assembling the vanity frame.
Step 2: Cut and Assemble the Vanity Frame
Now that you have your measurements and plan in place, it’s time to start building the vanity frame. The frame serves as the basic structure and support for the entire floating vanity.
Begin by cutting the wooden boards to the appropriate lengths according to your plan. Use a saw to make precise cuts, ensuring that the edges are smooth and even. Take care to follow your measurements accurately to ensure a proper fit for the frame.
Next, lay out the cut boards on a flat surface, such as a workbench or the floor. Position them according to your plan, ensuring that the corners are square and aligned. Use a level to double-check that the boards are straight.
Once you’re satisfied with the alignment, it’s time to assemble the vanity frame. Pre-drill pilot holes at the points where the boards will be joined together. This will prevent the wood from splitting and make it easier to insert the screws.
Apply wood glue to the edges of the boards to provide additional stability and reinforcement. Then, carefully align the edges and screw the boards together using the pre-drilled holes. Make sure to countersink the screws so that they sit flush with the surface of the wood.
Continue this process until the entire vanity frame is assembled. Check once again with the level to ensure that the frame is straight and level. If necessary, make any adjustments before proceeding.
Allow the wood glue to dry completely before moving on to the next step. This will ensure that the frame is solid and secure, ready for the installation of the support brackets.
With the vanity frame successfully assembled, you’re now ready to move on to step 3: installing the support brackets.
Read more: How To Hide Pipes Under Floating Vanity
Step 3: Install Support Brackets
Installing support brackets is a crucial step in creating a floating vanity. These brackets ensure that your vanity is securely attached to the wall, providing stability and preventing it from sagging or falling.
Start by locating the wall studs where you plan to install the vanity. Studs are vertical wooden beams behind the drywall that provide structural support. You can use a stud finder or tap the wall to locate them.
Once you’ve identified the studs, mark their locations on the wall. It’s important to install the support brackets directly into the studs for maximum strength and stability.
Measure the height at which you want to install the vanity and mark this on the wall as well. Use a level to ensure that the marks are straight and aligned.
Position the support brackets against the wall, aligning them with the stud marks. Make sure they are level and evenly spaced. Mark the screw hole locations on the wall through the bracket holes.
Pre-drill pilot holes at the marked locations to make it easier to insert the screws. Use a drill bit that is slightly smaller than the diameter of the screws you will be using.
Now, attach the support brackets to the wall by inserting the screws into the pre-drilled holes. Make sure the brackets are securely anchored to the studs. Tighten the screws, but be careful not to overtighten and strip the holes.
Once the brackets are installed, place the vanity frame on top of them. Adjust the position as needed to ensure a proper fit against the wall. Use a level to check that the vanity frame is straight and level.
If the vanity frame is too wide or obstructs the plumbing, you may need to make some adjustments. Trim the sides of the frame or create notches to accommodate the plumbing pipes. Ensure that there is enough clearance for the pipes to pass through without interfering with the vanity.
Once you’re satisfied with the fit and alignment, attach the vanity frame to the support brackets using screws. Make sure to use screws that are appropriate for the material of your vanity frame and support brackets.
Now that your floating vanity is securely attached to the wall, it’s time to move on to step 4: attaching the vanity to the wall.
When making a floating vanity, be sure to use strong and sturdy mounting hardware to support the weight of the vanity and any items placed on it. This will ensure the vanity is secure and safe to use.
Step 4: Attach Vanity to Wall
With the support brackets securely installed and the vanity frame in place, it’s time to attach the vanity to the wall. This step will ensure that your floating vanity is stable, safe, and properly secured.
Start by positioning the vanity against the wall and the support brackets. Make sure it is centered and aligned with the desired placement. Use a level to check that the vanity is straight and level.
Once you’re satisfied with the positioning, mark the holes on the backside of the vanity where it will be attached to the support brackets.
Pre-drill pilot holes at the marked locations on the vanity. Use a drill bit that is appropriate for the size of the screws you will be using.
Next, carefully align the pre-drilled holes on the vanity with the support brackets. Insert screws through the holes and into the support brackets, tightening them securely. Check once again with the level to ensure that the vanity is level and properly aligned.
If your vanity has multiple sections or shelves, repeat this process for each section, making sure they are all securely attached to the support brackets.
As a final check, give the vanity a gentle shake to test its stability. It should feel solid and not wobble or move. If you notice any instability, double-check the attachment points and make any necessary adjustments or tighten the screws further.
Once you’re confident that the vanity is securely attached to the wall, you can proceed to the final step: adding the finishing touches to your floating vanity.
Congratulations! You’re almost there. Just a few more steps to go.
Step 5: Add Finishing Touches
Now that your floating vanity is securely installed, it’s time to add the finishing touches to complete the project and enhance its overall appearance.
If your vanity has a wooden surface, sand it down with sandpaper to smooth out any rough edges or imperfections. This will create a clean and polished look. Be sure to wipe away any dust or debris before proceeding.
Next, you have the option to paint or stain your vanity to match your bathroom decor. Choose a paint color or wood stain that complements the overall aesthetic of your bathroom. Apply the paint or stain evenly using brushes or rollers, following the manufacturer’s instructions. Allow the paint or stain to dry completely before moving on to the next step.
Consider adding a protective coat to your vanity to make it more resistant to moisture and wear. A clear sealant or polyurethane can help to prolong the lifespan of the wood and maintain its appearance over time.
If your vanity has a top surface, such as a countertop or vanity top, install it according to the manufacturer’s instructions. Ensure that it is properly sealed and attached securely to the vanity frame.
Accessorize your floating vanity with handles or knobs for any drawers or cabinet doors. Choose hardware that matches the style and finish of your vanity, adding a touch of elegance to the overall design.
Finally, take a step back and admire your completed floating vanity. Enjoy the fruits of your labor and appreciate the functionality, style, and personal touch you have added to your bathroom.
Remember to regularly maintain and clean your floating vanity to keep it looking its best. Wipe it down with a damp cloth and mild cleanser to remove any dirt or grime. Stay vigilant for any signs of wear or damage, and address them promptly to ensure the longevity of your vanity.
Congratulations on successfully creating your own floating vanity! You’ve added a beautiful and functional element to your bathroom that will be enjoyed for years to come.
As a final reminder, always exercise caution and follow proper safety procedures when working with tools and materials. If you’re unsure about any aspect of the project, don’t hesitate to consult with professionals or seek expert advice.
Thank you for following this step-by-step guide. We hope you found it helpful and inspiring. Happy DIY-ing!
Conclusion
Building a floating vanity can be a rewarding and fulfilling DIY project that adds both style and functionality to your bathroom. By following the steps outlined in this guide, you can create a custom-made floating vanity that fits perfectly in your space.
Throughout the process, it’s important to keep safety in mind and to seek professional assistance if needed. Basic carpentry skills and tools are necessary to successfully complete this project, but with some patience and careful planning, you can achieve professional-looking results.
Remember to start by measuring and planning, ensuring that you have accurate dimensions and a clear vision of your design. Assemble the vanity frame, making sure it is level and secure. Install the support brackets correctly to provide stability and prevent sagging. Attach the vanity to the wall, ensuring it is properly aligned and securely fastened. Finally, add the finishing touches such as painting or staining, installing a countertop, and choosing hardware.
With your floating vanity complete, step back and admire your handiwork. Enjoy the functional storage space and the stylish focal point it provides in your bathroom. Regular maintenance and cleaning will help keep your vanity looking its best for years to come.
Whether you’re a seasoned DIY enthusiast or a beginner looking to take on a new project, building a floating vanity allows you to showcase your creativity and craftsmanship. By following this comprehensive guide, you’re well on your way to creating a stunning and functional addition to your bathroom.
Thank you for joining us on this journey. We hope you found this guide helpful and that you’re inspired to tackle your own floating vanity project. Happy building!
Frequently Asked Questions about How To Make Floating Vanity
Was this page helpful?
At Storables.com, we guarantee accurate and reliable information. Our content, validated by Expert Board Contributors, is crafted following stringent Editorial Policies. We're committed to providing you with well-researched, expert-backed insights for all your informational needs.


0 thoughts on “How To Make Floating Vanity”