Home>Articles>How To Make Ice Cream With A Cuisinart Ice Cream Maker
Articles
How To Make Ice Cream With A Cuisinart Ice Cream Maker
Modified: January 20, 2024
Learn how to make delicious homemade ice cream with a Cuisinart ice cream maker with step-by-step instructions and helpful tips. This article is your ultimate guide to creating frozen treats at home.
(Many of the links in this article redirect to a specific reviewed product. Your purchase of these products through affiliate links helps to generate commission for Storables.com, at no extra cost. Learn more)
Introduction
Welcome to the delicious world of homemade ice cream! There’s nothing quite like the smooth and creamy taste of freshly churned ice cream, and with a Cuisinart ice cream maker, you can easily create your own homemade frozen treats in the comfort of your own kitchen. Whether you’re a seasoned ice cream enthusiast or a novice in the kitchen, this article will guide you through the steps of making delectable ice cream using a Cuisinart ice cream maker.
With its user-friendly design and efficient freezing technology, the Cuisinart ice cream maker is a favorite among home chefs. From classic flavors like vanilla and chocolate to more adventurous concoctions like strawberry cheesecake or mint chocolate chip, the possibilities are endless when it comes to creating your own ice cream flavors. Plus, making ice cream from scratch allows you to control the ingredients, ensuring a healthier and tastier alternative to store-bought varieties.
Before we dive into the step-by-step process, let’s take a look at the equipment you’ll need to make ice cream with a Cuisinart ice cream maker.
Key Takeaways:
- Indulge in the Delightful World of Homemade Ice Cream
With a Cuisinart ice cream maker, you can easily create your own creamy and flavorful ice cream at home. Experiment with different flavors and mix-ins to craft your signature frozen treats. - Control Your Ice Cream Ingredients for Healthier, Tastier Treats
Making ice cream from scratch allows you to choose high-quality ingredients, reduce sugar content, and incorporate fresh fruits and nuts for a healthier and more flavorful alternative to store-bought varieties.
Read more: How To Make Ice Cream With Ice Cream Maker
Equipment Needed
To successfully make ice cream with a Cuisinart ice cream maker, you’ll need a few essential pieces of equipment. Don’t worry, you won’t need any fancy or hard-to-find tools. Here’s what you’ll need:
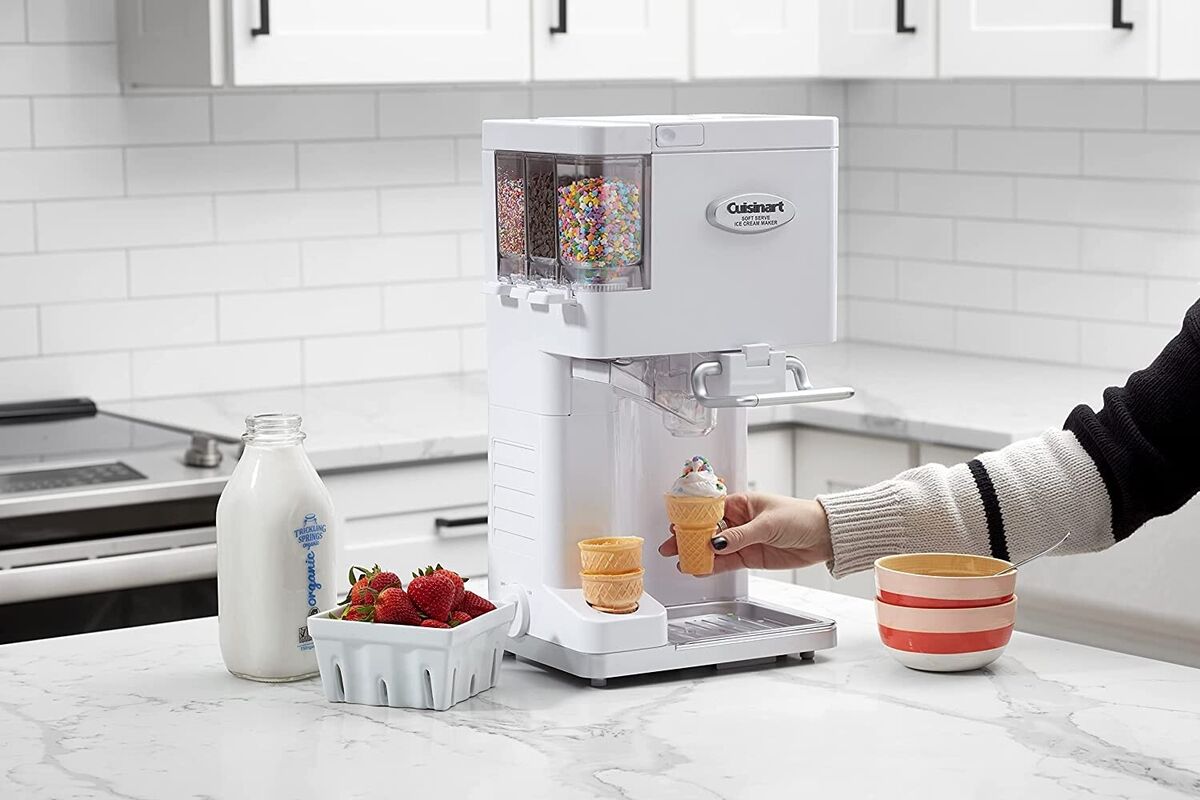
- Cuisinart Ice Cream Maker: First and foremost, you’ll need a Cuisinart ice cream maker. There are various models available, ranging from small countertop machines to larger, more advanced models. Choose the one that best fits your needs and budget.
- Freezer Bowl: The freezer bowl is a crucial component of the Cuisinart ice cream maker. It must be pre-frozen before use, so make sure you have enough space in your freezer to accommodate it.
- Measuring Cups and Spoons: Accurate measurements are essential when it comes to making ice cream. Have a set of measuring cups and spoons on hand to ensure precise ingredient proportions.
- Mixing Bowls: You’ll need a few mixing bowls to prepare and combine your ice cream ingredients. Opt for bowls of varying sizes to accommodate different recipes.
- Whisk or Electric Mixer: A whisk or electric mixer will come in handy for blending the ingredients together smoothly and ensuring a uniform mixture.
- Spatula or Wooden Spoon: You’ll want a spatula or wooden spoon to scrape the sides of the mixing bowl and incorporate any ingredients that may have settled.
- Ice Cream Storage Containers: Once your ice cream is ready, you’ll need containers to store it. Choose airtight containers to prevent ice crystals from forming and maintain the ice cream’s texture and flavor.
Now that you have all the necessary equipment, let’s move on to the ingredients required for making homemade ice cream with a Cuisinart ice cream maker.
Ingredients
To whip up a batch of creamy and delicious homemade ice cream with your Cuisinart ice cream maker, you’ll need the following ingredients:
- Heavy Cream: 2 cups of heavy cream will provide the richness and creaminess that is synonymous with a classic ice cream base.
- Whole Milk: 1 cup of whole milk will help to achieve a luscious texture, while adding a hint of lightness to the ice cream.
- Sugar: 3/4 cup of granulated sugar will provide the sweetness necessary to balance out the flavors.
- Vanilla Extract: 2 teaspoons of vanilla extract will infuse the ice cream with a delightful and aromatic vanilla flavor. You can also use other extracts like chocolate, strawberry, or mint for different flavor variations.
- Optional Mix-Ins: Get creative with your ice cream by adding various mix-ins like chocolate chips, crushed cookies, nuts, fruit, or caramel swirls. These will add extra texture and flavor to your homemade creations.
Now that you have gathered all the ingredients, let’s move on to the step-by-step process of making ice cream with your Cuisinart ice cream maker.
Step 1: Prepare the Ice Cream Maker
The first step in making ice cream with a Cuisinart ice cream maker is to prepare the machine for use. Follow these simple instructions:
- Freeze the Freezer Bowl: Before using the Cuisinart ice cream maker, make sure the freezer bowl is completely frozen. This typically takes around 12-24 hours, so it’s best to plan ahead. Place the bowl in the freezer upside down to ensure even freezing.
- Assemble the Ice Cream Maker: Once the freezer bowl is frozen, assemble the machine according to the manufacturer’s instructions. Typically, this involves attaching the mixing arm to the motor base and placing the frozen bowl onto the base.
- Ensure the Ice Cream Maker is Level: To prevent any mishaps during the churning process, ensure that the ice cream maker is placed on a level surface. This will help the machine operate smoothly and prevent spills.
With the ice cream maker prepared, it’s time to move on to the next step – assembling the ingredients. Let’s get started!
Step 2: Assemble the Ingredients
Now that your Cuisinart ice cream maker is ready to go, it’s time to assemble the ingredients for your homemade ice cream. Follow these steps:
- Mix the Cream and Milk: In a mixing bowl, combine the heavy cream and whole milk. Whisk them together until well blended.
- Add the Sugar: Gradually add the granulated sugar to the cream and milk mixture. Continue to whisk until the sugar is fully dissolved.
- Flavor it with Vanilla Extract: Add the vanilla extract to the mixture and whisk again to incorporate the flavor evenly. If you’re using a different extract or flavoring, now is the time to add it.
That’s it! You’ve assembled the base ingredients for your homemade ice cream. The next step is to chill the mixture before churning it in the ice cream maker. Let’s move on to Step 3.
Make sure to chill the ice cream mixture in the refrigerator for at least 2 hours before pouring it into the Cuisinart ice cream maker. This will help the mixture freeze faster and result in a smoother texture.
Step 3: Chilling the Mixture
After assembling the ingredients for your homemade ice cream, it’s important to chill the mixture before transferring it to the Cuisinart ice cream maker. This step helps to improve the texture and consistency of the final product. Follow these instructions:
- Refrigerate the Mixture: Pour the ice cream mixture into a clean, airtight container. Cover it and place it in the refrigerator for at least 2-4 hours, or preferably overnight. Chilling the mixture allows the flavors to meld together and gives the mixture time to cool down.
- Note: It’s important to ensure that the mixture is completely chilled before churning it in the ice cream maker. If the mixture is not adequately chilled, it may not freeze properly, resulting in a softer ice cream or an extended churning time.
With the ice cream mixture chilled and ready, it’s time to move on to the next step – churning the ice cream in the Cuisinart ice cream maker. Let’s proceed to Step 4.
Step 4: Churning the Ice Cream
Now that your ice cream mixture is chilled, it’s time to churn it in the Cuisinart ice cream maker. Churning is the process of freezing the mixture while it’s being mixed, resulting in a smooth and creamy texture. Follow these steps:
- Retrieve the Frozen Freezer Bowl: Take the frozen freezer bowl out of the freezer and place it in the ice cream maker.
- Attach the Mixing Arm and Lid: Attach the mixing arm onto the motor base and place the lid on top of the ice cream maker. This will ensure that everything is secure and ready for churning.
- Turn on the Ice Cream Maker: Turn on the machine and select the desired churning speed, if applicable. Most Cuisinart ice cream makers have an automatic timer, so you can set it and let the machine do the work for you.
- Pour in the Chilled Mixture: Slowly pour the chilled ice cream mixture into the freezer bowl through the opening in the lid. Be careful not to overfill the bowl, as the mixture will expand during the churning process. Leave some space for the mixture to expand.
- Churn until Thick and Creamy: Let the ice cream maker churn the mixture for the recommended time, usually around 20-30 minutes, or until the ice cream reaches a thick and creamy consistency. The exact time may vary depending on your machine and the desired texture of the ice cream.
Once the churning process is complete, it’s time to add any optional mix-ins, if desired. Move on to Step 5 for the next part of the ice cream-making process.
Step 5: Adding Mix-Ins (Optional)
Adding mix-ins to your homemade ice cream can take it to the next level of deliciousness. Whether you prefer chocolate chips, crushed cookies, nuts, fruit, or swirls of caramel or fudge, this step allows you to customize your ice cream to your liking. Here’s how to add mix-ins to your ice cream:
- Pause the Churning Process: Once the ice cream has reached your desired consistency, pause the churning process by turning off the machine.
- Add the Mix-Ins: Carefully add your desired mix-ins to the partially churned ice cream in the freezer bowl. You can add as much or as little as you prefer, depending on your taste preferences.
- Resume Churning: After adding the mix-ins, reattach the lid and the mixing arm, then turn the machine back on. Let it continue churning for a few more minutes, allowing the mix-ins to evenly distribute throughout the ice cream.
Adding mix-ins is entirely optional, but it can elevate your homemade ice cream to new heights of flavor and texture. Once you’ve completed this step, it’s time to move on to the final step – storing your freshly made ice cream. Let’s proceed to Step 6.
Step 6: Storing the Ice Cream
After churning the ice cream and optionally adding mix-ins, it’s time to store your homemade creation to maintain its optimal texture and flavor. Follow these steps to properly store your ice cream:
- Transfer to a Storage Container: Using a spatula or a wooden spoon, carefully transfer the freshly churned ice cream from the freezer bowl to an airtight storage container. Choose a container that is freezer-safe and has a tight-fitting lid.
- Smooth the Surface: Smooth the surface of the ice cream with the back of the spoon or spatula to remove any air pockets and create an even texture.
- Seal the Container: Seal the container tightly with the lid to prevent air from entering and crystallization from occurring. Make sure the lid is secure to maintain the ice cream’s creamy consistency.
- Label and Date: If desired, label the container with the flavor and date of preparation. This will help you keep track of your homemade ice cream collection and ensure you consume it at its freshest.
- Place in the Freezer: Lastly, place the container of freshly made ice cream in the freezer for at least 2-4 hours or until it is fully frozen and ready to enjoy.
Now that your homemade ice cream is safely stored, you can enjoy it whenever you have a craving for a cold and creamy treat. Remember to remove the ice cream from the freezer a few minutes before serving to allow it to soften slightly for easier scooping.
Congratulations! You’ve successfully made homemade ice cream with your Cuisinart ice cream maker. Enjoy the fruits of your labor and savor the delightful flavors of your homemade creations!
Happy churning!