Articles
How To Make Latch Hook Rugs
Modified: February 24, 2024
Learn how to make latch hook rugs with these informative articles. Discover techniques, tips, and step-by-step instructions to create beautiful rugs at home.
(Many of the links in this article redirect to a specific reviewed product. Your purchase of these products through affiliate links helps to generate commission for Storables.com, at no extra cost. Learn more)
Introduction
Creating your own latch hook rugs is not only a fun and enjoyable craft, but it also allows you to customize your home decor with unique and beautiful designs. Latch hooking is a technique that involves using a special tool, known as a latch hook, to form knots with yarn onto a canvas. The end result is a plush and textured rug that adds warmth and personality to any space.
In this article, we will guide you through the step-by-step process of making latch hook rugs. We will cover everything from preparing the rug canvas to selecting yarn colors and mastering latch hook techniques. Whether you’re a beginner or have some experience in crafting, this comprehensive guide will help you create stunning latch hook rugs that you can proudly display in your home or give as thoughtful handmade gifts.
Before we dive into the details, let’s go over the materials you will need to get started:
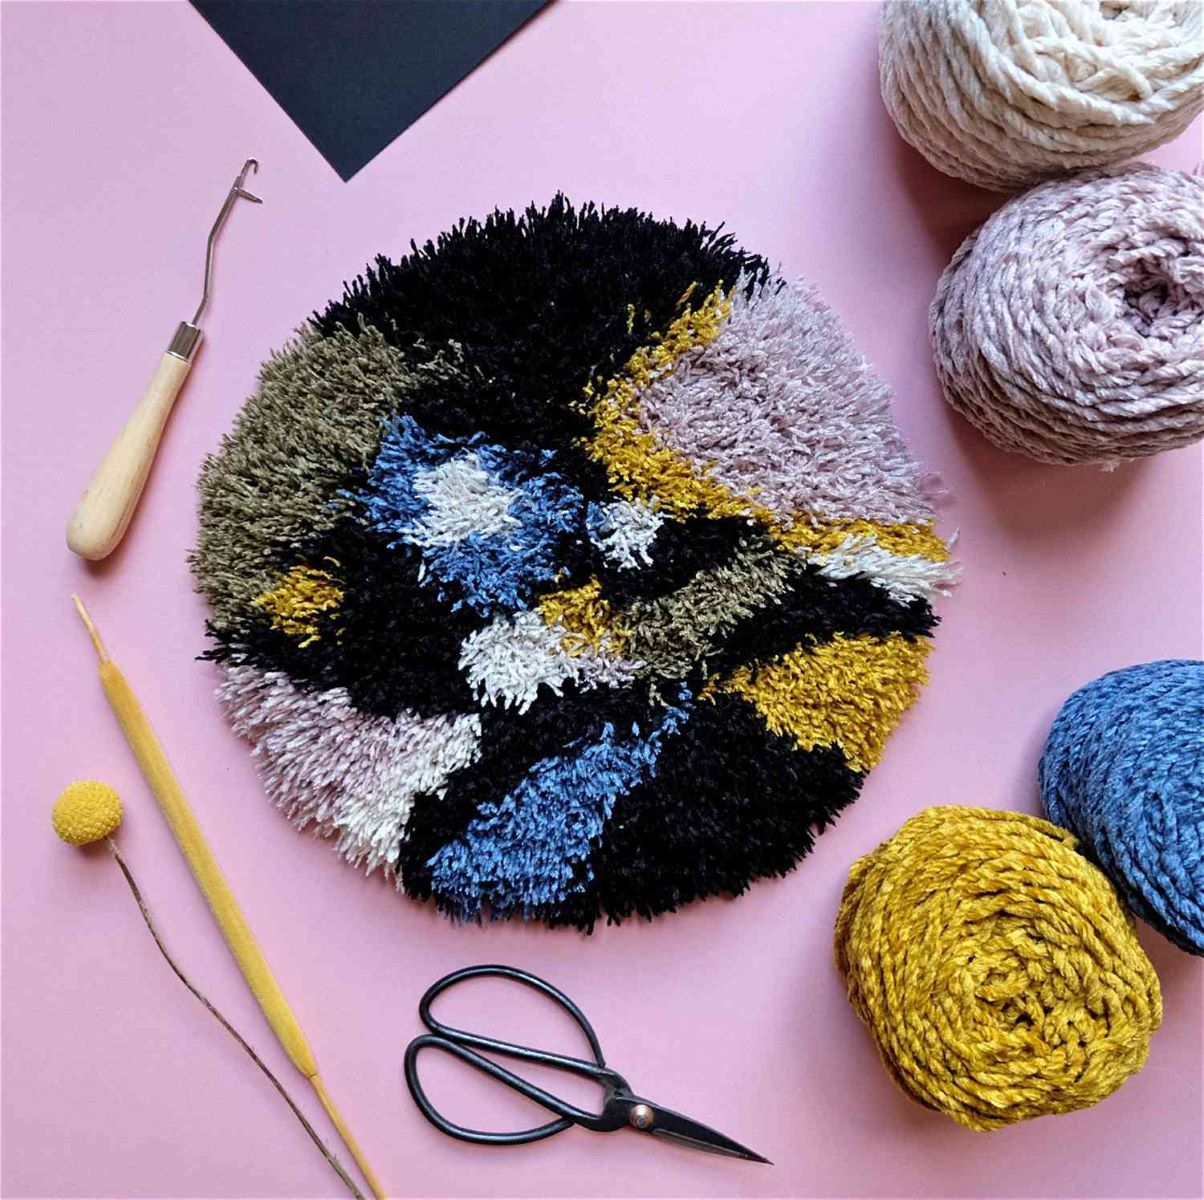
– Latch Hook: This is the essential tool used to create the knots. It consists of a handle with a latch and a hook. The latch allows you to open and close the hook, making it easy to catch and pull yarn through the canvas.
– Rug Canvas: The canvas provides the foundation for your latch hook rug. It typically comes in a grid-like pattern, where each square represents a knot. Rug canvas is available in various sizes, so choose one that suits the dimensions of your desired rug.
– Yarn: Yarn is the main material used to create the knots. Choose yarn that is thick and durable for a sturdy and long-lasting rug. There are many colors and textures to choose from, allowing you to unleash your creativity and design a rug that matches your style.
– Scissors: A good pair of sharp scissors is essential for cutting yarn and trimming your finished rug.
– Latch Hook Rug Pattern: While you can create your own designs, using a pre-made latch hook rug pattern can be helpful, especially if you’re just starting out. These patterns provide a guide for where to place each color of yarn on the canvas.
Now that we have covered the necessary materials, let’s move on to the step-by-step process of making latch hook rugs. Get ready to unleash your creativity and create beautiful and functional rugs that will bring joy and comfort to your home.
Key Takeaways:
- Latch hooking rugs is a creative and rewarding craft that allows you to express your artistic flair while creating beautiful and functional pieces for your home. With the right materials, techniques, and care, you can bring your unique designs to life and add a personalized touch to your living space.
- Choosing the right materials, patterns, and yarn colors is crucial in creating visually appealing latch hook rugs. By mastering latch hook techniques and taking the time to finish and maintain your rug, you can ensure its longevity and preserve its beauty for years to come.
Read more: How To Make Hooked Rugs
Materials Needed
To get started on your latch hook rug project, there are a few essential materials that you will need. These materials will not only make the process easier but also ensure that you have everything required to create a beautiful and durable rug. Here are the materials you will need:
Latch Hook: The latch hook is the primary tool used for creating latch hook rugs. It consists of a handle with a latch and a hook. The latch allows you to open and close the hook, making it easy to catch and pull yarn through the canvas. These tools are widely available in craft stores or online, and you can choose one that feels comfortable and suits your preferences.
Rug Canvas: The rug canvas serves as the foundation for your latch hook rug. It is a grid-like fabric with holes that allow you to insert the latch hook. Rug canvas comes in different sizes and materials, so choose one that fits your desired rug dimensions. For beginners, it’s recommended to start with a smaller canvas to practice and gain proficiency in latch hooking.
Yarn: Yarn is the main material used for creating the knots in the latch hook rug. It’s important to choose yarn that is thick and durable to ensure the longevity of your rug. Acrylic yarn is commonly used for latch hooking due to its softness, durability, and wide variety of colors available. You can select yarn in different shades, textures, and finishes to add depth and visual interest to your design.
Scissors: A good pair of scissors is an essential tool for any craft project, including latch hook rugs. You will need them to cut the yarn and trim any excess material. Choose a pair of sharp, fabric scissors that will make clean and precise cuts, helping you achieve a professional finish on your rug.
Latch Hook Rug Pattern: While you have the freedom to create your own design, using a latch hook rug pattern can be helpful, especially if you’re new to latch hooking. Rug patterns provide a visual guide, indicating where to place each color of yarn on the canvas. You can find a variety of latch hook rug patterns online or in craft stores, catering to different design preferences and skill levels.
Now that you have gathered all the necessary materials, you’re ready to embark on your latch hook rug journey. So, let’s dive into the step-by-step process of creating a beautiful latch hook rug that will add warmth and personality to your space.
Step 1: Preparing the Rug Canvas
Before you can start latch hooking, it’s important to properly prepare the rug canvas. This involves cutting the canvas to the desired size and securing the edges to prevent fraying. Follow these steps to get your canvas ready:
Cutting the canvas to size: Start by measuring and determining the dimensions of your desired latch hook rug. Using a ruler and a fabric marker, mark the measurements on the rug canvas. Make sure to leave some extra canvas on all sides to account for the edges and any trimming you may need to do later.
Once you have marked the dimensions, use a pair of sharp fabric scissors to carefully cut along the lines. Take your time and ensure that your cuts are straight and even. If the canvas is too large to handle, you can fold it along the desired dimensions and cut through multiple layers, but be cautious not to create any jagged edges.
Securing the edges of the canvas: To prevent the edges of the canvas from fraying and unravelling, it’s important to secure them. There are a few methods you can use to achieve this:
– Use masking tape: This is a simple and quick method to secure the edges. Stick strips of masking tape along all four sides of the canvas, overlapping them slightly to fully cover the raw edges.
– Sew a binding: If you prefer a more polished look, you can sew a binding along the edges of the canvas. Cut a strip of fabric or binding tape that is slightly wider than the canvas. Fold the strip in half lengthwise, align it with the edge of the canvas, and sew it in place.
– Apply fabric glue: Another option is to use fabric glue to secure the edges. Run a thin line of fabric glue along the raw edges of the canvas, making sure to fully cover them. Press the glued edges together and hold them in place until the glue dries and sets.
Once you have secured the edges of the canvas, your base for latch hooking is ready. It’s important to have a sturdy and well-prepared canvas to ensure the longevity of your latch hook rug. Now, it’s time to move on to the next steps of choosing a latch hook rug pattern and selecting yarn colors.
Step 2: Choosing a Latch Hook Rug Pattern
Choosing a latch hook rug pattern is an exciting part of the process, as it sets the foundation for the design and visual appeal of your rug. Here are two options for finding the perfect pattern:
Online resources for patterns: The internet offers a vast array of resources where you can find latch hook rug patterns. There are websites, forums, and online communities dedicated to sharing patterns and ideas. Take advantage of these platforms to explore various designs, themes, and styles.
You can search for specific patterns based on your preferences, such as floral, geometric, abstract, or even characters and landscapes. Many websites allow you to filter patterns by difficulty level, so you can choose one that matches your skill and experience. Additionally, some platforms offer downloadable patterns, making it convenient to access and print them at your convenience.
Creating your own pattern: If you have a unique design in mind or want to unleash your creativity, consider creating your own latch hook rug pattern. This allows you to personalize your rug and make it truly one-of-a-kind.
Start by sketching your design on a piece of paper. Use a grid or graph paper to help you accurately translate your design onto the latch hook rug canvas. Each square on the paper grid should represent a corresponding square on the canvas. Take your time to refine and perfect your design before proceeding.
Once you have finalized your pattern, transfer it onto the rug canvas by marking the corresponding squares. You can use a fabric marker or tailor’s chalk to trace the pattern onto the canvas. Ensure that your markings are clear and visible, as they will guide you in placing the yarn during the latch hooking process.
Remember, choosing a pattern is a personal preference, so select one that resonates with you and matches your style. Whether you decide to use a pre-made pattern or create your own, the key is to have fun and enjoy the process of bringing your design to life on the latch hook rug canvas.
Now that you have chosen a pattern, it’s time to move on to the next step—selecting yarn colors.
Step 3: Selecting Yarn Colors
Selecting the right yarn colors for your latch hook rug is crucial in creating a visually appealing and harmonious design. Here are a few tips to help you choose the perfect colors:
Considering color scheme and design: Start by considering the overall color scheme and design of the room where your latch hook rug will be placed. Take into account the existing decor, furniture, and color palette. You can either choose colors that complement and blend with the existing scheme or opt for contrasting colors to create a bold and eye-catching statement piece.
Additionally, think about the mood or theme you want to convey. Soft, pastel shades create a calming and serene ambiance, while vibrant and bold hues can add energy and vibrancy to a space. Consider the purpose of the rug and the atmosphere you want to create.
Calculating the amount of yarn needed: Once you have decided on the colors, it’s important to calculate the amount of yarn you will need. This depends on several factors, including the size of your latch hook rug, the thickness of the yarn, and the pattern you have chosen.
To estimate the amount of yarn needed, consult the instructions provided with the pattern or use a yarn calculator available online. These calculators typically require you to input the rug dimensions and the type of yarn you are using. They will provide you with an estimate of the total yardage required.
It’s always a good idea to purchase slightly more yarn than the estimated amount to account for any mistakes or irregularities that may occur during the latch hooking process. Having extra yarn ensures that you have enough to complete the rug without running out of a specific color.
In addition to the main colors, consider selecting a few accent colors to add depth and interest to your latch hook rug. These accent colors can be used to create patterns, shapes, or textures within your design.
Remember, the color selection process is an opportunity to get creative and let your imagination run wild. Experiment with various combinations, shades, and textures to find the perfect yarn colors that bring your latch hook rug vision to life.
Now that you have selected your yarn colors, it’s time to move on to the next step—starting the latch hook rug.
When making latch hook rugs, be sure to use a sturdy backing material and secure your knots tightly to prevent unraveling over time.
Read more: How To Make Yarn Rugs
Step 4: Starting the Latch Hook Rug
Now that you have your materials prepared and the yarn colors selected, it’s time to start the exciting process of latch hooking your rug. Follow these steps to begin:
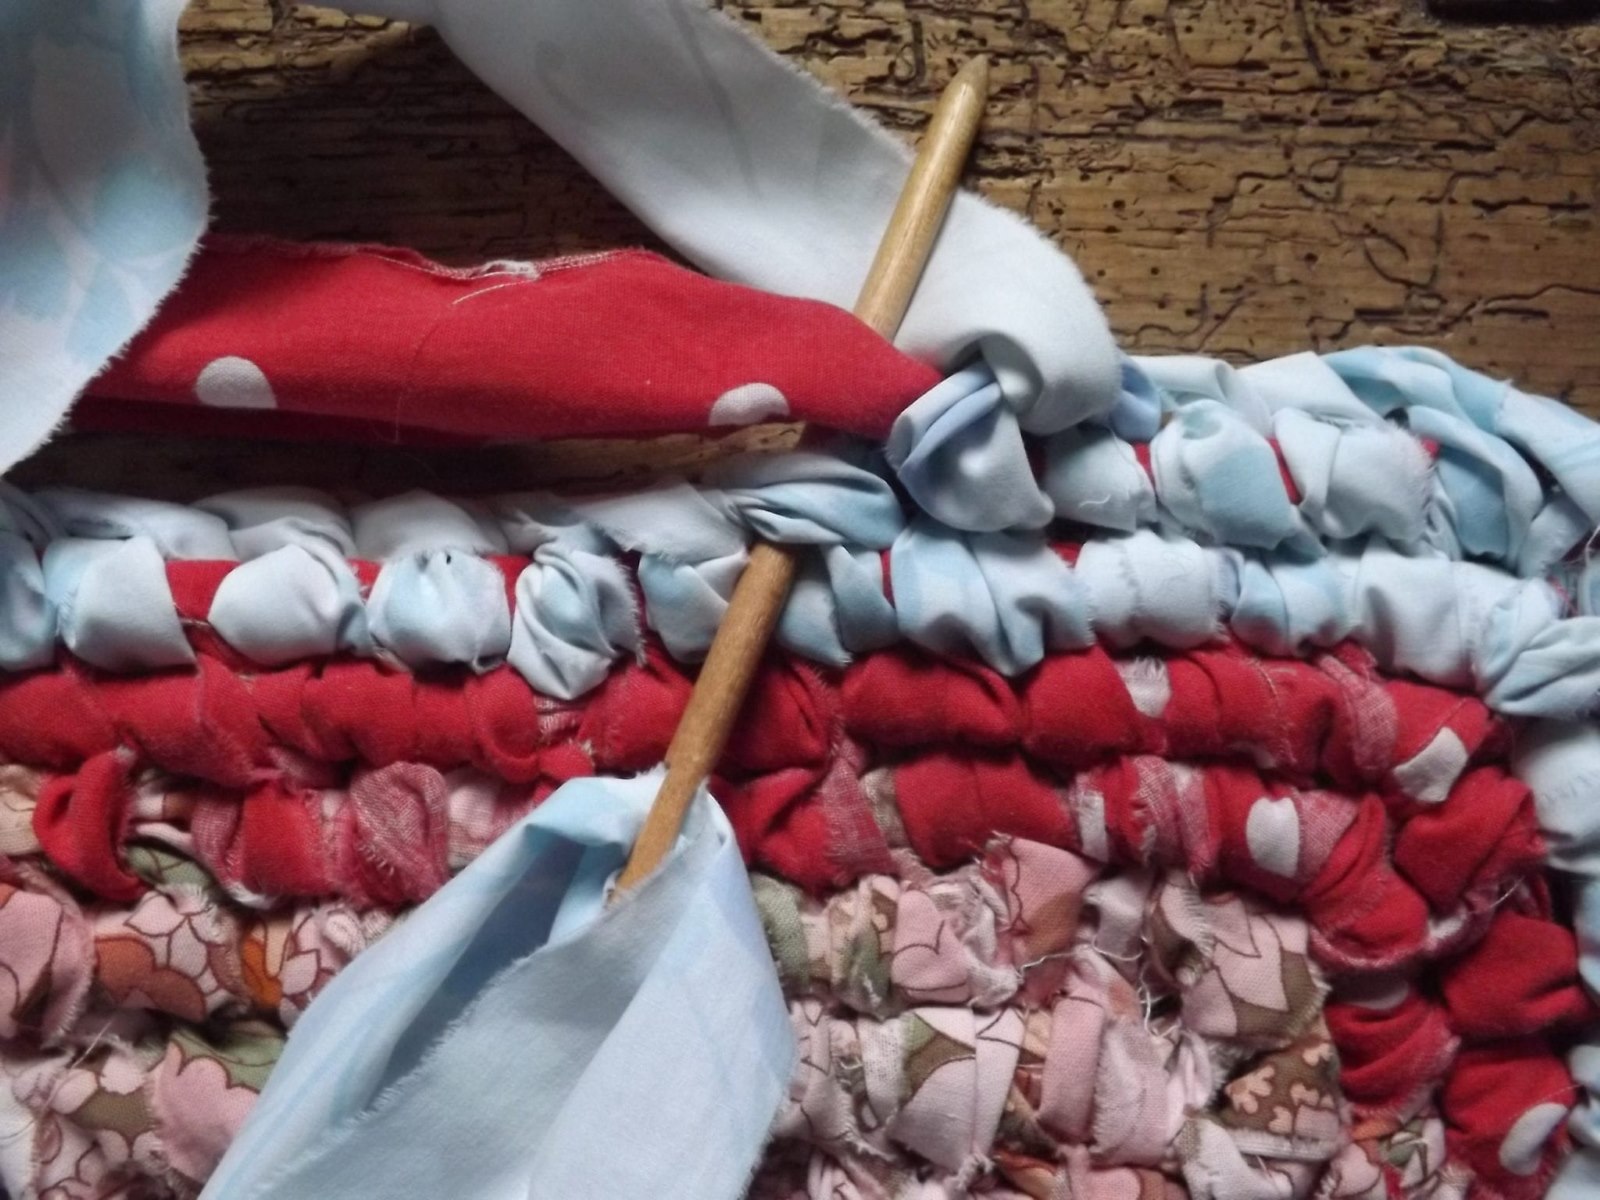
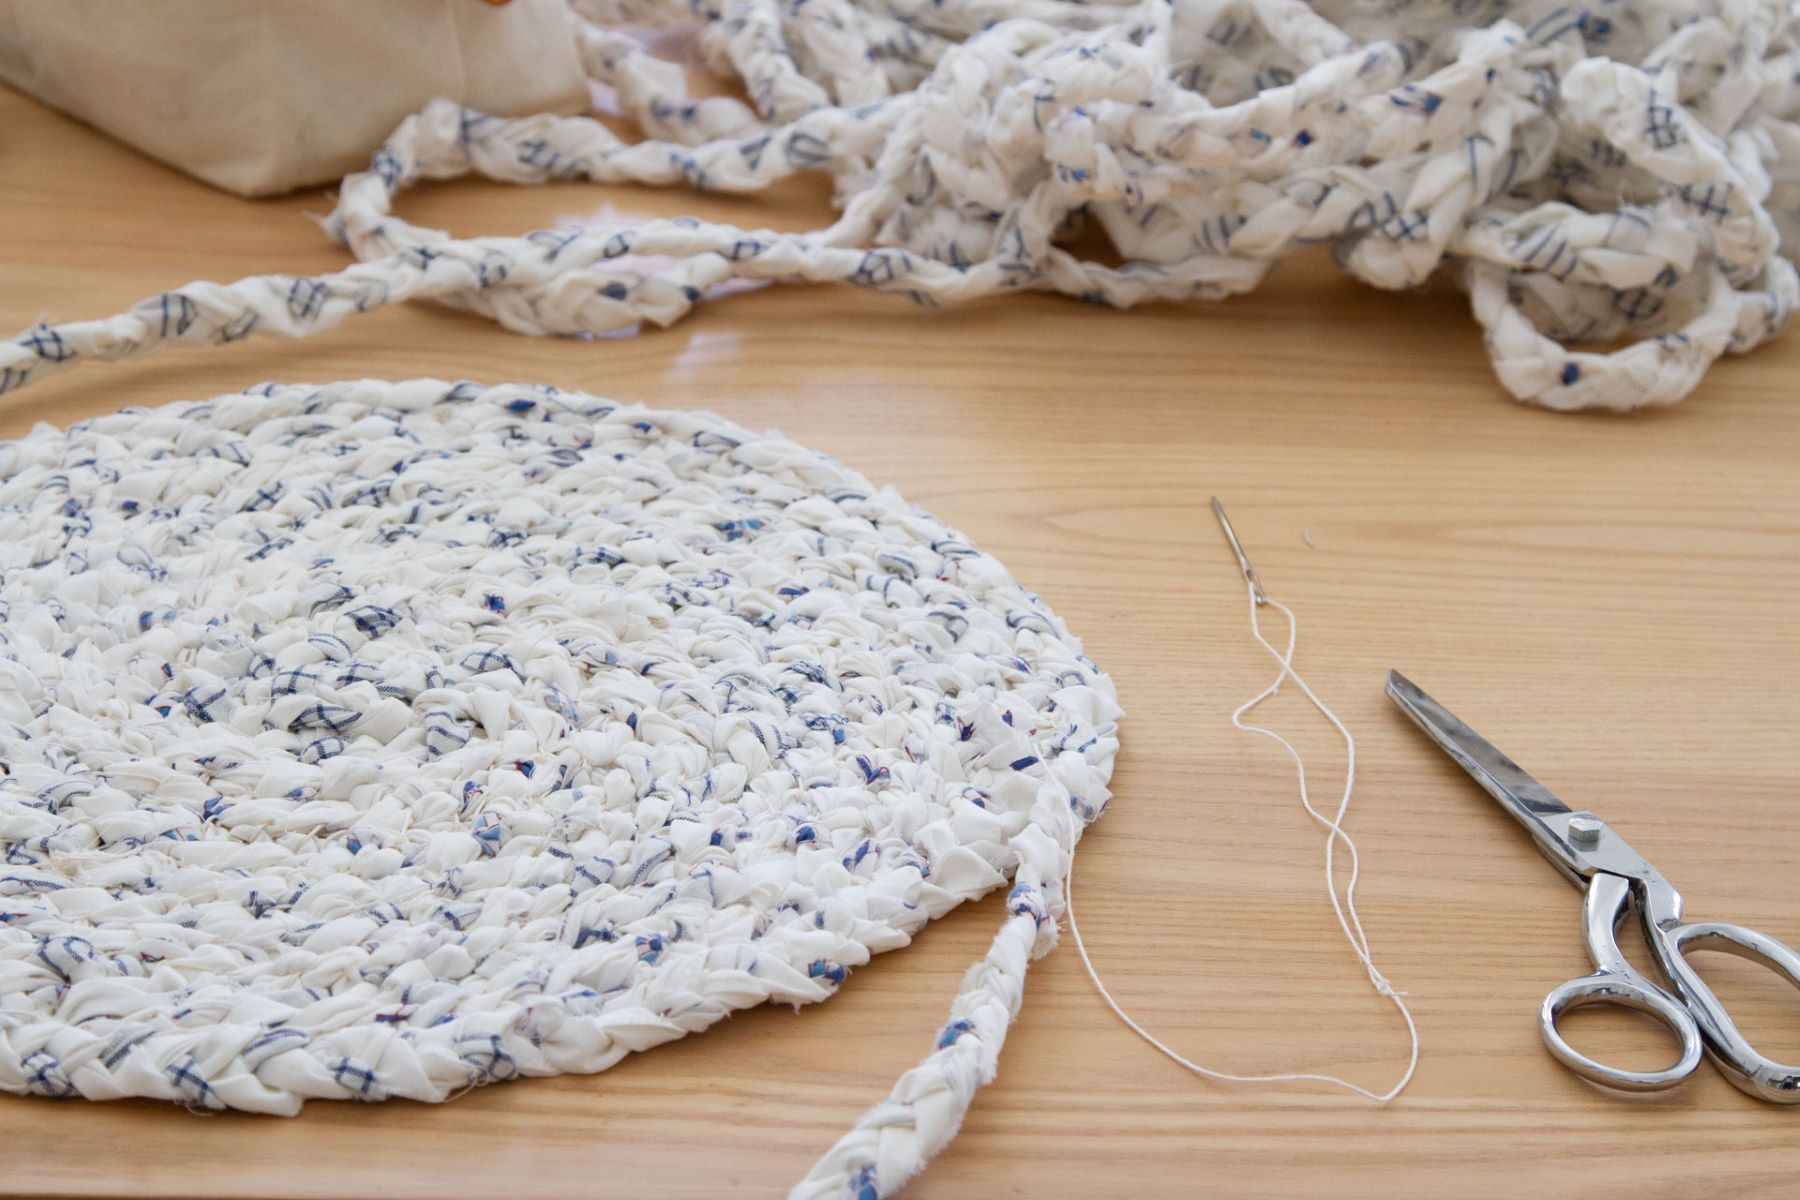
Attaching yarn to the latch hook: Take the first color of yarn you are using and cut a length that is manageable to work with. It’s recommended to start with a shorter length, around 12-18 inches, to prevent tangling and allow for easier control.
Fold the yarn in half to create a loop. Insert the latch hook tool through a hole in the canvas from front to back. Open the latch on the hook and place the loop of yarn over the latch. Close the latch, securing the yarn in place.
Working row by row on the canvas: Start latch hooking your rug from one corner of the canvas, and work row by row towards the opposite side. Begin with the first row of your pattern by following the instructions provided or referring to your own design.
To create a latch hook knot, insert the hook through a hole in the canvas from front to back, catching the yarn in the hook’s latch. Close the latch and gently pull the hook back, bringing the yarn through the canvas and leaving a loop on the front side.
Take both ends of the loop and thread them through the loop itself, creating a knot. Tighten the knot by gently pulling on the yarn ends. This secures the yarn in place.
Continue working row by row, filling in the canvas with the designated colors according to your pattern. Remember to reference the pattern or your design to ensure correct placement of the colors.
As you complete each row, gently press down on the finished knots to create a uniform and neat appearance. This also helps to create a plush texture in your finished latch hook rug.
Take your time with each knot and ensure that they are secure and tight. Consistency in tension and knot size is important for an even and professional-looking finished rug.
Continue working row by row until you have finished latch hooking the entire canvas. You will start to see your pattern come to life and your design taking shape.
Latch hooking requires patience and attention to detail, but the process is enjoyable and rewarding. Take breaks as needed and enjoy the meditative nature of this craft.
In the next step, we’ll explore different latch hook techniques to create interesting textures and finishes on your rug.
Step 5: Latch Hook Techniques
As you continue latch hooking your rug, you have the opportunity to explore different techniques that can enhance the texture and visual interest of your finished piece. Let’s dive into two popular latch hook techniques:
Traditional latch hook technique: The traditional latch hook technique involves creating standard knots with the yarn. This technique is simple yet effective in creating a plush and textured rug.
To create a traditional latch hook knot, insert the hook through a hole in the canvas from front to back. Catch the yarn in the hook’s latch and close the latch. Then, gently pull the hook back, bringing the yarn through the canvas and leaving a loop on the front side. Take both ends of the loop and thread them through the loop itself, creating a knot. Tighten the knot by pulling gently on the yarn ends.
Continue using this technique to fill in each square of the canvas according to your pattern or design. Pay attention to the tension of the knots to ensure consistency in size and appearance.
Tips for creating different textures: If you want to add more visual interest and variety to your latch hook rug, you can experiment with different textures using various techniques. Here are a few tips to get you started:
– Looped pile: Instead of pulling the yarn all the way through the canvas, leave the loop on the front side slightly loose. This creates a looped pile texture that adds dimension and bounce to your rug.
– High or low pile: Vary the height of the pile by adjusting the length of the yarn before knotting it. Longer yarn will result in a higher pile, while shorter yarn will create a lower pile. Play around with different lengths to achieve the desired effect.
– Mixing yarn weights: Combine yarns of different weights to create contrasting textures and surfaces. Mix bulky yarns with thinner ones to add depth and interest to your design.
– Gradual color changes: If your pattern includes areas of gradual color changes, blend the colors together by using yarns that gradually transition from one color to another. This creates a smooth and seamless color gradient effect in your rug.
Remember to refer to your pattern or design as a guide for where to implement these techniques. The combination of different textures can create a visually striking and unique latch hook rug.
In the next step, we’ll discuss the finishing touches of securing loose yarn ends and trimming the rug edges to give it a polished and professional look.
Step 6: Finishing the Rug
Now that you have completed the latch hooking process on your rug, it’s time to give it the finishing touches to ensure its durability and enhance its overall appearance. Follow these steps to finish your latch hook rug:
Securing loose yarn ends: Throughout the latch hooking process, you may have loose yarn ends on the backside of the rug. These loose ends need to be secured to prevent them from unraveling over time.
Take a sharp pair of scissors and carefully trim any excess yarn, leaving about half an inch to an inch of yarn tail. Then, using a yarn or tapestry needle, weave the yarn ends through the backside of the rug, going in different directions to secure them. This will help to keep the yarn tails in place and prevent them from coming loose.
Trimming the rug edges: To give your latch hook rug a clean and polished look, you will need to trim the edges. Start by looking at the edges of the rug and identifying any uneven or loose strands.
Using sharp scissors, carefully trim the excess yarn along the edges, creating a straight line. Be cautious not to cut any of the loops or knots in the main body of the rug. Take your time and use small, precise cuts to achieve a professional finish.
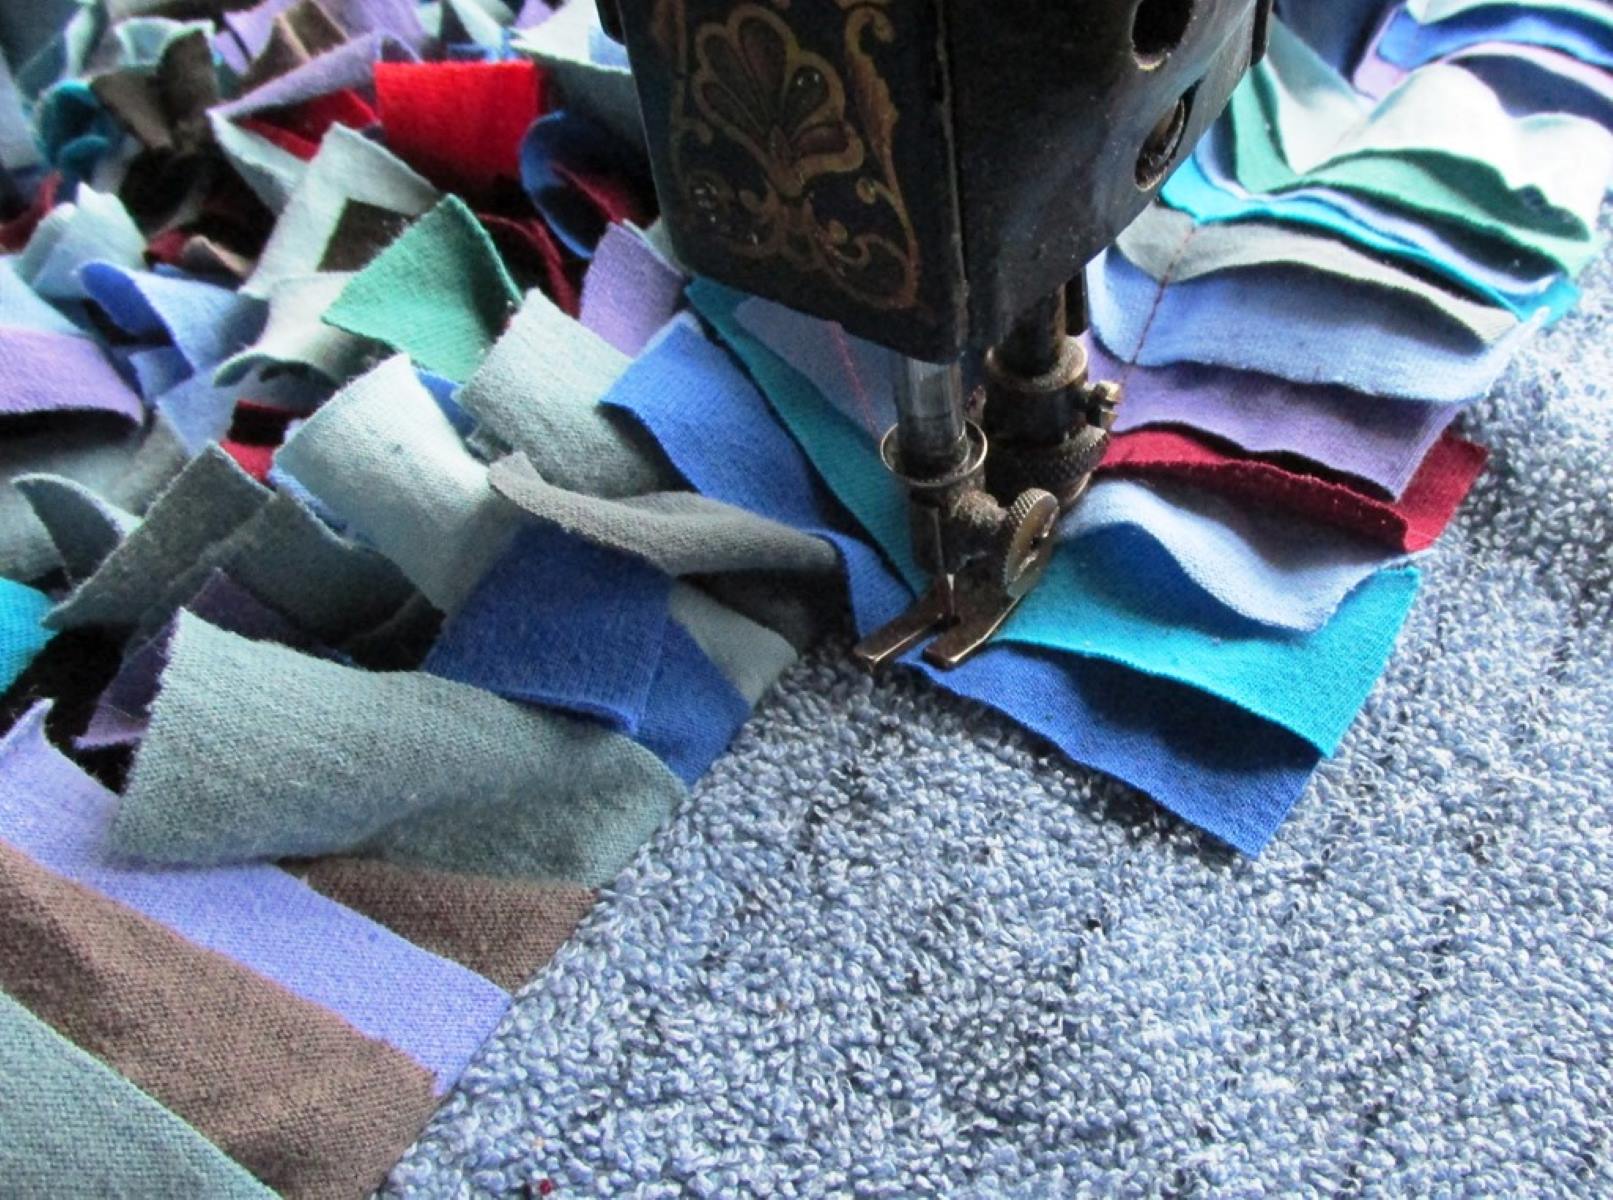
If desired, you can also add a decorative edge to your rug. This can be done by using a sewing machine to stitch a binding tape or fabric strip around the edges of the rug. Alternatively, you can crochet or hand sew a border to add a personal touch and frame your latch hook rug.
Once you have trimmed and secured the edges, give your rug a final inspection to ensure everything is intact and well-finished. Check for any loose knots or yarn that may need additional securing.
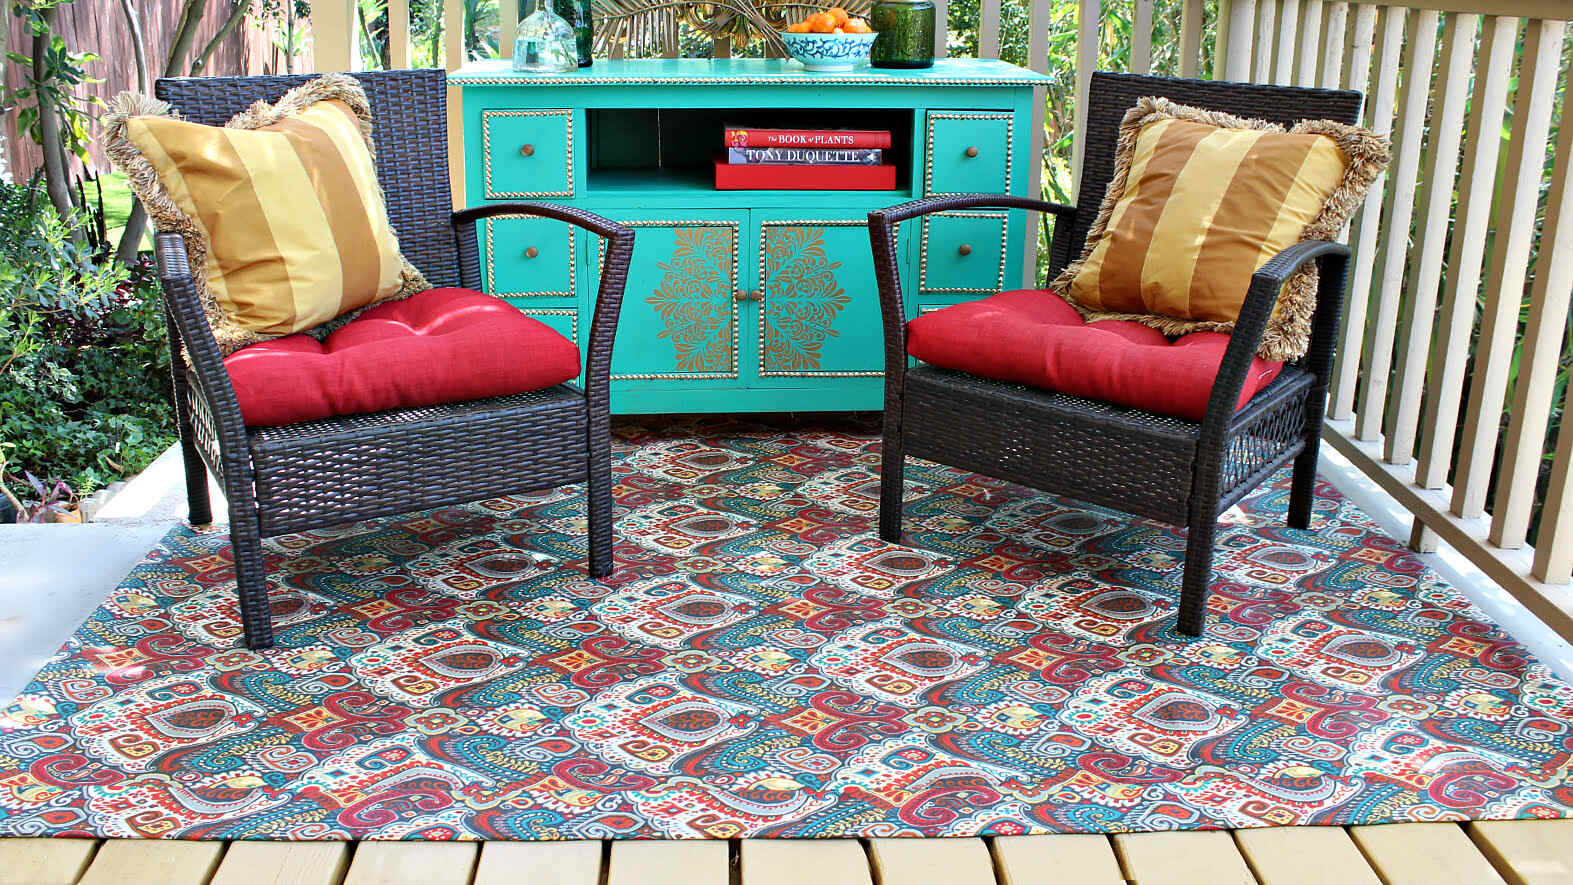
Congratulations! You have successfully completed your latch hook rug. Take a step back and admire your creation. It’s now ready to be showcased and enjoyed in your home.
In the final step, we’ll discuss the care and maintenance of your latch hook rug, ensuring its longevity and preserving its beauty for years to come.
Step 7: Care and Maintenance
To ensure the longevity and beauty of your latch hook rug, it’s important to provide proper care and maintenance. Follow these steps to keep your rug looking fresh and vibrant:
Cleaning the latch hook rug: Over time, your latch hook rug may accumulate dust, dirt, or other debris. Regular cleaning is vital to keep it looking its best. Here’s how you can clean your latch hook rug:
– Vacuuming: Use a vacuum cleaner with a brush attachment to gently vacuum the surface of the rug. This will help remove loose dirt and debris without disturbing the knots and loops.
– Spot cleaning: For small stains or spills, gently blot the area with a clean cloth or sponge and use a mild detergent mixed with water to clean the spot.
– Professional cleaning: If your latch hook rug requires a deep clean, consider taking it to a professional rug cleaner. They have the expertise and equipment to ensure a thorough and safe cleaning process.
Protecting it from wear and tear: Latch hook rugs, like any other rugs, are susceptible to wear and tear, especially in high-traffic areas. Here are some tips to protect your latch hook rug:
– Use rug pads: Place rug pads underneath your latch hook rug to provide cushioning and prevent slippage. Rug pads also help to reduce friction between the rug and the floor, minimizing wear and tear.
– Rotate the rug: Periodically rotate your latch hook rug to distribute the foot traffic evenly. This helps to prevent excessive wear on specific areas of the rug.
– Avoid direct sunlight: Prolonged exposure to direct sunlight can cause the colors in your latch hook rug to fade over time. Consider using curtains or blinds to block out harsh sunlight or rotate the rug periodically to prevent uneven fading.
– Avoid moisture: Moisture can weaken the fibers of your latch hook rug and promote mold and mildew growth. Keep the rug away from damp and humid areas, and promptly address any spills or moisture to prevent damage.
By following these care and maintenance tips, you can protect your latch hook rug and ensure its longevity, allowing you to enjoy its beauty for years to come.
As a reminder, crafting latch hook rugs requires patience and attention to detail, but the end result is a stunning and unique piece of art that you can proudly display in your home. Embrace your creativity, experiment with different patterns and textures, and have fun throughout the process. Happy latch hooking!
Read more: How To Make Tufted Rugs
Conclusion
Latch hooking rugs is a creative and rewarding craft that allows you to express your artistic flair while creating beautiful and functional pieces for your home. With the step-by-step process outlined in this guide, you have learned how to prepare the rug canvas, choose patterns and yarn colors, master latch hook techniques, and finish and maintain your latch hook rug.
By cutting the canvas to size and securing the edges, you provided a sturdy foundation for your rug. Choosing a latch hook rug pattern, whether from online resources or your own imagination, allowed you to create a design that suits your style and preferences. Selecting yarn colors with careful consideration of the color scheme and design elements helped bring your vision to life.
As you dove into the latch hooking process, you discovered the traditional latch hook technique and explored various tips to create different textures, adding depth and interest to your rug. You then took the necessary steps to secure loose yarn ends and trim the rug edges, giving it a polished and professional finish.
To ensure the longevity of your latch hook rug, you learned about proper care and maintenance. Cleaning your rug regularly and protecting it from wear and tear will help it maintain its vibrant colors and plush texture for years to come.
Latch hooking rugs not only provides a creative outlet but also allows you to personalize your home decor with a unique and handmade touch. Each rug tells a story, reflecting your creativity, patience, and attention to detail.
Now, armed with the knowledge from this guide, you are ready to embark on your latch hook rug-making journey. Remember to have fun, embrace your creativity, and enjoy the process of bringing your designs to life. Whether you’re making a rug for your own home or gifting it to a loved one, your latch hook creation is sure to bring warmth and beauty to any space.
So, gather your materials, choose your pattern and colors, and start latch hooking! Happy crafting!
Frequently Asked Questions about How To Make Latch Hook Rugs
Was this page helpful?
At Storables.com, we guarantee accurate and reliable information. Our content, validated by Expert Board Contributors, is crafted following stringent Editorial Policies. We're committed to providing you with well-researched, expert-backed insights for all your informational needs.


0 thoughts on “How To Make Latch Hook Rugs”