Articles
How To Make Toothbrush Rugs
Modified: October 20, 2024
Learn how to make beautiful and practical toothbrush rugs with our step-by-step articles. Perfect for adding a unique touch to your home décor.
(Many of the links in this article redirect to a specific reviewed product. Your purchase of these products through affiliate links helps to generate commission for Storables.com, at no extra cost. Learn more)
Introduction
Have you ever wondered what to do with those old, worn-out toothbrushes lying around your house? Instead of throwing them away, why not repurpose them into something useful and beautiful? In this article, we will guide you through the process of making toothbrush rugs, a fantastic way to upcycle those old brushes and create unique and stylish home decor.
Toothbrush rugs have been around for decades, originating from the frugal creativity of resourceful homemakers. These rugs are typically made using fabric strips and a toothbrush needle, which is a modified toothbrush with a hole drilled into its handle. The result is a durable and attractive rug that can be used in various areas of your home, from the bathroom to the living room.
Not only are toothbrush rugs sustainable and environmentally friendly, but they also give you a chance to let your creative juices flow. You can choose from a variety of fabrics, colors, and patterns to match your personal style and home decor. Plus, making toothbrush rugs can be a relaxing and rewarding hobby, allowing you to spend your free time crafting something unique and practical.
In this step-by-step guide, we will walk you through the process of making toothbrush rugs, from preparing the toothbrush and cutting fabric strips to starting the rug and finishing it with finesse. We will also share some tips and tricks to help you troubleshoot any challenges you may encounter along the way.
So, grab your old toothbrushes, gather some fabric scraps, and let’s get started on this creative journey of making toothbrush rugs!
Key Takeaways:
- Transform old toothbrushes and fabric scraps into unique, sustainable, and stylish rugs that add a personal touch to your home decor. Enjoy the meditative process and express your creativity through this rewarding craft.
- Embrace the art of toothbrush rug making, experiment with fabric combinations, and create beautiful, durable rugs for various areas of your home. Share your passion, inspire others, and enjoy the gratifying journey of turning simple materials into functional works of art.
Read more: How To Make A Toothbrush
Materials Needed
Before diving into the exciting world of toothbrush rug making, let’s gather all the necessary materials. Here’s what you’ll need:
- A toothbrush – Look for an old toothbrush with a flat handle. You can repurpose one or buy a new one specifically for rug making.
- Fabric scraps – Choose fabrics that are sturdy and can withstand the wear and tear of a rug. Cotton, denim, or muslin are popular choices.
- Scissors – Make sure you have a sharp pair of fabric scissors for cutting the fabric strips.
- Ruler – A ruler will help you measure and cut the fabric strips accurately.
- Marker or pen – You’ll need a marker or pen to mark the cutting lines on the fabric.
- Toothbrush needle – If you don’t have a toothbrush needle, you can make one by drilling a small hole in the handle of a toothbrush.
- Thread – Choose a durable thread that matches the color of your fabric strips.
- Optional: Sewing machine – A sewing machine can speed up the process, but you can also hand sew the rug if you don’t have one.
Make sure you have all these materials at your disposal before you begin. Having everything ready will make the process smoother and more enjoyable.
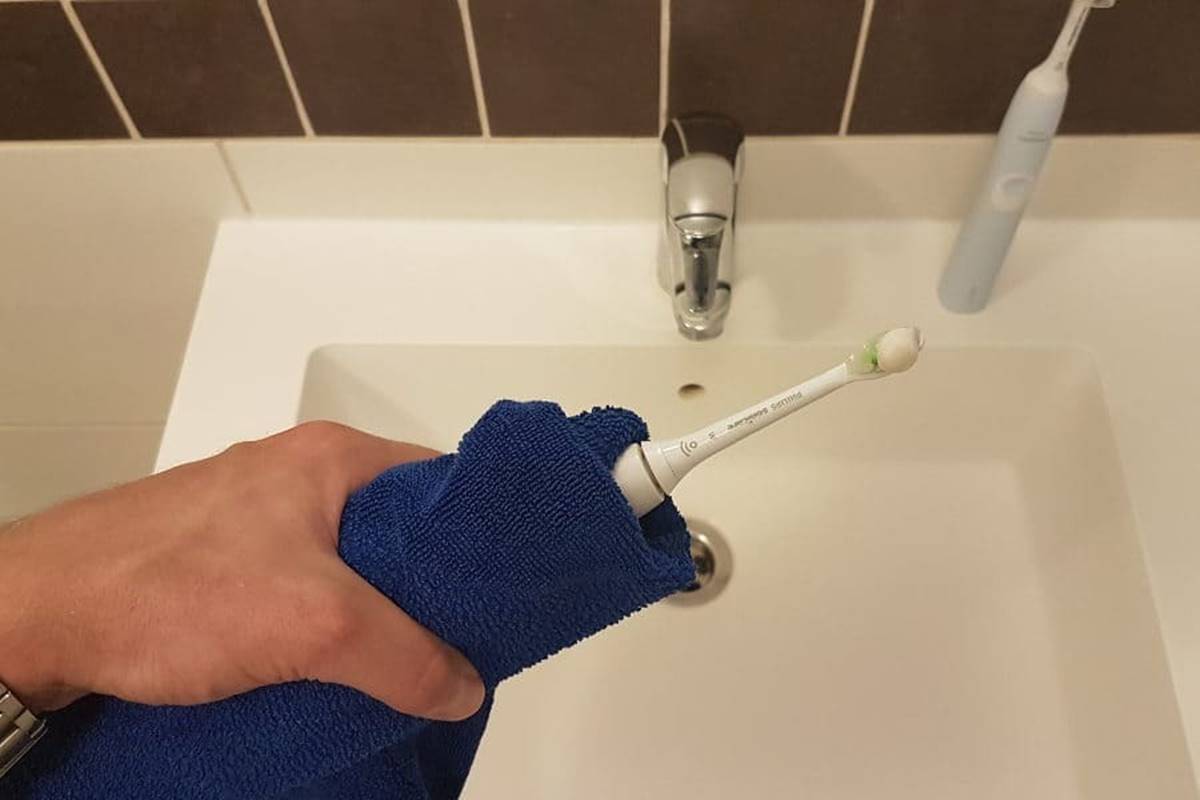
Step 1: Preparing the Toothbrush
The first step in making a toothbrush rug is to prepare the toothbrush itself. Here’s how to do it:
- Start by cleaning the toothbrush thoroughly. Remove any leftover toothpaste or debris to ensure a clean working surface. You can use soap and water to wash the toothbrush and rinse it thoroughly.
- If your toothbrush has bristles, you will need to remove them. Use a pair of pliers or wire cutters to carefully pull out the bristles. You want to create a flat surface on the toothbrush handle to allow for easier weaving.
- Smooth any rough edges or remaining bristle remnants using sandpaper or a file. This step is essential to prevent the fabric from snagging or getting caught on the toothbrush handle while you are weaving.
- Once the toothbrush handle is smooth and bristle-free, you can create a hole in it for the fabric strips. Use a small drill bit or a heated nail to make a hole near the end of the handle. The size of the hole should be large enough to accommodate your fabric strips but not too big that they slip out easily.
- After drilling the hole, use sandpaper again to smoothen any rough edges around the hole. This will ensure that the fabric strips slide through easily without any obstructions.
Once you have completed these steps, your toothbrush is now ready to be the tool for creating your toothbrush rug. Make sure to double-check that it is clean, smooth, and has a functional hole before moving on to the next step.
Step 2: Cutting the Fabric Strips
Now that your toothbrush is prepped and ready, it’s time to cut the fabric strips. These strips are what you will be weaving through the toothbrush to create your rug. Follow these steps to cut the fabric strips:
- Gather your fabric scraps and decide on the width you want for your strips. Typically, toothbrush rug makers use strips that are around 1 inch wide, but you can adjust the width to your preference.
- Using a ruler and a marker or pen, measure and mark the width along the edge of the fabric. You can make small dots to guide your cutting.
- Start cutting along the marked line, making sure to keep the width consistent throughout. Be careful when cutting to maintain straight edges, as this will help with weaving later on.
- Continue cutting fabric strips until you have enough to complete your rug. The number of strips you need will depend on the size of your rug and the desired thickness.
- If you run out of fabric on one strip, you can join another strip to extend its length. To do this, overlap the end of one strip with the beginning of another and sew them together. Make sure the seam is secure to prevent unraveling.
It’s a good idea to cut more fabric strips than you think you will need, as it’s better to have extra than to run out in the middle of the project. Once you have a sufficient number of fabric strips, you’re ready to move on to the next step of creating your toothbrush rug.
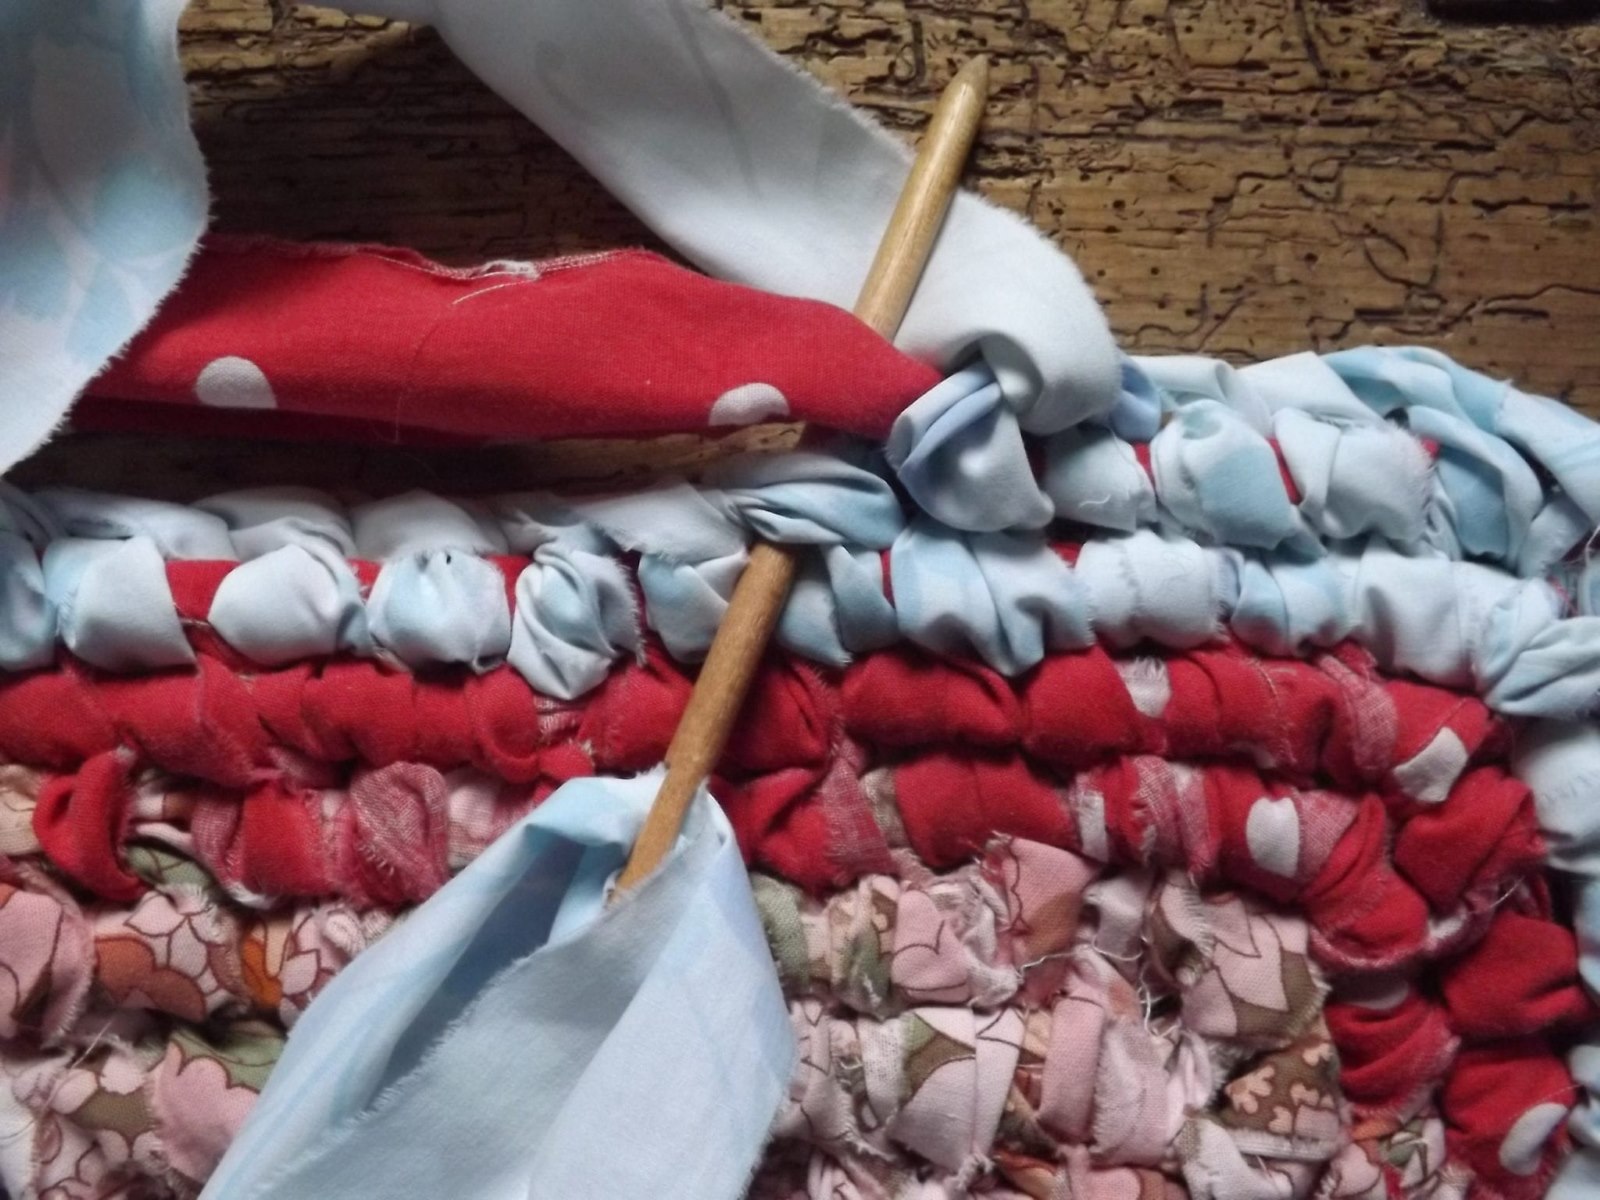
Step 3: Starting the Rug
With your toothbrush prepared and fabric strips cut, it’s time to start weaving your toothbrush rug. Follow these steps to begin:
- Take one fabric strip and fold it in half, creating a loop at one end.
- Insert the looped end of the fabric strip through the hole in the toothbrush handle. Pull the fabric strip halfway through the hole so that the loop is secured.
- Hold the toothbrush with one hand, gripping it tightly to create tension, while using your other hand to hold onto the loose end of the fabric strip.
- Now, with the loose end of the fabric strip, form a small loop around the toothbrush handle, making sure it is below the looped end of the fabric strip.
- Grab the loose end of the fabric strip and pass it through the small loop you just created. Pull the loose end of the fabric strip, tightening the loop around the toothbrush handle. This is your first stitch.
- Repeat steps 3 to 5 with additional fabric strips until your toothbrush handle is full of stitches, leaving a small space at the end for finishing purposes.
By creating these stitches, you are securing the fabric strips to the toothbrush handle, forming the foundation of your rug. It’s important to maintain tension while weaving to ensure a tight and sturdy rug.
You can choose to use the same color fabric strips or mix and match different colors to create an interesting pattern. Be creative and experiment with different combinations for a unique look.
Once you have completed the initial stitches, you’re ready to start adding rows to your toothbrush rug. This is where the weaving process truly begins and your rug starts to take shape.
When starting a toothbrush rug, use a sturdy fabric strip as the base and a toothbrush or large needle to weave the fabric strips together in a circular pattern. This will create a durable and attractive rug.
Read more: How To Make Yarn Rugs
Step 4: Creating Rows and Adding Strips
Now that you have the foundation of your toothbrush rug in place, it’s time to create rows and add more fabric strips to expand the rug. Follow these steps to continue the weaving process:
- Take another fabric strip and fold it in half, forming a loop at one end.
- Insert the looped end of the fabric strip through the first stitch of the previous row, just below the toothbrush handle. Make sure the loop is secured.
- Hold the toothbrush with one hand, keeping the tension, and hold onto the loose end of the fabric strip with your other hand.
- Form a small loop around the toothbrush handle with the loose end of the fabric strip, below the looped end.
- Pass the loose end of the fabric strip through the small loop you just created and pull it tightly to form the next stitch.
- Continue adding fabric strips in the same manner, weaving them through the previous row of stitches. Make sure to keep the strips close together to create a densely woven rug.
- Once you reach the end of the toothbrush handle, you can slide the completed row of stitches off the handle to create more space for weaving.
- Repeat steps 1 to 7 to create additional rows, gradually expanding your toothbrush rug.
As you add more rows, you will see the rug taking shape and growing in size. It’s important to maintain even tension and consistent stitches to create a uniform and sturdy rug. Take your time and enjoy the rhythmic process of weaving.
Remember to periodically push the fabric strips up towards the handle to keep the rug tight and avoid any gaps or loose stitches. This will ensure that your toothbrush rug remains durable and beautiful.
Continue adding rows and fabric strips until you reach the desired size for your toothbrush rug.
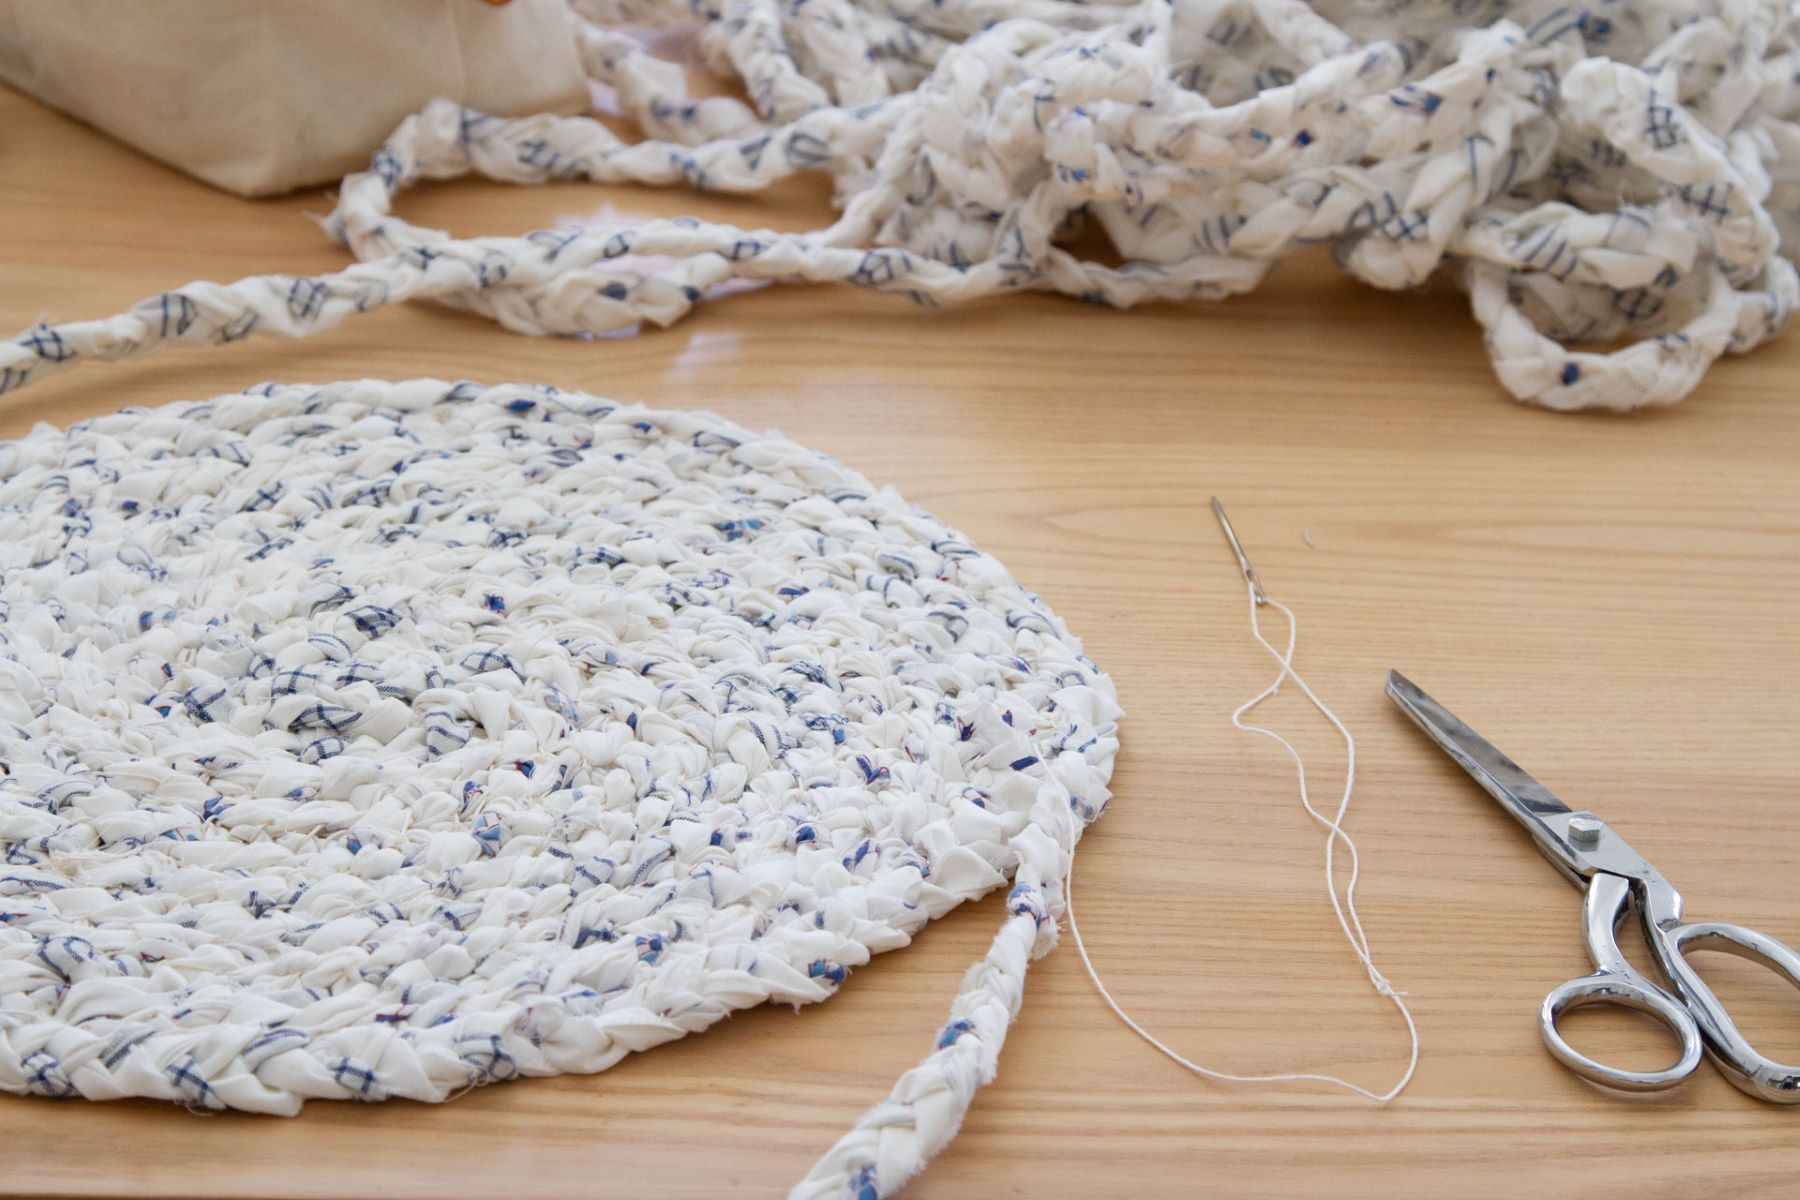
Step 5: Finishing the Rug
You’re almost there! In this final step, you will learn how to finish off your toothbrush rug and give it a polished look. Follow these steps to complete your rug:
- Once you have reached the desired size for your rug, weave a final row of stitches, following the same process as before.
- Once the final row is complete, trim the excess fabric strips, leaving about an inch of length.
- Take each fabric strip and fold it back onto itself, forming a small loop.
- Thread a needle with a thread that matches the color of the fabric strips.
- Secure each loop by stitching through it with the needle and thread. Make a few stitches to ensure the loops are secure and will not unravel.
- Continue stitching through each loop until you have secured all the loops along the edge of the rug.
- Tie off the thread with a knot and trim any excess.
- Gently tug and adjust the fabric strips to ensure they are evenly distributed and the rug has a neat appearance.
Congratulations! You have successfully completed your toothbrush rug. Take a moment to admire your creation and revel in the satisfaction of turning old toothbrushes and fabric scraps into a beautiful and functional rug.
Your toothbrush rug is now ready to adorn any area of your home, whether it’s the bathroom, kitchen, or living room. It can also make a wonderful gift for friends or family.
Remember to keep your toothbrush rug clean by regularly vacuuming or shaking it out to remove any dirt or debris. If needed, you can spot clean or gently hand wash the rug to maintain its beauty.
Now that you know the process of making toothbrush rugs, embrace your creativity and explore different patterns, colors, and sizes to create unique and personalized rugs for your home.
Tips and Tricks
As you embark on your toothbrush rug making journey, here are some tips and tricks to enhance your experience and ensure great results:
- Choose fabric scraps wisely: Opt for fabrics that are durable and can withstand frequent use. Denim, cotton, and muslin are popular choices for toothbrush rugs.
- Experiment with different fabric combinations: Mix and match fabric strips of different colors and patterns to create unique and eye-catching designs.
- Keep your stitches consistent: Maintain the same tension and stitch size throughout the rug to create a uniform look.
- Push fabric strips up towards the handle: Regularly push the fabric strips up towards the toothbrush handle to keep the rug tight and avoid any gaps or looseness.
- Use a thimble if needed: If you find it challenging to push the needle through the tightly woven fabric, consider using a thimble to protect your finger and provide more force.
- Take breaks and stretch your hands: Weaving a toothbrush rug can be a repetitive task, so remember to take breaks and stretch your hands to prevent fatigue or strain.
- Practice patience: Creating a toothbrush rug requires time and patience. Enjoy the process and embrace the meditative nature of weaving.
- Experiment with rug sizes: You can make smaller rugs for specific areas of your home, or larger ones for a statement piece in your living room.
- Personalize your rug with embellishments: Once your rug is complete, you can add decorative touches like fabric flowers, bows, or beads to make it truly unique.
- Share your creations: Display your toothbrush rugs proudly or gift them to friends and family. Share your passion for rug making and inspire others to try it out.
Remember, practice makes perfect. The more toothbrush rugs you make, the more skilled and creative you will become. Don’t be afraid to experiment and make each rug a reflection of your personal style and creativity.
Enjoy the process, and have fun creating beautiful and functional toothbrush rugs!
Conclusion
Congratulations on learning how to make toothbrush rugs! You’ve embarked on a creative and sustainable journey, transforming old toothbrushes and fabric scraps into beautiful and functional rugs. Not only are toothbrush rugs an environmentally friendly way to repurpose materials, but they also allow you to express your creativity and add a personal touch to your home decor.
Throughout this article, we’ve covered the step-by-step process of making toothbrush rugs, from preparing the toothbrush and cutting fabric strips to starting the rug and finishing it with finesse. We’ve also provided some tips and tricks to ensure a smooth and enjoyable rug making experience.
As you continue to make toothbrush rugs, don’t be afraid to experiment with different fabrics, colors, and patterns. Each rug you create can be a unique work of art, reflecting your personal style and adding character to any space.
Remember, making toothbrush rugs is a craft that requires patience and practice. The more rugs you create, the more you’ll refine your weaving skills and develop your own techniques. It’s a gratifying process that allows you to unwind, tap into your creativity, and create something with your hands.
So, gather your materials, clear some space, and dive into the world of toothbrush rug making. Let your imagination guide you as you create rugs that bring warmth, style, and a sense of accomplishment to your home.
Enjoy this wonderful journey of turning simple materials into something beautiful, functional, and meaningful. Happy rug making!
Frequently Asked Questions about How To Make Toothbrush Rugs
Was this page helpful?
At Storables.com, we guarantee accurate and reliable information. Our content, validated by Expert Board Contributors, is crafted following stringent Editorial Policies. We're committed to providing you with well-researched, expert-backed insights for all your informational needs.


0 thoughts on “How To Make Toothbrush Rugs”