Articles
How To Make Quilt Hangers
Modified: October 19, 2024
Learn how to make beautiful quilt hangers with these helpful articles. Discover various techniques and tips to showcase your quilts in style.
(Many of the links in this article redirect to a specific reviewed product. Your purchase of these products through affiliate links helps to generate commission for Storables.com, at no extra cost. Learn more)
Introduction
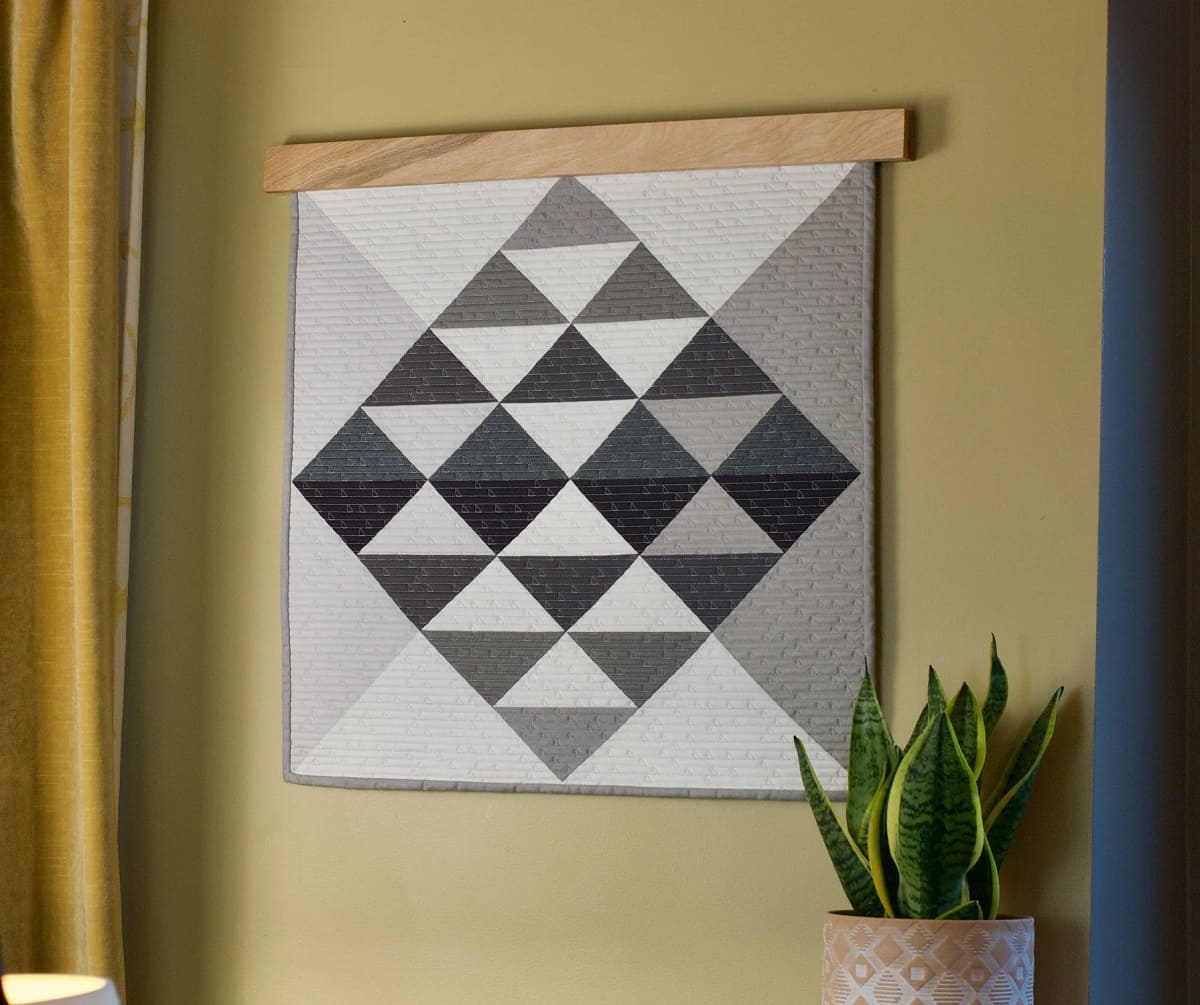
Quilts are not only beautiful works of art but also cherished heirlooms that hold sentimental value. Displaying quilts in your home not only adds warmth and character to the space but also allows you to showcase the intricate craftsmanship of the quilt. One of the best ways to display a quilt is by using quilt hangers. Quilt hangers are functional and aesthetically pleasing, ensuring that your quilt remains flat and wrinkle-free while also enhancing its visual appeal.
In this article, we will guide you through the process of making your own quilt hangers. In just a few simple steps, you can create custom quilt hangers that perfectly suit your style and the dimensions of your quilt. We will cover everything from measuring and cutting the wood to staining or painting it, attaching the hanging hardware, and assembling the quilt hanger. So, let’s dive in and learn how to make quilt hangers!
Key Takeaways:
- Create custom quilt hangers to showcase your quilts with personalized style and elegance. From measuring and cutting wood to hanging your quilt, this DIY project adds warmth and character to your home.
- Embrace the joy of quilting and unleash your creativity by making your own quilt hangers. Display your quilts with pride, adding a touch of artistry and functionality to your living space.
Read more: How To Make A Quilt
Materials Needed
Before you start making quilt hangers, gather the following materials:
- Wood: Select a hardwood such as oak, walnut, or cherry for durability and strength. The size and quantity of wood will depend on the dimensions of your quilt.
- Sandpaper: Choose a variety of grits, ranging from coarse to fine, to smooth the edges and surface of the wood.
- Stain or paint: If you prefer a natural wood look, choose a wood stain that matches your decor. Alternatively, you can paint the wood in any color of your choice.
- Hanging hardware: This includes D-ring hangers, sawtooth hangers, or a French cleat system. Consider the weight of your quilt and choose hardware that can support it.
- Measuring tape and ruler: These tools will help you accurately measure and cut the wood.
- Saw: A miter saw or hand saw will be needed to cut the wood to the desired length.
- Drill: You will use a drill to create holes for attaching the hanging hardware.
- Screws: Choose screws that are appropriate for the thickness of the wood and the type of hanging hardware you’re using.
- Optional: Wood glue, brushes for staining or painting, and a drop cloth to protect your work surface.
Having these materials ready will ensure a smooth and efficient process as you create your own quilt hangers. Now, let’s move on to the step-by-step instructions for making quilt hangers.
Step 1: Measuring and Cutting the Wood
The first step in making quilt hangers is to measure and cut the wood to the desired length. Start by determining the width of your quilt. You’ll want your quilt hangers to be slightly wider than the quilt to ensure proper support. Measure the width of your quilt and add a few inches to each side for the quilt hanger overhang.
Using a measuring tape and ruler, mark the desired length on the wood. Use a miter saw or hand saw to make straight cuts according to your measurements. Make sure to wear safety goggles and follow proper safety precautions when using power tools.
It is recommended to cut two pieces of wood for each quilt hanger – one for the top and one for the bottom. This will provide balanced support and distribute the weight of the quilt evenly. Make sure both pieces are cut to the same length.
Once you’ve made the cuts, use sandpaper to smooth any rough edges or surfaces. Start with a coarse grit sandpaper to remove any splinters or imperfections, then gradually move to finer grits for a smoother finish. Sanding the wood will ensure that it is safe to handle and prevent any snags on the quilt fabric.
With the wood cut and sanded, you are ready to move on to the next step – staining or painting the wood to enhance its appearance and protect it from damage.
Step 2: Sanding the Wood
After cutting the wood to the desired length in Step 1, the next step is to sand the wood to ensure a smooth and polished finish. Sanding not only enhances the overall appearance of the quilt hangers but also prevents any rough or sharp edges that could potentially damage the quilt.
Start by using a coarse-grit sandpaper, such as 80 or 100 grit, to remove any rough patches, splinters, or imperfections on the surface of the wood. With firm but gentle strokes, run the sandpaper along the grain of the wood. It’s important to maintain a consistent pressure to ensure even sanding.
Once you have achieved a smooth surface with the coarse-grit sandpaper, switch to a medium-grit sandpaper, such as 120 or 150 grit, to refine the surface further. Continue sanding in the direction of the wood grain to avoid creating scratches or marks. This step will help eliminate any remaining roughness and prepare the wood for a final finish.
Finally, use a fine-grit sandpaper, such as 220 grit, for the last round of sanding. This will give the wood a silky-smooth finish and prepare it for staining or painting. Sanding with a fine-grit paper will also remove any visible marks left by the previous sanding steps, resulting in a flawless surface.
Throughout the sanding process, make sure to frequently check the wood’s surface for any remaining imperfections. Run your hand over the wood to feel for any rough spots or sharp edges. If necessary, go back to the appropriate grit sandpaper and continue sanding until you achieve a consistently smooth finish.
Once you’re satisfied with the smoothness of the wood, use a clean cloth or brush to remove any dust or debris from the sanding. This will ensure a clean surface for the next step – staining or painting the wood.
Step 3: Staining or Painting the Wood
Now that you have sanded the wood to a smooth surface, it’s time to add some color and protection to your quilt hangers. You have the option to stain the wood, allowing the natural beauty of the grain to shine through, or to paint it in a color that complements your decor. Choose the method that best suits your preference and the overall aesthetic you want to achieve.
If you decide to stain the wood, start by ensuring the surface is clean and free from any dust or debris. Use a clean cloth or brush to remove any remaining sanding dust. Next, apply a thin coat of wood stain using a brush or a clean cloth, following the manufacturer’s instructions. Make sure to apply the stain evenly and along the wood grain to achieve a consistent color.
Allow the stain to penetrate the wood for the recommended amount of time specified on the stain container. This typically ranges from a few minutes to half an hour, depending on the desired color intensity. Once the desired color is achieved, gently wipe off any excess stain with a clean cloth. Allow the wood to dry completely before moving on to the next step.
If you prefer to paint the wood, prepare the surface by applying a primer. This will create a smooth base and help the paint adhere better. After the primer has dried completely, apply your chosen paint color using a brush or a roller. Apply multiple thin coats, allowing each coat to dry before applying the next one. This will ensure a smooth and even finish.
Once the stain or paint has dried, inspect the wood for any areas that may need touch-ups. Use a fine-grit sandpaper to lightly sand any rough spots or imperfections. Wipe away any sanding dust with a clean cloth before proceeding.
By staining or painting the wood, you not only add a personal touch to your quilt hangers but also provide protection against moisture and wear. Now that the wood is beautifully colored or painted, it’s time to move on to the next step – attaching the hanging hardware.
When making quilt hangers, be sure to use sturdy materials such as wood or metal to ensure they can support the weight of the quilt. Additionally, consider adding padding or fabric to the hangers to protect the quilt from damage.
Step 4: Attaching the Hanging Hardware
With the wood stained or painted, it’s time to attach the hanging hardware that will allow you to securely display your quilt. The type of hanging hardware you choose will depend on the weight and size of your quilt, as well as your personal preference.
Some common options for hanging hardware include D-ring hangers, sawtooth hangers, or a French cleat system. D-ring hangers provide a secure hold and are suitable for medium to heavy quilts. Sawtooth hangers are easy to install and can support lighter quilts. The French cleat system offers a strong and secure mounting option for larger and heavier quilts.
Before attaching the hanging hardware, decide on the placement of the hangers on the wood. Measure and mark the desired positions, ensuring they are evenly spaced and aligned. Use a ruler or level to guide you in achieving straight and symmetrical placement.
Once you have determined the placement, take the necessary precautions to ensure safety when working with tools. Use a drill to create pilot holes at the marked positions on the wood. The size of the pilot holes should match the screws that come with your chosen hanging hardware.
Attach the hanging hardware securely to the wood using the provided screws. Make sure to tighten the screws firmly, but be mindful of not over-tightening and damaging the wood. Double-check that the hardware is straight and aligned properly before moving on to the next step.
It is recommended to use at least two sets of hanging hardware for each quilt hanger – one at the top and one at the bottom. This will provide stability and securely hold your quilt in place.
With the hanging hardware securely attached, you’re one step closer to displaying your quilt with pride. The next step will guide you through assembling the quilt hanger and preparing it for hanging your quilt.
Step 5: Assembling the Quilt Hanger
Now that you have your stained or painted wood with the hanging hardware attached, it’s time to assemble the quilt hanger. This step involves joining the top and bottom pieces of wood together to create a sturdy frame that will hold your quilt.
Start by placing the top and bottom pieces of wood parallel to each other, ensuring that the hanging hardware is facing the same direction. Align the corners of the wood pieces and check to see if they are flush.
To join the wood pieces together, you have a few options. One common method is to use wood screws. Pre-drill pilot holes through one piece of wood and then screw in the wood screws to hold the pieces together. Make sure the screws are long enough to penetrate through both pieces of wood securely.
Another option is to use wood glue in addition to screws for added strength. Apply a thin layer of wood glue to one of the wood pieces, then press the other piece firmly against it. Wipe away any excess glue that seeps out. Use clamps to hold the wood pieces together tightly while the glue dries.
Allow the wood glue to cure according to the manufacturer’s instructions. This usually takes several hours or overnight. Once the glue has dried and the wood pieces are securely joined together, check the stability and strength of the quilt hanger by gently applying pressure.
If desired, you can add decorative elements or trim to the quilt hanger. This could include adding a decorative finial at the top or staining the edges of the wood for a more finished look. Get creative and personalize the quilt hanger to match your style!
With the quilt hanger assembled, it’s time for the final and exciting step – hanging your quilt!
Step 6: Hanging the Quilt
Congratulations! You’ve made it to the final step – hanging your beautiful quilt on the quilt hanger you have created. Properly hanging your quilt will not only display it with pride but also ensure it stays flat and wrinkle-free.
Start by selecting the ideal location to hang your quilt. Choose a wall that provides enough space to showcase the quilt and complements your home decor. Make sure the wall is clean and free from any obstructions.
Measure the desired height at which you want to hang the quilt. Use a pencil to mark the starting point on the wall. It’s recommended to have the quilt hanger positioned slightly higher than eye level to allow for better visibility and appreciation of the quilt.
Next, use a level to ensure the quilt hanger is straight. Adjust the position if necessary to achieve a level and balanced display. Once you are satisfied with the position, mark the screw hole locations on the wall.
If you are using a French cleat system, follow the manufacturer’s instructions to securely attach the cleat to the wall and the quilt hanger. This system provides a secure and stable method for hanging larger and heavier quilts.
If you are using D-ring or sawtooth hangers, drill pilot holes at the marked locations on the wall and insert appropriate wall anchors. Then, screw in the screws, leaving a small gap between the screw head and the wall to hang the quilt hanger.
Gently hang the quilt hanger on the wall, making sure it is securely in place. Take a step back and check if the quilt hanger is straight and level. Adjust if needed for the perfect display.
Once the quilt hanger is securely mounted, carefully drape your quilt over the hanger. Adjust the quilt to ensure it is centered and hanging evenly. Smooth out any wrinkles or folds to showcase the quilt’s beauty.
Step back and admire your beautifully displayed quilt. The quilt hanger you have made not only enhances the aesthetic appeal of the quilt but also provides proper support and protection.
Remember to periodically check the hanging hardware and the quilt to ensure they are secure and in good condition. Enjoy the beauty of your quilt as it graces your wall and becomes a centerpiece in your home.
Congratulations again on successfully making your own quilt hangers and displaying your quilt with pride!
Conclusion
Making your own quilt hangers is a rewarding and fulfilling process that allows you to showcase your quilts in a personalized and elegant way. By following the step-by-step instructions outlined in this article, you can create custom quilt hangers that perfectly complement your style and the dimensions of your quilts.
Starting with measuring and cutting the wood, sanding it to a smooth finish, and staining or painting it to enhance its appearance, you have learned the essential techniques for creating quilt hangers. Attaching the hanging hardware securely and assembling the quilt hanger ensures that your quilt will be supported and displayed with pride.
The final step of hanging your quilt completes the process, transforming your quilt from a cherished piece of fabric into a beautiful work of art on display in your home. Whether it’s an heirloom passed down through generations or a quilt you created yourself, hanging it with care and attention adds warmth and character to your living space.
Remember to periodically check the hanging hardware and the quilt to ensure they are secure and in good condition. Proper maintenance will ensure that your quilt remains displayed beautifully for years to come.
So, why wait? Gather the materials, follow the steps, and start making your own quilt hangers. Unleash your creativity and showcase your quilts in a way that reflects your unique style. Through this DIY project, you’ll not only create functional and visually appealing quilt hangers but also deepen your appreciation for the art of quilting.
Embrace the joy of quilting and enjoy the satisfaction of displaying your quilts with pride using the quilt hangers you’ve made with your own hands.
Frequently Asked Questions about How To Make Quilt Hangers
Was this page helpful?
At Storables.com, we guarantee accurate and reliable information. Our content, validated by Expert Board Contributors, is crafted following stringent Editorial Policies. We're committed to providing you with well-researched, expert-backed insights for all your informational needs.


0 thoughts on “How To Make Quilt Hangers”