Articles
How To Make A Wooden Towel Bar
Modified: October 20, 2024
Learn how to make a stylish wooden towel bar for your bathroom with our step-by-step articles. Create a practical and elegant addition to your space today!
(Many of the links in this article redirect to a specific reviewed product. Your purchase of these products through affiliate links helps to generate commission for Storables.com, at no extra cost. Learn more)
Introduction
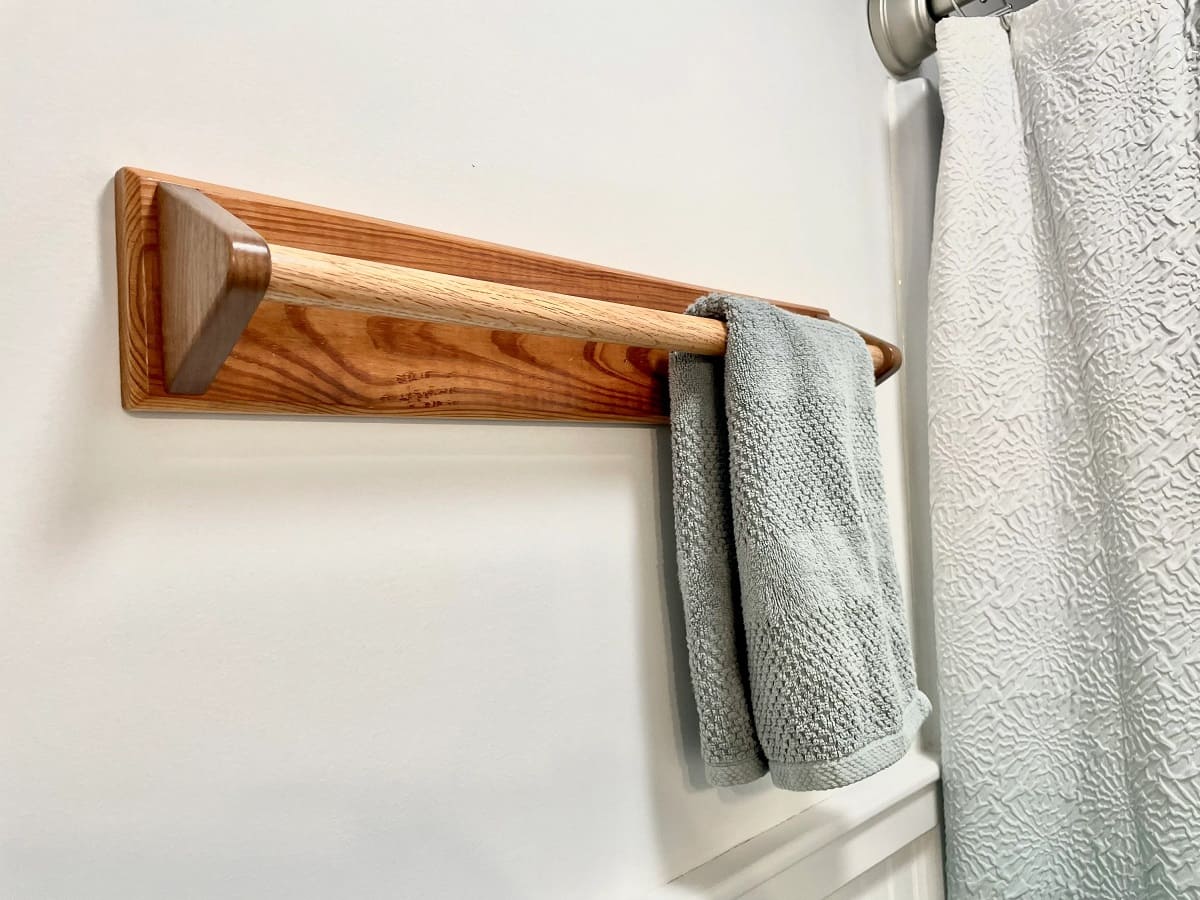
Adding a wooden towel bar to your bathroom can not only provide a functional and stylish way to hang towels, but it can also add a touch of warmth and natural beauty to the space. Whether you’re looking to upgrade your existing towel bar or create a customized one from scratch, this article will guide you through the step-by-step process of making your own wooden towel bar.
A wooden towel bar is a versatile and durable option that complements various bathroom styles. It can be crafted from a variety of woods, such as oak, pine, or cedar, depending on your personal preference and the overall aesthetic of your bathroom. Additionally, making your own towel bar allows you to customize its size, stain, and style to perfectly match your bathroom décor.
In this article, we will go over the materials needed and provide detailed instructions on how to measure, cut, sand, stain, and mount the wooden towel bar. Whether you’re an experienced DIY enthusiast or a beginner, you’ll find this guide easy to follow and implement.
Before starting the project, it’s important to ensure you have all the necessary materials and tools on hand. Let’s take a look at what you’ll need to get started.
Key Takeaways:
- Create a personalized wooden towel bar to add warmth and functionality to your bathroom. Customize the size, stain, and style to match your decor and enjoy the satisfaction of a DIY project.
- Follow simple steps to measure, cut, sand, stain, and mount your own wooden towel bar. Enjoy the beauty and functionality of a custom-made addition to your bathroom.
Read more: How To Make A Galvanized Pipe Towel Bar
Materials Needed
Before you begin crafting your wooden towel bar, gather the following materials:
- Wood: Choose a high-quality wood that suits your taste and matches your bathroom decor. Popular options include oak, pine, or cedar.
- Measuring tape: You’ll need a measuring tape to measure the desired length of your towel bar.
- Saw: A saw, such as a miter saw or circular saw, will be needed to cut the wood to the desired length.
- Sandpaper: Use sandpaper or a sanding block to smooth the edges and surfaces of the wood.
- Stain or paint: If you want to add color or enhance the natural beauty of the wood, choose a stain or paint that suits your preferences.
- Paintbrush or foam brush: Use a paintbrush or foam brush to apply the stain or paint evenly to the wood surfaces.
- Screws and mounting hardware: You’ll need screws and mounting hardware to attach the towel bar to the wall securely.
- Drill: A drill with a drill bit suitable for your screws will be necessary to create holes for mounting the towel bar.
- Level: Use a level to ensure that the towel bar is installed straight.
- Pencil: A pencil will be handy for marking measurements and hole placements on the wood and wall.
Once you have gathered all the necessary materials, you’re ready to move on to the next steps of building your wooden towel bar.
Step 1: Measure and Cut the Wood
The first step in creating your wooden towel bar is to measure and cut the wood to the desired length.
Start by determining the ideal length for your towel bar. Measure the space where you plan to install the towel bar and consider the size of the towels you’ll be hanging. This will help you determine the appropriate length for your towel bar.
Once you have the measurement, mark the wood with a pencil, indicating where you’ll make the cuts. Use a measuring tape or a straight edge to ensure straight and accurate markings.
Next, using a saw suitable for cutting wood, carefully cut along the marked lines. Ensure that your cuts are straight and accurate for a professional-looking final result. Double-check the measurements before making the cuts to avoid any mistakes.
Remember to wear safety glasses and follow proper safety precautions while using the saw. If you’re not confident in your woodworking skills or you don’t have access to the necessary tools, you can also have the wood cut to size at a local hardware store or lumber yard.
Once the wood is cut to the desired length, proceed to the next step: sanding the wood to achieve a smooth and polished surface.
Step 2: Sand the Wood
After cutting the wood to the desired length, the next step is to sand the surfaces to achieve a smooth and polished finish.
Start by selecting the appropriate grit of sandpaper. For initial sanding, a medium-grit sandpaper, such as 80 or 120, can be used to remove any rough edges or imperfections in the wood. Then, move on to a finer-grit sandpaper, such as 220, for a smoother finish.
Using a sanding block or sandpaper wrapped around a flat block of wood, begin sanding the surfaces of the wood. Move the sandpaper in the direction of the wood grain to avoid scratching or damaging the surface.
Apply even pressure while sanding and periodically check the smoothness of the wood with your hand. Continue sanding until all rough areas, splinters, and sharp edges are eliminated, and the wood feels consistently smooth to the touch.
Ensure to sand all sides of the wood, including the edges, to achieve a uniform appearance. Take care not to oversand or remove too much material, as this can compromise the structural integrity of the towel bar.
Once you have finished sanding, wipe away any dust or debris from the wood using a clean, dry cloth. This will prepare the surface for the next step: drilling holes for mounting.
Now that the wood is smooth and prepared, you’re ready to move on to the next step: drilling holes for mounting the towel bar.
Step 3: Drill Holes for Mounting
Now that you have sanded the wood to a smooth finish, it’s time to drill holes for mounting the towel bar. These holes will later be used to secure the towel bar to the wall.
Start by deciding where you want to position the mounting brackets on the towel bar. Measure and mark the desired distance between the brackets, ensuring they are evenly spaced and aligned with the length of the towel bar.
Using a pencil, mark the positions of the mounting holes on the wood, making sure they are centered and aligned with the brackets. If using the brackets as a guide, place them against the wood and mark where the holes should be drilled.
Next, select an appropriate drill bit size for your screws and mounting hardware. The size of the drill bit should match the diameter of the screws you’ll be using.
Secure the wood to a workbench or surface with clamps to prevent it from moving while drilling. This will ensure accuracy and safety during the drilling process.
Now, carefully drill holes at the marked positions on the wood. Start drilling slowly, applying gentle pressure. Make sure to keep the drill straight and perpendicular to the wood surface.
Drill the holes to a depth that accommodates the length of the screws and mounting hardware, ensuring they are deep enough to securely hold the towel bar but not too deep that they penetrate through the other side.
Once all the holes are drilled, remove any wood chips or debris from the surface, and double-check the alignment and positioning of the holes.
With the holes drilled, you’re ready to move on to the next step: staining or painting the wood to enhance its appearance.
When making a wooden towel bar, be sure to choose a wood that is resistant to moisture, such as teak or cedar, to prevent warping or rotting over time.
Read more: How To Make Swing Arm Towel Bar
Step 4: Stain or Paint the Wood
With the holes drilled for mounting, it’s time to add color and protection to the wooden towel bar by staining or painting it.
Before applying any stain or paint, make sure the wood is clean and free from dust or debris. Wipe the surfaces with a cloth to ensure a smooth and even application.
If you choose to stain the wood, select a stain color that complements your bathroom decor and personal preference. Stir the stain thoroughly before applying to ensure it’s well mixed.
Using a paintbrush or foam brush, apply an even coat of stain to the wood surfaces. Make sure to follow the wood grain and cover all sides, including the edges.
Allow the stain to penetrate the wood for the recommended time indicated on the product instructions. This will give the wood a rich, natural color. If you desire a darker hue, you can apply additional coats of stain after the first coat has dried.
If painting the wood is your preferred option, choose a paint color that matches your bathroom decor. Apply a coat of paint using a paintbrush or foam brush, ensuring smooth and even coverage.
Allow the paint to dry completely between coats if you wish to apply multiple layers for a more opaque finish. Lightly sand the surface between coats to achieve a smooth texture.
If desired, you can apply a clear topcoat or protective finish to seal and safeguard the stained or painted wood. This will enhance its durability and make it easier to clean and maintain.
Once the stain or paint has dried and any protective finish has been applied, you’re ready to move on to the next step: attaching the mounting brackets to the wood bar.
Step 5: Attach the Mounting Brackets
After staining or painting the wood, it’s time to attach the mounting brackets to the towel bar. These brackets will provide support and stability when the towel bar is mounted on the wall.
Start by positioning the brackets on the underside of the towel bar, aligning them with the pre-drilled holes. Ensure that the brackets are centered and evenly spaced along the length of the towel bar.
Using screws that are appropriate for your brackets and wood, insert them through the holes in the brackets and into the pre-drilled holes in the wood. Start by hand-tightening the screws to ensure they are properly aligned.
Once the screws are in place, use a screwdriver or power drill fitted with a screwdriver bit to tighten them securely. Take care not to overtighten, as this can damage the wood or strip the screws.
Repeat the process for all of the mounting brackets, ensuring they are firmly attached to the towel bar.
After attaching the mounting brackets, double-check their alignment and the overall stability of the towel bar. Make any necessary adjustments to ensure it is level and secure.
With the mounting brackets securely attached, move on to the next step: attaching the wood bar to the brackets and completing the installation process.
Step 6: Attach the Wood Bar to the Brackets
With the mounting brackets securely in place, it’s time to attach the wooden bar to the brackets to complete your towel bar.
Starting from one end of the towel bar, align the holes on the wood bar with the screws protruding from the brackets. Gently slide the wood bar onto the screws, ensuring that it is centered and level.
Once the wood bar is properly aligned, tighten the screws by hand to hold the bar in place. Make sure the bar is securely attached to the brackets and does not wobble or shift.
Using a screwdriver or power drill fitted with a screwdriver bit, tighten the screws on the brackets to firmly secure the wood bar. Take care not to overtighten, as this may cause damage to the wood or weaken the mounting.
Double-check the alignment and stability of the towel bar. If necessary, make any final adjustments to ensure it is level and secure.
With the wood bar successfully attached to the brackets, you’re almost done with the installation process. Proceed to the final step: mounting the towel bar onto the bathroom wall.
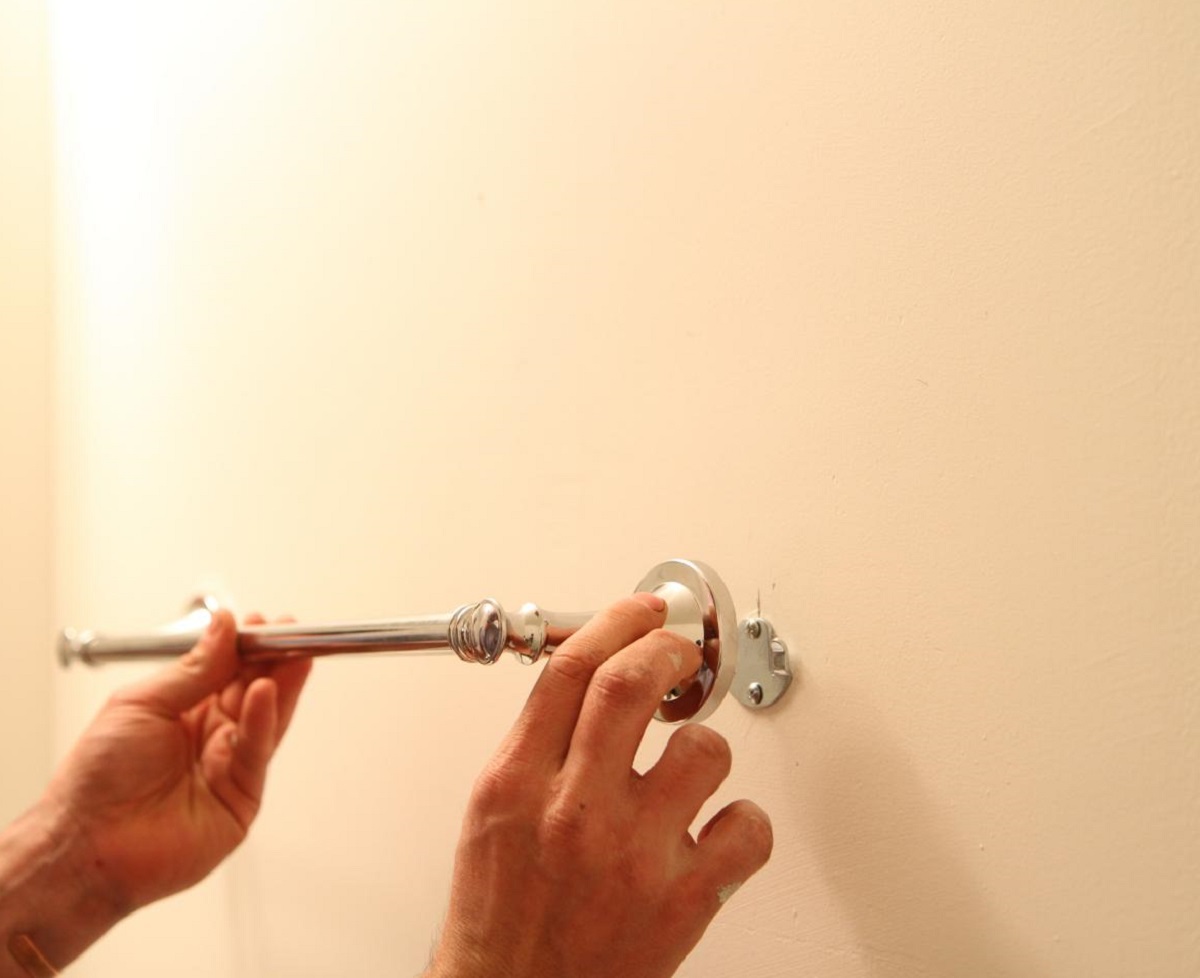
Step 7: Mount the Towel Bar
Now that your wooden towel bar is fully constructed, it’s time to mount it onto the bathroom wall.
Start by choosing the desired location for the towel bar. Use a measuring tape and level to ensure accurate placement. Mark the positions where you’ll be mounting the brackets on the wall using a pencil.
Hold one of the brackets against the wall, aligning it with the marked position. Use a pencil to mark the positions for the mounting holes on the wall.
With the marked positions on the wall, it’s time to drill pilot holes for the screws. Choose a drill bit that matches the diameter of your mounting screws.
Carefully drill the pilot holes at the marked positions on the wall. Ensure that the holes are deep enough to securely hold the mounting screws.
Once the pilot holes are drilled, hold the bracket against the wall again, aligning it with the holes. Insert screws into the holes of the bracket, tightening them to secure the bracket to the wall.
Repeat the process for the second bracket, ensuring that it is level and aligned with the first bracket.
Once both brackets are securely attached to the wall, it’s time to hang the towel bar. Align the wood bar with the brackets and slide it onto the screws protruding from the brackets.
Ensure that the wood bar is level and properly aligned with the brackets. If necessary, make any final adjustments to achieve a straight and secure towel bar.
Step back and admire your handiwork—the wooden towel bar is now successfully mounted and ready to use!
Remember to test the stability of the towel bar by applying gentle pressure and ensuring it holds firmly in place. If any adjustments or tightness is required, make them accordingly.
Congratulations! You have successfully created and installed your very own wooden towel bar, adding both functionality and aesthetic appeal to your bathroom.
Now, step back and enjoy the beauty and functionality of your custom-made wooden towel bar.
Summary of the Steps:
- Measure and cut the wood to the desired length.
- Sand the wood to achieve a smooth surface.
- Drill holes for mounting the towel bar.
- Stain or paint the wood to enhance its appearance.
- Attach the mounting brackets to the wood bar.
- Attach the wood bar to the brackets.
- Mount the towel bar securely onto the bathroom wall.
With these simple steps, you can create a stylish and functional wooden towel bar that adds a touch of elegance to your bathroom decor.
Read more: How To Fold Towel On Towel Bar
Conclusion
Creating your own wooden towel bar is a rewarding and satisfying DIY project that allows you to customize your bathroom’s functionality and aesthetics. With just a few simple steps, you can have a beautiful and functional towel bar that adds a touch of natural beauty to your space.
Throughout this article, we have walked you through the process of measuring and cutting the wood, sanding it to a smooth finish, drilling holes for mounting, staining or painting the wood, attaching the mounting brackets, and finally, mounting the towel bar onto the wall.
By following these steps, you can have a towel bar that fits your needs perfectly and matches your bathroom decor. Whether you choose a rustic oak finish or a sleek painted design, your wooden towel bar will add a touch of warmth and elegance to your bathroom.
Remember to measure carefully, use the appropriate tools, and take your time to ensure the best outcome. Safety should also be a priority throughout the process, so wear protective gear and operate tools responsibly.
Now that you have completed your wooden towel bar, take a step back and admire the result of your hard work and creativity. Hang your towels with pride, knowing that you have added a personalized and functional element to your bathroom.
We hope this guide has been helpful in guiding you through the process of creating your own wooden towel bar. Enjoy the satisfaction of completing a DIY project and the beauty it brings to your bathroom!
Happy crafting!
Frequently Asked Questions about How To Make A Wooden Towel Bar
Was this page helpful?
At Storables.com, we guarantee accurate and reliable information. Our content, validated by Expert Board Contributors, is crafted following stringent Editorial Policies. We're committed to providing you with well-researched, expert-backed insights for all your informational needs.


0 thoughts on “How To Make A Wooden Towel Bar”